

Page 1

Image Processing for
Scanner 1500 and
Scanner 2500
User’s Guide
A-63055
Page 2

ISIS is a registered trademark of Pixel Translations, a division of Input
Software, Inc.
Windows and Windows NT are either registered trademarks or
trademarks of Microsoft Corporation in the United States and/or other
countries.
Page 3

Contents
Introduction..........................................................................................1
Features...........................................................................................2
Memory Requirements ....................................................................3
ISIS Driver.............................................................................................5
Installation........................................................................................5
Scanner Settings Dialog Box...........................................................6
Buttons in the Scanner Settings Dialog Box.............................6
Mode.........................................................................................7
Dither.........................................................................................8
Dots per inch (Resolution) ........................................................9
Page Size..................................................................................9
Brightness...............................................................................10
Contrast...................................................................................11
Region Selection.....................................................................12
Area.........................................................................................12
Specifying an Area............................................................13
Kodak Scanner Special Features Dialog Box ...............................14
Buttons in the Kodak Scanner Special Features
Dialog Box ...........................................................................16
Image Emphasis .....................................................................17
Noise Reduction......................................................................17
Gamma ...................................................................................18
Lamp.......................................................................................18
A-63055 December 1999 i
Page 4

Length Control.........................................................................18
Long Paper..............................................................................19
Detect Page Size ....................................................................20
Read Deskew Data................................................................. 21
Detect Double Feed................................................................21
Slow Feeding ..........................................................................21
Mirror Image............................................................................22
Reverse Image........................................................................22
Remove Shadow.....................................................................22
Fit to Page...............................................................................22
White Level From Paper.........................................................23
Binary Mode Automatic Threshold..........................................24
Halftone Mode Automatic Separation ..................................... 24
Manual Feed Modes ...............................................................25
Download From File................................................................25
Scanner Information................................................................26
Barcode...................................................................................28
Setting up for Barcode Reading.......................................28
Detecting Patch Codes ...........................................................31
Document Printer (Imprinter) ..................................................32
Printable Characters.........................................................32
Printing a Counter, Date, Time, or Fixed String................33
Printing Start Position.......................................................34
Setting up for Document Printing .....................................35
Counter.............................................................................36
Compression...........................................................................37
A-63055 December 1999 ii
Page 5

TWAIN Data Source............................................................................38
Installation......................................................................................38
Kodak Twain Driver Dialog Box.....................................................39
Buttons in the Kodak Twain Driver Dialog Box .......................41
Side.........................................................................................42
Method....................................................................................42
Page........................................................................................42
Image Type .............................................................................43
Resolution (DPI)......................................................................43
Paper Size...............................................................................44
Creating a Custom Paper Size.........................................44
Detect Paper Size................................................................... 45
Halftone (Dither)......................................................................46
Brightness...............................................................................47
Contrast...................................................................................48
Area.........................................................................................48
Sub Area .................................................................................49
Specifying an Area............................................................50
More Settings Dialog Box..............................................................51
Buttons in the More Settings Dialog Box................................53
Automatic Threshold ...............................................................53
White Level .............................................................................54
Gamma ...................................................................................55
Noise Reduction......................................................................55
Lamp.......................................................................................56
A-63055 December 1999 iii
Page 6

Image Emphasis .....................................................................56
Scanner Status........................................................................57
Mirror Image............................................................................59
Reverse Image........................................................................59
Automatic Separation (Halftone Mode)...................................60
Remove Shadow.....................................................................60
Fit to Page...............................................................................61
Slow Feeding ..........................................................................61
Detect Paper Size................................................................... 61
Detect Double Feed................................................................61
Stop at Skew...........................................................................62
Manual Feed...........................................................................62
Document Printer (Imprinter) ..................................................63
Printable Characters.........................................................63
Printing a Counter, Date, Time, or Fixed String................64
Printing Start Position.......................................................65
Setting up for Document Printing .....................................66
Counter.............................................................................67
A-63055 December 1999 iv
Page 7
Introduction
Kodak’s low volume production scanners include image processing
technology that can improve image quality and sometimes make the
reproduction better than the original.
Kodak Digital Science
You can use the ISIS driver or TWAIN Data Source (both are available
on the CD that is included with the scanner) or
Low Volume Capture Software to enable image processing.
Many popular scanning applications are also compatible with these
scanners. However, other scanning applications may not be able to
access any or all of the image processing options.
Not all image processing features are available for each scanner or
each driver. Refer to the table on the following page for the features
available for each scanner.
NOTE: The scanned images used in this guide were selected for the
challenges presented to a typical scanner due to the lowcontrast characteristics of the images.
A-63055 December 1999 1
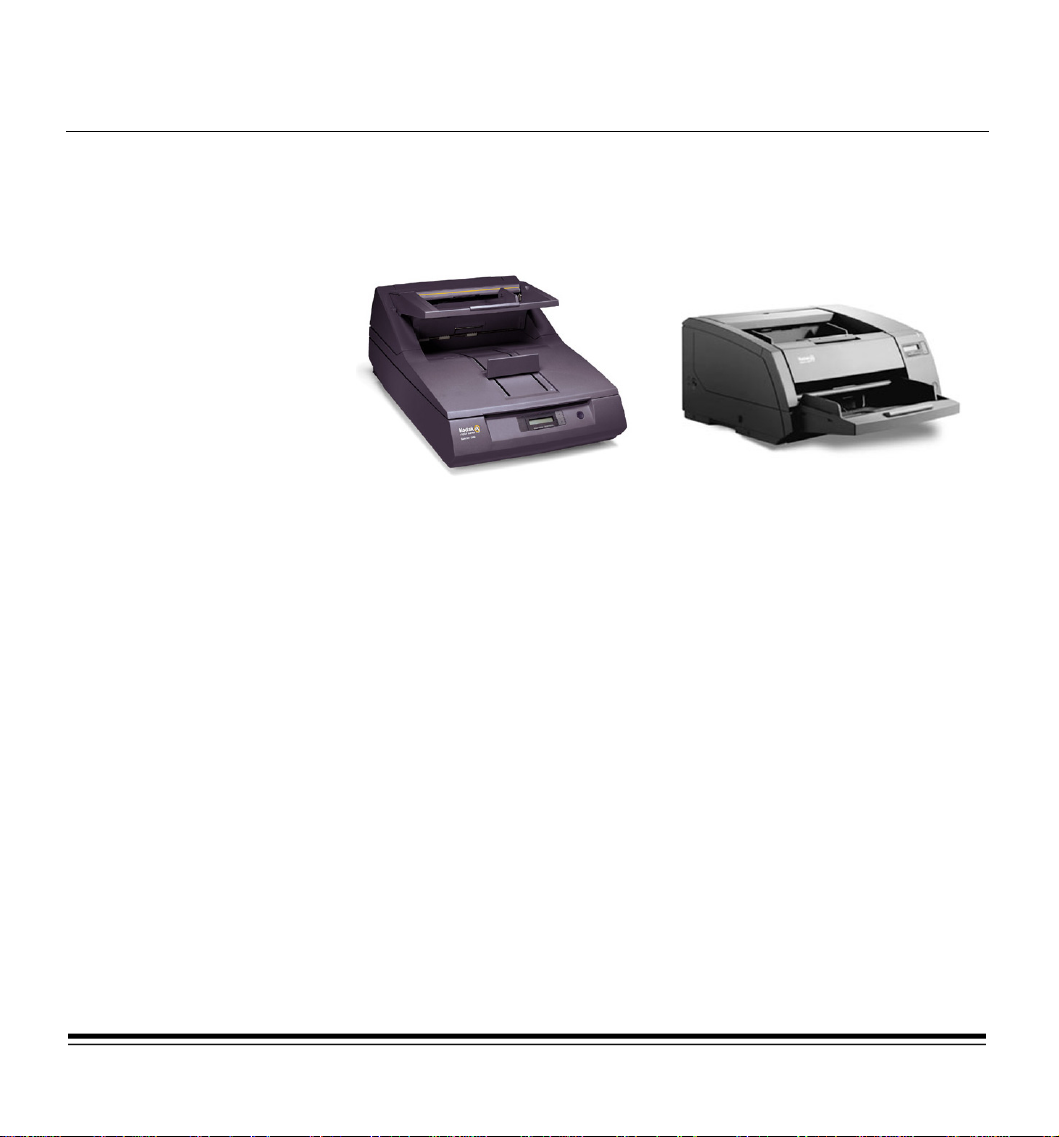
™ Scanner 1500
Kodak Digital Science
Kodak Digital Science
™ Scanner 2500
Page 8

Feature
Area
Barcode
Binary Mode / Automatic Threshold
Brightness
Compression
Contrast
Detect Double Feed
Detect Page Size / Detect Paper Size
Detecting Patch Codes
Dither / Halftone
Dots per inch / Resolution (DPI)
Fit to Page
Gamma
Halftone Mode / Automatic Separation
Image Emphasis
Imprinter (Document Printer)
Lamp (dropout lamp color)
Length Control
Long Paper
Manual Feed
Method
Mirror Image
Mode / Image Type
Noise Reduction
Page
Page Size / Paper Size
Read Deskew Data
Region / Side Settings
Remove Shadow
Reverse Image
Scanner Information / Scanner Status
Side
Slow Feeding
Stop at Skew
Sub Area
White Level From Paper / White Level
Scanner 1500 Scanner 2500
ISIS TWAIN ISIS TWAIN
¥¥¥¥
¥¥
¥¥¥¥
¥¥¥¥
¥¥
¥¥¥¥
¥¥¥¥
¥¥¥¥
¥¥
¥¥¥¥
¥¥¥¥
¥¥¥¥
¥¥¥¥
¥¥¥¥
¥¥¥¥
¥¥¥¥
¥¥
¥¥
¥
¥¥¥¥
¥
¥¥¥¥
¥¥¥¥
¥¥¥¥
¥¥
¥¥¥¥
¥¥
¥¥¥¥
¥¥¥¥
¥¥¥¥
¥¥¥¥
¥¥
¥¥¥¥
¥
¥¥
¥¥¥¥
A-63055 December 1999 2
Page 9

Memory Requirements
The Scanner 1500 and the Scanner 2500 both have 8 MB of memory
already installed. This may be sufficient for your scanning needs.
Additional memory may be required, depending on the selected
resolution and paper size. You may add up to 64 MB more memory on
SIMM modules for a total of 72 MB. (Memory is available in 8, 16, or 32
MB modules. Obtain memory at a local retailer.) Up to two SIMM
modules can be installed for the required extended memory. Refer to
the scanner’s User ’s Guide for infor mation about installing memory.
The tables below and on the following page show how much memory
(in MB) you would need to add to scan a particular paper size at a
given resolution. (“0” means that no additional memory is required.)
Simplex Scanning (8-bit)
Simplex Scanning (4-bit)
Simplex Scanning (Binary)
Resolution A3 A4 A5 A6 B4 B5 B6 Ledger Legal Letter
100 dpi 0 0 0 0 0 0 0 0 0 0
200 dpi 0 0 0 0 0 0 0 0 0 0
300 dpi 16 8 0 0 8 0 0 16 8 8
400 dpi 24 8 0 0 16 8 0 24 16 8
500 dpi 40 16 8 0 32 16 8 40 24 16
600 dpi 64 32 16 8 48 24 8 64 40 32
Resolution A3 A4 A5 A6 B4 B5 B6 Ledger Legal Letter
100 dpi 0 0 0 0 0 0 0 0 0 0
200 dpi 0 0 0 0 0 0 0 0 0 0
300 dpi 8 0 0 0 0 0 0 8 0 0
400 dpi 8 0 0 0 8 0 0 8 8 0
500 dpi 16 8 0 0 16 8 0 16 8 8
600 dpi 32 16 8 0 24 8 0 32 16 16
Resolution A3 A4 A5 A6 B4 B5 B6 Ledger Legal Letter
100 dpi 0 0 0 0 0 0 0 0 0 0
200 dpi 0 0 0 0 0 0 0 0 0 0
300 dpi 0 0 0 0 0 0 0 0 0 0
400 dpi 0 0 0 0 0 0 0 0 0 0
500 dpi 0 0 0 0 0 0 0 0 0 0
600 dpi 8 0 0 0 0 0 0 8 0 0
A-63055 December 1999 3
Page 10

Duplex Scanning (8-bit)
Resolution A3 A4 A5 A6 B4 B5 B6 Ledger Legal Letter
100 dpi 0 0 0 0 0 0 0 0 0 0
200 dpi 8 0 0 0 8 0 0 8 8 0
300 dpi 32 16 8 0 24 8 0 32 16 16
400 dpi 56 24 8 0 40 16 8 56 32 24
500 dpi – 40 16 8 64 32 16 – 56 40
600 dpi – 64 32 16 – 48 24 – – 64
Duplex Scanning (4-bit)
Duplex Scanning (Binary)
Resolution A3 A4 A5 A6 B4 B5 B6 Ledger Legal Letter
100 dpi 0 0 0 0 0 0 0 0 0 0
200 dpi 0 0 0 0 0 0 0 0 0 0
300 dpi 16 8 0 0 8 0 0 16 8 8
400 dpi 24 8 0 0 16 8 0 24 16 8
500 dpi 40 16 8 0 32 16 8 40 24 16
600 dpi 64 32 16 8 48 24 8 64 40 32
Resolution A3 A4 A5 A6 B4 B5 B6 Ledger Legal Letter
100 dpi 0 0 0 0 0 0 0 0 0 0
200 dpi 0 0 0 0 0 0 0 0 0 0
300 dpi 0 0 0 0 0 0 0 0 0 0
400 dpi 0 0 0 0 0 0 0 0 0 0
500 dpi 8 0 0 0 0 0 0 8 0 0
600 dpi 16 8 0 0 8 0 0 16 8 8
A-63055 December 1999 4
Page 11

ISIS Driver
Installation
The ISIS driver is included with the scanner. You can install the driver
from the CD.
After installation of the driver is complete, install your application
software on the host PC.
After your application software is loaded and launched, left-click on
File and choose
the scanner you want to use. The highlighted scanner is the scanner
currently in use.
Select Scanner
. The Scanner list allows you to select
A-63055 December 1999 5
Page 12

Scanner Settings Dialog Box
This section describes the features and buttons in the Scanner
Settings dialog box.
The Scanner Settings dialog box shown below appears when either
the Scanner 1500 or the Scanner 2500 is selected in the Scanner list.
Version information for the driver and scanner appear on the left side
of the Scanner Settings dialog box.
Buttons in the Scanner Settings Dialog Box
OK Click on the OK button to accept all of the selections.
Default Click on the Default button to return all settings to their predetermined
Cancel Click on the Cancel button to close the dialog box without saving any
Area Click on the Area button to access the Set Scanning Area dialog box.
More Click on the More button to access the Kodak Scanner Special
A-63055 December 1999 6
Following are descriptions of the buttons in the Scanner Settings
dialog box.
factory settings.
changes.
Features dialog box. Refer to the section entitled “Kodak Scanner
Special Features Dialog Box.”
Page 13

Mode
Choose a grayscale or binary (black and white) scanning format in the
Mode drop-down list box. Select the format that is best suited to your
application. Grayscale provides better image quality but requires more
scanning time and memory.
Grayscale Binary
NOTES: Additional memory may be required for grayscale scanning,
depending on the selected resolution and paper size. Refer
to the chapter entitled
information about memory.
If the base memory is not adequate,
resets to the smallest format. No error message appears.
4-level gray = 2-bit gray
8-level gray = 3-bit gray
16-level gray = 4-bit gray
Memory Requirements
Mode
for more
automatically
256-level gray = 8-bit gra y
A-63055 December 1999 7
Page 14

Dither
Dithering is a technique for reproducing halftone images, such as a
photo, in binary mode.
Two pixel levels are used to represent the entire grayscale, thereby
reducing the levels of gray required displaying an image. Using a
dithering pattern requires less memory than using a grayscale mode.
Choose a dithering method in the Dither drop-down list box: None,
Bayer Dither 64 (64 steps), Bayer Dither 16 (16 steps), 45 degree
Halftone, 0 degree Halftone, Error Diffusion, and User Download.
Original Bayer Dither 64 Bayer Dither 16
45 deg. Halftone 0 deg. Halftone Error Diffusion
NOTE: You can specify a *.PXH file that uses a different dither pattern.
Dither
To do this, choose “User Download” in the
list box. Click on the
More
button in the Scanner Settings
drop-down
dialog box to access the Scanner Special Features dialog box.
Click on the
Dither
button in the Download From File group
box in the Scanner Special Features dialog box and select a
dither pattern file in the file selection box.
A-63055 December 1999 8
Page 15

Dots per inch (Resolution)
Dots per inch (dpi) indicates the scanning resolution, which largely
determines the quality of the scanned image. The greater the
resolution, the better the reproduction. However, scanning at a higher
resolution also increases scanning time and file size. This function sets
the resolution of the main scan and sub-scan areas. The industry
standard is 200 dpi (about 8 pixels/mm).
Page Size
You can choose a preset resolution value in the
down list box or type the desired value. The default value is 300 dpi.
Following are the available resolutions:
• Scanner 1500—100-600 dpi (1 dpi/step)
• Scanner 2500—100-600 dpi (1 dpi/step)
NOTE: Changing the resolution affects the
Barcode
these functions.
This option determines the scanning area by a pre-determined paper
size. The default page size is set when a scanner is first selected.
Choose a paper size in the Page Size drop-down list box.
NOTE: Changing the page size affects the
Barcode
these functions.
settings. Specify the resolution before you select
settings. Specify the page size before you select
Dots per inch
Area, Region, Dither
Area, Region, Dither
drop-
, and
, and
A-63055 December 1999 9
Page 16

Brightness
This function allows you to adjust the image brightness, making it
lighter or darker. There are two Brightness modes,
Manual
, and three preset modes,
Darken, Norm
, and
Automatic
Lighten
and
.
Select the
adjust the brightness setting by dragging the Brightness sliding control
bar. Select a value from 1-255. The default is 128. The smaller the
number, the darker the image. You also can click on the
and
document and check the brightness.
• Manual—allows you to increase or decrease the brightness
• Automatic—sets brightness according to the scanning resolution.
• Darken—sets a low brightness value (51), which is better for
• Norm—sets an average brightness value (128).
• Lighten—sets a high brightness value (205), which is better for
Manual
Lighten
setting.
NOTE: Refer to the section entitled “Binary Mode Automatic
scanning light originals.
scanning dark originals.
radio button in the Brightness group box. You can
Darken, Norm
buttons to adjust the brightness setting. Scan the
Threshold” for information about setting automatic
brightness by Binary mode.
,
Brightness 51 Brightness 128 Brightness 205
A darker setting is recommended for blurred character documents.
With a brighter setting, background noise in a color document
disappears.
A-63055 December 1999 10
Page 17

Contrast
The Contrast option sets the image contrast by adjusting the difference
between black and white, thereby making an image sharper or softer.
In a low-contrast setting, the difference between black and white is
small, so the image is softer. In a high-contrast setting, the difference
between black and white is large, so the image is clearer. Select a
contrast value from 1-255. The default is 128.
Contrast 51 Contrast 128 Contrast 205
Select the
adjust the contrast setting by dragging the Contrast sliding control bar.
Scan the document and check the contrast.
NOTE: The
Manual
Automatic
radio button in the Contrast group box. You can
option is not available.
A-63055 December 1999 11
Page 18

Region Selection
You can specify single-sided (simplex) or double-sided (duplex)
scanning in the Region Selection group box.
NOTE: Both sides of the document are scanned at a same time in
duplex scanning. The front side of the image/page is output
first, then the back side of the image/page.
• Front Main Scan—sets scanning settings for the front side.
• Back Main Scan—sets scanning settings for the back side.
• Front Region #1, Front Region #2, and Front Region #3—sets the
scanning settings for front regions #1-3.
• Back Region #1, Back Region #2, and Back Region #3—sets the
scanning settings for back regions #1-3.
Area
Choose a window in the
Selection group box. Specify the
NOTE: The More dialog box is available only when “Front Main Scan”
is selected in the
You can define a brightness level and dither setting for a specific area
of an image that is different from the brightness level and dither setting
of the whole image.
This way, a picture can be dithered while the rest of the page remains
undithered, or a faint stamp can be enhanced by setting a lower
brightness than the rest of the page. You can define three regions per
side. Each region can have its own bright nes s leve l, but al l reg ions
must use the same dither setting.
Each scanning side is settable for up to three regions. This function is
available only for binary mode.
Choose a region in the Region Selection group box. Choose a dither
pattern for the region in the
Area
button to access the Set Scanning Area dialog box and specify
the position of the region. Select the next region in the Region
Selection group box, if necessary. Input the number of the windows, in
Front
either the
section in the Region Select ion gr ou p box.
text box or the
Region
Region
Dither
drop-down list box in the Region
Mode, Dither
drop-down list box.
drop-down list box. Click on the
Back
text box in the
, and
Area
settings.
Additional Region
A-63055 December 1999 12
Page 19

Specifying an Area To capture a portion of an image, click on the
the Set Scanning Area dialog box. Area settings are determined by the
X and Y positions and the width and length coordinates.
Original Scanned image
Set the scanning area in the Set Scanning Area dialog box on the
basis of the size specified in the
Page Size
drop-down list box. You
can also use the mouse to define the scanning area in the window.
Area
button to access
• Units—select mm, inches, or pixels.
• X Position—the position from the left end of the document to the
left end of the scanning area.
• Y Position—the position from the top end of the document to the
top end of the scanning area.
• Width—the width of the scanning area.
• Length—the length of the scanning area.
A-63055 December 1999 13
Page 20

Kodak Scanner Special Features Dialog Box
This section describes the features and buttons in the Kodak Scanner
Special Features dialog box. This dialog box is accessed by clicking on
More
the
The Kodak Scanner Special Features dialog box shown below appears
when the Scanner 1500 is selected in the Scan ner lis t.
button in the Scanner Settings dialog box.
A-63055 December 1999 14
Page 21

The Kodak Scanner Special Features dialog box shown below appears
when the Scanner 2500 is selected in the Scan ner lis t.
A-63055 December 1999 15
Page 22

Buttons in the
Kodak Scanner Special
Following are descriptions of the buttons in the Kodak Scanner Special
Features dialog box.
Features Dialog Box
Barcode Click on the Barcode button to access the Barcode Parameters dialog
box. This dialog box allows you to choose barcode and patch code
options. Refer to the section entitled “Barcode.”
Imprinter Click on the Imprinter button to access the Imprinter Parameters
dialog box. This dialog box allows you to choose document printer
options. Refer to the section entitled “Document Printer (Imprinter).”
Default Click on the Default button to return all settings in the Kodak Scanner
Special Features dialog box to their predetermined factory settings.
Cancel Click on the Cancel button to dismiss the dialog box without saving
any changes.
OK Click on the OK button to accept all of the selections.
A-63055 December 1999 16
Page 23

Image Emphasis
Image Emphasis allows you to adjust the softness or sharpness of
the scanned image. Choose one of the following image emphasis
levels: High, Medium, Low, None, and Smooth. The default is Medium.
Original Smooth High
Noise Reduction
Unwanted black speckles or splotches in a scanned document are
referred to as noise. Noise Reduction improves image clarity by
removing black spots, dust, or voids in white areas. Choose a noise
reduction level in the
is “None.”
The more noise in a scanned image, the larger the compressed file
size. Also, if images are being produced for an OCR system (a system
that can read text from an image produced by a scanner), too much
noise may lessen the reliability and read rate of the OCR system.
While choosing the larger matrix decreases large noise, commas (,) or
decimal points (.) may disappear as well.
in Binary mode. Using
using a
None Noise Reduction 4 x 4
Dither
setting.
Noise Reduction
Noise Reduction
drop-down list box. The default
Noise Reduction
is not recommended when
is valid only
A-63055 December 1999 17
Page 24

Gamma
The Gamma option allows you to define the gamma curve setting for
normal scanning and computer screen viewing. Choose one of the five
gamma curves in the
and CRT levels in a gamma curve. If you intend to view the scanned
images on a computer screen, select “CRT.”
When “User Download” is selected, you must specify a gamma pattern
(*.PXG file). Click on the
group box and select a gamma pattern in the file selection box.
A gamma setting can be specified only when a Dither pattern, an Error
Diffusion pattern for Binary mode, or a Grayscale mode is selected.
Gamma
Gamma
drop-down list box. There are standard
button in the Download From File
Lamp
Length Control
Select “Red” in the Lamp box to allow the scanner to perform red
dropout color. The green lamp is the normal setting. When red dropout
is specified, most red characters, lines, or illustrations will not be
captured when a document is scanned.
NOTE: This feature is available only on the Scanner 2500.
When Length Control is selected, the scanned image length is
automatically determined. Different length documents will be detected
and scanned accordingly, thereby conserving memory.
By using
For example, if you are simultaneously scanning A4 and A5 size
documents, and the A5 size is in a horizontal position and
Control
The bottom half of the paper will become a black image. If
Control
Length Control
is off, the A5 horizontal document will be scanned as A4 size.
is on, the A5 horizontal document is scanned as horizontal A5.
A5
Landscape
, the scanner does not use excessive memory.
Length
Length
A5
Landscape
A5
Landscape
Document Length Control off Length Control on
A-63055 December 1999 18
Page 25

Long Paper
When Long Paper is enabled, a lengthy type of document, such as an
oil drill chart or a cardiogram, can be captured.
NOTE: This feature is available only on the Scanner 2500.
The scanned image is divided and filed in the size selected in the
Size
drop-down list box.
The scannable length capability differs by the size of available
memory. Refer to the table on the next page for details.
Document Image
Page 1
Page 2
Page 3
Page N
Page
A-63055 December 1999 19
Page 26

The length that can be scanned is determined by the memory size.
Detect Page Size
dpi
Scanner
Memory
8 MB
(no additional
memory added)
72 MB 200 Letter 30 letter size pages
8 MB 100 Letter 35 letter size pages 70 images when
72 MB 100 Letter 60 letter size pages 120 images when
When you enable
Document
Width
200 Letter 8 letter size pages
Long Paper
:
Longest
Document Size
(11 inches long)
(11 inches long)
Comments
16 images when
scanning duplex
60 images when
scanning duplex
scanning duplex
scanning duplex
• Scanner speed decreases.
• The straight paper pass is recommended. (For more information
about the paper pass, refer to the scanner’s User’s Guide.)
• Multiple page detection and jam detection do not register. If a
document jams during scanning, cancel the scan from the
application or open the scanner door and stop scanning.
NOTE:
Long Paper
Detect Page Size
is not available when
is enabled.
Read Deskew Data
or
When Detect Page Size is enabled, diff erent si ze paper can be
scanned without having to reconfigure the
Paper Size
function. Size is
determined by paper width, not length.
This feature detects the following paper sizes: Legal, Letter, A3, A4,
A5, A6, B4, B5, and B6.
Set documents of different sizes on the left side of the feeder. The
scanner detects the document size by the document guide positions.
NOTE:
Detect Page Size
is not available when
Long Paper
is enabled.
A-63055 December 1999 20
Page 27

Read Deskew Data
Enable Read Deskew Data to detect the skewing of a document and
notify the application when a skewed document occurs.
Detect Double Feed
Slow Feeding
NOTE:
When Detect Double Feed is enabled, multiple feed documents (two
or more documents scanned simultaneously) will be detected.
Sensitivity—when you enable enabled. Select one of the following detection sensitivities:
• High—select this when you scan thick paper.
• Low—select this when you scan thin paper.
• Normal—select this when you scan standard paper.
NOTES: The scanner uses an ultrasonic wave to detect multiple feed
Slow Feeding allows you to change the feeder speed in order to scan
a thin, folded, creased, or curled document in the automatic document
feeder. Before scanning, straighten the document and select the
Feeding
Read Deskew Data
enabled.
documents. Document thickness and wrinkles may cause
false reads.
When you scan important documents, check the number of
sheets of a document and the number of scanned images to
verify that all documents have been scanned.
is not available when
Long Paper
Detect Double Feed, Sensitivity
is
is also
Slow
check box.
NOTE: Enable
A-63055 December 1999 21
Slow Feeding
when
Long Paper
is selected.
Page 28

Mirror Image
Select Mirror Image to flip scanned images to create mirror images.
Original Mirror
Reverse Image
Remove Shadow
Fit to Page
Select Reverse Image to reverse the color of the scanned image so
that black areas are white and white areas are black.
Original Reverse
Enable Remove Shadow to remove any black lines which may appear
at the top and bottom of a scanned image.
When this feature is enabled, about 3 mm of the top and the bottom of
the scanned image become white.
Selecting Fit to Page allows you to specify whether documents are
scanned at actual size or reduced (Fit to Page) size.
Normally, the scanner scans at 100% of the actual page size. Some of
the data on the edges of the page may be lost. When
enabled, the scanner shrinks the image to fit the scanned page.
Fit to Page
is
A-63055 December 1999 22
Page 29

White Level From Paper
When White Level From Paper is on, the first 3 mm of each
document is analyzed and the back ground br igh tnes s lev el is adjuste d
so the background of the scanned document becomes white.
Level From Paper
is “Off” when
Dither
or
Grayscale
is enabled.
White
• Auto—when
Dither
and
Binary
are set to “None,” white level is set
from a preset white color definition.
• On—white level is set from the first 3 mm of a scanned document.
• Off—white level is set according to the white level calibration strip
in the scanner (not the scanned document).
Original
Auto
On
Off
If you scan colored paper (such as red or blue), the scanned paper’s
background color may cause the noise level to increase.
NOTE: The document color 3 mm from the upper edge is detected. If
a document contains colors that are different from the 3 mm
sampled section color, this function may not work correctly.
A-63055 December 1999 23
Page 30

Binary Mode
Automatic Threshold
Selecting Automatic Threshold automatically sets
Brightness
Contrast, White Level From Paper, Gamma, Noise Reduction
Image Emphasis
Automatic Threshold
in
Mode
.
Select the mode best suited for the application:
• Mode 1—for dark documents.
• Mode 2—for normal documents.
• Mode 3—for light documents.
in accordance with the scanning resolution.
is valid only when a binary mode is specified
,
, and
Halftone Mode Automatic Separation
When Automatic Separation is enabled, the scanner automatically
recognizes and separates text and photo. This function automatically
sets tonal gradation type. The text is scanned in binary mode and the
Dither
photo image areas are scanned in dither mode specified in
Automatic Separation
Mode
in
Binary mode Error Diffusion Automatic Separation
NOTES: Depending on the document, the text and photograph(s) may
.
not be perfectly separated.
If photographs are always located in the same positions,
instead of using
region and select a dither pattern for that region.
is valid only when a binary mode is specified
Automatic Separation
, you could define a
.
A-63055 December 1999 24
Page 31

Manual Feed Modes
The Manual Feed Modes group box allows you to configure the
feeder in different ways, from a manual feed mode so you can scan
pages one by one, to a mode where you only have to place paper in
the feeder to begin scanning.
Choose a manual feed mode:
Download From File
• Off—
• On—you can insert documents one by one. Insertion of a
• Auto Start—when documents are placed in the feed tray, scanning
• Wait Until User Pushes Key—place documents in the feed tray and
Manual Timeout(s)—when you enable a
Timeout(s)
1–300 seconds. The default is 300 seconds (5 minutes). If a document
is not fed manually within the specified time, the scanner returns to
automatic feeding mode.
The
allow you to access dither and gamma files.
Manual Feed
document starts scanning.
starts automatically. When scanning is finished, the scanner waits
for more documents. Scanning starts again after you place more
documents in the feed tray.
press the scanner’s Stop/Start button to start scanning. When
scanning is finished, the scanner waits for more documents.
Scanning starts again after you place more documents in the feed
tray and press the scanner’s Stop/Start button.
is also enabled. You can specify a time delay setting from
Dither
and
Gamma
is off.
Manual Feed
buttons in the Download From File group box
mode,
Manual
A-63055 December 1999 25
Page 32

Scanner Information
The
Counter
box allow you to check the scan count and roller status.
and
Status
buttons in the Scanner Information group
Click on the
the current scan count or to set up the counter.
Scanner Counter—when this button is selected, the number of sheets
scanned appears only on the scanner’s LCD display.
User Counter—when this button is selected, the number of sheets
scanned appears only in the Counter dialog box. The Current Number
and the Step Number boxes are enabled.
• Current Number—the value that appears in this box is the number
of sheets scanned multiplied by the step value that appears in the
Step Number
• Step Number—you can multiply the value in the
box by specifying a value in the
values are 1 through 9.
Counter
box.
button to access the Counter dialog box to view
Current Number
Step Number
box. Allowable step
For example, when you enter “1” in the
value in the
(i.e., 1, 2, 3, . . .) for each sheet that is scanned.
Enter a step value of “2” to increment the
multiples of two (i.e., 2, 4, 6, . . .) for each sheet that is scanned.
A-63055 December 1999 26
Current Number
box increments in multiples of one
Step Number
Current Number
box, the
value in
Page 33

Click on the
view roller cleaning and replacement guidelines.
Refer to the scanner’s User’s Guide for detailed information about
cleaning and replacing the rollers. When you have cleaned or replaced
the rollers, click on the
Status
button to access the Scanner Status dialog box to
Clear
button to reset the roller status.
A-63055 December 1999 27
Page 34

Barcode
The scanner can read barcodes. The barcode data is analyzed and
the information is sent in ASCII code to an application that supports
barcode reading (e.g.,
Kodak Digital Science
Capture Software).
IMPORTANT: Your application must support barcode reading.
The following barcode types can be detected:
Codabar (NW-7) ITF (Interleaved 2 of 5) Code39
NOTES: Scanner speed decreases when you detect barcodes.
Setting up for Barcode Reading
Barcode is not available when
Detect Paper Size
1. Select the document size and resolution in the Scanner Settings
dialog box.
2. Click on the
dialog box.
3. Click on the
dialog box.
More
Barcode
are enabled.
button to access the Scanner Special Features
button to access the Barcode Parameters
Long Paper
and
A-63055 December 1999 28
Page 35

4. Check the
Enable Barcode
box.
5. Select the barcode region in the
list box.
Ten regions can be specified: five front barcodes (Front #1-Front
#5) and five back barcodes (Back #1-Back #5).
6. Select a measurement in the
mm, or inches.
7. Select the barcode in the
8. Choose the direction of the barcode (Forward Search or Reverse
Search) in
Barcode Search Direction
Barcode Type
Barcode Settings For
Units
drop-down list box in pixels,
drop-down list box.
.
drop-down
*0000000*
*0000000*
Forward Search Reverse Search
A-63055 December 1999 29
Page 36

9. Set the barcode area:
• X-Position to Begin Search—must be 10 mm (0.39 inches) to
the left of the first barcode data to be read.
• Y-Position to Begin Search—the length from the top of the
document to the upper edge of the barcode.
• Width of area on page to search—set this value 20 mm
(0.79 inches) greater than the actual width of the barcode.
• Length of area on page to search—set this value equal to the
entire barcode search length. If the search area is large
(e.g., an 8.5 x 11-inch region) then the scanning time will
increase considerably.
Width
Length (>10 mm)
X coordinate
ulx
10 mm
10 mm
uly Y coordinate
Document
A-63055 December 1999 30
Page 37

Detecting Patch Codes
Patch codes can be used to index documents via the industry standard
patch codes ll, lll, and T.
The patch code data is analyzed and the information is sent to an
application that supports patch code reading (e.g.,
Science
Capture Software).
Kodak Digital
IMPORTANT: Your application must support patch code reading.
Select a patch code by the same method used to select a barcode.
NOTE: Scanner speed decreases when you detect patch codes.
1. Click on the
dialog box.
2. Click on the
dialog box.
3. Choose a patch code in the
More
button to access the Scanner Special Features
Barcode
button to access the Barcode Parameters
Barcode Settings
drop-down list box.
A-63055 December 1999 31
Page 38

The Barcode Parameters dialog box lists the Front Side and Back
Side settings.
4. Choose the direction of scanning (Horizontal Orientation or Vertical
Orientation) in
Vertical Orientation
Patchcode Orientation
Type II
Type III
Type T
.
Document Printer (Imprinter)
Printable Characters
The Imprinter button in the Scanner Special Features dialog box
allows you to access the Imprinter Parameters dialog box in
which you can set up parameters for the optional document printer.
The document printer can print character strings on a document.
• Pre-Imprinter—prints on the front of the document before
scanning. The printing becomes part of the scanned image.
(Available for the Scanner 1500 and the Scanner 2500.)
• Post-Imprinter—prints on the back of the document after scanning.
The printing does not become part of the scanned image.
(Available only for the Scanner 2500.)
The chart below shows the characters that the document printer can
print on the scanned document.
SP ! " # $ % & ’ ( ) * + , - . /
0123456789: ;<=>?
@ABCDEFGH I J K LMNO
PQRSTUVWXYZ [ ] ^ _
abcdefghi j k lmnop
qrstuvwxyz{| }¯
A-63055 December 1999 32
Page 39

Printing a Counter, Date, Time, or Fixed String
Use the following strings to print any combination of a counter, a date,
a time, or a fixed string.
Counter
#:9999999
The first pound character (#) encountered in the string is replaced with
the value specified in the Counter dialog box. Every successive pound
character (#) is printed in sequential order.
Extra spaces are padded with zeroes (0) when %0# is specifie d.
Date
String Example
%1d: YY/MM/DD 97/02/20
%2d: YYYY/MM/DD 1997/02/20
%3d: MM/DD/YY 12/13/97
%4d: DD/ABBREVIATED MONTH/YY 13/Dec/97
NOTE: YY or YYYY: year, MM: month, DD: day
Time
String Example
%1t: HH:MM 11:27
%2t: HH:MM:SS 10:46:34
NOTE: HH: hour, MM: minutes, SS: seconds
Fixed String
Almost any text string can be a fixed string that can be printed on a
scanned document. Up to 72 characters can be printed. This includes
any variable information, such as a counter, date, or time. Only the
characters shown in the chart on the previous page may be used in a
fixed string.
A-63055 December 1999 33
Page 40

Printing Start Position
Printing is done vertically from the top of the paper. The character top
(“A” in the diagram below) points to the right edge of the document.
10 mm
Start position
Printing area
The printing start position is specified in the
A
Character top
Paper
10 mm
Printing Offset
text box in
the Imprinter Parameters dialog box.
The horizontal printing position (the distance from the right or left
margin) is set mechanically on the document printer in the scanner.
A-63055 December 1999 34
Page 41

Setting up for Document Printing
1. Click on the
dialog box.
More
button to access the Scanner Special Features
2. Click on the
dialog box.
3. Check the
4. Type the character sequence in the
A time and date can also be specified.
5. Type the printing start position in the
Imprinter
button to access the Imprinter Parameters
Enable Imprinter
box.
Imprinter String
Printing Offset
text box.
text box.
A-63055 December 1999 35
Page 42

Counter Click on the Counter button in the Imprinter Parameters dialog box to
access the Counter dialog box to view the current scan count or to set
up the counter.
Scanner Counter—when this button is selected, the number of sheets
scanned appears only on the scanner’s LCD display.
User Counter—when this button is selected, the number of sheets
scanned appears only in the Counter dialog box. The Current Number
and the Step Number boxes are enabled.
• Current Number—the value that appears in this box is the number
of sheets scanned multiplied by the step value that appears in the
Step Number
box.
• Step Number—you can multiply the value in the
box by specifying a value in the
values are 1 through 9.
For example, when you enter “1” in the
value in the
(i.e., 1, 2, 3, . . .) for each sheet that is scanned.
Enter a step value of “2” to increment the
multiples of two (i.e., 2, 4, 6, . . .) for each sheet that is scanned.
A-63055 December 1999 36
Current Number
Step Number
Step Number
box increments in multiples of one
Current Number
Current Number
box. Allowable step
box, the
value in
Page 43

Compression
Scanned image data can be compressed to decrease file sizes. When
Compression is specified, files transmitted from the scanner decrease
in size, thus allowing more images to be stored on the host PC.
Select a compression type in the
Document Name dialog box.
Compression cannot be used for some applications or image file
formats. For example, you cannot use Compression for the bitmap
format (*.bmp) used by Windows. Choose a compression form that is
compatible to the one your application supports.
The following compression methods are available:
• CCITT-G3—an old version of the CCITT compression standard
which should be used only with older imaging systems. This can
be used only for bitonal images.
• CCITT-G4—the current industry standard. This can be used only
for bitonal images.
Compression
box in the Scanned
• JBIG—has a high compression rate for bitonal and grayscale
images and significantly better compression rate for dithered
images in comparison with CCITT-G4. However, JBIG does not
have the same industry acceptance as CCITT-G4.
NOTE: For documents composed almost entirely of photographs
scanned by Dither using G3 and G4 compression, the
compressed file may be larger than the uncompressed file.
A-63055 December 1999 37
Page 44

TWAIN Data Source
Installation
The TWAIN Data Source is included with the scanner . You can install
the driver from the CD.
After installation of the driver is complete, install your application
software on the host PC.
After your application software is loaded and launched, left-click on
File and choose
the scanner you want to use. The highlighted scanner is the scanner
currently in use.
NOTE: If your PC is running Windows NT 4.0, the 32-bit version ASPI
Manager is required. You can install this by installing EZ-SCSI
by Adaptec Co. or SCSI installer for Windows 95/98/NT.
Select Source
. The Scanner list allows you to select
A-63055 December 1999 38
Page 45

Kodak Twain Driver Dialog Box
This section describes the features and buttons in the Kodak Twain
Driver dialog box.
The Kodak Twain Driver dialog box shown below appears when the
Scanner 1500 is selected in the Scanner list.
A-63055 December 1999 39
Page 46

The Kodak Twain Driver dialog box shown below appears when the
Scanner 2500 is selected in the Scanner list.
A-63055 December 1999 40
Page 47

Buttons in the
Kodak Twain Driver
Following are descriptions of the buttons in the Kodak Twain Driver
dialog box.
Dialog Box
Scan Click on the Scan button to accept all selections and begin scanning.
PreScan Click on the PreScan button to scan a document so you can check the
selected scanning settings.
Free Size Click on the Free Size button to access the Free Paper Size dialog box
in which you can create and save a custom page size. Refer to the
section entitled “Creating a Custom Paper Size.”
More Click on the More button to access the Scanner Special Features
dialog box. Refer to the section entitled “More Settings Dialog Box.”
About Click on the About button for version inf or mation for the driver and
scanner.
Default Click on the Default button to return all settings to their predetermined
factory settings.
Cancel Click on the Cancel button to dismiss the dialog box without saving
any changes.
A-63055 December 1999 41
Page 48

Side
You can specify single-sided or double-sided scanning in the Side
group box by selecting the
NOTES: Both sides of the document are scanned at a same time in
duplex scanning. The front side of the image/page is output
first, then the back side of the image/page.
Side
is always available for the Scanner 2500.
available for the Scanner 1500 unless
Method group box.
Simplex
or
Duplex
radio button.
Side
ADF
is selected in the
is not
Method
Page
The Method group box allows you to indicate whether you are using the
automatic document feeder (ADF) or the flatbed when you are scanning
on the Scanner 1500. Select the
Method group box.
NOTE: This option is available only for the Scanner 1500.
The Page group box contains options that allow you to specify whether
All Pages or a specific Number Of Pages are to be scanned.
NOTES: If you select
to indicate the amount of pages to be scanned.
If you are scanning in duplex mode, enter “2” for the number
of pages when scanning one sheet (front side and back side).
Number Of Pages
ADF
or
Flatbed
, type a number in the text box
radio button in the
A-63055 December 1999 42
Page 49

Image Type
Choose a grayscale or binary (black and white) scanning format in the
Image Type drop-down list box. Select the format that is best suited to
your application. Grayscale provides better image quality but requires
more scanning time and memory.
Grayscale Binary
NOTE: Additional memory may be required for grayscale scanning,
depending on the selected resolution and paper size. Refer
to the chapter entitled
information about memory.
Memory Requirements
for more
Resolution (DPI)
A-63055 December 1999 43
Resolution or dots per inch (dpi) indicates the scanning resolution,
which largely determines the quality of the scanned image. The
greater the resolution, the better the reproduction. However, scanning
at a higher resolution also increases scanning time and file size. This
function sets the resolution of the main scan and sub-scan areas. The
industry standard is 200 dpi (about 8 pixels/mm).
You can choose a preset value in the Resolution box or type the
desired value. The default value is 300 dpi. Following are the available
resolutions:
• Scanner 1500—100-600 dpi (1 dpi/step)
• Scanner 2500—100-600 dpi (1 dpi/step)
NOTE: Changing the resolution affects the
(Dither), and
you select these functions.
Barcode
settings. Specify the resolution before
Area, Region, Halftone
Page 50

Paper Size
This function determines the scanning area by a pre-determined size.
The default paper size is set when a scanner is first selected. You can
choose a paper size in the Paper Size drop-down list box.
Creating a Custom Paper Size
NOTE: Changing the paper size affects the
(Dither), and
you select these functions.
You can create and save a custom page size, as long as it does not
exceed the maximum page size. Click on the
in the Kodak Twain Driver dialog box to access the Free Paper Size
dialog box. You can save up to ten page sizes.
Barcode
settings. Specify the paper size before
Area, Region, Halftone
Free Paper Size
button
A-63055 December 1999 44
Page 51

Creating a New Paper Size
1. Type the paper name, width, and length into the appropriate text
boxes in the Free Paper Name/Size group box in the Free Page
Size dialog box.
Detect Paper Size
2. Click on the
The new paper size is registered and the name appears in the
Added Paper Size List box.
Deleting a Paper Size
1. Click on the paper size you want to delete in the
list in the Free Paper Size dialog box.
2. Click on the
The paper size is removed from the Added Paper Size List box.
When Detect Paper Size is enabled in the Kodak Twain Driver dialog
box for the Scanner 1500, different sized paper can be scanned
without having to reconfigure the Paper Size function. Size is
determined by paper width, not length.
This feature detects the following paper sizes: Legal, Letter, A3, A4,
A5, A6, B4, B5, and B6.
Set documents of different sizes on the left side of the feeder. The
scanner detects the document size by the document guide positions.
Add
button.
Delete
Added Paper Size
button.
A-63055 December 1999 45
Page 52

Halftone (Dither)
Dithering is a technique for reproducing halftone images, such as a
photo, in binary mode.
Two pixel levels are used to represent the entire grayscale, thereby
reducing the levels of gray required displaying an image. Using a
dithering pattern requires less memory than using a grayscale mode.
Choose a dithering method in the Halftone drop-down list box for the
Front Side Settings and Back Side Settings group boxes: None
(Binary), Bayer Dither 64 (64 steps), Bayer Dither 16 (16 steps),
Halftone Dot 32, Halftone Dot 64, and Error Diffusion.
Original Bayer Dither 64 Bayer Dither 16
Halftone Dot 32 Halftone Dot 64 Error Diffusion
A-63055 December 1999 46
Page 53

Brightness
The Brightness option allows you to adjust the image brightness,
making it lighter or darker.
Adjust the brightness setting by dragging the Brightness sliding bar in
the Front Side Settings or Back Side Settings group box. Select a
value from 1-255. The default is 128. The smaller the number, the
darker the image. Or you can type a value (1-255) in the Brightness
text box. Scan the document to check the brightness.
Brightness 51 Brightness 128 Brightness 205
A darker setting is recommended for blurred character documents.
With a brighter setting, background noise in a color document
disappears.
NOTE: Refer to the section entitled “Automatic Threshold” for
information about setting automatic brightness by
Binary mode.
A-63055 December 1999 47
Page 54

Contrast
The Contrast option sets the image contrast by adjusting the difference
between black and white, thereby making an image sharper or softer.
In a low-contrast setting, the difference between black and white is
small, so the image is softer. In a high-contrast setting, the difference
between black and white is large, so the image is clearer. Select a
contrast value from 1-255. The default is 128.
Contrast 51 Contrast 128 Contrast 205
Adjust the contrast setting by dragging the Contrast sliding bar in the
Front Side Settings or Back Side Settings group box. Or you can type
a value (1-255) in the
the contrast.
Contrast
text box. Scan the document to check
Area
A-63055 December 1999 48
The Area group box shows the area settings for a region.
• Units—select mm or inches.
• X—the position from the left end of the document to the left end of
the scanning area.
• Y—the position from the top end of the document to the top end of
the scanning area.
• Width—the width of the scanning area.
• Length—the length of the scanning area.
NOTE: This feature is available only for the Scanner 1500.
Page 55

Sub Area
You can define a brightness level and dither setting for a specific area
of an image that is different from the brightness level and dither setting
of the whole image.
This way, a picture can be dithered while the rest of the page remains
undithered, or a faint stamp can be enhanced by setting a lower
brightness than the rest of the page. You can define three regions per
side. Each region can have its own bright nes s le ve l, but al l regions
must use the same dither setting.
Each scanning side is settable for up to three regions. This function is
available only for Binary mode.
Original Scanned image
A-63055 December 1999 49
Page 56

Specifying an Area To capture a portion of an image, click on the
Front Side Settings group box or in the Back Side Settings group box
to access the Sub Area dialog box.
NOTE: The Sub Area dialog box shown above appears for the
Scanner 1500. The Sub Area dialog box shown below appears
for the Scanner 2500.
Sub Area
button in the
Area settings are determined b y the X and Y positions and the width
and length coordinates. Set the scanning area in the Area group box
on the basis of the size specified in the
You can also use the mouse to define the scanning area in the window.
A-63055 December 1999 50
Paper Size
drop-down list box.
Page 57

More Settings Dialog Box
This section describes the features and buttons in the More Settings
dialog box. This dialog box is accessed by clicking on the
in the Kodak Twain Driver dialog box.
The More Settings dialog box shown below appears when the
Scanner 1500 is selected in the Scanner list.
More
button
A-63055 December 1999 51
Page 58

The More Settings dialog box shown below appears when the
Scanner 2500 is selected in the Scanner list.
A-63055 December 1999 52
Page 59

Buttons in the
More Settings
Following are descriptions of the buttons in the More Settings
dialog box.
Dialog Box
Imprinter Click on the Imprinter button to access the Imprinter Parameters
dialog box. This dialog box allows you to choose document printer
options. Refer to the section entitled “Document Printer (Imprinter).”
OK Click on the OK button to accept all of the selections.
Automatic Threshold
Selecting Automatic Threshold automatically sets
Contrast, White Level, Gamma, Noise Reduction
Emphasis
Threshold
Select the mode best suited for the application:
• Mode 1—for dark documents.
• Mode 2—for normal documents.
• Mode 3—for light documents.
in accordance with the scanning resolution.
is valid only when a binary mode is specified in
, and
Brightness
Image
Automatic
Image Type
,
.
A-63055 December 1999 53
Page 60

White Level
When White Level is on, the first 3 mm of each document is analyzed
and the background brightness level is adjusted so the background of
the scanned document becomes white. White Level is set to “From
White Stick” when
Halftone
(Dither) or
Grayscale
is enabled.
• From White Stick—white level is set according to the white level
calibration strip in the scanner (not the scanned document).
• From Paper—white level is set from the first 3 mm of a scanned
document.
• Automatic—when
Halftone
(Dither) and
Binary
are set to “None,“
white level is set from a preset white color definition.
Original
From White Stick
From Paper
Automatic
If you scan colored paper (such as red or blue), the scanned paper’s
background color may cause the noise level to increase.
NOTE: The document color 3 mm from the upper edge is detected. If
a document contains colors that are different from the 3 mm
sampled section color, this function may not work correctly.
A-63055 December 1999 54
Page 61

Gamma
The Gamma option allows you to define the gamma curve setting for
normal scanning and computer screen viewing. Choose one of the five
gamma curves in the
and CRT levels in a gamma curve. If you intend to view the scanned
images on a computer screen, select “For CRT.” Otherwise, choose
“Normal.”
A gamma setting can be specified only when a Halftone (Dither)
pattern, an Error Diffusion pattern for Binary mode, or a Grayscale
mode is selected.
Gamma
drop-down list box. There are standard
Noise Reduction
Unwanted black speckles or splotches in a scanned document are
referred to as noise. Noise Reduction improves image clarity by
removing black spots, dust, or voids in white areas. Choose a noise
reduction level in the
The more noise in a scanned image, the larger the compressed file
size. Also, if images are being produced for an OCR system (a system
that can read text from an image produced by a scanner), too much
noise may lessen the reliability and read rate of the OCR system.
While choosing the larger matrix decreases large noise, commas (,) or
decimal points (.) may disappear as well.
in Binary mode. Using
using a
None Noise Reduction 4 x 4
Halftone
Noise Reduction
Noise Reduction
(Dither) setting.
box. The default is “None.”
Noise Reduction
is not recommended when
is valid only
A-63055 December 1999 55
Page 62

Lamp
Select Red in the Lamp box to allow the scanner to perform red
dropout color. The green lamp is the normal setting. When red dropout
is specified, most red characters, lines, or illustrations will not be
captured when a document is scanned.
NOTE: This feature is available only on the Scanner 2500.
Image Emphasis
Image Emphasis allows you to adjust the softness or sharpness of the
scanned image. Choose one of the following image emphasis levels in
the Front Side Settings or Back Side Settings group boxes: High,
Medium, Low, None, and Smooth. The default is Medium.
Original Smooth High
A-63055 December 1999 56
Page 63

Scanner Status
The Counter and Warning buttons in the Scanner Status group box
allow you to check the scan count and roller status.
Click on the
the current scan count or to set up the counter.
Scan Counter—when this button is selected, the number of sheets scanned appears only on the scanner’s LCD display.
User Counter—when this button is selected, the number of sheets
scanned appears only in the
the number of sheets scanned multiplied by the step value that
appears in the
For example, when you enter a step value of “1,” the value in the
Counter
sheet that is scanned.
Enter a step value of “2” to increment the
multiples of two (i.e., 2, 4, 6, . . .) for each sheet that is scanned.
Counter
button to access the Counter dialog box to view
User Counter
step
box. Allowable step values are 1 through 9.
box. The value in this box is
User
box increments in multiples of one (i.e., 1, 2, 3, . . .) for each
User Counter
value in
A-63055 December 1999 57
Page 64

Click on the
view roller cleaning and replacement guidelines.
Refer to the scanner’s User’s Guide for detailed information about
cleaning and replacing the rollers. When you have cleaned or replaced
the rollers, click on the
Warning
button to access the Warning Status dialog box to
Clear
button to reset the status.
A-63055 December 1999 58
Page 65

Mirror Image
Select Mirror Image to flip scanned images to create mirror images
Original Mirror
Reverse Image
Select Reverse Image to reverse the color of the scanned image so
that black areas are white and white areas are black.
Original Reverse
A-63055 December 1999 59
Page 66

Automatic Separation (Halftone Mode)
When Automatic Separation is enabled, the scanner automatically
recognizes and separates text and photo. This function automatically
sets tonal gradation type. The text is scanned in binary mode and the
photo image areas are scanned in dither mode specified in Halftone
(Dither).
specified in
Binary mode Error Diffusion Automatic Separat i on
NOTES: Depending on the document, the text and photograph(s) may
Automatic Separation
Image Type
not be perfectly separated.
If photographs are always located in the same positions,
instead of using
region and select a dither pattern for that region.
is valid only when a binary mode is
.
Automatic Separation
, you could define a
Remove Shadow
A-63055 December 1999 60
Enable Remove Shadow to remove any black lines which may appear
at the top and bottom of a scanned image.
When this feature is enabled, about 3 mm of the top and the bottom of
the scanned image become white.
Page 67

Fit to Page
Selecting Fit to Page allows you to specify whether documents are
scanned at actual size or reduced (Fit to Page) size.
Normally, the scanner scans at 100% of the actual page size. Some of
the data on the edges of the page may be lost. When
enabled, the scanner shrinks the image to fit the scanned page.
Fit to Page
is
Slow Feeding
Detect Paper Size
Detect Double Feed
Slow Feeding allows you to change the feeder speed in order to scan
a thin, folded, creased, or curled document in the automatic document
feeder. Before scanning, straighten the document and select the
Feeding
When Detect Paper Size is enabled in the More Settings dialog box
for the Scanner 2500, different sized paper can be scanned without
having to reconfigure the
paper width, not length.
This feature detects the following paper sizes: Legal, Letter, A3, A4,
A5, A6, B4, B5, and B6.
Set documents of different sizes on the left side of the feeder. The
scanner detects the document size by the document guide positions.
When Detect Double Feed is enabled, multiple feed documents (two
or more documents scanned simultaneously) will be detected.
Sensitivity—when you enable enabled. Select one of the following detection sensitivities:
• High—select this when you scan thick paper.
• Low—select this when you scan thin paper.
• Normal—select this when you scan standard paper.
check box.
Paper Size
function. Size is determined by
Detect Double Feed, Sensitivity
Slow
is also
NOTES: The scanner uses an ultrasonic wave to detect multiple feed
documents. Document thickness and wrinkles may cause
false reads.
When you scan important documents, check the number of
sheets of a document and the number of scanned images to
verify that all documents have been scanned.
A-63055 December 1999 61
Page 68

Stop at Skew
When Stop at Skew is enabled, the scanner stops scanning when a
skewed document is detected.
NOTE: This feature is available only on the Scanner 1500.
Manual Feed
Manual Feed allows you to configure the feeder in different ways, from
a manual feed mode so you can scan pages one by one, to a mode
where you only have to place paper in the feeder to begin scanning.
Check the
• All Pages—when documents are placed in the feed tray, scanning
• All Pages and Wait till user pushes key—place documents in the
• 1 Page—you can insert documents one by one. Insertion of a
Manual Timeout—when you enable
also enabled. Y ou can specify a time delay setting from 1–300
seconds. The default is 300 seconds (5 minutes). If a document is not
fed manually within the specified time, the scanner returns to automatic
feeding mode.
Enable
starts automatically. When scanning is finished, the scanner waits
for more documents. Scanning starts again after you place more
documents in the feed tray.
feed tray and press the scanner’s Stop/Start button to start
scanning. When scanning is finished, the scanner waits for more
documents. Scanning starts again after you place more documents
in the feed tray and press the scanner’s Stop/Start button.
document starts scanning.
box and choose a
Manual Feed
mode:
Manual Feed, Manual Timeout
is
A-63055 December 1999 62
Page 69

Document Printer (Imprinter)
The Imprinter button in the Scanner Special Features dialog box
allows you to access the Imprinter Parameters dialog box in which you
can set up parameters for the optional document printer. The
document printer can print character strings on a document.
There are two printing methods:
• Pre—prints on the front of the document before scanning.
The printing becomes part of the scanned image.
(Available for the Scanner 1500 and the Scanner 2500.)
• Post—prints on the back of the document after scanning.
The printing does not become part of the scanned image.
(Available only for the Scanner 2500.)
Printable Characters
The chart below shows the characters that the document printer can
print on the scanned document.
SP ! " # $ % & ’ ( ) * + , - . /
0123456789: ;<=>?
@ABCDEFGH I J K LMNO
PQRSTUVWXYZ [ ] ^ _
abcdefghi j k lmnop
qrstuvwxyz{| }¯
A-63055 December 1999 63
Page 70

Printing a Counter, Date, Time, or Fixed String
Use the following strings to print any combination of a counter, a date,
a time, or a fixed string.
Counter
#:9999999
The first pound character (#) encountered in the string is replaced with
the value specified in the Counter dialog box. A double pound
character (##) is printed as #.
Extra spaces are padded with zeroes (0) when %0# is specifie d.
Date
String Example
%1d: YY/MM/DD 97/02/20
%2d: YYYY/MM/DD 1997/02/20
%3d: MM/DD/YY 12/13/97
%4d: DD/ABBREVIATED MONTH/YY 13/Dec/97
NOTE: YY or YYYY: year, MM: month, DD: day
Time
String Example
%1t: HH:MM 11:27
%2t: HH:MM:SS 10:46:34
NOTE: HH: hour, MM: minutes, SS: seconds
Fixed String
Almost any text string can be a fixed string that can be printed on a
scanned document. Up to 72 characters can be printed. This includes
any variable information, such as a counter, date, or time. Only the
characters shown in the chart on the previous page may be used in a
fixed string.
A-63055 December 1999 64
Page 71

Printing Start Position
Printing is done vertically from the top of the paper. The character top
(“A” in the diagram below) points to the right edge of the document.
10 mm
Start position
Printing area
A
Character top
10 mm
Paper
The printing start position is specified in the Printing Offset text box in
the Imprinter Parameters dialog box.
The horizontal printing position (the distance from the right or left
margin) is set mechanically on the document printer in the scanner.
A-63055 December 1999 65
Page 72

Setting up for Document Printing
1. Click on the
2. Click on the
dialog box.
More
button to access the More dialog box.
Imprinter
button to access the Imprinter Parameters
3. Check the
4. Type the character sequence in the
A time and date can also be specified.
5. Type the printing start position in the
Enable Imprinter
box.
Imprinter String
Printing Offset
text box.
text box.
A-63055 December 1999 66
Page 73

Counter Click on the Counter button in the Imprinter Parameters dialog box to
access the Counter dialog box to view the current scan count or to set
up the counter.
Scan Counter—when this button is selected, the number of sheets
scanned appears only on the scanner’s LCD display.
User Counter—when this button is selected, the number of sheets
scanned appears only in the
the number of sheets scanned multiplied by the step value that
appears in the
step
box. Allowable step values are 1 through 9.
User Counter
box. The value in this box is
For example, when you enter a step value of “1,” the value in the
Counter
sheet that is scanned.
Enter a step value of “2” to increment the
multiples of two (i.e., 2, 4, 6, . . .) for each sheet that is scanned.
A-63055 December 1999 67
box increments in multiples of one (i.e., 1, 2, 3, . . .) for each
User Counter
value in
User
Page 74

EASTMAN KO DAK COMPANY
Document Imagin g
Rochester, New York 14650
Kodak, Digital Science, and the ds monogram
symbol, are trademarks of Eastman Kodak
Company.
Printed on recycled paper .
A-63055 12/99
Eastman Kodak Company, 1999
DOCUMENT
IMAGING
 Loading...