

Page 1
Part No. 1F8039
08May03
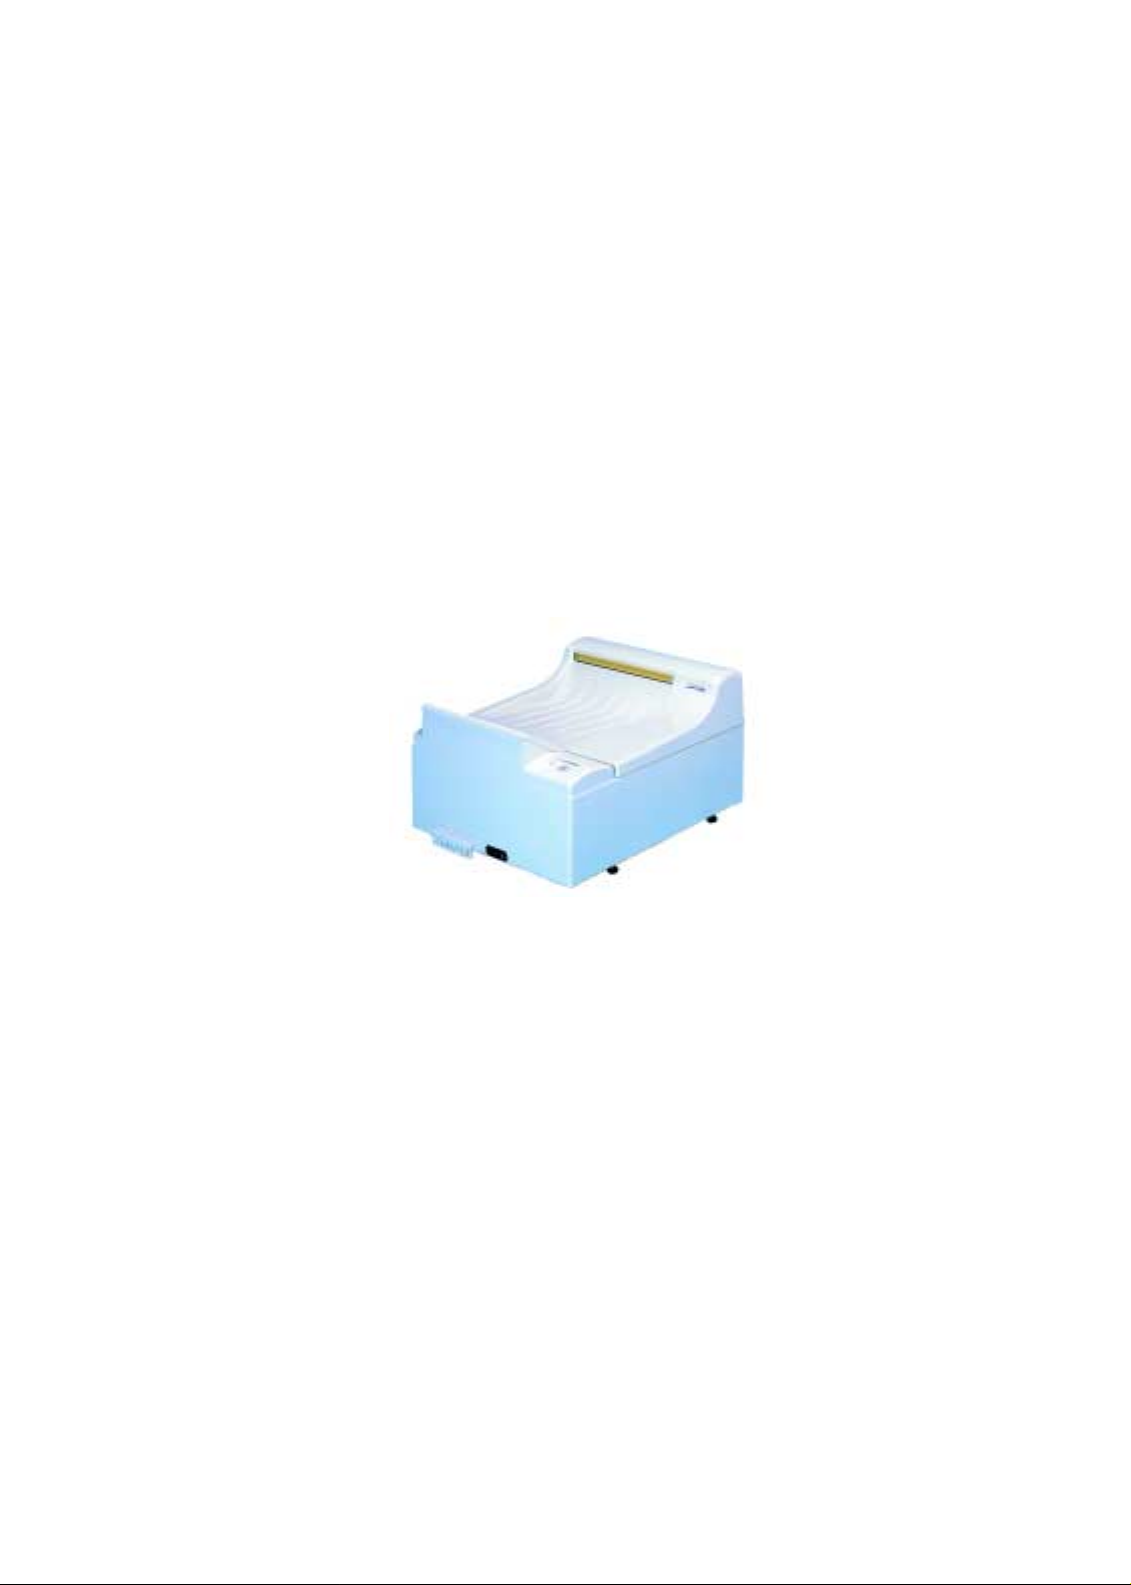
Kodak Medical X-ray Processor, Model 104
Operator Manual
Page 2

Table of Contents
Table of Contents
Technical Specifications............................................................................3
Safety Instructions.....................................................................................4
Installation.................................................................................................5
Initial Operation.........................................................................................8
Operation ................................................................................................ 10
Daily Care ............................................................................................... 14
Weekly Care............................................................................................14
Thorough Cleaning..................................................................................15
Film Defects............................................................................................16
Machine Errors........................................................................................17
New Equipment Warranty.......................................................................19
The information con t ain ed he rein is based on the experience and knowledge re lating to the subject matter gained by Eastman Kodak Company prior to publication.
No patent license is granted by this information.
Eastman Kodak Com pany re serve s the ri ght to chan ge t his info rmati on with ou t no-
tice, and makes no warranty, express or implied, with respect to this information.
Kodak shall not be liable fo r any loss or dama ge, inclu ding con sequent ial or spe cial
damages, resulting from any use of this information, even if loss or damage is
caused by Kodak’s negligence or other fault.
Copyright
© 2003 by Kodak. All rights reserved. Any reproduction, out of the limitation by the
copyright law, needs written authorization by Kodak.
Introduction
The Kodak processor is a compact, automatic table-top sheet film processor. The
film materials are de vel oped, fixed, rinsed and dr ied . Th e pr ocessor has automatic
film-regis trat ion an d a St and-by mode . The devel oping sol ution s are t empe ratur eregulated, circulated and auto matically replenished.
This User’s Guide contains instructions for installation, operation and servicing of
the processor. Read the User’s Guide carefully to ensure reliable and satisfactory
operation.
2
Page 3

Technical Specifications
Technical Specifications
Film transport:
Film formats:
Processing capactiy:
Process time:
Tank capacities:
Circulation system:
Replenishment:
Developer temperature:
Fixer temperature:
Water connection:
Water consumption:
Drain capacity:
Continuous roller transport system
In general: Sheet and roll films up to 35.8 cm
(14.1 in.) width;
roll films with leader from 70 mm (2.8 in.) width; smallest film format 10x10 cm
(4x4 in.).
35 x 43 cm: 62 films/hr
105 sec
Developer, fixer and washing 5 litres each (1.3gal)
Developer and fixer are continiuously circulated by a circulation pump
Automatic replenishment by film detection, in relation to film length
Adjustable 28 - 37°C (82.4 - 98.6°F)
Adjusted to developer temperature by heat exchanger.
Filtered water supply, 50 micron filter
Permissible water pressure 20 - 85 psi, permissible water temperature
5 - 30°C (41 - 86°F).
1.9 litres per minute (0.5 gal/min) when processing.
7 litres per minu te (1.85 gal/min).
Noise level:
Heat emission:
Environmental
conditions:
Power source:
Power consumption:
Weight (processor):
Dimensions (LxWxH ):
Floor space required:
* Depending on gears used, processor has different speeds.
** Height including optional working table or base cabinet.
Less than 58 dB(A).
Stand-by: 0.1 kJ/s Proc essing: 1.4 kJ/s
1) Temperature 21 - 26°C (68 - 79°F), room temperature should be lower than
set bath temperature .
2) Ventilation: 10 room air exchanges/hr. for a 3x3x3 m (10x10x10 ft) room.
3) Relative humidity 15% - 50% RH
4) Height above sea level less than 2000 m (6666 ft)
5) Indoor use
120 V, 60 Hz, 15A, GFI protected
1.4 kW/hr. when processing film
0.12 kW/hr in standby
Empty 35 kg (77 lbs)
Filled 50 kg (110 lbs)
77x59x42 (** 112) cm 30.3x23.2x16.5 (** 44.1) in.
2
0.45 m
(4.8 ft2)
3
Page 4

Technical Specifications
Safety Instructions
NOTE: Always follow local regulations for handling and disposing chemicals.
T o ensure the safe operation of this processor, installation and use should always
conform to the instructions contained in this manual .
Prior to handling, the Material Safety Data Sheets (MSDS’s) and product labels,
for the processor chemicals should be read and understood. MSDS’s for Kodak
products can be downloaded from the internet at www.kodak.com/go/msds. Safe
handling measures outlined on the MSDS’s for each product should be followed.
Impervious g loves and protective cl othing are recommended to p revent direct
skin contact. Safety glasses with side shields, goggles, or a face shield are recommended to prevent accidental eye contact from a splash. Proper industrial
hygiene practices should always be followed to prevent accidental ingestion.
Promptly wash after handling these chemicals. Do not eat, drink, or smoke in
areas where chemicals are used or stored. In addition , chemical-holdi ng tanks
should be equipped with tightly fitted lids to minimize chemical evaporation.
Drains should be operating properly to prevent gases and vapors from backing
up into the processing area. Spills and leaks should be cleaned up promptly.
Good gener al ven tilat ion is r ecomme nded in x-ray proces sing areas an d is t ypically defined as ten room changes of air per hour. Supplementary ventilation may
be needed in special situations such as mixing operations, in poorly ventilated
spaces, or in the event of evaporation from large surface areas.
Environmental regulations regarding the storage and disposal of waste chemicals should be obtained from the local water authorities and complied with.
Before opening the processor switch off the unit and unplug it from the
electrical socket. Service and repairs must be performed by trained
service technicians only. Use only manufacturers replacement parts.
4
Page 5

Installation
Installation
1. Requirements for installation
a. Filtered fresh water connection: Install a water filter between water tap and
water connection of processor. Don’t assemble the water filter directly to the
solenoid valve of processor. Stop cock with 3/4 in. outer-thread diameter
(washing machine connection), Water pressure 20 - 85 psi.
b. Drainage connection: Plastic tube - inner diameter 50 mm (2 in.) or larger. A
ventilated syphon which serves as odour preventor should be included in the
planning. The drainage tubes should be installed with a fall of minimum 5%.
Local Water Authorities regulations should be complied with.
c. Electrical connection: Fused wall socket with earth connection according to
electrical data (see Technical Specifications, page 3). It is also required to
install an Earth-Leakage Switch (with 25 A / 30 mA nominal error current).
Electrical connec tions should be carried out ac cordi ng to regulations by an electrician.
2. Set up of processor
Unpack the process or. Re move cov er and tra nsport se curing br ackets on the sid es
of the roller racks. Remove roller racks - start with the dryer rack.
The processor is delivered as a tabletop processor with a three part floorplate. If the
machine is upgra ded w ith th e opt ion al sta nd or cabi ne t, both small PVC- par ts ha ve
to be removed and main plate must be reconnected.
Table-top installation
For tabletop installation, screw on the adjustable feet.
Attention!
Machine shou l d n ot be i ns tal led on ta b le- to p w ith ou t a dj ust able feet, as this would block the ventilation openings under the
machine and cause overheating.
Installing on processor stand or base cabinet
For stand or cabinet installation, mount the processor directly on the stand or cabinet. Mount processor according to manual included with stand or cabinet (the adjustable feet inside the accessory bag are not required).
Level the pro cessor:
Place spirit level acros s the sidew a lls of pro ce ss or and adjust the levelling feet accordingly. Replace the racks into the processor and close the latches.
5
Page 6

Installation
3. Connecting the processor
Drainage and
collecting
containers
Water connection: Connect the water hose from the back of the processor to the
filtered fresh water supply.
All other hoses (see diagram Page 7): Connect the enclosed hoses according to
colour system onto the front of the machine. Put hose clip (enclosed in accessory
bag) over hose end, before attaching to connection. Warm up hose end (with hot
water) and pu s h on to th e res pec ti v e con ne ct ion . Pus h the cl i p over ho se and co nnection.
Cut hoses to required leng th. Then integr ate the stop co cks int o the thre e drai nage
hoses in such a position, that they are easy to reach.
Connect the suct ion pi pes to th e hose ends for th e r eplen ishm ent tan ks us ing h ose
clips. Put suction pipes through cover opening into respective replenishment tanks
and snap them in.
Place the developer and fixer overflow and drainage hoses into their respective collecting containers.
The overflow and the drainage of the water can either be placed into the drainage
syphon or into respective collection containers.
min. 70 cm
6
Page 7

Installation
Hose connections
DEV FIX
Developer (red) Fixer (blue) Water (clear)
HO
2
Overflow
Outlet
Replenishment tanks
Pay attention to the correct colour connections:
Developer: red; fixer: blue; water: clear
Danger of Overflow!
Use the incl ud ed ca bl e b ind er s (a cc es sor y ba g) to s ec ure t h e
hoses. Fix all hose ends which guide in to syphon or colle cting
container, so that they do not drop into the liquid.
Very important:
The hoses sho uld be as sh ort a s pos sibl e and withou t be nds
and kinks. This is very important for the water overflow hose
or an overflow may occur.
Inform yourself of the local authority regulations regarding
drainage. In addition, the x-ray processing product’s MSDS’s
will provide guidance on disposal of used chemicals.These
regulations may differ from information in this manual, but
they should be complied with.
Replenishment tanks
Overflow
Overflow
Overflow
Outlet
Replenishment
Overflow
Outlet
Outlet
If the machine is installed table-top, ensure that the table is
stable and does not wobble.
7
Page 8

Initial Operation
Initial Operation
1. Test run
Important!
Processor sh ould not be run dry!
a. Close the three drainage stop cocks and fill the tanks and replenishment con-
tainers with water. Open water inflow tap. Connect electrical socket and
switch the machine on . Water now flows into water ta nk . The c irc ulation pump
activates, however the hosing of the machine must be ventilated.
b. V e ntilation of the replenishment pump:
Set tempera ture dial to position “Manual pumping”. Keep dial to this position
until no more air bubbles rise in the tanks.
c. Ventilati on of the circulation pump:
If air is in the circulatio n pu m p, a loud running noise can be heard. Switch the
machine off again. Open the stop cocks of the developer and fixer for five seconds and switch machine on again. Repeat this procedure until no more air
bubbles are visible in the developer and fixer baths and until the circulation
pump runs quietly.
d. Check all hose connections for leakage. Switch machine off and drain water
out.
2. Install racks
Important!
Be careful to install racks properly and in correct position.
a. Install rac ks, st ar ting wit h devel ope r (red) , then fi xer (bl ue), t hen dryer (b eige) .
b. Make sure they are seated properly, so film transports correctly.
c. Latch racks securely.
Important notice:
Ensure that the racks are firmly installed and keep the secur-
ing latches on the drive shafts closed.
Don’t operate processor with empty replenishment tanks.
3. Fill processor with chemicals
Prepare chemicals in side the reple nishment co ntainers ac cording to ma nufacturers
instructions. Refer to the chemicals MSDS for proper handling guidelines.
Note: Kodak chemicals are recommended for use with Kodak films.
Fill up processor manually
By using a suitable contai ner, pour chem icals into the respective tanks . First the fixer and then the developer. Caution: when filling, be sure that chemicals do no
splash from one bath into another. When fixer solution is mixed with developer solution, the developer chemical is destroyed.
Snap each suction pip e into the respective co ver of it’s reple nishment contai ner and
close it carefully. Place containers under processor.
8
Page 9

Initial Operation
Using replenishment pump
Filling of proce sso r c an also be done by use of the replenishment pump (this takes
much more time). Snap each suctio n pipe into the respe ctive cover of it’s re plenishment container and close it care fully. Place co ntainers und er process or. Now set
temperature dial to “ Manual pumping”. Keep dial in this position u ntil tanks are filled.
After 20 minutes this function sto ps automat ically - to restart a cycl e, turn di al to another position and return to “Manual pumping”. Limitation: The function may fill up
tanks of develope r and fixe r to differe nt levels. T his may b e due to dif ferent cau ses.
If this happens, then use a suitable container to fill up the tanks completely.
9
Page 10

Operation
Operation
Control panel
LED displays
• Film feed
Wait with the next film until light goes off.
• Power
When power is on the LED lights up.
• Bath temperature
Flashes when temperature is not reached.
T em p era tu r e dia l
Manual pumping
Important!
Safety interlock stops film transportation when cover is re-
moved. Therefore keep cover placed on the machine when
processing films.
Medical X-ray Processor
31
30
29
28
ºC
32
33
34
35
36
37
10
Page 11

Operation
Startup
1. Close water-drainage stop cock.
2. Open water tap for water supply.
3. Switch processor on.
4. Check liquid level in replenishment and drainage collecting containers.
5. Wait until the developer temperature is reached. If the temperature has not
been reached, the bath temperature light is flashing.
6. Run cleaning films through processor.
Working procedure
7. Processi ng films:
Open light protection cover. Important: Put film first on left side of feed tray
and then feed in. During processing films please watch the display “Infeeding
film”. If this is lit, wait until it goes off again and an audible signal can be
heard, before inserting the next film.
Shutdown
8. Switch processor off.
9. Close water tap.
10. Open water-drainage stop cock and drain water out of the machine.
Stand-by mode
When no film is b eing proce ssed, the m achine sw itches to S tand-by. The chemica ls
remain at a constan t temper ature. Th e film tra nsport a nd water inflow activate at intervals to avoid crystalisation of the chemicals on the transport rollers. Entry of the
next film is possible at any time.
Film exit
Drying
WashingFixing
Fresh water inflow
Do not place any
object on the processor.
Replenishment Fixer
11
Page 12

Operation
Switching the machine on
The processor is switched on at the main switch on the front side. After switching
on, the water tank will be filled u p and a replenis hment cycl e will be carri ed out. T he
developer bath will be hea te d up. Until the tempe ratur e is re ached the LED-d isp lay
“Bath temperature” will b e flash ing. When the pro cess or is rea dy and the ba th temperature reached, a long signal tone can be heard.
Bath temperature
The processor heats up the chemicals automatically to the dial-set temperature.
When this temperature is reached for the first time after switching on the machine,
a long signal tone can be heard. This is also the case when the temperature is
changed by t he dial switch.
If the difference betw een actual an d dial-set t emperature i s more than 1°C , the bath
temperature LED will flash. If a film has been fed in and the temperature is not
reached, a warning sound will be heard.
Display “Film Feed”
The light “Film Feed ” is on du ring feed ing of film . After the f ilm has b een fed in completely the light goes off. Additionally an audible signal indicates that the next film
can be fed in. If films are fed into the processor without clearance one after an other,
then this may cause a film jam.
Manual pumping
The function “Manual pumping” activates the replenishment pump and pumps
chemicals into the tanks in ad dition to automatic replenish ment. Turn the dial to the
position “Manual pumpi ng” an d c hemicals will b e pumped in to the ta nks. Thi s fu nction is only availabl e durin g stan d-by ( no f ilm in p roces s). If th e di al is lef t in this position, the pumping function is stopped automatically after 20 minutes. To restart a
cycle turn, dial to a temperature and return to “Manual pumping”.
Please note: Fil ms cannot be pr ocessed when dia l is s et to “Man ual pum ping”. A lso
bath temperature is set automatical to 28°C during “Manual pumping”. After ending
the manual pumping the temperature must be set again by turning the dial. It takes
some time until the temperature is reached (look at the bath temperature display).
Remark: Both chemical pumps - f ixer and develope r - are dri ven paral lel by onl y
one motor and therefore they run simultaneously.
Anticrystalisation function
During the stand-by mode, the film transport, the dryer blower, the dryer heating
and the water inflow are activated every 20 minutes for a period of 20 seconds. This
prevents t he build-up of cryst als on the rollers.
Time replenishment (Anti oxidation funct ion, Flooded replenishment)
Also during the stand-by, th e developer chemic als are subject to change which
causes their deter ioration. By means of the tim e replenishm ent, a replenish ment cycle is activated after 60 minutes without replenishment. The pump runs for
15 seconds. With this function, the quality of the developer chemicals are maintained even when standing idle for long periods.
12
Page 13

Operation
Automatic replenishment
The chemicals are replenished automatically based on the amount of film processed. This is done by pumping c hemicals from the reple nis hm e nt con t a ine rs. The
film-detect ion swit ch calcul ates the proces sed film surfac e area at the fil m-infeed
and after 0,25 m
activated. The replenish ment qu antity pe r cycle (at pu mp setti ng 100% ) amounts to
150 ml. The chart below shows the replenishment rate in ml per m
reliance on film width and setting of the pump.
Film width Setting of replenishment pump
35 cm
24 cm
18 cm
**Standard setting
2
, a replenishment cycle of 40seconds duration is automatically
2
film surface in
Replenishment Rate
85%** 62%
600 ml/m
870 ml/m
1150 ml/m
2
2
2
450 ml/m
650 ml/m
875 ml/m
2
2
2
13
Page 14

Daily Care
Daily Care
Before use
• Remove dirt and dust from film- infeed with soft cloth.
• Run 2 - 3 clean-up films through pr ocess or to remo ve all acc umulated dir t and
dust from the rollers.
• Check the liquid level in the replenishment containers and if necessary refill.
• Leave light prot ection cover open wh en no film is i n the pr ocess or . T his avoi ds
condensation on feed tray.
After use...
• When work has been completed at the end of the day, drain water out of the
machine. This avoids the growth of algae in the water.
Attention: Do not let any liquid drop inside the processor or
run over the co ntrol. Liquids may caus e damag e to the processor electronics.
Weekly Care
The developer che mical s cau se re sidue build up in the mac hine. This resid ue ha s a
negative effec t on the dev elopi ng p roces s of th e fil m ma teri al. F or t his r eas on t he
processor should be regularly cleaned. Proceed as follows:
1. Switch machine off and remove cover.
2. Loosen the securing latches (red, blue and beige) of the drive shafts of each
roller rack at the right side.
3. Wear prote cti ve equ ipmen t, outli ned in the pr ocess ing ch emica l’ s MS DS.F irst
of all remove the large dryer -rack (beige). The racks are ea sier to remo ve and
insert when they are slightly tilted. Remove the fixer (blue) and developer
(red) racks in sequence.
4. Rinse all racks thoroughly under warm running water and then leave to dr ain
off. It is advisable to use a soft sponge (do not use scouring-pad, as this
would scratch the rollers) and remove the residue from t he rollers.
5. Replace the racks: Red = Developer, Blue = Fixer. Beige = Washing/Drying.
Ensure that the racks are firmly installed and do not forget to close the securing latches on the drive shafts.
6. Replace machine cover and ensur e it is securely closed.
7. Clean proce ssor outer shell with dam p c l oth . D o no t use abrasive cleaners o r
solvents.
Please note: When removing the Rinsing / Drying roller-rack,
ensure that no water gets into the film dryer air channel.
14
Page 15

Thorough Cleaning
Thorough Cleaning
A thorough cleani ng is ne cessary a t a minimu m of ever y three m onths. Ta nk cleaners are available for developer and water baths. The fixer bath is cleaned with water. When preparing chemical tank cleaners, follow manufacturers instructions
explicitly and refer to the MSDS for safe handling guidelines. Discharge, treatment
disposal of used chemicals may be subject to national, state or local laws or guidelines.
How to proceed:
1. Switch the machine off and empty all tanks by opening the stop cocks.
2. Remove mac hin e co ver. When all t an ks are emptied, close stop cock s again.
Now fill the fixer-tank with water. Prepare clean er solutions for developer and
water baths and fill into respective tanks.
3. Remove suc tion pip es fro m the re pl enish ment c ont ain ers an d pl ace th em in a
water filled bucket. Attention: Do not add chemical cleaners here!
4. Close machine cover and switch mach ine on.
5. Start film transportati on and kee p runnin g for 10 to 20 minutes. Place a film in
the infeed so that it activates the film switch but will not be pulled into the
processor. During the operation with water, the installed roller racks will be
cleaned.
6. Important: Af ter completion of tan k cleaning, the tank should be rinsed thoroughly with clean w ate r. To do th is, fill the machine with fre sh w ate r twice and
each time, let the ma ch ine run for a 10minute period. Empty the tank s and r eclose the stop cocks.
7. Take out the roller-racks and rinse them thoroughly with running water.
Remove remaining dirt from the rollers by using a sponge and clean thoroughly. Doing this, the rollers can be turned by turning the drive shaft.
Remove the sheet metal covers from the dryer rack and clean the rack with
mild soap. Reinstall the roller-racks in the machine.
8. Refill the tanks with respective chemicals. Replace the suction pipes into the
replenishment containers. In certain circumstances the circulation system
must be ventil ated: see Page 8, item 1c.
9. For quality check, process test films.
Extended shutdown
In the event that your pro cesso r will no t be in use for longer than two weeks, all the
chemicals have to be emptied out of the tanks. If you don't want to do a complete
tank cleaning at this time, then fill the tanks with water after emptying.
15
Page 16

Film Defects
Film Defects
Your processor has been constructed for long term use. If however irregularities
might occur, you will find help to locate the problem below. Please check the listed
points, before calling your service-technician.
Films do not have enough density
• Developer bath temperature is too low.
• Developing time is too short.
• Exposure time is too short.
• Replenishment rate of develo per too low.
• Developer chemicals are exhausted or too strong diluted: Renew.
• Fixer solution has been mixed into developer: Renew. Clean and rinse bath
well before refilling.
• Circulation is broken down.
Too high a density
• Developer bath temperature too high.
• Developin g time too long.
• Exposure time is too long.
• Replenishment rate of develo per too high.
• Developer chemicals are too high diluted: Renew.
• After renewing chemicals: Starter is missing.
• Circulation is broken down.
Films will not dry
Note: Depending on film type, you may need to switch to a longer
processing cycle.
• If warm air exits the air channel in the dryer, verify you are using the correct
processing cycle for the film type being used.
• Fixer solution is exhausted or diluted.
Film has a yellow-green surface.
• Improperly fixed film. Check the film type and fixer chemistry.
• Fixer solution is exhausted or diluted. Replenishment rate of fixer is too low.
Scratches, pressure marks, dirt on film
• Prior to processing films, run cleaner films through the processor.
• Pressure marks caused by careless handling, finger nails etc.
• Rollers are dirty or damaged. Clean tanks and roller racks or replace racks.
Cloudy film
• Level in developer is too low.
• First guide bar of fixer rack is dirty (condensate or crystals). Clean rollerracks.
• Developer is old or circulation not working.
• Try processing films by feeding them with emulsion side up.
16
Page 17

Machine Errors
Machine Errors
Machine does not switch on
• Ensure that electrical plug is firmly inserted into socket.
• Ensure that electrical socket has power supply by testing with an appliance
(e.g. tablelight).
Machine does not start automatically
• Film switch left side at the infeed side of the processor has not been pressed
down. Feed in the film to activate the switch.
Developer temperature too low
• The temperature dial is not set at the proper position (knob should not be set
in between positions).
Replenishment pump does not pump
• Check whether the replenishment containers are full and that the end of the
suction pipe is positioned under the liquid level.
• Check whether there is air in the replenishm ent pip es. If this is the case, then
check the pipe connections.
Rinsing water does not flow
• Open water inflow tap.
• Water pressure in the water system is too low: Minimum pressure 2 bar (20
psi).
Water tank overflows
• Water drainage h ose (overflow) is bent. The hose end should be positioned
above the dra inage level in the syphon (see diagram on Page7).
• Water drainage in the tank, hoses and connections should be checked for
blockage and pollution. The drainage hoses should be straight without bends
or kinks.
The film will not feed but the dryer works
• Place cover firmly on machine, ensuring that the cover switch on the right
front side has been activated.
The film does not transport correctly
• Film is fed in and gets caught in the machine: Check the positioning of the
racks in the machine and make sure that the latches are closed.
Important notice:
Ensure th at the r ack s ar e firm ly in sta lle d and keep the secur-
ing latches on the drive shafts closed.
Don’t operate processor with empty replenishment tanks.
After a long machine shut down check bath level and refill if
necessary.
17
Page 18

Machine Errors
Level Indicator
If the level of the deve loper fall s below th e ideal lev el the symbol “Manual pumping ”
appears until the ideal level is reached again.
To reach the ideal level please see “Manual pumping” on Page12 in th e operating
manual.
When the symbol “Manual pumping” disappears the pump-process can be stopped
by turning the te mp erature switch on t he sa me position you had b efo re when starting “Manual pumping”.
Medical X-ray Processor
31
30
29
32
33
28
ºC
37
34
35
36
Manual pumping
18
Page 19

New Equipment Warranty
New Equipment Warranty
Warranty Coverage
Kodak warrants the processors to function properly for 1 year from date of initial installation, when installed within one year from the date of shipment.
If the equipment does not function correctly during the warranty period, the dealer
that sold the equipment will provide or arrange for repair of the equipment during
the dealer’s normal working hours. Such repair service will include any necessary
adjustments and/or replacement of parts necessary to maintain your equipment in
good working order.
How to Obtain Service
Should equipmen t require se rvice, see the sales c ontract for details on whom to c all
for service, or contact the dealer that sold you the equipment.
Limitations
• Warranty service is limited to the contiguous United States, the island of Oahu in
Hawaii, and certain areas of Alaska.
• This warranty does not cover circumstances beyond Kodak’s control, misuse, or
abuse. Any at tachments, accessories, or alterations not marketed by Kodak
(including service or parts to correct problems resulting from the use of such
attachments, accessories or alterations), failure to follow Kodak’s operating
instructions, or supply items.
• Kodak makes no other warranties, express, implied, or of merchantability for this
equipment.
• Repair without charge is Kodak’s and the dealer’s only obligation under this warranty.
• Kodak will not be responsible for any consequential or incidental damages resulting from the sale, use, or imprope r functioning of this equipment even if loss or
damage is caused by the negligence or other fault of Kodak.
• Such damages for which Kodak will not be responsible, include, but are not limited to, loss of revenue or profit, downtime costs, loss of use of the equipment,
cost of any substitute equipment, fa cilitie s or services or claims of your customer s
for such damages.
• This limitat ion of liab ility wil l not apply to cla ims for injury to pe rson s or dama ge to
property caused by the sole negligence or fault of Kodak or by persons under its
direction or control.
19
 Loading...