

Page 1

ListList
List
ListList
NoticeNotice
Notice
NoticeNotice
Device OverviewDevice Overview
Device Overview
Device OverviewDevice Overview
Side---------------------------------------4Side---------------------------------------4
Side---------------------------------------4
Side---------------------------------------4Side---------------------------------------4
Wired Remote Controller--------------------5Wired Remote Controller--------------------5
Wired Remote Controller--------------------5
Wired Remote Controller--------------------5Wired Remote Controller--------------------5
Accessories--------------------------------6Accessories--------------------------------6
Accessories--------------------------------6
Accessories--------------------------------6Accessories--------------------------------6
LCD Display-------------------------------7LCD Display-------------------------------7
LCD Display-------------------------------7
LCD Display-------------------------------7LCD Display-------------------------------7
MP3 FunctionMP3 Function
MP3 Function
MP3 FunctionMP3 Function
Power on/off------------------------------8Power on/off------------------------------8
Power on/off------------------------------8
Power on/off------------------------------8Power on/off------------------------------8
Playing Music---------------------------9-12Playing Music---------------------------9-12
Playing Music---------------------------9-12
Playing Music---------------------------9-12Playing Music---------------------------9-12
Menu options---------------------------13-14Menu options---------------------------13-14
Menu options---------------------------13-14
Menu options---------------------------13-14Menu options---------------------------13-14
Voice Recording------------------------15-16Voice Recording------------------------15-16
Voice Recording------------------------15-16
Voice Recording------------------------15-16Voice Recording------------------------15-16
Setup parameter in Recording mode---------17Setup parameter in Recording mode---------17
Setup parameter in Recording mode---------17
Setup parameter in Recording mode---------17Setup parameter in Recording mode---------17
Setup Mpeg Mode------------------------18-20Setup Mpeg Mode------------------------18-20
Setup Mpeg Mode------------------------18-20
Setup Mpeg Mode------------------------18-20Setup Mpeg Mode------------------------18-20
Setup Stereo---------------------------21-22Setup Stereo---------------------------21-22
Setup Stereo---------------------------21-22
Setup Stereo---------------------------21-22Setup Stereo---------------------------21-22
SYNC----------------------------------23-25SYNC----------------------------------23-25
SYNC----------------------------------23-25
SYNC----------------------------------23-25SYNC----------------------------------23-25
VAD-----------------------------------26-27VAD-----------------------------------26-27
VAD-----------------------------------26-27
VAD-----------------------------------26-27VAD-----------------------------------26-27
Setup Frequency------------------------28-29Setup Frequency------------------------28-29
Setup Frequency------------------------28-29
Setup Frequency------------------------28-29Setup Frequency------------------------28-29
Setup Bit Rate------------------------30-32Setup Bit Rate------------------------30-32
Setup Bit Rate------------------------30-32
Setup Bit Rate------------------------30-32Setup Bit Rate------------------------30-32
Setup Silence-------------------------33-34Setup Silence-------------------------33-34
Setup Silence-------------------------33-34
Setup Silence-------------------------33-34Setup Silence-------------------------33-34
Setup Memory------------------------35-36Setup Memory------------------------35-36
Setup Memory------------------------35-36
Setup Memory------------------------35-36Setup Memory------------------------35-36
Setup Record Source------------------37-39Setup Record Source------------------37-39
Setup Record Source------------------37-39
Setup Record Source------------------37-39Setup Record Source------------------37-39
Delete Files-------------------------40-42Delete Files-------------------------40-42
Delete Files-------------------------40-42
Delete Files-------------------------40-42Delete Files-------------------------40-42
Setup EQ (Equalizer)-----------------43-44Setup EQ (Equalizer)-----------------43-44
Setup EQ (Equalizer)-----------------43-44
Setup EQ (Equalizer)-----------------43-44Setup EQ (Equalizer)-----------------43-44
Setup Repeat-------------------------45-47Setup Repeat-------------------------45-47
Setup Repeat-------------------------45-47
Setup Repeat-------------------------45-47Setup Repeat-------------------------45-47
LCD Contrast------------------------48-49LCD Contrast------------------------48-49
LCD Contrast------------------------48-49
LCD Contrast------------------------48-49LCD Contrast------------------------48-49
----------------------------------1-2----------------------------------1-2
----------------------------------1-2
----------------------------------1-2----------------------------------1-2
-----------------------3-7-----------------------3-7
-----------------------3-7
-----------------------3-7-----------------------3-7
--------------------------8-79--------------------------8-79
--------------------------8-79
--------------------------8-79--------------------------8-79
Page 2

ListList
List
ListList
Setup Backlight Time----------------50-51Setup Backlight Time----------------50-51
Setup Backlight Time----------------50-51
Setup Backlight Time----------------50-51Setup Backlight Time----------------50-51
Setup ID3 Language Displaying--------52-53Setup ID3 Language Displaying--------52-53
Setup ID3 Language Displaying--------52-53
Setup ID3 Language Displaying--------52-53Setup ID3 Language Displaying--------52-53
Memory Information-------------------54Memory Information-------------------54
Memory Information-------------------54
Memory Information-------------------54Memory Information-------------------54
Format----------------------------------55-56Format----------------------------------55-56
Format----------------------------------55-56
Format----------------------------------55-56Format----------------------------------55-56
Directory------------------------------57-59Directory------------------------------57-59
Directory------------------------------57-59
Directory------------------------------57-59Directory------------------------------57-59
A-B Repeat-------------------------------60A-B Repeat-------------------------------60
A-B Repeat-------------------------------60
A-B Repeat-------------------------------60A-B Repeat-------------------------------60
FM radio-------------------------------61-63FM radio-------------------------------61-63
FM radio-------------------------------61-63
FM radio-------------------------------61-63FM radio-------------------------------61-63
Using SD/MMC card-------------------------64Using SD/MMC card-------------------------64
Using SD/MMC card-------------------------64
Using SD/MMC card-------------------------64Using SD/MMC card-------------------------64
Battery Extension------------------------65Battery Extension------------------------65
Battery Extension------------------------65
Battery Extension------------------------65Battery Extension------------------------65
Convert into MP3 files--------------------66Convert into MP3 files--------------------66
Convert into MP3 files--------------------66
Convert into MP3 files--------------------66Convert into MP3 files--------------------66
USB Connection---------------------------67USB Connection---------------------------67
USB Connection---------------------------67
USB Connection---------------------------67USB Connection---------------------------67
PC System Requirement -----------------68PC System Requirement -----------------68
PC System Requirement -----------------68
PC System Requirement -----------------68PC System Requirement -----------------68
Managerment System Requirement------------69Managerment System Requirement------------69
Managerment System Requirement------------69
Managerment System Requirement------------69Managerment System Requirement------------69
Install driver for player-----------------70Install driver for player-----------------70
Install driver for player-----------------70
Install driver for player-----------------70Install driver for player-----------------70
Installation of Manager Software-------71-72Installation of Manager Software-------71-72
Installation of Manager Software-------71-72
Installation of Manager Software-------71-72Installation of Manager Software-------71-72
Sending files to Digital Audio---------73-74Sending files to Digital Audio---------73-74
Sending files to Digital Audio---------73-74
Sending files to Digital Audio---------73-74Sending files to Digital Audio---------73-74
Sending files from Digital Audio to PC--75-76Sending files from Digital Audio to PC--75-76
Sending files from Digital Audio to PC--75-76
Sending files from Digital Audio to PC--75-76Sending files from Digital Audio to PC--75-76
To Delete file----------------------------77To Delete file----------------------------77
To Delete file----------------------------77
To Delete file----------------------------77To Delete file----------------------------77
To refresh USB connection-----------------78To refresh USB connection-----------------78
To refresh USB connection-----------------78
To refresh USB connection-----------------78To refresh USB connection-----------------78
Internal Memory Display-------------------79Internal Memory Display-------------------79
Internal Memory Display-------------------79
Internal Memory Display-------------------79Internal Memory Display-------------------79
Trouble DiagnosisTrouble Diagnosis
Trouble Diagnosis
Trouble DiagnosisTrouble Diagnosis
Technical Specifications------------------82Technical Specifications------------------82
Technical Specifications------------------82
Technical Specifications------------------82Technical Specifications------------------82
----------------------80----------------------80
----------------------80
----------------------80----------------------80
Page 3
NoticeNotice
Notice
NoticeNotice
NoticeNotice
Notice
NoticeNotice
Please do not operate the device under
extreme temperature.
Take out the rechargeable battery if not
use for a period of time to avoid internal
damages.
Release the hold button before operating
the device.
Be careful not to drop the device. This may
cause internal damages or scratches on the
surface.
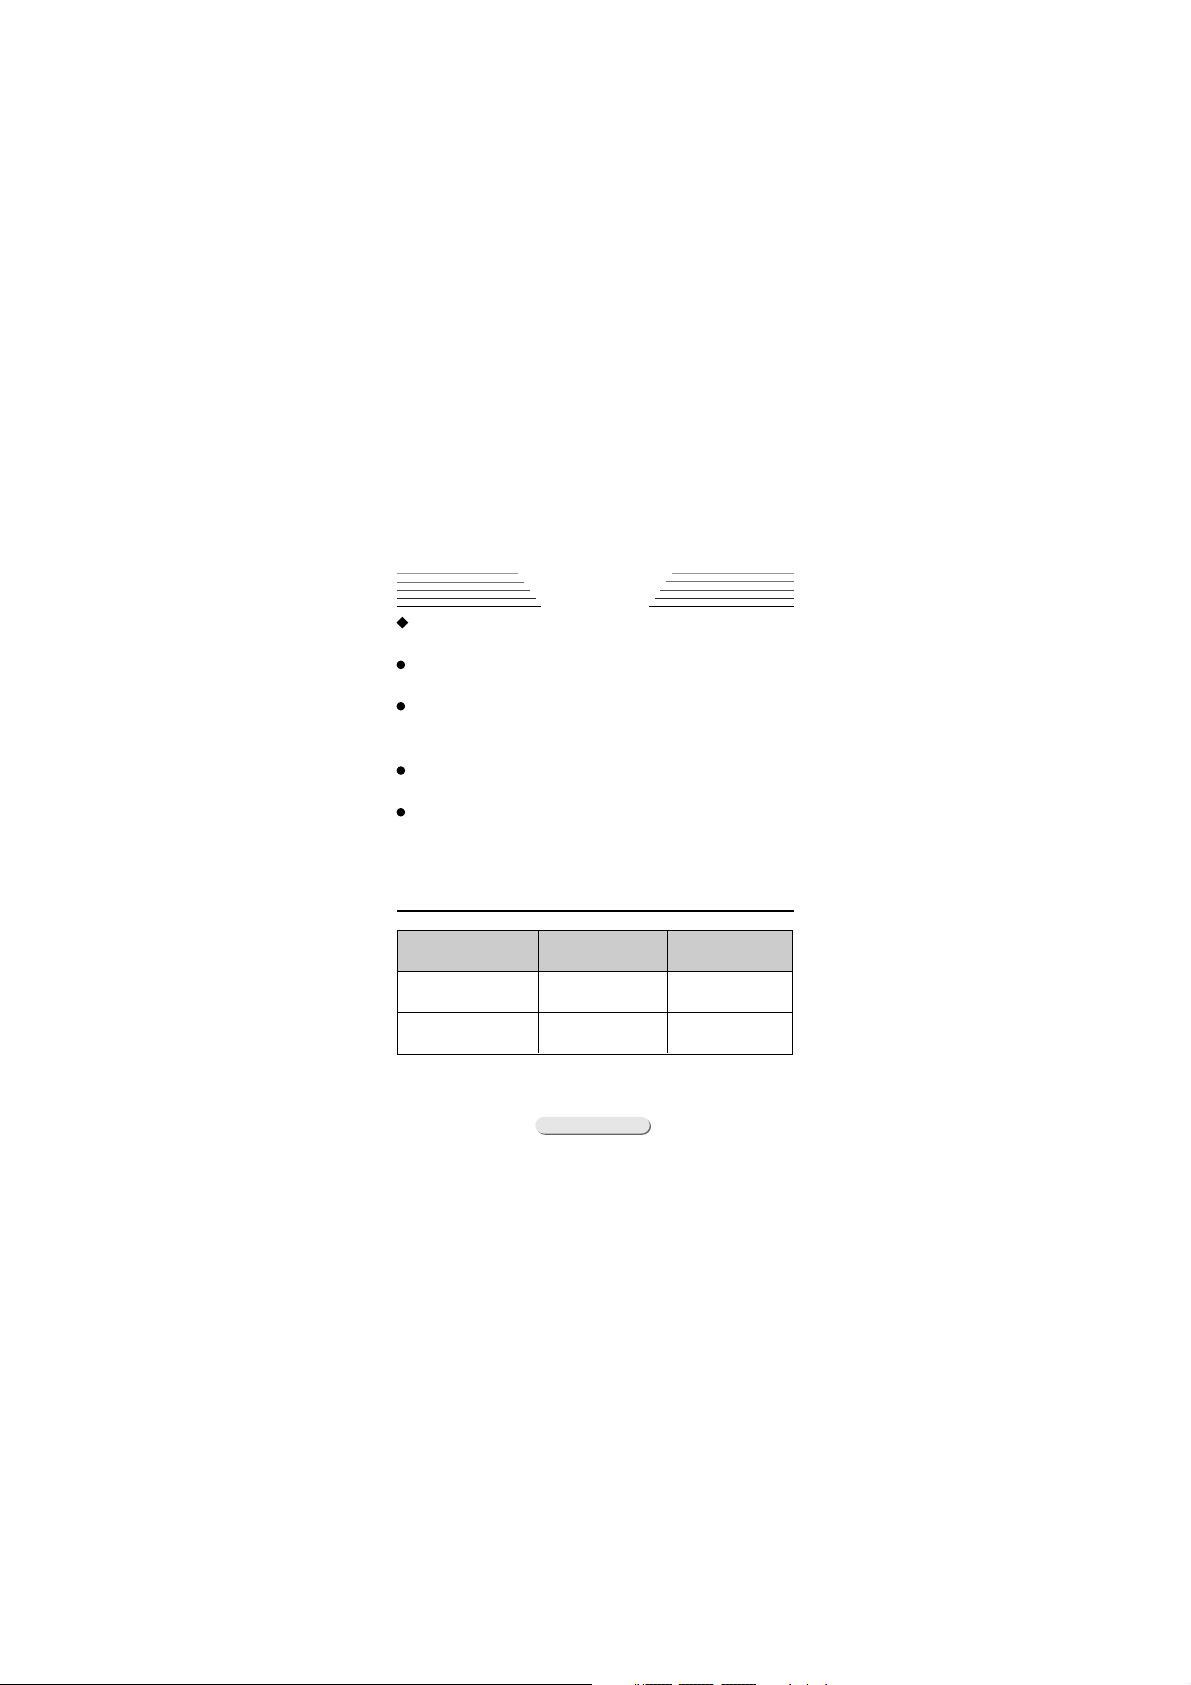
Battery Life(AAA Battery recommend Alkaline battery)
Unit: hour
Battery Type Recharging Play time
hours
Rechargeable 6 5
battery
AAA Battery No 6
Extension
Note: Battery life may vary accordingly.
1
Page 4

NoticeNotice
Notice
NoticeNotice
You can replace the battery underYou can replace the battery under
You can replace the battery under
You can replace the battery underYou can replace the battery under
the following conditionsthe following conditions
the following conditions .
the following conditionsthe following conditions
The device shuts down right after power on.
All the buttons on the device does not
response.
The display screen shows low battery ”
warning.
The battery icon is empty and flashes.
To avoid static when operating, pleaseTo avoid static when operating, please
To avoid static when operating, please
To avoid static when operating, pleaseTo avoid static when operating, please
pay attention to the following:pay attention to the following:
pay attention to the following:
pay attention to the following:pay attention to the following:
If possible, do not operate the device
under extremely dry environment.
If the device stops functioning under normal condition, please restore it to the original settings.
2
Page 5
Device OverviewDevice Overview
Device Overview
Device OverviewDevice Overview
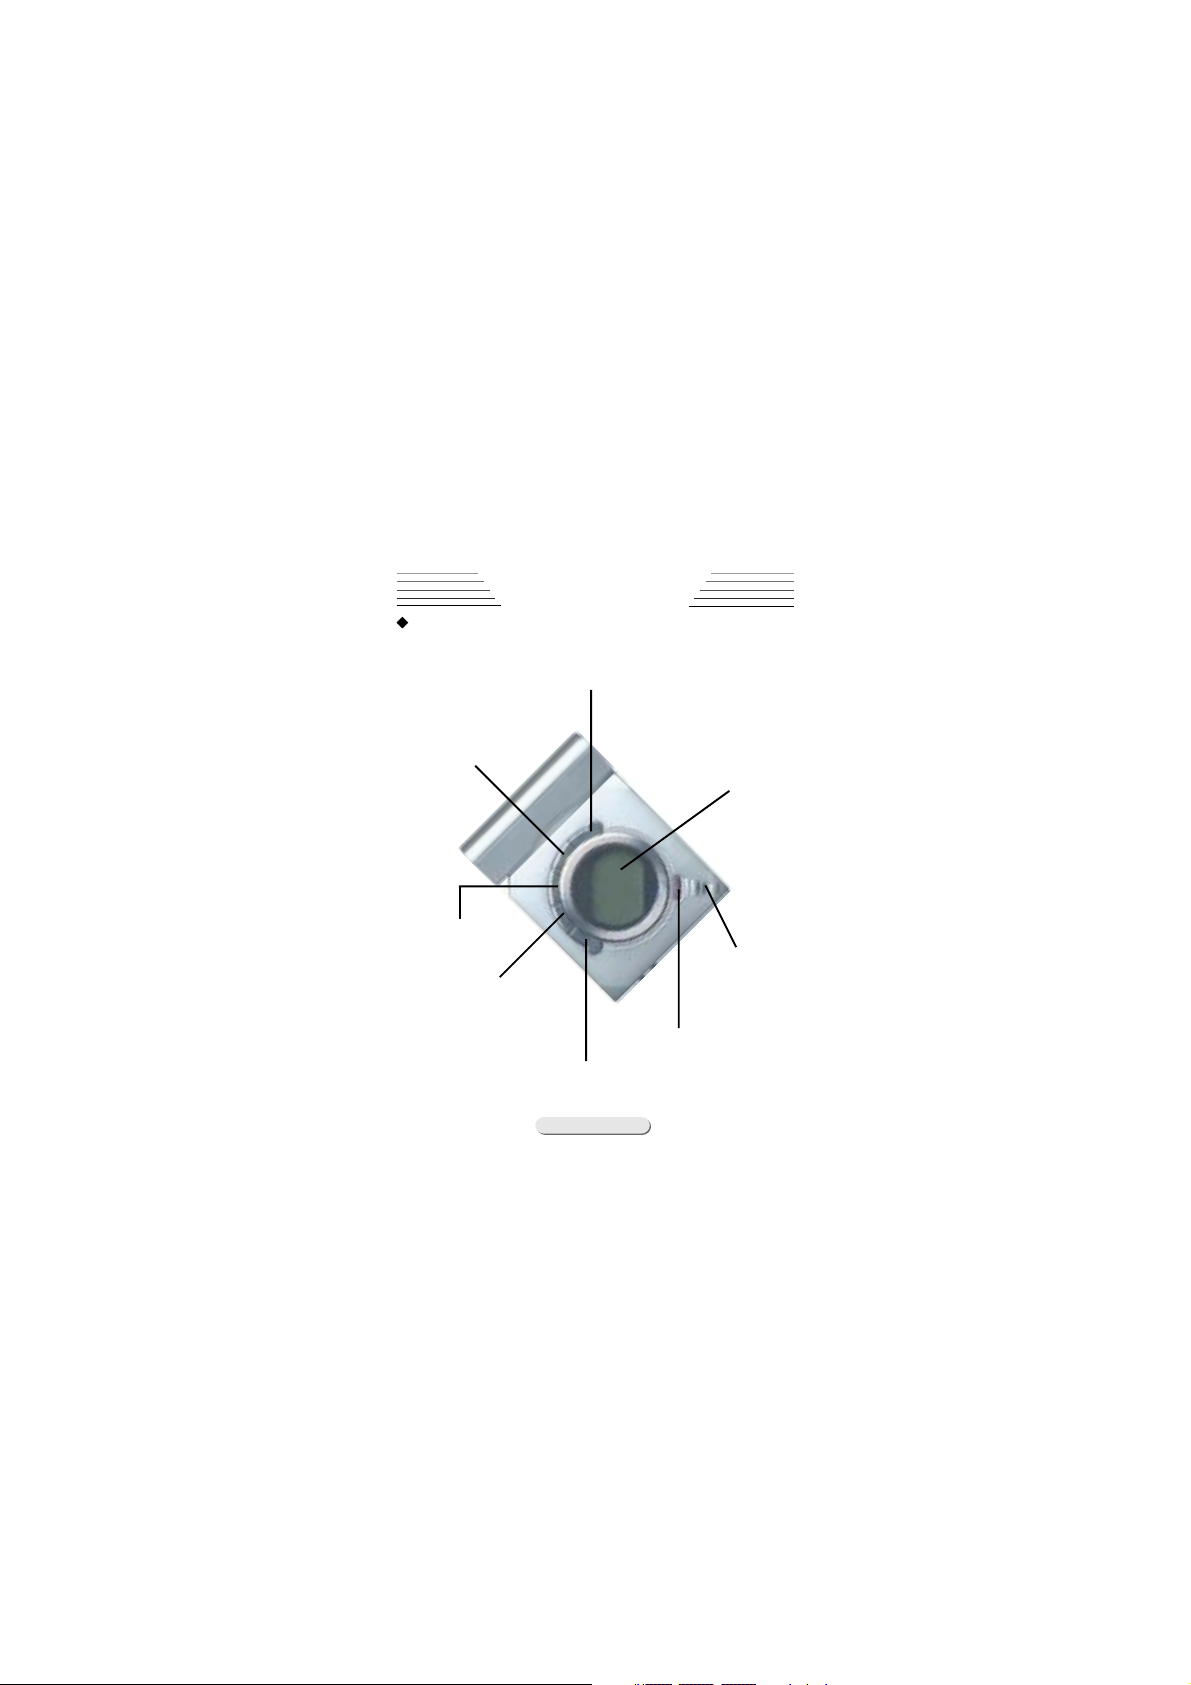
FrontFront
Front
FrontFront
Stop/Power off
Play(Pause)/
Power on
A-B repeat/REC
Volume-
Screen display
Microphone
Power LED
Volume+
3
Page 6
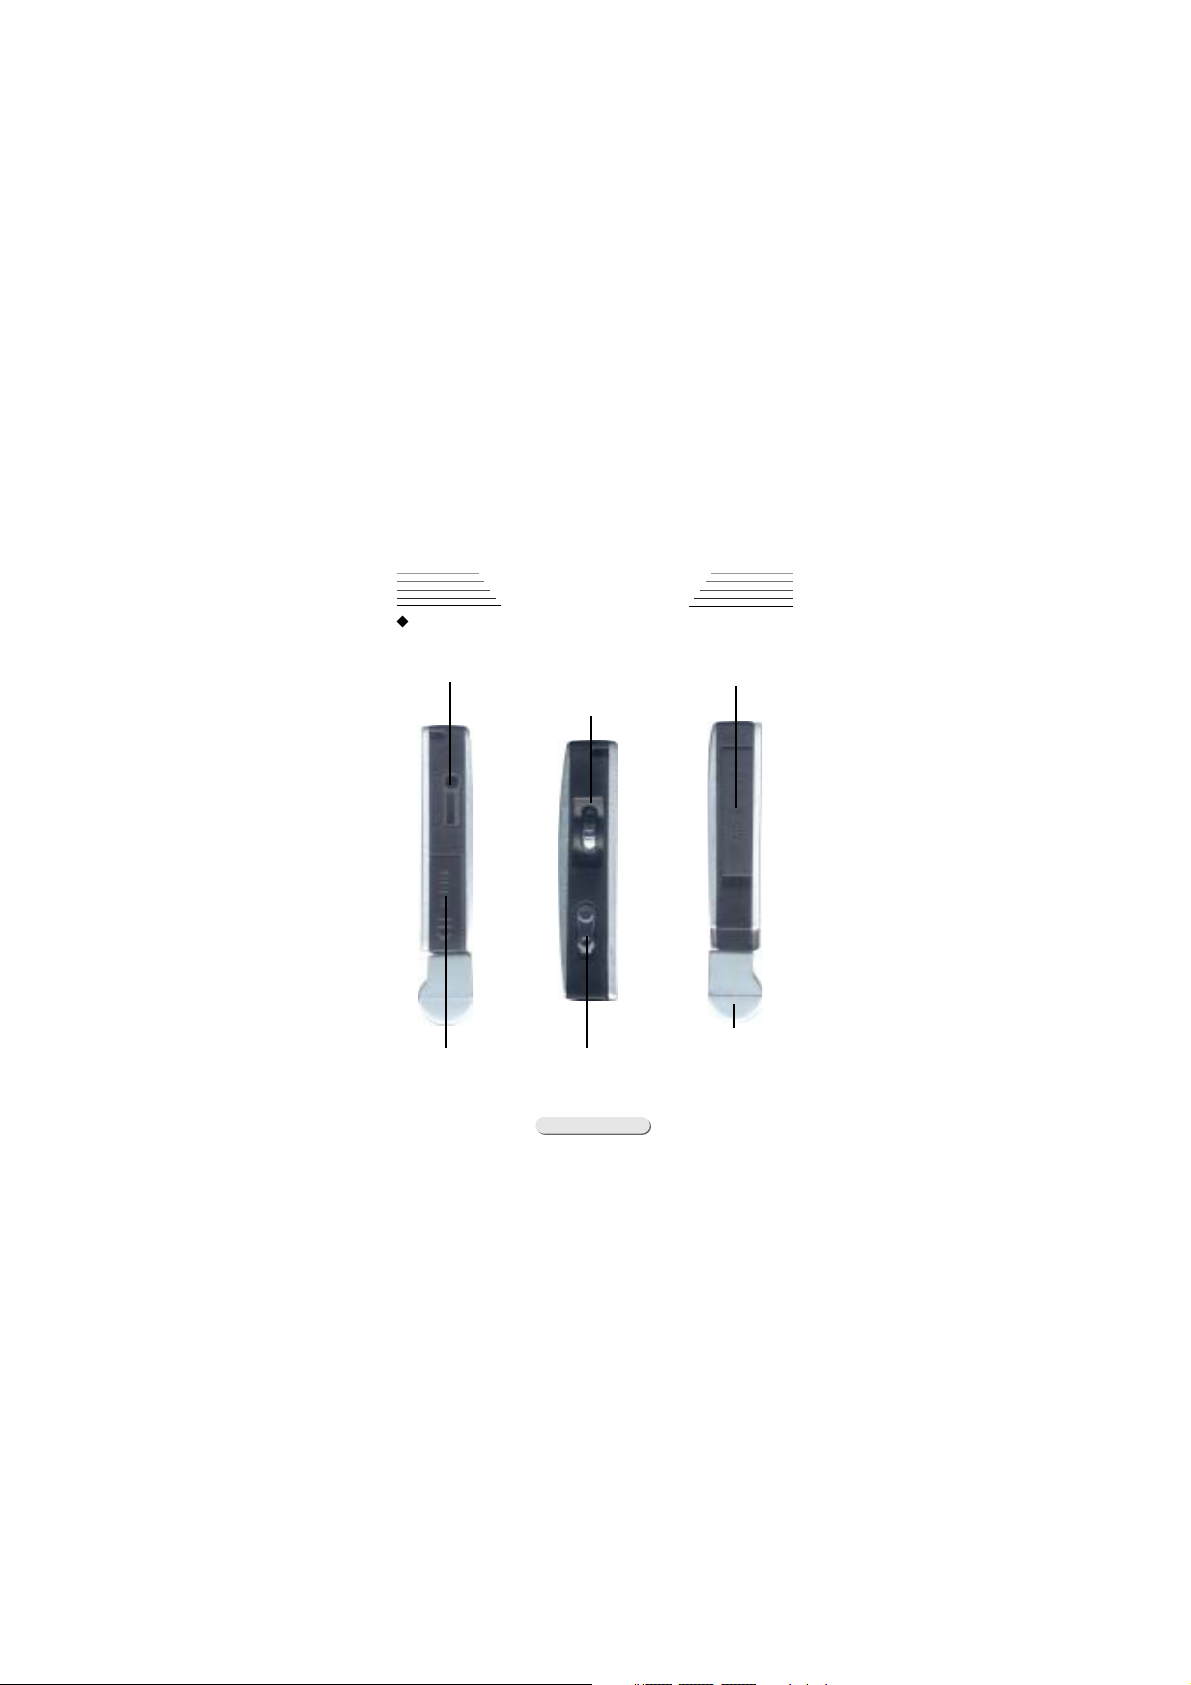
SideSide
Side
SideSide
Earphone slot
Device OverviewDevice Overview
Device Overview
Device OverviewDevice Overview
USB port SD/MMC
scroller
FF/MENU(FM)/REW
extension slot
Battery Slot
Hold button
4
Battery
Extension
Page 7
Device OverviewDevice Overview
Device Overview
Device OverviewDevice Overview
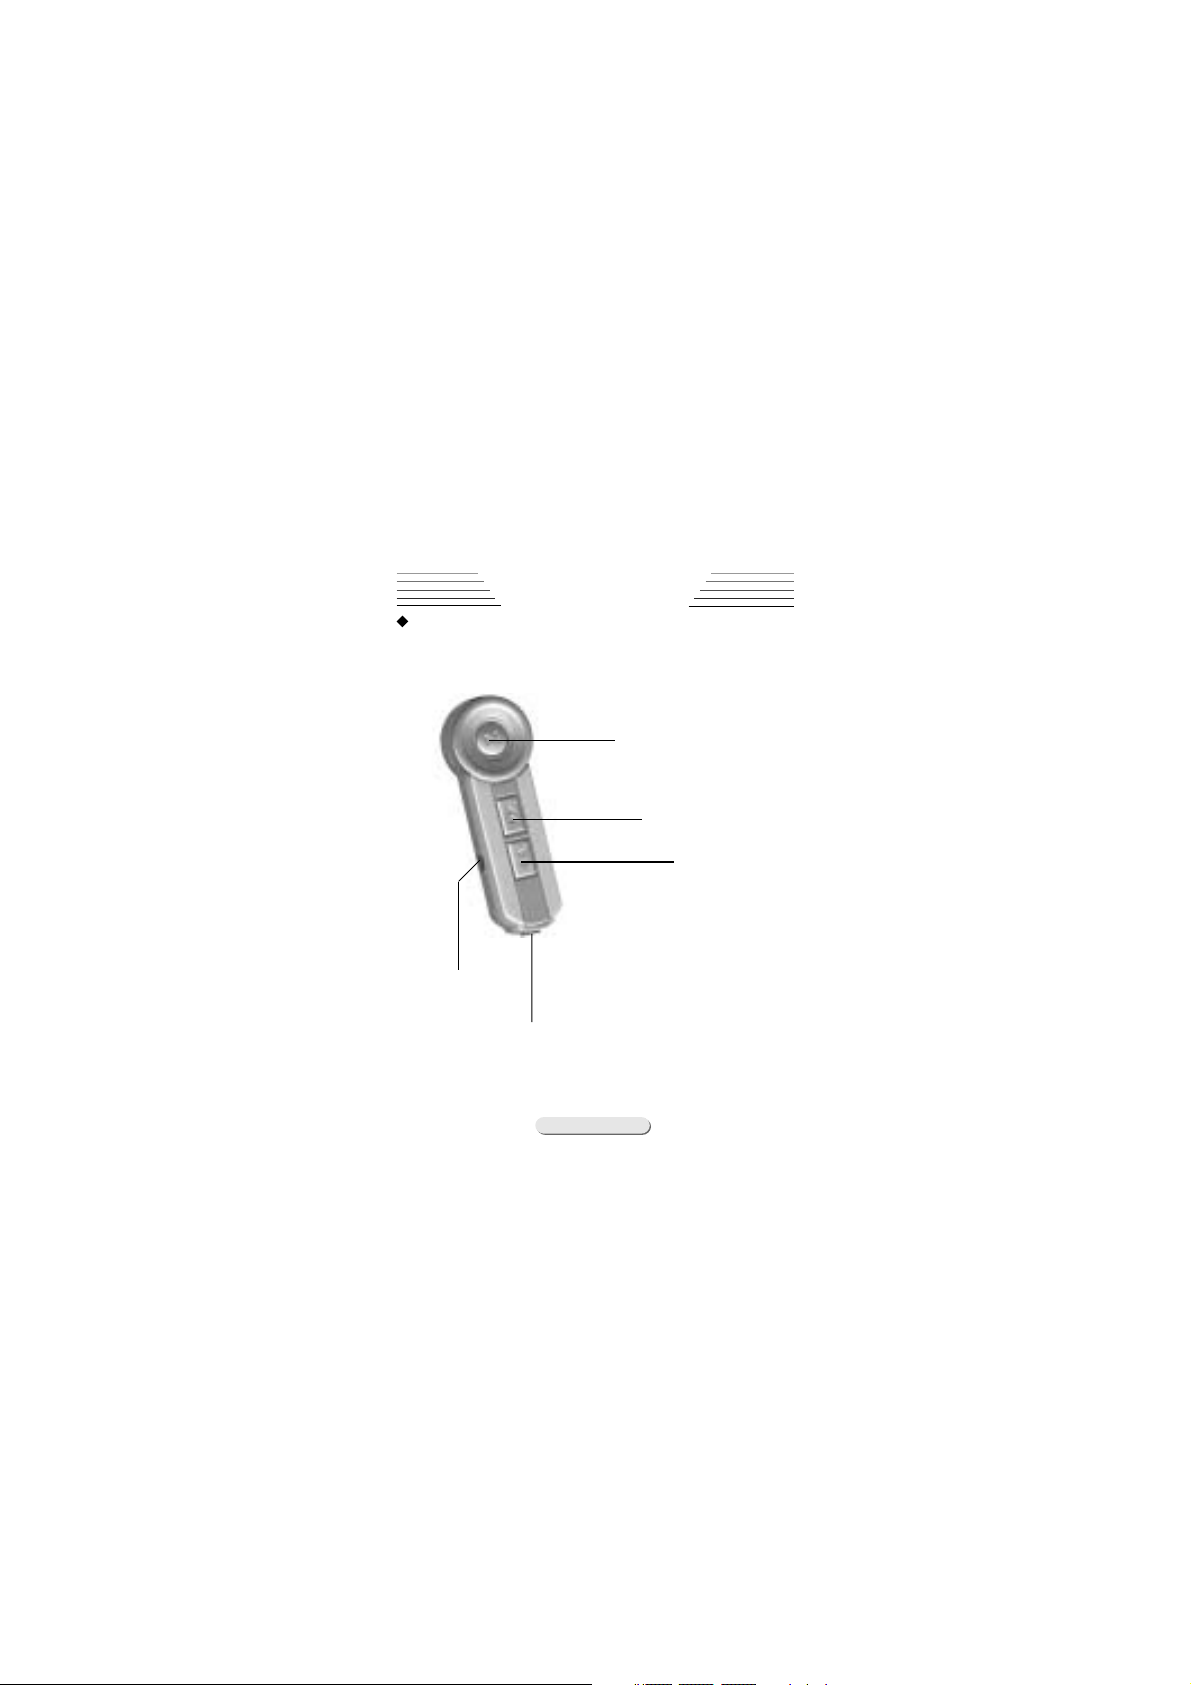
Wired Remote ControllerWired Remote Controller
Wired Remote Controller
Wired Remote ControllerWired Remote Controller
Line-In Slot
Earphone Slot
5
Play/Pause
Next/FF
Prev/REW
Page 8
Device OverviewDevice Overview
Device Overview
Device OverviewDevice Overview
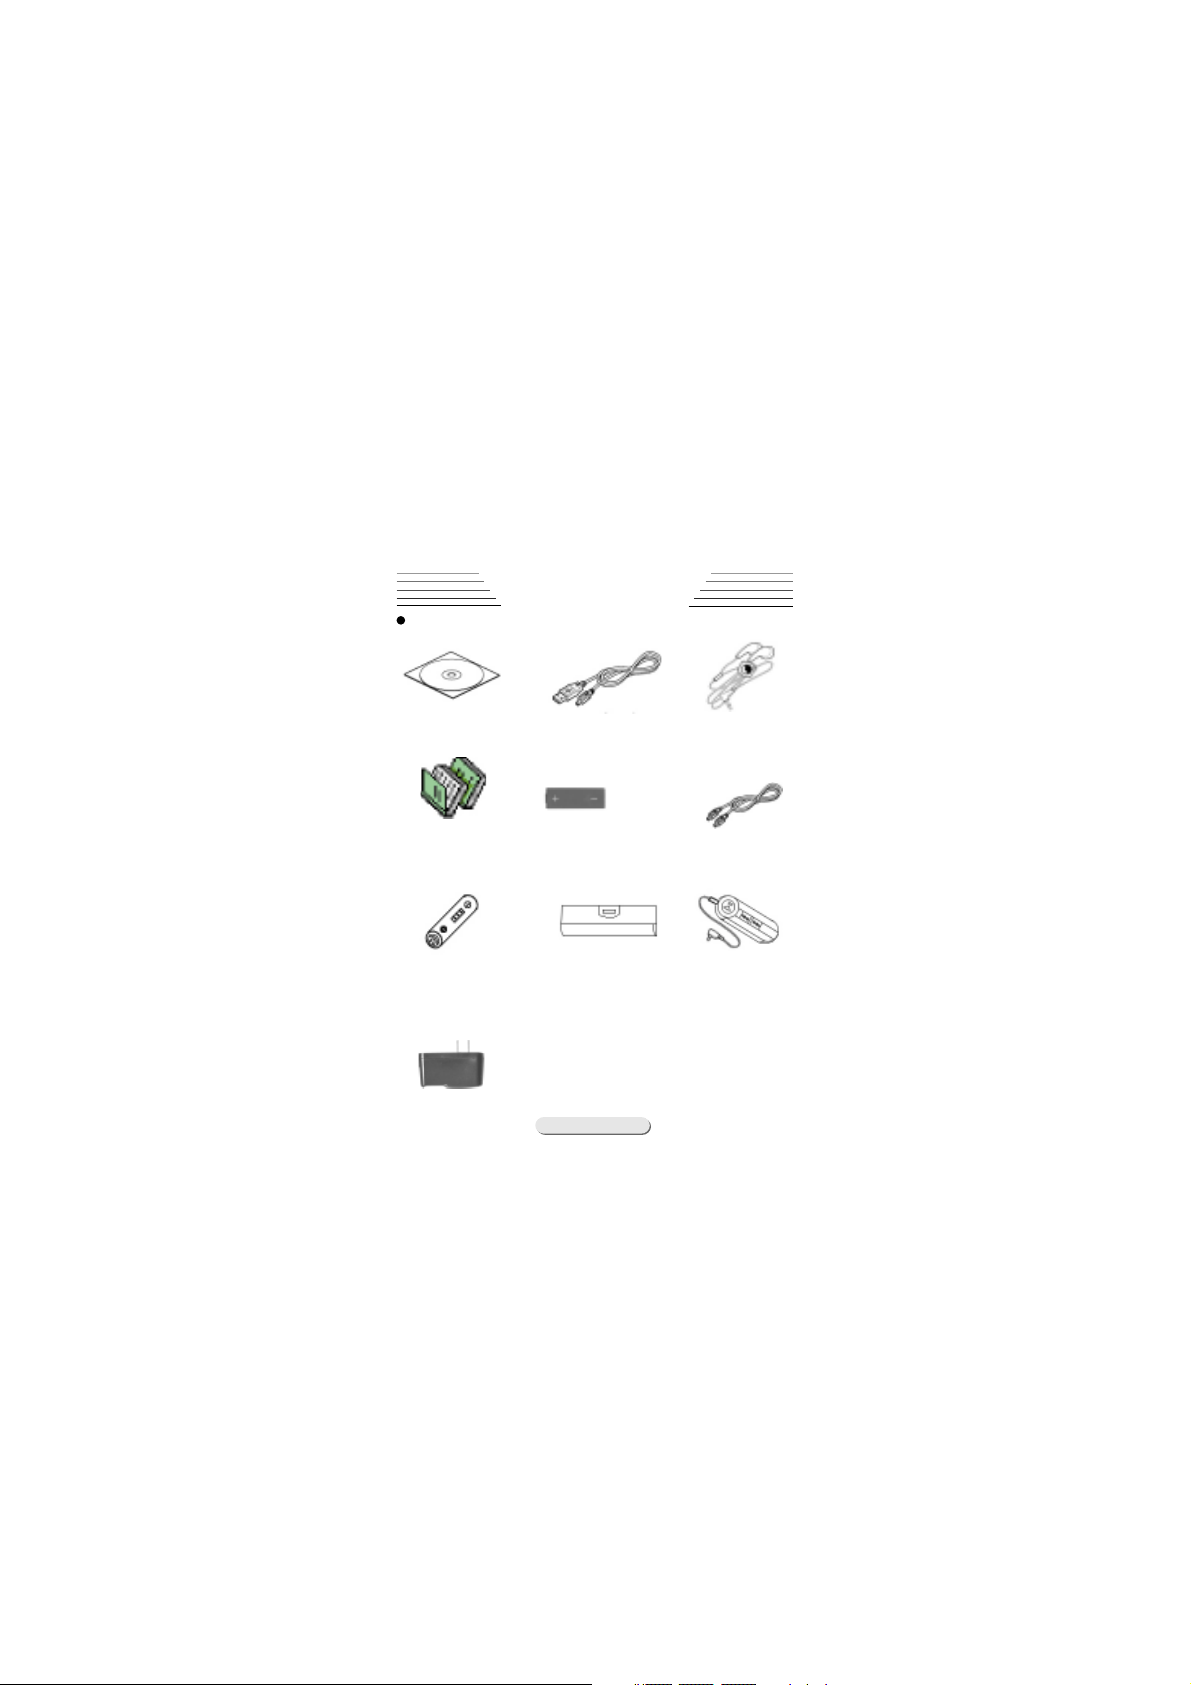
Accessories
Installation CD USB cable Standard
Earphone
User Manual Rechargeable Battery Device Connector
AAA Battery Battery Wired Remote
Extension Controller
Charger
6
Page 9
LCD DisplayLCD Display
LCD Display
LCD DisplayLCD Display
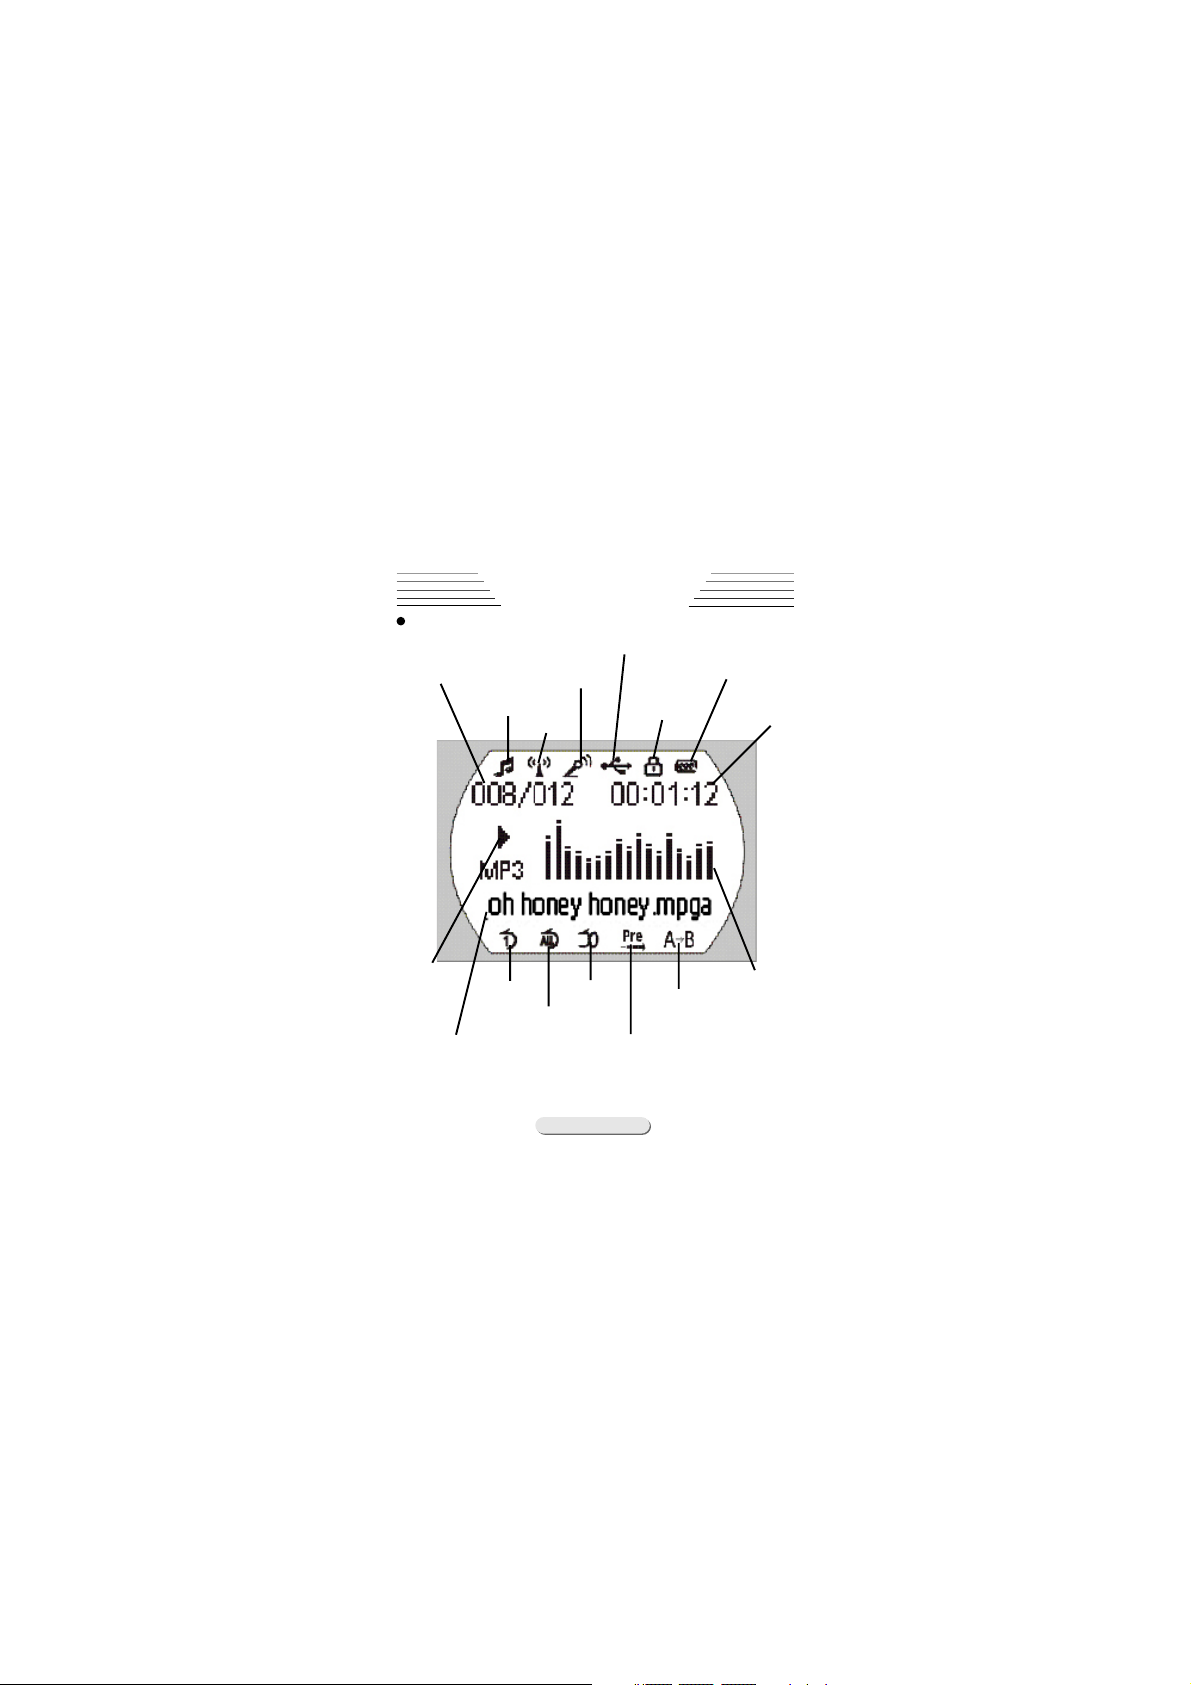
Playing track/
Total Track
Music Status
Device OverviewDevice Overview
Device Overview
Device OverviewDevice Overview
USB Connect
Record
Status
FM Radio
Hold button
status
Battery Life
Current
Playtime
Current
Status
Current Title
Repeat One
Repeat All
Random
Repeat mode
A-B repeat
Stabilizer
Repeat modes include"Repeat""Repeat All",
"Random","review",and"Normal"(Normal mode will
not be display)
7
Page 10
MP3 FuntionMP3 Funtion
MP3 Funtion
MP3 FuntionMP3 Funtion
Power on/offPower on/off
Power on/off
Power on/offPower on/off
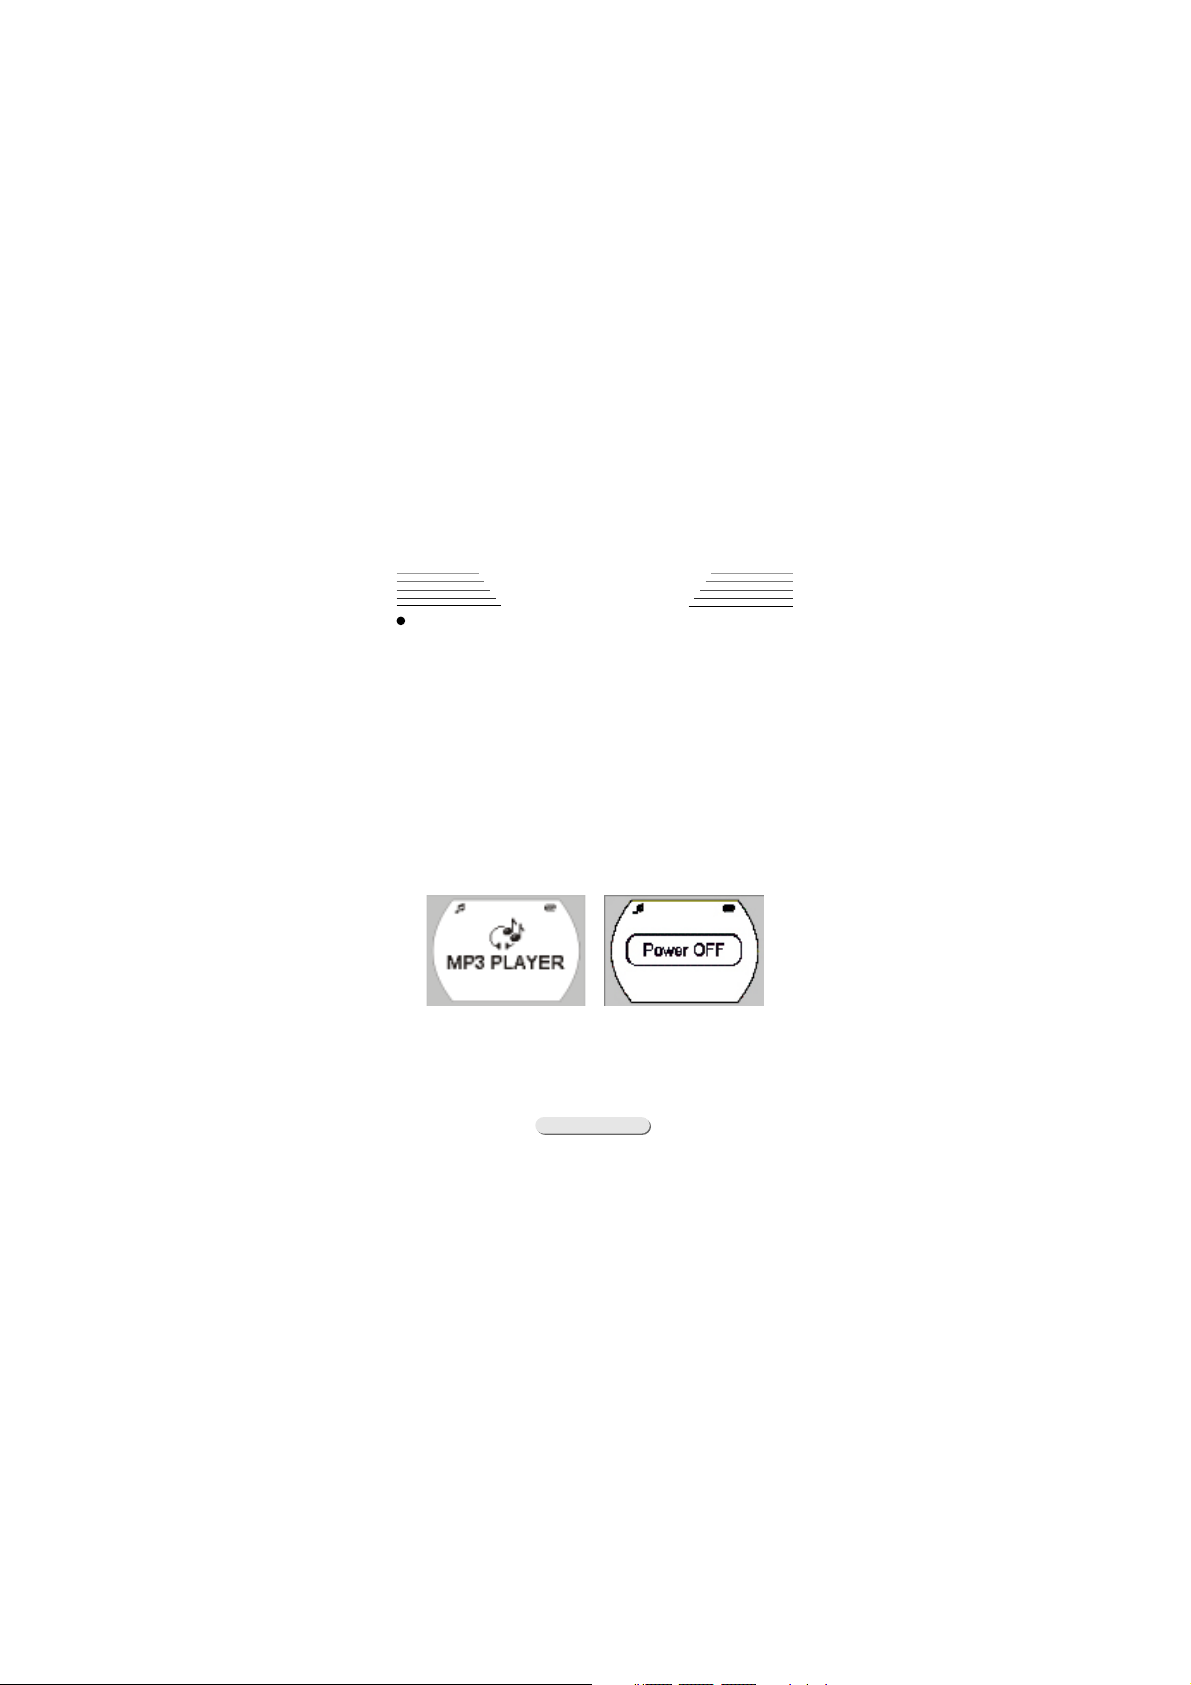
The power can be turned on by holding the
PLAY/ PAUSE. The blue backlight will then appear.
Backlight will be shut off automatically after
a period of time. You can also set the length
of the backlight time according to your
preference.
To turn the power off safely, hold the PLAY/
STOP button again until"Power OFF"appears on
the screen (as shown below)
8
Page 11
MP3 FuntionMP3 Funtion
MP3 Funtion
MP3 FuntionMP3 Funtion
Playing MusicPlaying Music
Playing Music
Playing MusicPlaying Music
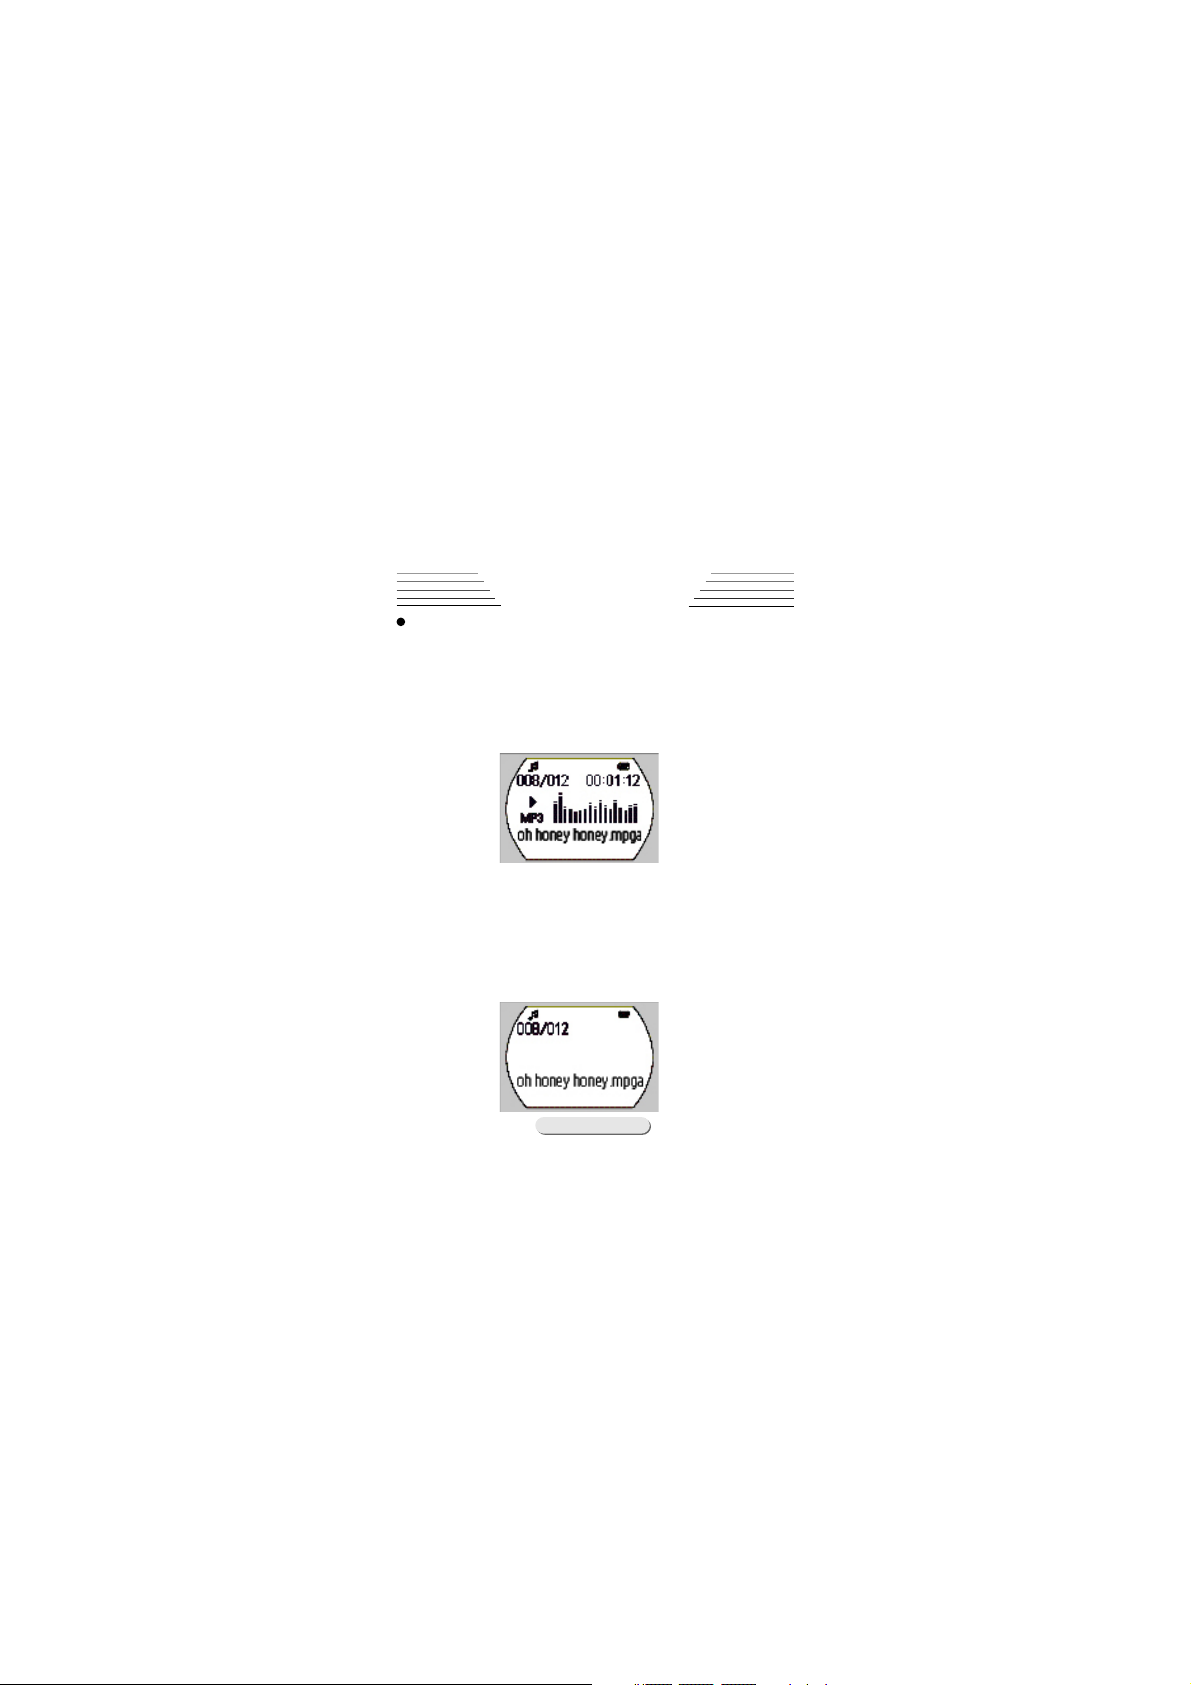
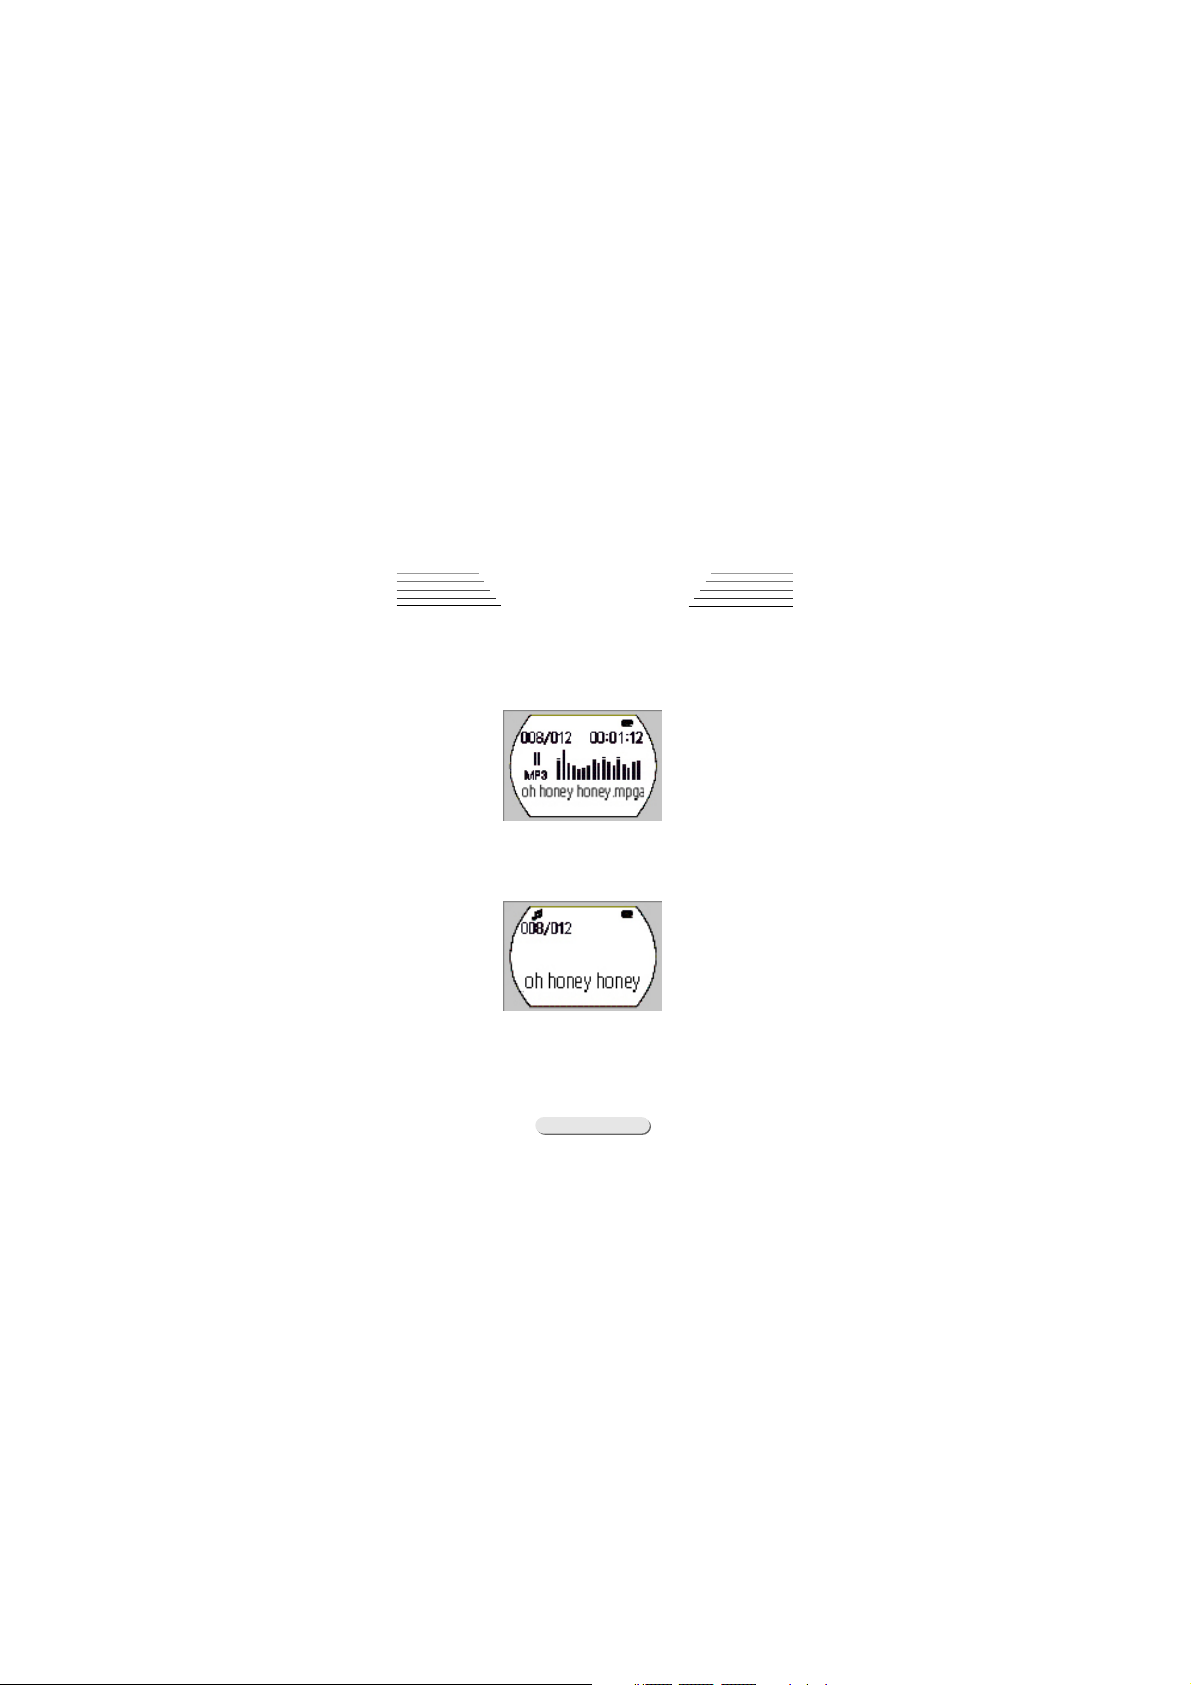
1,Power on the player, you can see the
following interface: The numbers (Example: 008/
012)on the left corner means the current track
is on the 8th track out of the total 12 tracks.
2,Press the PLAY/PAUSE button to start
playing music. The numbers on the right corner
is the current playtime (Example: 00:01:12),
and the track title will also be shown in the
LCD display as above:
9
Page 12
MP3 FuntionMP3 Funtion
MP3 Funtion
MP3 FuntionMP3 Funtion
3,If you wish to select the previous/next
track, use the scroller to get to the track.
Press PLAY / PAUSE button to pause the music.
As shown below:
4,To stop the music completely, press the
Stop button.As Shown below:
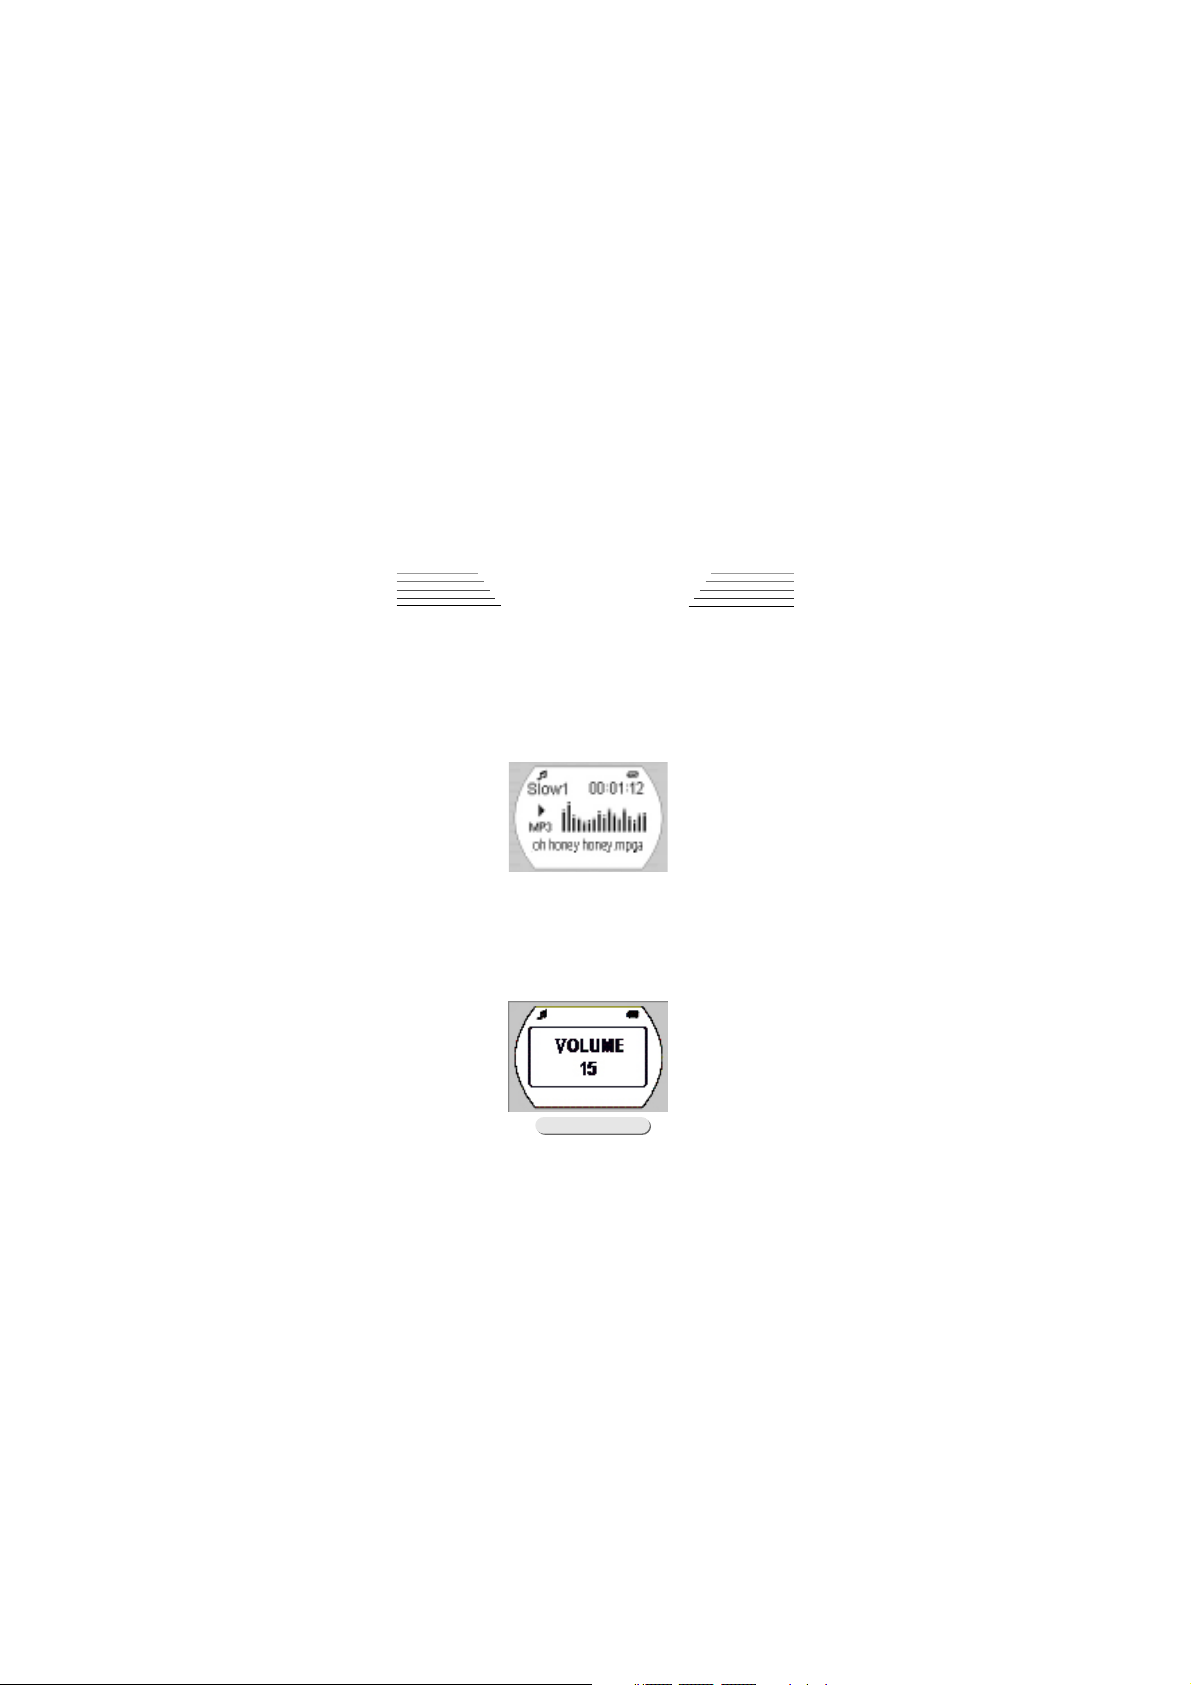
5,You can also adjust the playing rate
accordingly to your preference. Press the PLAY/
10
Page 13
MP3 FuntionMP3 Funtion
MP3 Funtion
MP3 FuntionMP3 Funtion
PAUSE longer until the "Slow1" is shown. There
are 5 levels of playing rate, hold the PLAY/
PAUSE button long to change the levels.After
we press five times, it will return normal.
Also press STOP to switch back to normal mode
(as shown):
6,When playing/pausing the music, you can
use the volume+/- to adjust the volume
accordingly. There are 16 volume levels in
total (as shown)
11
Page 14

MP3 FuntionMP3 Funtion
MP3 Funtion
MP3 FuntionMP3 Funtion
7,During music playing, you can choose to
forward or backward within the same track by
holding the Next/ FF or Prev/ REW button( as
shown):
Forward Rewind
Note:Note:
Note:
Note:Note:
The battery consumption level mightThe battery consumption level might
The battery consumption level might
The battery consumption level mightThe battery consumption level might
be unstable due to different consump-be unstable due to different consump-
be unstable due to different consump-
be unstable due to different consump-be unstable due to different consump-
tion rate.tion rate.
tion rate.
tion rate.tion rate.
If the player does not function prop-If the player does not function prop-
If the player does not function prop-
If the player does not function prop-If the player does not function prop-
erly during music playing, check if theerly during music playing, check if the
erly during music playing, check if the
erly during music playing, check if theerly during music playing, check if the
HOLD button is released.HOLD button is released.
HOLD button is released.
HOLD button is released.HOLD button is released.
Please note the title track will bePlease note the title track will be
Please note the title track will be
Please note the title track will bePlease note the title track will be
in walking mode when it contents morein walking mode when it contents more
in walking mode when it contents more
in walking mode when it contents morein walking mode when it contents more
than 12 characters.than 12 characters.
than 12 characters.
than 12 characters.than 12 characters.
12
Page 15
MP3 FuntionMP3 Funtion
MP3 Funtion
MP3 FuntionMP3 Funtion
Menu opterationMenu opteration
Menu opteration
Menu opterationMenu opteration
1, Hold the PLAY/PAUSE button to power on
the player.
2, Press the menu button ( middle of the
scroller) until you see the menu options.(
Note: menu options will be different under
playing or stand-by mode):
Delete
Setup
REC Set
Directory
Format
Mem Info
Return
3.Use the scroller to select the menu option.
For function details, please refer to the related chapter. There are 7 options, including
"delete""Setup""REC Set"
"Directory""Format""Memory Info"and "Return"
(See related chapter for further details)
4.When you find what you want to use, press
13
Page 16

MP3 FuntionMP3 Funtion
MP3 Funtion
MP3 FuntionMP3 Funtion
the menu button to enter.Also you can select
return item to exit menu.
Note:Note:
Note:
Note:Note:
The menu button will not functionThe menu button will not function
The menu button will not function
The menu button will not functionThe menu button will not function
when player is under the music, record-when player is under the music, record-
when player is under the music, record-
when player is under the music, record-when player is under the music, recording and FM mode. Only when pressing theing and FM mode. Only when pressing the
ing and FM mode. Only when pressing the
ing and FM mode. Only when pressing theing and FM mode. Only when pressing the
STOP button and enter the stand-by modeSTOP button and enter the stand-by mode
STOP button and enter the stand-by mode
STOP button and enter the stand-by modeSTOP button and enter the stand-by mode
will the menu button functions.will the menu button functions.
will the menu button functions.
will the menu button functions.will the menu button functions.
When the player is playing music un-When the player is playing music un-
When the player is playing music un-
When the player is playing music un-When the player is playing music un-
der the music mode, you can change yourder the music mode, you can change your
der the music mode, you can change your
der the music mode, you can change yourder the music mode, you can change your
preference in the SETUP menu by presspreference in the SETUP menu by press
preference in the SETUP menu by press
preference in the SETUP menu by presspreference in the SETUP menu by press
menu key. (Please refer to the chaptermenu key. (Please refer to the chapter
menu key. (Please refer to the chapter
menu key. (Please refer to the chaptermenu key. (Please refer to the chapter
of SET UP for details)of SET UP for details)
of SET UP for details)
of SET UP for details)of SET UP for details)
14
Page 17

MP3 FuntionMP3 Funtion
MP3 Funtion
MP3 FuntionMP3 Funtion
Voice RecordingVoice Recording
Voice Recording
Voice RecordingVoice Recording
Hold the PLAY/PAUSE button to power off the
player. Press the A-B/REC button to enter the
recording mode. As shown:
1, During recording, hold the A-B/REC button to pause the recording. To continue, hold
A-B/REC button again (as shown):
15
Page 18

MP3 FuntionMP3 Funtion
MP3 Funtion
MP3 FuntionMP3 Funtion
2, To stop recording press the STOP button
and it will be back in the music mode. All the
recorded files are with MP3 format, such as
ENC0-001.MP3. To listen to the recorded files,
enter the music mode and press the PLAY/PAUSE
button to play the files.
3, During the recording, if the memory is
full, the display will show such warning" FULL
Memory"and stop the process.
Note:Note:
Note:
Note:Note:
During the recording process, onlyDuring the recording process, only
During the recording process, only
During the recording process, onlyDuring the recording process, only
the STOP button, A-B/REC button andthe STOP button, A-B/REC button and
the STOP button, A-B/REC button and
the STOP button, A-B/REC button andthe STOP button, A-B/REC button and
Hold button will function normally.Hold button will function normally.
Hold button will function normally.
Hold button will function normally.Hold button will function normally.
16
Page 19
MP3 FuntionMP3 Funtion
MP3 Funtion
MP3 FuntionMP3 Funtion
Setup parameter in Recording mode:Setup parameter in Recording mode:
Setup parameter in Recording mode:
Setup parameter in Recording mode:Setup parameter in Recording mode:
You can setup different parameter in the
REC set up menu. Press the Menu button and
select REC Set option to enter.
1,Hold the PLAY/PAUSE button to power on
the player.
2,Press the Menu button and select REC Set
option. Press again to enter.
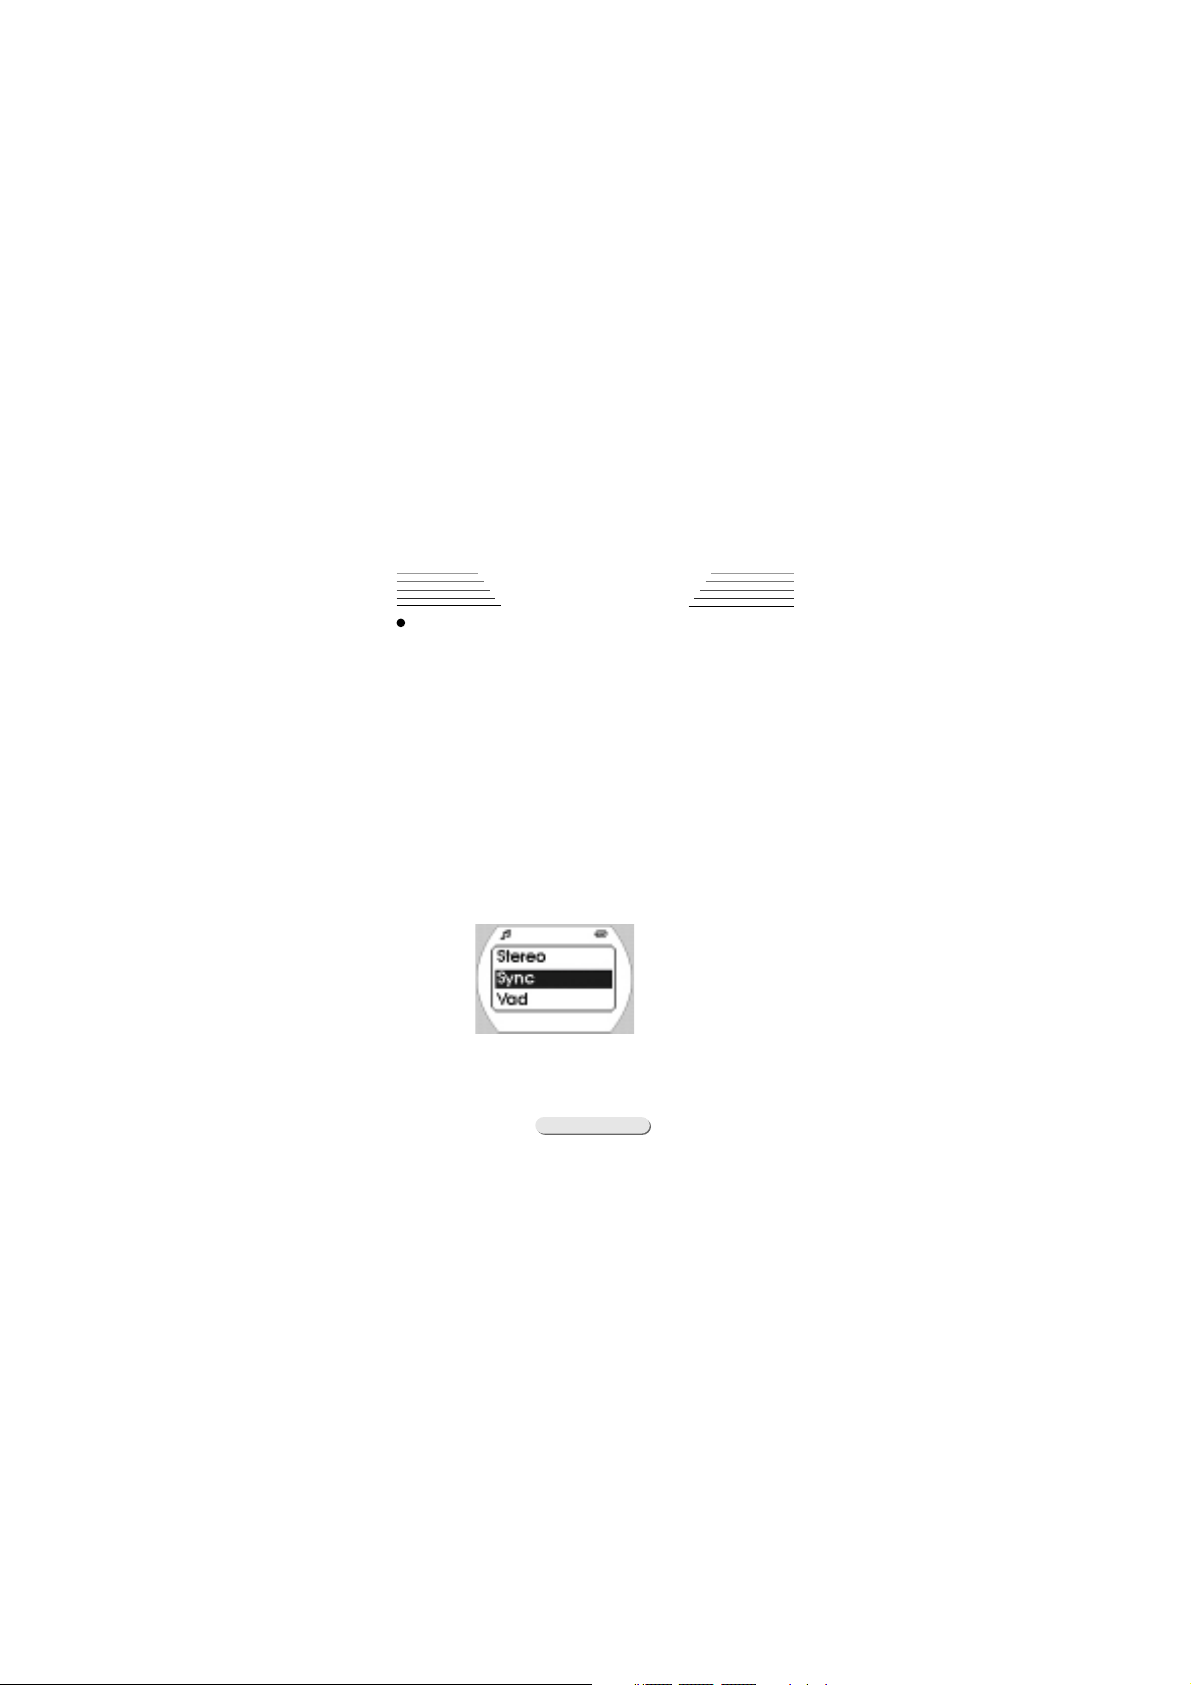
3,In the recording mode, you can see the
following function menu (as shown)
4,Press STOP to go back to music mode and
did not change anything.
Mpeg ModeMpeg Mode
Mpeg Mode
Mpeg ModeMpeg Mode
StereoStereo
Stereo
StereoStereo
SyncSync
Sync
SyncSync
VADVAD
VAD
VADVAD
FrequencyFrequency
Frequency
FrequencyFrequency
Bit RateBit Rate
Bit Rate
Bit RateBit Rate
SillenceSillence
Sillence
SillenceSillence
Men SelectMen Select
Men Select
Men SelectMen Select
SourceSource
Source
SourceSource
ReturnReturn
Return
ReturnReturn
There are 10 options in this menu,including"Mpeg Mode""Stereo""Sync""VAD"
"Frequency""Bit rate""Silence""Memory
Select""Source"and"Return"Function details
will be explained in the later chapters.
17
Page 20
MP3 FuntionMP3 Funtion
MP3 Funtion
MP3 FuntionMP3 Funtion
Setup Mpeg ModeSetup Mpeg Mode
Setup Mpeg Mode
Setup Mpeg ModeSetup Mpeg Mode
Before recording, you can setup the recording format.
1,Hold the PLAY /PAUSE button to power on
the player.
2,Press the Menu button to enter the menu
options and use the scroller to select the"REC
Set"function. Enter by pressing the button
again.
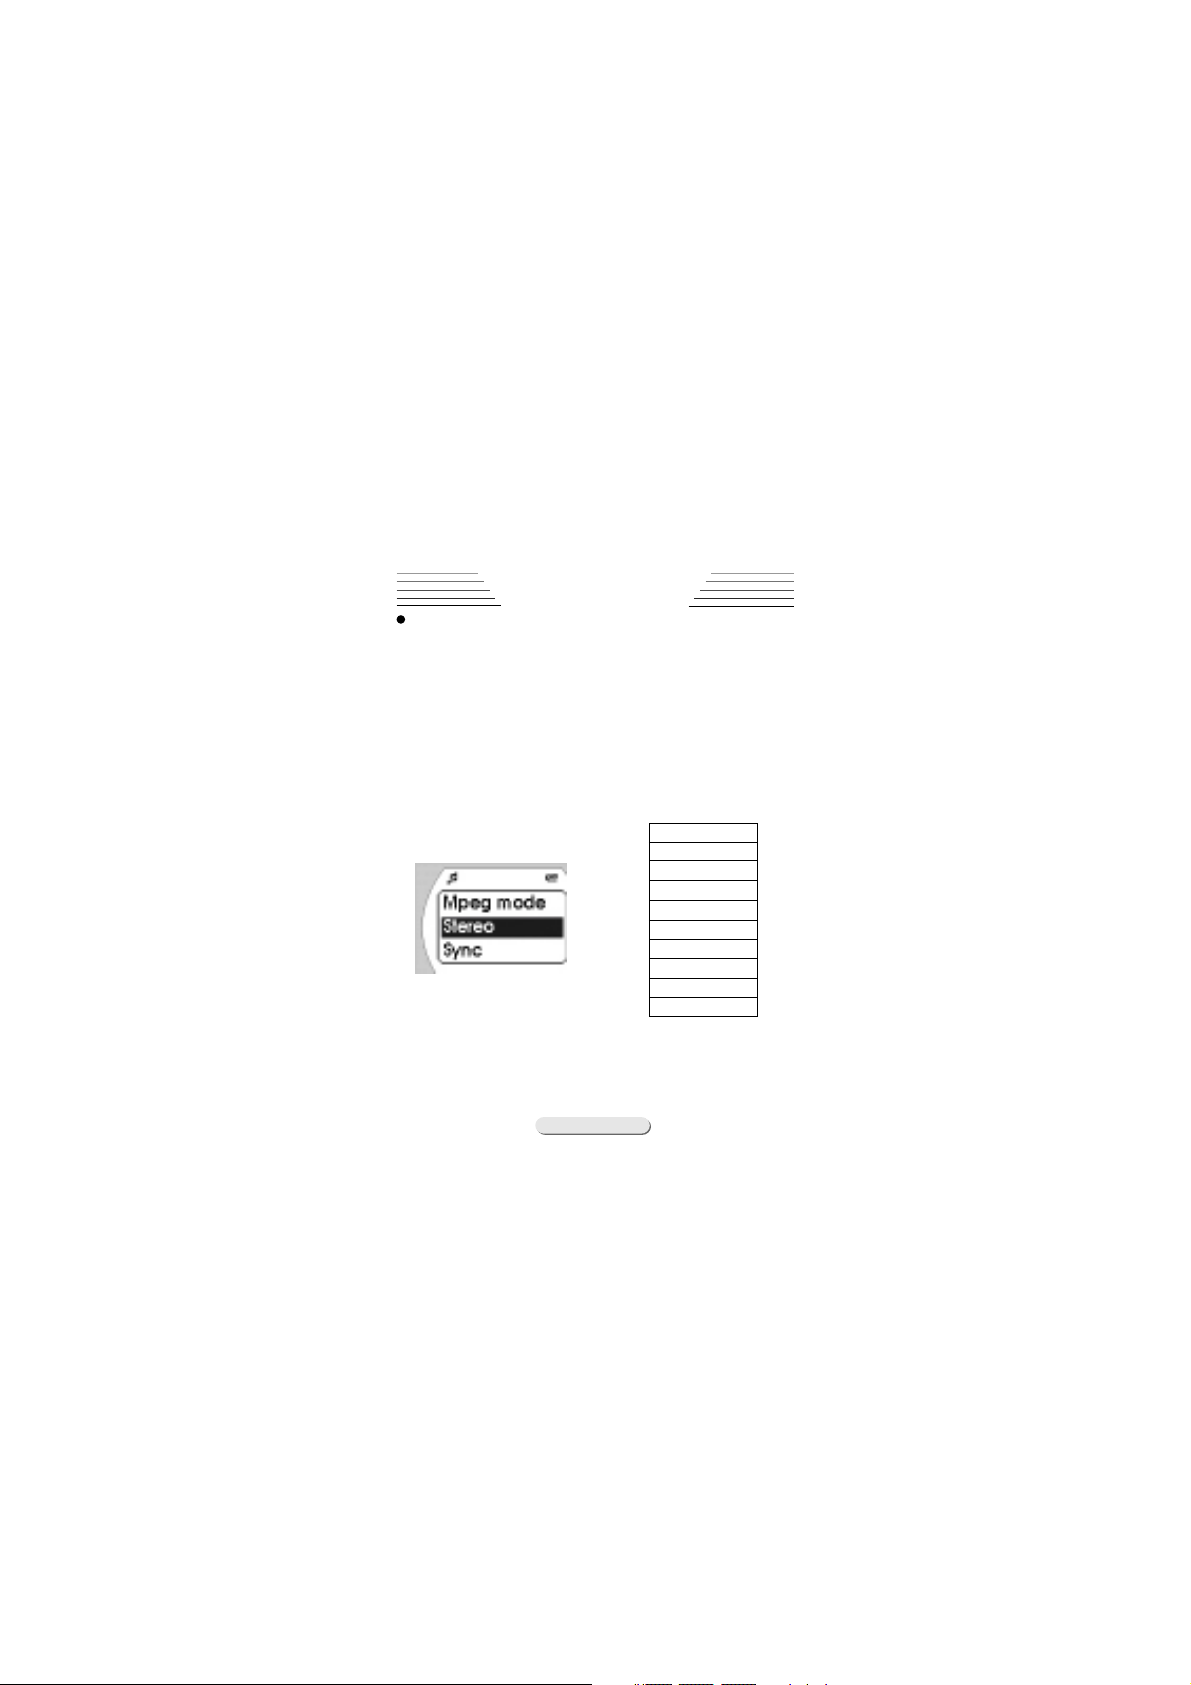
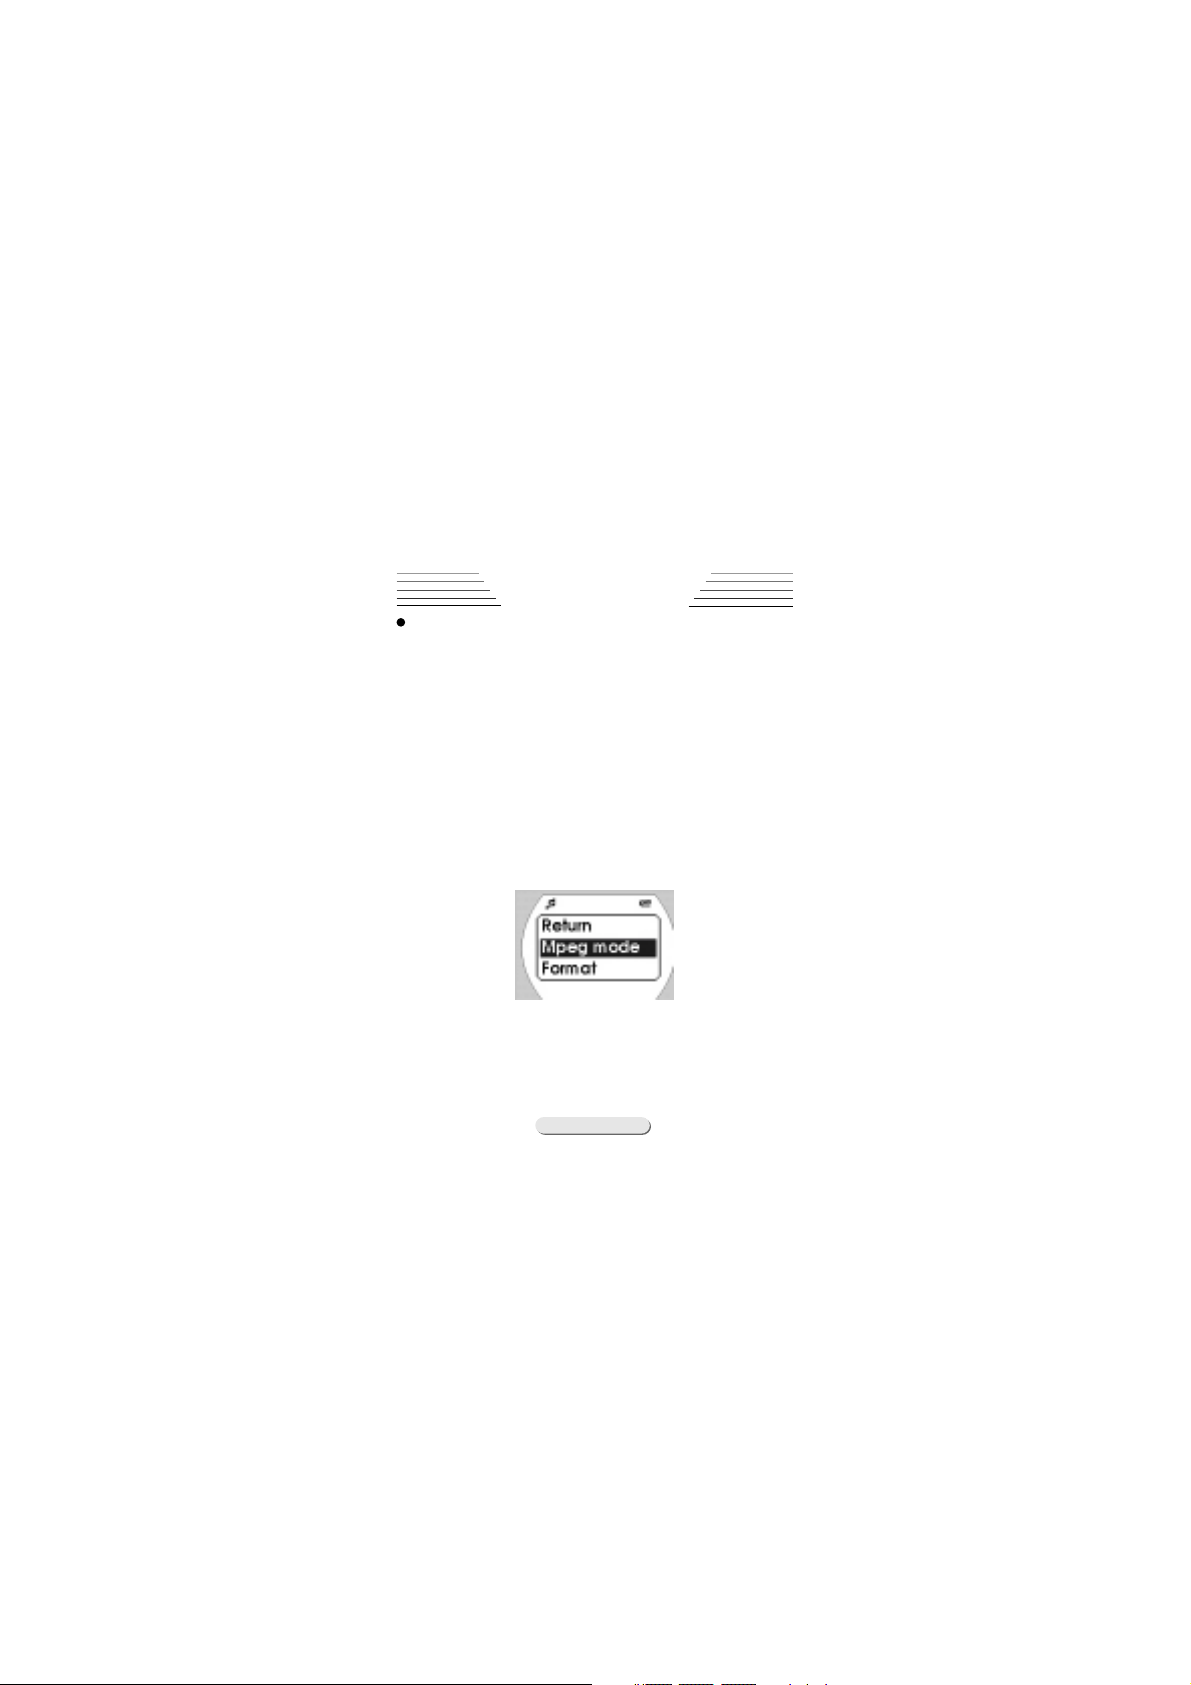
3,In the recording interface, use the
scroller to select the options"Mpeg mode"(as
shown):
4,Press the menu button to enter. You can
then select the recording format in the Mpeg
Mode menu (as shown):
18
Page 21
MP3 FuntionMP3 Funtion
MP3 Funtion
MP3 FuntionMP3 Funtion
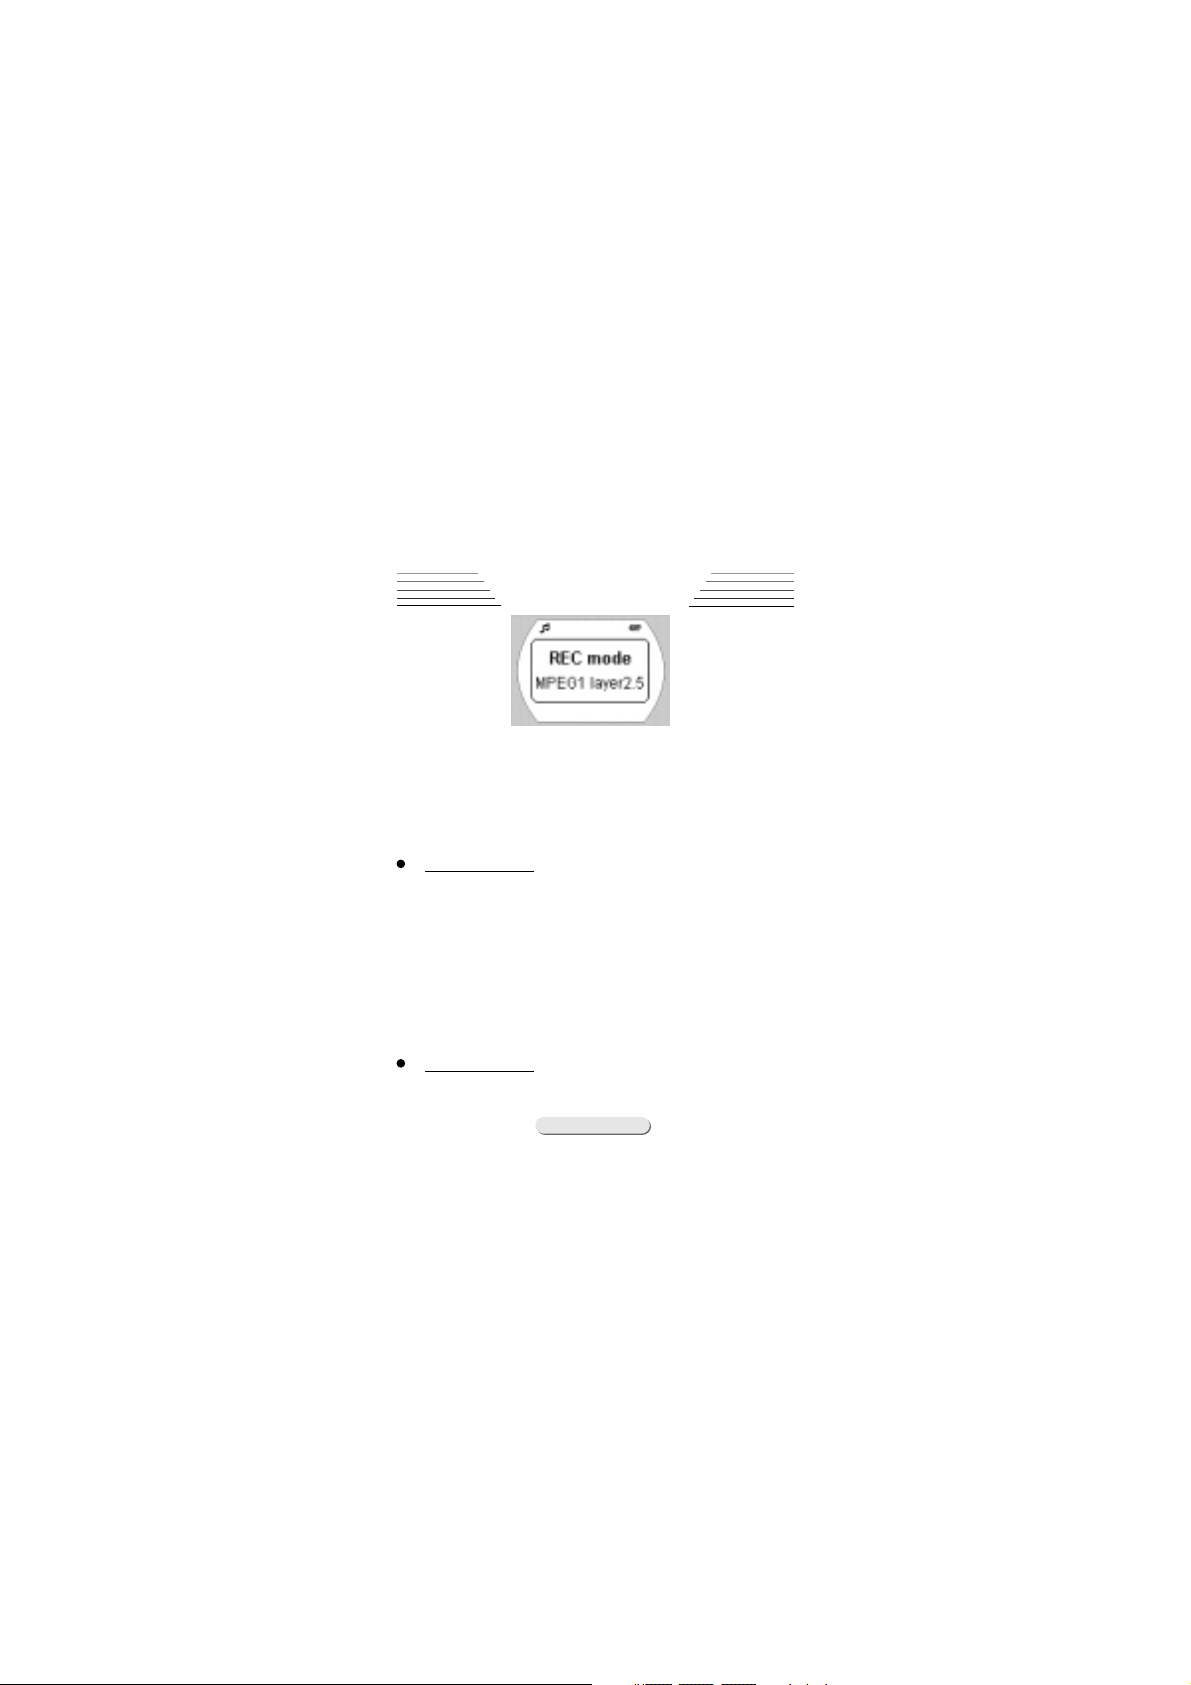
5,Use the scroller to select the preferred
format in the menu. When you finish, press the
menu button to enter. There are 3 kinds of
recording format, including, MPEG1 LAYER3,MPEG2
LAYER3,MPEG1 LAYER2.5.
MPEG1 Layer3 is the standard MP3 format.
Under this format, you can set the sampling
rate and bit rate according to your own
preference. Sampling rates are ranged from
32KHz,44.1KHz to 48KHz;Bit rates are ranged
from 32Kbps,40Kbps,48Kbps,56Kbps,64Kbps,
80Kbps,96Kbps,112Kbps,128 Kbps,160 Kbps,192
Kbps,224 Kbps to 256 Kbps.
Note:please refer to related chapterNote:please refer to related chapter
Note:please refer to related chapter
Note:please refer to related chapterNote:please refer to related chapter
for detailsfor details
for details
for detailsfor details
MPEG2 Layer3 is a format with lower sampling rate. You can save memories in your
player under this mode. Sampling rates are
19
Page 22

MP3 FuntionMP3 Funtion
MP3 Funtion
MP3 FuntionMP3 Funtion
ranged from 16KHz,22.05KHz to 24KHz;Bit rates
are ranged from 16Kbps,32Kbps,40Kbps,48Kbps,
56Kbps,64Kbps,80Kbps,96Kbps,112Kbps,128 Kbps
to 160 Kbps.
MPEG1 Layer2.5 is the format that takes the
least memories. Both the sampling and bit rate
are only 8Kbps. However, when choosing this
format, the recording time is the longest, but
the sound quality is poor.
6,Sound quality will adjusted according to
the setting.
7,If you wish not to change the setting,
press STOP to return.
Note:Note:
Note:
Note:Note:
Under normal condition, MPEG1 Layer3Under normal condition, MPEG1 Layer3
Under normal condition, MPEG1 Layer3
Under normal condition, MPEG1 Layer3Under normal condition, MPEG1 Layer3
is the most common Mp3 formatis the most common Mp3 format
is the most common Mp3 format.
is the most common Mp3 formatis the most common Mp3 format
20
Page 23
MP3 FuntionMP3 Funtion
MP3 Funtion
MP3 FuntionMP3 Funtion
Setup StereoSetup Stereo
Setup Stereo
Setup StereoSetup Stereo
Before recording, you can setup the sound
effect to optimize the recording result.
1,Hold PLAY/PAUSE button to power on the
player.
2,Press the Menu button to enter the menu
options and use the scroller to select the REC
Set function.
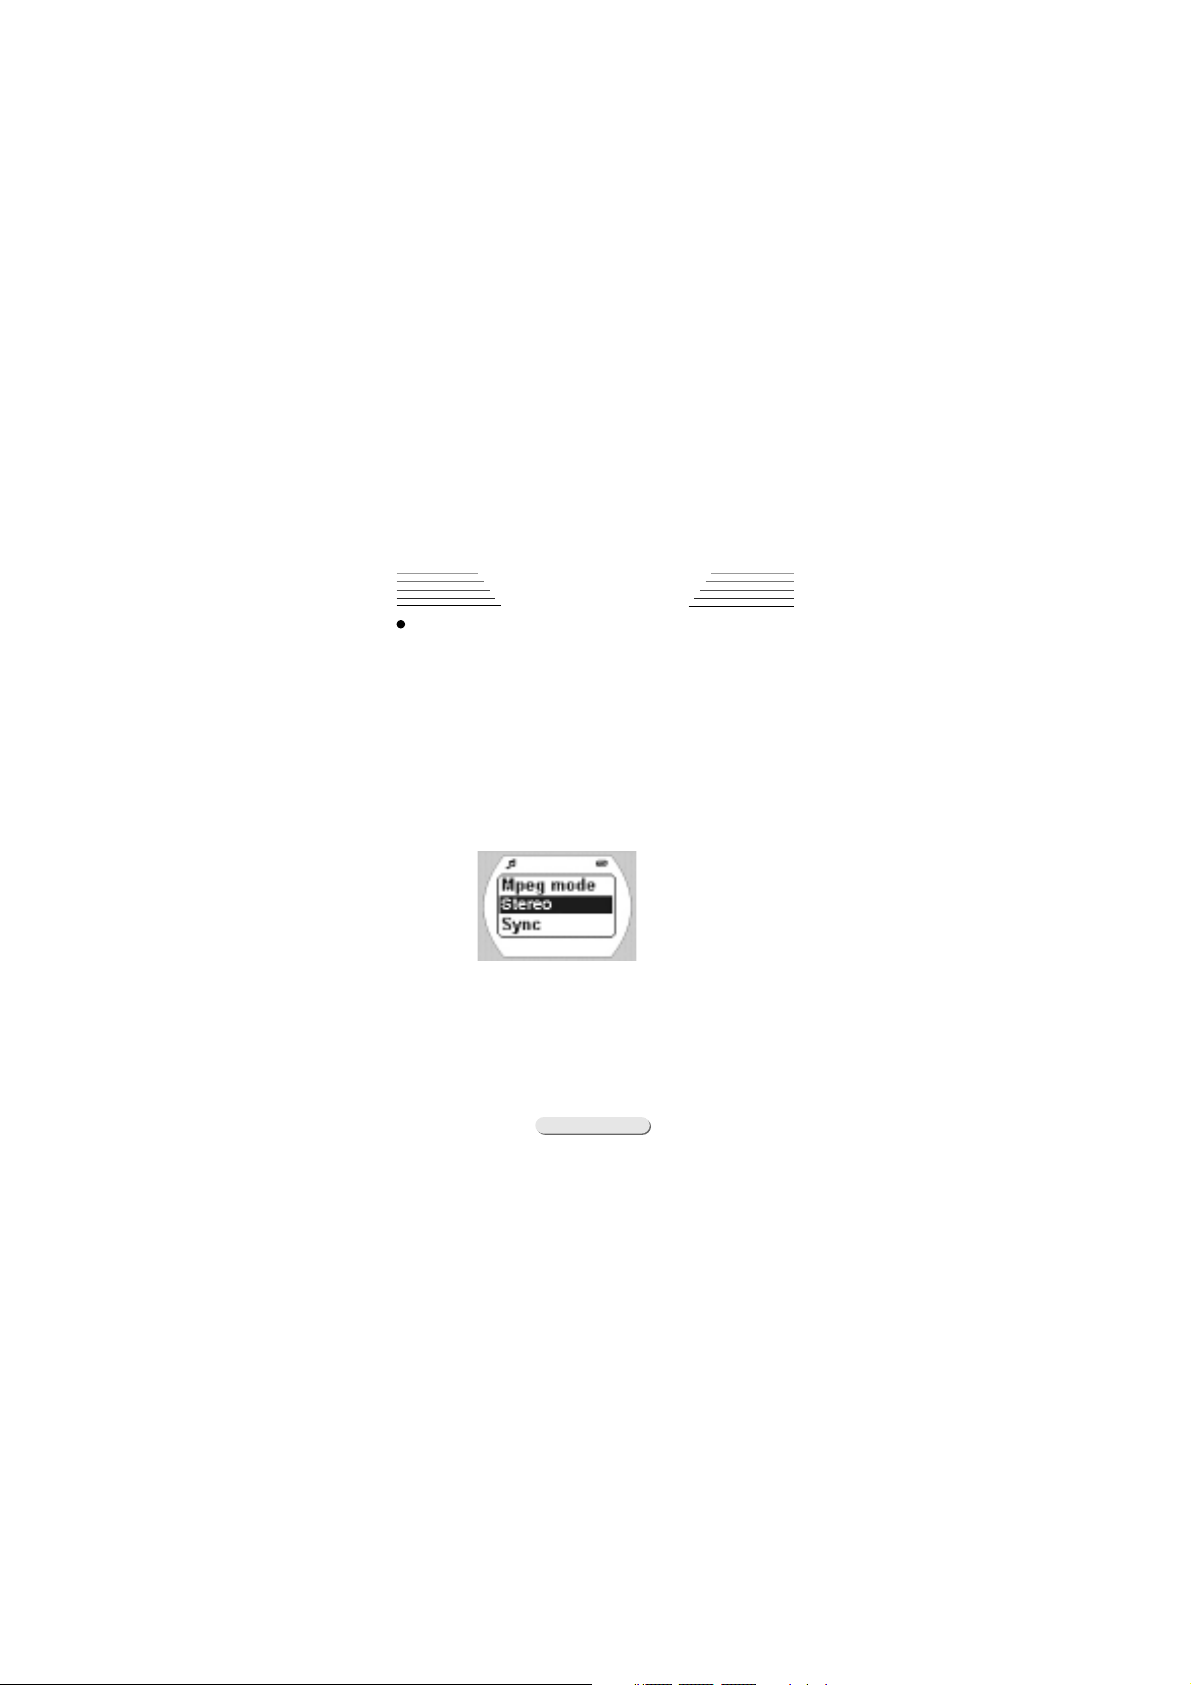
3,In the recording interface, use the
scroller to select the options"Stereo"(as
shown):
4,Press the menu button to enter. You can
now select the sound effect in the Stereo menu
(as shown)
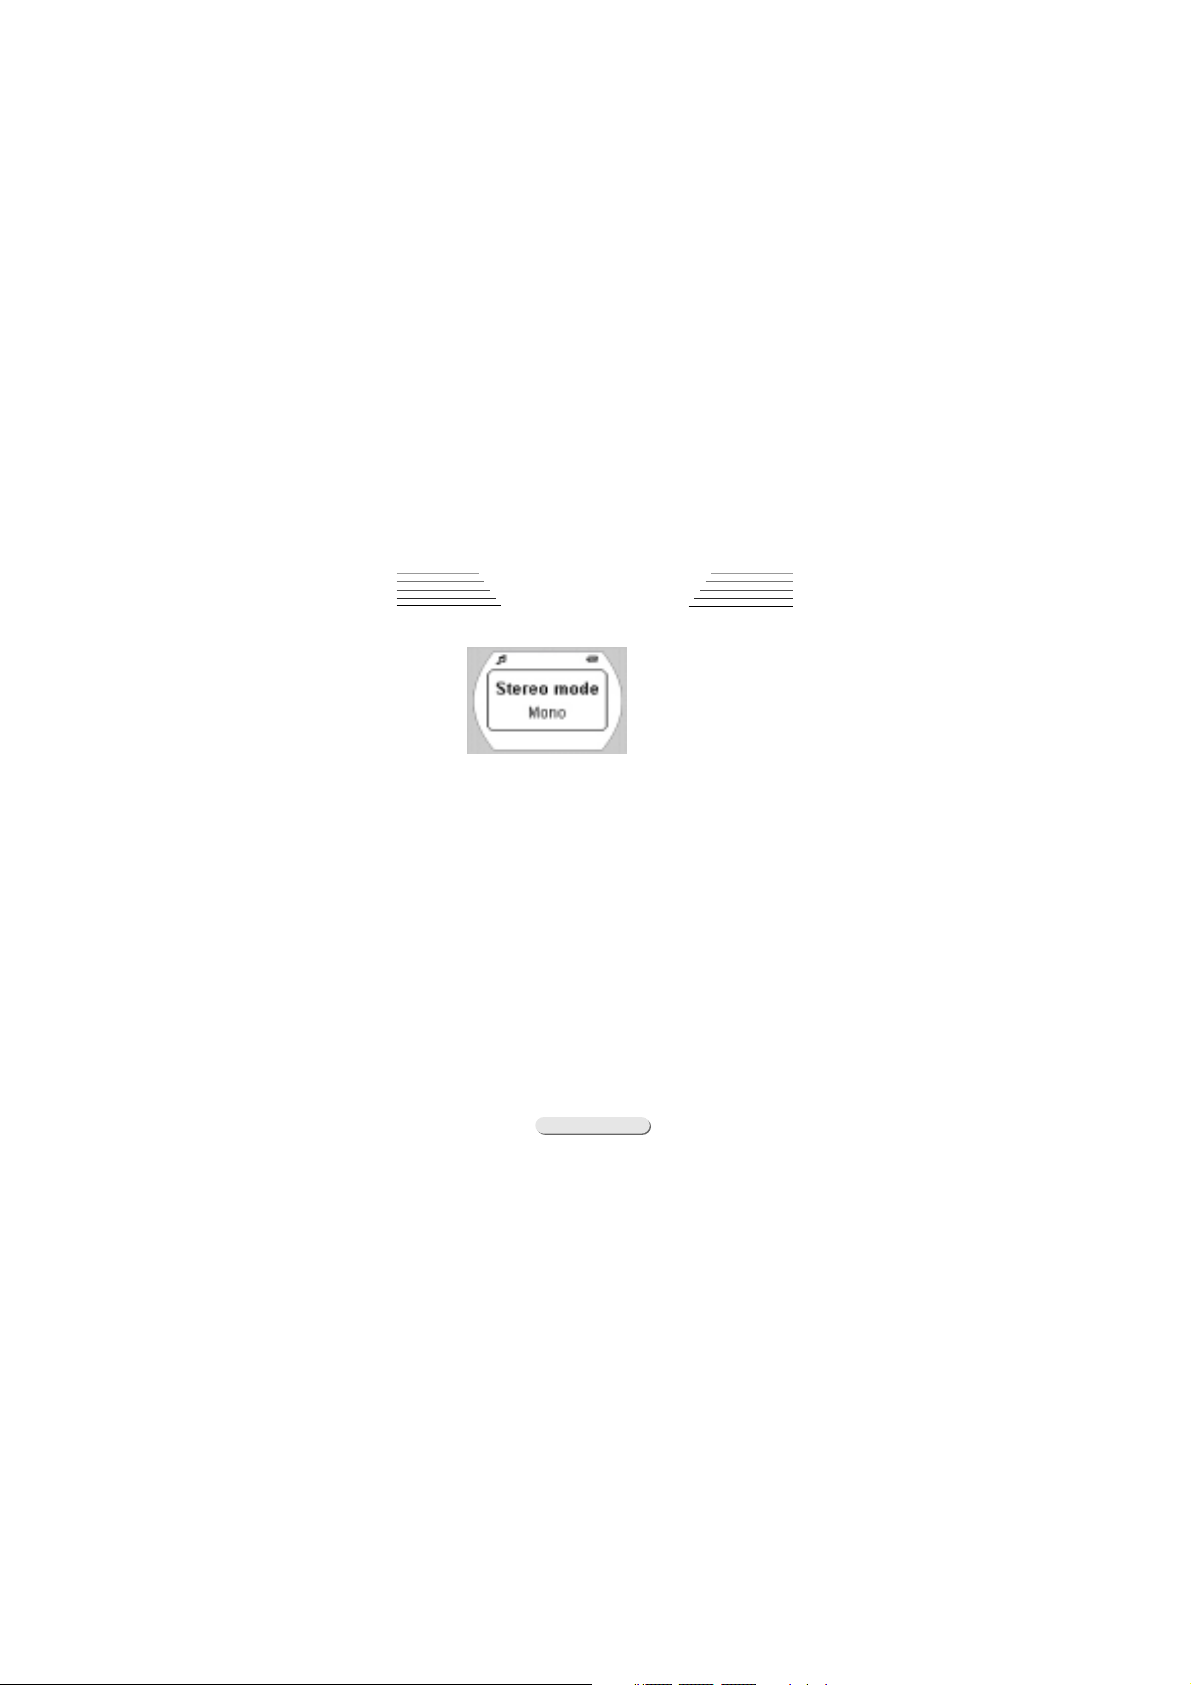
5,Use the scroller to select the preferred
effects in the menu. When you finish, press
the menu button to enter. There are 3 options
in the menu, including JOINT STEREO, MONO, and
21
Page 24
MP3 FuntionMP3 Funtion
MP3 Funtion
MP3 FuntionMP3 Funtion
STEREO.
Stereo illustrate recording file have stereo effect.
Mono illustrate recording file only have
mono effect.
JOINT STEREO illustrate recording file have
JOINT STEREO effect.
6,If you wish not to change the setting,
press STOP to return
Note:Note:
Note:
Note:Note:
If you select as MPEG1 LAYER2.5 theIf you select as MPEG1 LAYER2.5 the
If you select as MPEG1 LAYER2.5 the
If you select as MPEG1 LAYER2.5 theIf you select as MPEG1 LAYER2.5 the
recording format, only "mono"can berecording format, only "mono"can be
recording format, only "mono"can be
recording format, only "mono"can berecording format, only "mono"can be
used.used.
used.
used.used.
22
Page 25
MP3 FuntionMP3 Funtion
MP3 Funtion
MP3 FuntionMP3 Funtion
SYNCSYNC
SYNC
SYNCSYNC
When recording from CD (or VCD, Disk,DVD)
to you player, you can select the option to
synchronize the recording tracks during encode.
1,Hold PLAY/PAUSE button to power on the
player
2,Press the Menu button to enter the menu
options and use the scroller to select the Rec
Set function. Enter by pressing the button
again.
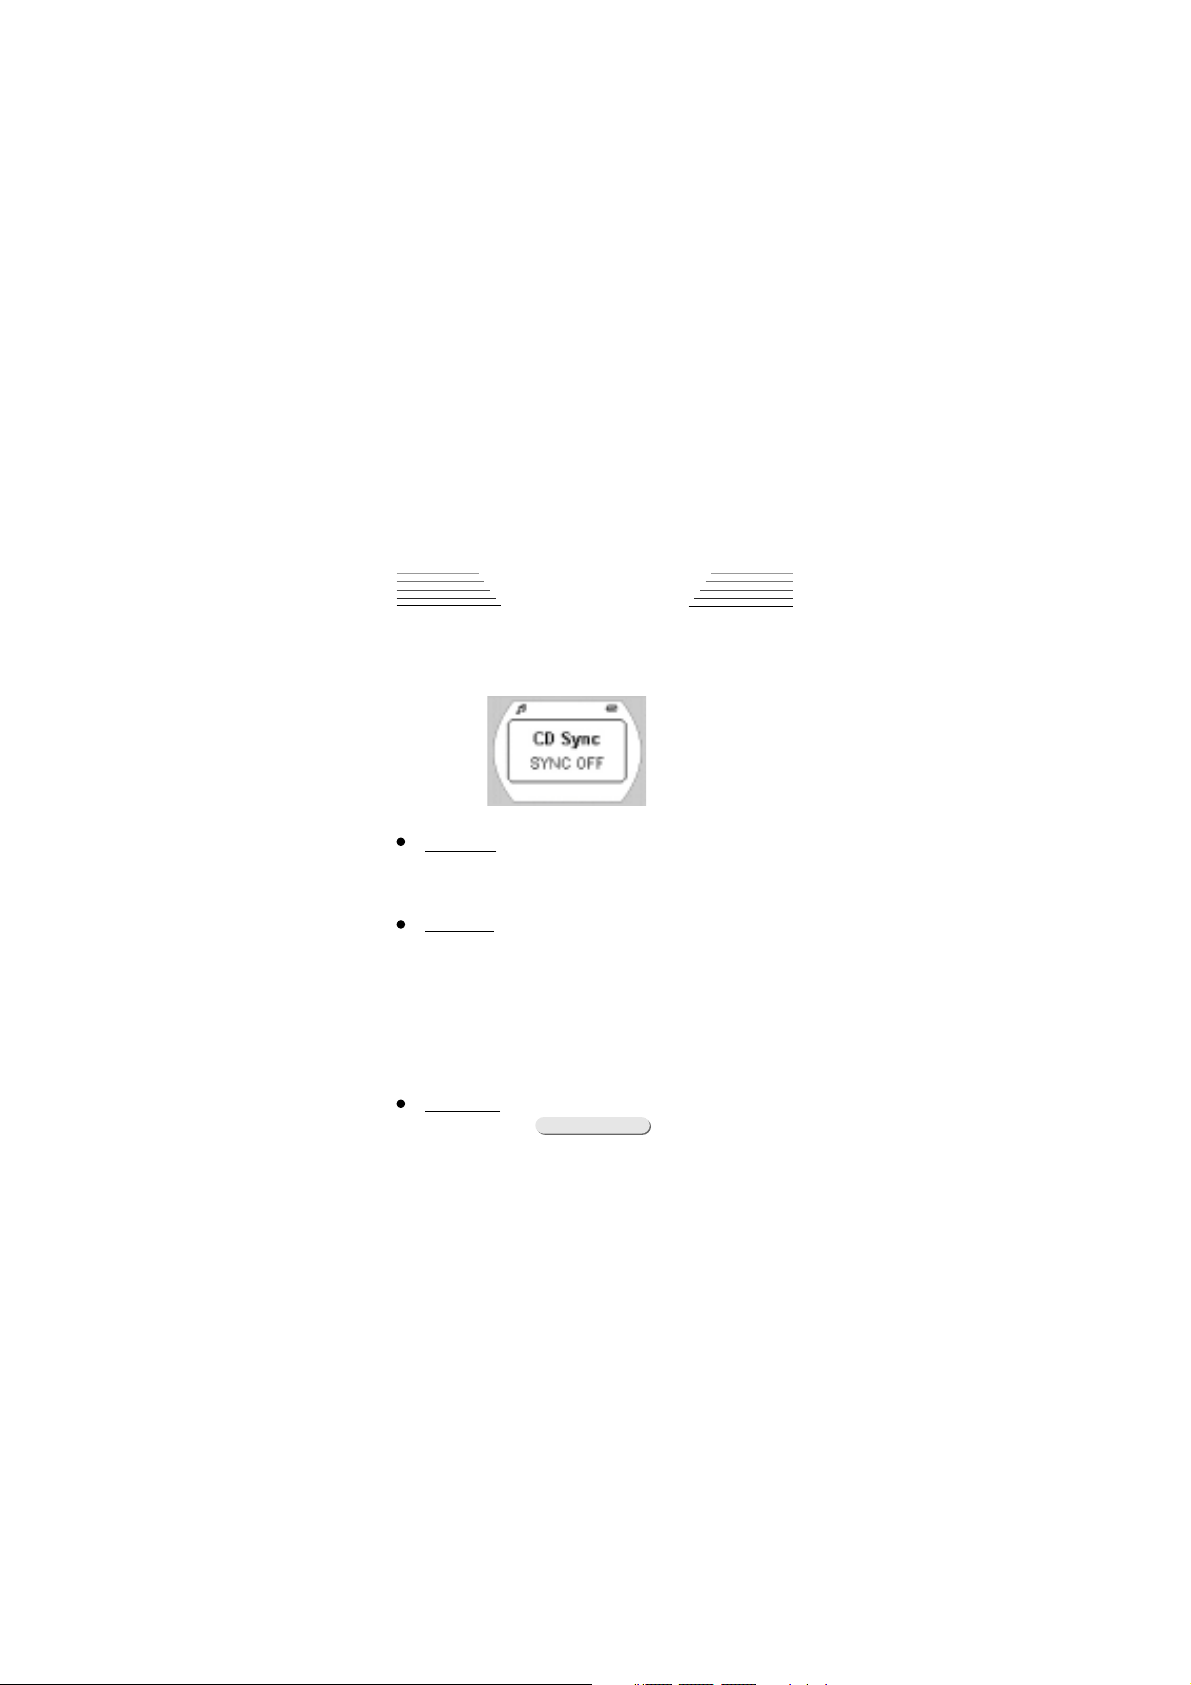
3,In the recording interface, use the
scroller to select the options "SYNC".(as
shown):
4,Press the menu button to enter. You can
now select to turn on the song synchronizer
function in the SYNC menu.
23
Page 26
MP3 FuntionMP3 Funtion
MP3 Funtion
MP3 FuntionMP3 Funtion
5,Use the scroller to select the preferred
options in the menu. When you finish, press
the menu button to enter.
SYNC OFF means not to synchronize the recording tracks. When recording under this mode,
the tracks will not be interrupted until you
interrupt it by manual.
SYNC ¡¡ON means to synchronize the recording tracks. The function will detect the silence or no line-in voice such recording file
will finish and wait for new voice input to
create another recording file while recording.
The new voice input will then be recorded
individually as a separate file until further
actions. There are 3 silence levels, please
refer to the related chapter for details.
SYNC One -this function will detect the
24
Page 27

MP3 FuntionMP3 Funtion
MP3 Funtion
MP3 FuntionMP3 Funtion
silence or any line-in voice while recording.
If there is, the voice document will be saved
and exit from then recording mode. This means
only one document will be saved during
recording.
6,If you wish not to change the setting,
press STOP to return.
Note:Note:
Note:
Note:Note:
We strongly recommend on setting theWe strongly recommend on setting the
We strongly recommend on setting the
We strongly recommend on setting theWe strongly recommend on setting the
VAD on, silence low to optimize theVAD on, silence low to optimize the
VAD on, silence low to optimize the
VAD on, silence low to optimize theVAD on, silence low to optimize the
synchronizing resultssynchronizing results
synchronizing results.
synchronizing resultssynchronizing results
25
Page 28

MP3 FuntionMP3 Funtion
MP3 Funtion
MP3 FuntionMP3 Funtion
VADVAD
VAD
VADVAD
When using the voice recording function,
you can select to turn on/off the VAD option to
avoid blank recording.
1,Hold PLAY/PAUSE button to power on the
player
2,Press the Menu button to enter the menu
options and use the scroller to select the"REC
Set"function. Enter by pressing the button
again.
3,In the recording interface, use the
scroller to select the options"VAD"(as shown):
4,Press the menu button to enter. You can
now select to turn on/off the VAD function in
the menu.
5,Use the scroller to select the preferred
26
Page 29

MP3 FuntionMP3 Funtion
MP3 Funtion
MP3 FuntionMP3 Funtion
options in the menu. When you finish, press
the menu button to enter.There are 2 options ,
including VAD OFF and VAD ON.
VAD OFF:The recording will not be interrupted under any condition.
VAD ON:When detecting any silence or linein voice while recording, the player will pause
and wait for new voice input and continue
until further actions are made.
6. If you wish not to change the setting,
press STOP to return.
Note:Note:
Note:
Note:Note:
We strongly recommend on setting theWe strongly recommend on setting the
We strongly recommend on setting the
We strongly recommend on setting theWe strongly recommend on setting the
VAD on, silence low to optimize the CDVAD on, silence low to optimize the CD
VAD on, silence low to optimize the CD
VAD on, silence low to optimize the CDVAD on, silence low to optimize the CD
synchronizing results.synchronizing results.
synchronizing results.
synchronizing results.synchronizing results.
27
Page 30

MP3 FuntionMP3 Funtion
MP3 Funtion
MP3 FuntionMP3 Funtion
Setup FrequencySetup Frequency
Setup Frequency
Setup FrequencySetup Frequency
When recording, you can set the sampling
frequency rate to adjust the sound quality.
1.Hold PLAY/PAUSE button to power on the
player
2.Press the Menu button to enter the menu
options and use the scroller to select the Rec
set function. Enter by pressing the button
again.
3.In the recording interface, use the
scroller to select the options VAD(as shown):
4.Press the menu button to enter. You can
now select to turn on/off the VAD function in
the menu.
5.Use the scroller to select the preferred
28
Page 31

MP3 FuntionMP3 Funtion
MP3 Funtion
MP3 FuntionMP3 Funtion
options in the menu. When you finish, press
the menu button to enter. (as shown):
6.The sampling frequency is according to
the MPEG settings (please refer to related
chapter for details):
In MPEG1 Layer3, you can choose from 32KHz,
44.1KHz and 48KHz
In MPEG1 Layer2.5, you can only choose 8KHz
In MPEG2 Layer3, you can choose from 16KHz,
22.05KHz and 24KHz.
7.If you wish not to change the setting,
press STOP to return.
Note:Note:
Note:
Note:Note:
The sampling frequency for normalThe sampling frequency for normal
The sampling frequency for normal
The sampling frequency for normalThe sampling frequency for normal
MP3 format is 44.1KHz(MPEG1 Layer3).MP3 format is 44.1KHz(MPEG1 Layer3).
MP3 format is 44.1KHz(MPEG1 Layer3).
MP3 format is 44.1KHz(MPEG1 Layer3).MP3 format is 44.1KHz(MPEG1 Layer3).
29
Page 32

MP3 FuntionMP3 Funtion
MP3 Funtion
MP3 FuntionMP3 Funtion
Setup Bit RateSetup Bit Rate
Setup Bit Rate
Setup Bit RateSetup Bit Rate
When recording, you can set up the bit rate
to increase efficiency for the capacity and
sound quality.
1. Hold PLAY/PAUSE button to power on the
player
2. Press the Menu button to enter the menu
options and use the scroller to select the"REC
Set"function. Enter by pressing the button
again.
3. In the recording interface, use the
scroller to select the options"Bit rate"(as
shown)
4.
Press the menu button to enter. You can
now set the bit rate in the menu.
30
Page 33

MP3 FuntionMP3 Funtion
MP3 Funtion
MP3 FuntionMP3 Funtion
5. Use the scroller to select the preferred options in the menu. When you finish,
press the menu button to enter. (As shown):
6. Use the scroller to choose the bit rates.
The bit rates setting should be according to
the MPEG settings:
MPEG 1 Layer 3MPEG 1 Layer 3
MPEG 1 Layer 3: you can choose from
MPEG 1 Layer 3MPEG 1 Layer 3
32Kbps,40Kbps,48Kbps,56Kbps,64Kbps,80Kbps,
96Kbps,112Kbps,128 Kbps,160 Kbps,192 Kbps,224
Kbps up to 256 Kbps;Please aware that when the
sampling rate is set at 32KHz or 44.1KHz,You
cannot set the bit rate to 256Kbps.
MPEG 1 Layer 2.5:MPEG 1 Layer 2.5:
MPEG 1 Layer 2.5: Only 8KHz is available;
MPEG 1 Layer 2.5:MPEG 1 Layer 2.5:
at this time the bit rate will be 8Kbps;
MPEG 2 Layer 3:MPEG 2 Layer 3:
MPEG 2 Layer 3: You can choose from
MPEG 2 Layer 3:MPEG 2 Layer 3:
16Kbps,32Kbps,40Kbps,48Kbps,56Kbps,64Kbps,
80Kbps,96Kbps,112Kbps,128 Kbps up to 160 Kbps.
31
Page 34

MP3 FuntionMP3 Funtion
MP3 Funtion
MP3 FuntionMP3 Funtion
7. If you wish not to change the setting,
press STOP to return.
Note:Note:
Note:
Note:Note:
The bit rate setting has a strongThe bit rate setting has a strong
The bit rate setting has a strong
The bit rate setting has a strongThe bit rate setting has a strong
impact on the recording time as well asimpact on the recording time as well as
impact on the recording time as well as
impact on the recording time as well asimpact on the recording time as well as
the sound quality of the music. Thethe sound quality of the music. The
the sound quality of the music. The
the sound quality of the music. Thethe sound quality of the music. The
larger the bit rate, the more capacitylarger the bit rate, the more capacity
larger the bit rate, the more capacity
larger the bit rate, the more capacitylarger the bit rate, the more capacity
the recording will take; however, thethe recording will take; however, the
the recording will take; however, the
the recording will take; however, thethe recording will take; however, the
sound quality will be better.sound quality will be better.
sound quality will be better.
sound quality will be better.sound quality will be better.
32
Page 35

MP3 FuntionMP3 Funtion
MP3 Funtion
MP3 FuntionMP3 Funtion
Setup SilenceSetup Silence
Setup Silence
Setup SilenceSetup Silence
When recording, you can set up the silence
feature to obtain more sensitive sound quality.
1.Hold PLAY/PAUSE button to power on the
player
2.Press the Menu button to enter the menu
options and use the scroller to select the"REC
Set"function. Enter by pressing the button
again.
3. In the recording interface, use the
scroller to select the options"Bit rate"(as
shown)
4.
Press the menu button to enter. You can
now set the Silence level in the menu.
5. Use the scroller to select the pre-
33
Page 36

MP3 FuntionMP3 Funtion
MP3 Funtion
MP3 FuntionMP3 Funtion
ferred options in the menu. When you finish,
press the menu button to enter. (As shown):
6. Use the scroller to choose the silence
level. There are 3 levels options including
high, mid, and low. Different silence levels
will effect the VAD ON mode when recording.
(see VAD partment)
7. If you wish not to change the setting,
press STOP to return.
Note:Note:
Note:
Note:Note:
We strongly recommend on setting theWe strongly recommend on setting the
We strongly recommend on setting the
We strongly recommend on setting theWe strongly recommend on setting the
"VAD ON" silence low to optimize the"VAD ON" silence low to optimize the
"VAD ON" silence low to optimize the
"VAD ON" silence low to optimize the"VAD ON" silence low to optimize the
synchronizing results. (for details, seesynchronizing results. (for details, see
synchronizing results. (for details, see
synchronizing results. (for details, seesynchronizing results. (for details, see
the chapter on VAD).the chapter on VAD).
the chapter on VAD).
the chapter on VAD).the chapter on VAD).
34
Page 37

MP3 FuntionMP3 Funtion
MP3 Funtion
MP3 FuntionMP3 Funtion
Setup Storage MemorySetup Storage Memory
Setup Storage Memory
Setup Storage MemorySetup Storage Memory
When recording, you can select the memory
to storage(external or internal).
1. Hold PLAY/PAUSE button to power on the
player
2. Press the Menu button to enter the menu
options and use the scroller to select the"REC
Set"function. Enter by pressing the button
again.
3. In the recording interface, use the
scroller to select the options"Mem Select"(as
shown)
4.
Press the menu button to enter. You can
now select the memory type in the menu.
5. Use the scroller to select the preferred
options in the menu. There are 2 options,
35
Page 38

MP3 FuntionMP3 Funtion
MP3 Funtion
MP3 FuntionMP3 Funtion
external and internal. When you finish, press
the menu button to enter.
If you select Int flash, when you record
file, the recording file will storage in Int
flash, and if you select Ext Card, the recording file will storage in Ext card if there is
a MMC card inserting.
7. If you wish not to change the setting,
press STOP to return.
Note:Note:
Note:
Note:Note:
If the MMC extension card is notIf the MMC extension card is not
If the MMC extension card is not
If the MMC extension card is notIf the MMC extension card is not
recognized or insert, then only INTrecognized or insert, then only INT
recognized or insert, then only INT
recognized or insert, then only INTrecognized or insert, then only INT
FLASH will be available.FLASH will be available.
FLASH will be available.
FLASH will be available.FLASH will be available.
If you have setup the memory type inIf you have setup the memory type in
If you have setup the memory type in
If you have setup the memory type inIf you have setup the memory type in
the directory menu, then it will onlythe directory menu, then it will only
the directory menu, then it will only
the directory menu, then it will onlythe directory menu, then it will only
used the selected type.used the selected type.
used the selected type.
used the selected type.used the selected type.
36
Page 39

MP3 FuntionMP3 Funtion
MP3 Funtion
MP3 FuntionMP3 Funtion
Setup Record SourceSetup Record Source
Setup Record Source
Setup Record SourceSetup Record Source
When recording, you can choose recording
source from the menu.
1.Hold PLAY/PAUSE button to power on the
player
2.Press the Menu button to enter the menu
options and use the scroller to select the"REC
Set"function. Enter by pressing the button
again.
3.In the recording interface, use the
scroller to select the options"Source"(as
shown)
4.Press the menu button to enter. You can
now select the recording source in the menu.
5.Use the scroller to select the preferred
options in the menu. There are 2 options,
37
Page 40

MP3 FuntionMP3 Funtion
MP3 Funtion
MP3 FuntionMP3 Funtion
"LINE IN"or"MIC"When you finish, press the
menu button to enter.
When you choose"LINE IN"you have to use the
line-in audio cable to connect external audio
device as the recording source. When you choose
"MIC"you can directly record by MIC device
from the player.
7. If you wish not to change the setting,
press STOP to return.
8. Different source the recording inter-
face is different, you can see below.
From MIC From Line In
38
Page 41

MP3 FuntionMP3 Funtion
MP3 Funtion
MP3 FuntionMP3 Funtion
If you record from MIC, you can see a MIC
icon will show at the top of LCD. And if you
record from Line-In, you can see a Music icon
will show at the top of LCD.
Note:Note:
Note:
Note:Note:
If the player is connected to theIf the player is connected to the
If the player is connected to the
If the player is connected to theIf the player is connected to the
LINE-IN audio cable, but the setting isLINE-IN audio cable, but the setting is
LINE-IN audio cable, but the setting is
LINE-IN audio cable, but the setting isLINE-IN audio cable, but the setting is
on"MIC"the recording source will useon"MIC"the recording source will use
on"MIC"the recording source will use
on"MIC"the recording source will useon"MIC"the recording source will use
the MIC as the recording course.the MIC as the recording course.
the MIC as the recording course.
the MIC as the recording course.the MIC as the recording course.
If the setting is Line-In, but youIf the setting is Line-In, but you
If the setting is Line-In, but you
If the setting is Line-In, but youIf the setting is Line-In, but you
did not connect Line-In cable, when youdid not connect Line-In cable, when you
did not connect Line-In cable, when you
did not connect Line-In cable, when youdid not connect Line-In cable, when you
record file, you can not record anything.record file, you can not record anything.
record file, you can not record anything.
record file, you can not record anything.record file, you can not record anything.
39
Page 42
MP3 FuntionMP3 Funtion
MP3 Funtion
MP3 FuntionMP3 Funtion
Delete FilesDelete Files
Delete Files
Delete FilesDelete Files
You can choose to delete files from the
player or the provided management software.
1. Hold PLAY/PAUSE button to power on the
player
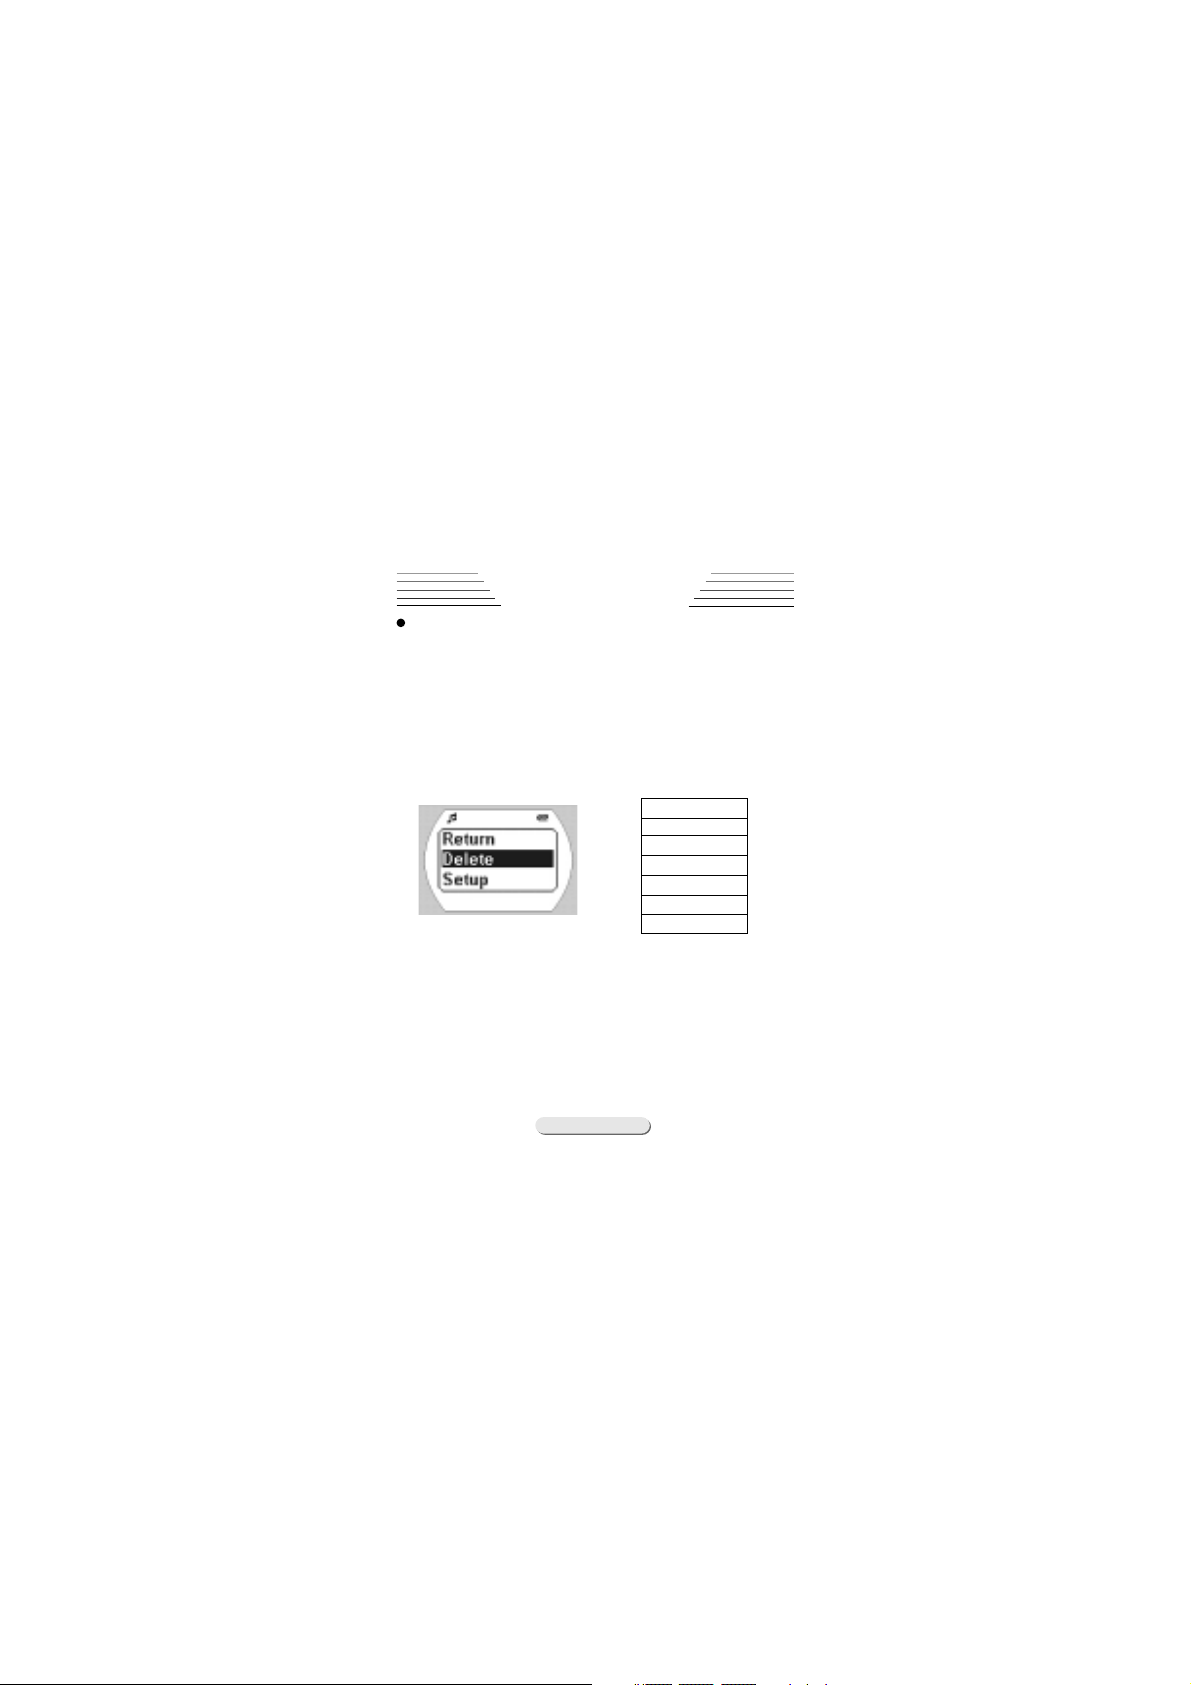
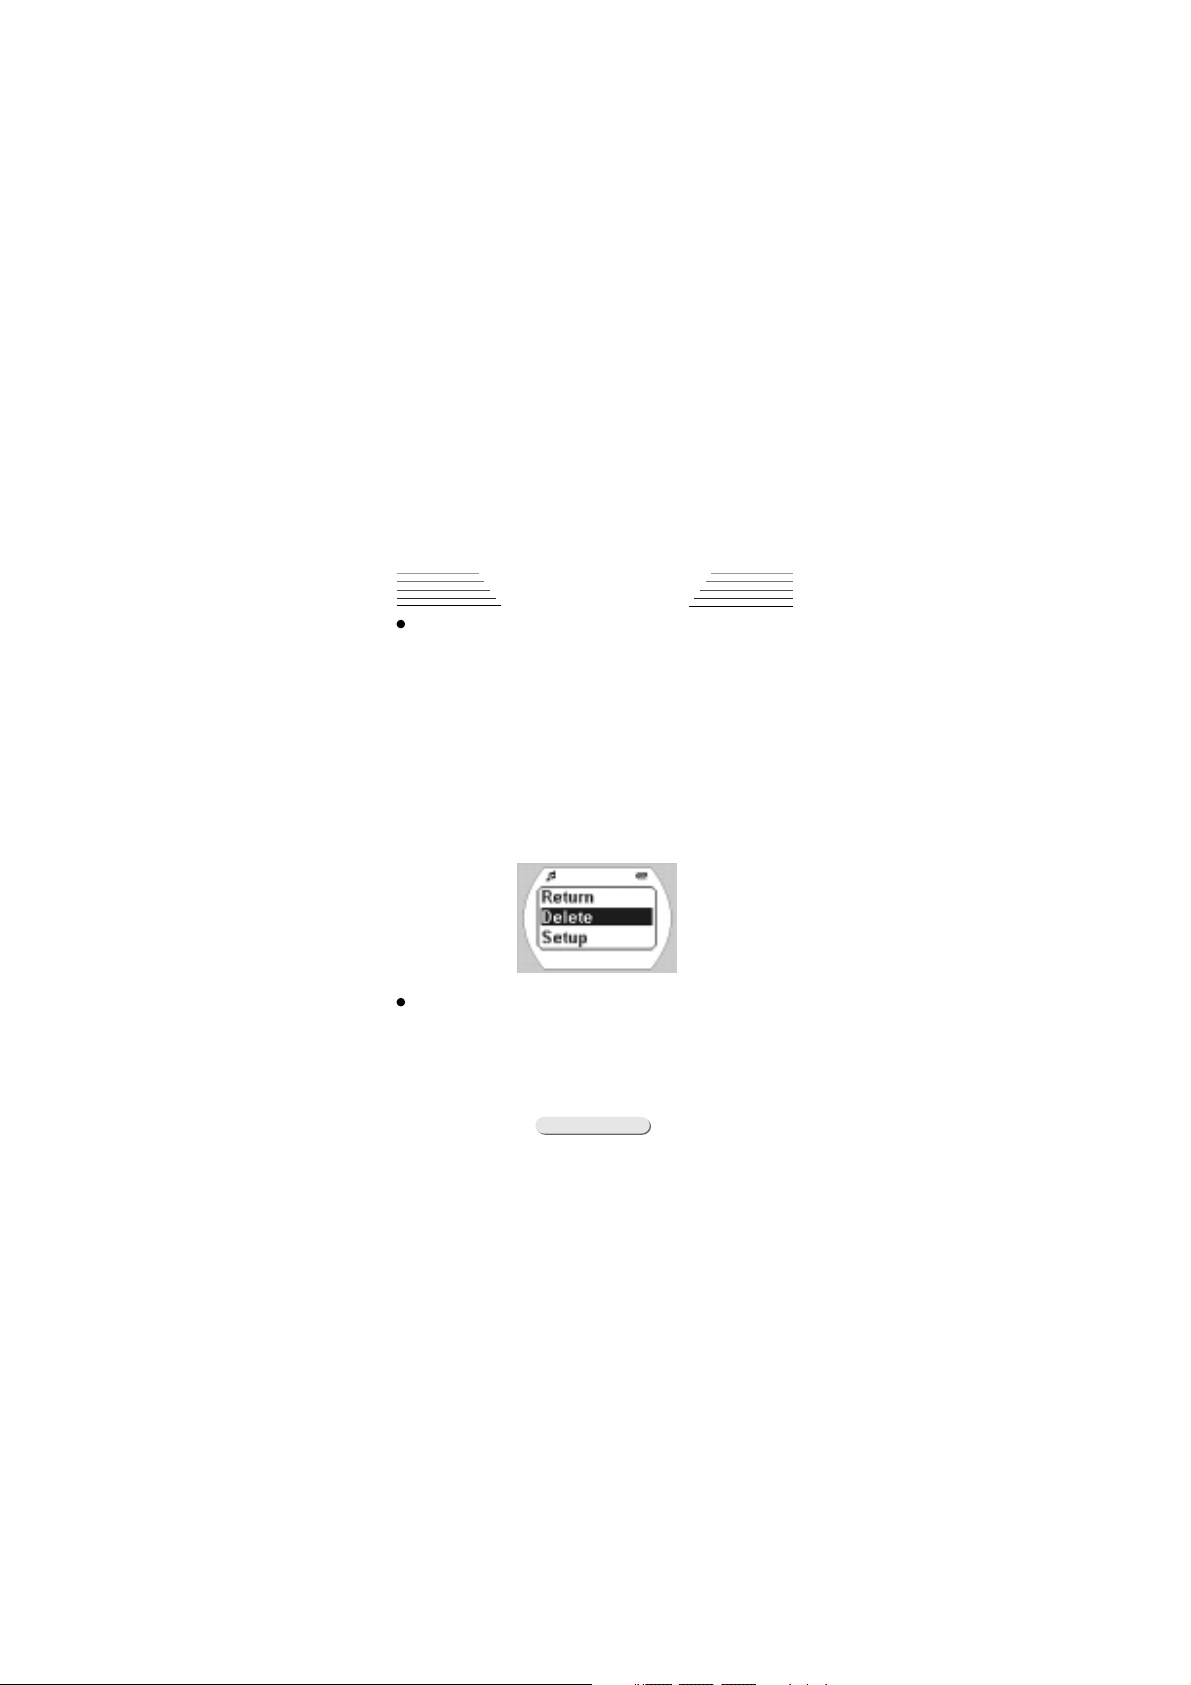
2. Press the Menu button to enter the menu
options and use the scroller to select
the"Delete"function. Enter by pressing the
button again (As shown)There are 3 options in
the delete menu, including"All files""One
file"and"Return".
All files,this will remove all the files in
the player including non audio files. To delete all files, press the Menu button to confirm deleting. and press the stop button to
return the main menu.( as shown)
40
Page 43

MP3 FuntionMP3 Funtion
MP3 Funtion
MP3 FuntionMP3 Funtion
One file
To delete one file, enter the "One
File"function and select the track you want to
remove by using the scroller. When finish,
press the menu button. (As shown):
41
Page 44

MP3 FuntionMP3 Funtion
MP3 Funtion
MP3 FuntionMP3 Funtion
7. If you wish not to change the setting,
press STOP to return.
42
Page 45

MP3 FunctionMP3 Function
MP3 Function
MP3 FunctionMP3 Function
EQ (Equalizer)EQ (Equalizer)
EQ (Equalizer)
EQ (Equalizer)EQ (Equalizer)
You can select different EQ mode according
to different music.
1.Hold PLAY/PAUSE button to power on the player.
2.Press the Menu button to enter the menu
options and use the scroller to select the"SET
UP"function. Enter by pressing the menu button
again (As shown).
3.Press the menu button to enter. You can
now select the"Equalizer"function in the "SET
UP"menu (as shown). Use the scroller to select
the options.
43
Page 46

MP3 FunctionMP3 Function
MP3 Function
MP3 FunctionMP3 Function
There are five modes: JAZZ, CLASSIC, ROCK,
POP and NORMAL The list of equilibrium effect
pops up after selecting"Equalizer"(as shown):
LIVE
CLASSIC
NORMAL
ROCK
POP
You can adjust the modes by the EQ menu.
You could experience perfect Jazz, Classic,
Rock, Pop sound effect by choosing suitable
corresponding mode. Normal mode could bring
you original sound effect
4. If you wish not to change the setting,
press STOP to return.
44
Page 47

MP3 FunctionMP3 Function
MP3 Function
MP3 FunctionMP3 Function
RepeatRepeat
Repeat
RepeatRepeat
When playing, you can choose to repeat the
tracks according to your own reference.
1.Hold PLAY/PAUSE button to power on the player.
2.Press the Menu button to enter the menu
options and use the scroller to select
the"Setup"function. Enter by pressing the menu
button again (As shown).
3.Press the menu button to enter. You can
now select the"Repeat"functions in the Menu
(as shown). When you finish, press the menu
button to enter.
45
Page 48

MP3 FunctionMP3 Function
MP3 Function
MP3 FunctionMP3 Function
4.Use the scroller to select the options,
when you finish, press the menu button to
enter. There are 6 options, including, Random,
Normal, Repeat All, Repeat one and Preview.
(As shown)
Icons for the repeat mode:
¡¡
Random Repeat all
Repeat one
Random
Normal
Repeat all
Repeat one
Preview
Return
46
Page 49

MP3 FunctionMP3 Function
MP3 Function
MP3 FunctionMP3 Function
Normal Preview
Repeat: Plays the current MP3 music file
repeatedly.
Repeat All: Plays all MP3 music in order
repeatedly until another operation is
performed.
Random: Plays all MP3 music at random and
then stops.
Preview: Plays every first 10 seconds of
all MP3 music in order and stops after the last
music has been played.
Normal: Plays the MP3 music in order and
stops after the last music has been played.
7.If you wish not to change the setting,
press STOP to return.
47
Page 50

MP3 FunctionMP3 Function
MP3 Function
MP3 FunctionMP3 Function
Setup LCD ContrastSetup LCD Contrast
Setup LCD Contrast
Setup LCD ContrastSetup LCD Contrast
The LCD display will be different according to
the outside temperature. You can choose to adjust
the contract according to your own preference.
1.Hold PLAY/PAUSE button to power on the player.
2.Press the Menu button to enter the menu
options and use the scroller to select
the"Setup"function. Enter by pressing the menu
button again (As shown)
3.Press the menu button to enter.You can now
select the "Contrast"functions in the When you
finish, press the menu button to enter. (As shown).
48
Page 51

MP3 FunctionMP3 Function
MP3 Function
MP3 FunctionMP3 Function
4. Use the scroller to select the options,
when you finish, press the menu button to enter.
5.There are 20 levels of contrast to choose
from, use the scroller to select your preference.
When you finish press the menu button to enter.
6,If you wish not to change the setting,
press STOP to return.
Note:Note:
Note:
Note:Note:
The lower the level, the brighterThe lower the level, the brighter
The lower the level, the brighter
The lower the level, the brighterThe lower the level, the brighter
the LCD displays and the higher thethe LCD displays and the higher the
the LCD displays and the higher the
the LCD displays and the higher thethe LCD displays and the higher the
darker.darker.
darker.
darker.darker.
49
Page 52

MP3 FunctionMP3 Function
MP3 Function
MP3 FunctionMP3 Function
Setup Backlight TimeSetup Backlight Time
Setup Backlight Time
Setup Backlight TimeSetup Backlight Time
You can set up the period of time for the
backlight of your display screen.
1.Hold PLAY/PAUSE button to power on the player.
2.Press the Menu button to enter the menu
options and use the scroller to select
the"Setup"function. Enter by pressing the menu
button again (As shown).
3.Press the menu button to enter. You can
now select the"Backlight"in the When you finish,
press the menu button to enter. (As shown).
4.Use the scroller to select the time, when
50
Page 53

MP3 FunctionMP3 Function
MP3 Function
MP3 FunctionMP3 Function
you finish, press the menu button to enter.
5.There are different options to choose,
including OFF, 1-20 Seconds and ALL.
When you choose OFF, the backlight will not
be on under any condition.
When you choose"1-20 Sec"the backlight time
will be on according to the selected time.
When you choose"ALL"the backlight will
always be on until you reset it again.
6.If you wish not to change the setting,
press STOP to return.
51
Page 54

MP3 FunctionMP3 Function
MP3 Function
MP3 FunctionMP3 Function
Setup ID3 Displaying LanguageSetup ID3 Displaying Language
Setup ID3 Displaying Language
Setup ID3 Displaying LanguageSetup ID3 Displaying Language
In order to show the correct display language for the track title, you need to select
the language version in the player. This language supports including, Simplified/Traditional Chinese (GB2312 & BIG 5), Korean, Japanese and English.
1.Hold PLAY/PAUSE button to power on the
player
2.Press the Menu button to enter the menu
options and use the scroller to select
the"Setup"function. Enter by pressing the menu
button again (As shown)
3.Press the menu button to enter. You can
now select the"Language"in the When you finish,
press the menu button to enter. (As shown).
52
Page 55

MP3 FunctionMP3 Function
MP3 Function
MP3 FunctionMP3 Function
4.Use the scroller to select the language,
when you finish, press the menu button to
enter.(As shown)
SIM-CHINESE
TRAD-CHINESE
ENGLISH
JAPANESE
KOREAN
5.If you wish not to change the setting,
press STOP to return.
Note:Note:
Note:
Note:Note:
If the selected language settingIf the selected language setting
If the selected language setting
If the selected language settingIf the selected language setting
does not match the track title, youdoes not match the track title, you
does not match the track title, you
does not match the track title, youdoes not match the track title, you
might experience random charactersmight experience random characters
might experience random characters
might experience random charactersmight experience random characters
in the display screen.in the display screen.
in the display screen.
in the display screen.in the display screen.
53
Page 56

MP3 FuntionMP3 Funtion
MP3 Funtion
MP3 FuntionMP3 Funtion
Memory InfomationMemory Infomation
Memory Infomation
Memory InfomationMemory Infomation
You can directly check the available memory in
the player.
1.Hold PLAY/PAUSE button to power on the player
2.Press the Menu button to enter the menu
options and use the scroller to select the"Mem
Info"function. Enter by pressing the menu button
again (As shown)
3.You can now see both the external and internal memory information on the display screen. If
the MMC card is not inserted, then it will show"NO
CARD"in the external info part (As shown)
4.The display will return to the original
interface after 6 seconds.
54
Page 57

MP3 FuntionMP3 Funtion
MP3 Funtion
MP3 FuntionMP3 Funtion
FormatFormat
Format
FormatFormat
There are 2 formatting tools, using the
computer or the player. We strongly recommend
users to use the player to format.
1. Hold PLAY/PAUSE button to power on the
player
2. Press the Menu button to enter the menu
options and use the scroller to select
the"Format"function. Enter by pressing the menu
button again (As shown)
3.
You can now select to format the"i nternal
flash"or the "e xternal SD/MMC card"Please beware if the SD/MMC card is not insert into the
player, it would not be able to be formatted.
55
Page 58

MP3 FuntionMP3 Funtion
MP3 Funtion
MP3 FuntionMP3 Funtion
When you choose to format the internal
flash, press the menu button, or press the
stop button to return. The display screen will
also show the format status. (As shown):
4. After the formatting process, it will au-
tomatically return back to the normal interface.
Note:Note:
Note:
Note:Note:
The formatting time will be differ-The formatting time will be differ-
The formatting time will be differ-
The formatting time will be differ-The formatting time will be different according to the capacity of theent according to the capacity of the
ent according to the capacity of the
ent according to the capacity of theent according to the capacity of the
player. Please do not disconnect theplayer. Please do not disconnect the
player. Please do not disconnect the
player. Please do not disconnect theplayer. Please do not disconnect the
player when formatting; it will causeplayer when formatting; it will cause
player when formatting; it will cause
player when formatting; it will causeplayer when formatting; it will cause
serious damage to the player.serious damage to the player.
serious damage to the player.
serious damage to the player.serious damage to the player.
56
Page 59

MP3 FuntionMP3 Funtion
MP3 Funtion
MP3 FuntionMP3 Funtion
DirectoryDirectory
Directory
DirectoryDirectory
You can choose the location where the files
can be saved.
1.Hold PLAY/PAUSE button to power on the player
2.Press the Menu button to enter the menu
options and use the scroller to select
the"Directory"function. Enter by pressing the
menu button again (As shown)
3.You can now select the options, when you
finish press the menu button to enter. There
are 3 options, including"All Root""Explore""Set
Dir"and"Return"(As shown)
57
Page 60

MP3 FuntionMP3 Funtion
MP3 Funtion
MP3 FuntionMP3 Funtion
4. To view files from the directory, select
"Explore"from the menu to view audio files in
the player, and press the menu button to enter.
Now you can view the files in the internal
memory.
Select"Root"you can access the files in
the root menu;"Return"to go back to the previous interface; to exit the directory,
select"CD"option in the directory (As shown):
Please note to set the memory typePlease note to set the memory type
Please note to set the memory type
Please note to set the memory typePlease note to set the memory type
(external) if you insert the SD/MMC(external) if you insert the SD/MMC
(external) if you insert the SD/MMC
(external) if you insert the SD/MMC(external) if you insert the SD/MMC
card.card.
card.
card.card.
5. When you select"All Root"the player will
only play the audio files in the root menu
including Ext Card root. We strongly recommend
users to save the audio files in the root menu
to optimize efficiency.
6. When you select the option of"Set Dir"
58
Page 61

MP3 FuntionMP3 Funtion
MP3 Funtion
MP3 FuntionMP3 Funtion
(Set Directory), first choose the memory type
( internal/external), and press the menu button to enter. You will now see the list of all
the directories.
When you finish, press the menu button
again to set your preference and return.
7.If you wish not to change the setting,
select"Return"to go back to the original
setting.
Note:Note:
Note:
Note:Note:
After selecting the directory, theAfter selecting the directory, the
After selecting the directory, the
After selecting the directory, theAfter selecting the directory, the
player will only play the Audio filesplayer will only play the Audio files
player will only play the Audio files
player will only play the Audio filesplayer will only play the Audio files
(MP3,WMA)under that directory. Also the(MP3,WMA)under that directory. Also the
(MP3,WMA)under that directory. Also the
(MP3,WMA)under that directory. Also the(MP3,WMA)under that directory. Also the
recorded files will also be saved underrecorded files will also be saved under
recorded files will also be saved under
recorded files will also be saved underrecorded files will also be saved under
the set directory.the set directory.
the set directory.
the set directory.the set directory.
59
Page 62

MP3 FunctionMP3 Function
MP3 Function
MP3 FunctionMP3 Function
A-B RepeatA-B Repeat
A-B Repeat
A-B RepeatA-B Repeat
This function is used when you want to
listen to a certain section repeatedly during
the playback. It is also great for language
learning.
1.Hold PLAY/PAUSE button to power on the player.
2.Select and play the desired track. While
the selected track is playing, press the A-B
Repeat button to designate the Start position.
You will see the icon"A-"in the display screen.
3.Press the A-B Repeat button again at the
expected time to designate the End position;
now the designated section will be repeated
automatically. (As shown)
Designate the Start position A Designate the End position B
4.To release the repeated section, press
the A-B Repeat button again or use the scroller
to go to the previous/next track.
60
Page 63

MP3 FunctionMP3 Function
MP3 Function
MP3 FunctionMP3 Function
FM radioFM radio
FM radio
FM radioFM radio
This player can also function as a FMThis player can also function as a FM
This player can also function as a FM
This player can also function as a FMThis player can also function as a FM
radio.radio.
radio.
radio.radio.
1.Hold PLAY/PAUSE button to power on the
player.
2.To listen to the FM radio, hold the"MODE/
FM"button to enter the FM mode. You can choose
to select the station manually or select it
automatically by the player.
3.To select the station manually
When you see"M anual"on the display screen,
this means you are under the FM manual mode.
Press the "F F/REW"button to search for stations,
the frequency will increase/decrease in 0.
1MHz. To search the next available station,
hold the "F F/REW"button for a longer period of
time.
4.You can also save the stations in the
menu. Press the menu button and enter the"F M
Mode"menu. Select "S ave Preset"to save the
61
Page 64

MP3 FunctionMP3 Function
MP3 Function
MP3 FunctionMP3 Function
settings. (As shown)
When you finish, press the menu button to
confirm the setting.
5.Listen to the Preset FM radio stations
Select the "P reset Mode"and press the menu
button and enter. Use the FF/REW button to
select the preset stations. The display screen
will also show the station frequency and the
number of the preset stations.(As shown)
6.Transfer FM signal to MP3 file.
Under the FM radio mode, hold the A-B/REC
button long time to transfer the FM signal to
MP3 file. After the file transfer, the FM
signal will be under the title as ENC-001.
62
Page 65

MP3 FunctionMP3 Function
MP3 Function
MP3 FunctionMP3 Function
MP3"and so on.(as shown)
7.Listen to the transferred files
Press Stop button to exit the FM Mode, and
enter the music mode. Under the music mode,
you will find track titles such as "ENC-***.
MP3"Press the play button to play.
8.Exit FM mode
Press Stop button to exit the FM Mode and
return to the music mode.
Note:Note:
Note:
Note:Note:
When searching for FM stations,When searching for FM stations,
When searching for FM stations,
When searching for FM stations,When searching for FM stations,
please connect the Earphone or wiredplease connect the Earphone or wired
please connect the Earphone or wired
please connect the Earphone or wiredplease connect the Earphone or wired
remote controller. This is because theremote controller. This is because the
remote controller. This is because the
remote controller. This is because theremote controller. This is because the
earphone will function as the antennaearphone will function as the antenna
earphone will function as the antenna
earphone will function as the antennaearphone will function as the antenna
for the FM radio.for the FM radio.
for the FM radio.
for the FM radio.for the FM radio.
The level of the FM signal will alsoThe level of the FM signal will also
The level of the FM signal will also
The level of the FM signal will alsoThe level of the FM signal will also
be different according to the positionbe different according to the position
be different according to the position
be different according to the positionbe different according to the position
or location of the unit.or location of the unit.
or location of the unit.
or location of the unit.or location of the unit.
63
Page 66

MP3 FunctionMP3 Function
MP3 Function
MP3 FunctionMP3 Function
Using SD/MMC cardUsing SD/MMC card
Using SD/MMC card
Using SD/MMC cardUsing SD/MMC card
You can choose to insert the SD/MMCYou can choose to insert the SD/MMC
You can choose to insert the SD/MMC
You can choose to insert the SD/MMCYou can choose to insert the SD/MMC
card for increasing the capacity of thecard for increasing the capacity of the
card for increasing the capacity of the
card for increasing the capacity of thecard for increasing the capacity of the
player.player.
player.
player.player.
1.Turn off the player
2.Open the lid of the USB/SD/MMC slot,
insert the SD/MMC card. Make sure the finger
sign is facing the USB port.
3.Close with lid. If the lid does not fit
well, this means the card might not be inserted properly.
4.You can now use the external memory.
Note:Note:
Note:
Note:Note:
Due to the compatible issue, we rec-Due to the compatible issue, we rec-
Due to the compatible issue, we rec-
Due to the compatible issue, we rec-Due to the compatible issue, we rec-
ommend known brand SD/MMC card such asommend known brand SD/MMC card such as
ommend known brand SD/MMC card such as
ommend known brand SD/MMC card such asommend known brand SD/MMC card such as
SANDISK or SCANDISK.SANDISK or SCANDISK.
SANDISK or SCANDISK.
SANDISK or SCANDISK.SANDISK or SCANDISK.
64
Page 67

MP3 FunctionMP3 Function
MP3 Function
MP3 FunctionMP3 Function
AAA Battery ExtensionAAA Battery Extension
AAA Battery Extension
AAA Battery ExtensionAAA Battery Extension
When the rechargeable battery is not enough
for the playback, you can choose to use the AAA
batter extension to increase the playtime for
your player.
1.Turn off the player. And take off NiMH
battery.
2.Put the AAA battery into the battery
extension slot. Attach and screw the battery
extension to the button of the player.
3.You can now use the external battery.
65
Page 68

MP3 FunctionMP3 Function
MP3 Function
MP3 FunctionMP3 Function
Convert into MP3 filesConvert into MP3 files
Convert into MP3 files
Convert into MP3 filesConvert into MP3 files
You can choose to convert external voice
file(Such as CD,VCD,DVD,Disk) into MP3 format,
and listen to them in your player.
1.Connect the wired remote controller to
the player.
2.Use the provided Line-In audio cable to
connect with remote controller.(the small connector to the wired remote controller; big
connector to recording source)
3.Turn on the player, confirmed
the "Source"setting (Line-In) in the REC setup
menu. Then, hold the A-B/REC button to start
the process.
4.You can also choose to set the sampling
and bit rate to optimize the quality or memory
efficiency before converting.
5.Press the Stop button to stop, you can
now listen the converted files.
Note:Note:
Note:
Note:Note:
It is not possible to convert if theIt is not possible to convert if the
It is not possible to convert if the
It is not possible to convert if theIt is not possible to convert if the
recording source does not support therecording source does not support the
recording source does not support the
recording source does not support therecording source does not support the
3.5"earphone plug.3.5"earphone plug.
3.5"earphone plug.
3.5"earphone plug.3.5"earphone plug.
66
Page 69

MP3 FunctionMP3 Function
MP3 Function
MP3 FunctionMP3 Function
USB ConnectionUSB Connection
USB Connection
USB ConnectionUSB Connection
You could transfer MP3 files through USB
port of your PC.
1.Make sure your PC support USB devices.
(Refer to the manual of your PC for the information about hardware).
2.Connect your PC directly or by USB cable
with digital audio.
3.The display window will show connecting
picture if connection is finished. As shown:
4.If you installed the attached software,
the PC will automatically find the device when
the player is connected to the PC . If not,
please install the provided management software first. We strongly recommend users install the provided management software under
all Window ¡¯s OS.
67
Page 70

MP3 FunctionMP3 Function
MP3 Function
MP3 FunctionMP3 Function
PC System RequirementPC System Requirement
PC System Requirement
PC System RequirementPC System Requirement
We strongly recommend installing the provided Management software before connecting
Digital Audio to PC.
IBM compatible personal computer
Pentium 166 MHz MMX or faster
Windows 98 SE, Windows 2000 or Windows
XP
USB Port
32MB RAM or more (64MB is recommended for
Windows 2000)
20MB free hard-disk space or more
4xCD-ROM drive or more
Sound Card (Optional)
Accessible to Internet (Recommended)
68
Page 71

MP3 FunctionMP3 Function
MP3 Function
MP3 FunctionMP3 Function
Managerment System RequirementsManagerment System Requirements
Managerment System Requirements
Managerment System RequirementsManagerment System Requirements
It is important to install Digital Audio
manager software before connecting Digital Audio
to PC. After putting the Installation CD into
CDROM Drive, USB Driver is installed
automatically.
The Digital Audio manager software requires
the following systems:
IBM compatible personal computer
Pentium 166 MHz MMX or faster
Windows 98 SE, Windows 2000 or Windows XP
USB Port
32MB RAM or more (64MB is recommended for
Windows 2000, XP)
20MB free hard-disk space or more
4xCD-ROM drive or more
Sound Card (Optional)
Accessible to Internet (Recommended)
69
Page 72

MP3 FunctionMP3 Function
MP3 Function
MP3 FunctionMP3 Function
Install driver for playerInstall driver for player
Install driver for player
Install driver for playerInstall driver for player
Automatic installingAutomatic installing
Automatic installing
Automatic installingAutomatic installing
Put CD which is attached in the gift to PC,
and it will install MP3 player managerment
automatically. After installing, if the operation of PC is Win98, you must reboot you PC,
then when you connect MP3 player with PC, you
can find PC will find new device and install
driver automatically. And if your pc have
win2000 operation system, if the win2000 is
not SP3 version or more, when you plug MP3
player to PC, the PC only can find one removable disk and can not find the other disk for
external card. So you must install external
driver for Win2000 Sp2 or low. You can go to
Win2000 SP direction in CD, and install the
driver referring to readme.txt by manual in
the direction. After you install the Win2000
SP, you can see another disk for MMC card after
you reboot your PC.
Installing by Manual Installing by Manual
Installing by Manual
Installing by Manual Installing by Manual
You can connect the MP3 player to PC
directly before you install driver, when it
connected, you will find a new device and the
PC will let you give correctly file to install
driver. You can install it referring to readme.
pdf at the Win98 Driver in CD.
70
Page 73

MP3 FunctionMP3 Function
MP3 Function
MP3 FunctionMP3 Function
Installation of Manager SoftwareInstallation of Manager Software
Installation of Manager Software
Installation of Manager SoftwareInstallation of Manager Software
Put the Installation CD into CD-ROM Drive
and then it will be installed automatically.
You should click the"Next"button on installation screens, and the Digital Audio Manager
Software and USB Driver will be installed. It
will remind you of restarting your PC when
installation is finished. At last, "/Start/
Program/Digital Audio Manager Software"is created in the Windows Menu, and the Digital
Audio icon is also created on the Desktop
window.
Click the icon on the Desktop Then the
interface of Digital Audio management system
will be shown
71
Page 74

MP3 FunctionMP3 Function
MP3 Function
MP3 FunctionMP3 Function
72
Page 75

MP3 FunctionMP3 Function
MP3 Function
MP3 FunctionMP3 Function
Sending files to Digital AudioSending files to Digital Audio
Sending files to Digital Audio
Sending files to Digital AudioSending files to Digital Audio
Before sending, please turn on the Digital
Audio and connect it to your PC directly or
with presented USB cable.
1.Double click the icon on the desktop.
2.Select files. First, select the folder
that includes the files to be transmitted from
the left Program Manager. Then the files in
the folder will be displayed in right
3.Click the Download button or select download option in the tool menu.
4.An interface of Copy will appear.
73
Page 76

MP3 FuntionMP3 Funtion
MP3 Funtion
MP3 FuntionMP3 Funtion
5.System will set up an EDISK directory
automatically and place the non-audio files to
EDISK in the removable disk of the Digital
Audio after you download the non-MP3 or WMA
files.
6.The management system will examine the
Digital Audio automatically. When the USB cable
is pulled out from the Digital Audio, the
management system could not work.
Caution:Caution:
Caution:
Caution:Caution:
1) Do not pull out digital audio while a
file is being downloaded. It will do harm to
your Digital Audio.
2) If the Digital Audio cannot work by
accident, take out the battery and reinsert it
3 seconds later. Reconnect Digital Audio to
PC.
3) If you could not find the downloaded
non-audio files in the removable disk of Digital Audio, please look into EDISK directory.
4) While you download file in Win98 OS, the
transmitting must regard to player displaying.
We simulate the transmitting by the player
displaying motivation. When the motivation stop,
which denote the transmitting finished, you
can take out the player safely. The player do
harm when you take out the player while the
transmitting have not completed.
74
Page 77

MP3 FunctionMP3 Function
MP3 Function
MP3 FunctionMP3 Function
Sending files from Digital Audio to PCSending files from Digital Audio to PC
Sending files from Digital Audio to PC
Sending files from Digital Audio to PCSending files from Digital Audio to PC
Digital Audio can also act as a removable
electronic disk. You could send files in the
disk to your PC with the management system but
the audio files are not permitted to send due
to copyright protection. Only files in the
EDISK are allowed.
1. Connect the Digital Audio and PC.
2. Select the files to be sent.
3. Click the Upload button in the manager
software.
4. The interface of transmission would be
displayed.
75
Page 78

MP3 FunctionMP3 Function
MP3 Function
MP3 FunctionMP3 Function
Caution:Caution:
Caution:
Caution:Caution:
Do not pull out the digital audio while a
file is being downloaded. Otherwise it will do
harm to your Digital Audio.
If the Digital Audio cannot work by accident,
take out the battery and reinsert it 3 seconds
later. Reconnect Digital Audio to PC.
It is not permitted to transmit music files
for copyright protection. System will warn you
"it cannot be send"if you select MP3 or WMA
files.
76
Page 79

MP3 FunctionMP3 Function
MP3 Function
MP3 FunctionMP3 Function
To Delete fileTo Delete file
To Delete file
To Delete fileTo Delete file
Besides deleting files directly by Digital
Audio, you could also achieve this by using
the management system of Digital Audio.
1. Connect the Digital Audio and PC; turn
on the Digital Audio and run management system.
2. Select the files to be deleted.
3. Click the Delete button.
You could also use the option of Deletion
in the player.
NoteNote
Note :
NoteNote
Once a file is deleted, it will notOnce a file is deleted, it will not
Once a file is deleted, it will not
Once a file is deleted, it will notOnce a file is deleted, it will not
be restored.be restored.
be restored.
be restored.be restored.
77
Page 80

MP3 FunctionMP3 Function
MP3 Function
MP3 FunctionMP3 Function
To refresh USB connectionTo refresh USB connection
To refresh USB connection
To refresh USB connectionTo refresh USB connection
For safer use while connecting Digital Audio
and PC, you could click refresh button in the
management system of Digital Audio to refresh
the USB connection.
78
Page 81

MP3 FunctionMP3 Function
MP3 Function
MP3 FunctionMP3 Function
Internal Memory DisplayInternal Memory Display
Internal Memory Display
Internal Memory DisplayInternal Memory Display
The management system of Digital Audio can
display the internal memory by numbers and
figures. In the above figure, green represents
used memory while green available memory.
79
Page 82

MP3 FunctionMP3 Function
MP3 Function
MP3 FunctionMP3 Function
Trouble Diagnosis
The LCD display window shows nothing after turning
on MP3 player.
· Check to see if the battery has been inserted.
· Check to see if the battery needs replacement.
· Try reinserting the battery or replace it.
· Take out the battery and insert it correctly after 5
seconds.
2. The LCD display “Error” after turning on MP3
player?
If you format the MP3 player by windows FAT32, it
will show “Error, Reformat Media”, now you must reformat it by manager formatting tools in the MP3 player
manager.
3. The buttons are not workable.
· Check to see if the “Hold” button is on.
· Release the Hold button.
4. No sound could be heard while playing MP3 files.
80
Page 83

MP3 FunctionMP3 Function
MP3 Function
MP3 FunctionMP3 Function
· Check to see if the volume is too low and turn it up.
· Check to see if the MP3 player is being connected
with computer.
· Check to see if there is any music file in the memory.
5. I can’t download music files after connection.
· Check to see if Manager Software is setup.
Check the removable disk have shown in PC explore. If
not, please check your USB devices or you have install
manager software.
81
Page 84

MP3 SpecMP3 Spec
MP3 Spec
MP3 SpecMP3 Spec
Technical Specifications:Technical Specifications:
Technical Specifications:
Technical Specifications:Technical Specifications:
Memory 64/128M/256M(Build-in Flash)
Battery Rechargeable Battery(720mAh)
Battery extension AAA Alkaline battery
LCD 100*56Dot Matrix with Blue backlight
Dimensions 62mmx62mmx15mm
Signal/noise 90dB
Earphone output 5mW+5mW
Frequency Range 20Hz-20KHz
Supported voice recording bit rate 8Kbps~256Kbps
Music format Mp3,WMA
Recording format
Support language display
Supported Mp3 music bit rate 8Kbps-320Kbps
MPEG1 Layer3, MPEG2 Layer3, MPEG1
Layer2.5
Chinese(simplified/Traditional),Japanese, Korean and English
82
 Loading...