

Page 1

Introduction
Thank you for purchasing the MP3 player. It is a
digital audio player. You do not need to carry a
cassette tape or CD anymore.
With the player, enjoying CD-quality music
becomes a breeze. You can store dozens of MP3
files in the built-in flash memory. Also, you can
listen to the radio or even record your favorite
radio program, an interview, conversation or
lecture.
The sound in this light shock-resistant player
will not skip or stretch at all. The file name and
MP3 track title are also conveniently displayed on
the LCD in the middle of the player for easy
reference.
Page 2
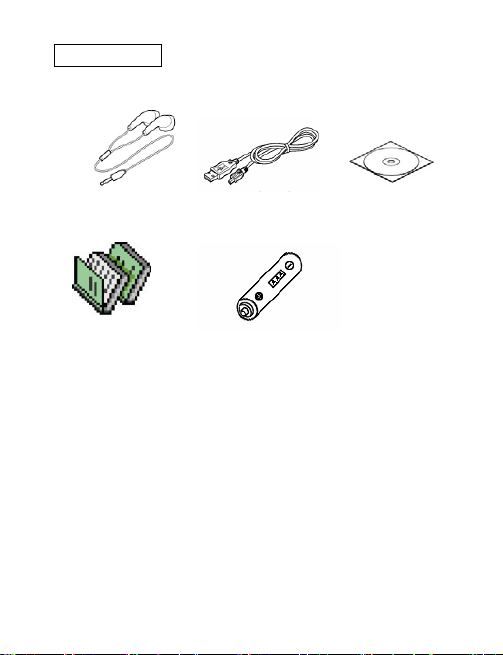
Accessories
Stereo Earphone USB Cable Installation CD
Manual 1 AAA battery
System Requirements
■ Pentium 166 MHz, 32MB memory
■ 20MB hard disc space
■ USB 1.1 port
■ CD-ROM Drive 4X speed or above
Microsoft Windows 98 / 98SE / 2000 / XP
Page 3

Knowing your MP3 Player
LCD
128*64 pixels, OLED
5-ways Switch
Press the 5-ways switch to enter MENU
Dial the 5-ways switch up or down to increase or
decrease the volume level
Dial the 5-ways switch left or right to skip to
previous or next track
Dial and hold the 5-ways switch left or right to fast
forward or reverse within the current track
USB port
Upload/ download files via this port with the USB
cable connected to computer
SD/MMC
Supports normal MMC/SC cards
Earphone
Plug the earphone into the jack for listening to the
Page 4

player
Hold switch
EQ
Press the button to switch 5 play modes - Normal,
Rock, Jazz, Classical and Pop
Play / Pause / Power Button
Press the button to power on the player, Playback
or pause playback of music or voice files, Press
and hold to power off the player
REC / A-B
Press and hold the button to record music or
voice files, Press to repeat between section A and
B during music mode
Page 5

Connecting to PC
Power on your computer.
Plug the flat USB connector of the USB
cable we attached to a USB port of your
computer.
Plug the mini connector of the USB cable we
attached to the player.
The player will power on automatically.
“Ready” appears on the LCD of the player,
indicates the connection with the computer has
established successfully.
When the player is connected to your computer,
it starts working as a removable hard disk on your
computer. You can transfer, copy, paste and
delete the data (audio files, voice recording files,
etc.) that stored on your player into your computer
very conveniently. It can also be used for storage
of non-music files.
Page 6
Function & Keys Instructions
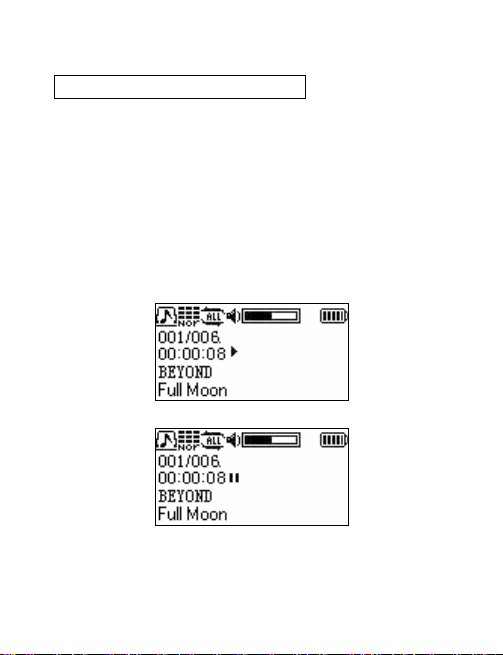
Play the Music
When you press Play/Pause button, you will
see the below pictures show the player in which
play mode, music serial number/total number,
playing time, music singer and name. At lowest
row, it shows music name or ID3 information.
When the player is in status of play and you
press Play/Pause, the player will pause playback.
Page 7

To skip to previous or next track, please dial
the 5-ways switch left or right (FF/REW).
To power off the player, please press and
hold Play/Pause for 3 seconds.
When the player is in status of play or pause,
you can dial the 5-ways switch up or down to
increase or decrease the volume level. The
adjusting range of volume is 32 levels.
To fast forward or reverse within the current
tract, please dial and hold the 5-ways switch left
or right.
Note: When the player is in status of play, the
battery volume may flop because different
power consumption will make the battery
volume librating.
Menu
Press the 5-ways switch to enter MENU and
Page 8
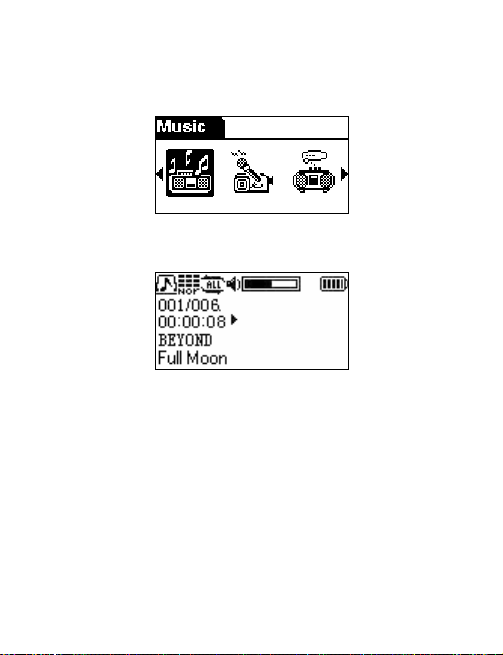
dial it left or right to choose sub-menu, then press
it again to enter sub-menu as below.
Select Music to go into playing mode of music.
Select Voice to go into playing mode of recorded
voice WAV files. In such status, you still can
choose the corresponding function in the same
menu.
Page 9
Select FM Tuner to enter radio interface.
Select Setting to enter parameters setting menu.
Select Delete File to enter files deleting interface.
Page 10
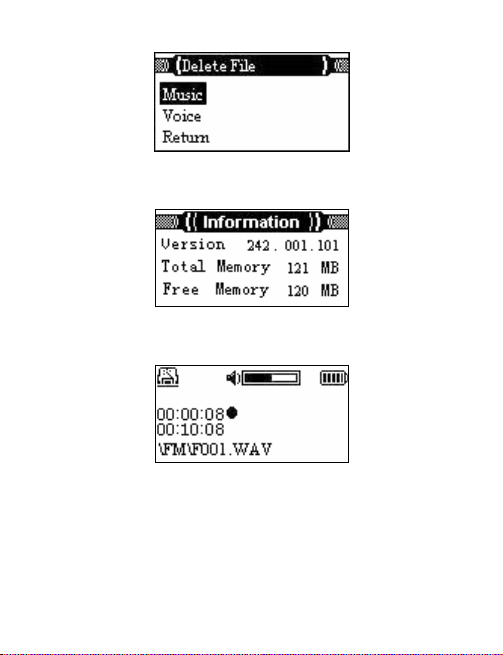
Select Information to enter information interface.
Select Record to enter recording interface.
FM Function
Adjust frequency - Press the 5-ways switch
to enter menu and dial it to select FM, then press
the switch to enter Preset mode as below.
Page 11
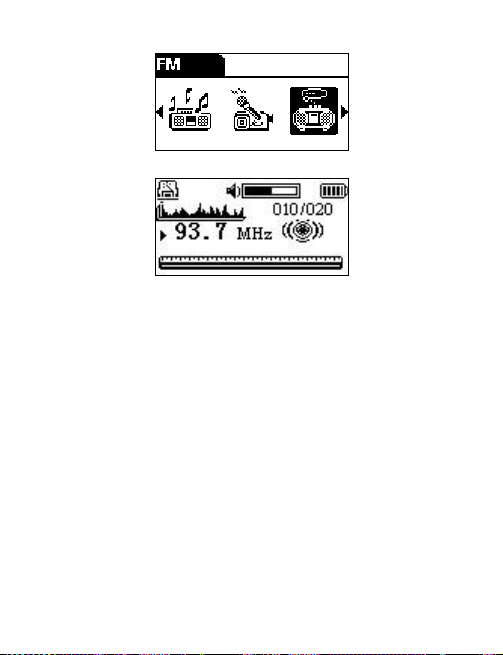
The Preset mode – It sets 20 fixed channels.
The first time you enter the mode, the player will
search channels automatically. After searching,
you can choose each channel by dial the switch
left or right.
The Manual mode – Press the switch to
enter the interface as below. You can adjust
channel manually by dialing the switch left or right.
Dialing once; 100kHz will be changed. Dialing and
hold the switch, frequency will be changed
Page 12

100kHz continuously.
If you want to save the frequency you adjusted
manually, press the A-B button shortly. Then, the
channel will be saved in the Preset mode for
listening in the future.
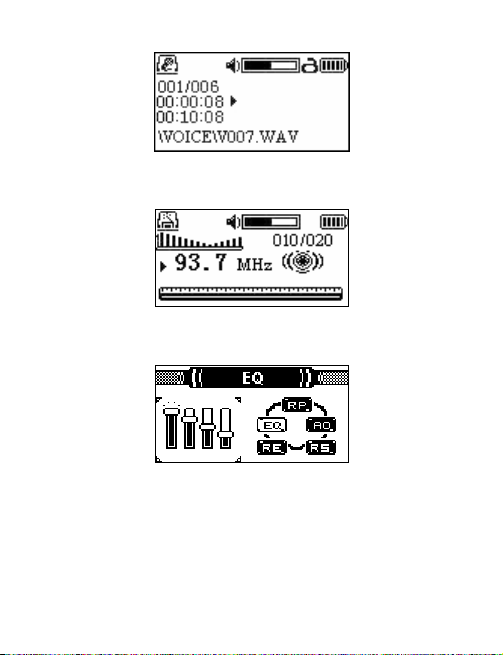
FM Radio Recording
You can record FM programs as MP3 or WAV
files. Press and hold the A-B button to enter
recording interface as below.
Press the 5-ways switch to pause the recording.
Page 13

Press it again to keep recording. Press
Play/Pause to stop recording and return to FM
sub-menu. If you want to back to the Music or
voice mode to listen to the files you recorded,
please press and hold the 5-ways switch.
Note: The volume control is still useful by
dialing the 5-ways switch up or down.
Set Recording Setting
You can record files by built-in microphone and
FM. Press the 5-ways switch to enter menu and
dial it left to select Setting.
Press the switch to enter Setting and dial it left
or right to choose Rec Setting. Press the menu
Page 14

button to enter Rec Setting as below.
1. Select Source to set the recording sources,
microphone or FM. If you choose microphone, the
voice or music will be recorded by built-in
microphone from outside. If you choose FM, the
voice or music will be recorded from FM
programs.
2. Select Encoder to set the format of
recorded files, including MP3 and WAV. You
can press the Menu button for selection.
3. Select Quality to set the quality of recording
files, including high, middle and low levels.
The better the sound quality is; the more
space it takes. Please select it depends on
Page 15

your needs.
Recording Operation
There are 2 ways to begin recording.
1. Recording by press and hold REC / A-B
button – The recorded files will be named
and saved automatically to Voice folder at
root directory as M010.MP3 or V007.WAV. As
below pictures, the LCD shows present LCD
shows present recording time, left recording
time and file name.
To pause recording, please press the 5-ways
switch. Press it again to keep on recording.
Press Play/Pause button to stop recording.
Press Play/Pause again to play the recorded
Page 16

file.
2. Press the 5-ways switch to enter menu and
dial it to select Record, then press the switch
to enter recording interface as below.
To pause recording, please press the 5-ways
switch. Press it again to keep on recording.
Press Play/Pause button to stop recording.
Press Play/Pause again to play the recorded
file.
Play Recorded files
To play recorded MP3 files, please enter
menu and select Music.
To play recorded WAV files, please enter
menu and select Voice as below. Choose the
Page 17

recorded file that you want to play by dialing the
5-ways switch left or right, then press Play/Pause
button to play the WAV file.
When you stop recording, you can press
Play/Pause button to listen to the recorded file
immediately. The playing picture is as below.
If there are no recorded files or it’s the first time
you enter the interface, No Files will be shown as
below.
Page 18

To press the menu button, you can also
enter the function menu to finish all selections and
the settings.
To press Play/Pause to stop the status of
playing and back to Voice interface.
Note: To play MP3 recorded files must under
Music mode. To play WAV recorded files are
required to under Voice mode.
Set MP3 Equalizer
There are 2 ways to choose different play
modes to enjoy music better.
1. Press EQ button once; play mode will be
changed once.
Page 19

2. Press the 5-ways switch to enter menu and
dial it to select Setting, then press the switch to
enter EQ sub-menu. It has 5 play modes –
Normal, Rock, Jazz, Classical and Pop as below.
If you don’t want to change the current setting,
choose EXIT to quit the sub-menu. Then press
and hold the 5-ways switch to back to the Music
mode. After setting, EQ mode will be shown in the
playing interface as below.
Page 20

8. Set Repeat Mode
Press the 5-ways switch to enter menu and dial
it to select Setting, then press the switch to enter
Repeat sub-menu. It has 5 repeat modes –
Normal, Repeat Track, Repeat All, Shuffle, and
Shuffle Repeat as below.
Page 21

Repeat Track: a certain piece of music plays
loopy.
Repeat All: all music play continuously and
orderly until you do other operation.
Shuffle: play at shuffle one music.
Normal: All music plays orderly once and the
player stops playing.
Shuffle Repeat: all music plays at shuffle
without order.
If you want to back to the Music mode, please
choose EXIT to quit the sub-menu, then press
and hold the 5-ways switch.
Repeating Function
If you need to listen to some segment
repeatedly, like language study, you can use the
function by pressing A-B button to choose the
segment.
When the player is in status of play, please
Page 22

press A-B to set the start point (A) and press it
again to set the end point (B) as below.
(A)
(B)
The player begins to play the repeated
segment.
To Press A-B or left/right to choose another
music to cancel the loop function.
Set Automatically Closing Time
There are 5 times for optional to power off the
player automatically. Press the 5-ways switch to
enter menu and dial it to select Setting, then press
Page 23

the switch to enter Auto Off sub-menu as below.
Select Disable, the player will not close
automatically. Select 1 Min, 2Mins, 5 Mins or
10Mins, the player will close automatically at the
corresponding minutes under stop or pause mode.
If you want to back to the Music mode, please
press and hold the 5-ways switch.
Delete Files
You can use menu function to delete the files in
the player or format them by the management
Page 24

software we attached.
Press the 5-ways switch to enter menu and
dial it to select Delete, then press the switch to
choose music or voice files that you want to
delete as below.
To choose music or voice files, you will enter
the delete interfaces as below.
Page 25

If you don’t want to delete the current file,
please choose NO to back to the sub-menu.
Select the file you want to delete and choose YES
to back to the sub-menu. Then you can continue
deleting files. If you want to back to the Music
mode, please press and hold the 5-ways switch.
View the Using Volume of the Player
Press the 5-ways switch to enter menu and dial
it to select Information, and then press the switch
to enter as below.
Page 26

Note: If total volume and left volume are not
shown on the LCD correctly, please format the
player with the management software to
insure the correct showing data.
Display lyric Function
Lyric files are of LRC format and they have the
same name with the corresponding music files.
You can download them by "Mini Lyric" or make
them by special tools.
When playing music, the screen will show
two lines of lyric if the music has corresponding
lyric.
Page 27

Files Browser Function
Choose FOLDER item and the file list is
showed in the screen. You can choose each file
with the left/right button in the wheel.
Choose music file and press the MODE button,
the menu will be popped out, as picture one:
choose PLAY to play the music being chosen;
choose PLAYLIST to pop out submenu as picture
two: choose ADD to add the music to the
PLAYLIST, choose EXIT to delete the music from
the PLAYLIST; choose DELETE to delete the
music file; choose EXIT to exit the menu.
Choose folder and press the MODE button to
enter this item, the whole content of the folder will
be showed. Press VOL-button to return the parent
menu; Press MODE to return to the play mode.
Page 28

User Interface
For the convenience of users, the player has
8 language items for users to choose. Whatever
language you choose, the screen and ID3
information will show the corresponding language.
For the convenience of users’ operation, the
content of the current language is shown in
English.
Page 29

Trouble Shooting
Before using, we strongly suggest to install the
management software first and format the player.
In win98, please install the management software
and connect the player to recognize device.
During transferring process, the speed
shown in the computer is faster different because
of different OS, so the speed should be up the
player. The transferring speed of the player is
shown with animation. The stopping of animation
means the end of transfer.
Plug and play function is only for
Win2000/XP. It doesn’t support Win98 and
Win98SE, so please install the driver in
management software.
Q: No reaction on the player when press the
Play/Pause button.
A: There is no battery or the battery power is
Page 30

consumed. Please install a new battery.
Q: After opening the player, no reaction
when press buttons.
A: The hold switch is locked. Unlock the
switch and try it again.
Q: After connecting, the mobile storage icon
of the player can’t be found.
A: You may not install the management
software, or the application has be corrupted.
Install the application again. Or the mainboard
has no USB port. If so, please contact mainboard
agent for upgrading.
Q: The time is shown in a mess when music
is played.
A: The MP3 files compressed with the VBR
format will cause the time change during playing.
You can compress them with the fixed rate format
to solve the time problem.
Page 31

Q: Up-plug the player brings out abnormity
of the computer.
A: It’s for the plugging or up-plugging of
USB. In order to avoid the problem, we suggest
don’t up-plug the USB while transferring.
Q: The response of pressing button is slow
and earphone doesn’t work normal.
A: The compressed format may not be
supported by the system or the rate is beyond the
following rate. Please delete the music or
compress the music according to the standard
with some tools again. The music format supports
MPEG I Layer 3, MPEG I Layer 2, MPEG I Layer
1, MPEG 2 Layer 3, MPEG 2.5 Layer 3 and WMA.
The rate range of MP3: 32Kbps~256Kbps.
The rate range of WMA: 64Kbps~192Kbps.
Q: Why isn’t the general memory shown
same in fact?
Page 32

A: The player stores application and
Chinese character library, so the memory shown
is smaller than the actual.
Q: Why do the preferences often lose?
A: We often save preferences in Setting.dat.
If you delete files or format the player, these
preferences will lose, so you need to set again.
Technical Specifications
Memory 64 / 128 / 256 / 512M
Battery One AAA battery
LCD 128 * 64 pixels, OLED
Signal / Noise 75db
Earphone Output 5mW + 5m W
Music Format MP3 MP3, WMA, WAV
Record Format MP3, PCM WAV
Language Library ISO 8859
Page 33

Handleiding
g
Accessories
1. De accesoires van uw MP3 speler
Installatie CD
Handleidin
2. Gebruik
2.1 Power aan / uit
USB verleng kabel
AAA batterij
Page 34

Druk op de Play/Pause/Power knop. De
‘Power-aan’ afbeelding verschijnt
Druk op de Play/Pause/Power knop en houd deze
ingedrukt totdat bovenstaande afbeelding
verschijnt en de voortgang indicatie verdwijnt. De
MP3 speler is dan afgesloten.
2.2. ‘Hold’ funktie
Beweeg de hold knop in de richting van de pijl. De
Mp3 speler zal de hold afbeelding weergeven.
Alle funkties zijn nu uitgeschakeld. U kunt de hold
funktie uitschakelen door de knop terug te
bewegen.
Page 35

Verbind de USB aansluiting van de MP3 speler
met de aansluiting van uw PC. (De meegeleverde
USB kabel kan hiervoor gebruikt worden). De
bovenstaande afbeelding ‘connect’ zal
verschijnen in uw MP3 speler.
2.4 Display
1 2 3 4 5
8
9
6
7
11
1. Afspeel status
Page 36

2. Equalizer effect
‘3. loop’ status
4. Volume
5. ‘locked’ status
6. Batterij status
7. Herhaal teken
8. De actuele muziek
9. Afspeel tijd
10. Artiest
Bestands naam
2.5 Afspelen van muziek
Uw MP3 speler ondersteunt WMA/MP3
bestanden. Nadat de MP3 speler geactiveerd is,
drukt u kort op de play/pause/power knop om
bestanden af te spelen. U kunt stoppen door de
knop nogmaals in te drukken. Door de menu knop
naar links of naar rechts te bewegen (REW/FF)
kunt u naar het volgende of vorige nummer gaan.
Page 37

Door de knop langer vast te houden kunt u een
nummer versneld afspelen. Door omhoog en
omlaag te bewegen verhoogt of verlaagt u het
volume.
2.6 FM Radio
Uw Mp3 speler is geschikt om naar FM radio te
luisteren. Druk kort op de menu knop om de radio
functie in te schakelen. Duw de Menu knop naar
links of rechts om een vorig of volgend station te
kiezen.
2.7 Spraak opname
Page 38

Om spraak op te nemen dient u op de A-B/REC
knop te drukken. Houd deze ingedrukt om het
signaal op te nemen. Druk op de
Play/Pause/Power knop om te stoppen.
Indien u herhaaldelijk naar hetzelfde bestand wilt
Page 39

luisteren, drukt u éénmaal op de A-B knop tijdens
afspelen om het begin te markeren. Druk
nogmaals om het eindpunt te markeren. De MP3
speler zal het geselecteerde gedeelte
herhaaldelijk afspelen. Tijdens het afspelen kunt u
de A-B knop indrukken of een ander
muziekbestand kiezen om het afspelen te
beëindigen.
2.9 ‘Encoder’ funktie
In de opname functie heeft u keuze uit 3 opties;
bron, ‘encoder’ en kwaliteit. Beweeg de Menu
knop naar links of rechts om de gewenste
mogelijkheid te kiezen, druk vervolgens op de
menu knop om de instellingen te wijzigen. Als u
Page 40

het menu wilt verlaten dient u de menu knop
langere tijd ingedrukt te houden. In het ‘bron’
menu kunt u kiezen uit: microfoon en FM. U kunt
het formaat van de opname instellen op MP3 of
WAV. De kwaliteit kan ingesteld worden op hoog,
gemiddeld en laag. Een kwalitatief goede opname
neemt meer ruimte in dan een kwalitatief mindere
opname.
2.10 Taal instellingen
Draai het menu om de gewenste taal in te stellen.
Er is o.a. keuze uit Engels en Duits.
 Loading...