

Page 1
ATTACH YOUR RECEIPT HERE
ITEM #1438136
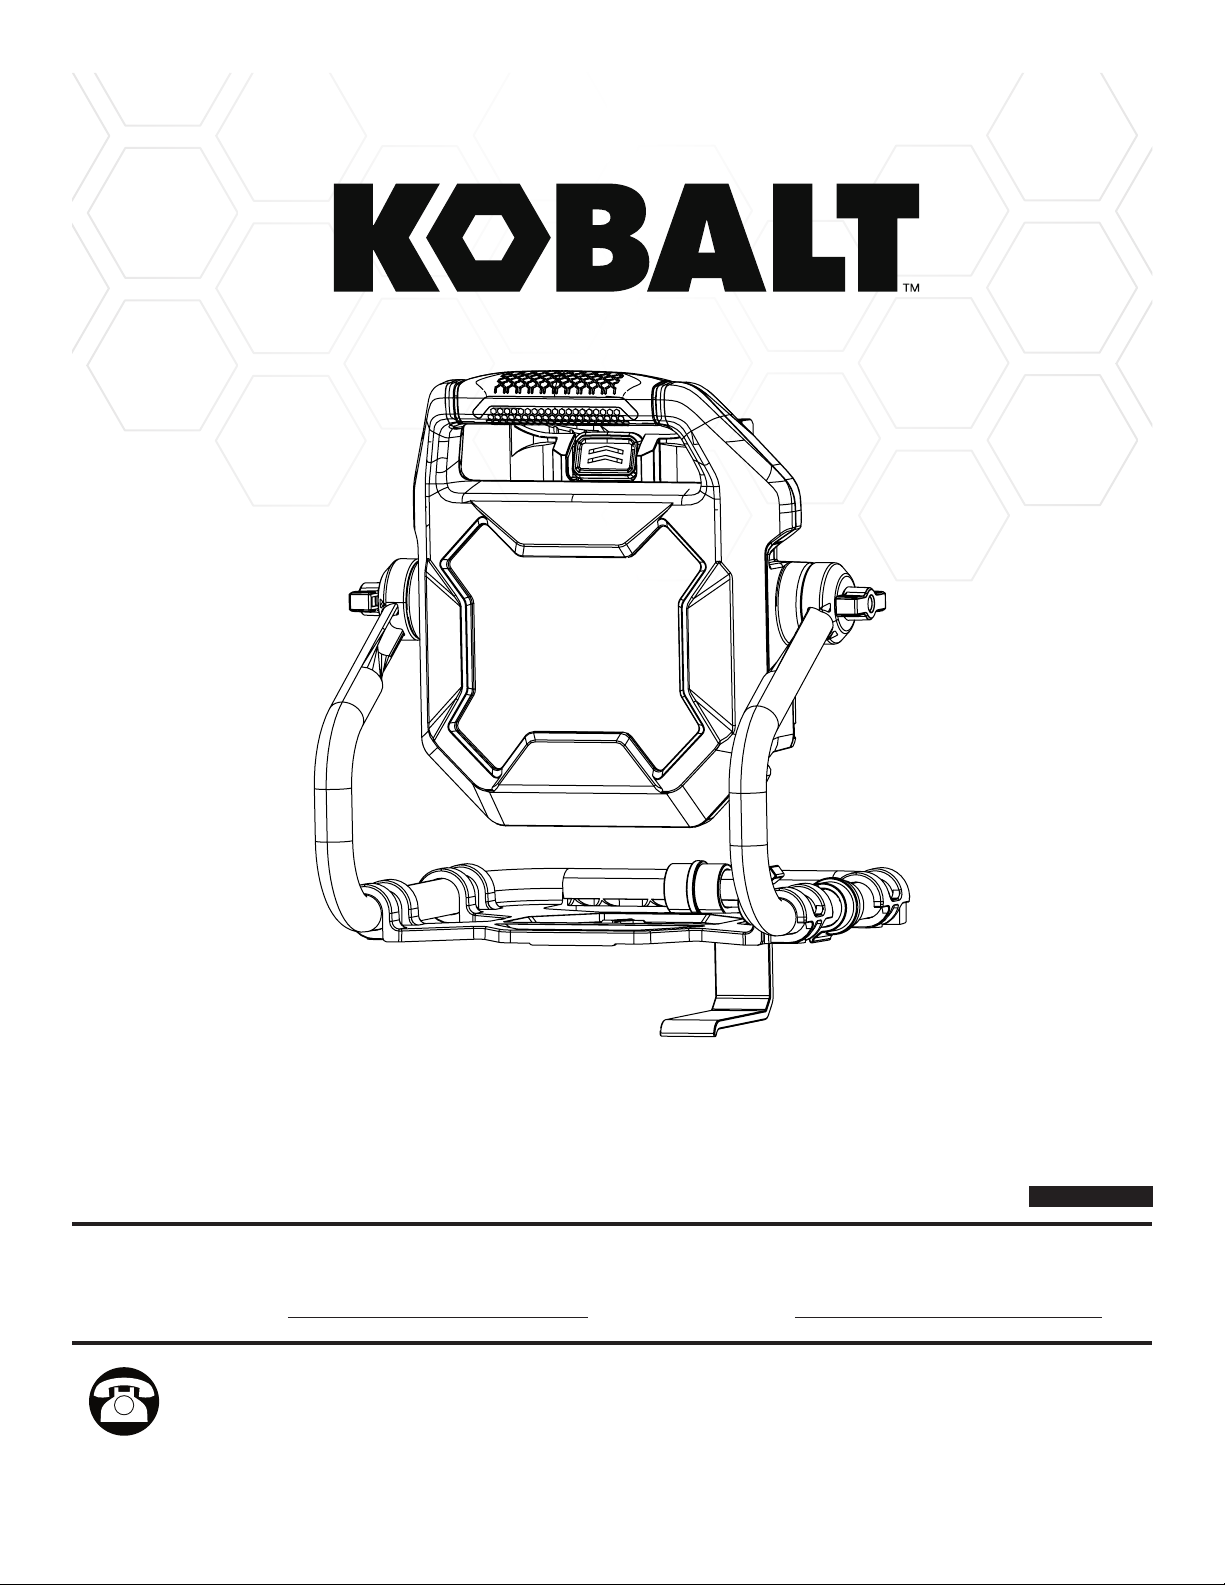
40V SITTING WORKLIGHT
MODEL #WL 2040-06
Español p. 12
Serial Number Purchase Date
Questions, problems, missing parts? Before returning to your retailer, call our customer
service department at 1-888-3KOBALT (1-888-356-2258), 8 a.m. - 8 p.m., EST, Monday -
Friday.
PH19222
1
Page 2

TABLE OF CONTENTS
Product Specications ................................................................................................. 2
Package Contents ....................................................................................................... 3
Hardware Contents ...................................................................................................... 3
Symbols ..................................................................................................................... 4
Safety Information ...................................................................................................... 5
Assembly Instructions .................................................................................................. 8
Operating Instructions ................................................................................................. 9
Care and Maintenance.............................................................................................. 10
Troubleshooting ........................................................................................................ 10
Warranty ................................................................................................................. 10
Replacement Parts List .............................................................................................. 11
PRODUCT SPECIFICATIONS
SPECIFICATIONS
Input 40V / 120 V, 60 Hz, 0.2 A
Illumination 2,000 lumens
Running time
Rotation 360°
Weight without battery 3.35 lbs
Battery model
Charger model KRC 40-06
The recommended ambient temperature range:
Item Temperature
Appliance Storage Temperature Range -4˚ F (-20˚ C) ~ 158˚ F (70˚ C)
24 hours (2000 lumens /1000 lumens / off)
KB240C-06 / KB2540C-06 / KB340C-06 /
KB440C-06 / KB540C-06 / KB640C-06
Appliance Operation Temperature Range 6.8˚ F (-14˚ C) ~ 104˚ F (40˚ C)
Battery Charging Temperature Range 39˚ F (4˚ C) ~ 113˚ F (40˚ C)
Charger Operation Temperature Range 39˚ F (4˚ C) ~ 113˚ F (40˚ C)
Battery Storage Temperature Range 32˚ F (0˚ C) ~ 73˚ F (23˚ C)
Battery Discharging temperature Range 6.8˚ F (-14˚ C) ~ 113˚ F (45˚ C)
2
Page 3
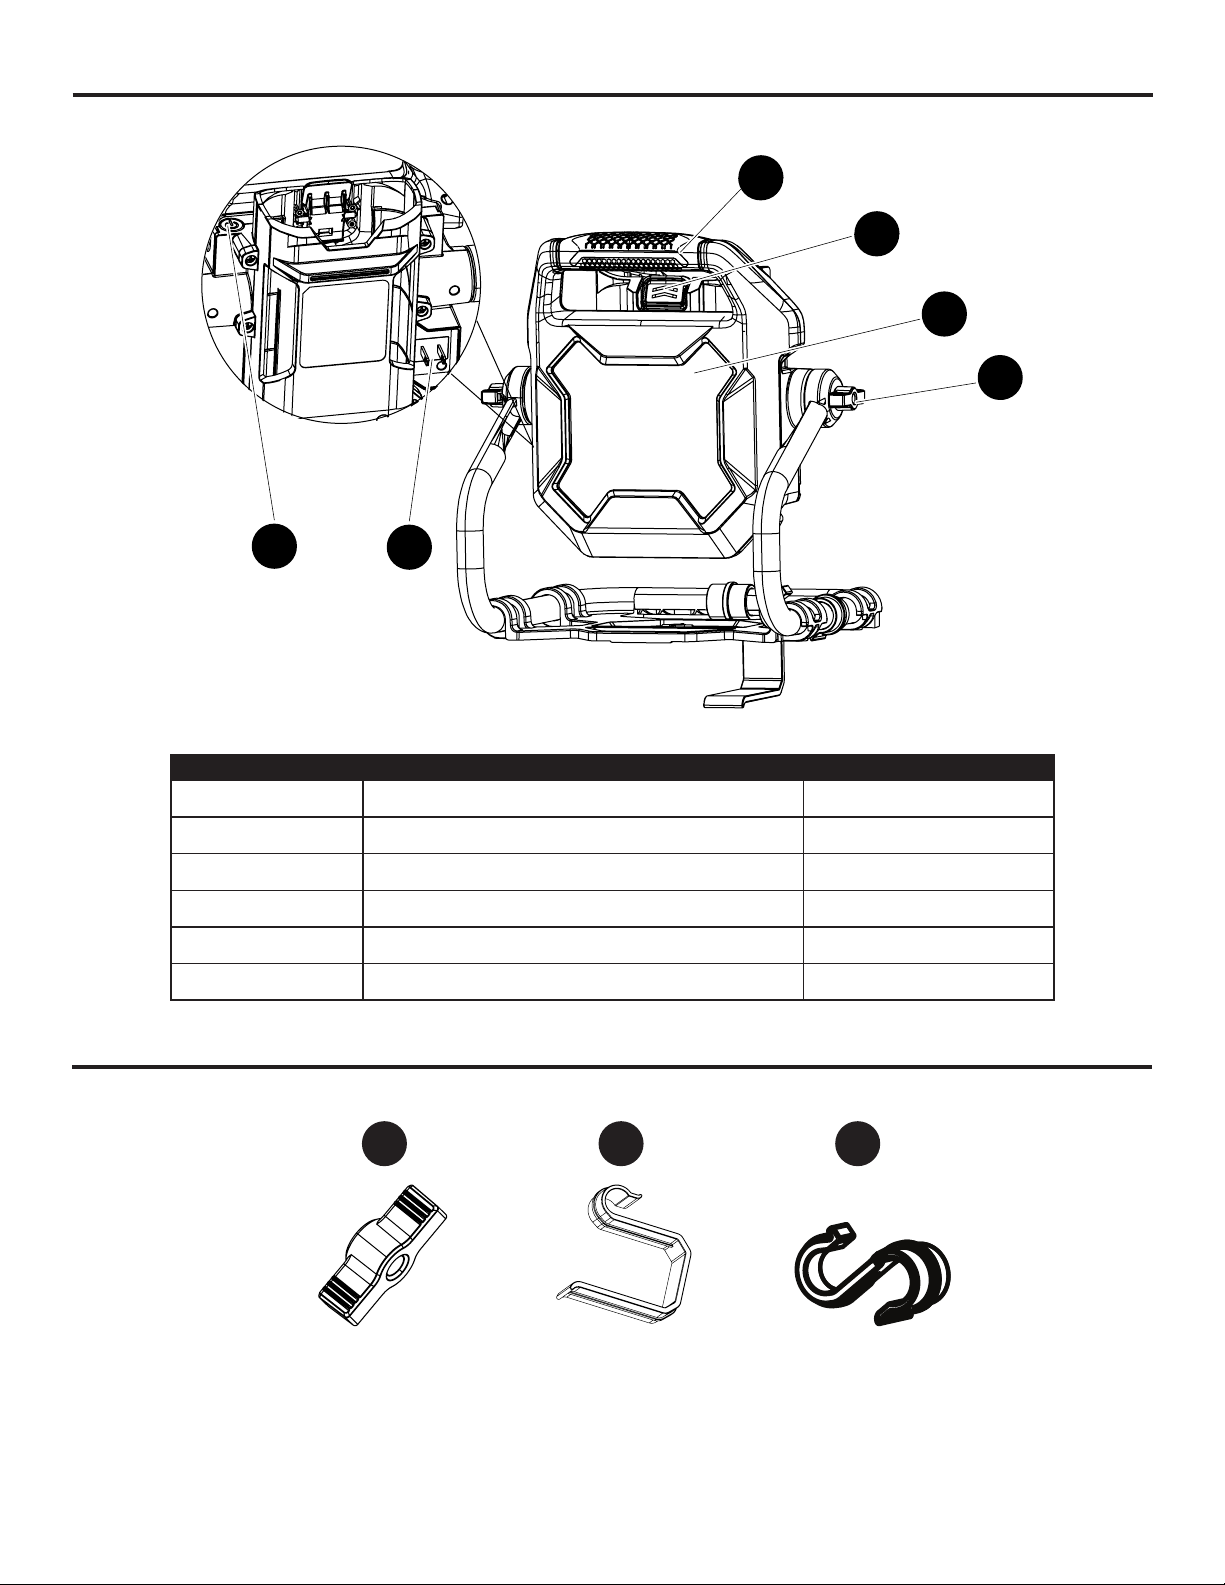
PACKAGE CONTENTS
D
C
B
A
E
F
PART DESCRIPTION QUANTITY
A Knob (tighten / loosen) 2
B Lens 1
C Battery-release button 1
D Auxiliary handle 1
E ON/OFF switch 1
F Plug 1
HARDWARE CONTENTS (not shown actual size)
AA BB
Knob
Qty. 2
Hook
Qty. 1
3
CC
S Hook
Qty. 1
Page 4
SYMBOLS
Some of the following symbols may be used on this product. Please study them and learn their meaning. Proper interpretation of these symbols will allow you to operate the product better and safer.
SYMBOLS NAME DESIGNATION/EXPLANATION
V Volts Voltage
A Amperes Current
Hz Hertz Frequency (cycles per second)
Wh Watt Hour Energy Storage Capacity
Ah Amp Hour Current Capacity
Direct Current Type or a characteristic of current
Lm Lumen Brightness of the light
Wet Conditions Alert Do not expose to rain or use in damp locations.
Read The Operator’s
Manual
Safety Alert Precautions that involve your safety.
The following signal words and meanings are intended to explain the levels of risk associated with
this product.
SYMBOL SIGNAL MEANING
DANGER
WARNING
CAUTION
CAUTION
WARNING
• To avoid serious personal injury, do not attempt to use this product until you have read this Owner's
Manual thoroughly and understand it completely. If you do not understand the warnings and
instructions in this Owner's Manual, do not use this product. Call 1-888-356-2258 for assistance.
To reduce the risk of injury, user must read and understand
operator’s manual before using this product.
Indicates an imminently hazardous situation, which, if not
avoided, will result in death or serious injury.
Indicates a potentially hazardous situation, which, if not
avoided, could result in death or serious injury.
Indicates a potentially hazardous situation, which, if not
avoided, may result in minor or moderate injury.
(Without Safety Alert Symbol) Indicates a situation that may
result in property damage.
4
Page 5

SAFETY INFORMATION
WARNING: IMPORTANT SAFETY INSTRUCTIONS
Read and understand all instructions before using this product. Failure to follow all instructions listed
below may result in electric shock, re, and/or serious personal injury.
The term “power tool” in all of the warnings listed below refers to your mains-operated (corded) power
tool or battery-operated (cordless) power tool.
• To disconnect, turn all controls to the off (″O″) position, then remove plug from outlet.
• Do not unplug by pulling on cord. To unplug, grasp the plug, not the cord.
• Unplug from outlet when not in use and before servicing or cleaning.
• Do not operate any product with a damaged (cord or) plug, or after the product malfunctions or is
dropped or damaged in any manner. Return product to the nearest authorized service facility for
examination, repair, or electrical or mechanical adjustment.
• Use only extension cords which have plugs and receptacles which accept the product’s plug.
Replace damaged extension cords.
• Make sure your extension cord is in good condition. When using an extension cord, be sure to use
one heavy enough to carry the current your product will draw. An undersized extension cord will
cause a drop in line voltage resulting in loss of power and overheating. The table on the next page
shows the correct size to use depending on cord length and nameplate ampere rating. If in doubt,
use the next heavier gauge. The smaller the gage number, the heavier the cord.
• Don’t Abuse Cord – Never carry product by cord or yank it to disconnect from receptacle. Keep cord
from heat, oil, and sharp edges.
• Disconnect the product from the power supply when not in use, before servicing, when changing
bulbs (lamp), cleaning, and similar actions.
• Do not insert foreign objects into this product.
• Servicing of a product requires extreme care and knowledge of the system, and should be done
only by qualied service personnel. Replacement parts for a product must be identical to those
parts in the product.
• If operating a product in a damp location is unavoidable, then the product should only be connected
to a circuit that is protected by a ground-fault circuit-interrupter (GFCI). Use of a GFCI reduces the
risk of electric shock.
• Store product indoors when not in use.
• Keep out of reach of children.
• Do not clean this product with a water spray or the like. Follow manufacturers cleaning instructions.
• Avoid direct eye exposure. Do not direct the light beam at persons or animals and do not stare into
the light beam yourself (not even from a distance). The work light can cause ash blindness.
• Do not use the work light in road trafc. The cordless work light is not approved for illumination in
road trafc.
• Disconnect the battery pack from the work light before making any adjustments, changing
accessories, or storing power tools, etc.
• Do not permit children to use the work light; it is not a toy. Children can unintentionally blind
themselves or other persons.
• Recharge only with the battery charger specied by the manufacturer. A battery charger that is
suitable for one type of battery pack may create a risk of re when used with another battery pack.
• Use only with specically designated battery packs. Use of any other battery packs may create a
risk of injury and re.
• When battery pack is not in use, keep it away from other metal objects like paper clips, coins,
5
Page 6

SAFETY INFORMATION
keys, nails, screws, or other small metal objects, that can make a connection from one terminal to
another. Shorting the battery terminals together may cause burns or a re.
• The battery can be damaged by pointed objects such as nails or screwdrivers or by force applied
externally. An internal short circuit can occur and the battery can burn, smoke, explode or overheat.
• Under abusive conditions, liquid may be ejected from the battery; avoid contact. If contact
accidentally occurs, ush with water. If liquid contacts eyes, additionally seek medical help. Liquid
ejected from the battery may cause irritation or burns.
• The work light is ruggedly constructed. It should, however, be handled with care.
• Store idle power tools out of the reach of children and do not allow persons unfamiliar with the
power tool or these instructions to operate the power tool. Power tools are dangerous in the hands
of untrained users.
• Have your power tool serviced by a qualied repair person using only identical replacement parts.
This will ensure that the safety of the power tool is maintained.
• Battery disposal should be in compliance with the local regulations that address the disposal of
hazardous materials, and do not incinerate battery pack.
GENERAL SAFETY RULES
• Verify that the power tool is secure while transporting.
• Store the power tool in a dry area that will prevent unauthorized use or damage. Keep out of the
reach of children.
• Keep handles dry, clean, and free of debris. Clean the power tool after each use. Refer to the
Maintenance Section in this manual for more information.
• If the labels on the power tool become defaced or start to lift off, contact customer service
at 1-888-356-2258.
• Keep these instructions in a safe place for future reference. Refer to them often and use them to
instruct other users. Anyone who uses this power tool must read these instructions carefully.
• Maintain the power tool with care. Follow the instructions for lubricating and changing accessories.
6
Page 7

ELECTRICAL
When using a power tool at a considerable distance from a power source, be sure to use an extension
cord that has the capacity to handle the current the product will draw. An undersized cord will cause a
drop in line voltage, resulting in overheating and loss of power. Use the chart to determine the minimum
wire size required in an extension cord. Only round jacketed cords listed by Underwriter’s Laboratories
(UL) should be used.
When working outdoors with a product , use an extension cord that is designed for outside use. This
type of cord is designated with “W-A” or “W” on the cord’s jacket. Before using any extension cord,
inspect it for loose or exposed wires and cut or worn insulation.
MINIMUM GAUGE FOR EXTENSION CORDS (AWG)
(WHEN USING 120 V ONLY)
Ampere Rating Total Length of Cord in Feet (meters)
More Than Not More Than 25' (7.6 m) 50' (15 m) 100' (30.4 m) 150' (45.7 m)
0 6 18 16 16 14
6 10 18 16 14 12
10 12 16 16 14 12
12 16 14 12 Not Recommended
Extension Cord – Make sure your extension cord is in good condition. When using an extension
cord, be sure to use one heavy enough to carry the current your product will draw. An undersized
extension cord will cause a drop in voltage resulting in loss of power and overheating. The table shows
the correct size to use depending on cord length and name plate ampere rating. If in doubt, use the next
heavier gauge. The smaller the gauge number, the heavier the cord. To reduce the risk of disconnection
of appliance cord from the extension cord during operating:
1. Make a knot as shown in Figure A. or
2. Use one of the plug-receptacle retaining straps or connectors.
METHOD OF SECURING EXTENSION CORD
(A) THE CORD AS SHOWN
(B) CONNECT PLUG AND RECEPTACLE
7
Page 8

ASSEMBLY INSTRUCTIONS
WARNING
• Do not allow familiarity with this product to make you careless. Remember that a careless fraction
of a second is sufcient to inict serious injury.
• Do not use any attachments or accessories not recommended by the manufacturer of this product.
The use of attachments or accessories not recommended can result in serious personal injury.
• Deviation from the assembly instruction may result in a risk of re or electric shock.
1a. TO INSTALL BATTERY PACK
a. Align the battery pack (not included) with the
battery opening.
b. Insert the battery into the battery opening until the
the battery release button (N) locks into place.
c. Push down on the battery until it locks into place.
You should hear a “click” once it is installed.
1b. TO REMOVE BATTERY PACK
a. Press the battery-release button to release the
battery pack.
b. Pull up on the battery pack to remove it from
the tool.
WARNING
Battery tools are always in operating condition.
Therefore, always turn off the light when the light is
not in use or when carrying the tool at your side.
1
C
2. TO INSTALL THE LIGHT HEAD
a. Align the bolt the the hole (on the bracket).
b. Insert the bolt into the hole until it kocks into place
and then tighten them with knobs (A).
c. Do the same operation on the other side.
8
2
A
Page 9

OPERATING INSTRUCTIONS
3. POWERING ON AND OFF
a. To turn the work light ON, install the battery pack
or connect the power source, and then press the
ON/OFF switch (E). The work light will be turned
on at maximum brightness.
b. To reduce the brightness, press the ON/OFF
switch (E) again.
c. To turn it OFF, press the ON/OFF switch (E) a
third time.
WARNING
Do not continue to press the ON/OFF switch (E)
after the work light has automatically switched off.
The battery can be damaged.
3a
Install the
battery
pack
E
Note: Hanging hook (BB) can be used for hanging on
2x4 inch.
4. SWIVELING THE LIGHT HEAD
a. Hold the auxiliary handle (D) and unlock the right
and left knobs (A).
b. Turn the light head to the necessary position and
then tighten the knobs.
3b
4
E
Connect
the power
source
BB
360°
D
A
9
Page 10
CARE AND MAINTENANCE
All maintenance should only be carried out by a qualied repair person.
Cleaning
Before cleaning or performing any maintenance, remove the battery or extension cord from the work
light. For safe and proper operation, always keep the tool and its ventilation slots clean.
Always use only a soft, dry cloth to clean the plastic transparent cover, never use detergent or
alcohol. Always wear safety goggles when cleaning tools with compressed air.
TROUBLESHOOTING
If you still have questions or an unresolved issue after going through this troubleshooting guide, or
just want to speak to a Kobalt product expert, please call our Kobalt customer service department at
1-888-356-2258.
PROBLEM POSSIBLE CAUSE CORRECTIVE ACTION
The work light does
not work.
1. Low battery charge.
2. The plug is not connected to
the power source.
1. Charge the battery.
2. Connect the plug to the power source.
3. The light has stopped
working to protect
internal circuits.
WARRANTY
5 - YEAR LIMITED WARRANTY
This 40V Sitting Worklight is warranted to the original purchaser from the original purchase date for ve
(5) years subject to the warranty coverage described herein.
This 40V Sitting Worklight is warranted for the original user to be free from defects in material and
workmanship.
If you believe that the 40V Sitting Worklight is defective at any time during the specied warranty
period, simply return the Sitting Worklight along with proof of purchase to the place of purchase for a
free replacement or refund, or call 1-888-356-2258 for warranty service.
This warranty is void if: defects in materials or workmanship or damages result from repairs or
alterations which have been made or attempted by others or the unauthorized use of nonconforming
parts; the damage is due to normal wear, damage is due to abuse (including overloading of the tool
beyond capacity), improper maintenance, neglect or accident; or the damage is due to the use of the
tool after partial failure or use with improper accessories or unauthorized repair or alteration.
3. Turn off the light, wait for the tool
and battery to cool down, then and
start the tool again.
This warranty gives you specic legal rights, and you may also have other rights that vary from province
to province.
10
Page 11

REPLACEMENT PARTS LIST
AA
BB
CC
PART DESCRIPTION
AA Knobs
BB Hook
C S Hook
D Bracket
D
11
Printed in China
 Loading...