

Page 1
DELUXE CEILING
CM10/24/25
MOUNT KIT
The ceiling mount center bolt needs be about 3”
to the left (when viewing the screen) of the left
to right center imaginary line from the screen.
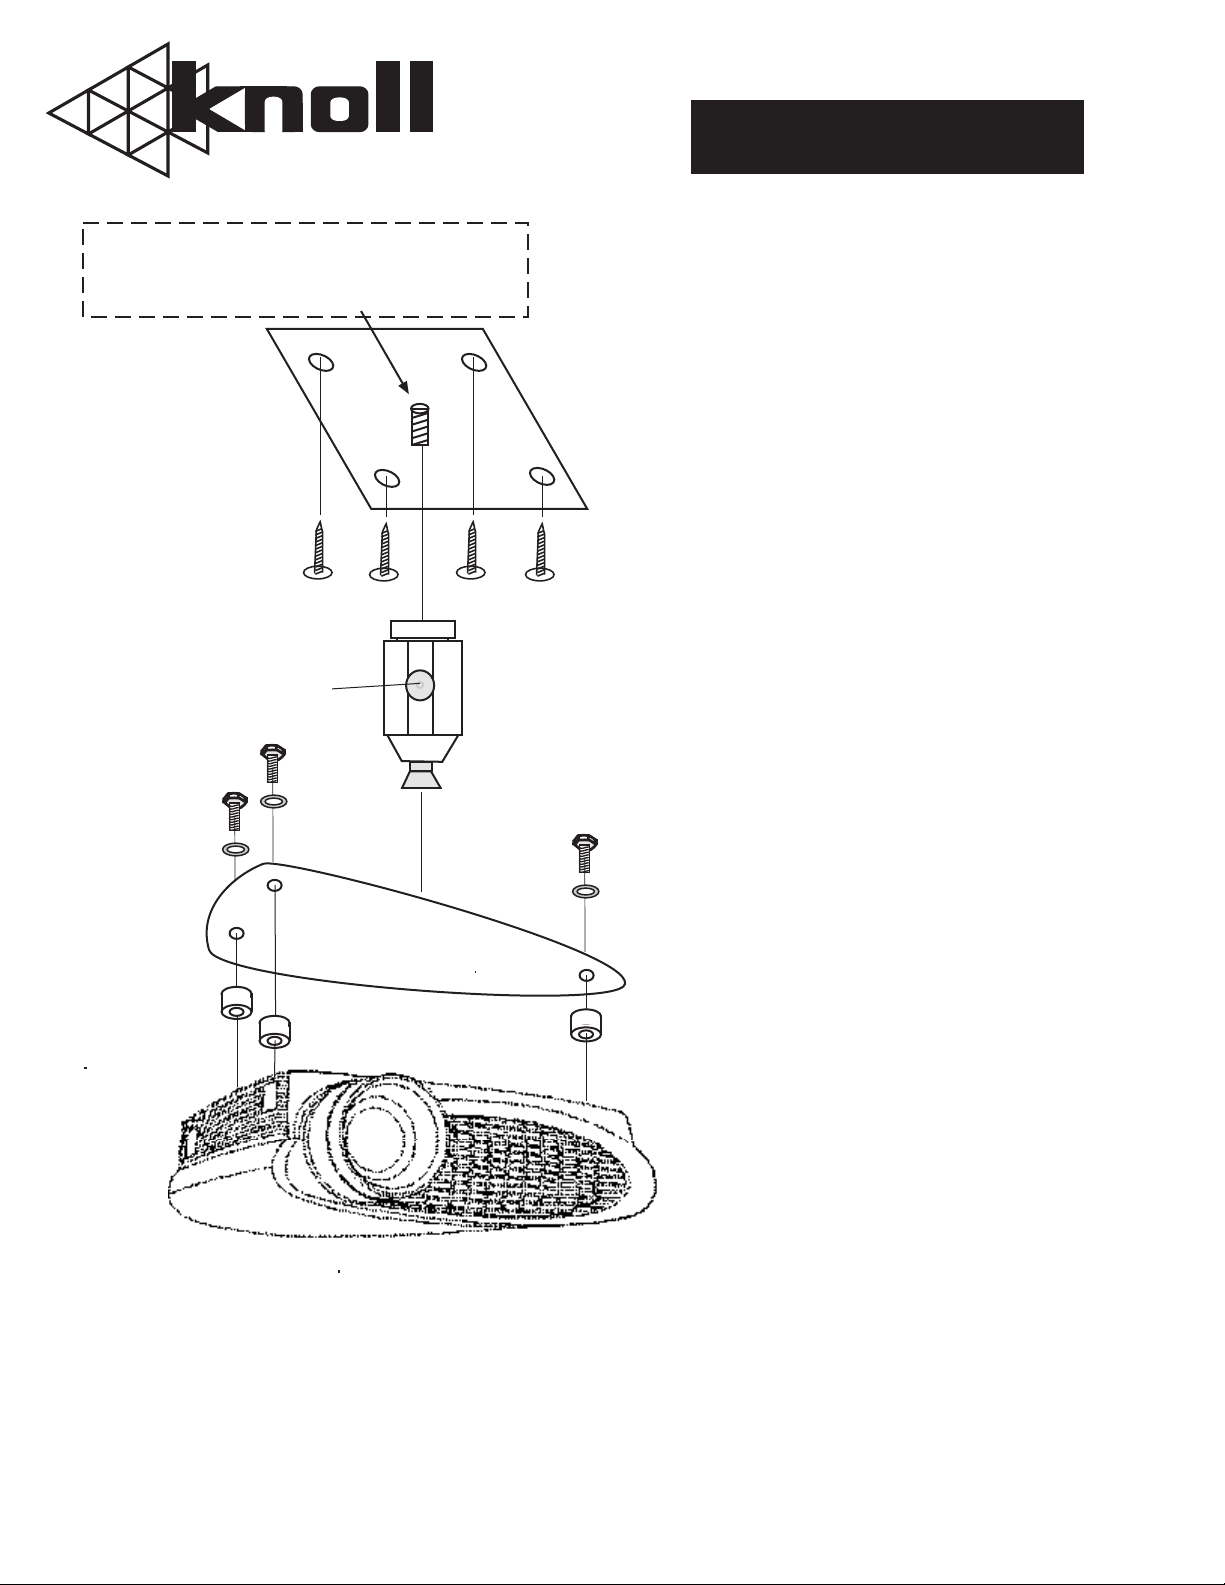
Ceiling
mount
Screws
(not provided)
Allen bolt
Knuckle
assembly
Hex bolt X 3
Lock
washer X 3
Projector
mount
Congratulations for choosing this HDTV projector.
To assure correct installation, please follow
these instructions carefully. If you have questions
or comments, please don't hesitate to call or write
your Knöll dealer.
1. Calculate the maximum and minimum
distance from the projector to the screen
using the HD101, HD110,HD177 or HD272 manual or
our web site at www.knollsystems.com/dlpchose.htm.
The ceiling mount center bolt needs be about 3”
to the left (when viewing the screen) of the left
to right center imaginary line from the screen.
2. Select a safe and secure position to firmly
screw the square ceiling mount to the ceiling.
We do NOT RECOMMEND using sheet rock
or wall board with inserts to hold the projector
and mount. Instead screw the ceiling mount
to a secure joist or use a 1/2” painted wood
butch plate secured to the joists and the
ceiling mount screwed to the butch plate.
3. After screwing the ceiling mount to the ceiling
thread the knuckle assembly on to the ceiling
mount. With a allen wrench, slightly loosen
the knuckle assemble screw.
4. Using the three supplied nylon spacers, mount
the triangle shaped projector mount on the
projector With the enclosed bolts and lock
washers. Be sure to use the lock washers.
Tighten but do not over tighten the screws.
Nylon
spacer X 3
Knöll Systems
145 Tyee Drive, Point Roberts, WA 98291
11791 Machrina Way, Richmond BC V7A 4V3
tel (604) 272 4555, fax (604) 272 5595
web www.knollsystems.com
5. Thread the projector mount onto the knuckle
assembly (mounted on the ceiling mount)
and spin the projector until it is tight. Spin
the projector up to one more complete turn
until it is facing the correct direction and the
allen nut is also facing the screen.
6. Turn the projector on and horizontally and
vertically adjust the projector until the image
fills the screen. Tighten the knuckle assembly
with the allen wrench. The projector may
need to have its keystone adjusted so the
image top and bottom fit on the screen.
7. Some jurisdictions require a second safety
attachment on all ceiling mounted
equipment. If this is the case in your area,
add a secondary attachment. A popular
method is to use a fishing leader from the
projector’s adjustable foot to the ceiling.
 Loading...