


KNOCTIFY
Installation and Operation Guide
Thank you for purchasing Knoctify

2
Preparation
In the box you will find:
• Knoctify button
• Knoctify light
• Wall-mounting screws and anchors
• User manual
Overview
Just follow these simple steps:
1. Install batteries.
2. Set up the Knoctify light and customize your
preferences.
3. Mount the Knoctify button on the door.
3
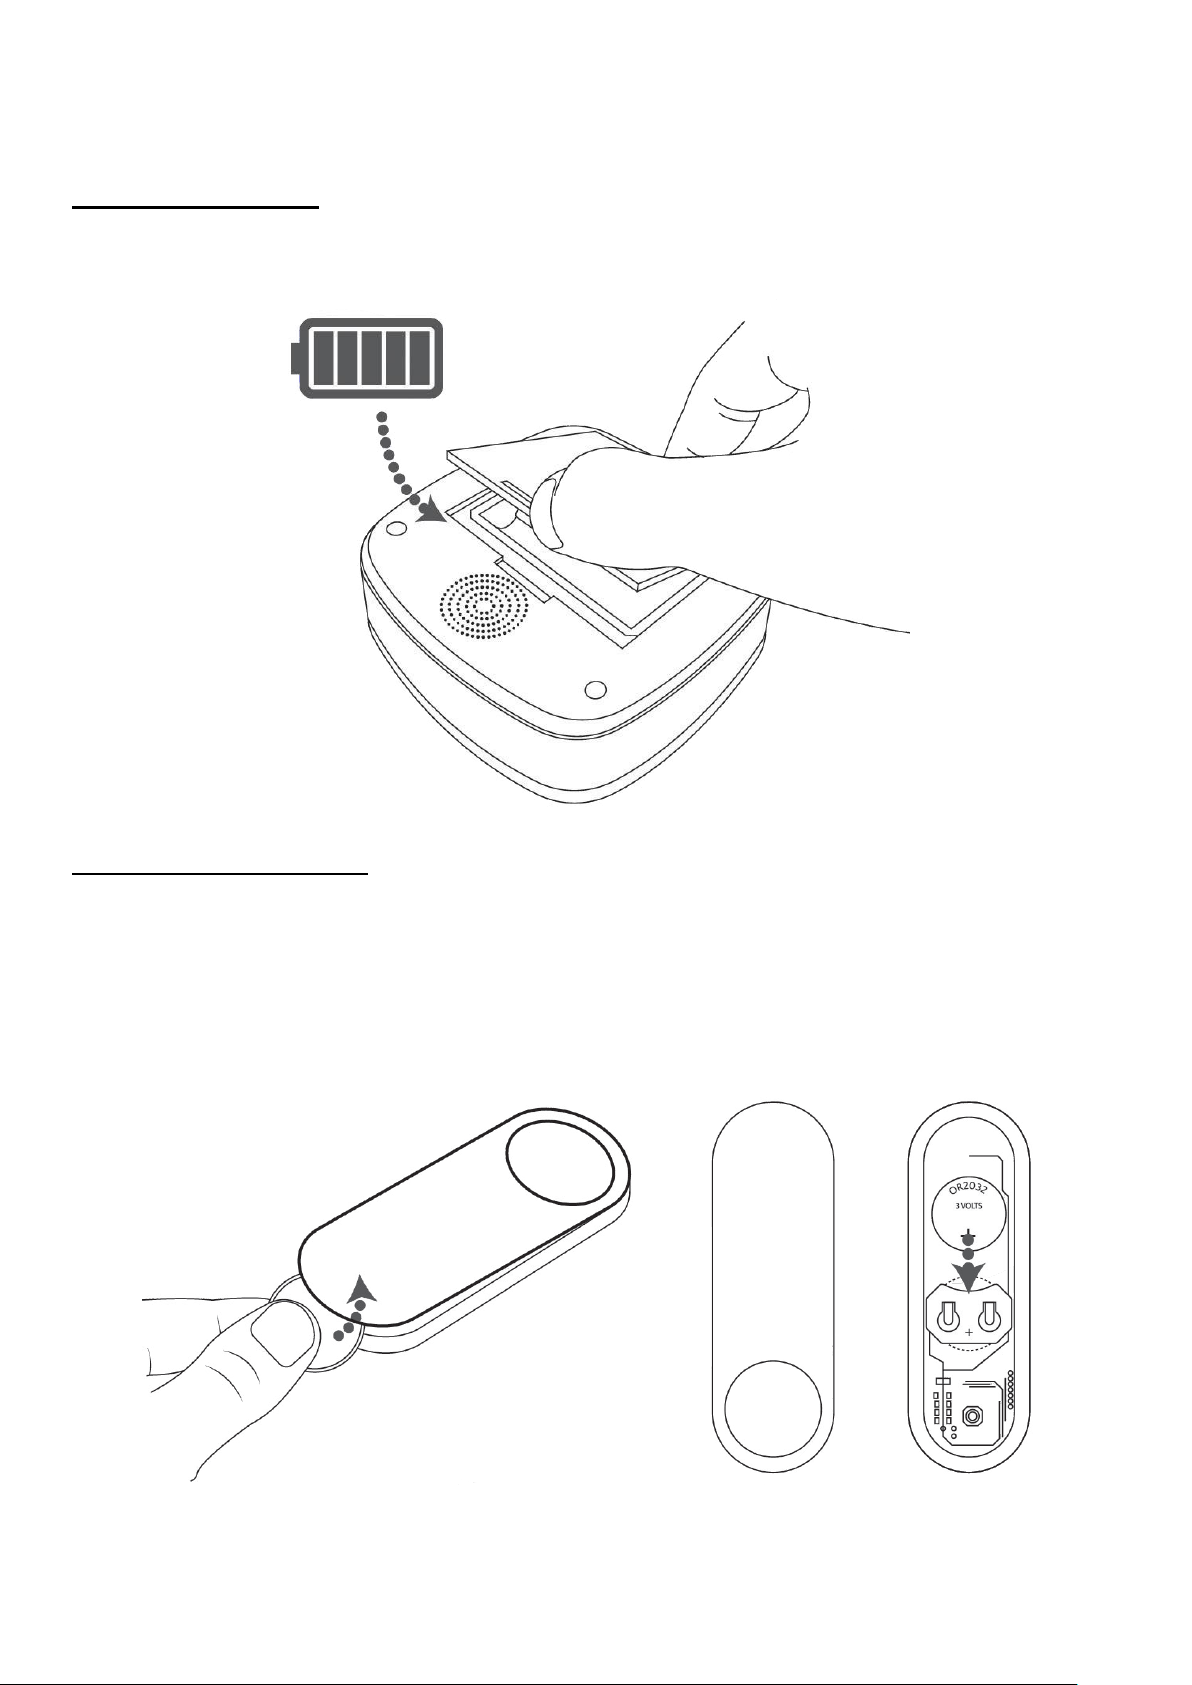
Install Batteries
Knoctify light
Open the battery cover and install 3 AA batteries.
Knoctify button
Twist open the battery cover with a small coin, and
install a CR2032 lithium battery.
4
Setting up the Knoctify light
The Knoctify light is paired to the Knoctify button by
default. Pressing on the Knoctify button will trigger the
Knoctify light to flash. If it does not, see “Pairing and
Reset” on page 9.
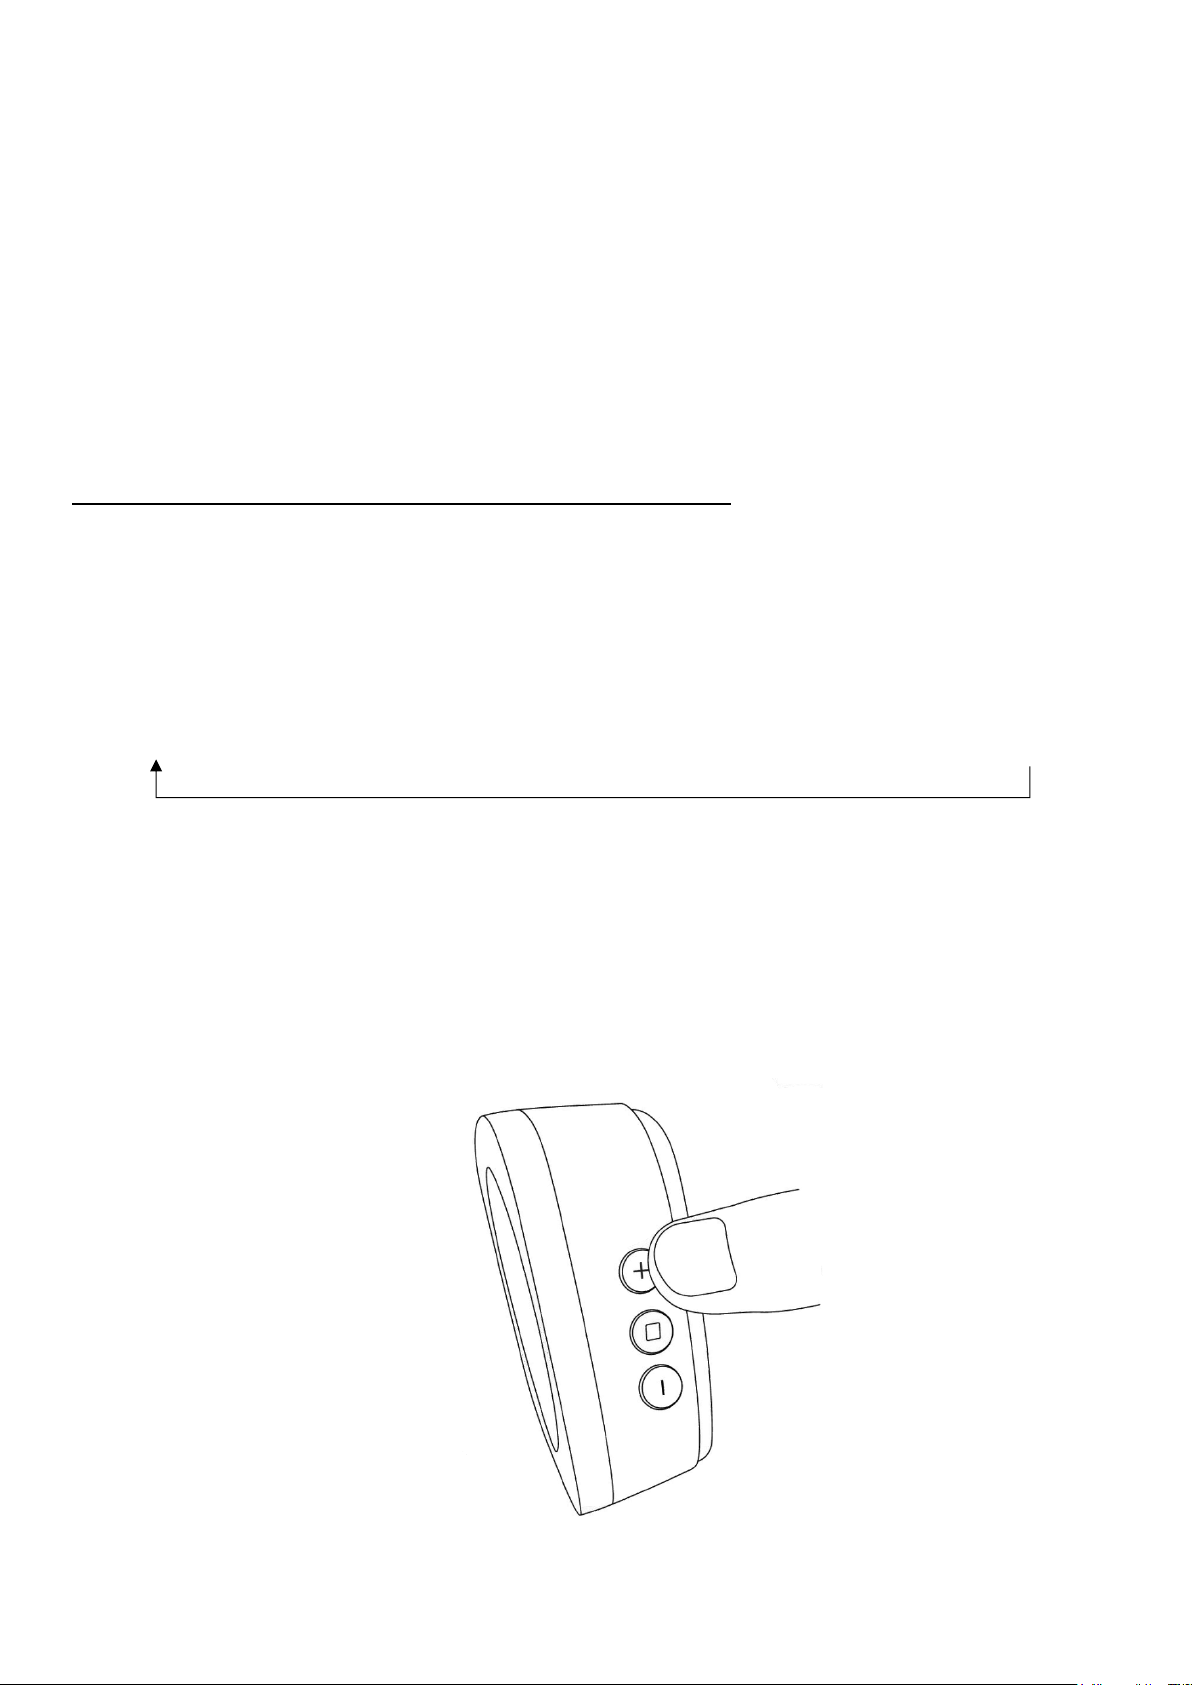
Changing the light’s flashing color
Press the + button to change the color of the flashing
LED. It will cycle through the following colors:
Red → Green → Blue → Cyan → Magenta → Orange → OFF
Stop pressing the + button when you see the color
you want. To turn off flashing, press until the LED turns
off.
5
Change the vibration intensity
The Knoctify light comes with vibration feedback and
can be placed under the pillow, cushion, etc., to alert
the user when he or she is resting.
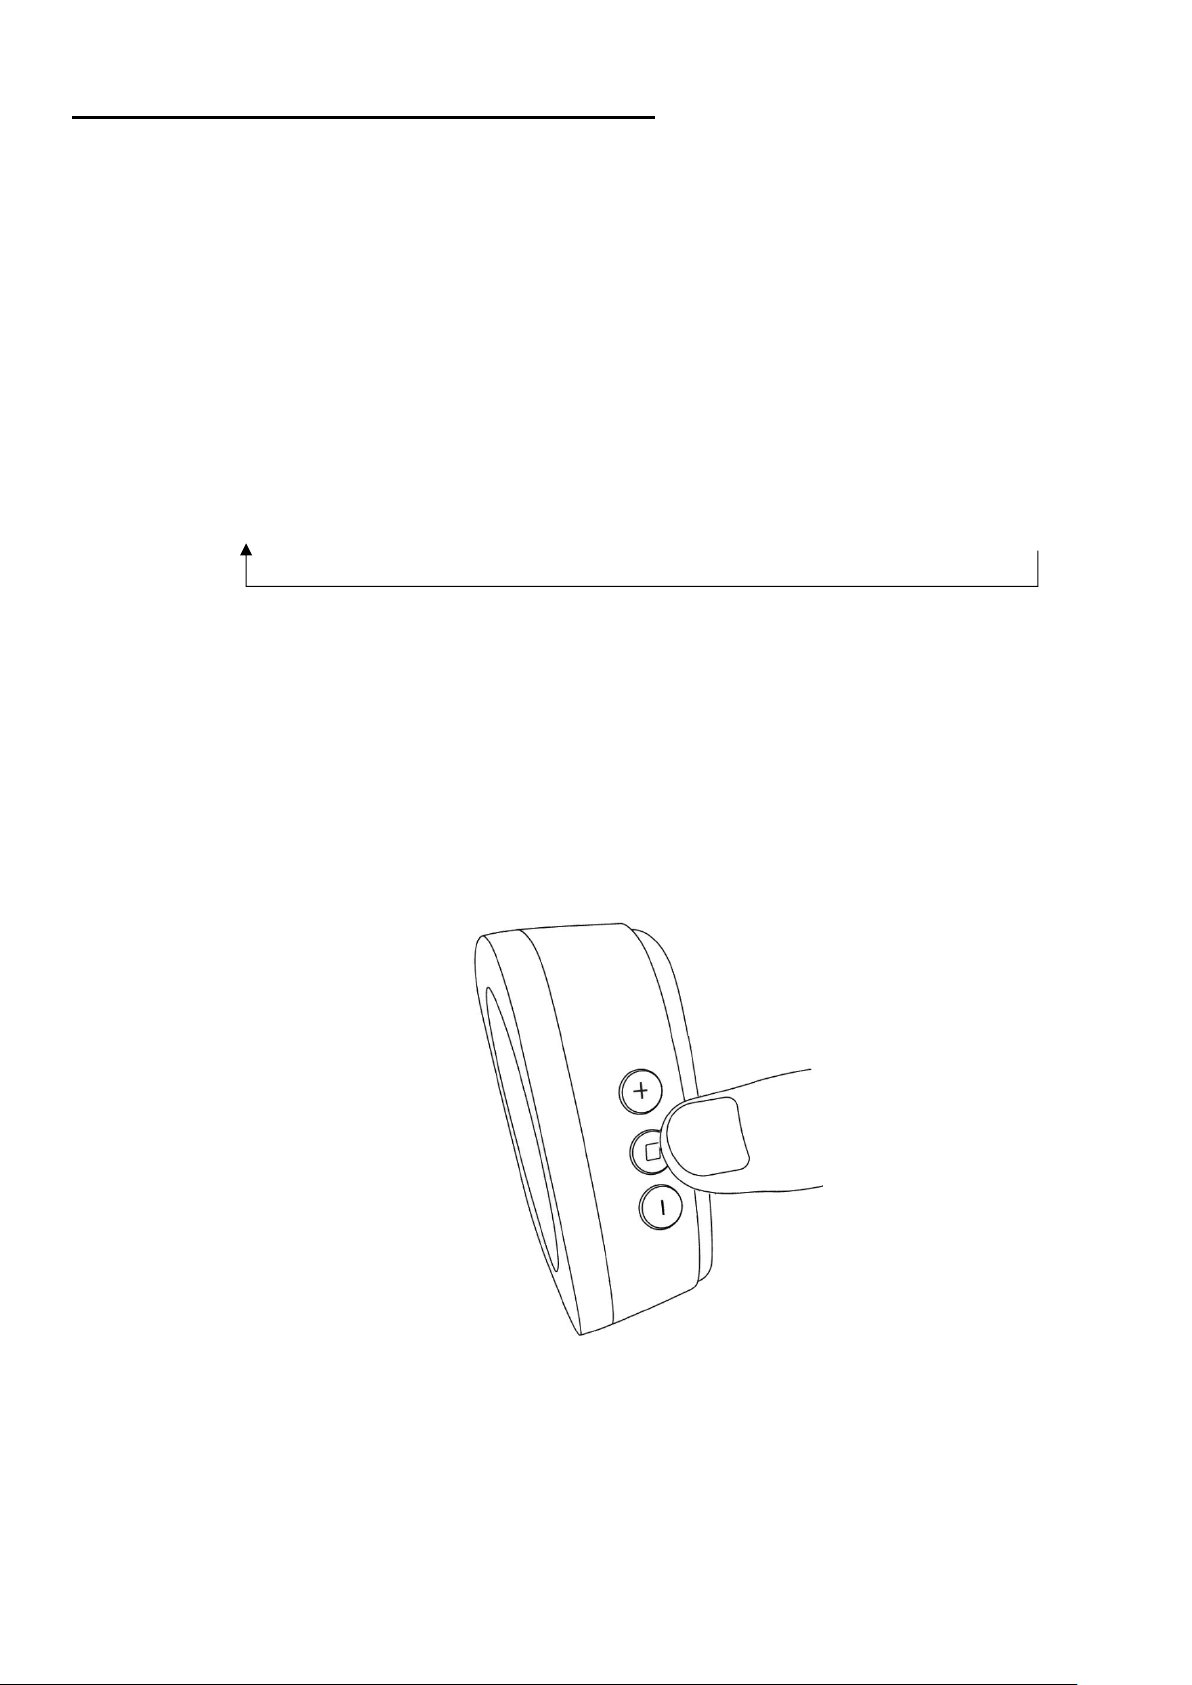
Press the □ button to choose between 3 different
vibration powers. You will feel the different vibrations.
Vibrate Power 1 → Vibrate Power 2 → Vibrate Power 3 → OFF
Stop pressing the □ button when you can feel
vibration power you want. To turn off vibration, press
until the vibration stop.

6
Change the tune
Press the - button to change the doorbell tune. Every
time you press the - button, the tune will change, and
the doorbell LED will light up. Stop pressing the button when you hear the tune you want. To turn off
sound, press until there is no sound playing and the
LED is turned off.
Setting the Knoctify light to power-saving mode
When the Knoctify light is set to power saving mode, it
will not respond to the Knoctify button. To enter
power-saving mode, press and hold the + button for 5
seconds. Release this button when the light turns red.

7
Waking up from power-saving mode
To wake up your Knoctify light from power-saving
mode, simply press any button on the side.
Setting up the Knoctify button
Knock detection
The Knoctify Button is able to detect vibrations
caused by knocking on the door’s surface. This
activates the Knoctify light. At least two consecutive
knocks are required for a valid detection. Knock
detection works best on a solid wooden surface.
Pressing on the Knoctify button also activates the
Knoctify light.

8
Enabling/disabling knock detection
Knock detection is enabled by default. If you do not
require the knock detection feature, we recommend
that you disable it to further improve the battery life of
the Knoctify button.
To disable knock detection, press and hold the
Knoctify button for 5 seconds until you see the blue
LED. Release the button; the LED will flash four times
and stop. Knock detection will be disabled.
To re-enable knock detection, similarly, press and
hold the Knoctify button for 5 seconds until you see
the blue LED. Release the button, the LED will flash
two times and stop. Knock detection will be enabled
now.

9
Mounting the Knoctify button
1. Open the casing and unscrew the circuit board.
Follow the screw markings on the bottom casing
and use an electric drill to drill two holes. Use the
wall-anchors and screws to fix the push-button
sensor to the wall.
-OR-
2. Clean the flat surface where you intend to install
the push-button sensor. Tear off one side of the
double-sided adhesive tape and stick it to the
underside of the push-button sensor. Tear off the
other side and put the push-button sensor onto the
surface. Press firmly.
Pairing and Reset
The Knoctify light and button support multiple pairing.
You can pair one Knoctify light to multiple Knoctify
buttons, pair multiple Knoctify lights to one Knoctify
button, or pair multiple Knoctify lights to multiple
Knoctify buttons.
Pairing Knoctify light with Knoctify button
1. Press and hold the □ button located on the side of
Knoctify light for 5 seconds. The LED will start flashing
in white. The Knoctify light is now ready to accept
pairing requests from any Knoctify buttons.

10
2. Press on the Knoctify button device that you want
to pair with. The LED on the Knoctify light will stop
flashing to indicate that pairing is completed.
3. The Knoctify light will timeout and stop flashing after
20 seconds if it does not receive any pairing
request.
Reset all pairings on Knoctify light
1. Press and hold the □ button on your Knoctify light for
5 seconds. The LED will start flashing in white.
2. Press the + button. The Knoctify light will stop
flashing to indicate that all pairings have been
removed.
Maintenance
The Knoctify light and button require no maintenance
except periodic battery changes.
If using the correct batteries, battery life should be
approximately:
• Up to 8 months for the Knoctify light; replace with
3 AA batteries.
• Up to 18 months for the Knoctify button; replace
with a CR2032 lithium battery.

11
Specifications
Knoctify Light
Knoctify Button
Operating
Temperature
-5⁰C to 40⁰C
-20⁰C to 40⁰C
Frequency
433.19MHz
433.19MHz
Range (open field)
100 m
100m
Battery Type
3 x AAA
CR2032
Battery Life (5
activations/day)
Up to 8
months
Up to 18
months
Troubleshooting
If
Then
Knoctify light
does not work.
1. Check that the batteries are
installed in the right direction.
2. The Knoctify light might be out of
range. Move it to a different
location and try again.
3. Reset and set up pairing again.
See “Pairing and reset.”
Knock
detection
does not work.
1. Check to ensure that knock
detection is enabled. See the
section on “Enabling/disabling
knock detection.”
2. Try to install on another surface.

12
Range is
reduced.
1. Metal structures can interfere
with the wireless signal. Avoid
installing the Knoctify light and
button near any large metal
structures.
2. Weak batteries will reduce the
range. In cold conditions (below
5⁰C), the batteries may need to
be replaced more often.

13
Warranty
1-year limited warranty.
Knoctify warrants this product, excluding battery, to
be free from defects in workmanship or materials,
under normal use and service, for a period of one (1)
year from the date of first purchase by the original
purchaser. If at any time during the warranty period
the product is determined to be defective due to
workmanship or materials, Knoctify shall repair or
replace it (at Knoctify’s option).
If the product is defective, (i) return it, with a receipt
or other dated proof of purchase, to the place from
which you purchased it; or (ii) email Knoctify
Customer Care at support@knoctify.com. Customer
Care will make the determination whether the
product should be returned or whether a
replacement product can be sent to you.
This warranty does not cover removal or reinstallation
costs. This warranty shall not apply if it is shown by
Knoctify that the defect was caused by damage
which occurred while the product was in the
possession of a consumer.
Knoctify’s sole responsibility shall be to repair or
replace the product within the terms stated above.
KNOCTIFY SHALL NOT BE LIABLE FOR ANY LOSS OR
DAMAGE OF ANY KIND, INCLUDING ANY INCIDENTAL

14
OR CONSEQUENTIAL DAMAGES RESULTING, DIRECTLY
OR INDIRECTLY, FROM ANY BREACH OF ANY
WARRANTY, EXPRESS OR IMPLIED, OR ANY OTHER
FAILURE OF THIS PRODUCT.
If you have any questions concerning this warranty,
please email Knoctify Customer Care at
support@knoctify.com.
 Loading...