

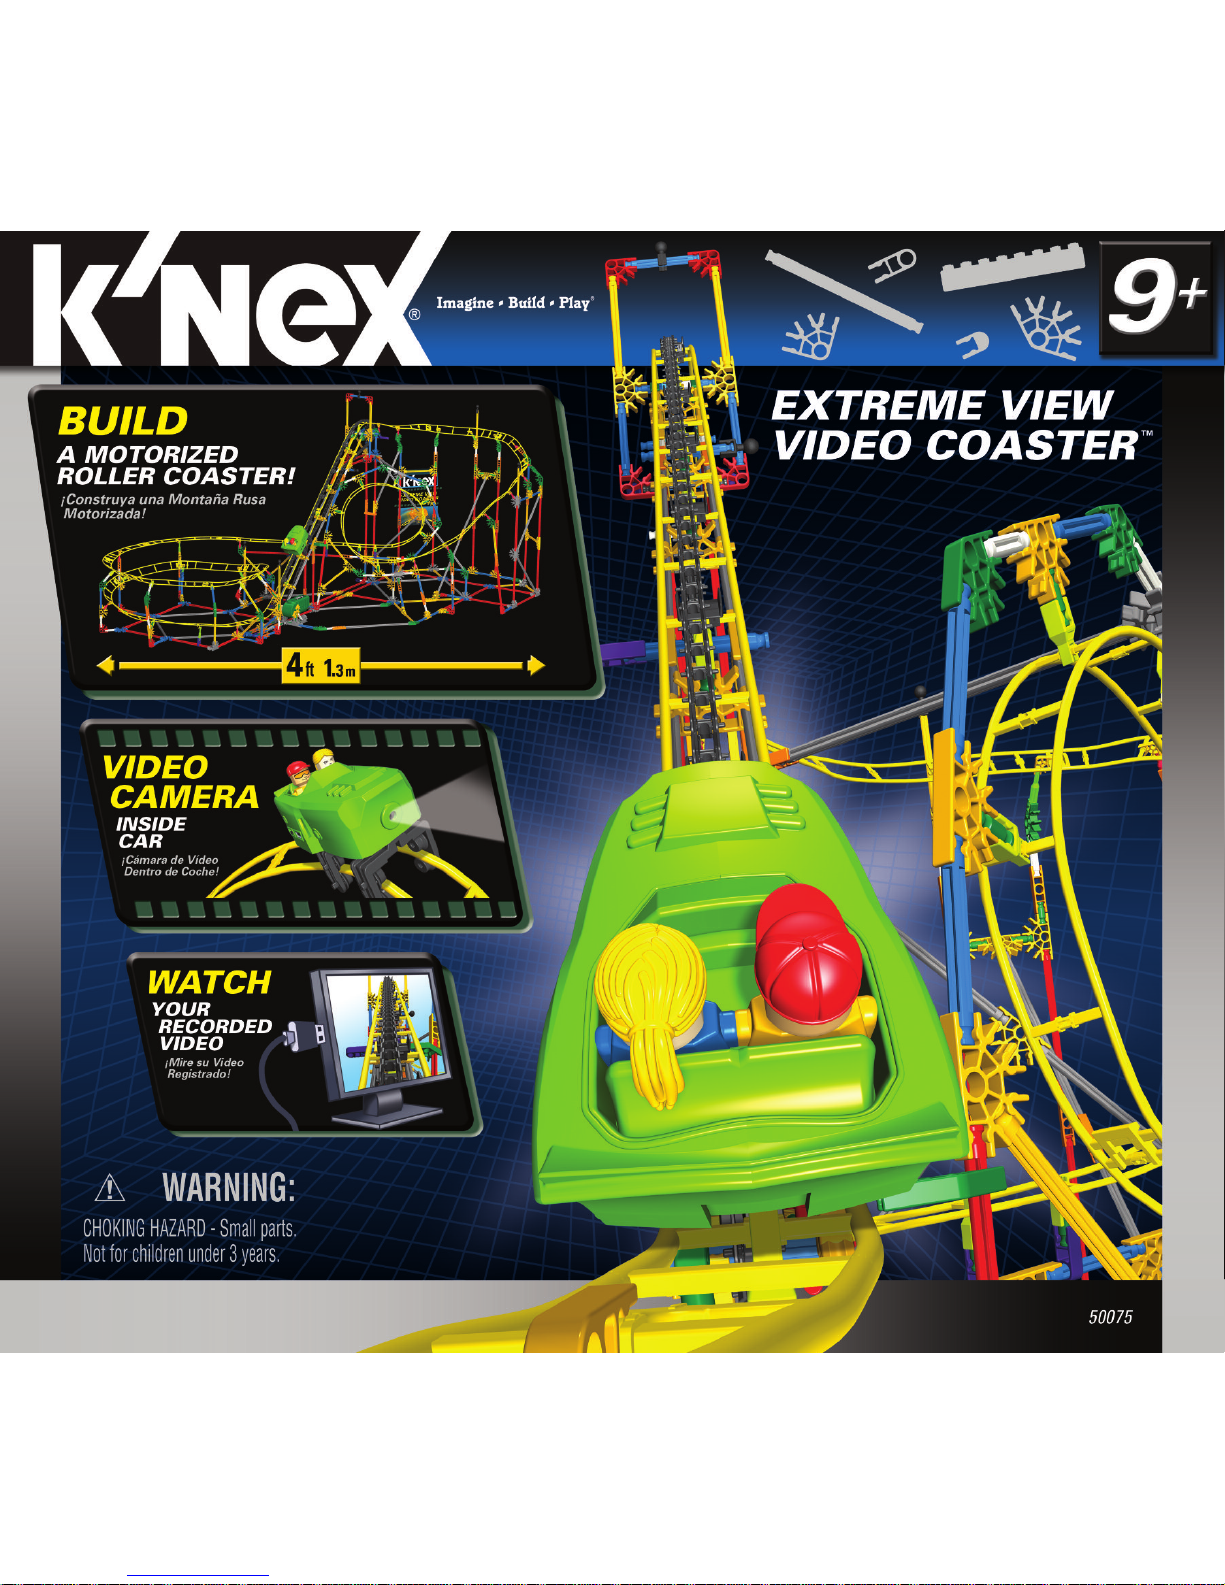
Page 1
Page 2
IMPORTANT STUFF
FOR PARENTS & KIDS
Keep these instructions in a handy
location. They contain important
safety information.
Read all warnings and instructions
before you start to build and
operate the model.
WARNING: CHOKING HAZARD -
Small parts. Not for Children under 3 years.
CAUTION: Keep hands, face, hair and clothing
away from all moving parts.
CAUTION: Be careful not to tip the model over.
Model should be placed on a flat and hard surface.
• Share the K'NEX experience with your child
and make building with K'NEX a family fun
adventure.
• Take your time to enjoy the building process.
Don't rush!
• While you’re building make sure you face your
model in the same direction as the pictures
show in the instructions.
• Be sure to install batteries into the motor before
you start building your motorized models.
• Product and colors may vary.
• Help the environment by disposing of your
product and packaging responsibly. The wheelie
bin symbol indicates the product and batteries
must not be disposed of in the domestic waste
as they contain substances which can be
damaging to the environment and health. Please
use designated collection points or recycling
facilities when disposing of the item or batteries.
• Video Camera Car System Requirements:
PC: Windows
® Vista, XP and 2000
MAC: Macintosh
® OS 9.2 or higher
CPU Speed: Intel
® Pentium III 800 MHz or higher
Memory: Requires at least 128 MB & 80 MB
of free hard disc space
Software: Supports USB 2.0 and MSDC
(Mass Storage Device Controller)
!
BATTERY INFORMATION
Caution: To Avoid Battery Leakage
• Be sure to insert the batteries correctly and always follow the toy
and battery manufacturers’ instructions.
• Do not mix old and new batteries or alkaline, standard (carbon-
zinc) or rechargeable (nickel-cadmium) batteries. Only batteries
of the same or equivalent type recommended should be used.
• Always remove weak or dead batteries from the product; do not
short-circuit supply terminals.
• Insert batteries with correct polarity (+/-) as shown.
Important Tips:
• Alkaline batteries AA (LR6) are recommended.
• Rechargeable batteries are not recommended.
• Remove rechargeable batteries from toy before charging; they
must be charged only under adult supervision.
• Non-rechargeable batteries must not be recharged.
• Keep components free of dust; do not immerse or use in water.
• Do not dispose of batteries in a fire; they could leak
or explode and cause injury.
• Remove all batteries if the toy will not be used for a long period of time.
• Do not put Rods smaller than 2 inches in any openings of the
motor; they will damage the motor, and cannot be removed.
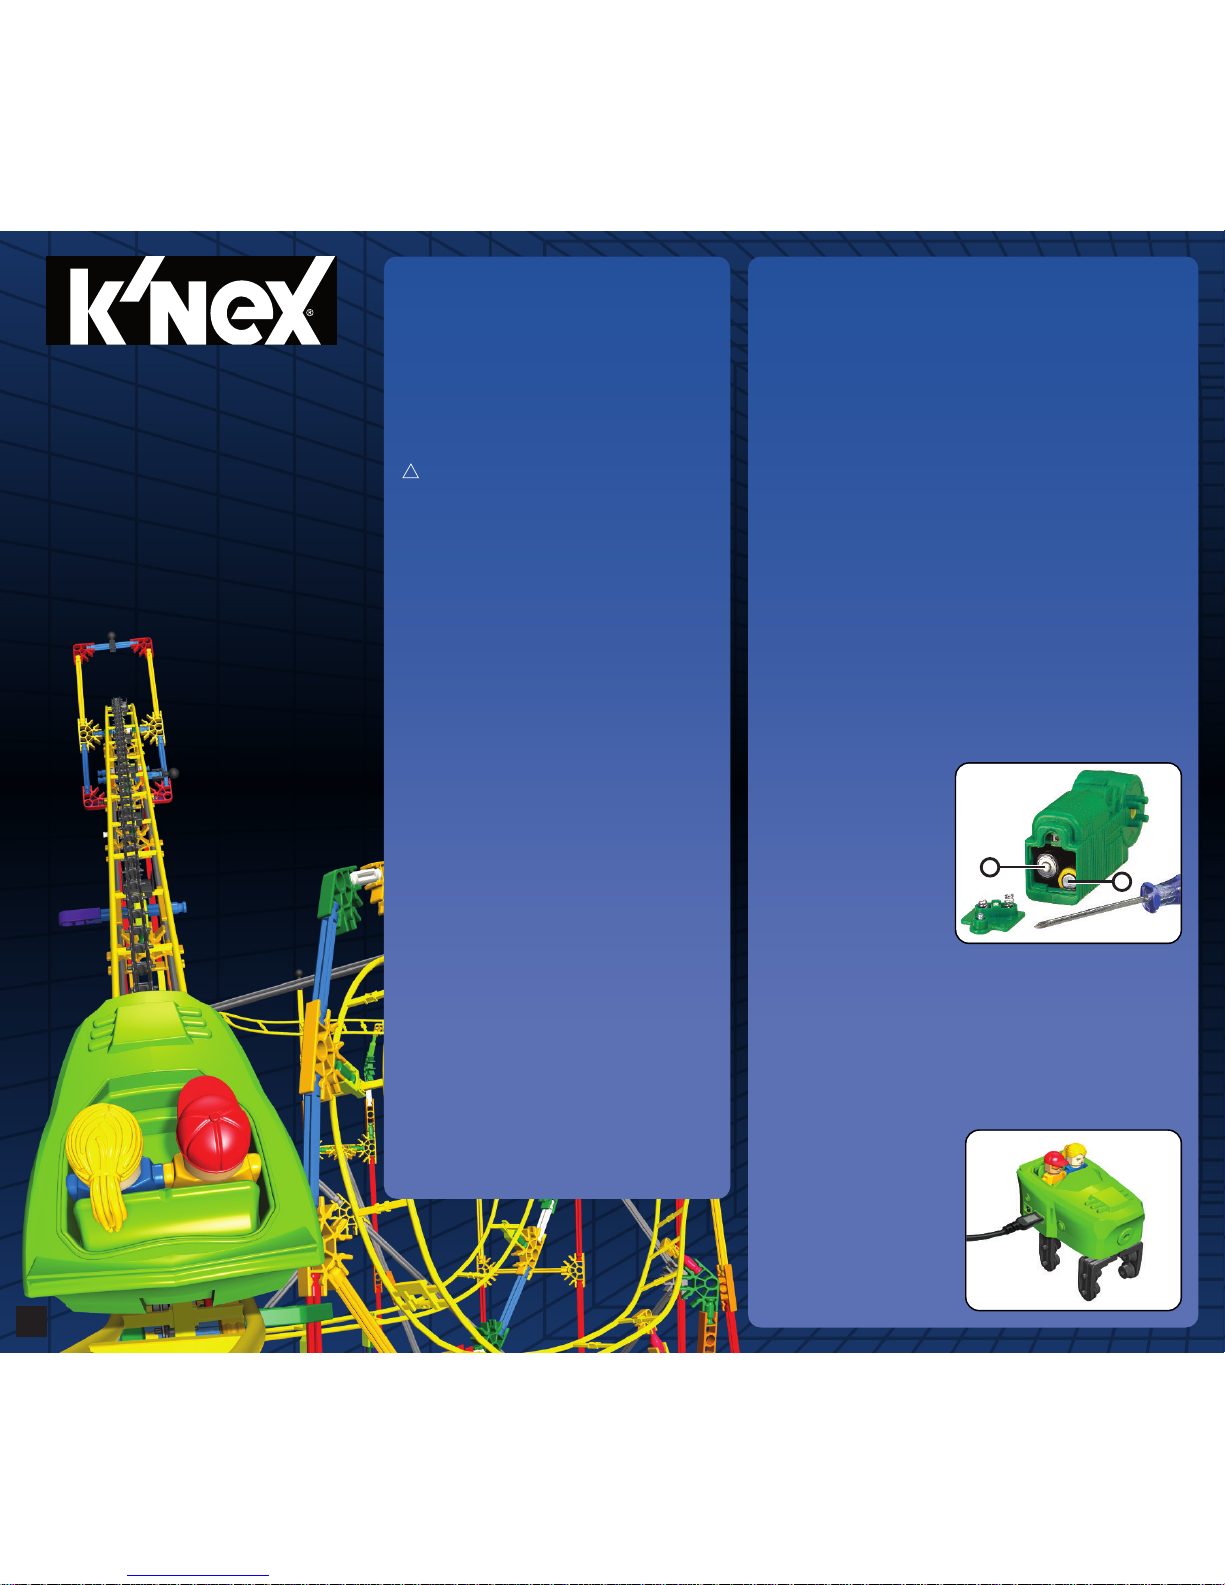
How to Insert the
Motor Batteries:
•
Use a small Phillips head
screwdriver to loosen the
screw. Insert 2 fresh AA
batteries (LR6) into the
compartment with the
correct polarity (+/-) as
shown here.
How to Charge the
Video Camera Car:
•
Battery charging should be done by an adult.
•
Follow these instructions carefully. Only charge by this USB
cable. Normal charging time 1-2 hours (when battery is empty).
•
Do not leave the video car unattended while it is charging.
•
Unplug the USB cord when the video camera car is charged.
•
Overcharging could result in overheating the video camera car.
•
Charge the video camera car on a non-flammable surface, keep it
away from flammable items.
•
Do not place in or near
water, heat or fire.
•
Do not short circuit the
battery terminals.
•
If the video car has been
damaged, immediately
stop use, unplug and
safely move it away from
flammable materials.
2
CONTENTS
Building Instructions . . . 4
Attaching the Graphic Panel . . . . .
50
Attaching the Coaster Car . . . . . . .
50
How to Use the Video Camera . . . .
52
Tips & Troubleshooting . . . . . . . . .
54
Español . . . . . . . . . . . . . . . . . . . .
55
+
-
Page 3
BUILDING BASICS
Getting Started:
To begin your model, find the and follow
the numbers. Each piece has its own shape and
color. Just look at the pictures, find the pieces
in your set that match and then connect them
together. Try to face your model in the same
direction as the instructions while you build.
Faded colors show you this section is already
built. You’ll want to connect the new section to
the place where the arrows are pointing (not all
connections have arrows).
Track:
A
lways connect the track top side to top side
throughout the build. Attach the connectors to the
bottom side of the track exactly as shown. Be sure
to push the connectors on firmly until they “click”.
Connectors:
T
here are blue and gray connectors with special
long slots. They slide together as you see in the
pictures. Push these parts together until you hear
a “click”.
Spacers:
There are places in your model where you need to
add blue and silver spacers. Be sure to use the
right color and count them carefully.
FCC State m ents:
WARNING : Changes or mod ifications to thi s unit n ot expres sly appro ved
by th e party respo nsible fo r the co mpliance coul d void t he user’s right to
operat e the eq uipment.
This devi ce complie s with P art 15 o f the FC C Rules.
Operat ion is s ubject to the fo llowing t wo condit ions:
1. Th is device may no t cause harmf ul inter ference a nd
2. Th is device mus t accept any int erference rec eived, in cluding i nterferen ce
that may caus e undesir ed operat ion. This mod el is te sted to comp ly with
FCC s tandards - FO R HOME O R OFFICE USE .
This equi pment has bee n tested and fou nd to co mply with the lim its for a
Class B digit al device , pursuan t to par t 15 of the FCC Rul es. These lim its
are d esigned t o provide rea sonable p rotection aga inst harm ful inter ference
in a res idential i nstallatio n. This equi pment gen erates, u ses and can radi ate
radio freq uency ene rgy, and, if not insta lled and use d in acc ordance w ith
the i nstruction s, may c ause harm ful inter ference to r adio comm unications .
However, ther e is no guar antee that in terference wil l not occur in a partic ular
instal lation. I f this e quipment does cau se harmfu l interf erence to rad io or
televi sion rece ption, wh ich can be d etermined by turn ing the equi pment
off a nd on, t he user is e ncouraged to try to cor rect the inte rference by one
or mo re of th e followi ng measur es: (1) Reori ent or r elocate t he receiv ing
antenn a. (2) I ncrease t he separa tion betw een the equip ment and rec eiver.
(3) C onsult th e dealer or an exper ienced ra dio/TV te chnician.
This Clas s B digit al appara tus compl ies with Can adian ICE S-003.
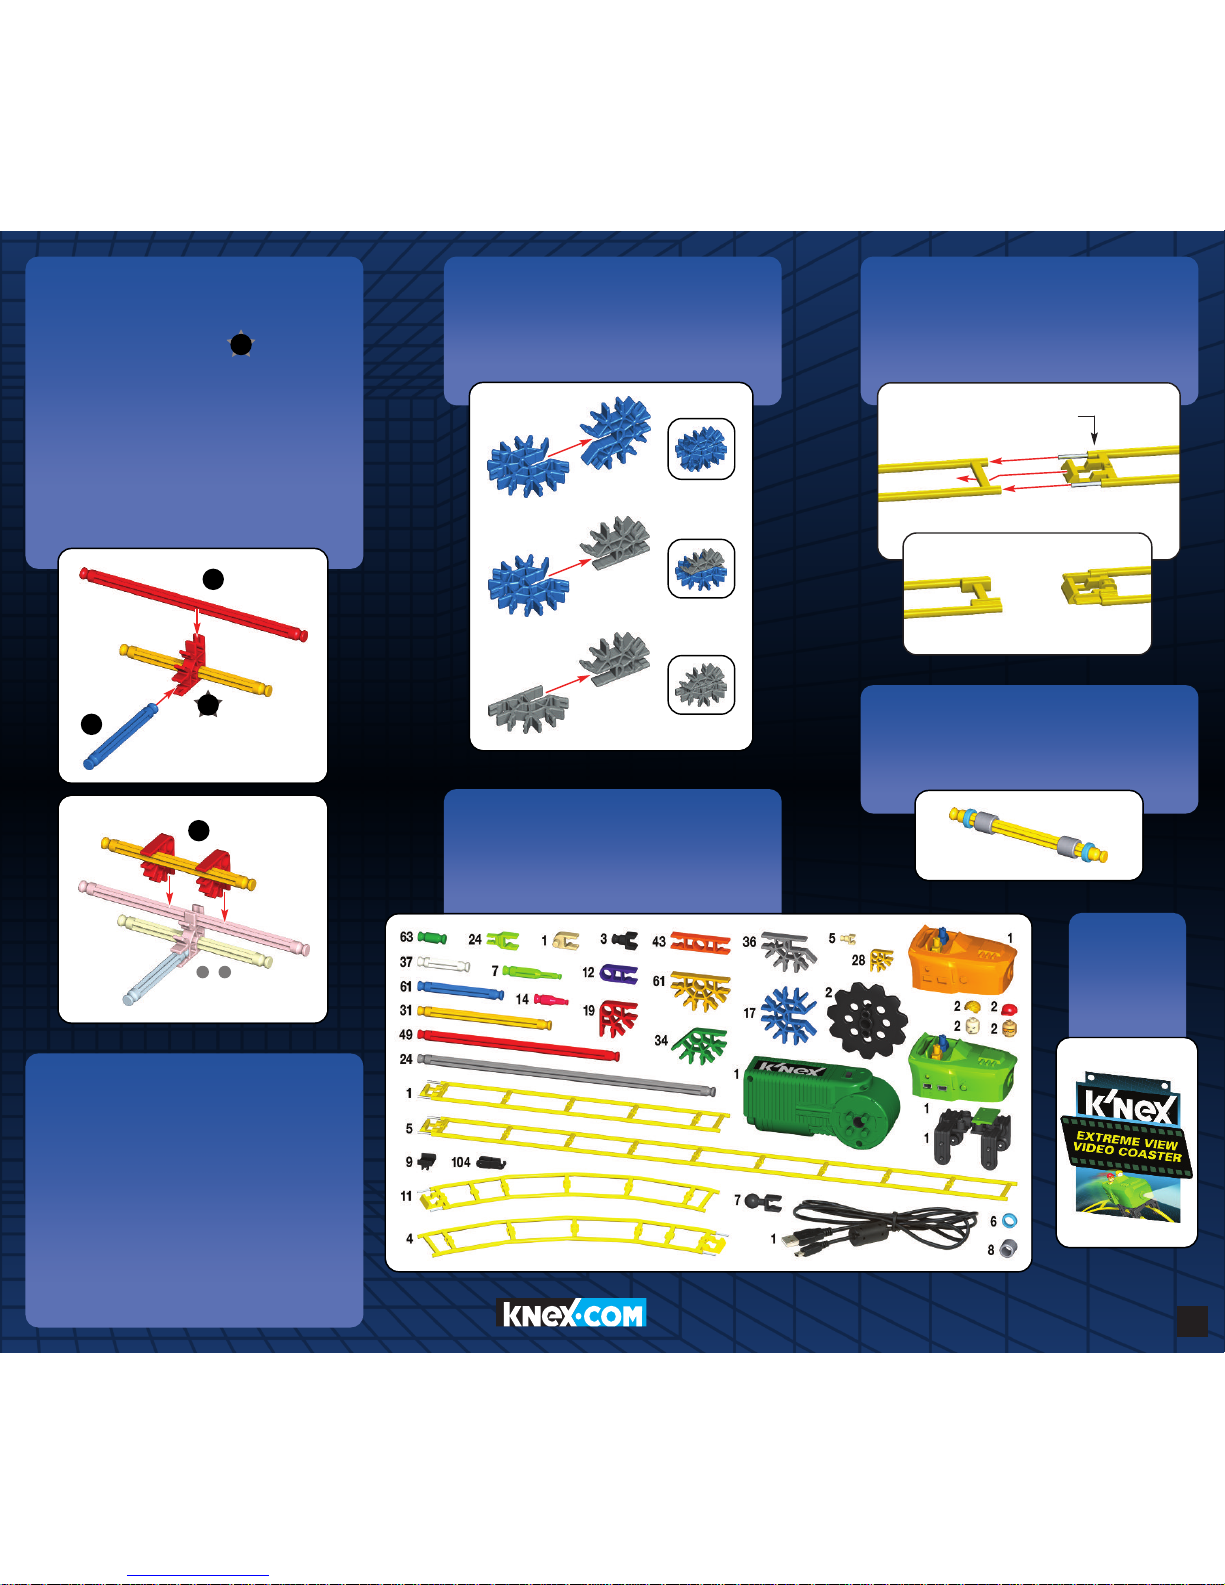
Parts Count:
Before you start building, be sure to com pare the
parts in your set w ith the parts listed here. If anything
is missing, call or write to us using the information
on the back cover. We’re here to help!
Graphic
Panel:
See page 50 for
attaching panel
to the model.
3
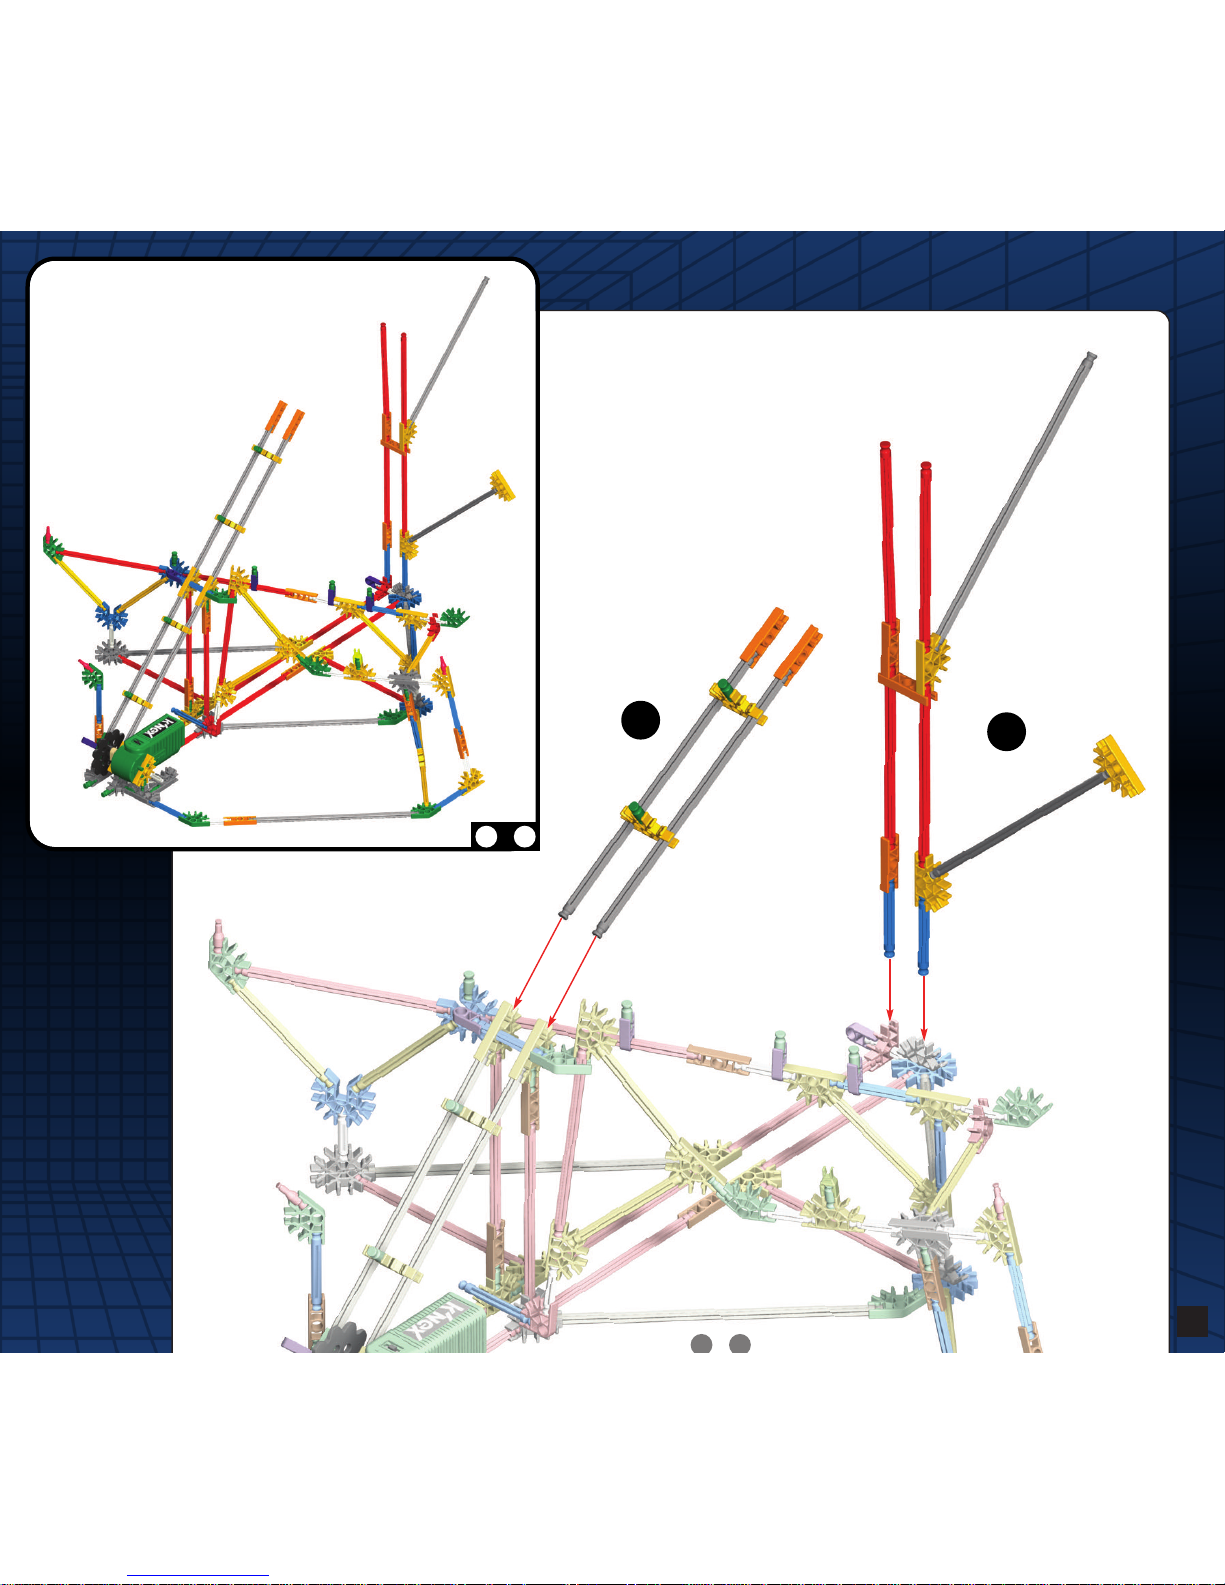
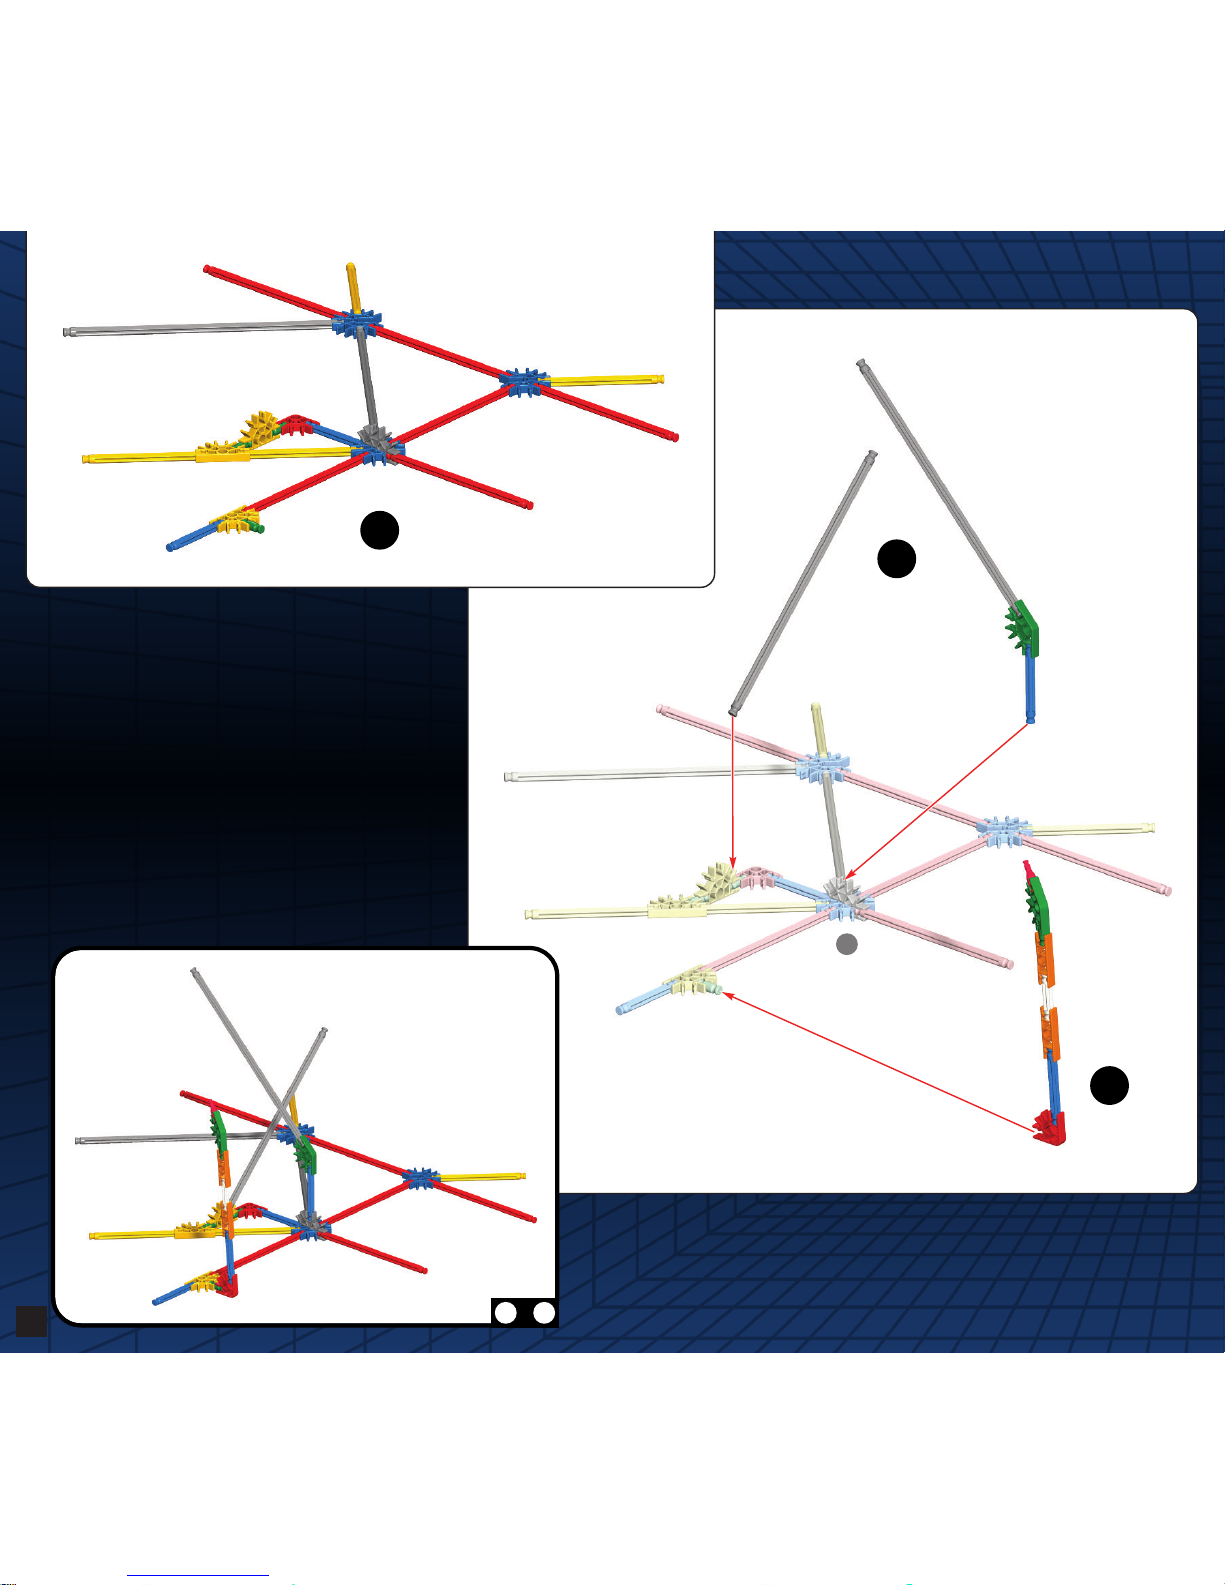
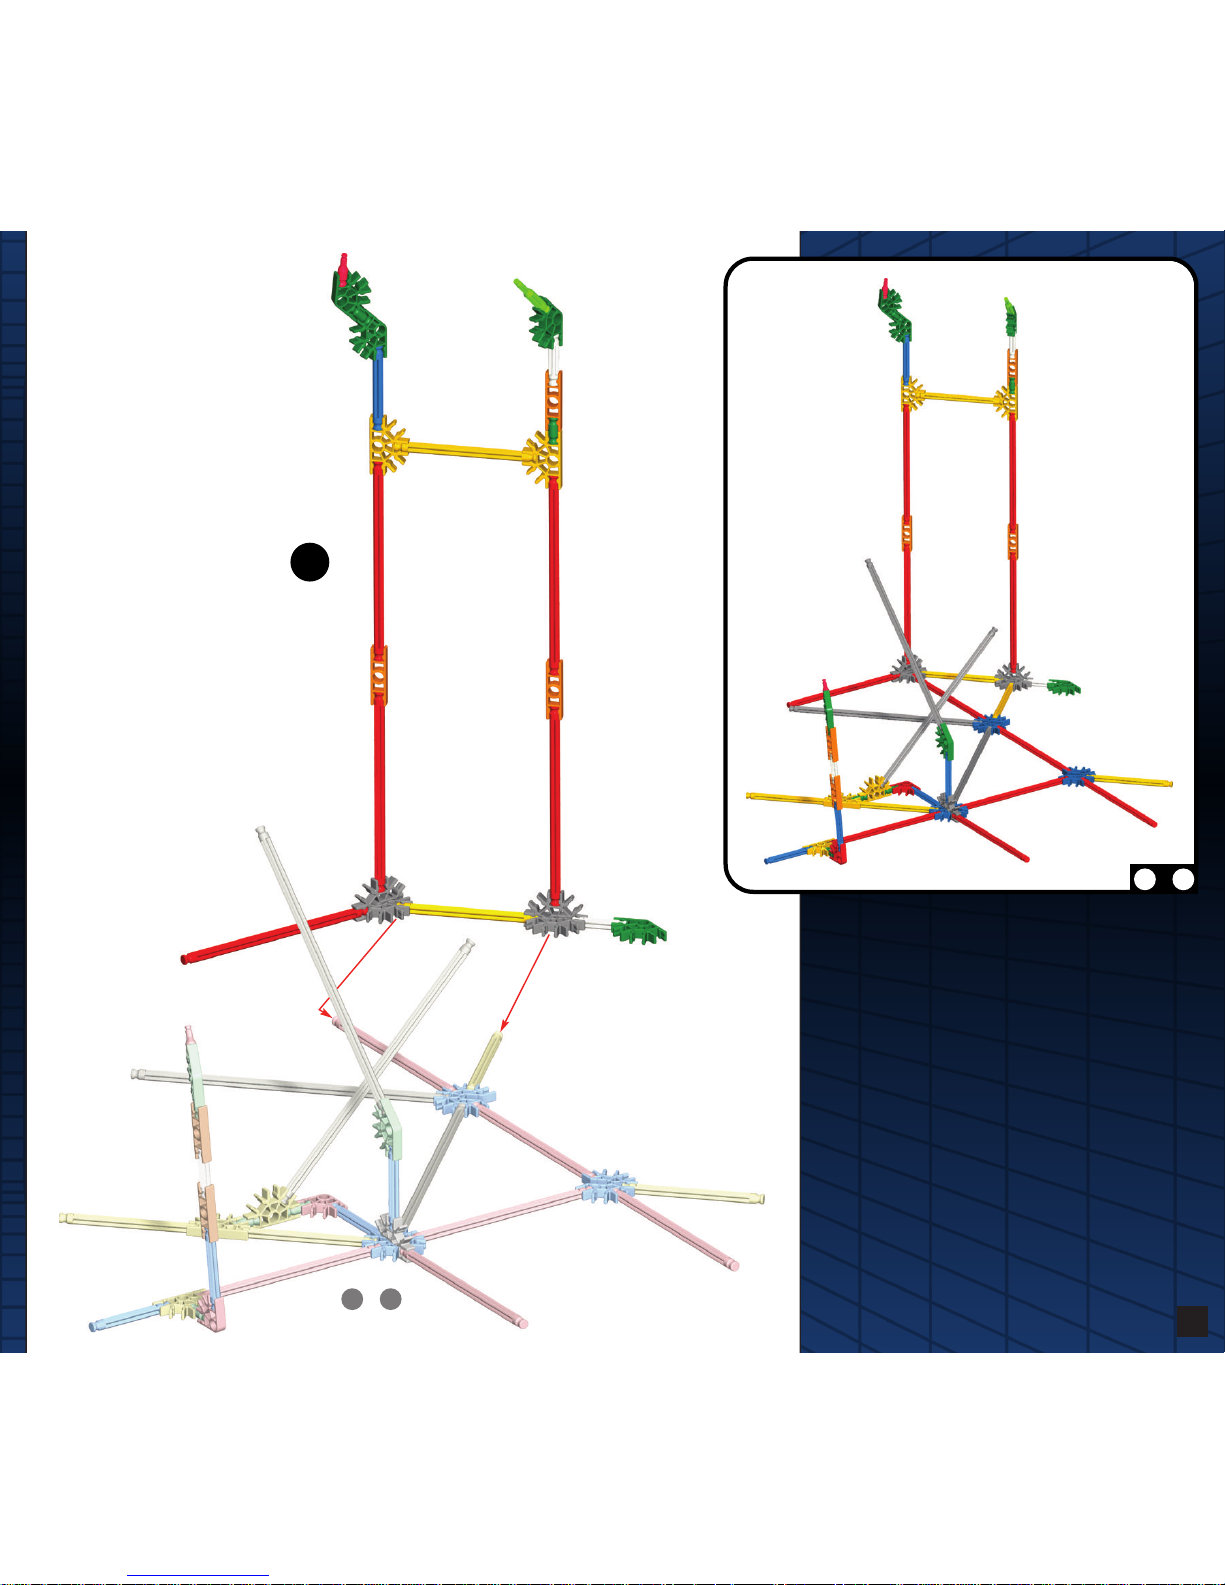
1
for Instruction UpdatesGo to
1 3
-
2
1
3
4
Top side of track
Track may look like this.
Page 4

4
1
2
3
1 3
-
Page 5
5
1 4
-
4
1 3
-
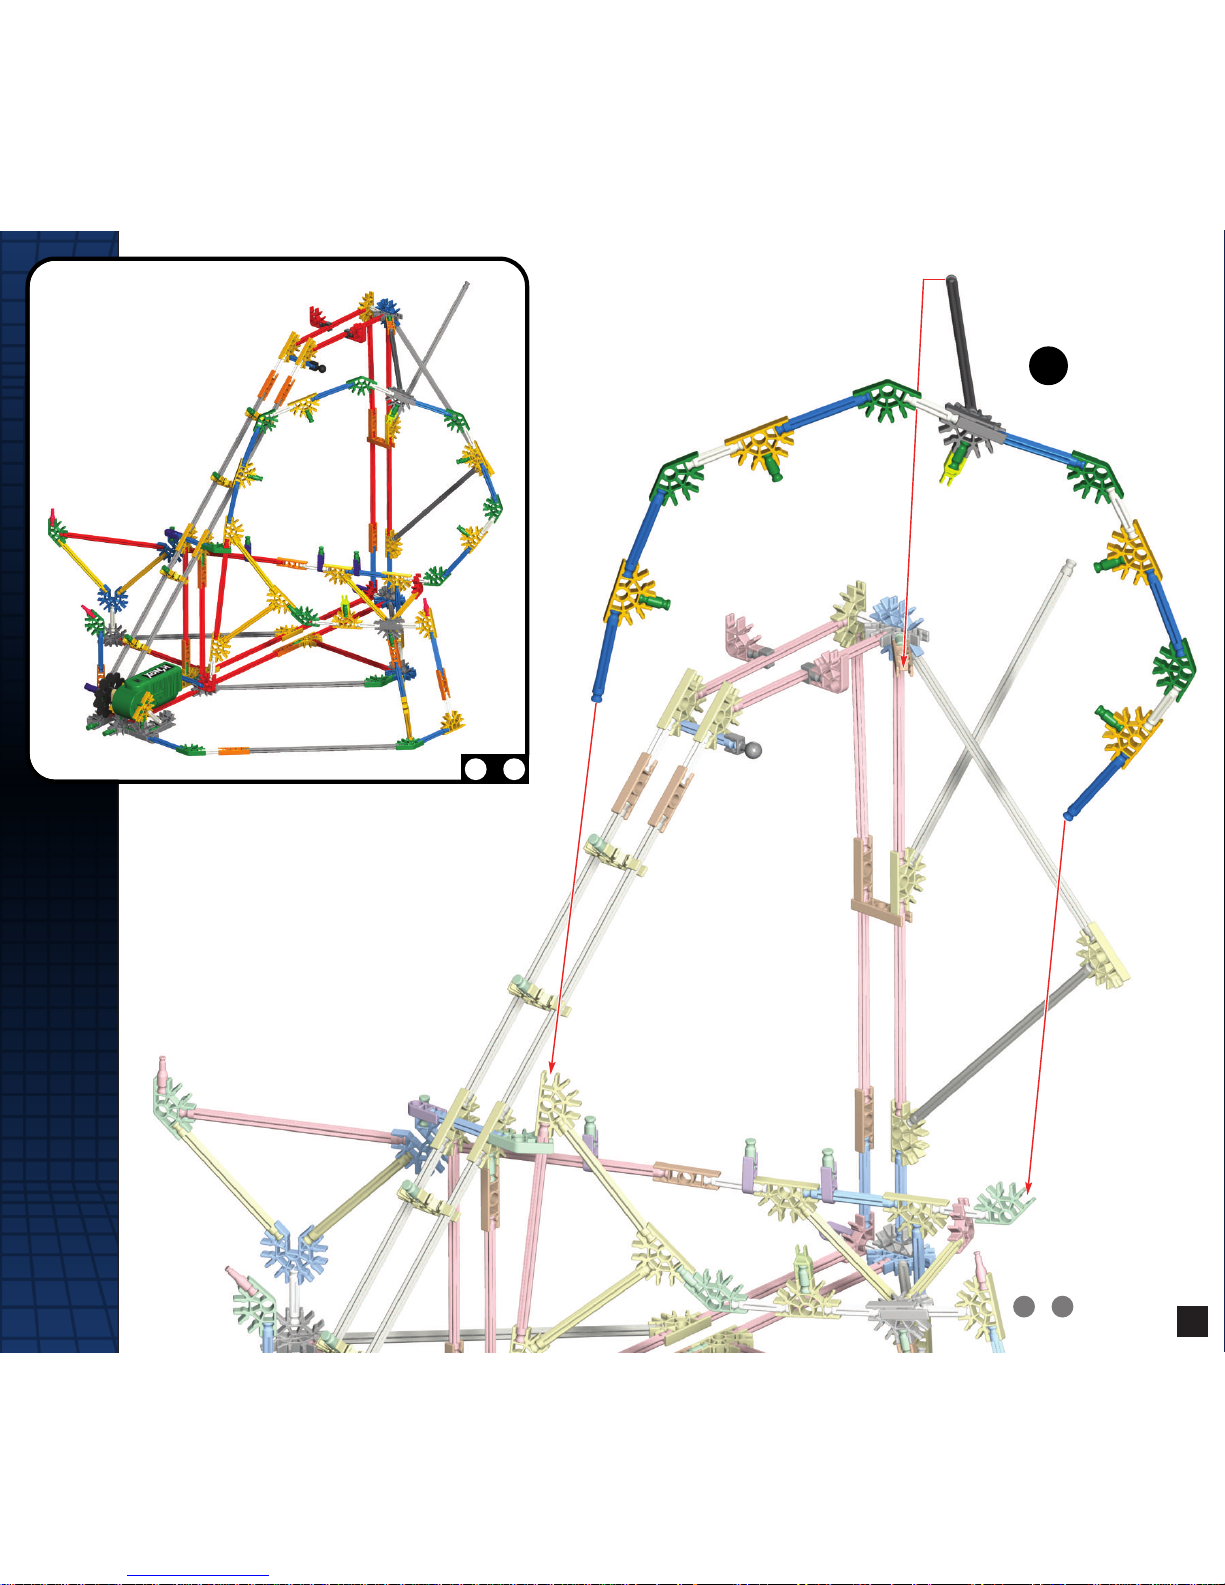
Page 6
6
1 5
-
5
1 4
-
Page 7

7
1 6
-
6
1 5
-
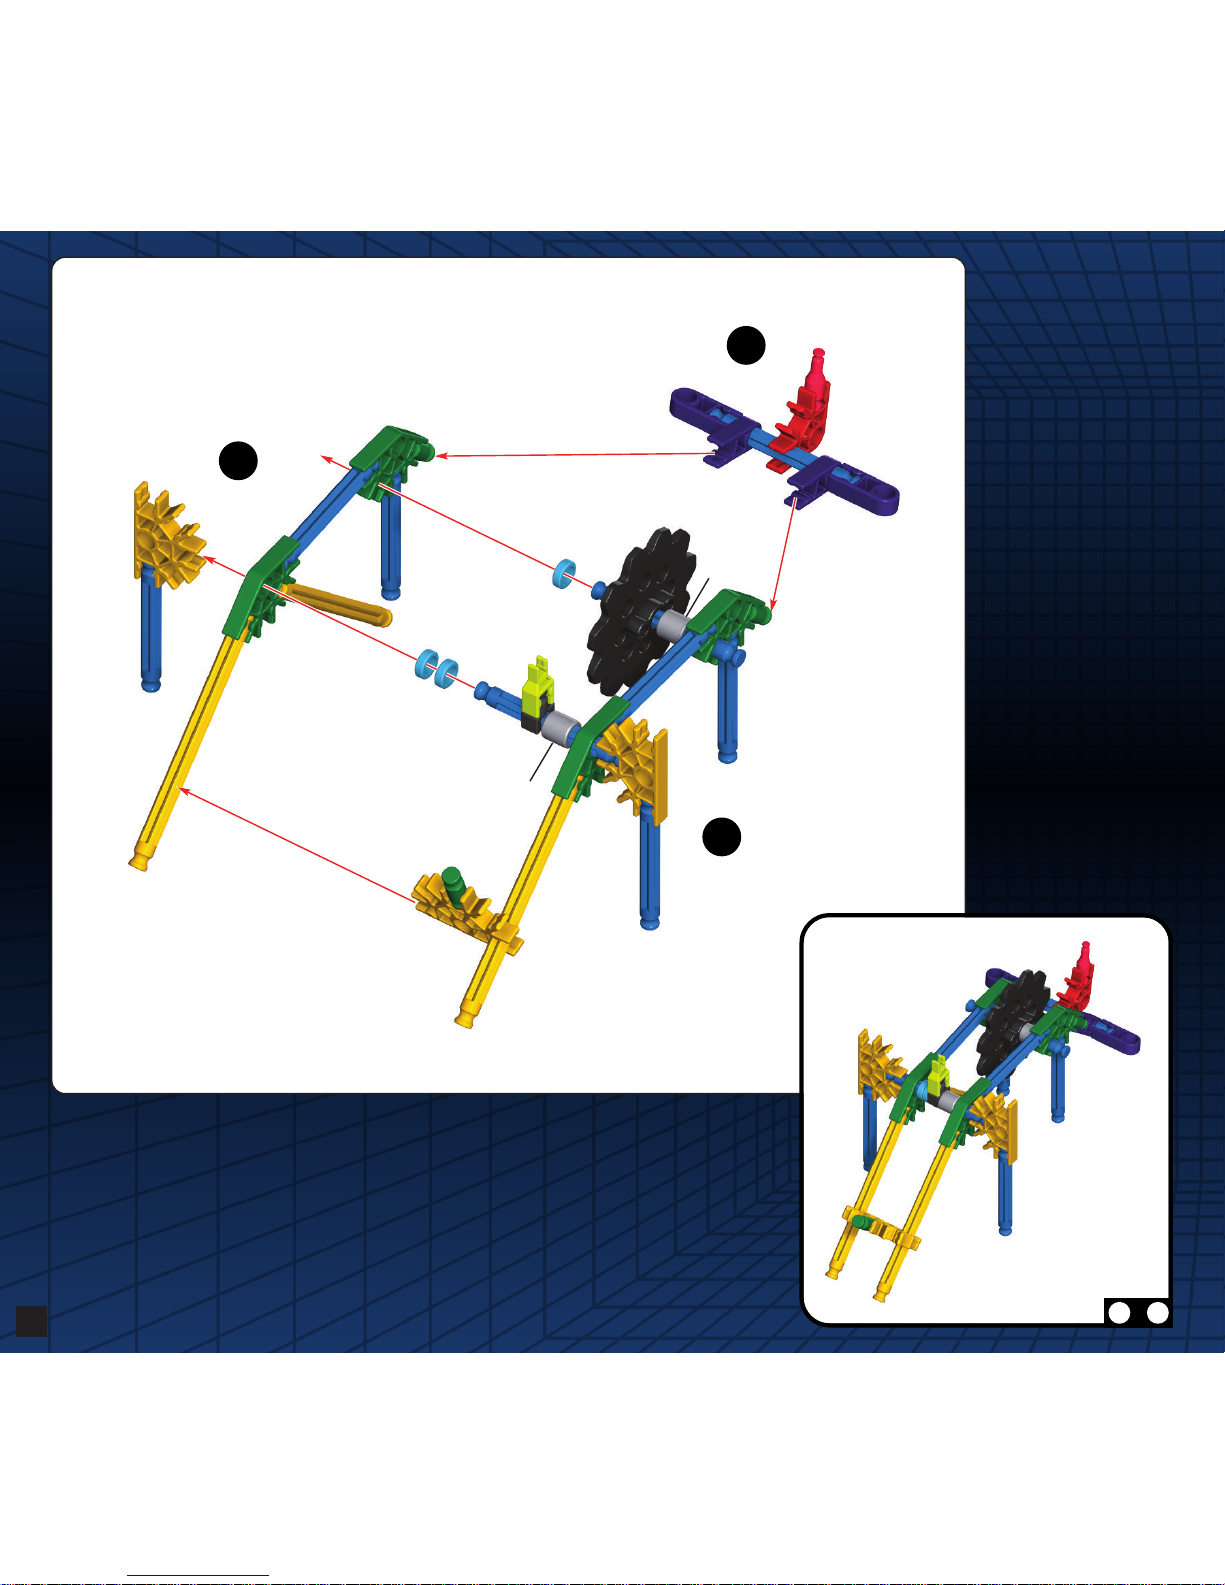
Page 8
8
7 9
-
D
id you install 2 AA (or LR6) batteries
in the Motor?
¿
Instalaste dos pilas AA (o LR6) en el Motor?
E
S
7
8
9
Page 9
9
1 10
-
10
1 6
-
7 9
-
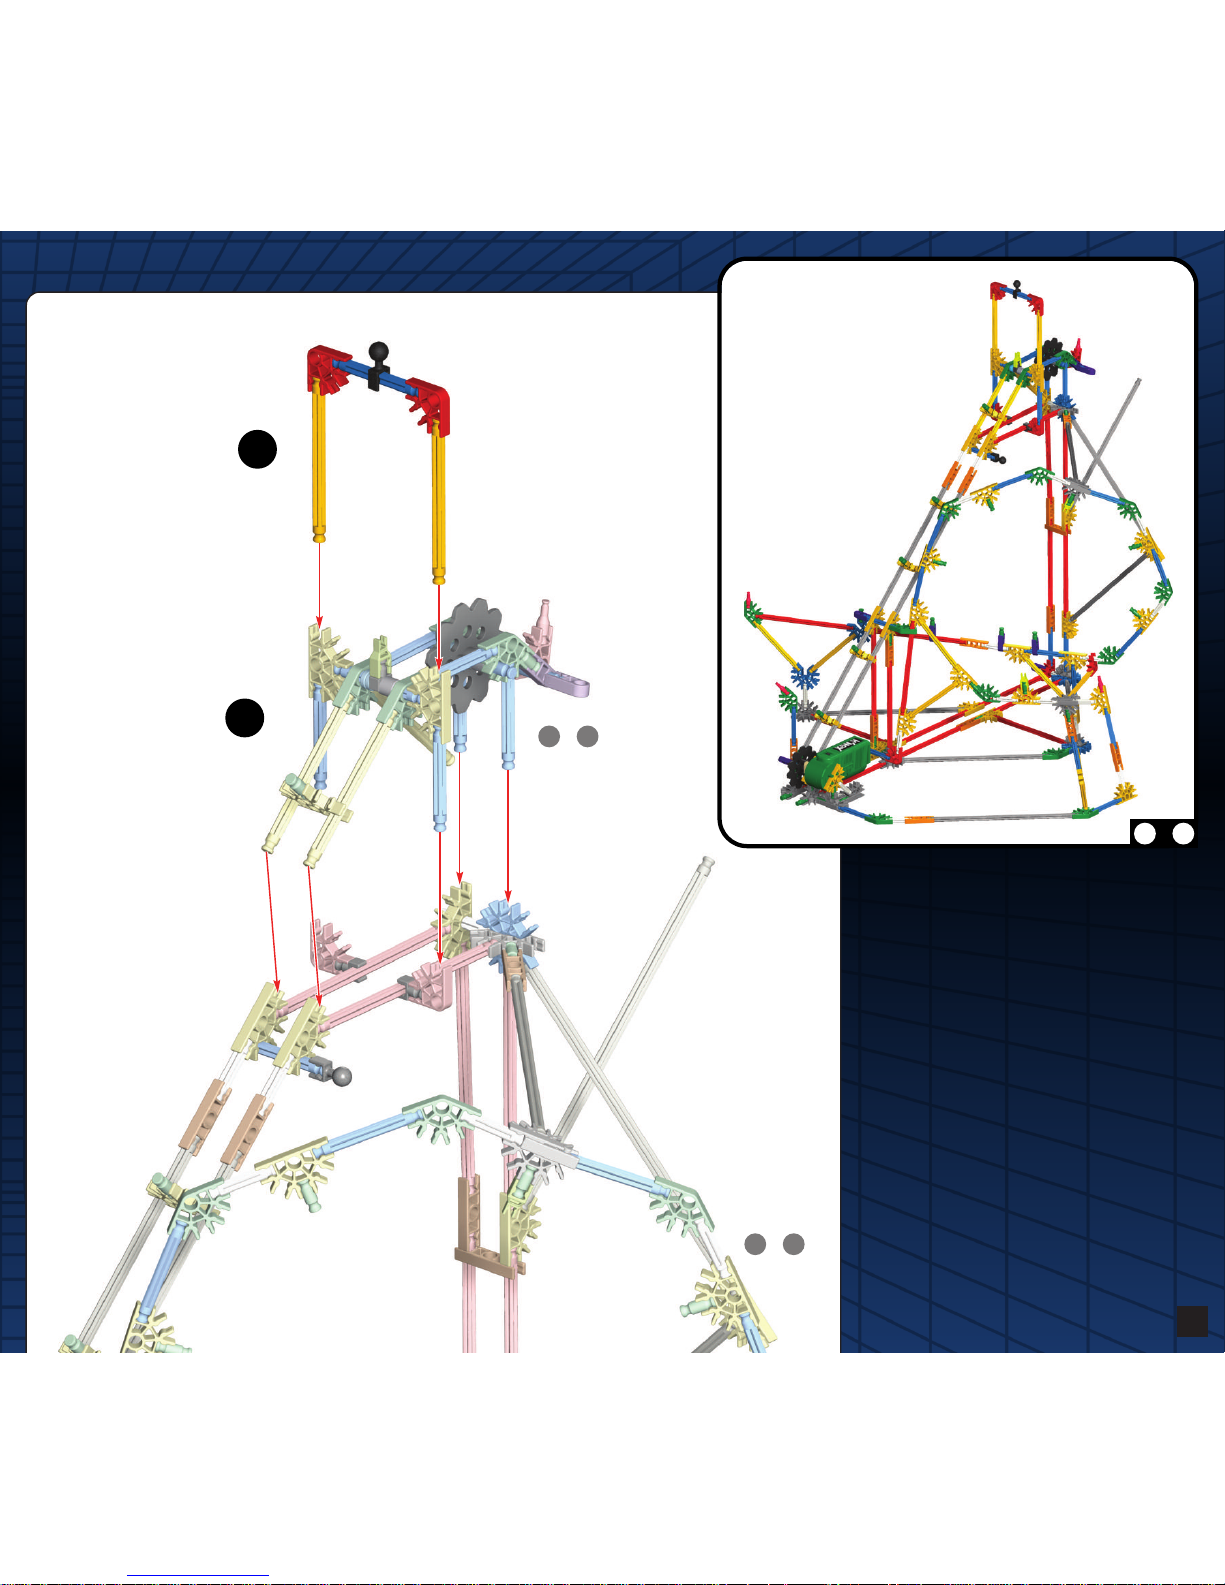
Page 10
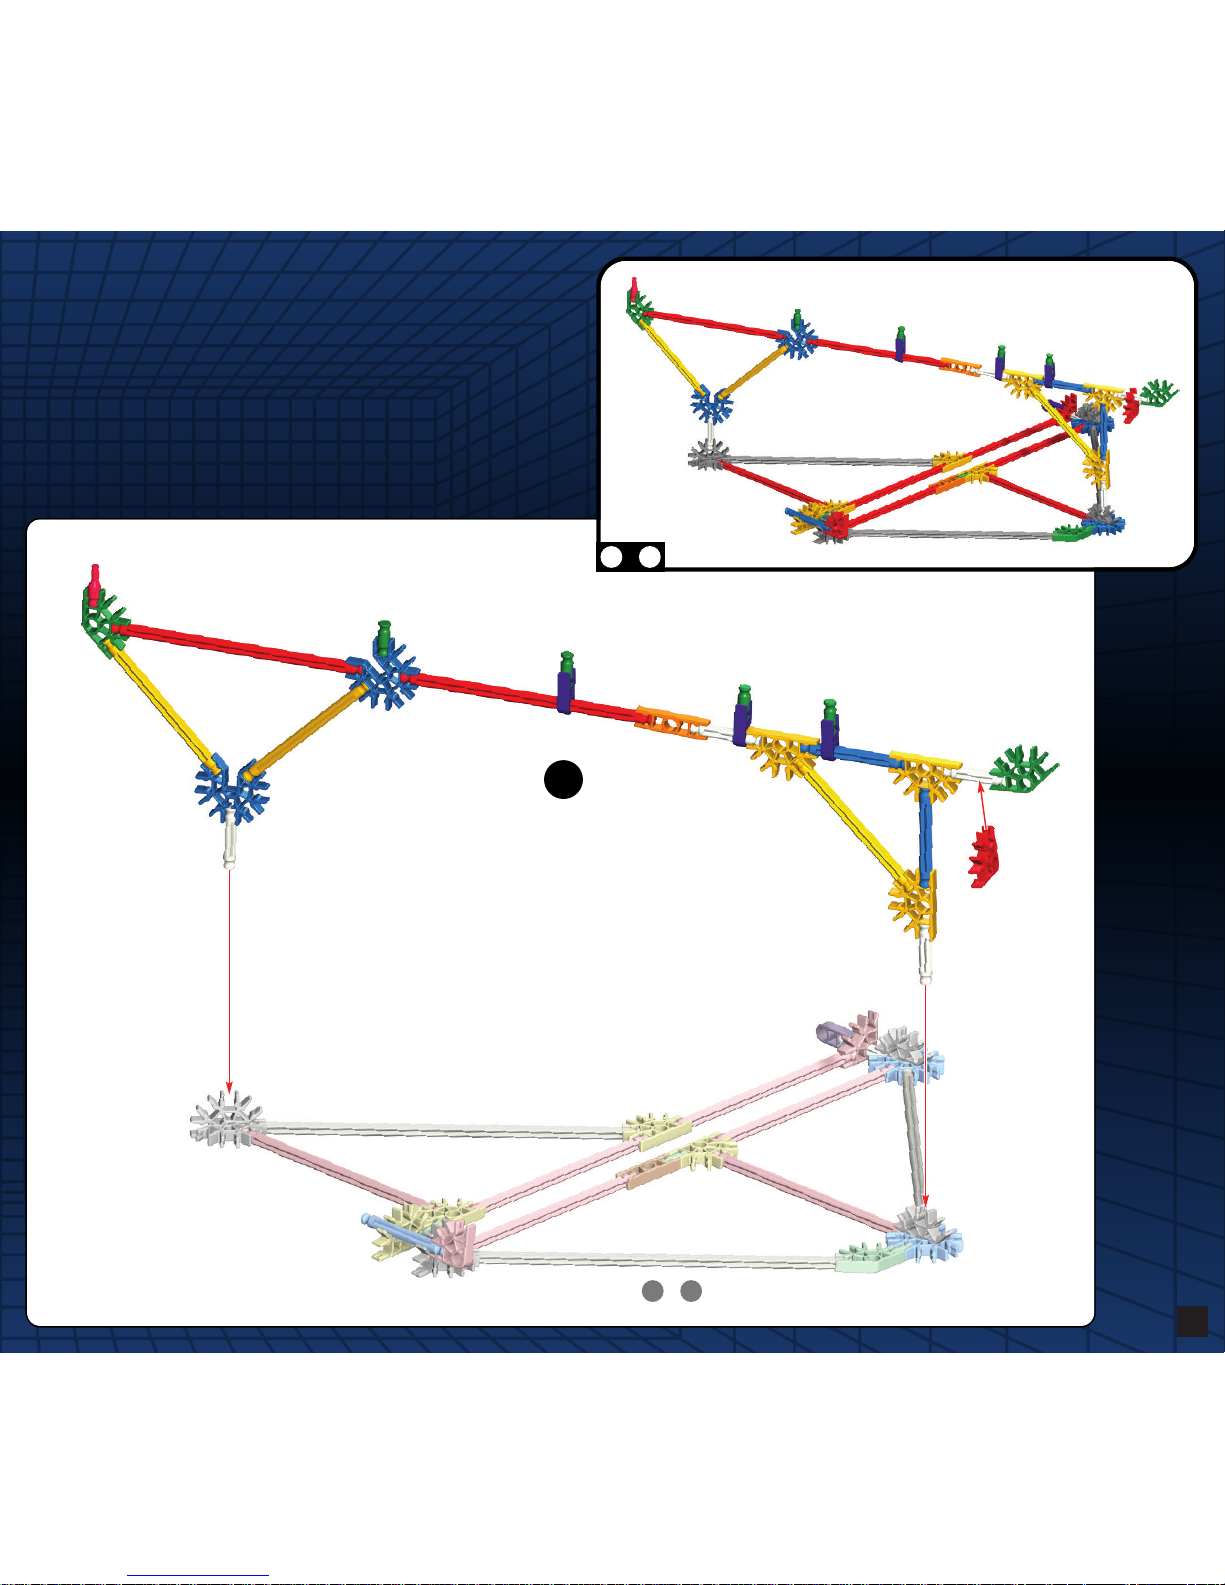
10
1 11
-
1 2
-
11
1 10
-
Page 11
11
1 13
-
12
13
1 11
Page 12

12
1 14
-
14
1 13
-
Page 13
1 15
-
13
15
1 14
-
Page 14
14
16 18
-
16
17
18
1
1
Page 15
15
1 20
-
19
20
1 15
-
16 18
-
Page 16
16
21 23
-
21
23
22
21
Page 17
17
21 24
-
24
21 23
-
Page 18

18
21 25
-
25
21 24
-
Page 19

21 26
-
19
26
21 25
-
Page 20

20
27
1 20
-
21 26
-
Page 21

21
1 27
-
Page 22

22
1
3
1
3
28
29
30
28 29
-
28 30
-
Page 23

23
28 31
-
31
28 30
-
Page 24

24
32
28 31
-
28 32
-
Page 25

25
28 32
-
1 27
-
33
1 33
-
Page 26

26
Top side of track
1
Consejos para armar las Pistas:
1
. Sujeta las guías de cad ena al lado superi or de la pista. Sujeta los con ectores en el lado inferi or
d
e la pis ta, exactamente com o se muestra.
2
. Empuja los cone ctores hacia a dentro hasta que o igas un “clic” .
3
. Los coc hes corren en el lado superi or de la pis ta. Para sujet ar los coches , aprieta la pista
l
evemente y e ngancha las ru edas en la P ista. Al construi r, con ecta siempre la pi sta de lado
s
uperior a la do superior.
ES
3534
TRACK BUILDING TIPS:
1. Attach the black chain guides to the top of the track and
attach the connectors to the bottom of the track exactly as
the instructions show.
2. Be sure to push the connectors on firmly until they “click”.
3. To connect the track pieces, line up the pins and push until
they are tight. Always connect the track top side to top side
throughout the build.
23
Track may look like this
Esto viene a dos estilos diferentes.
ES
Page 27

27
1 36
-
36
1 33
-
34 35
-
Page 28

28
37
1 38
-
38
A
lways join this end of the track
to the previous track piece first,
then connect the rest of the
track to the coaster frame.
A
l construir, conecta siempre la pista de lado
s
uperior a lado superior.
ES
1 36
-
37
Page 29

29
39
1 40
-
40
1 38
-
39
Page 30

30
1 42
-
41
42
1 40
-
41
Page 31

31
1 44
-
43
44
1 42
-
43
Page 32

32
45
1 46
-
46
1 44
-
45
Page 33

33
47
1 48
-
48
1 46
-
47
Page 34

34
49
1 50
-
50
1 48
-
49
Page 35

35
51
1 52
-
52
1 50
-
51
Page 36

36
1 54
-
53
54
1 52
-
53
Page 37

37
1 56
-
55
56
1 54
-
55
Page 38

38
1 58
-
57
58
1 56
-
57
Page 39

39
1 60
-
59
60
1 58
-
59
Page 40

40
1 62
-
61
62
1 60
-
61
Page 41

1 64
-
63
41
64
1 62
-
63
Page 42

42
1 66
-
65
66
1 64
-
65
Page 43

43
1 68
-
67
68
1 66
-
67
Page 44

44
1 70
-
69
70
1 68
-
69
Page 45

45
1 72
-
71
72
1 70
-
71
Page 46

46
73
74
1 72
-
73
Page 47

47
1 74
-
Page 48

48
x
10
x
1
75
76
77
76
75
IMPORTANT: Attach all the chain
links in the same direction.
IMPORTANTE: Conecta los eslabones de la cadena en
la misma dirección.
ES
x
10
x
4
Page 49

49
1 78
-
78
1 74
-
75 77
-
Page 50

79
50
Para sujetar los Coches, aprieta la Pista levemente y engancha las ruedas en la Pista.
Si los coches quedan atascados mientras van hacia abajo: Asegúrate de que el coche no
esté golpeando ninguna de las piezas K'NEX.
ES
ATTACHING THE COASTER CAR:
To attach the coaster car, slide it onto an open
end of the track. If the car gets stuck while going
around the track, make sure it is not hitting any
of the K’NEX parts.
80
1 78
-
1 79
-
Page 51

1 81
-
51
81
Page 52

52
RECORDING VIDEO FOOTAGE:
• Turn the camera on using the On/Off Switch (Green LED will turn on).
• To start recording, press the Record Button (Green LED will begin to blink).
• To stop recording, press the Record Button (Green LED will stop blinking).
• Note: Internal memory holds approximately 17 seconds of video and it is erased
each time the camera is turned off (save video to computer before turning off).
Use an external Micro SD memory card (2 GB or less) to record longer video.
IDEAS FOR ADDITIONAL FUN:
• Share your video online with friends and family on your website, or post it to a site
such as www.youtube.com. (Youtube is a registered trademarks of Google Inc.).
• Try connecting the video camera to your other K’NEX creations, like motorized
vehicles or other amusement park rides.
• Create your own movie by recording 1st–person and 3rd–person video from your
coaster, then splice video footage together to create a movie using your own editing
software such as Windows
® Movie Maker® or Apple® iMovie® . (Windows and
Movie Maker are registered trademarks of Microsoft Corporation. Apple and iMovie
are registered trademarks of Apple Inc.)
• Once you build the roller coaster, try building your own roller coaster design and
share it with other people on sites like www.sscoasters.net.
DOWNLOADING VIDEO FOOTAGE TO A COMPUTER:
• Connect the USB cord to the GREEN video camera car. (It is recommended that
you attach the USB cord after the computer has successfully started.)
• Connect the other end of the USB cord to the computer.
• Save video footage to the computer. (PC users can do this by going to
“My Computer” and then clicking on the appropriate removable drive.)
• Use your computer program to watch the video.
• Note: Once the video is on your computer, delete the video footage from your
video camera car or memory card so you can save new video footage.
VIDEO CAMERA BASICS:
• To capture 1st–person (in-ride) video, as if you were in the car, put the GREEN video
camera car on the roller coaster track (with the wheels on the car as shown).
• To capture 3rd–person video, point the GREEN video camera car at the ORANGE car
and record video as it moves around the roller coaster.
• Turn the coaster car upside-down (as shown),
and gently slide the black wheel assembly
off the GREEN car then reattach them to the
ORANGE car. The GREEN video camera car
can then be attached to any of the 7 camera
mounting points.
CHARGING YOUR VIDEO CAMERA:
• The video camera battery can be recharged by connecting the video camera
car to a computer using the USB cord.
• The red LED light indicates the camera is still charging. Once the light turns
off, charging is complete (normal charging time 1-2 hours, when battery is empty).
Page 53

53
Page 54

54
If the motor is not working properly:
• Ensure that new batteries are being used, and that they are
inserted correctly in the motor.
• Ensure you have the correct amount of parts in the chain.
• Ensure the chain is not getting caught on any other K’NEX
parts.
If the car gets stuck on the track:
• Check that the model is built correctly.
• Check that the car is attached to the track correctly.
• Check that the car is not hitting any K’NEX parts.
• Check that the track pieces are snapped together correctly
and that there are no bumps.
• Adjust the track and smooth the bumps. The car should
coast through the track layout smoothly. Bumps or creases
in the track reduce the cars momentum and may prevent
the car from getting around the track.
To record smoother video footage:
• To record smoother, clearer video footage through the
high-speed sections of the roller coaster, try attaching
K’NEX parts to the track (as shown below). This technique
uses friction to reduce the speed of the coaster car, which
may result in clearer video footage.
If the video camera car does not record video:
• Make sure that the video camera battery is fully charged,
connect the camera to a computer with the USB cord.
• Check that the video camera is turned on. The green LED
light indicates that the video camera is on.
• Check that the record button has been pressed.
The green LED light will blink when recording has started.
• Check that the video camera’s internal memory is not full.
Download existing video footage to your computer and
then delete video footage stored in the camera.
• If you are using a Micro SD card, check that it is not larger
than 2 GB. Cards larger than this will not function with the
video camera.
If the video footage is not viewable on your computer:
• Check that your computer has the following systems:
• PC: Windows
®
Vista, XP, 2000 or
• Macintosh
®
: OS 9.2 or higher
• CPU Speed: Intel
®
Pentium III 800 MHz or higher
• Memory: Requires at least 128 MB of RAM and 80 MB of
free hard disc space.
• Software: Supports USB 2.0 and MSDC
(Mass Storage Device Controller)
If your computer does not turn on, or tries to start
from the coaster car:
• Unplug the USB cord from your computer before you turn
on your computer.
• Plug in the USB cord only after the computer has turned on.
If you have other questions, or are still experiencing
difficulties:
• Please call our Consumer Hotline at 1-800-KID-KNEX
(USA & Canada only). You can find additional ways to
contact K’NEX on the back cover of this booklet.
• Note: that the K’NEX Consumer Hotline can only answer
questions related to your K’NEX product. For computer
related problems, please contact your computer
manufacturer’s customer service department.
TIPS &TROUBLESHOOTING
Page 55

Español
(Página 2)
Información importante para los padres y niños
Guarda estas instrucciones en un sitio conveniente. Contienen información importante
de seguridad. Lee todas las advertencias e instrucciones antes de comenzara construir
y operar este modelo.
ADVERTENCIA: PELIGRO DE ASFIXIA - Piezas pequeñas. No es para niños
menores de 3 años.
PRECAUCIÓN:
Mantén el cabello, los dedos, la cara y la ropa alejada de las piezas móviles.
PRECAUCIÓN: Tenga cuidado para no inclinar el modelo sobre. El modelo se debe
colocar en una superficie plana y dura.
• No intentes lanzar nada que no sea el carrito.
• No obstruyas la pista con objetos o cualquier parte de tu cuerpo.
• Compartan la experiencia K'NEX con su niño y hagan que la construcción con
K'NEX sea una divertida aventura de toda la familia.
• Dedicatiempo a disfrutar elproceso deconstrucción. ¡No teapresures!
• Mientras construyes, trata de colocar tu modelo en la misma dirección que se
muestra en las instrucciones.
• El producto y los colores pueden variar.
• Ayudar al ambiente disponiendo de su producto y empaquetándolo responsable. El
símbolo del compartimiento del wheelie indica que el producto y las baterías no se
deben disponer en los residuos domésticos mientras que contienen las sustancias
que pueden ser perjudiciales al ambiente y a la salud. Utilizar por favor los puntos
señalados de la colección o las instalaciones del reciclaje al disponer del artículo o
de las baterías.
• LA CÁMARA DE VIDEO - REQUISITOS DE SISTEMA:
Sistema operativo: PC: Windows
® Vista, XP, 2000 o Macintosh®: OS 9.2 o más alto
Velocidad de la CPU: Pentium III de Intel® 800 megaciclos o más alto
Memoria: Requiere por lo menos MB 128 y 80MB de espacio libre
Software: USB 2.0 y MSDC (regulador de dispositivo de memoria masiva)
Información acerca de las pilas
PRECAUCIÓN:
• Asegúrese de insertar las pilas correctamente y de siempre seguir las instrucciones
del fabricante del juguete y de las pilas.
• No mezcle pilas viejas con nuevas, ni pilas alcalinas, estándar (carbón-cinc) o
recargables (níquel-cadmio). Se debe usar solamente pilas del mismo tipo, o las
que se recomienden como equivalentes.
• Siempre retire las pilas débiles o gastadas del producto; no forme cortocircuito en
los puntos de intercambio.
• Inserte las pilas de acuerdo con los esquemas de polaridad (+/-).
Consejos importantes
• Se recomiendan las pilas alcalinas.
• No se recomiendan las pilas recargables.
• Retire las pilas recargables del juguete antes de cargarlas; éstas deben ser
cargadas solamente bajo la supervisión de un adulto.
• No se debe recargar las pilas que no son recargables.
• Mantenga los componentes sin polvo; no sumerja ni use en agua.
• No deseche las pilas en el fuego ya que pueden tener fugas, explotar y causar
lesiones personales.
• Retire todas las pilas si el juguete no se usará por mucho tiempo.
• No meta las vanilas pequeñas en los orificios del motor ya que dañarian el motor y
no se podrian sacar.
• Proteja el medio ambiente desechando su producto y el embalaje de una manera
responsable. El símbolo del recipiente con ruedas indica que el producto y las pilas
no deben tirarse en la basura doméstica, ya que contienen sustancias que pueden
dañar el medio ambiente y la salud. Por favor acuda a los lugares de recolección
designados o a instalaciones de reciclaje para desechar el artículo o las pilas.
Cómo insertar y quitar las pilas
• Usa un pequeño destornillador de estrella para abrir el Motor. Coloca 2 pilas AA
(o LR6) nuevas dentro del compartimento con la polaridad correcta (+/-).
Cómo cargar el coche video:
• La carga de batería se debe hacer por un adulto.
• Seguir estas instrucciones cuidadosamente. Cargar solamente por este cable del
USB. Tiempo de carga del Normal 1-2 horas (cuando la batería es vacía).
• No dejar el coche video desatendido mientras que está cargando.
• Desenchufar la cuerda del USB cuando se carga el coche video.
• El cobrar excesivamente podía dar lugar al recalentamiento.
• Cargar el coche video en una subsistencia superficial inflamable él lejos de artículos
inflamables.
• No colocar adentro o agua cercana, calor o fuego.
• No cortocircuitos los terminales de la batería.
• Si se ha dañado el coche video, parar inmediatamente el uso, desenchufarlo y
moverlo con seguridad lejos de los materiales inflamables.
(Página 3)
Consejos básicos de construcción de K'NEX
Empieza a construir: Para comenzar tu modelo, busca el 1 y sigue los números.
Cada pieza tiene su propia forma y color. Simplemente mira los dibujos, busca las
piezas correspondientes en tu juego y después conéctalas. Mientras construyes, trata
de colocar tu modelo en la misma dirección que se muestra en las instrucciones.
Los colores desteñidos muestran que esta sección ya está construida. Conecta las
nuevas secciones en los lugares señalados por las flechas. Las nuevas piezas que
agregues estarán en colores vivos.
Espaciadores: Hay lugares en tu modelo donde tendrás que utilizar espaciadores.
Asegúrate de utilizar el color correcto y el número de espaciadores indicados en las
instrucciones.
Conectores: Hay conectores azules y plateados con ranuras largas especiales.
Se enganchan deslizándose como ves en los dibujos. Conecta estas piezas
empujándolas hasta que oigas “clic ”.
Pista: Para sujetar los coches, aprieta la pista levemente y engancha las ruedas
en la Pista. Al construir, conecta siempre la pista de lado superior a lado superior.
Empuja los conectores hacia adentro hasta que oigas un “clic”. Esto viene a dos
estilos diferentes.
Sign: Aspecto at página 50 for instrucciones.
Lista de piezas: Antes de empezar con la construcción, asegúrate de comparar las
piezas en tu conjunto con la lista de las piezas aquí. Si faltan algunas, llámanos o
escríbenos siguiendo las instruccionesen la página trasera. Estamos aquí para ayudarte.
(
Página 52)
CARGA DE SU CÁMARA DE VÍDEO:
• Esta batería puede ser recargada, conectando la cámara de vídeo con una
computadora por (la cuerda del USB).
• Una luz roja del LED indica que la cámara todavía está cargando. Una vez que la
luz se apaga, la carga está completa.
• Nota: Dejar que la batería se cargue por más de 2 horas la primera vez.
FUNDAMENTOS DE LA CÁMARA DE VÍDEO:
• El coche VERDE con la cámara de vídeo está diseñado para utilizarlo en la pista
(con las ruedas colocadas) o fuera de la pista (con las ruedas quitadas):
• Para capturar el vídeo en la primera persona, como si usted estuviera en la
montaña rusa, coloque el coche VERDE de la cámara de vídeo en la pista de la
montaña rusa (con las ruedas en el coche como se muestra).
• Para capturar el vídeo en la tercera persona, como si usted esté mirando el coche
ANARANJADO en la montaña rusa, señalar el coche VERDE de la cámara de
vídeo en el coche ANARANJADO cuando él se mueve alrededor de la montaña
rusa. Dar vuelta arriba al coche, y utilizar suavemente sus pulgares para deslizar la
rueda negra del coche VERDE después remontarla al coche ANARANJADO
(como se muestra) antes.
• El coche VERDE de la cámara de vídeo se puede entonces atar a los varios puntos
del cámara-montaje (como se muestra).
IMÁGENES DE VÍDEO EN LA GRABACIÓN:
• Mover el interruptor para prender la cámara (una luz verde se prenderá)
• Presionar el botón una vez PARA COMENZAR a grabar (la luz verde comenzará a
parpadear)
• Presionar el botón otra vez PARA PARAR el grabar video(la luz verde parará de
parpadear)
• Nota: Aproximadamente 17 segundos de cantidad se pueden grabar una sola vez.
Si una tarjeta externa del “SD micro” (2 GB o menos) se inserta en la ranura para la
tarjeta externa de la memoria, la cantidad adicional puede ser registrada.
TRANSFERENCIA DEL VÍDEO A LA COMPUTADORA:
• Conectar la cuerda del USB con el coche VERDE de la cámara de vídeo.
• Nota: Se recomienda que usted conecte el cordón del USB después que la
computadora haya comenzado.
• Conectar el otro extremo del cordón del USB con la computadora.
• Guardar el vídeo a la computadora. (Usted puede hacer esto llendo a
“mi computadora” y después presionar en la (entrada movible.)
• Utilizar su programa de computadora para mirar el vídeo.
• Nota: Una vez que el vídeo está en su computadora, borrar el vídeo del coche de la
cámara o de la tarjeta de memoria.
IDEAS PARA LA DIVERSIÓN ADICIONAL:
• Compartir su vídeo en la red cibernética con los amigos y la familia colocandolo a
su Página Personal de en la red cibernética, o a los sitios de la comunidad tales
como www.youtube.com. (Youtube es una marca registrada de Google Inc.).
• Intentar conectar la cámara de vídeo con creaciones de K’NEX, como los vehículos
motorizados ó en otras vueltas en los parques de atracciones.
• Crear su propia película grabando el vídeo de su montaña, y después unir los
vídeos juntos para crear una película usando sus propios programas de
computadoratales como Windows
® Movie Maker® ó Apple® iMovie®.
(Windows y Movie Maker están registrados bajo la coorporación de Microsoft
Corporation. Apple y iMovie están registrados bajo Apple Inc.)
• Una vez que usted construya la montaña rusa, trate de construir su propio diseño
de montaña rusa y lo comparte con la otra gente en sitios de lared cibernética,
como www.sscoasters.net.
CÁMARA DE VIDEO FÁCIL DE USAR:
• Presiona botón de registro para encender ó parar las la grabación de video.
• La luz del LED indica funciones de la cámara; VERDE - la cámara está prendida;
VERDE (parpadeando) - está grabando; ROJO - la cámara está cargando. NOTA:
Cuando el LED no se prende, la cámara está apagada o la bacteria se está cargando.
• Éste es la lente de la cámara de vídeo. La cámara de vídeo tiene una resolución del
cuadro de 320 x 240, y registra 30 FPS (marco-por-segundos). El vídeo es registrado
como un archivo de AVI. La cámara de vídeo tiene libre 4.7 MB de memoria interna,
que almacena aproximadamente 17 segundos de imágenes de vídeo.
• Imágenes adicionales pueden ser registradas y ser almacenadas usando una tarjeta
externa micro de la memoria del SD (2 GB o menos). Una vez insertada en esta
ranura, el video se almacenará automáticamente a la tarjeta micro de la memoria del
SD (no a la memoria interna). Acuerdese que las tarjetas micro de la memoria del
SD sobre 2 GB no funcionarán.
• Esta es la ranura donde la cuerda del USB se conecta. Conectando la cuerda del
USB a la computadora, la cantidad puede ser transferida. Esto también recarga la
cámara de vídeo. Nota: Tarda aproximadamente 2 horas para cargarcompletamente la
cámara. La luz roja del LED apagará una vez que la cámara se cargacompletamente.
(Página 54)
Ideas e Investigación de averías:
• Para grabar suavemente, con una claridad a través de las secciones de alta
velocidad de la montaña rusa, intenta unir piezas de K’NEX a la pista, como se
muestra. Esta técnica utiliza la fricción para reducir la velocidad del coche de la
montaña, que puede dar lugar a una cantidad más clara.
Si el motor no está funcionando correctamente:
• Asegurarse de que se estén utilizando las nuevas baterías, y de que están
insertadas correctamente en el compartimiento de batería (+/-).
• Asegurarse que usted tenga la cantidad correcta de piezas en la cadena
• Asegurarse que la cadena no esté cogiendo partes de K’NEX.
Si el coche se conecta en la pista:
• Comprobar que el modelo está construido correctamente.
• Comprobar que el coche está colocado a la pista correctamente.
• Comprobar que el coche no está golpeando piezas de K’NEX.
• Comprobar que los pedazos de la pista están encajados a presión juntos
correctamente y que no hay topetones.
• Ajustar la pista y alisar los topetones. El coche debe ir a través de la disposición
suavemente. Los topetones o los pliegues en la pista reducen el ímpetu de los
coches y pueden evitar que el coche consiga alrededor de la pista.
Si el coche de la cámara de vídeo no graba el vídeo:
• Comprobar la batería en la cámara de vídeo. Cerciorarse de que usted carga la
batería de la cámara, simplemente conectar la cámara con una computadora
usando el cordon del USB.
• Comprobar que la cámara de vídeo está prendida. Una luz verde indica que la
cámara está prendida.
• Comprobar que se ha presionado el botón de grabar. Una luz verde parpadeará
cuando la grabación ha comenzado.
• Comprobar que la memoria interna de la cámara de vídeo no esté llena. Transferir
las imágenes de vídeo existentes a su computadora y después suprimir las
imágenes de vídeo almacenadas en la cámara.
• Si usted está utilizando una tarjeta micro de la memoria del SD, comprobar que no es
más grande de 2 GB. Las tarjetasmás grandes no funcionaráncon la cámara devídeo.
Si las imágenes de vídeo no son visibles en su computadora:
• Comprobar que su computadora tiene los sistemas siguientes:
PC: Windows
® Vista, XP, 2000 o Macintosh®: OS 9.2 o más alto
Velocidad de la CPU: Pentium III de Intel® 800 megaciclos o más alto
Memoria: Requiere por lo menos RAM de 128 MB y el espacio de disco duro 80 MB
Software: USB 2.0 y MSDC (regulador de dispositivo de memoria masiva)
Si su computadora no prende, o intent prender desde el coche:
•
Separar el cable del USB de su computadora antes de que usted prenda su computadora.
• Atar el cable del USB solamente después que la computadora se ha prendido.
Si usted tiene otras preguntas, o todavía está teniendo dificultades, favor de llamar a
nuestro teléfono directo del consumidor en 1-800-KID-KNEX (los E.E.U.U. y Canadá
solamente). Usted puede encontrar maneras adicionales de entrar en contacto con
K’NEX en la contraportada de este panfleto. Observar que la línea directa para el
consumidor de K’NEX puede contestar solamente a las preguntas relacionadas con
producto de K’NEX. Para los problemas relacionados con la computadora, favor de
llamar al departamento de servicio al cliente de la fabricación de su computadora.
E
S
55
Page 56

 Loading...