

Page 1
INSTALLATION INSTRUCTIONS
MITSUBISHI ECLIPSE
EAGLE TALON
PLYMOUTH LASER
1990-93 L4-2.0L non turbo
57-5500
H
M
K
N
L
J
J
I
E
D
G
E
C
I
H
F
A
B
TOOLS NEEDED:
PARTS LIST:
TO START:
Large Phillips Head Screwdriver
10mm Socket
Long Ratchet Extension
Ratchet
12mm Wrench
4mm Allen Wrench
10mm Wrench
13mm wrench
P.O. BOX 1329, RIVERSIDE, CA, 92502 USA (909) 684-9762 FAX (909) 684-0716 TECH: (800) 858-3333 WWW:http://KNFilters.com e-mail: Tech@KNFilters.com
ROAD TESTING:
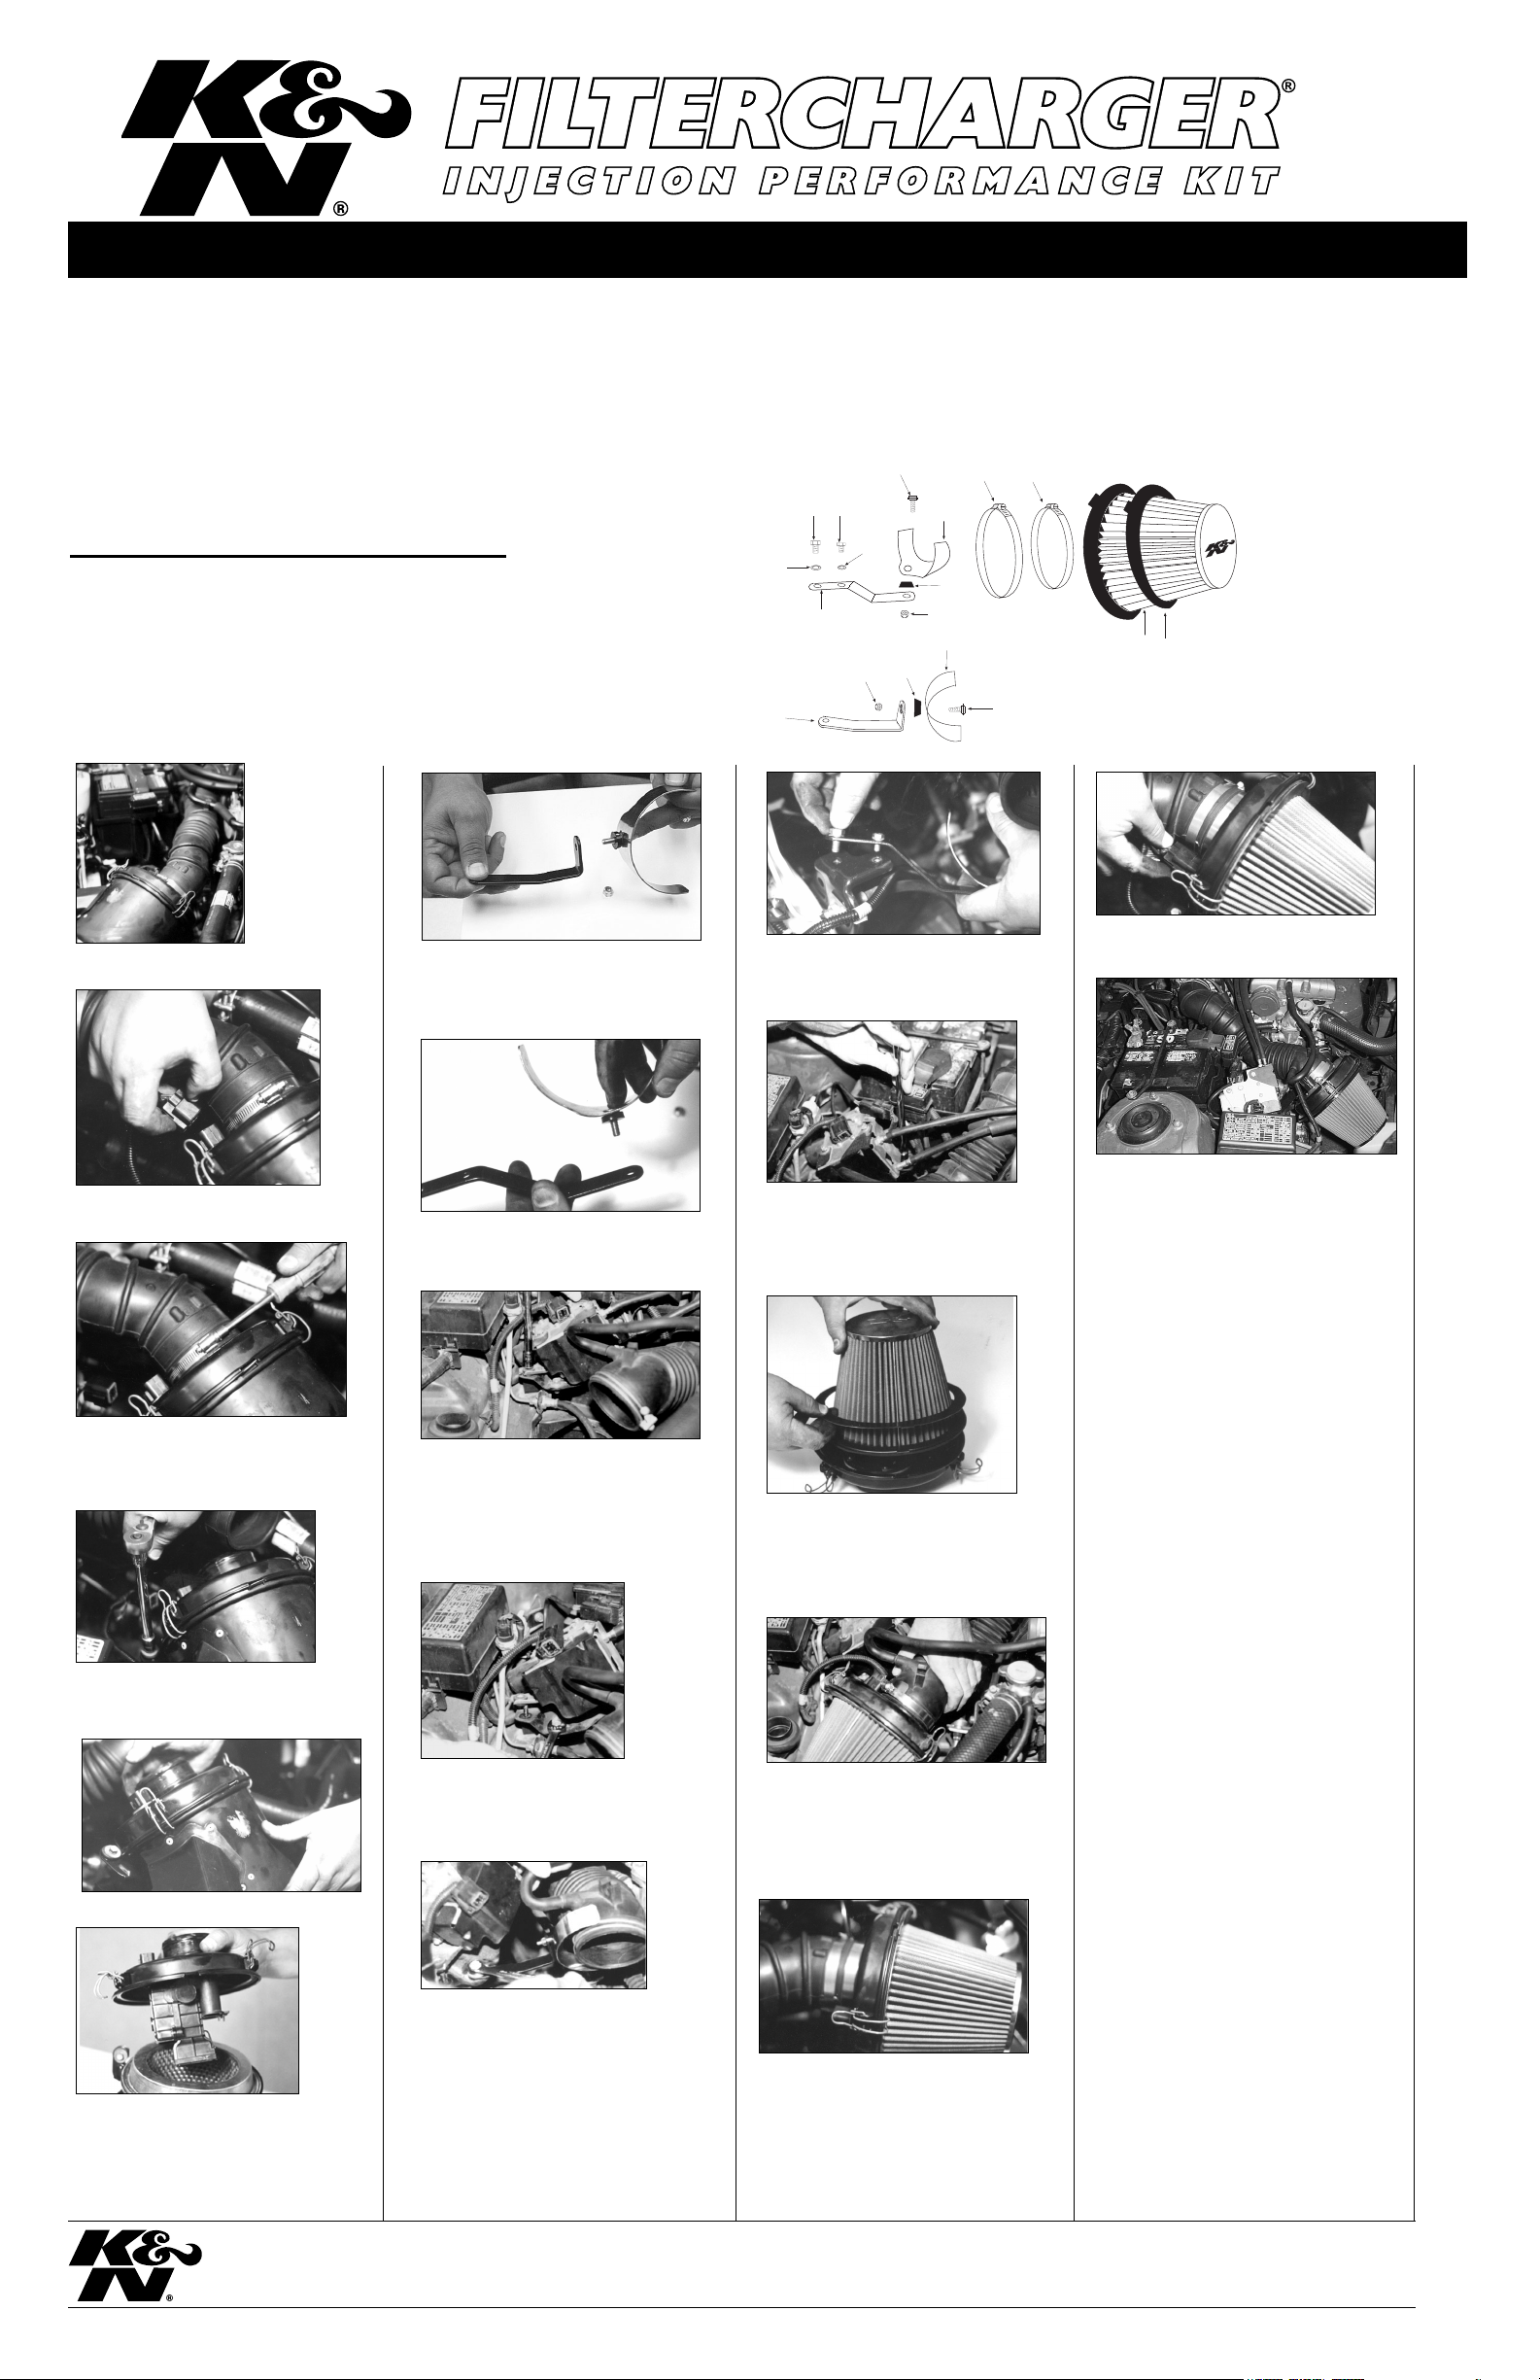
1. Turn the ignition OFF and disconnect
the vehicle's negative battery cable.
2. Disconnect the mass air sensor
electrical connection.
3. Loosen the hose clamp and disconnect the intake tube from the air cleaner
assembly. NOTE: Remove the factory
hose clamp as it will not be reused.
4. Using a 10mm socket, loosen and
remove the three bolts that secure the
air cleaner assembly.
5. Remove the air cleaner assembly.
7a. On 1990 models, assemble the saddle
to the ”L” bracket with the provided hardware as shown above.
7b. On 1991-93 models, assemble the
saddle to the “Z” bracket with the provided
hardware as shown above.
8. On 1990 models equipped with factory cruise control, use a 10mm socket to
loosen and remove the three nuts that
hold the cruise control actuator in place.
Move the cruise control actuator to the
side.
9. On 1990 models, use a 12mm
open end wrench to loosen and
remove the bolt as shown above.
10a. On 1990 models, mount the
saddle/bracket assembly to the cruise
control actuator bracket using the bolt
removed in the previous step as shown
above. NOTE: On vehicles without factory
cruise control, mount the saddle/bracket
assemble to the existing bracket to the
right of and below the fuse box.
10b. On 1991-93 models, mount the saddle / bracket assembly to the original airbox mounting location using the provided
hardware.
11. On 1990 models equipped with
factory cruise control, place the cruise
control actuator back into it’s original
location and secure it with the three
original nuts.
12. Install the Filtercharger Element along
with the provided retaining ring onto the
upper portion of the air cleaner assembly,
then secure into place using the three
over center clips as shown above.
13a. On the 1990 models, install the
filtercharger assembly into the stock
intake hose with the locating tab in the
12 o’clock position. Secure the intake
hose to the saddle with the hose clamp
provided as shown above.
13b. On 1991-93 models, install the filtercharger assembly into the stock intake
hose with the locating tab in the 12 o’clock
position and secure with the hose clamp
provided. Attach the saddle-bracket to the
intake hose using the second hose clamp
provided as shown above.
15. Re-connect the mass-air sensor
electrical connection.
17. The C.A.R.B. exemption sticker,
(attached), must be visible under the hood,
so that an emissions inspector can see it
when the vehicle is required to be tested
for emissions. California requires testing
every two years, other states may vary.
18. It will be necessary for all FIPK’s
to be checked periodically for realignment, clearance and tightening of all
connections. Failure to follow the
above instructions or proper maintenance may void warranty.
1. Start the engine with the transmission in neutral or park, and the parking
brake engaged. Listen for air leaks or
odd noises. For air leaks secure hoses
and connections. For odd noises, find
cause and repair before proceeding.
This kit will function identically to the
factory system except for being louder
and much more responsive.
2. Test drive the vehicle. Listen for odd
noises or rattles and fix as necessary.
3. If road test is fine, you can now
enjoy the added power and performance
from your kit.
4. K&N suggests checking the
Filtercharger element periodically for
excessive dirt build-up. When the element becomes covered in dirt (or once
a year), service it according to the
instructions on the Recharger service
kit that is included in this kit.
6. Release the three over center clips
and remove the upper air cleaner
assembly with the mass air sensor
attached. NOTE: The lower portion of
the air cleaner will not be re-used.
A. Filtercharger Element 1
B. Retaining Ring 1
C. Hose Clamp # 52 1
D. Hose Clamp # 56 1
*E. Saddle 1
F. “Z” Bracket 1
G. “L” Bracket 1
*H. 6mm Allen Bolt 1
*I. Conical Nylon Washer 1
*J. 6mm Nylock Nut 1
K. 6mm Hex Bolt 1
L. 6mm Wave Washer 1
M. 8mm Hex Bolt 1
N. 6mm Wave Washer 1
16. Re-connect the vehicle’s negative
battery cable. Double check to make sure
everything is tight and properly positioned
before starting the vehicle.
*There is only one of these items included in this kit,
depending on the year of your vehicle will determine
which bracket to use with the saddle-bracket.
17851b
8-25-99
 Loading...