

Kneader PK2025W User Manual
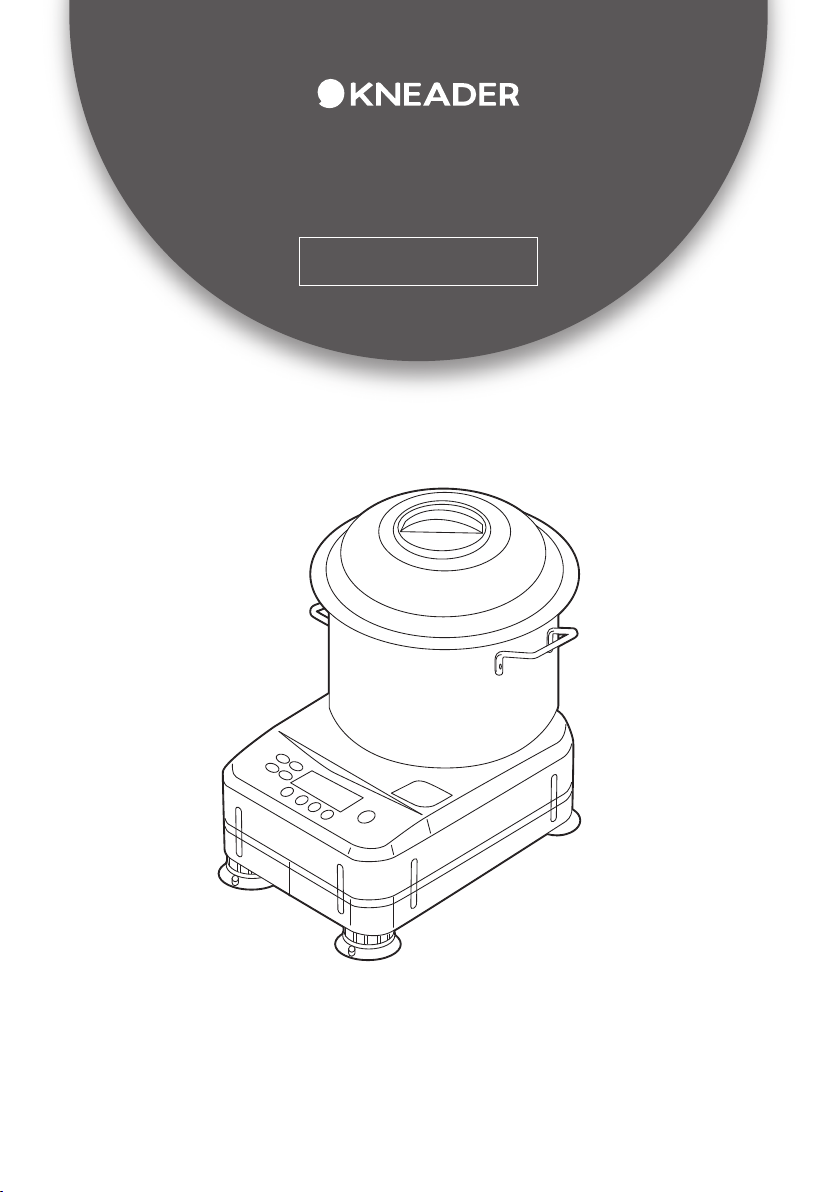
Kneader for Bread
User’s Manual
Stock Number: PK2025W
Thank you for purchasing this product. Please carefully store this User’s Manual so that it is
possible to retrieve it immediately when necessar y. Please use this Kneader for Bread after
thoroughly reading and understanding this User’s Manual.

Contents
Safety Precautions: Please Always Follow
Marks Used in This User’s Manual
Warnings
Cautions
Usage Requests
Names and Functions of Parts
Names of the Main Parts
Operation Unit
Explanation of the Display Screen
Before You Begin Making Bread Dough
Features of the Kneader for Bread
Tips to Be Successful in Making Bread Dough
Bread Making Tools
Kneader for Bread Preparation
How to Use
How to Use the Kneader for Bread Dough
Recipe Features
Recipe
How to Register Creative Recipes
Safety Functions
Maintenance
Detaching
Body of the Kneader
Pot, Pot Cover and Blade
Troubleshooting
2
4
7
10
20
23
After-sales Service
Specifications
1
1
24
25
1

Safety Precautions:
Please Always Follow
The precautions given here contain important safety information to prevent harm or damage to you and
other people, so please make sure to always follow these.
• We have divided the information relating to what will occur in the event of the incorrect usage of this
product as below.
Warning
Caution
Warnings indicate there is a possibility of a serious injury or death in the event of
the incorrect usage of this product
Cautions indicate there is a possibility of an injury or physical damage in the event
of the incorrect usage of this product
Marks Used in this User’s Manual
• The meaning of the marks (pictures) used in this User’s Manual is as below.
Please never do.
Please do not touch with your
hands.
Repairs should not be carried
out by anyone other than repair
technicians. Furthermore, please
never remodel this product.
Please avoid using this product
near fires.
Please avoid using this product
in places with spraying water.
Please always operate this
product in accordance with the
instructions.
Please always unplug the plug
from the outlet.
Please do not insert plugs with
wet hands.
Please aim to avoid the occurrence of accidents by following what is written on the warnings and cautions when
using this product. Moreover, users/managers of this product should please not let anyone who does not
understand this product use it.
Warnings
Remove dust from the plug
Using the plug with dust stuck to it may cause electric shocks or fires.
Do not forcibly bend or pull out
the power cord
If the power cord becomes damaged, it may cause electric shocks
or fires.
Do not damage or process the power cord
If you use a power cord that has been damaged or processed,
it may cause electric shocks or fires.
Do not insert the plug with wet hands
This may cause electric shocks.
Do not place things on the power cord or step on it
Please do not route the power cord in locations where people frequently come and go. If the power cord becomes damaged, it may cause
electric shocks or fires.
2
2
2
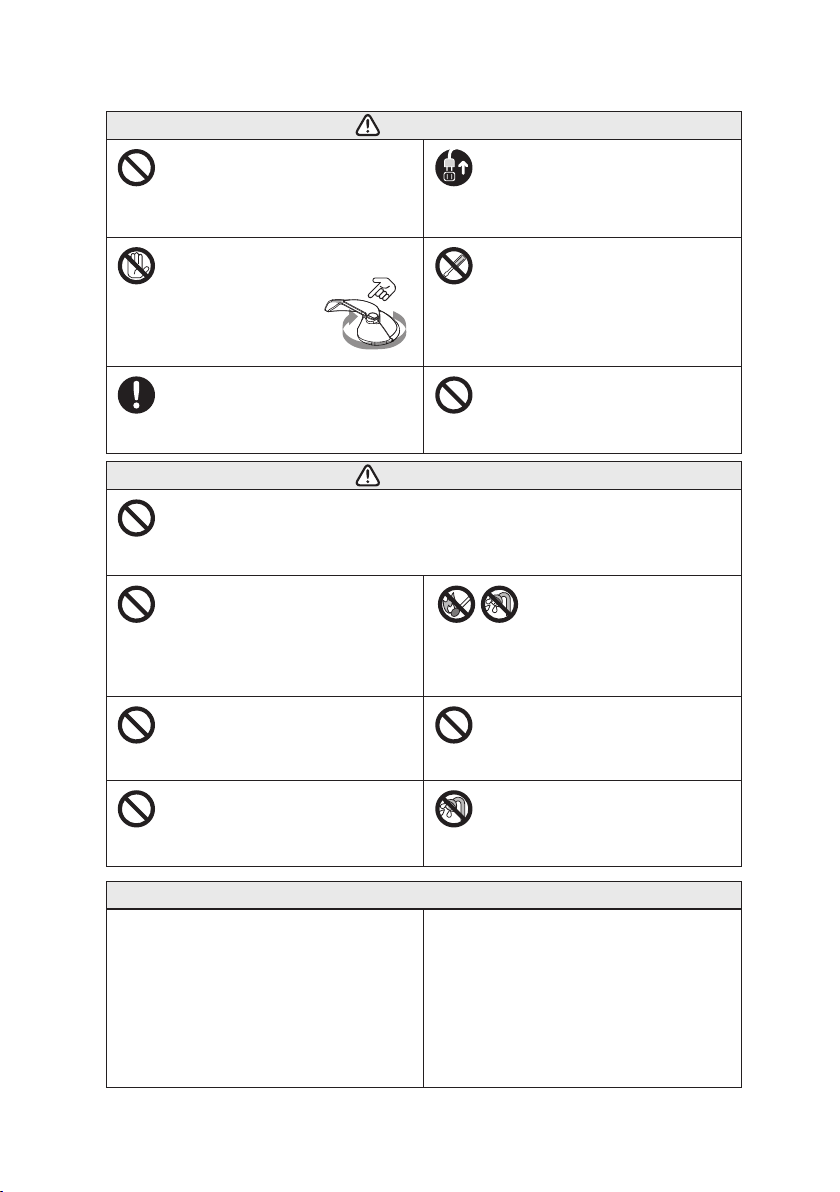
Warnings
Never wash the body of the kneader
with water
If water gets into the body of the kneader, it may cause electric shocks
or malfunctions.
Unplug the plug except when in use
(including during mounting, detaching
and maintenance)
Failure to do so may cause an injury. If you need to perform
maintenance on the body of the kneader, please do so after
unplugging the plug from the outlet.
Do not touch the blade during rotation
This may cause an injury. Please refrain from
using this kneader in places in the reach of
infants and young children especially. If you
need to put your hands into the pot, please only
do so after stopping the rotation of the blade.
Use an AC 220V-only outlet for
the power supply
Failure to do so may cause electric shocks or malfunctions.
Do not disassemble or modify
Disassembling or modifying this kneader may cause abnormalities or
fires. Moreover, there are parts with a high voltage for which there is a
danger of electric shocks and other dangerous parts in this product,
so there is a risk this may cause injury or death. Please inquire at
shop where purchased for internal inspections, adjustments and
repairs other than those described in this User’s Manual.
Do not overload electrical outlets
Going over the allowable electric current may cause electric shocks
or malfunctions.
Cautions
Do not use this product in unstable locations or on tables dirty with flour/oil
If this product falls over or down, it may cause an injury. Please always use this kneader in a horizontal and stable state. In addition, we
recommend you wipe the bottom of the legs of this product prior to use.
Do not use this product near walls and
furniture
If you use this product in close contact with walls or furniture, the
motor will not be cooled sufficiently and this may cause overheating
or malfunctions. There is also a possibility of deformation or
discoloration to walls or furniture, so please use this product at least
5cm away from the surface of walls.
Do not let children use this
product by themselves; do not use
this product within the reach of infants
Do not place anything on top of the pot
cover
Things placed on the top of the pot cover may fall down due to the
vibrations during operation and this may cause damage or an injury.
If this product gets caught on fire or water gets into its body, it may
lead to electric shocks.
This will be a great burden on the motor and so may cause
malfunctions.
This may cause a malfunction in the electrical circuits. Please
immediately wipe with a dry cloth if the operation panel gets wet.
Do not use this product near fires
or spraying water
Do not use amounts of ingredients
greater than those specified
Do not get water on the operation panel
Usage Requests
◆Please immediately turn off the power switch, unplug the plug
and then inquire at shop where purchased in the situations
below.
・If the breaker frequently turns “OFF”
・If the kneader does not operate even when you press the button
・If the power cord or plug becomes damaged or frayed
・If the kneader becomes deformed due to falling over
・If a liquid gets into the body (frame) of the kneader
・If there is smoke, an abnormal smell or the kneader does not
operate properly even though you are operating it it in accordance
with this User’s Manual
・If a danger arises, such as a hand or foreign substance getting
caught up in the blade
3
3
◆Important information for safety is described on the warning
labels attached to this product, so please use while following
the points below.
・Please use this product in a state in which it is possible to read
the labels affixed to it at all times. Moreover, please do not cover
these labels with other equipment.
・Do not remove or alter these labels.
3
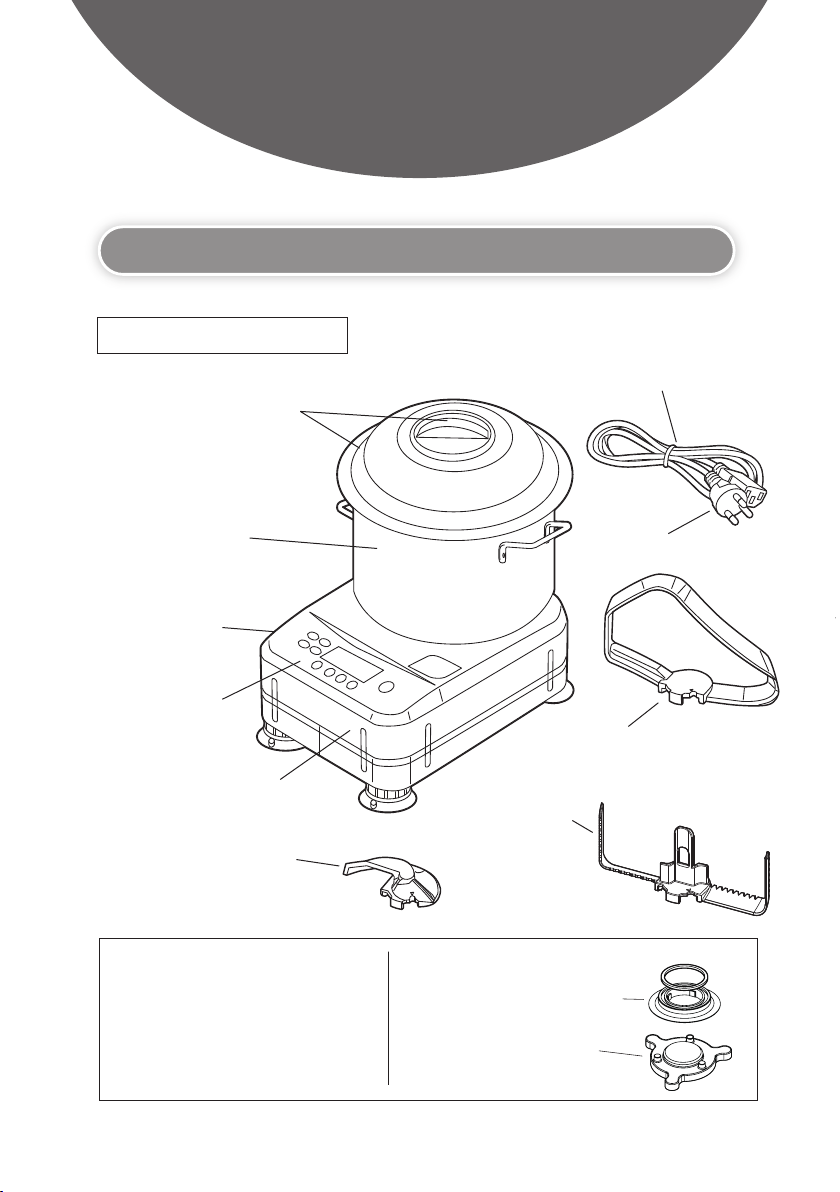
Names and Functions
Names of the Main Parts
Stock Number: PK2025W
• Domed pot cover
The small lid in the center can
also be opened and closed.
(Plastic PP)
of Parts
• Power Cord
The supplied power cord is only for use with this
product. Please do not use power cords other than
the one supplied with this product. Please do not use
the supplied power cord with other products.
• Pot
(Stainless steel)
• Power Switch
• Operation unit
• Body of the kneader
(Plastic PC + ABS)
• Kneading Blade
(Plastic POM)
Accessories
• User’s Manual (This document)
• Refrigerant
(It is not possible to heat this refrigerant up
in a microwave)
• Plug
• Mixing Blade
(Plastic PP)
Please use at speed 3 or less.
• Whisking Blade
(Plastic POM)
• Mount cover
• Replacement pot seal
※Pot seal is a consumable item.
• Holding assembly
(Plastic POM)
4
4
4
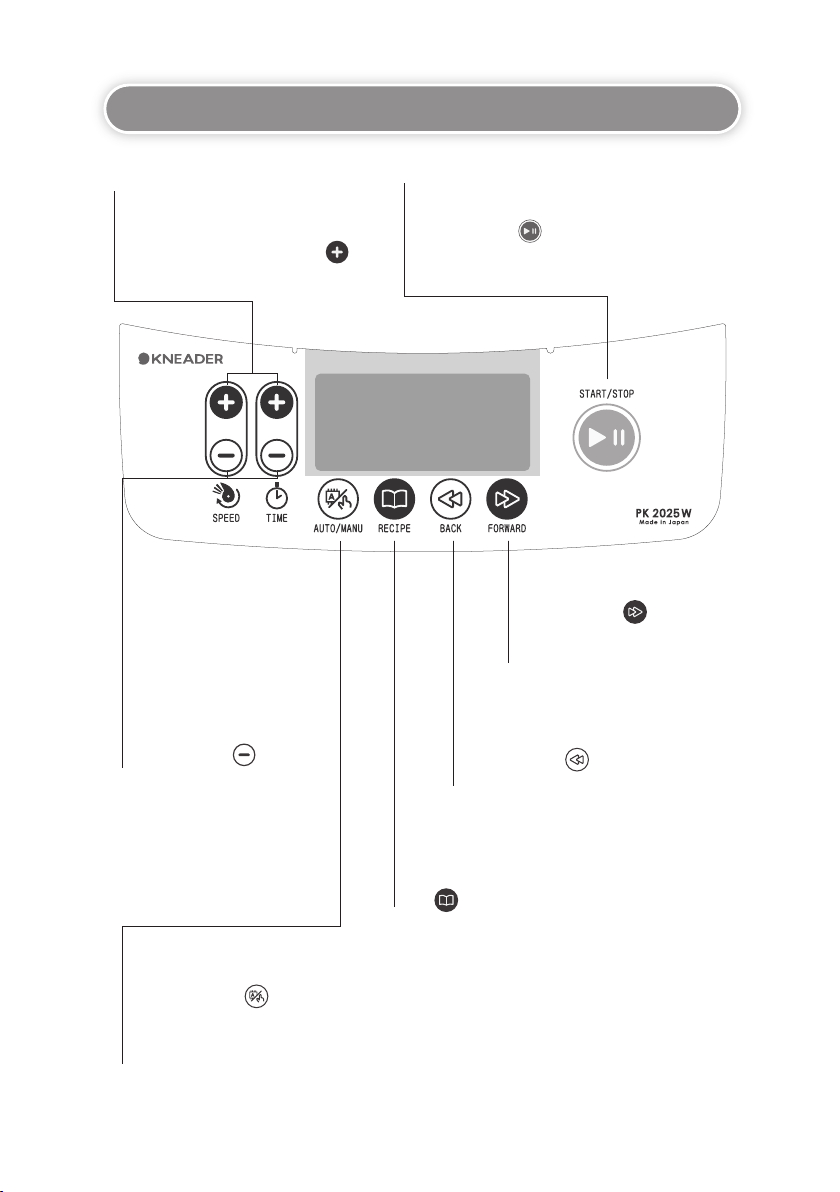
Operation Unit
Minus Button
RECIPE Button
If you press the button, the kneader will
move back to the previous process.
BACK Button
FORWARD Button
START/STOP Button
It is possible to subtract from
the set value of the spe ed/time
if you press the but ton.
If you press the but ton,
the kneader will move on to the
next process.
It is possible to change the recipe number if you press
the button during the standby screen.
Plus Button
It is possible to add to the set value of
the spee d/time if you press the
button.
If you press the button, the kneader will start; if you
press the button again, it will stop (the blade and the time
will stop).
AUTO/MANU Button
If you press the button, the kneader will switch between automatic and manual operation.
Manual Mode: This is recommended for those who wish to check the kneading and fermentation
state for each process
Automatic Mode: This is useful for when using the same recipe in succession
5
5
5
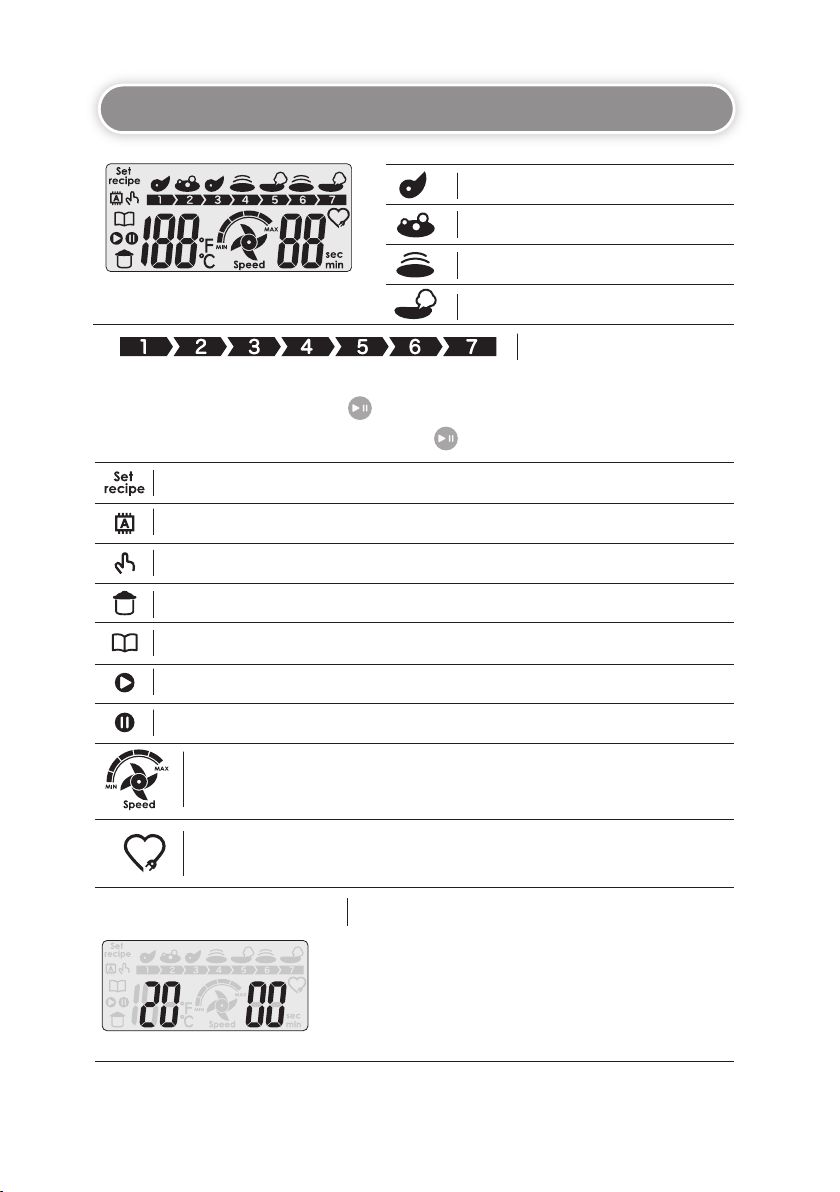
Explanation of the Display Screen
Kneading Process
Hydration and Maturation Process
Fermentation and Maturation Process
Degassing Process
Process Progression Display
The finished process will light up and the process in running will flash.
If you stop a process with the button, the process in running will light up,
but the flashing will resume by pressing the button.
It is possible to change the content of the recipe when this is lit up.
The kne ader will run in automatic operation until all the processes are complete
when this is lit up.
The kne ader will stop for each process and a buzzer will sound to inform you of this
when this is lit up.
This will flash when the pot or the domed pot cover have not been attached.
The recipe number will be displayed when this is lit up.
This will flash while in operation.
This will flash while stopped.
Blade drive display
Inspection Mark
Cumulative Operation Time Display
6
The speed is displayed in five levels.
The displayed blade will also rotate during rotation.
When the cumulative operation time exceeds 2,000 hours,
this will light up.
We recommend you carry out maintenance when this lights up.
The number displayed first when switching on the power is
the cumulative operation time.
Display Example:
This indicates that the cumulative operation time is 2,000 hours.
6
6

Before You Begin Making
Bread Dough
Features of the Kneader for Bread
The blade was made for bread dough
1
This product makes good gluten efficiently with the
“kneading blade (patent acquired)” attached to the pot and
then thoroughly kneads the gluten at an optimal speed
without having to detach it.
Temperature control is even easier
2
(1) It is possible to display the pot temperature (≒ dough
temperature).
*Temperature errors may arise depending on the
location where this product is used.
(2) It is possible to adjust the dough temperature with a
special refrigerant. ( This cannot be heated up in a
microwave, so please warm up in hot water and then
use.) Please wrap the refrigerant around the pot when
you want to adjust the dough tempe rature by cooling in
a refrigerator beforehand.
Refrigerant
How to Attach the Refrigerant
Please firmly hold in place with
the hook and loop fastener
It is possible to make creative recipes simply
3
(1) Basic recipes: 01 (timer set ting only), 02 (straight method) and 03 (Oochi method)
(2) Creative recipes: It is possible to record three recipes in C1 to C3
(3) Free recipes: It is possible to record three recipes in F1 to F3
(4) Japan kneader recipes: It is possible to select from the at tached recipe s
(5) LP (low-speed mode): This is suitable for noodles etc. (dough with low water content)
Simple maintenance
4
The pot and blade can be completely washed because they can be removed.
7
87
Amounts that can be made at a time
5
Kneading blade
Bread
Wheat flour
600-2,500g
*Please use at speed 1- 5.
*The speed may become slower depending on the state of the dough,
but this is not a malfunction.
Udon noodles
Wheat flour
600-2,000g
Whisking Blade
Meringue
Egg white
3-16 eggs
*HP mode
Guide of speed: 5
*The stainless steel pot cannot be used to knead sticky rice cake.
Fresh Cream Whip
Fresh cream
200-1,000cc
*HP mode
Guide of speed: 3
Mixing Blade
Dumpling Ingredients
Dumplings
1,000-4,000g
*Please use at speed
3 or less.
Tips to Be Successful in Making Bread Dough
(1) Bread dough is sensitive to the temperatur e
The room temperature and water temperature has an impact on the fermentation and affects the
finish to the bread.
[Guide to the ideal water temperature] Summer: 15-20°C / Winter: 30-35°C
(2) Restore ingredients to room temperature
In particular, if you use milk and eggs while they are still cold, the dough temperature will lower and
this will have an impact later on the fermentation and maturation.
(3) Accurately weight ingredients
If you make a mistake with the weighing, this will have an effect on the finish – the dough will be too
hard or too soft.
(4) Do not dr y the bread dough
Avoid drying the kneaded bread dough by matur ing it with the pot cover on.
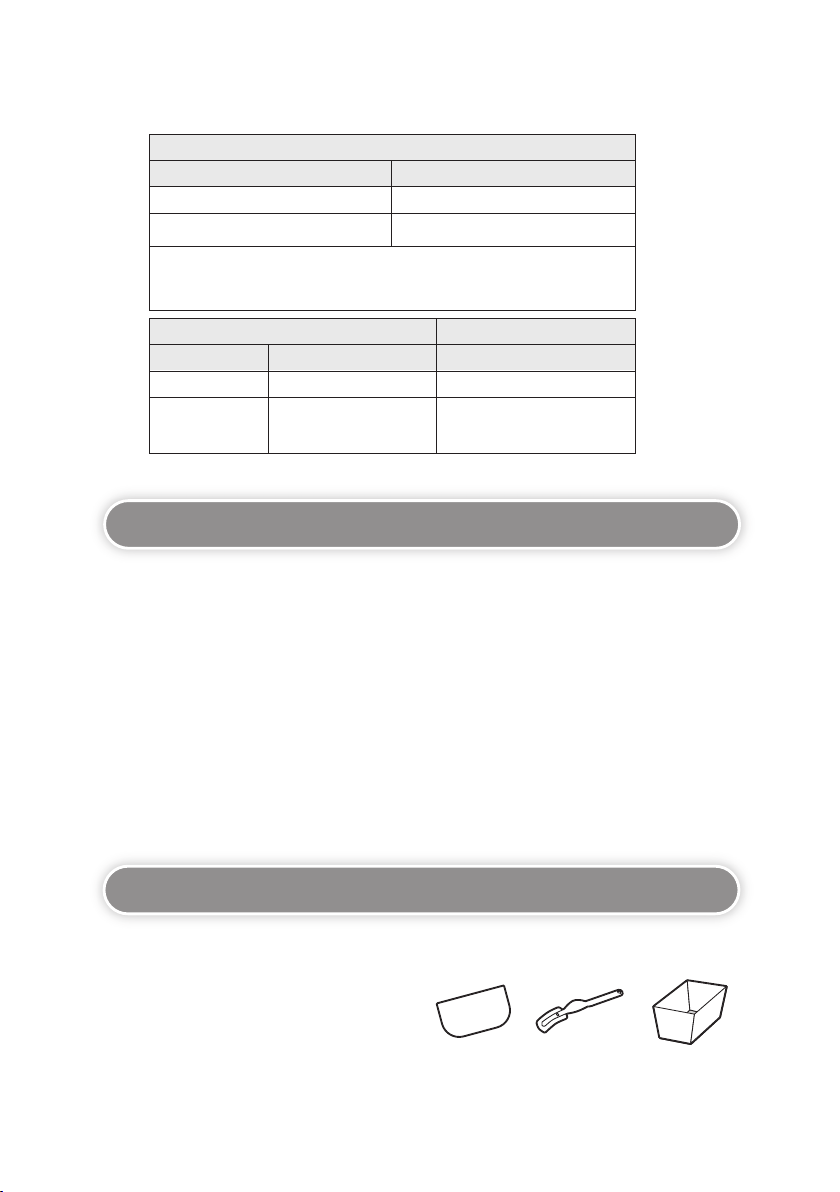
Bread Making Tools
• The tools you need to have at the minimum
(1) Dough making: Scales and thermometer
(2) Separating and molding: Bre ad mat and card
• Other desirable tools
Rolling pin, baking pan, cup knife and brush
8
Card Baking panCup knife
9
8
 Loading...