

Page 1
4” Pneumatic Damper Actuator
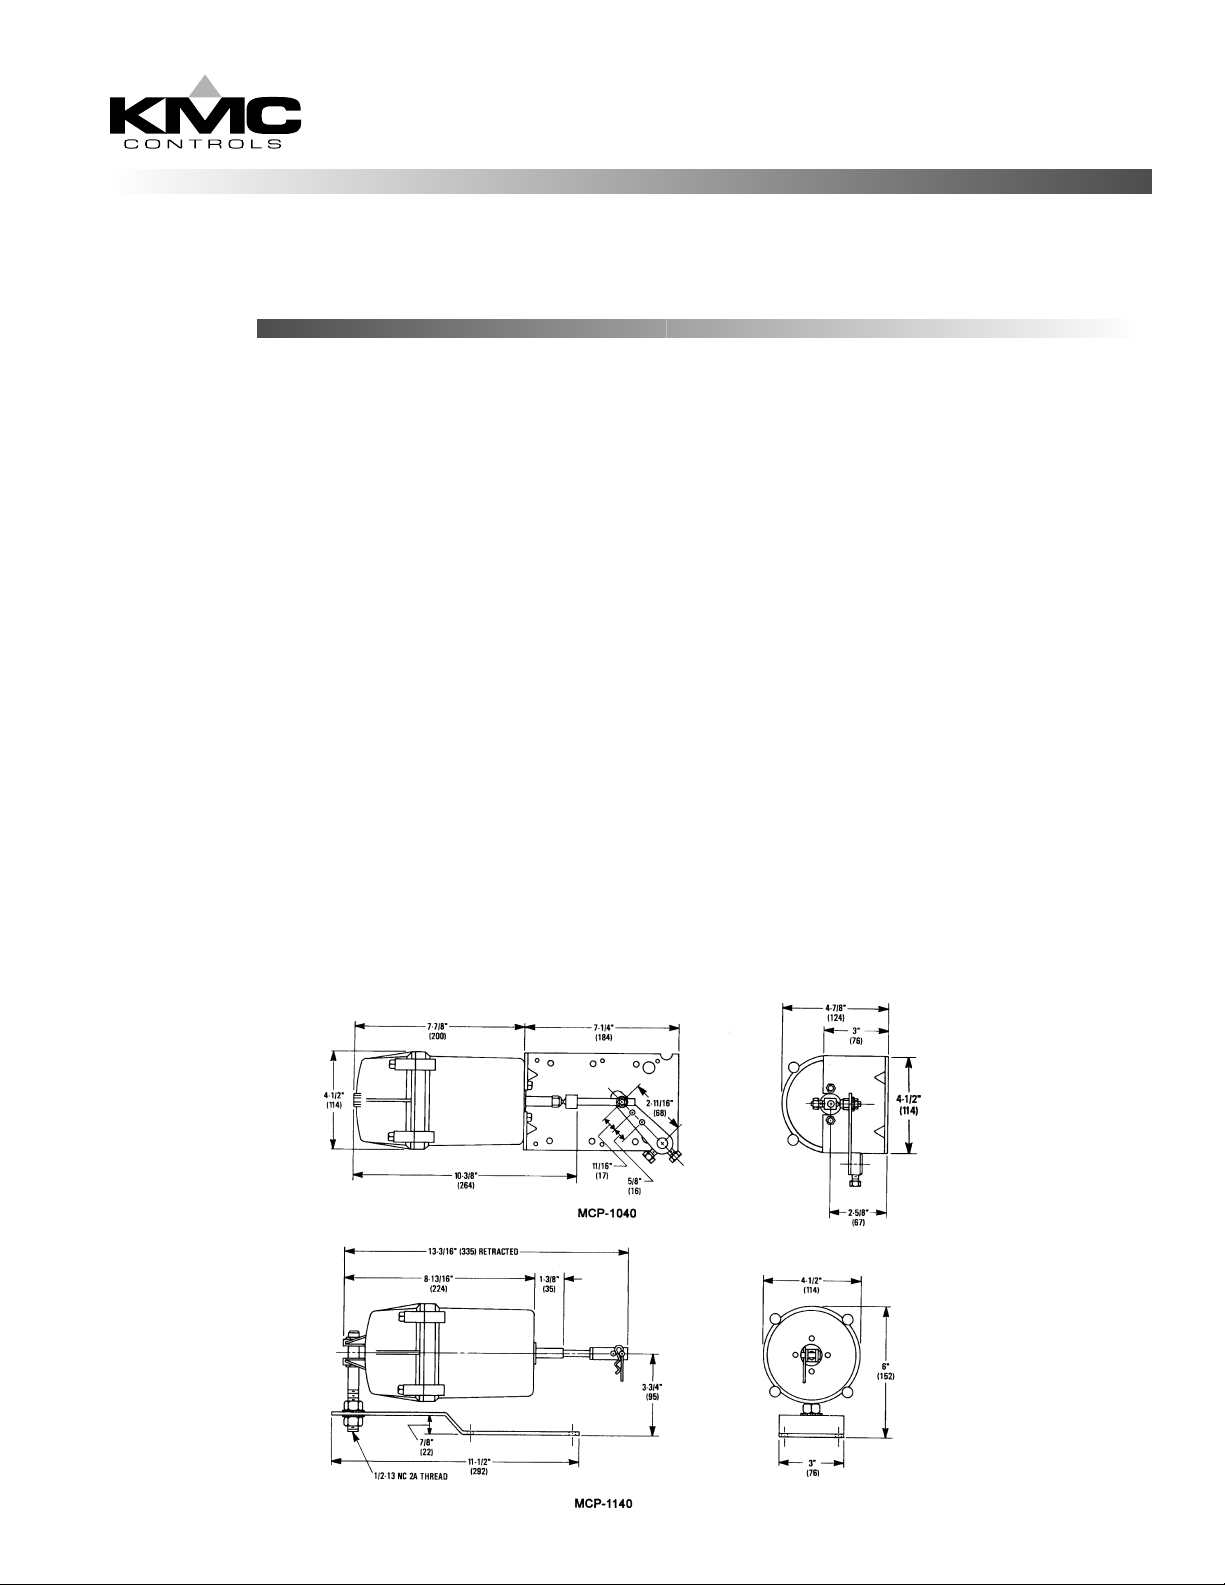
MCP-1040, 1140 Series
Installation Guide
Mounting
Post Mounted - Typically used for internal duct mounting.
1. Position the damper for its “normal” position.
2. Connect the damper’s blade clip or drive arm with the clevis pin and cotter pin.
3. Mount the offset bracket to either the damper frame or the duct.
4. Check that the linkage will not bind as the shaft extends and retracts.
Right Angle Mounted - Typically used for external duct mounting.
1. Slide the crankarm over the damper shaft.
2. Determine whether the damper shaft must rotate Clockwise (CW) or Counter Clockwise (CCW.
3. Locate the half-circle cutouts on the outside corners of the bracket.
4. Place the appropriate half circle cutout over (for clockwise rotation), or under (for counter clockwise
rotation) the damper shaft.)
5. Loosely mount the actuator externally on the duct or air handling unit.
6. Leave sufficient room for adjusting and servicing the unit.
7. Position the damper for its “normal” position.
8. Tighten the crankarm set screws.
9. Check that the linkage will not bind as the shaft extends and retracts.
10. Firmly anchor the bracket to the duct. The actuator assembly is positioned for 90° rotation.
Page 2

Connections
♦ Use 1/4" (6 mm) O.D. polyethlyene tubing.
♦ Use only clean, dry control air. No attempt should be
made to use any other medium.
NOTE: If the application requires operation near the
maximum temperature and maximum pressure, add
a tubing restraint to the actuator connection.
1. Connect the signal (0 to 20 psig) to the 3/16" fitting on
the base of the actuator.
2. Slowly apply supply pressure to fully stroke the
actuator and linkage.
3. Check for any binding. Fine tuning can be
accomplished by adjusting the balljoint on the
pushrod.
Adjustments and Calibration
DANGER
The MCP-1040 and MCP-1140 contain a large
powerful spring. Exercise extreme caution if
disassembly is required. The actuator shaft MUST
be restrained to prevent the spring from expanding.
Actuators with positioners contain an 8-13 psi
spring. A positioner allows the unit to operate over
any 5 psi span with the start-point adjustable from
3-10 psi. Replace the 5 psi spring with a 10 psi
spring to widen the span.
To change the positioner start-point:
1. Apply the desired signal pressure.
2. Rotate the start-point adjuster until the actuator
starts to stroke.
Maintenance
No routine maintenance is required.
Each component is designed for dependable, long
term reliability and performance.
KMC Controls
19476 Industrial Drive
New Paris, IN 46553
574.831.5250
www. kmccontrols.com
010-019-01
 Loading...