

Page 1
Installation and
KMD-5205
LanLite Controller
KMD-5270
WebLite Controller
Operation Guide
909-019-01JRevision J
Page 2

KMC Controls
Important notices ©2013, KMC Controls, Inc.
WinControl, NetSensor, and the KMC logo are registered trademarks of KMC Controls,
Inc.
TotalControl, BACstage, and FullBAC are trademarks of KMC Controls, Inc.
All rights reserved. No part of this publication may be reproduced, transmitted,
transcribed, stored in a retrieval system, or translated into any language in any form by
any means without the written permission of KMC Controls, Inc.
Printed in U.S.A.
Disclaimer The material in this manual is for information purposes only. The contents and the
product it describes are subject to change without notice. KMC Controls, Inc. makes no
representations or warranties with respect to this manual. In no event shall KMC
Controls, Inc. be liable for any damages, direct or incidental, arising out of or related to
the use of this manual.
KMC Controls
P.O. Box 497
19476 Industrial Drive
New Paris, IN 46553
U.S.A.
TEL: 1.574.831.5250
FAX: 1.574.831.5252
E-mail: info@kmccontrols.com
Revision J2
Page 3

KMD-5205 and KMD-5270 Installation and Operation
Contents
Section 1
About the controllers
Introduction .......................................................................................................................... 5
Internet operation ................................................................................................................ 5
BACnet 8802-3 option ......................................................................................................... 5
Modbus option ..................................................................................................................... 5
Specifications ........................................................................................................................ 6
Models and options ........................................................................................................... 10
Accessories and replacement parts ................................................................................. 10
Controls and connections ................................................................................................. 11
Safety considerations ........................................................................................................ 12
Section 2
Installing the controllers
Mounting ............................................................................................................................ 13
Connecting inputs ............................................................................................................. 13
Connecting outputs ........................................................................................................... 14
Connecting to networks .................................................................................................... 15
KMC Tier 1 networks ........................................................................................................ 15
KMC Tier 2 networks ........................................................................................................ 15
BACnet 8802-3 (optional) ................................................................................................. 17
Modbus (optional) ............................................................................................................. 18
Connecting power ............................................................................................................. 20
Connecting to a computer through the serial port ....................................................... 21
Connecting to a modem .................................................................................................... 22
Section 3
Operating the controller
Lights and indicators ......................................................................................................... 23
Powering the controller .................................................................................................... 24
Maintenance ....................................................................................................................... 24
Replacing the fuse .............................................................................................................. 24
Resetting the controller ..................................................................................................... 25
Section 4
Configuration and programming
Initializing with HCM ....................................................................................................... 27
Setting up for BACnet networks ..................................................................................... 30
Control Basic programming for BACnet ........................................................................ 31
Setting up for Modbus networks ..................................................................................... 32
Programming for Modbus in WinControl XL Plus ...................................................... 32
Firewalls and network communications ........................................................................ 33
System time keeping ......................................................................................................... 33
System graphics ................................................................................................................. 34
Revision J 3
Page 4

Section 5
Using a web browser (KMD-5270 models only)
Applicable models ............................................................................................................. 35
Browser requirements ....................................................................................................... 36
Opening the WebLite home page .................................................................................... 36
Viewing and editing .......................................................................................................... 38
PID controllers ................................................................................................................... 40
Trend Logs .......................................................................................................................... 40
Schedules ............................................................................................................................ 42
KMC Controls
Revision J4
Page 5

KMD-5205 and KMD-5270 Installation and Operation
SECTION 1
About the controllers
This section provides a description and specifications—including the
BACnet and Modbus options—for models KMD-5205 LANLite and
KMD-5270 WebLite controllers. Safety information is included also.
Review this material before installing or operating the controllers.
Introduction The KMD-5205 and KMD-5270 both provide programmable control and
high-level LAN connectivity for facilities management systems. These powerful,
direct-digital-controllers operate on a peer-to-peer, token passing protocol, using
either Ethernet or EIA-485 networks.
◆ Ethernet for KMD Tier 1 controllers and optional BACnet 8802.3 devices.
◆ EIA-485 for either KMD Tier 2 or Modbus RTU controllers
The operating software in the controllers use a high level, easy to learn
programming language to ensure reliability, rapid programming and
compatibility with future KMC system enhancements.
Internet operation
KMD-5270 models only The embedded internet server in the KMD-5270 models make them ideal
controllers for schools and businesses with an Ethernet infrastructure. System
operation can be changed using a standard internet browser such as Netscape or
Microsoft® Internet Explorer. In addition to changing settings, you can view
system groups, trend and runtime logs with the browser.
BACnet 8802-3 option
Models with the BACnet option adds open-system functionality to these
controllers.
◆ BACnet devices see input, output and variables in the controller as BACnet
input, output and value objects.
◆ When installed on the same Ethernet broadcast domain segment as a
BACnet 8802-3 network, use Control Basic to retrieve data from any
accessible BACnet object on the internetwork.
Modbus option Connect directly to Modbus RTU equipment with the Modbus option. Modbus
registers are mapped to variables in the controller that are then available for use
by other KMD controllers, BACnet devices or Control Basic.
Revision J 5
Page 6

About the controllers
Specifications
KMC Controls
Specifications Specifications for the KMD-5205 and KMD-5270 series of controllers are
subject to change without notice.
Inputs 8 universal inputs
Key features Software selectable for analog or digital signals.
Standard and custom units of measure.
Pull-up resistors for switch contacts and other
unpowered equipment.
Connector Removable screw terminal block, wire size
12–22 AWG
Conversion 12-bit analog–to–digital
Pulse Counting Up to 1000 Hz
Input impedance 100 kΩ without pull-up resistors
Analog input range 0–5 volts DC, 4–20 milliamperes DC
Digital input range 0–5 volts DC and pulse counting
Pull-up resistors None, 1kΩ and 10kΩ selected with movable
jumper
Outputs 8 universal outputs
Key features Software programmable for analog or digital
signals. Standard and custom units of measure.
Slots for KMC output override boards
Connector Removable screw terminal block, wire size
12–22 AWG
Conversion 12-bit digital-to-analog
Analog output range 0–10 volts DC, 50 milliamperes maximum
Programmable features
Control Basic programs 10 user-definable program areas
Networked points in 127 from Tier 1 controllers
512 from Tier 2 controllers
Networked points out 64 to Tier 1 controllers
64 to Tier 2 controllers
PID control loops 8 PID control loops
Program variables 256 — Software selectable as analog or digital
with standard and custom units of measure
Time keeping Real-time clock with power backup for 72
hours.
Programmable for automatic daylight saving
time by date, day of month and time of day.
Ta bl e s 5 user defined
Schedules
Weekly schedules 8 each with 2 override days
Annual schedules 4
6
Revision J
Page 7

KMD-5205 and KMD-5270 Installation and Operation
Logging
Trend logs 16 trend logs each supporting up to 6 analog,
Runtime logs 16 runtime logs with time and date stamp and
Custom graphics 32 system groups each of which can manage 64
Security Six operator access levels
About the controllers
Specifications
digital or virtual elements or points. Trend logs
displayed as text or graphics.
cumulative runtime
points with animated and color graphics.
Requires WinControl XL Plus to view and edit
graphics.
KMD-5270 models serves the background
system group graphic to browser accessible web
pages.
256 names with passwords
Alarms Alarm buffering up to 16 alarms
On-board 68-character alarm or maintenance
text messages
Memory
Flash memory 2 megabyte non-volatile flash memory
Ram 2 megabyte with six-hour backup
Programs and program parameters are stored in
non-volatile memory.
Communication ports
Ethernet One Ethernet 10Base-T port for KMD Tier 1 and
optional BACnet 8802.3
RS-485 Connects to either KMC Tier 2 or Modus RTU
controllers.
Connector type is removable screw terminal
block. Wire size 14–22 AWG
Serial Serial 9-pin connector for directly connecting to
a computer serial port or optional external
modem for remote operation.
Revision J
7
Page 8

About the controllers
Specifications
KMC Controls
Supported network protocols
KMDigital All WebLite controllers support connections to
controllers on KMDigital networks.
Tier 1—10Base-T Ethernet port supports
connection to 31 KMC Tier 1 controllers.
Tier 2—Supports connections to 64 KMDigital
controllers on the RS–485 port. KMD Tier 2 is
not available on models with Modbus RTU
protocol.
BACnet Connects to the BACnet internetwork as a
BACnet Ethernet 8802.3 device.
Modbus Supports connection to Modbus slave
controllers over the RS-485 port.
RS-485, half-duplex (2-wire)
9600, 19,200 or 38,400 baud.
Power loss Automatic restart on power failure
Compatibility
Software For full feature capability use WinControl XL
Plus 2.1 or later.
Controllers Compatible with Tier 1 controllers firmware
build 2.0 or a later release.
Regulatory UL 916 Energy Management Equipment
FCC Class A, Part 15, Subpart B
CE mark
Internet (KMD-5270 models only)
Browser access Use a standard internet browser to view and
change the following: Inputs. Outputs,
Variables, Controllers, System Groups, Trend
Logs, Run Time Logs, Weekly and Annual
Schedules, Alarm Summary.
E-mail Requires access to SMTP e-mail server with
static IP address. Sends text messages, logs and
data points.
Supply voltage 24 volts AC, –15%, +20% 25 VA
Environmental limits
Operating 32 to 120°F (0 to 49°C)
Shipping –40 to 140°F (–40 to 60°C)
Humidity 0–95% non-condensing relative humidity
Weight 16 ounces (454 grams)
8
Revision J
Page 9
O-R STATUS H O A
O-R STATUS H O A
O-R STATUS H O A
O-R STATUS H O A
1
2
3
4
O-R STATUS H O A
O-R STATUS H O A
O-R STATUS H O A
O-R STATUS H O A
5
6
7
8
PWR
S-LAN
PC
COLL
Rx
Tx
A
B
C
D
KMD-5205 and KMD-5270 Installation and Operation
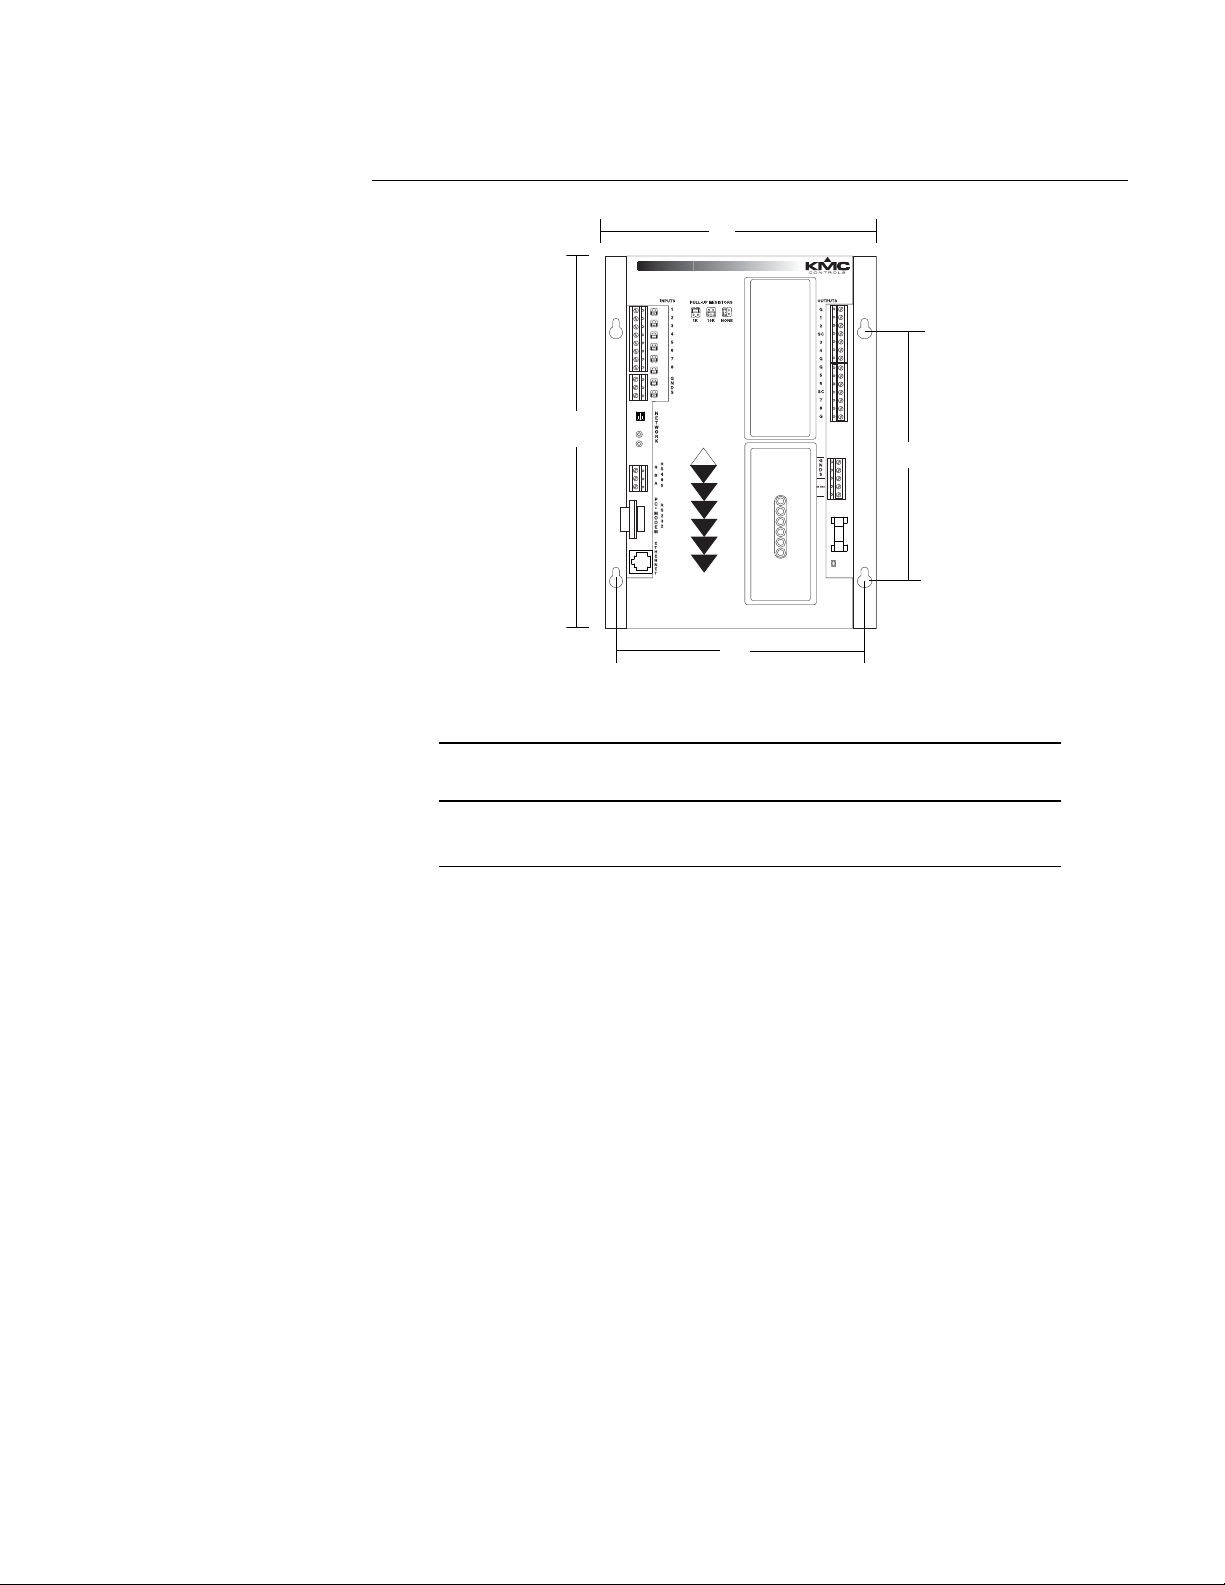
Dimensions
About the controllers
Specifications
Table 1-1 Mounting dimensions
A B C D Height (not
shown)
6.56 in. 9.00 in. 6.00 in. 6.00 in. 0.98 in.
167 mm 229 mm 152 mm 152 mm 25
Revision J
9
Page 10

About the controllers
Models and options
Models and options See Table 1-2 on page 10 for available models and protocols.
Table 1-2 Available models
Protocol
Model
KMD Tier 1 KMD Tier 2 Browser enabled BACnet 8802.3 Modbus RTU
KMD-5205
KMD-5205-005
KMD-5205-006
KMD-5270
KMD-5270-001
KMD-5270-005
KMD-5270-006
◆◆
◆ ◆
◆◆◆
◆ ◆◆
◆◆◆ ◆
◆◆ ◆
◆◆◆◆
KMC Controls
Accessories and replacement parts
The following accessories and replacement parts are available from KMC
Controls, Inc.
Output override boards
HPO-6701 Triac output
HPO-6702 Short protected analog output
HPO-6703 Relay, normally open contacts
HPO-6704 4–20mA current loop
HPO-6705 Relay, normally closed contacts
HPO-6802 Cover for output boards
Power transformer
XEE-6111-40 Single-hub 120 volt transformer
XEE-6112-40 Dual-hub 120 volt transformer
Connecting cables
KMD-5673 Six-foot computer-to-controller cable
KMD-5674 six-foot modem-to-controller cable
Replacement parts
902-600-05 Fast-acting, 1.6 Ampere 5 x 20 mm fuse
HPO-0054 FUSE BULB 863-617-03 (10/Pkg Min Qty)
HPO-0063 2-PIN KMD JUMPER (5/Pkg Min Qty)
10
Revision J
Page 11
O-R STATUS H O A
O-R STATUS H O A
O-R STATUS H O A
O-R STATUS H O A
1
2
3
4
O-R STATUS H O A
O-R STATUS H O A
O-R STATUS H O A
O-R STATUS H O A
5
6
7
8
PWR
S-LAN
PC
COLL
Rx
Tx
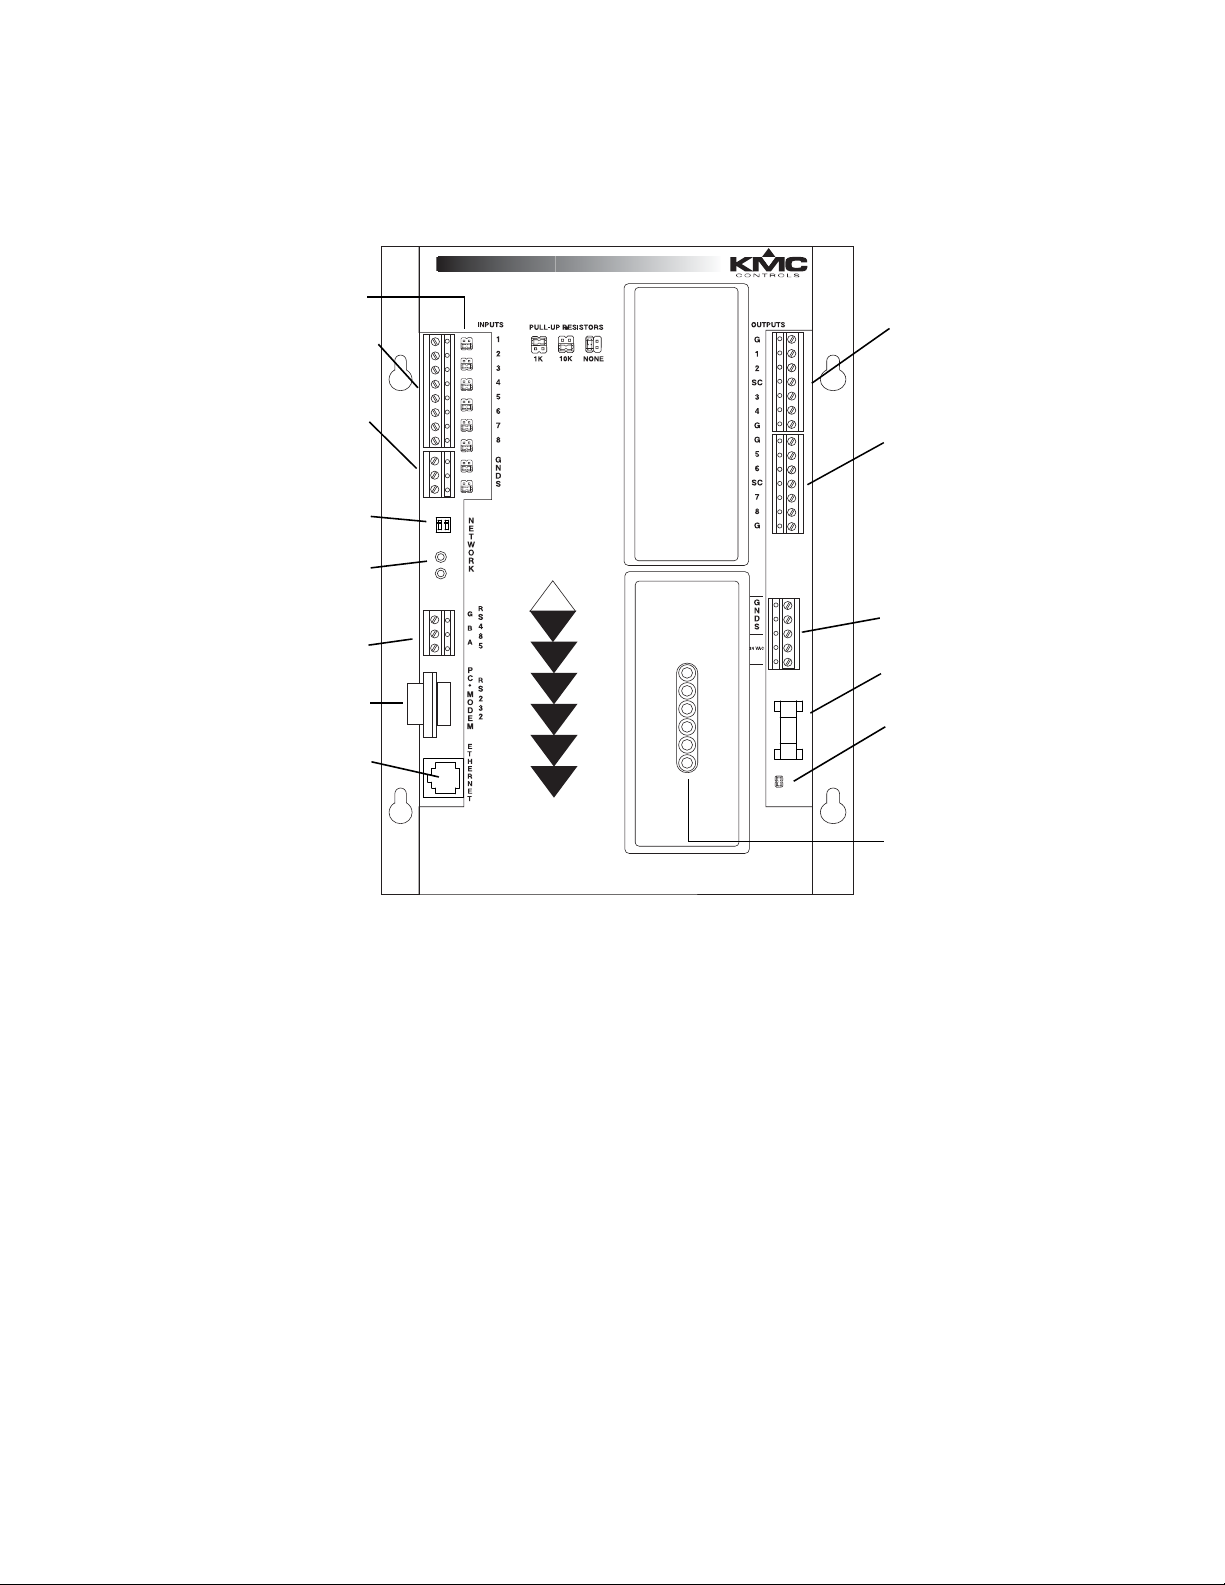
Pull-up jumpers
Input terminals
Input ground
terminals
RS-485 end-of-line
termination switches
Isolation bulbs
RS-485
RS-232
Ethernet
Output bank 1
Output bank 2
Input power
Power supply fuse
Power jumper
Indicator LEDs
KMD-5205 and KMD-5270 Installation and Operation
About the controllers
Controls and connections
Controls and
connections
Before installing a KMD-5205 or KMD-5270, take some time to become familiar
with the location of the components of the controller.
Illustration 1-1 Control and connection terminal locations
Revision J
11
Page 12
About the controllers
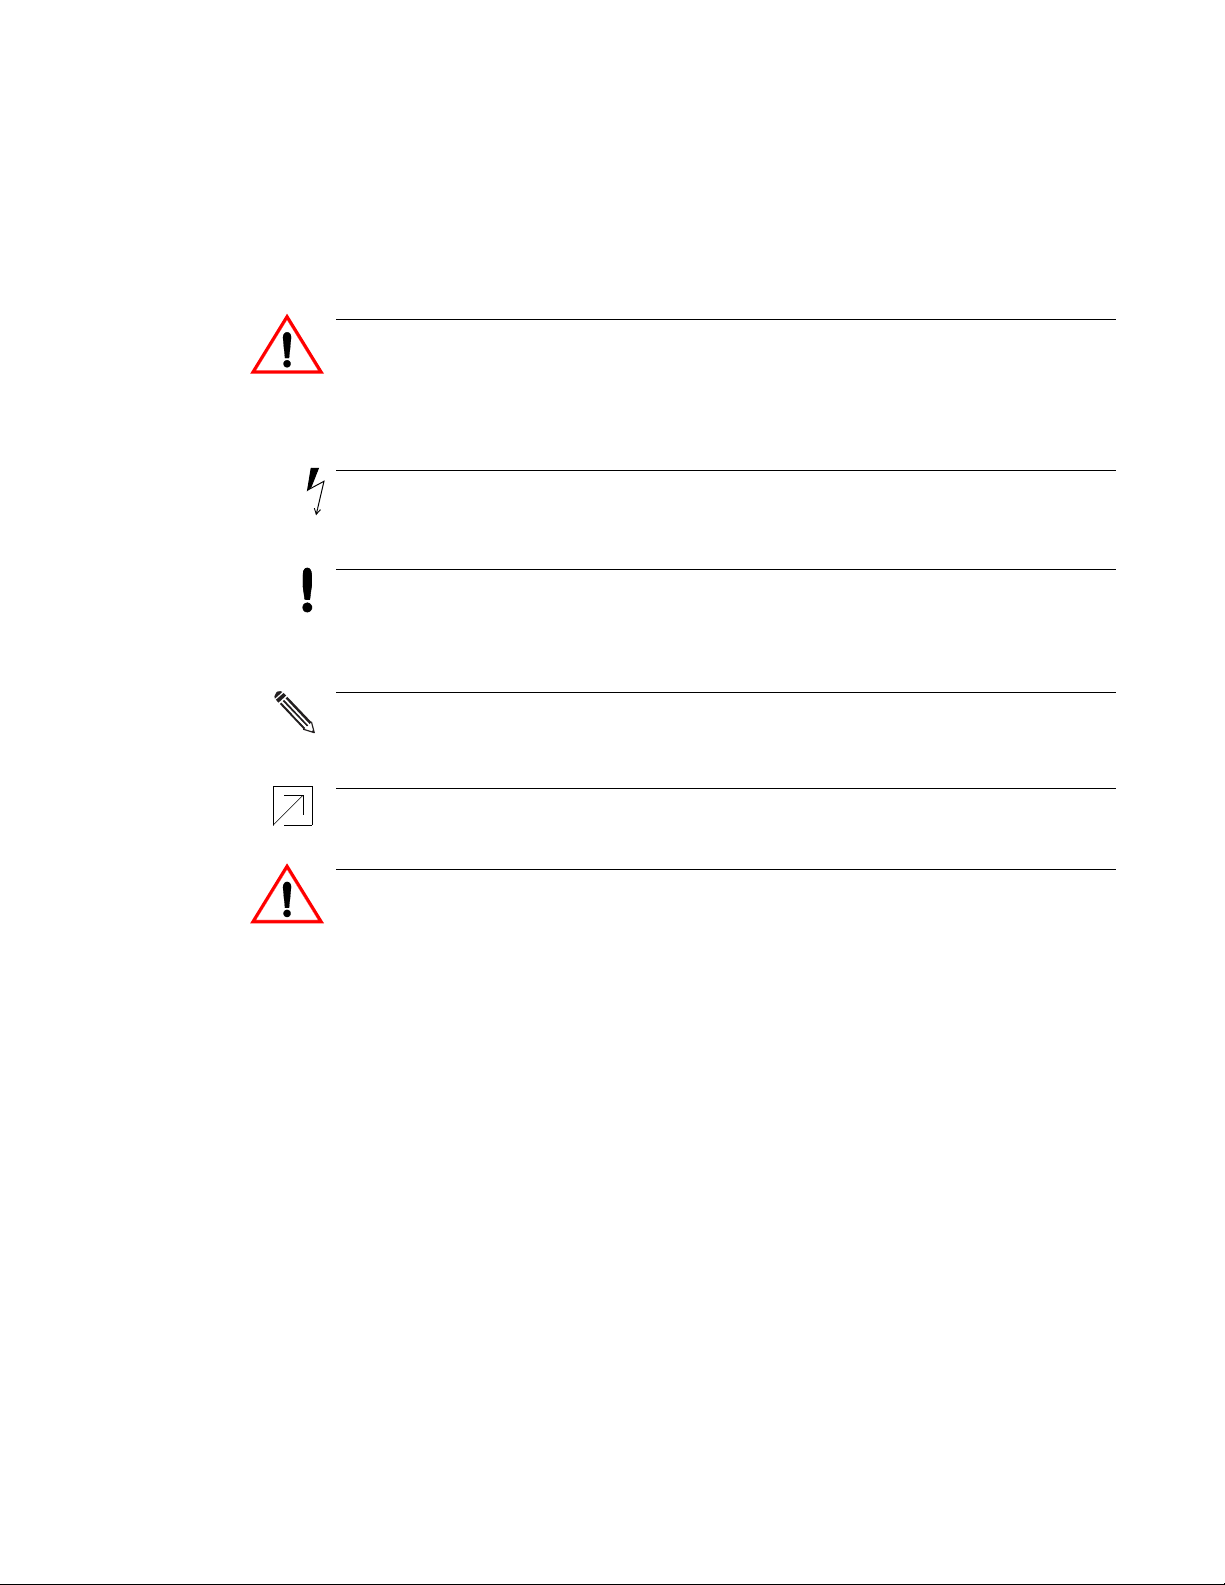
Danger
Warning
Caution
Note
Detail
Danger
Safety considerations
KMC Controls
Safety considerations KMC Controls assumes the responsibility for providing you a safe product and
safety guidelines during its use. Safety means protection to all individuals who
install, operate, and service the equipment as well as protection of the equipment
itself. To promote safety, we use hazard alert labeling in this manual. Follow the
associated guidelines to avoid hazards.
Danger represents the most severe hazard alert. Bodily harm or death will
occur if danger guidelines are not followed.
Warning represents hazards that could result in severe injury or death.
Caution indicates potential personal injury or equipment or property damage
if instructions are not followed.
Notes provide additional information that is important.
Provides programing tips and shortcuts that may save time.
12
Revision J
Page 13

KMD-5205 and KMD-5270 Installation and Operation
SECTION 2
Installing the controllers
This section provides important guidelines for installing KMC direct
digital controllers. Review this information carefully for proper
installation.
Mounting Mount the controller inside of a metal enclosure. KMC Controls recommends
using a UL-approved Enclosed Energy Management Equipment Panel such as a
KMC model HCO-1034, HCO-1035 or HCO-1036. Insert #6 hardware through the
two mounting holes on each side of the controller to securely fasten it to a flat
surface. See
maintain RF emission specifications, use either shielded connecting cables or
enclose all cables in conduit.
Dimensions on page 9 for mounting hole locations and dimensions. To
Connecting inputs The controllers include eight universal inputs. Each input can be configured with
software to receive either analog or digital signals. By using the optional pull-up
resistors, either passive or active devices may be connected to the inputs. For
additional information, see the application note AN0504L, Connecting inputs and
outputs to KMC controllers.
Pull-up resistors
For passive input signals, such as thermistors or switch contacts, use a pull-up
resistor. For KMC thermistors and most other applications place the moveable
jumper in the
4–20 mA inputs
To use a 4–20 current loop input, connect a 250 ohm resistor from an input to
ground. The resistor will convert the current input to a voltage which can be read
by the controller analog-to-digital converter. Place the moveable pull-up jumper
NONE position.
in the
Pulse inputs
Connect pulse inputs under the following conditions:
◆ If the pulse input is a passive input such as switch contacts, then place the
input pull-up jumper to the 10K position.
◆ If the pulse is an active voltage (up to a maximum of +5 volts DC), then place
the input pull-up jumper in the NONE position.
10K position.
Revision J 13
Page 14

Installing the controllers
Connecting outputs
KMC Controls
Ground terminals
Three input ground terminals are located next to the input terminals. Up to two
wires, size 12–22 AWG, can be clamped into each ground terminal. If more than
two wires must be joined at a common point, use an external terminal strip to
accommodate the additional wires.
Connecting outputs All eight outputs are universal and can be configured by software to operate
either analog or digital devices. Connect the device under control between the
output terminal and one of the ground (G) terminals on the same bank.
Override cards
For large relays or devices that cannot be powered directly from a standard
output, install an output override card. Override cards provide:
◆ A wide choice of output signals.
◆ A slide switch for automatic or manual control.
◆ An LED for assessment of the output state.
Install the output override cards in the area under the plastic cover next to the
output terminals. The following output cards are available from KMC Controls.
Table 2-1 Output override cards
Card model number Output type
HPO-6701 Triac
HPO-6702 0–10 volts DC analog
HPO-6703 Normally open contact
HPO-6704 4–20 milliampere current loop
HPO-6705 Normally closed contact
Grounds and Switched Commons
When using an output override card, use the SC terminal instead of the ground
(G) terminal as signal common. Use the
the output terminal.
SC terminal in the same output bank as
14
Revision J
Page 15

Note
KMD-5205 and KMD-5270 Installation and Operation
Installing the controllers
Connecting to networks
Connecting to
networks
Each controller in a KMC digital network may be used as either a stand-alone
controller or connected to other controllers in a network. The KMD-5205 and
KMD-5270 controllers can be connected to other KMC controllers through two
different types of networks.
◆ Connections to KMD Tier 1 controllers and BACnet 8802–3 devices use
standard Ethernet wiring and hardware.
◆ KMD Tier 2 controllers and Modbus controllers use EIA–485 wiring and
hardware.
KMC Tier 1 networks LAN connections
Connect a standard Ethernet cable between the Ethernet connector on the
controller and a port on a network hub or router. You may connect up to 31 Tier
controllers in a system using Ethernet. In addition to allowing the maximum LAN
controllers, multiple computers can access the system through the network. See
Initializing with HCM on page 27 for Ethernet configuration.
KMC Tier 2 networks Connect KMC Tier 2 controllers to a KMD-5205 or KMD-5270 at the RS-485
connector. The KMC Tier 2 network uses shielded twisted pair cable to connect
controllers together. See
controller for Tier 2 network operation.
Initializing with HCM on page 27 for configuring a
1
KMD Tier 2 controllers cannot be connected to KMD-5205 or KMD-5270 when
the Modus option is enabled.
Revision J
15
Page 16

Installing the controllers
A
B
G
B
G
A
G
B
A
G
B
A
B
A
G
B
A
G
Earth ground
Ground shield in
one place only.
KMC Tier 2 networks
KMC Controls
Tier 2 wiring
You may connect up to 64 KMDigital controllers to the RS–485 connector. Use
approved shielded cable and the following principles when connecting a
controller to a Tier
◆ Use 18 gauge, twisted pair, shielded cable with capacitance of no more than
50 picofarads per foot for all network wiring. Belden cable model #82760
meets the cable requirements.
◆ Connect the A terminal in parallel with all other A or -A terminals.
◆ Connect the B terminal in parallel with all other B or +B terminals.
◆ Connect the shields of the cable together at each controller.
◆ Connect the shield to an earth ground at the other end.
◆ Use a KMD–5575 repeater if the cable length will exceed 4000 feet
(1220 meters). Use no more than seven repeaters per Tier 2 network.
◆ Place a KMD–5567 surge surpressor in the cable where it exits a building.
2 (sub LAN) network:
16
Illustration 2-1 Connecting controllers to a Tier 2 network
Tier 2 end of line termination switches
The controllers on the physical ends of the RS-485 wiring segment must have
end-of-line termination installed for proper network operation. Set the end-of-line
termination to
On using the EOL switches. The KMD-5205 and KMD-5270
end-of-line termination is set with two switches located near the RS–485
connector. Termination in other KMC controllers may be set with moveable
jumpers or fixed resistors.
Revision J
Page 17

Note
O-R STATUS H O A
O-R STATUS H O A
O-R STATUS H O A
O-R STATUS H O A
1
2
3
4
O-R STATUS H O A
O-R STATUS H O A
O-R STATUS H O A
O-R STATUS H O A
5
6
7
8
PWR
S-LAN
PC
COLL
Rx
Tx
WD
Termination On
Termination switch
O-RSTATUS H O A
O-RSTATUS H O A
O-RSTATUS H O A
O-RSTATUS H O A
1
2
3
4
O-RSTATUS H O A
O-RSTATUS H O A
O-RSTATUS H O A
O-RSTATUS H O A
5
6
7
8
PWR
S-LAN
PC
COLL
Rx
Tx
O-RSTATUS H O A
O-RSTATUS H O A
O-RSTATUS H O A
O-RSTATUS H O A
1
2
3
4
O-RSTATUS H O A
O-RSTATUS H O A
O-RSTATUS H O A
O-RSTATUS H O A
5
6
7
8
PWR
S-LAN
PC
COLL
Rx
Tx
Set end-of-line termination to
On in these controllers only
KMD-5205 and KMD-5270 Installation and Operation
Set the End-of-Line termination at the controllers where only one wire is
attached to the A and B terminals.
Installing the controllers
BACnet 8802-3 (optional)
Illustration 2-2 Termination switches
BACnet 8802-3
(optional)
Revision J
Illustration 2-3 End-of line termination
Connect models with the BACnet option to the BACnet internetwork through the
same Ethernet 10Base-T connection as the Tier 1 connection. For access to devices
on a BACnet internetwork you must do the following:
◆ The BACnet internetwork must include at lease one 8802-3 network.
◆ The controller must be connected to the same Ethernet broadcast domain
segment as one of the BACnet 8802-3 networks.
◆ If the internetwork does not include an 8802-3 network, install a router to
route traffic from the existing BACnet network protocols to Ethernet 8802-3.
For internetworks that include MS/TP or BAcnet IP, use a BAC-5050. For
addition details on BACnet networks, see application note AN0404A,
Planning BACnet Internetworks, which is available on the KMC web site.
17
Page 18

Installing the controllers
Note
A
B
G
+
-
+
-
B
G
+
+
A
Ground shield in
one place only.
KMD-5205 or
KMD-5270
with Modbus
Modbus
devices
Modbus (optional)
KMC Controls
Modbus (optional) Connect Modus slave controllers to a KMD-5205 or KMD-5270 at the RS-485
connector. The Modbus network uses shielded twisted pair cable to connect
controllers together. To set up the controller, see
and Setting up for Modbus networks on page 32 for configuration details.
Modbus wiring
Connect Modbus slave devices to the RS-485 connector. Use approved shielded
cable and the following principles when connecting a controller to a Modbus
network:
◆ Use 18 gauge, twisted pair, shielded cable with capacitance of no more than
50 picofarads per foot for all network wiring. Belden cable model #82760
meets the cable requirements.
◆ Connect the A terminal of the KMD controller in parallel with the minus (-)
terminals on the Modbus devices.
◆ Connect the B terminal of the KMD controller in parallel with the plus (+)
terminals on the Modbus devices.
◆ Connect the shields of the cable together at each controller.
◆ Connect the shield to an earth ground at one end only.
◆ Place a KMD-5567 surge surpressor in the cable where it exits a building.
Initializing with HCM on page 27
In addition to these Modus wiring requirements, verify equipment specific
Modbus wiring requirements in the manuals supplied with the Modus devices.
18
Illustration 2-4 Connecting the Modbus network
Revision J
Page 19

Note
Set end-of-line
termination to On
in these controllers
only
KMD-5205 and KMD-5270 Installation and Operation
Modbus end-of-line termination switches
The controllers on the physical ends of the Modus wiring segment must have
end-of-line termination installed for proper network operation. For the KMD
controllers the end-of-line termination is set with two switches located near the
RS-485 connector. Set the end-of-line termination to
End-of-line termination for the connected Modbus devices may be set with
moveable jumpers or fixed resistors. Verify termination methods for the Modbus
devices in the manuals supplied with the Modbus devices.
Set the end-of-line termination at the controllers where only one wire pair is
attached to the A and B terminals.
Installing the controllers
Modbus (optional)
On using the EOL switches.
Illustration 2-5 End-of-line termination
Revision J
19
Page 20

Installing the controllers
Connecting power
KMC Controls
Connecting power The controllers require an external, 24 volt, AC power source. Use the following
guidelines when choosing and wiring transformers.
◆ Use a KMC Controls Class–2 transformer of the appropriate size to supply
power to the controllers.
◆ When installing a controller in a system with other controllers, you may
power multiple controllers with a single transformer as long as the total
power drawn from the transformer does not exceed its rating and phasing is
correct.
◆ If several controllers are mounted in the same cabinet, you can share a
transformer between them provided the transformer does not exceed 100 VA
or any regulatory requirements.
◆ Do not run 24 volt, AC power from within an enclosure to external
controllers.
20
Revision J
Page 21

2
3
5
2
3
5
Nine-pin, female D-shell connector
O-R STATUS H O A
O-R STATUS H O A
O-R STATUS H O A
O-R STATUS H O A
1
2
3
4
O-R STATUS H O A
O-R STATUS H O A
O-R STATUS H O A
O-R STATUS H O A
5
6
7
8
PWR
S-LAN
PC
COLL
Rx
Tx
KMD–5673 cable
KMD-5205 and KMD-5270 Installation and Operation
Installing the controllers
Connecting to a computer through the serial port
Connecting to a
computer through
the serial port
Multiple computers may access the same controller at the same time. However,
unpredictable operation may occur if two or more operators are making
simultaneous changes.
To initialize or address the controller with the KMC Hardware Configuration
Manager or to program with WinControl XL Plus, connect a KMD-5673 cable
between a serial port on the computer and the RS-232 port on the controller.
◆ See Illustration 2-6 for cable details.
◆ See the section Configuration and programming on page 27 for procedures on
initializing and programming the controller.
Illustration 2-6 Computer to controller cable
Revision J
Illustration 2-7 Direct connection to KMD-5205 and KMD-5270
21
Page 22

Installing the controllers
Detail
Detail
O-R STATUS H O A
O-R STATUS H O A
O-R STATUS H O A
O-R STATUS H O A
1
2
3
4
O-R STATUS H O A
O-R STATUS H O A
O-R STATUS H O A
O-R STATUS H O A
5
6
7
8
PWR
S-LAN
PC
COLL
Rx
Tx
KMD–5674 cable
Connecting to a modem
KMC Controls
Connecting to a
modem
By adding an optional modem to the controller, an off-site computer can access
the controller through a dial-up connection. The modem connection also supports
dial-in and the Control Basic functions TPAGE and NPAGE. If the modem
function is enabled, the serial port is not available for direct connection with a
computer.
KMC Controls recommends using U.S. Robotics modems for off-site
communications. KMC does not offer support for other modem installations.
To install a modem:
1. Use HCM to configure the controller for the modem function. See
Initializing with HCM on page 27 for setup details.
2. Connect a KMD-5674 computer-to-modem cable between the KMD-5569
modem and the nine-pin modem connector on the controller.
3. Connect the modem to a telephone line dedicated to the network system.
4. Verify the configuration switches on the back of the modem are in the
following positions.
Table 2-2 Modem configuration switches
12345678
Up Up Down Down Up Up Up Down
22
Illustration 2-8 Modem connection to KMD-5205 and KMD-5270
Use only the KMD-5674 cable between the controller and the modem. A
standard modem cable will not work.
Revision J
Page 23

O-R STATUS H O A
O-R STATUS H O A
O-R STATUS H O A
O-R STATUS H O A
1
2
3
4
O-R STATUS H O A
O-R STATUS H O A
O-R STATUS H O A
O-R STATUS H O A
5
6
7
8
PWR
S-LAN
PC
COLL
Rx
Tx
WD
Reset
button
Indicator
LEDs
Power
jumper
Isolation
bulbs
Termination
switch
KMD-5205 and KMD-5270 Installation and Operation
SECTION 3
Operating the controller
This section provides general operating parameters of your KMC
controller and a detailed description of the front panel display.
Lights and indicators Isolation bulbs
Two small bulbs located next to the RS-485 connector are protective isolation
bulbs for the Tier 2 networks. These bulbs serve three functions:
◆ When illuminated they indicate improper network phasing. Improper
phasing occurs when the ground potential of the controller is higher than the
phase or the ground potential of other Tier 2 or Modbus controllers on the
network.
◆ The bulbs protect the controller from damage by limiting the network signal.
If voltage or current exceeds safe operating condition, the bulbs will open
the connections between the controller and the network.
◆ By pulling the bulbs from their sockets you can disconnect the controller
from the network.
Illustration 3-1 Controls and indicators
Revision J 23
Page 24

Operating the controller
Powering the controller
KMC Controls
LED indicators
Six LEDs on the front of the controller display system status. Use the LEDs to
confirm proper operation or as an aid when troubleshooting.
PWR Flashes green during normal operation. The normal cycle is one second on
and one second off.
S-LAN Momentarily flashes yellow during the time when data is being
transmitted to either the KMD Tier 2 network controllers or to the connected
Modbus devices.
PC Flashes when sending or receiving data from a computer.
COL Momentarily flashes red when a collision occurs in Ethernet traffic.
Rx Flashes green when Ethernet traffic is being received.
Tx Flashes green when Ethernet traffic is being transmitted.
Powering the
controller
Use the jumper located next to the power terminal to disconnect the 24 volt AC
power from the controller while making wiring changes. Remove the power
terminal or disconnect the power feeding the transformer before removing the
controller. The controller begins operation as soon as power is applied.
Maintenance The controller does not require routine maintenance. If cleaning is required, wipe
with a
soft, damp cloth and mild soap.
Replacing the fuse If a fuse opens, investigate the cause, and then replace the fuse. To replace the
fuse:
1. Remove the power connection to the module.
2. Carefully pull out the open fuse from the fuse holder.
3. Carefully snap an identical 1.6 ampere, fast-acting, fuse into the fuse
holder.
4. Reconnect the power.
24
Revision J
Page 25

Caution
Caution
KMD-5205 and KMD-5270 Installation and Operation
Operating the controller
Resetting the controller
Resetting the
controller
Use the reset button for either of the following functions.
◆ Restore the modem settings.
◆ Restore all configuration settings to the factory default settings.
Restoring the controller erases all programs and point configuration. Connect
to the controller through Ethernet or a dial-up modem and use either
WinControl XL Plus or TotalControl to save the programming in a panel file
before resetting the controller.
To restore only the modem settings
A controller that has been set for modem operation with HCM cannot directly
connect to a computer at the RS–232 port unless it is changed with the reset
button.
To change the controller from modem connection to direct computer connection
do the following:
1. Remove the plastic cover surrounding the six LEDs.
2. Press the reset button for one second and then release it.
Restoring to factory settings
Restoring a controller to factory settings changes the controller as follows:
◆ Removes all programming.
◆ Removes all configuration settings.
◆ Restores the controller to factory default settings.
Resetting the controller erases all configuration and programming. After
resetting to factory settings, you must configure and program the controller to
establish normal communications and operation.
To reset the controller to factory settings.
1. If possible, use WinControl XL Plus or TotalControl Design Studio to
backup the controller.
2. Remove the plastic cover surrounding the six LEDs.
3. Remove the power jumper. See the illustration
page 23 for the location.
4. Press and hold the red restart button.
5. Replace the power jumper while continuing to hold the restart button.
6. Release the restart button when the SUBLAN and PC LEDs illuminate.
Controls and indicators on
Revision J
25
Page 26

Operating the controller
Resetting the controller
KMC Controls
26
Revision J
Page 27

Caution
Note
KMD-5205 and KMD-5270 Installation and Operation
SECTION 4
Configuration and programming
This section lists initialization settings and describes programming
functions that are unique to configuring the KMD-5205 and
KMD-5270 controllers. Other programming features and more
detailed instructions are covered in the
Manual
.
WinControl XL User’s Plus Reference
Initializing with HCM
Before a controller is placed into service, it must be initialized and addressed with
the KMC
the WinControl XL software CD; complete operating instructions are included in
the Hardware Configuration Manager help files or the HCM Reference Guide
available on the KMC Controls web site.
The Hardware Configuration Manager sets all controllers on the Tier 2
network to the same parameters. To prevent disruption to other controllers on
the network, disconnect the network cables at the RS-485 port or remove the
isolation bulbs on the controller prior to starting HCM.
Ethernet settings do not take effect in a controller until the power is cycled.
1. Unplug the Tier 2 or Modbus network connection from the RS-485 port.
2. Connect a serial cable between the controller and the computer on which
3. Start HCM and establish communications with the controller.
4. Make the entries as described in the section
5. Set up the Ethernet routing table. See
6. On applicable models, do the following:
7. Return the network connection to the RS-232 port.
Hardware Configuration Manager (HCM) software. HCM is distributed on
HCM will run. See
on page 28.
• Enter BACnet parameters. See Setting up for BACnet networks on page 30.
• Set up the Modus communications. See
page 32.
Connecting to a computer through the serial port on page 21.
KMC digital network configuration
Ethernet routing table on page 29.
Setting up for Modbus networks on
Revision J 27
Page 28

Configuration and programming
Initializing with HCM
KMC Controls
8. Cycle the power to the controller. The controller can now be connected to
a network and additional programming can be performed with
WinControl XL Plus or TotalControl.
KMC digital network configuration
The entries in the table HCM Configuration Screen setup fields on page 28 are required
for controller-to-controller communications on a either KMD Tier 1 or KMD Tier 2
networks.
Table 4-1 HCM Configuration Screen setup fields
Setting Description
Address Enter the address that is assigned to the controller on the KMD
Tier 1 network. Valid entries are 1–31.
Last Panel Not applicable on any KMD-5205 or KMD-5270 models.
SubLAN A Sets the connection speed of the Tier 2 port to which the
controller is connected. Set the baud to match the baud of the
other controllers on the Tier 2 network.
Modem Select to indicate a modem is connect to the nine-pin serial
connector. If Modem is selected, a computer cannot be directly
connected to the nine-pin connector.
Modem String The controller automatically transmits initialization strings for
U.S. Robotics modems. If you are using a different modem,
enter the initialization string here. This can normally be found
in the modem manual.
The default initialization string is AT&A &B1 &C1 &D2 &H1
&K0 &R.
Computer Port Enter the communication speed for a PC is directly connected
to this port or the modem-to-computer baud if a modem is
connected to the controller.
SMPT IP Address Enter the IP address of the e-mail SMTP server. This address is
required to
send e-mail with KMD-5270 models. The
address is supplied by the network system administrator.
28
Revision J
Page 29

Note
KMD-5205 and KMD-5270 Installation and Operation
Ethernet routing table
The Ethernet routing table is a list that associates the KMC network addresses
assigned to Tier 1 controllers with the IP addresses required by the LAN protocol.
If the controller is not configured correctly, it will not communicate with other
controllers and may cause problems with the rest of the network. Before starting
the HCM initializing process you will need information about the controller and
the LAN which is listed in Table 4-2.
Table 4-2 Tier 1 controller Ethernet settings in HCM
Setting Description
IP address Supplied by network administrator. Enter the address next to the
panel address of the LAN Controller.
MTU 1400 or as supplied by system administrator
Gateway Use default (255.255.255.255) unless a router (gateway) is
located between two Tier 1 controllers. The router IP address is
supplied by the network system administrator.
MAC address The MAC address is located on the white label on the front of the
controller. MAC addresses for KMC Controls products begin with
00-D0-6F.
Broadcast sever Check if this controller is a broadcast server.
Interval Set the interval for the broadcast message. The broadcast
message is for KMD controllers and not a LAN broadcast
message.
Subnet mask Set the Subnet Mask address to 255.255.255.0. or as supplied by
network system administrator.
Configuration and programming
Initializing with HCM
Ethernet settings do not take effect in a controller until the power is cycled.
Ethernet troubleshooting
If the controller does not appear Network Status in the WinControl program, try
the following.
1. Obtain a crossover cable (available in most stores that carry network
products).
2. Connect the crossover cable between the Ethernet connection on your
computer and the Ethernet connector on the LAN Controller.
3. Open an MS-DOS window on your computer and Ping the controller’s
IP address. If the controller is operating correctly, you should receive a
response to the ping command.
If you are unfamiliar with the above steps, contact KMC Controls for assistance
Revision J
29
Page 30

Configuration and programming
Detail
Setting up for BACnet networks
KMC Controls
Setting up for
BACnet networks
These topics apply only to the following models:
◆ KMD-5205-006
◆ KMD-5270-001
◆ KMD-5270-006
If the controller is licensed for BACnet and connected to a BACnet network, the
controller must be configured to communicate with the network.
Table 4-3 BACnet settings in HCM
Setting Description
Instance The device instance number as assigned by the BACnet system
designer. Instance numbers are required, must be unique among all
devices on the internetwork and range from 0 to 4,194,303.
Name A required 16-character label of the device. Name must be unique
among all devices on the internetwork. The set of characters used
in Name is restricted to printable characters.
Location Optional information used to further identify a piece of equipment.
Description Optional information used to further identify a piece of equipment.
APDU Timeout Indicates the period—in milliseconds— between retransmissions of
an APDU requiring an acknowledgement for which no
acknowledgment has been received. The default value is 3000
milliseconds.
Max Master Not applicable to KMD-5205 or KMD–5270 models.
Token Timeout
Not applicable to KMD-5205 or KMD–5270 models.
BACnet device settings are covered in more detail in BACstage or TotalControl
help. The BACstage and TotalControl reference guides are available also in
Adobe Acrobat format on the KMC Controls web site.
30
Revision J
Page 31

Caution
KMD-5205 and KMD-5270 Installation and Operation
Configuration and programming
Control Basic programming for BACnet
Control Basic programming for BACnet
These topics apply only to the following models:
◆ KMD-5205-001 ◆ KMD-5270-001
◆ KMD-5205-006 ◆ KMD-5270-006
Control Basic programming for BACnet
For Control Basic programming, the KMD–5270 models support the BACnet
object types that are listed in Table 4-4.
Table 4-4 Supported BACnet object types
Mnemonic Object type
AI Analog Input
AO Analog Output
BI Binary Input
BO Binary Output
AV Analog Value
BV Binary Value
Program the controllers as you would other KMD series controllers. Observe the
following details when programing an interface to a BACnet internetwork:
◆ Only input, output and variable points within a BACnet licensed controller
appear as objects in a device on the BACnet internetwork.
◆ A point configured as a KMD digital point will appear as a BACnet binary
object. Analog points appear as analog objects.
◆ To be visible as an object to BACnet devices, configure the KMD point with
both a description and a label.
◆ Use BAC-SET, BAC-GET and BAC-RLQ in Control Basic to read and write
other objects on other BACnet devices.
KMC Controls recommends that all BACnet services have adequate error
handling protocols within your control program. The following Control Basic
code segment demonstrates reading the state of binary input BI8 in a BACnet
device with instance number 1.
The WAIT statement in the following example is required. Do not delete it or
the program will not run correctly.
Example: 250 G = BAC-GET( 1 , BI8 ) : REM BACnet read
260 ON-ERROR 280 : REM If error, bad read, don’t use it
270 1-VAR16 = G : REM Read was good, use the value.
280 WAIT 0:00:15 : REM Release so other CB programs can run
290 END
Revision J
31
Page 32

Configuration and programming
Note
Setting up for Modbus networks
KMC Controls
Access to the controllers from BACnet
To access the BACnet licensed controller, use a BACnet operator workstation such
as BACstage.
◆ The WebLite will appear in the BACstage device list but cannot be selected.
Its objects are not accessible for configuration from the BACstage Object
menu.
◆ The configured points within the WebLite are the only points visible in
BACnet.
◆ In BACstage, use BACnet Read/Write Property under the System menu in
BACstage to manually view or change properties.
◆ In TotalControl the BACnet licensed controllers are added to the Network
Manager list.
◆ KMC BACnet controllers and third-party devices may read and write to the
objects in the WebLite with off-panel reads and writes.
Setting up for
Modbus networks
Programming for Modbus in WinControl XL Plus
These topics apply only to the following models:
◆ KMD-5205-005 ◆ KMD-5270-005
◆ KMD-5205-006 ◆ KMD-5270-006
Set the following Modbus communication parameters with HCM. All Modbus
devices connected to the same network—including the KMD-5205 and KMD 5270
models—must be set to the same mode, baud and parity.
Table 4-5 Modbus settings in HCM
Setting Description
Mode Select only RTU.
Baud Set to 9600, 19,200 and 38,00 baud.
Data Set to even, odd or no parity bits
Use WinControl XL Plus to map Modbus registers to variables in the KMD-5205
and KMD-5270 Modbus licensed controllers. Once the registers are mapped to
variables, the variables are handled with Control Basic to read from and write to
the registers. The procedures for mapping the registers to variables are covered in
WinControl XL Plus help and the WinControl XL Plus Reference manual.
32
WinControl XL Plus 2.1 or later is required to map Modbus registers to
variables in the KMD-5205-005 and KMD-5270-005 controller.
Revision J
Page 33

Note
KMD-5205 and KMD-5270 Installation and Operation
Configuration and programming
Firewalls and network communications
Firewalls and
network
communications
Firewalls are commonly installed on networks to prevent unauthorized traffic or
electronic probes from entering the network. If the controller must communicate
with a network where a firewall is in place, the following actions must be taken.
Tier 1 controllers communicate through one of three Ethernet Ports:
Tabel 4-6 Firewall ports
Connection UDP Port
WinControl to Tier 1 controller 21068
Tier 1 controller to Tier 1 controller 21069
Tier 1 controller to Tier 1 controller 21070
These ports must be open for communications to pass through a firewall.
If the controller resides behind a Network Address Translation (NAT) router, the
IP address for the controller must be preceded by the lowercase letter ‘r’ in the
WinControl system menu. (For example, r128.1.1.5.)
Adding this prefix letter will cause WinControl to disregard the IP table and
download from the panel itself.
If you use this method you will only be able to connect one Tier 1 controller
through the router.
System time keeping The controllers feature real-time clocks. Once the clock is set with WinControl XL,
the controller maintains accurate time even during power loss. A KMC digital
network uses the lowest addressed Tier 1 controller with a real-time clock as the
system time keeper.
Revision J
33
Page 34

Configuration and programming
Detail
Caution
System graphics
System graphics These topics apply only to the following models:
◆ KMD-5270 ◆ KMD-5270-005
◆ KMD-5270-001 ◆ KMD-5270-006
The KMD-5270 WebLite models can store up to eight system group background
graphics which can then be served to a standard web browser. Use the following
procedure in WinControl XL Plus to make a graphic available for browser access.
WinControl XL Plus 2.1 or later is required to load browser graphics into a
KMD–5270 WebLite.
1. Connect to the controller with WinControl XL Plus over Ethernet.
2. Choose Control menu, System Groups. and then Graphics.
3. Enter the file name of the background graphic to be stored in the
KMD-5270 for viewing with a web browser.
4. Enter the same name in the Bitmap/JPEG column in the System Groups
list window.
KMC Controls
34
Illustration 4-1 Web graphics file list
A background graphics file name may be compatible with WinControl XL Plus
but not with the browser. WinControl XL Plus will send a background graphic
with an incompatible file name to the controller but the browser may not
display it. Use the following guidelines for best results.
◆ Use the file name without the extension.
◆ The file type must be JPG format and cannot be larger than 50kB.
◆ Place the file in the Pictures directory in the job folder. This is the same
location for other system group graphics.
◆ Use only file names that are compatible with web browsers. If unsure about
browser compatibility, use only letters and numbers.
◆ File names are limited to 10 characters by WinControlXL Plus.
Revision J
Page 35

KMD-5205 and KMD-5270 Installation and Operation
SECTION 5
Using a web browser (KMD-5270 models only)
This section explains how to view and control a KMD-5270 with a
web browser.
Through the embedded HTTP server in the KMD-5270, you can use a web
browser to view and make changes to the following functions in the controller.
Table 5-1 WebLite view and change functions
Function Control
System Groups Views text and background graphics.
Inputs Change value and manual mode status
Outputs Change value and manual mode status
Variables Change value and manual mode status
PID Controllers Change value and manual mode status
Weekly Schedules Change times
Annual Schedules Change dates
These functions are fully described in the section The Control Menu of the
WinControl XL Plus User’s Manual.
Applicable models The topics in this section apply only to the following models:
◆ KMD-5270 ◆ KMD-5270-005
◆ KMD-5270-001 ◆ KMD-5270-006
Revision J 35
Page 36

Using a web browser (KMD-5270 models only)
Note
Click to change to
compatibility mode.
Enter IP
address
Click to log in
Enter operator name
and password
Browser requirements
KMC Controls
Browser
requirements
Opening the WebLite home page
Use only Microsoft Internet Explorer to view the web pages in a KMD-5270
controller. The browser requires the Java Virtual Machine, a product of Oracle, to
view the trend graphs in the controller. Download the Java Virtual Machine at the
following address.
www.oracle.com.
If you are using Internet Explorer version 10, which will only run on Windows 7
or Windows 8, you must enable the Compatibility View to get the WebLite web
pages to work correctly. If you open the WebLite web page and the Login button is
not present, change the compatibility mode by clicking the Compatibility icon
in the address bar.
Illustration 5-1 Changing to compatibility mode in IE 10.
To access a WebLite with a web browser, open a browser window and then enter
the IP address for the controller in the address bar. The WebLite home page opens.
Two IP addresses may be assigned to a WebLite. The network system
administrator will provide the address.
◆ Use the internal IP address if you are connected to the same network as the
WebLite.
◆ Use the IP address assigned for viewing with a browser if you are
connecting to the WebLite through an internet service or network firewall.
36
Illustration 5-2 WebLite home page
Revision J
Page 37

Choose available
functions from
the Controller
Data list
Click to log out
KMD-5205 and KMD-5270 Installation and Operation
Log in and security
When the home page is open, click Login and then enter your user name and
password. Only assigned operators can view or make changes to a WebLite
controller. Security levels are assigned with WinControl XL Plus and correspond
to WebLite permissions as follows:
Operator level Permission
1 View only
3 Changes permitted only to the initial system group
5 View and make changes
After a logging in, the home screen displays a list of available functions.
Using a web browser (KMD-5270 models only)
Opening the WebLite home page
Table 5-2 Password permissions
that opens for the operator at sign-on.
Revision J
Illustration 5-3 WebLite home page
Log out
Click the Logout button in the upper right corner of the home page to close the
connection with the WebLite. Logging out maintains security and prevents
unauthorized modifications to the system.
37
Page 38

Using a web browser (KMD-5270 models only)
Note
Edit link
Viewing and editing
KMC Controls
Viewing and editing Controlling a system through a WebLite is limited to making changes to values,
setting the state of manual overrides and changing times and dates in schedules.
When you choose a point such as Input, a monitor window opens. Below the data
displayed in the window is an edit link which opens an additional window with
the edit page.
Illustration 5-4 View only monitor window
Descriptions, labels and units can be changed only by using WinControl XL
Plus.
38
Revision J
Page 39

Calculator
button
Click OK to send
changes
Calculator
pop-up
Click Reset to
restore to original
state
KMD-5205 and KMD-5270 Installation and Operation
To ma ke c ha nge s t o va lu es:
1. Click Edit. The Edit window opens.
2. Enter a new value.
3. Click
Ok and the change is sent to the controller.
Using a web browser (KMD-5270 models only)
Viewing and editing
Illustration 5-5 Input edit window
Clicking the calculator button opens an additional window with calculator
functions. The value in the calculator pop-up is sent to the edit page when you
close the calculator pop-up or click
until you click
OK in the edit page.
Ok. The change is not sent to the controller
Revision J
39
Page 40

Using a web browser (KMD-5270 models only)
Note
PID controllers
KMC Controls
PID controllers PID controllers are managed the same as the input function described in Viewing
and editing on page 38.
Illustration 5-6 PID control loop
Trend Logs Trend logs may be viewed as either a table or graph.
Viewing trend log graphs require the Sun Microsystems Java Virtual Machine
to be installed on your computer. Download the Virtual Machine at http://
java.sun.com/getjava/download.html
To view a trend log:
1. Choose Trend Log from the Controller Data list. A trend log list window
opens.
2. Choose a trend log from the list. A window opens and displays the trend
log in table format.
3. Click
4. Passing the cursor over a point on the graph displays the data value and
To zoom in on a specific detail:
1. Left click and drag from left to right over the points you want to examine.
Open Graph. A new window opens in which the controller will graph
the data.
the time it was collected in the
Pointer Coordinates box.
40
Revision J
Page 41

KMD-5205 and KMD-5270 Installation and Operation
2. Click No Zoom to return to normal view.
Using a web browser (KMD-5270 models only)
Trend Logs
Illustration 5-7 Trend log graph
Revision J
41
Page 42

Using a web browser (KMD-5270 models only)
Schedules
KMC Controls
Schedules Weekly and annual schedules are managed much the same as with WinControl.
The method for editing a weekly schedule is described in
page 38.
Viewing and editing on
42
Illustration 5-8 Weekly and annual schedules
Revision J
 Loading...