

KLIQ UBERTUNER User Manual
Dear Musician,
Thank you for purchasing the UberTuner, and welcome to the KLIQ! To register your product warranty, please visit
www.kliqmusicgear.com/warranty. To get the most out of your new tuner, please carefully read this manual prior to
first use, and keep it for later reference.
PRECAUTIONS
1. Using the tuner in the following locations can result in a malfunction:
• In direct sunlight
• Locations of extreme temperature or humidity
• Excessively dusty or dirty locations
• Locations of excessive vibration
• Close to magnetic fields
2. When not using the tuner for an extended period of time, please remove the battery to prevent it from
leaking.
3. To avoid breakage, do not apply excessive force to the buttons, battery cover, or display.
4. If the exterior becomes dirty, wipe it with a clean, dry cloth. Do not use any chemical liquid cleaners or
water.
5. To avoid damage to your instrument‟s finish, we recommend removing the tuner from your instrument when
not in use.
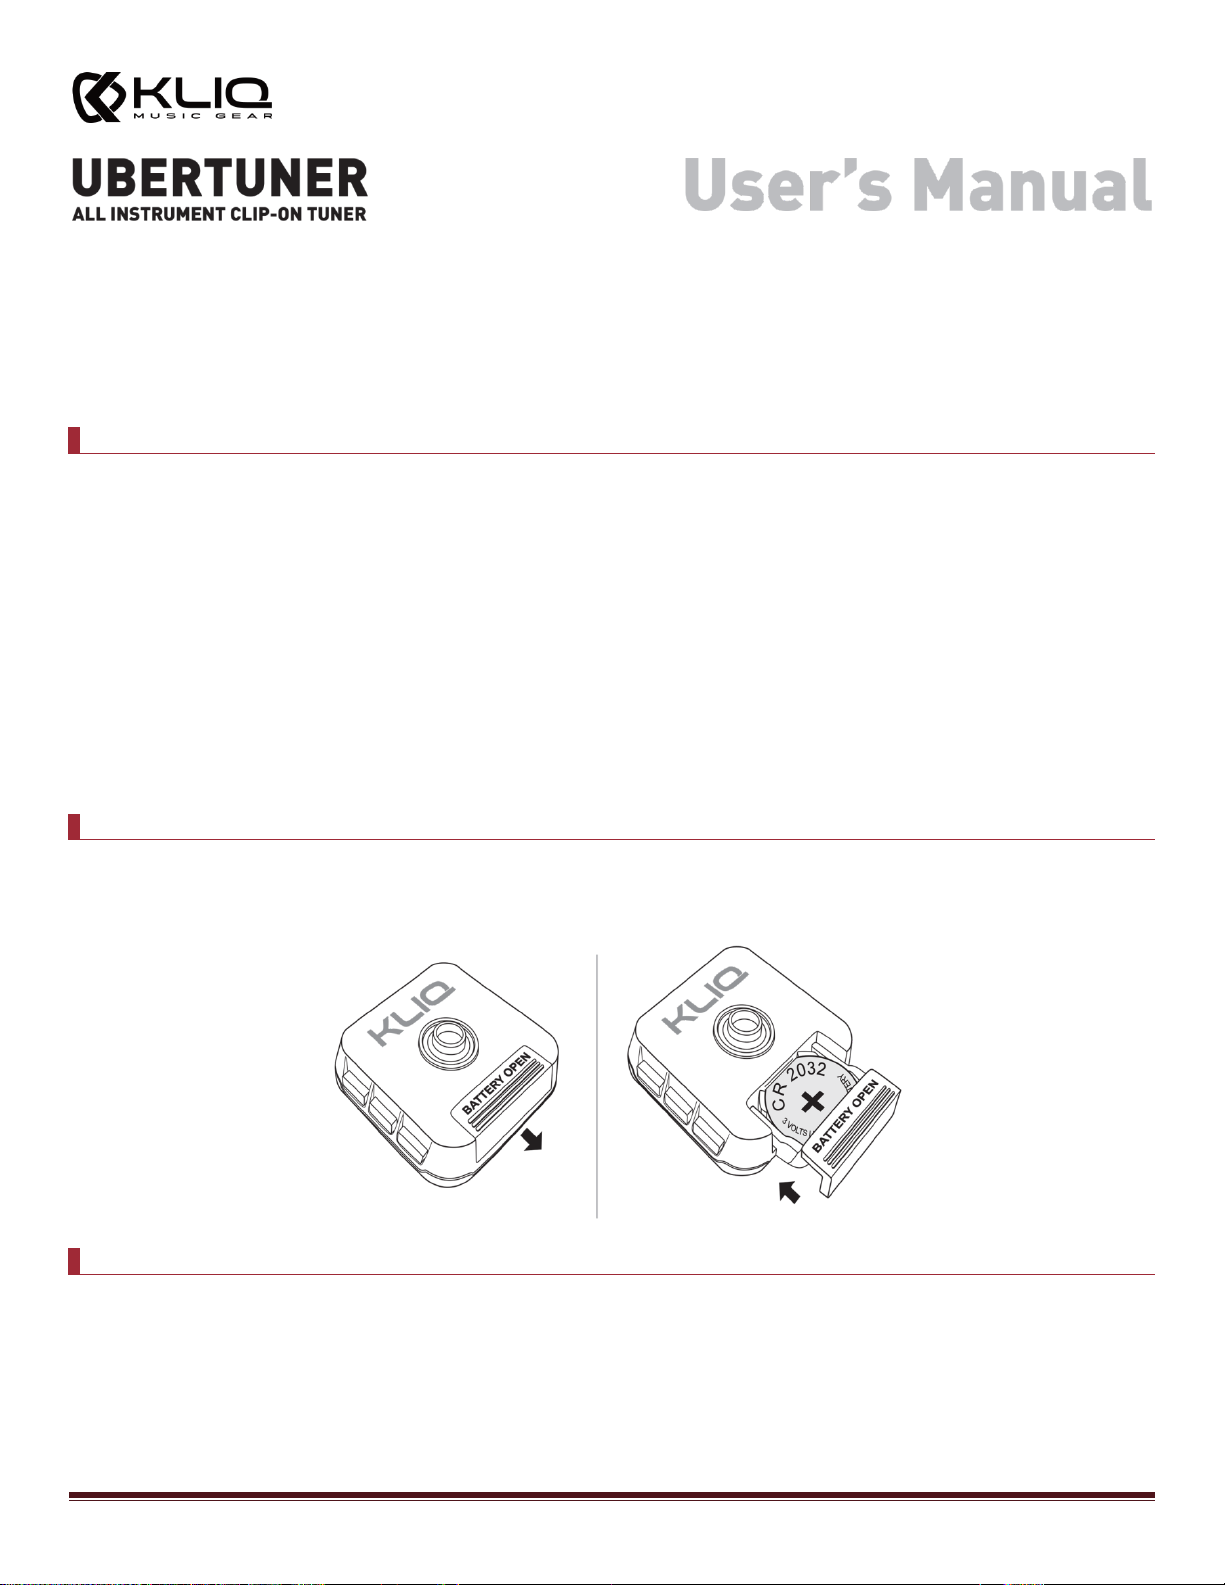
INSTALLING THE BATTERY
The tuner uses 1 CR2032 3V battery (included). To install the battery, slide out the battery tray from the tuner,
insert a new battery into the tray, and gently push the battery drawer tray back in until you feel a slight “click.” The
battery‟s positive side (+) should be facing up when placed inside the battery tray, as shown in the illustration below:
ATTACHING THE TUNER TO YOUR INSTRUMENT
When attaching the tuner to your instrument, please be careful as to not damage the instrument‟s finish. Do not
attach the tuner to your instrument if the rubber pads on the tuner clip are visibly worn or are missing. For guitars,
attach the tuner to the headstock with the display either in front of, or behind the headstock. For other instruments,
find a safe and visible location to attach the tuner to. Adjust the display by turning and tilting the „L‟ shaped arm
that connects the tuner to the clip. The display itself also rotates 360 degrees, which means you have many
adjustment options for optimal visibility of the tuner display.
UberTuner User‟s Manual Page 1

DISPLAY & BUTTON FUNCTIONS
OPERATING INSTRUCTIONS
1. Press and hold the POWER/KEY button (1) for 2 seconds. The power will turn on/off each time you press and
hold this button.
2. Play a single note on your instrument. The Note Name Indicator (D) will display the name of the note that‟s
closest to the pitch detected. The yellow indicators to the left of the note will light up if the pitch is too low
or flat. The red indicators to the right of the note will light up if the pitch is too high or sharp. Adjust the
tuning so that the green circle around the note lights up (along with the yellow indicators to the left), which
means the note you‟re playing is perfectly in tune.
TUNING MODES
To change the tuning mode, press and hold the MODE Button (2) for 2 seconds. Display indicators A, B, and C will
begin to flash. Each time you press the MODE button (2), the tuning mode will change, with the current mode shown
by the Tuning Mode Indicator (B). The various tuning modes are Chromatic Mode C, Guitar Mode G, Bass Mode B,
Violin Mode V, and Ukulele Mode U.
A4 REFERENCE PITCH CALIBRATION
To set the A4 calibration, press and hold the MODE button (2) for 2 seconds. Display indicators A, B, and C will begin
to flash. Each time you press the A4 button (3), the calibration value (reference pitch) will increase in 1 Hz steps,
with the current value shown by the Reference Pitch Indicator (A). This setting range is between 430 and 450 Hz.
TRANSPOSITION SETTINGS
This function is for tuning a transposing instrument. To select the appropriate transposition setting for your
instrument, press and hold the MODE button (2) for 2 seconds. Display indicators A, B, and C will begin to flash. Each
time you press the KEY button (1), the setting will cycle between C, B♭, E♭, and F under Chromatic Mode C, and
between C and D under Ukulele Mode U, with the current value shown by the Transposition Setting Indicator (C).
UberTuner User‟s Manual Page 2
 Loading...