

Page 1
www.klimaireINTL.com
Ceiling Mount
Precision Cooling Systems
Installation Operation &
Maintenance Manual
KLIMAIRE International
+1.647. 477. 3333
+1.646. 808. 0240
klimaireINTL@klimaireINTL.com
Page 2

Ecosaire®CM Series Precision Air Conditioner Owners Manual
NOTE:
For your convenience this manual is organized into
tasks arranged in a workable order. Most material
relevant to a single task is on one page or a group of
sequential pages.
Please feel free to attach copies of the appropriate
pages to the task work-order.
To the Owner:
This manual contains important instructions in operating
and maintaining your Ecosaire®system. Please read the
entire manual carefully and if you have any questions contact your local Ecosaire®representative. Your warranty is
valid only if conditions explained in this manual are met.
To the Installer:
This manual contains vital instructions for installing and
®
starting up the Ecosaire
manual carefully and if you have any questions
contact your local Ecosaire®representative. Your
customer’s satisfaction is at stake and the Ecosaire
system. Please read the entire
®
warranty may be void if conditions explained in this
manual are not met.
Data subject to change without notice.
2 Ecosaire
®
July 2007
Page 3

Owners Manual Ecosaire®CM Series Precision Air Conditioner
Contents
Ecosaire®EC Series
Precision Environmental
Control for Industrial and
Commercial Applications
All Ecosaire®equipment offers
maximum design flexibility ensuring
continuous and simultaneous control of
temperature, humidity, air purity, and airflow within each dedicated operating
site.
Ecosaire®Precision Environmental
Control Systems are feature-rich,
premium products that are available in
product ranges with uniquely engineered
designs that no other manufacturer
duplicates. Ecosaire®units offer the
best possible environmental protection.
®
For over 25 years Ecosaire
has demonstrated superior performance
in thousands of applications around the
world.
equipment
Page
Product Description 4
Unit Nameplate 13
Building
Moisture Migration 14
Installation
Unpacking & Locating 16
Locate Remote Condenser 18
Unit-Duct Connections 19
Standard Practice for Ducts 21
Piping 22
Water 22
Condensate 23
Refrigerant Piping 24
Evacuation & Charging 25
Water & Glycol 32
Wiring 36
Startup
Contents 45
Supervisaire
Pre-Startup Adjustments 49
Airflow 51
Remote Heat Exchanger 52
Humidifier 60
Pre-Startup Checklist 63
Enable Operation 68
Set Head Pressure 69
Expansion Valve Adjustment 71
Startup Report &
Warranty Registration 73
Warranty 75
Operation
Contents 77
Maintenance Schedule 78
Maintenance Record 80
Maintenance Tasks 83
Logical Flow Charts 90
Supervisaire
Password 92
Enable / Disable 93
Clock 94
Set Point Adjustment 95
Alarms 97
Alarm History 98
Component Run Times 99
Supervisaire®Diagnostics 100
Sensor Response Curves 108
®
Controller Interface 46
®
Controller 91
Ecosaire
Data subject to change without notice.
®
July 2007 3
Page 4

Ecosaire®CM Series Precision Air Conditioner Owners Manual
Product Description
DESCRIPTION
All sensitive electronic equipment
requires a stable environment for
optimum performance. The
Ecosaire®Precision Environmental
Control system provides the best
possible protection for any
application.
®
The Ecosaire
product line is
made up of feature-rich, energy efficient premium products that are
available in sizes and configurations
to suit any application - even corrosive industrial process environments.
Ecosaire®contains unique, highly
engineered subsystems that no other
manufacturer duplicates, ensuring
continuous, simultaneous control of
temperature, humidity, air purity and
air flow at each operating site.
Ecosaire®performs with the high-
est energy efficiency through intelligent design: less energy wasted on
undesired latent cooling, on-demand
dehumidification, and the state-ofthe-art Supervisaire®Control
System. These new controls offer
maximum design flexibility, networkable units, BACNETTM, and
TM
MODBUS
compatibility. This
allows remote monitoring and alarm
logging from either a graphics display
panel, personal computer, or via
modem.
The Ecosaire
®
product line offers
the maximum in environmental control performance and the lowest lifecycle cost of ownership.
Stable environmental conditions
are further ensured by on-demand
dehumidification. Unlike conventional computer-grade systems that con-
®
stantly dehumidify, Ecosaire
eliminates the costly process of removing
and then replacing moisture.
The Supervisaire®Microprocessor
Controls provide extremely userfriendly, programmable monitoring
and control for all Ecosaire
®
Precision Environmental Control systems. Individual Ecosaire®units can
be connected on a built-in local area
network together with a supervisory
panel complete with a backlit graphics display for robust, redundant
environment control. At the same
time, the network can be connected
to a personal computer supervisory
system, or to a BACNETTM, or MOD-
TM
BUS
network.
The LCD panel is large and easy
to read (4 x 20 characters) and the
simple layout provides an easy-touse interface for the operator.
English language menus (other languages available) and built-in diagnostics walk the user step-by-step
through the monitoring and control of
the system.
A powerful 16-bit microprocessor
ensures high program-execution
speed and efficient real-time management of even the fastest transients.
The computer-site conditions and
utilities will determine the type of
environmental control units selected.
A cooling-load calculation based on
design criteria should be performed
according to standard air-conditioning practice. The calculation should
include the heat gains of: exterior
walls and windows; area exposed to
unconditioned spaces (i.e. partitions,
ceilings, and floors); people; lighting;
and all computer and auxiliary
equipment. With this information
the type, size and number of
®
Ecosaire
units can be selected to
best match the equipment configuration in the computer room.
Allowances for expansion and redundancy should be considered at this
time.
While many important factors
require evaluation when designing a
computer room, the most important
are security, expandability, location
within the building, proximity of related data processing operations and
proximity to outdoor air-conditioning
components. Computer rooms are
best located in a central part of a
building so as not to be affected by
outside temperature and humidity.
When a room must be designed with
an outside wall, the wall should be
insulated and windows should be
kept to a minimum. Thermopane
windows should be used to prevent
condensation. Equipment access
through doors, elevators, etc., as well
as elevator capacity, must be
carefully considered.
Data subject to change without notice.
4 Ecosaire
®
July 2007
Page 5

Owners Manual Ecosaire®CM Series Precision Air Conditioner
Product Description
CM Series Standard
Features
The cabinet and frame are
constructed of heavy-gauge coldrolled steel. All interior air surfaces as well as access panels
are lined with 1/2 inch, 1.5 pound
density black-mat-coated fiberglass, providing double insulation
for reduced noise levels. Access
panels are may be easily removed
when necessary. All units are provided with top corner lifting lugs
for easy rigging.
The extra-large surface area of
the evaporator coil allows
Ecosaire®to provide high sensi-
All components require electric power in the following ranges under all conditions,
including compressor inrush:
Rated Voltage
Voltage (V) Range (V)
208 192 - 220
230 207 - 253
460 414 - 506
575 518 - 633
ble cooling with low air velocity
and smooth airflow. The evaporator is fitted with a corrosion-free
stainless-steel condensate pan.
The coil is constructed of copper
tubes expanded into aluminum
fins.
Deep-pleated filters rated at 25-
30% efficiency by the ASHRAE
52-76 method are standard on all
Ecosaire®units. They may be
easily replaced from the filteraccess door.
Refrigeration circuit is fitted
with filter/drier, sight glass/moisture indicator, liquid-line solenoid
valve, adjustable externally-
equalized thermal-expansion
valve, high-pressure switch, lowpressure switch, refrigeration service valves, and high-efficiency
heat-pump-duty hermetic compressor with crankcase heater.
Water-cooled, glycol-cooled, and
FreeCool units have stainlesssteel plate condensers.
All fans are arranged for drawthough airflow and include motors
with permanently-lubricated ball
bearings and internal overload
protection.
DESCRIPTION
Ecosaire®units are built to relevant standards and comply with all relevant listing agency requirements.
Units must be installed in accordance with all applicable codes. If components must be added to meet local
codes, please contact the factory in advance for engineering approval and warranty considerations. Any additional components are by others.
Data subject to change without notice.
®
Ecosaire
July 2007 5
Page 6
Ecosaire®CM Series Precision Air Conditioner Owners Manual
Product Description Major Cooling Options
DESCRIPTION
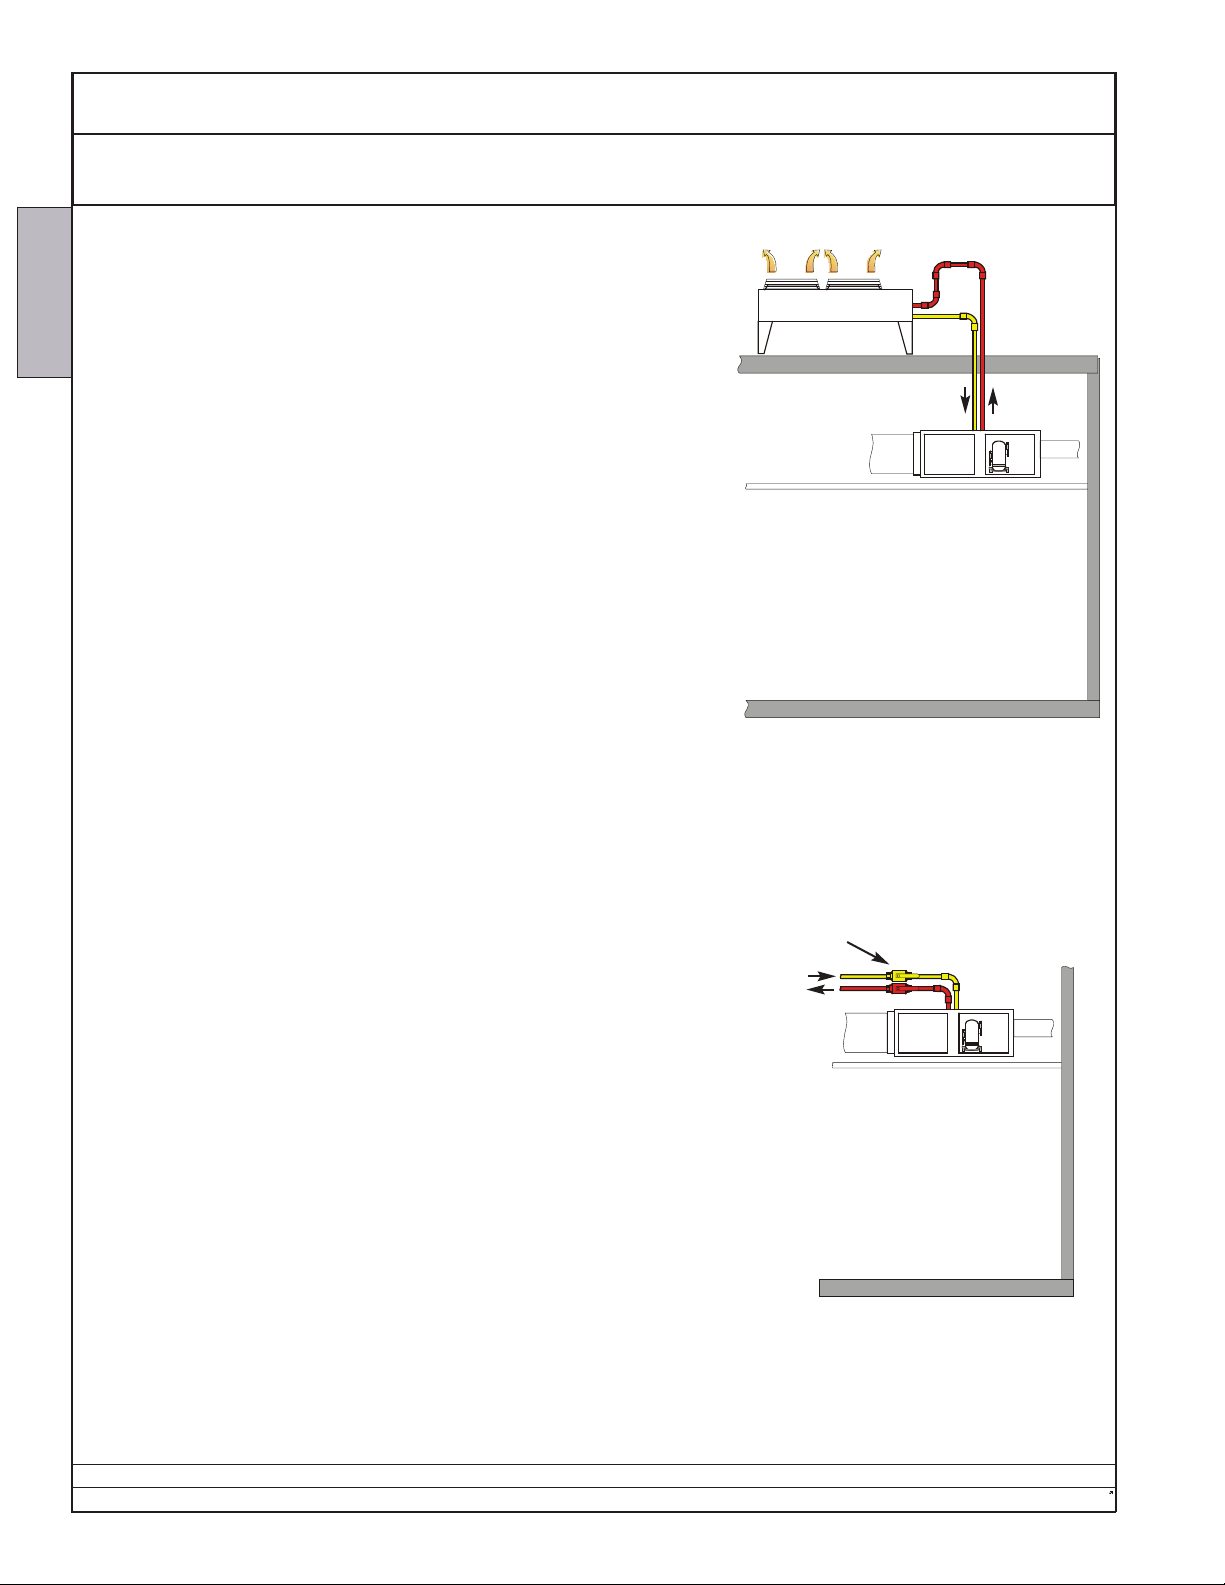
Air-Cooled Direct Expansion
The Ecosaire®unit operates its refrigeration system as needed to
control room conditions.
Heat is transported via refrigerant-vapor flow to an outdoor air-cooled
condenser. The refrigerant liquifies in the condenser and returns to the
Ecosaire®unit.
Outdoor condensers are rated for 95°F (35°C) ambient with optional
models available for higher or lower ambient temperatures. They are
constructed of copper tubes and aluminum fins. A factory-wired control
panel is provided for field connection. Fan cycling and pressureactuated fan speed control maintain head pressure of either compressor
down to -20°F (-29°C). Optional flood-back controls are available for
either 30°F (-34°C) or -40°F (-40°C) operation.
See Installation - Piping for details.
Remote Condenser
Ecosaire
CM
Air-cooled condensers are available for the following conditions:
Design Standard-Ambient Low-Ambient
Temp. min - max min - max
95°F (35°C) 0 - 105°F (-17 - 41°C) -40 - 105°F (-40 - 41°C)
100°F (38°C) 0 - 110°F (-17 - 43°C) -40 - 110°F (-40 - 43°C)
105°F (41°C) 0 - 115°F (-17 - 46°C) -40 - 115°F (-40 - 46°C)
Water-Cooled Direct Expansion
The Ecosaire®unit operates its refrigeration system as
needed to control room conditions.
Heat is transported via refrigerant-vapor flow to an internal water-cooled condenser. The refrigerant liquifies in
the condenser and re-circulates.
Water is pumped through the condenser to carry the
heat away. Proper flows and and temperatures of water
or other fluid must be provided by others. See
Installation - Piping.
service isolation
valves (by others)
cooling water or
other fluid,
(by others)
SAMPLE
may vary.
Number, location, and
appearnce of components
Ecosaire
CM
The cooling water entering the unit must have a minimum temperature of 65°F (18°C). Contact the factory for
lower temperatures.
Data subject to change without notice.
6 Ecosaire
SAMPLE
may vary.
Number, location, and
appearnce of components
®
July 2007
Page 7
Owners Manual Ecosaire®CM Series Precision Air Conditioner
Major Cooling Options Product Description
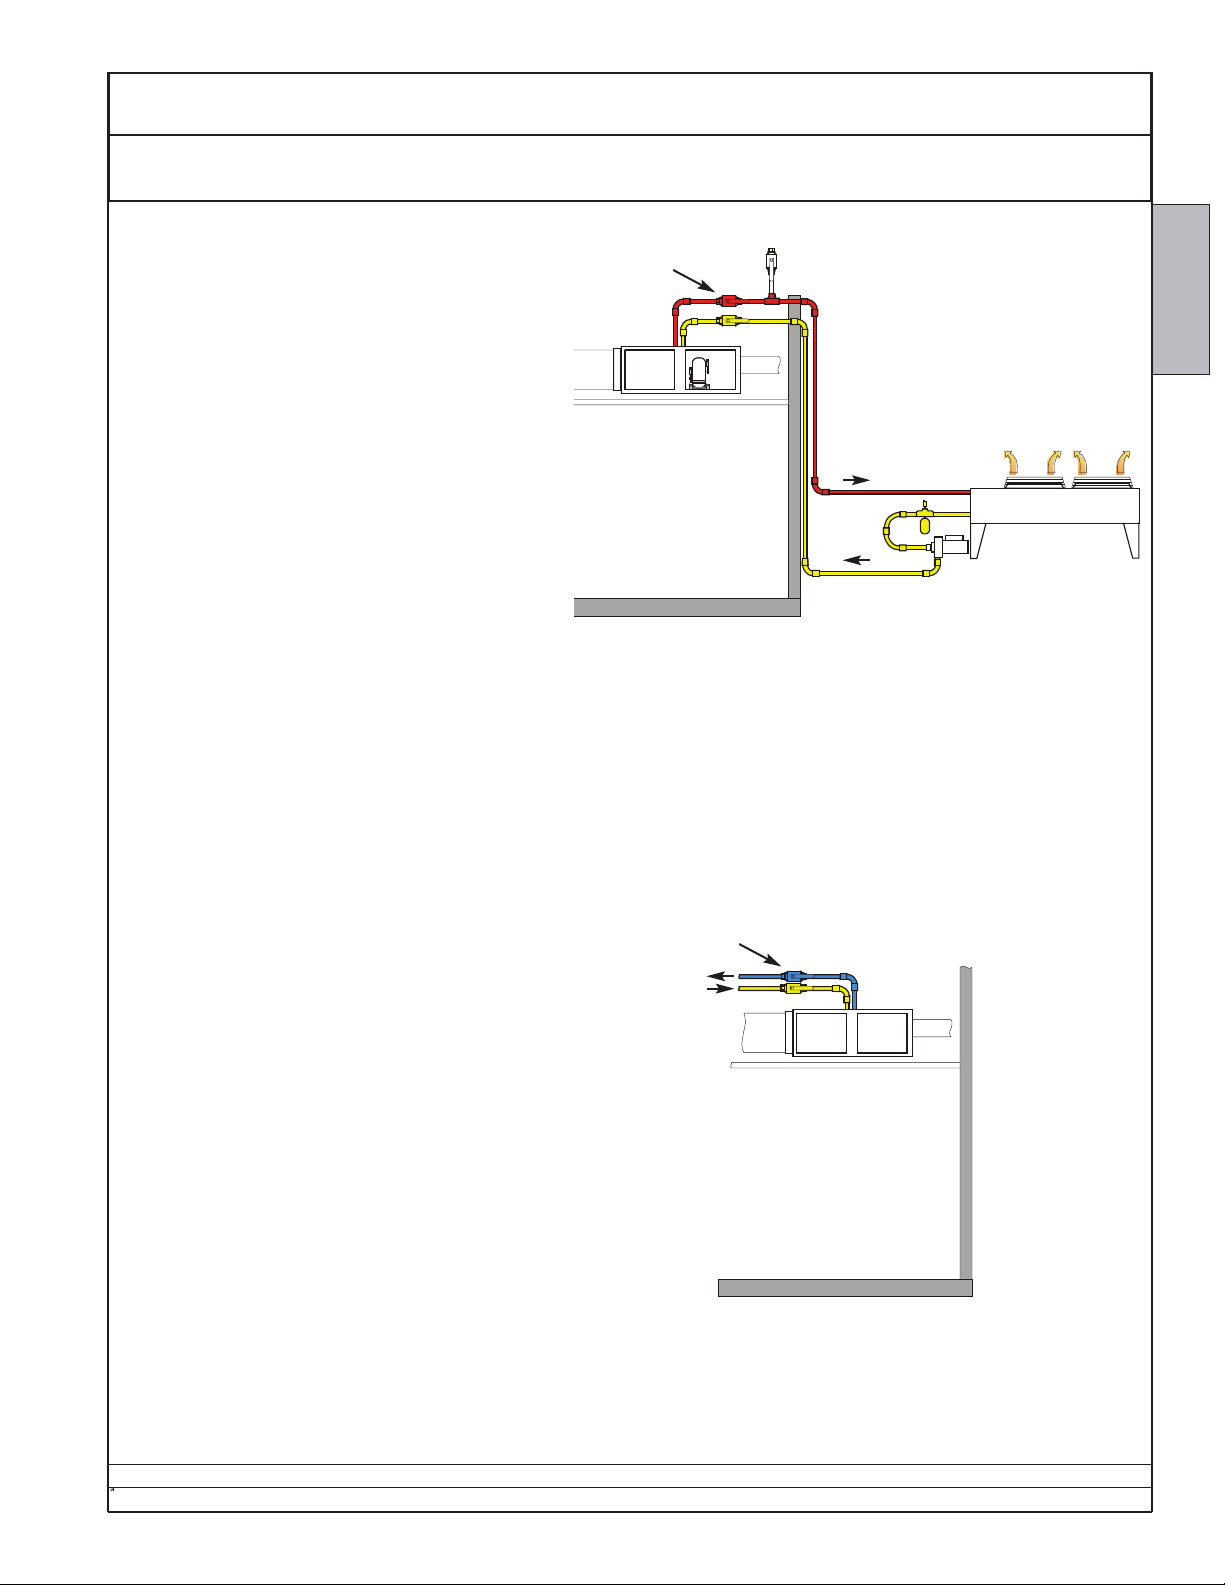
Glycol-Cooled Direct Expansion
The Ecosaire®unit operates its refrigeration sys-
tem as needed to control room conditions.
Heat is transferred via pumped glycol-fluid flow to
an outdoor heat exchanger.
The outdoor heat exchanger has multiple direct-
drive propeller fans and is built with aluminum
body panels and copper tubes with aluminum fins.
A factory-wired control box is supplied for field
connection. The TEFC NEMA-rated pump mounts
directly to the glycol-cooler subbase. Pre-wired
fan and pump control boxes are provided.
Glycol coolers are available for the following
ambient conditions:
Design
Temp.
95°F (35°C)
100°F (38°C)
105°F (41°C)
service isolation
valves (by others)
Ecosaire
CM
SAMPLE
Number, location, and
appearnce of components
DESCRIPTION
Remote Glycol Cooler
may vary.
Chilled Water
The Ecosaire®unit increases or decreases the
flow of chilled water (by others) through an internal heat exchanger to control room conditions.
The unit is rated for use with 45°F chilled water.
For flows and other details, see Installation -
Piping.
®
Ecosaire
July 2007 7
service isolation
valves (by others)
chilled water or
other fluid
(by others)
Ecosaire
CM
SAMPLE
may vary.
Number, location, and
appearnce of components
Data subject to change without notice.
Page 8
Ecosaire®CM Series Precision Air Conditioner Owners Manual
Product Description Major Cooling Options
DESCRIPTION
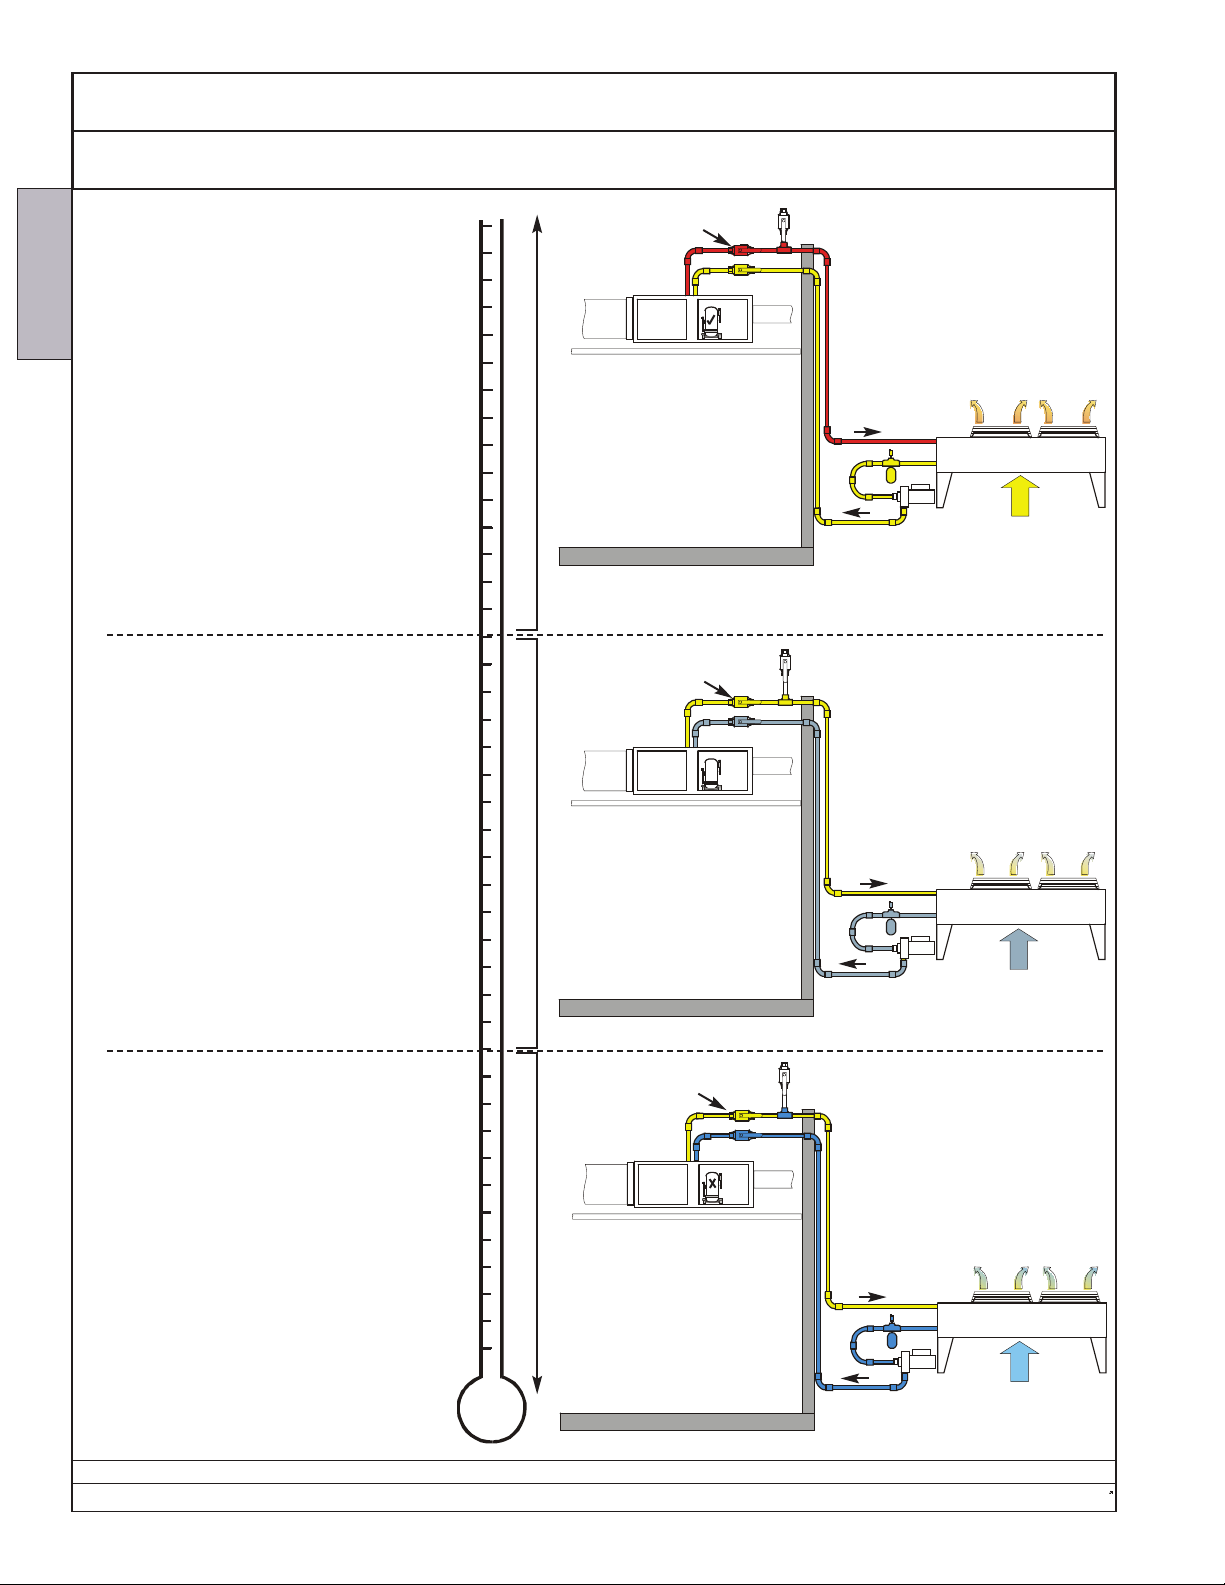
FreeCool
When the outdoor temperature is above
60°F (16°C), the Ecosaire
its refrigeration system to move heat into a
flow of glycol solution. Refrigeration condensing pressure is controlled by pressurecontrolled throttling valves.
Heat is transferred via pumped glycol-
fluid flow to an outdoor heat exchanger.
The outdoor heat exchanger has multiple
direct-drive propeller fans and is built with
aluminum body panels and copper tubes
with aluminum fans. A factory-wired control
box is supplied for field connection. The
TEFC NEMA-rated pump mounts directly to
the glycol-cooler subbase. Pre-wired fan
and pump control boxes are provided.
When the outdoor temperature is below
60°F (16°C), the Ecosaire®unit operates
its refrigeration system to move heat into a
flow of glycol. Refrigeration condensing
pressure is controlled by pressure-controlled throttling valves.
Heat is transferred via pumped glycol-
fluid flow to an outdoor heat exchanger.
Whenever refrigeration is not needed, the
glycol flow is diverted to internal air heat
exchangers to transfer as much heat from
the room as possible. This extends the
compressor off-time.
®
unit operates
70
65
60
55
50
service isolation
valves (by others)
Ecosaire
CM
service isolation
valves (by others)
Ecosaire
CM
Remote Glycol Cooler
?
SAMPLE
may vary.
Number, location, and
appearnce of components
Remote Glycol Cooler
45
service isolation
valves (by others)
When the outdoor temperature is below
45°F (7.2°C), the Ecosaire®unit does not
use the refrigeration system. The glycol
flow is diverted to internal air heat
exchangers and transfers all the heat from
40
Ecosaire
CM
the room to outdoor air.
35
Data subject to change without notice.
8 Ecosaire
Remote Glycol Cooler
®
July 2007
Page 9
Owners Manual Ecosaire®CM Series Precision Air Conditioner
Major Cooling Options Product Description
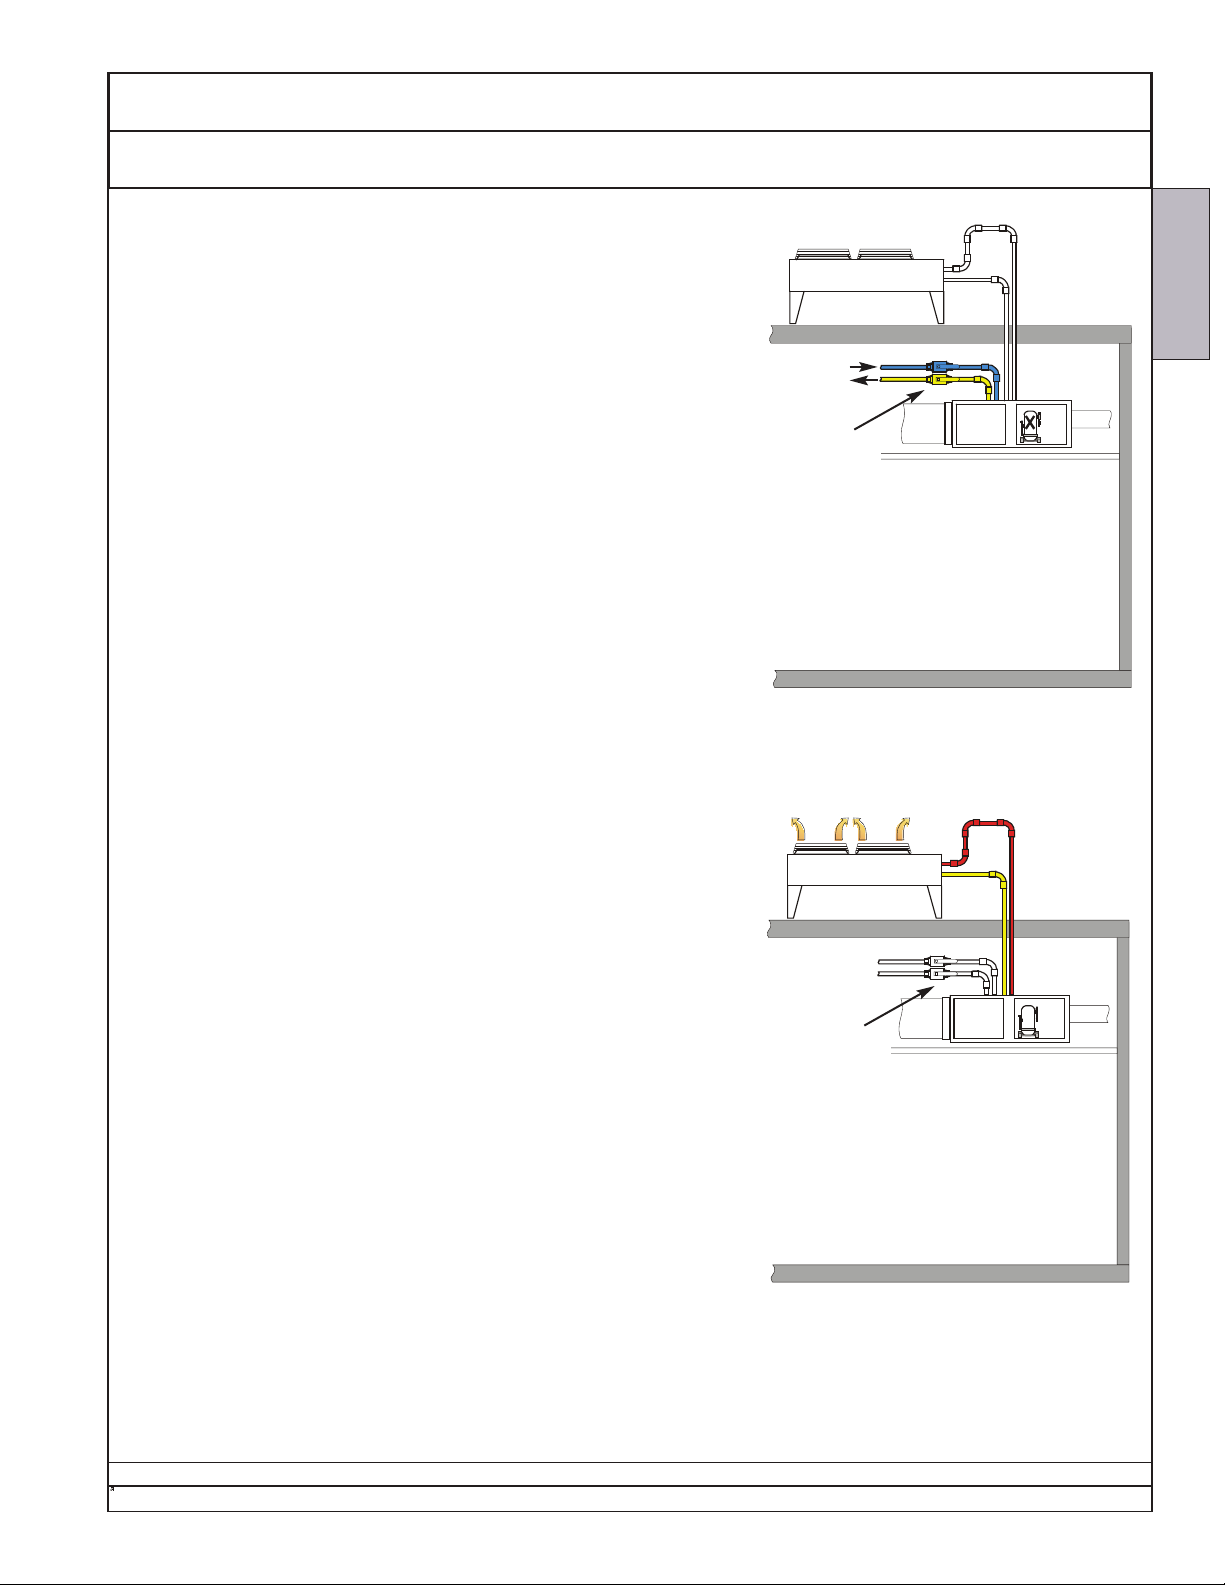
Air-Cooled DualCool
Normally, heat is transferred to a flow of chilled water
(by others).
DualCool units include a three-way proportional chilledwater valve, balanced bypass line, flow switch and watertemperature sensor. All are factory mounted to copper
piping for a standard working-pressure rating of 400 psig
(2758kPa), ideal for high-rise buildings.
chilled water
(by others)
service isolation
valves (by others)
Ecosaire
CM
DESCRIPTION
If the flow rate or temperature of the chilled water becomes inadequate for proper operation, the unit will automatically change to AirCooled Direct Expansion.
Air-cooled condensers are available for the following conditions:
Design Standard Low-Ambient
Temp. min - max (°F) min - max (°F)
95°F (35°C) 0 - 105°F (-17 - 41°C) -40 - 105°F (-40 - 41°C)
100°F (38°C) 0 - 110°F (-17 - 43°C) -40 - 110°F (-40 - 43°C)
105°F (41°C) 0 - 115°F (-17 - 46°C) -40 - 115°F (-40 - 46°C)
service isolation
valves (by others)
SAMPLE
may vary.
Number, location, and
appearnce of components
Ecosaire
CM
Ecosaire
SAMPLE
may vary.
Number, location, and
appearnce of components
Data subject to change without notice.
®
July 2007 9
Page 10
Ecosaire®CM Series Precision Air Conditioner Owners Manual
Product Description Major Cooling Options
DESCRIPTION
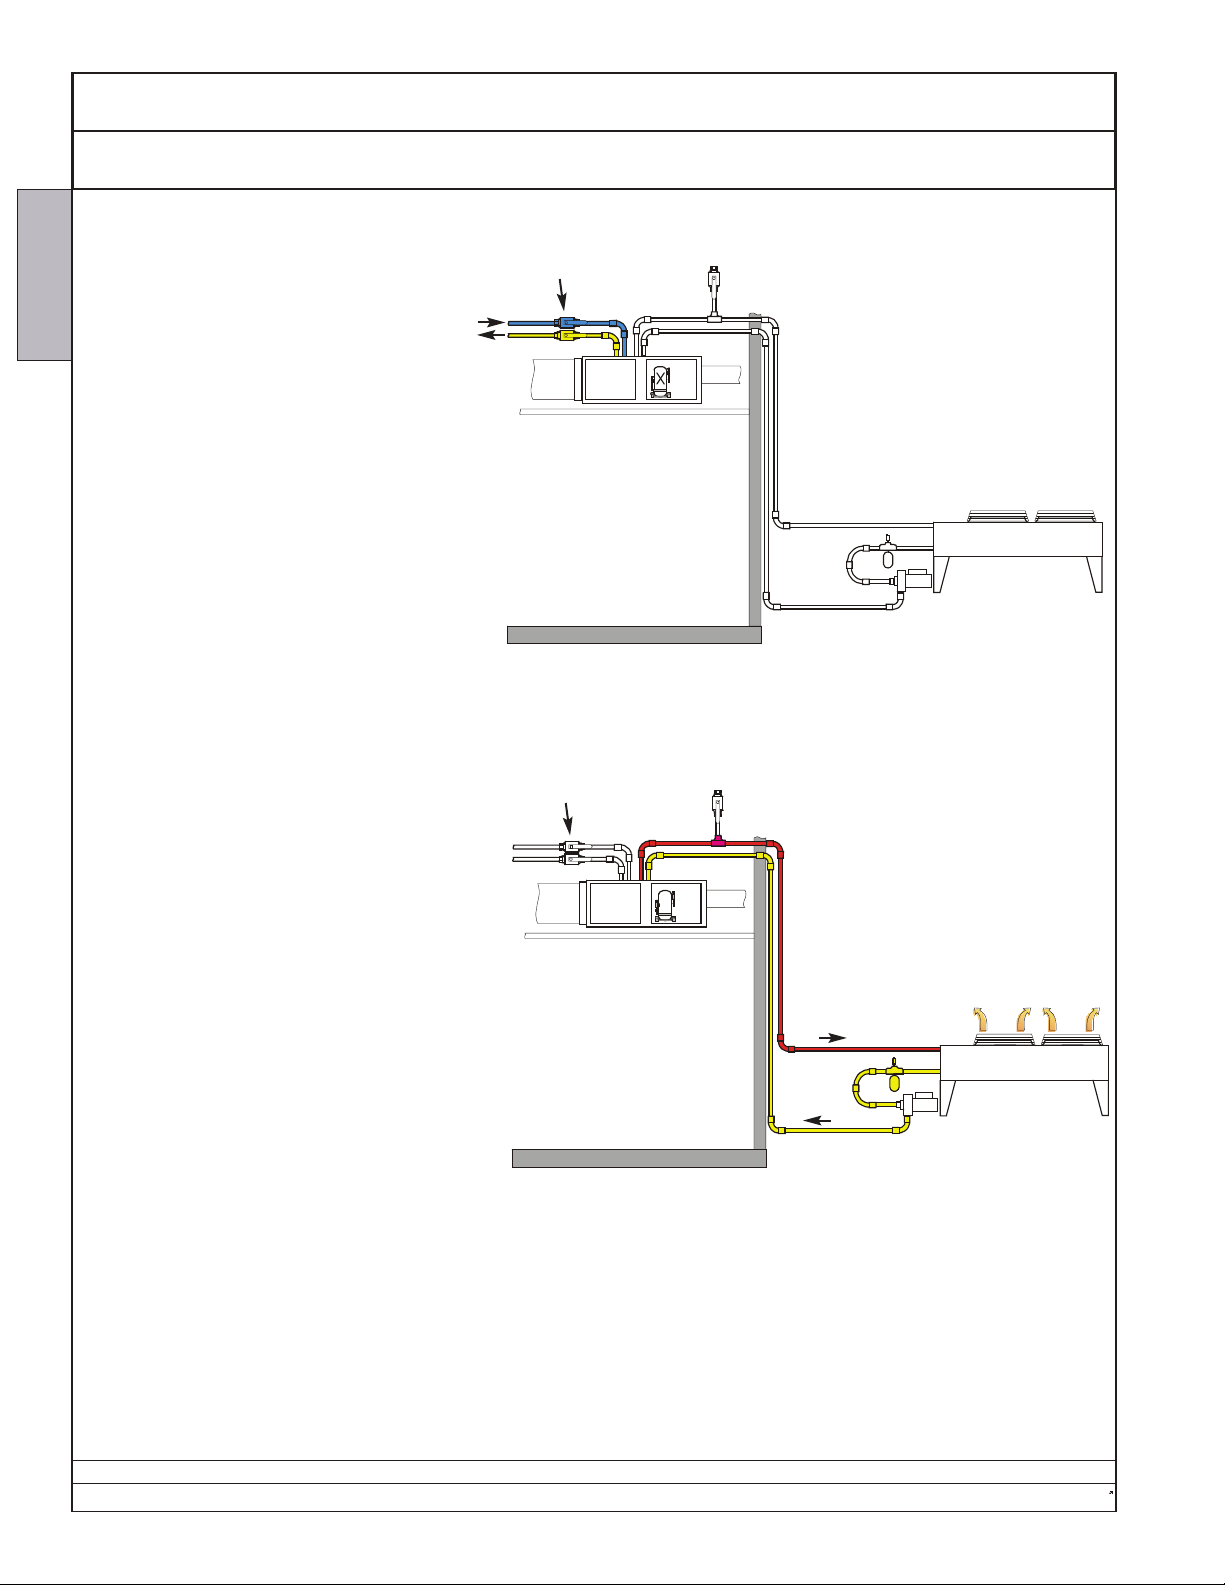
Glycol-Cooled DualCool
Normally, heat is transferred to
a flow of chilled water (by others).
DualCool units include a threeway proportional chilled-water
valve, balanced bypass line, flow
chilled water
or other fluid,
(by others)
switch and water-temperature
sensor. All are factory mounted
to copper piping for a standard
working-pressure rating of 400
psig (2758kPa), ideal for high-rise
buildings.
The unit is rated for use with
45°F (7.2°C) chilled water. For
flow rates and other details, see
Installation - Piping.
If the flow rate or temperature of the
chilled water becomes inadequate for
proper operation, the unit will automatically change to Glycol-Cooled DirectExpansion.
Glycol coolers are available for the fol-
lowing ambient conditions:
Design
Temp.
95°F (35°C)
100°F (37.8°C)
105°F (40.6°C)
service isolation
valves (by others)
service isolation
valves (by others)
Ecosaire
CM
Ecosaire
CM
SAMPLE
may vary.
Number, location, and
appearnce of components
Remote Glycol Cooler
SAMPLE
may vary.
Number, location, and
appearnce of components
Remote Glycol Cooler
Data subject to change without notice.
10 Ecosaire
®
July 2007
Page 11
Owners Manual Ecosaire®CM Series Precision Air Conditioner
Major Cooling Options Product Description
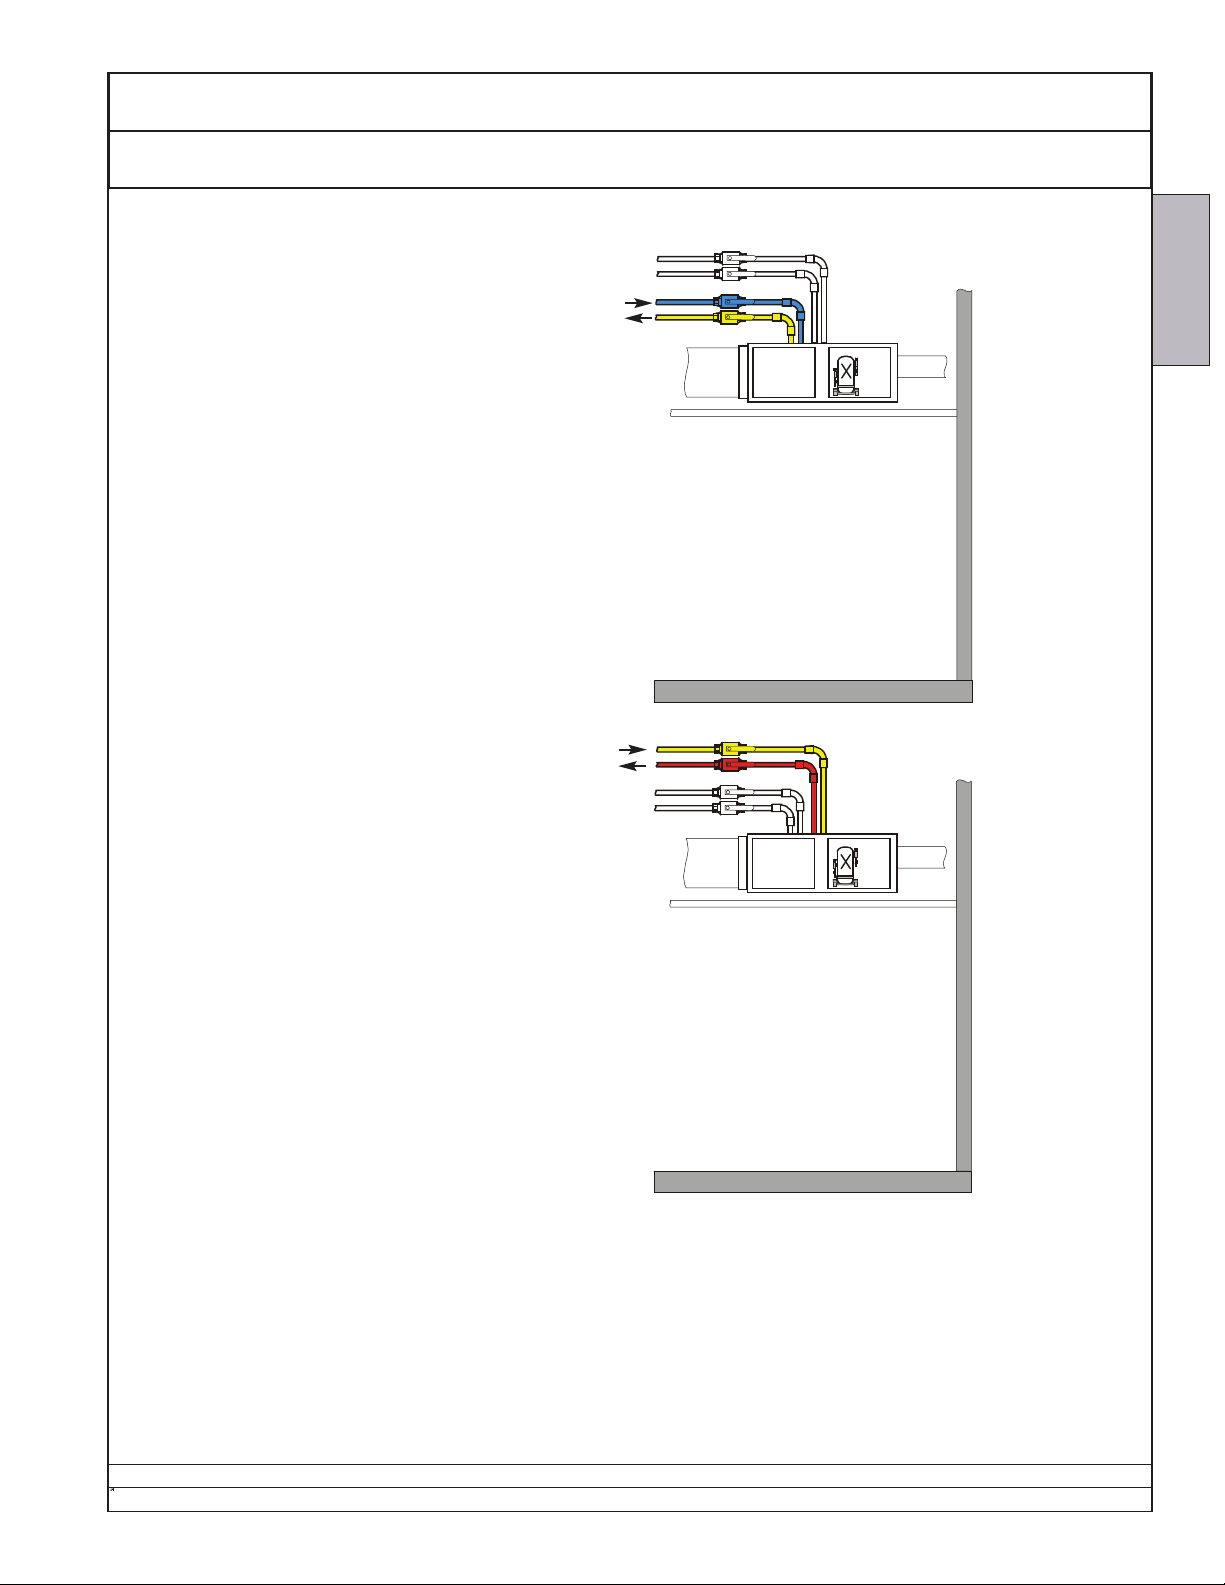
Water-Cooled Dual-Cool
Normally, heat is transferred to a flow
of chilled water (by others).
DualCool units include a three-way proportional chilled-water valve, balanced
bypass line, flow switch and water-temperature sensor. All are factory mounted
to copper piping for a standard workingpressure rating of 400 psig (2758kPa),
ideal for high-rise buildings.
The unit is rated for use with 45°F
(7.2°C) chilled water. For flow rates and
other details, see Installation - Piping.
chilled water or
other fluid,
(by others)
Ecosaire
CM
SAMPLE
may vary.
Number, location, and
appearnce of components
DESCRIPTION
If the flow rate or temperature of the
chilled water becomes inadequate for
proper operation, the unit will automatically change to Water-Cooled Direct
Expansion.
The temperature of the cooling water
entering the unit must be between 65°F
(18.3°C) and 85°F (29.4°). Contact the
factory for lower temperatures.
cooling water
or other fluid,
(by others)
Ecosaire
CM
SAMPLE
may vary.
Number, location, and
appearnce of components
Ecosaire
Data subject to change without notice.
®
July 2007 11
Page 12
Ecosaire®CM Series Precision Air Conditioner Owners Manual
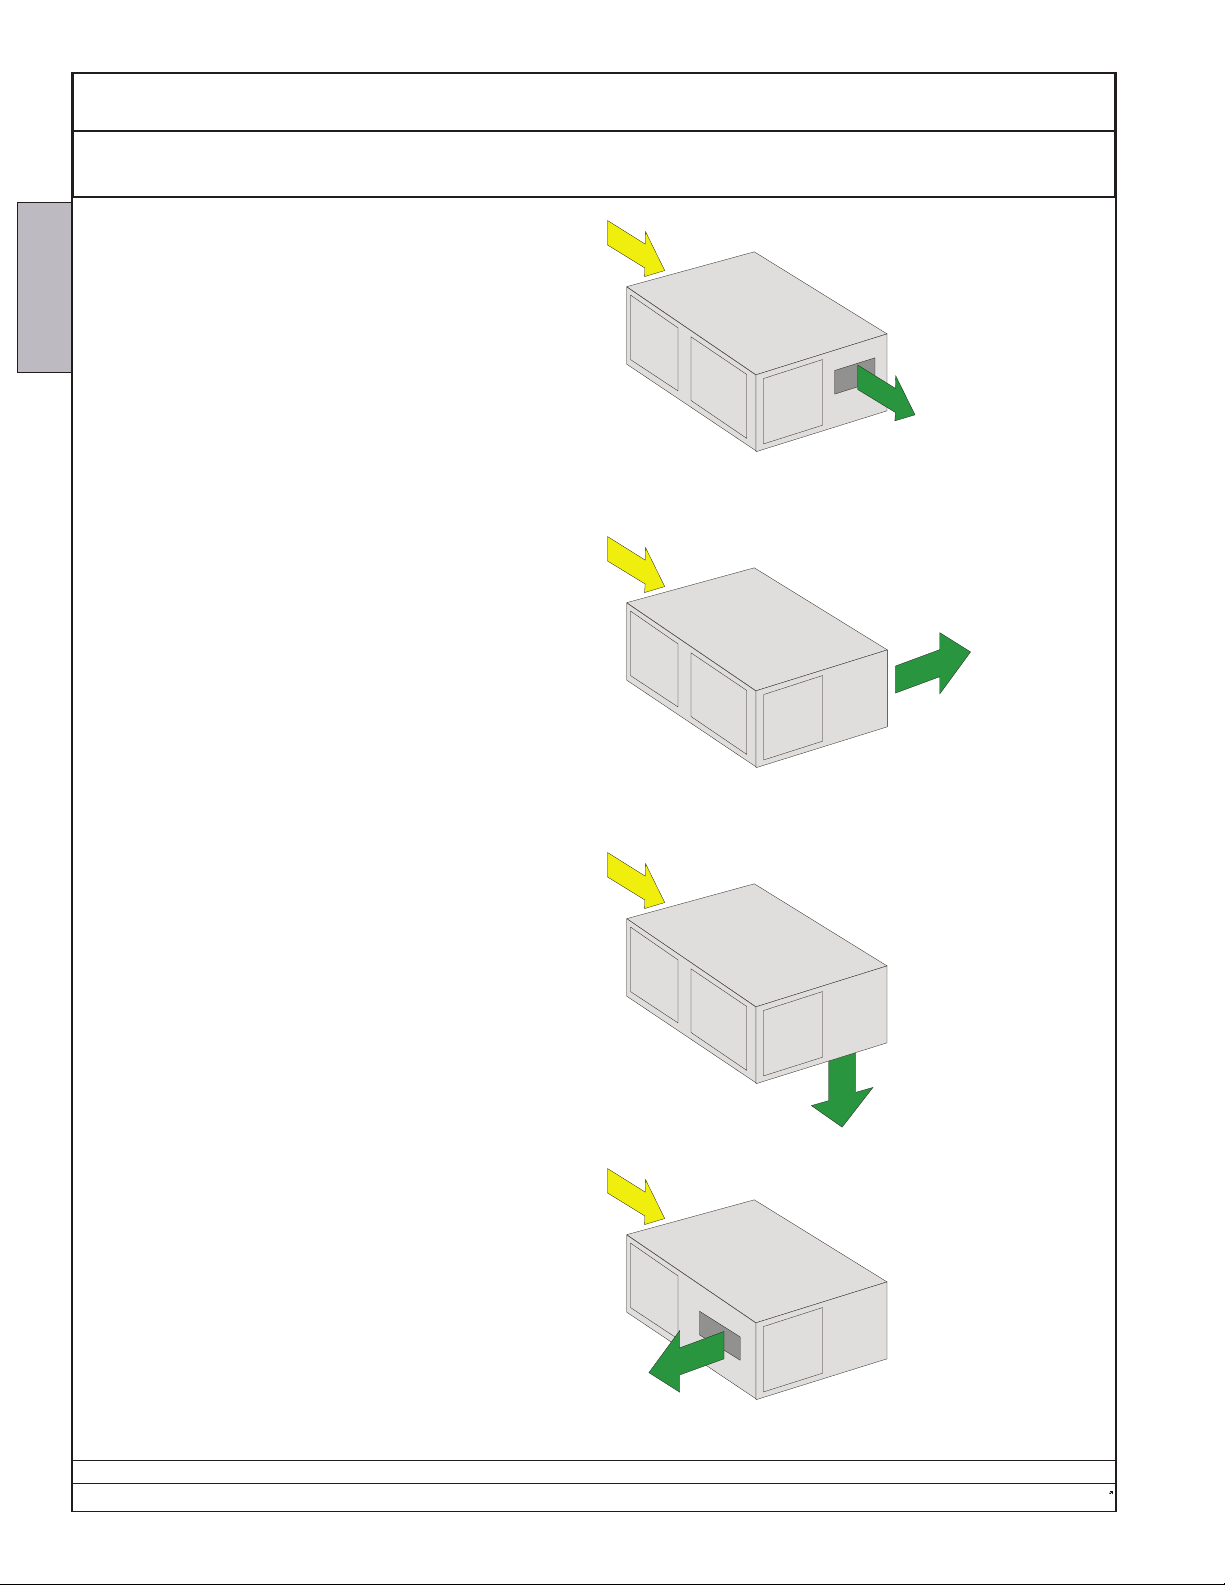
Product Description Air-Flow Options
DESCRIPTION
Horizontal - Straight
Horizontal - Left
Horizontal - Down
SAMPLE
may vary.
Number, location, and
appearnce of components
Horizontal - Right
Data subject to change without notice.
12 Ecosaire
®
July 2007
Page 13
Owners Manual Ecosaire®CM Series Precision Air Conditioner
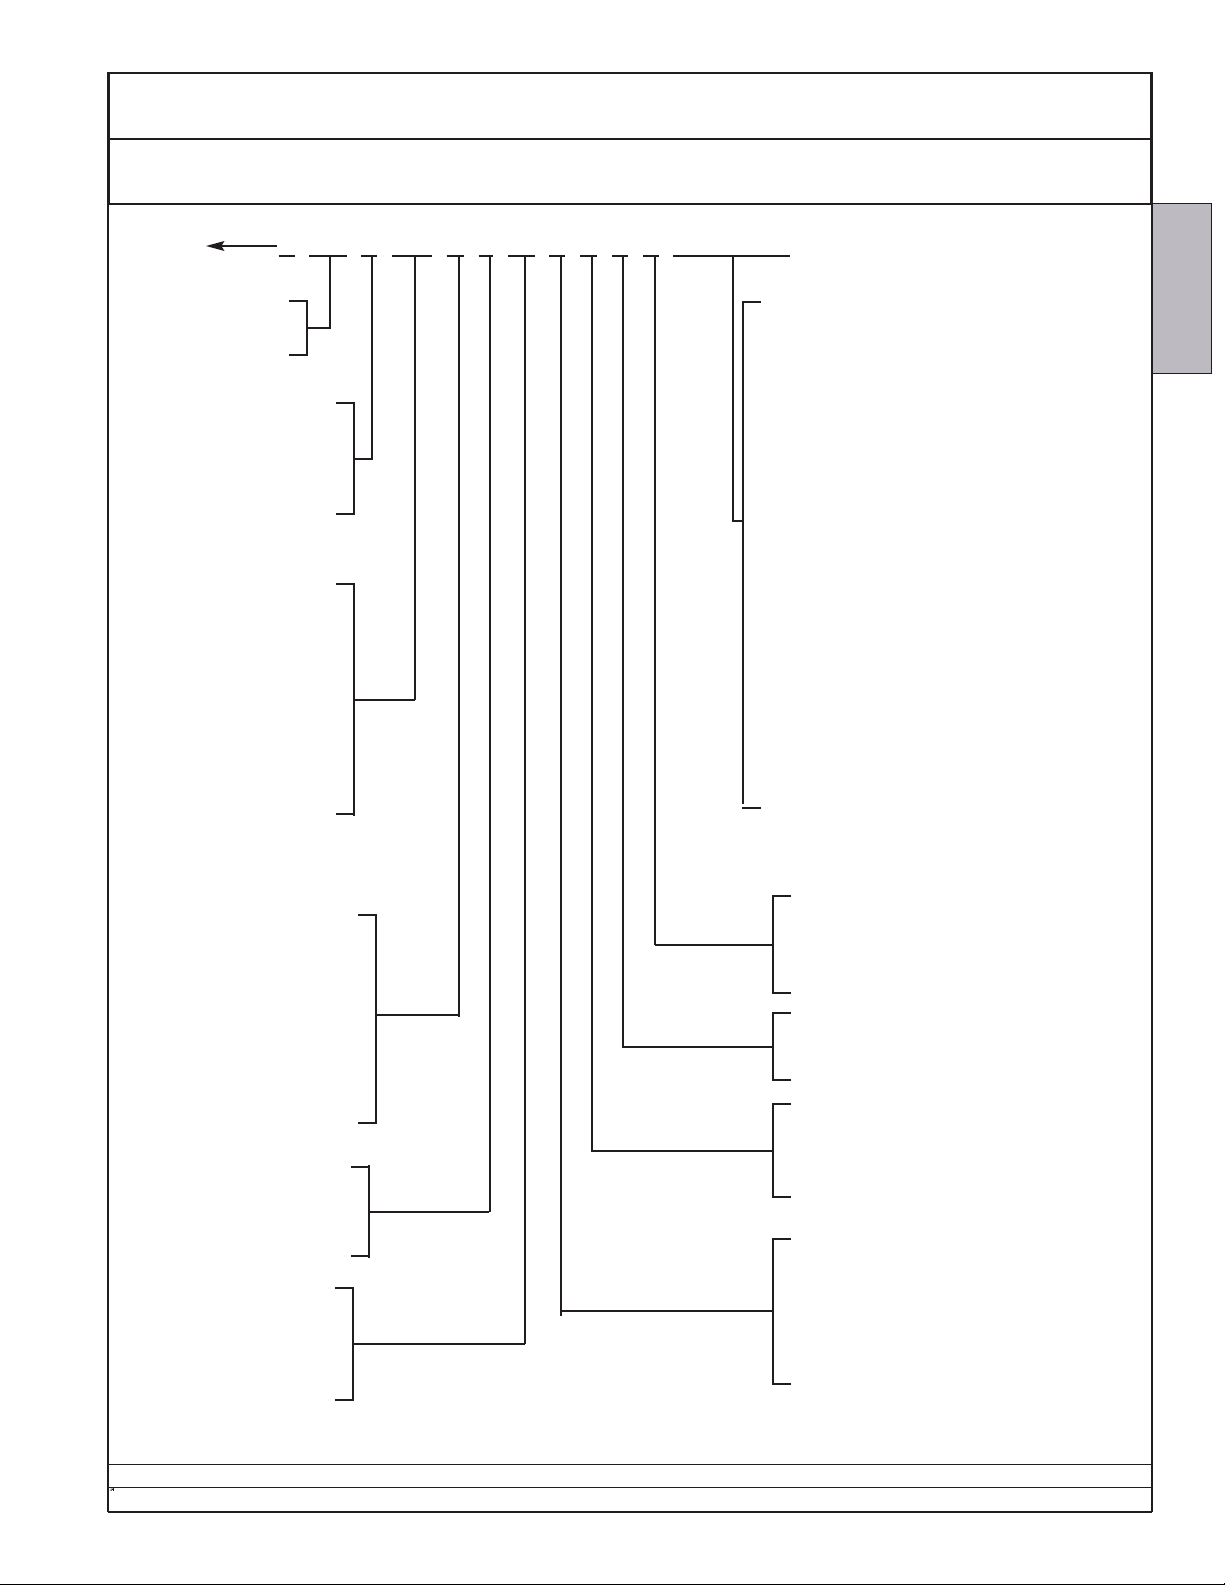
Model Designation Chart Product Description
SPECIAL
S CM S 050 A Z 46 E H P S 0 0 0 0 0 0
SERIES:
CM: Ceiling-Mount
ARRANGEMENT:
S: Horizontal - Straight
R: Horizontal - Right
L: Horizontal - Left
D: Horizontal - Down
Model:
010: 1 ton
015: 1.5 ton
020: 2 ton
030: 3 ton
050: 5 ton
060: 6 ton
070: 7 ton
080: 8 ton
100: 10 ton
Miscellaneous:
C: Condensate Pump
D: Hot Gas Bypass
E: Coil Temperature Sensor
F: Graphic Controller
G: RS485 Modbus RTU
H: PCO Webcard
I : LONworks Comm. Card
J: Wall Controller (PGD)
K: Smoke + Fire Detector
L: Water Detector (Point Sensor)
M: Water Detector (Tape Sensor)
N: Water Coil Solenoid Valve
(D1/D2/D3)
O: 2-way Water Reg. Valve (D2/D3/F/G/W)
P: 3-way Water Reg. Valve (D2/D3/F/G/W)
Q: 2-way Water Modul. Valve (C/D2/D3/F/G/W)
R: 3-way Water Modul. Valve (C/D2/D3/F/G/W)
S: Water-Flow Switch
T: Non-fused Disconnect
U: Fused Disconnect
V: Circuit Breaker
Z: Alarm Buzzer & Silence Push Button
DESCRIPTION
Cooling Type:
A: Air Cooled
C: Chilled Water
D1: DualCool Air Cooled
D2: DualCool Water Cooled
D3: DualCool Glycol Cooled
F: Free-Cool
G: Glycol Cooled
W: Water Cooled
Compressor Type:
M: Maneurop Scroll
T: Copeland Tandem Scroll
Z: Copeland Scroll
Voltage:
16: 230/1/60
36: 208-230/3/60
46: 460/3/60
56: 575/3/60
®
Ecosaire
July 2007 13
Control Type:
0: No Microprocessor
S: Standard Microprocessor
T: Wall Thermostat
Filter Section:
F: 40%
G: 60%
Humidifier:
0: None
H: 5lb/hr Electrode Steam Humidifier
I: 10lb/hr Electrode Steam Humidifier
L: Live Steam (Steamgrid)
Heating:
0: None
E: 2-stage Electric
F: 3-stage Electric
G: SCR Electric
R: Hot-Gas Reheat
T: St e am
W: Hot-Water
Data subject to change without notice.
Page 14
Ecosaire®CM Series Precision Air Conditioner Owners Manual
Product Description Unit Nameplate
DESCRIPTION
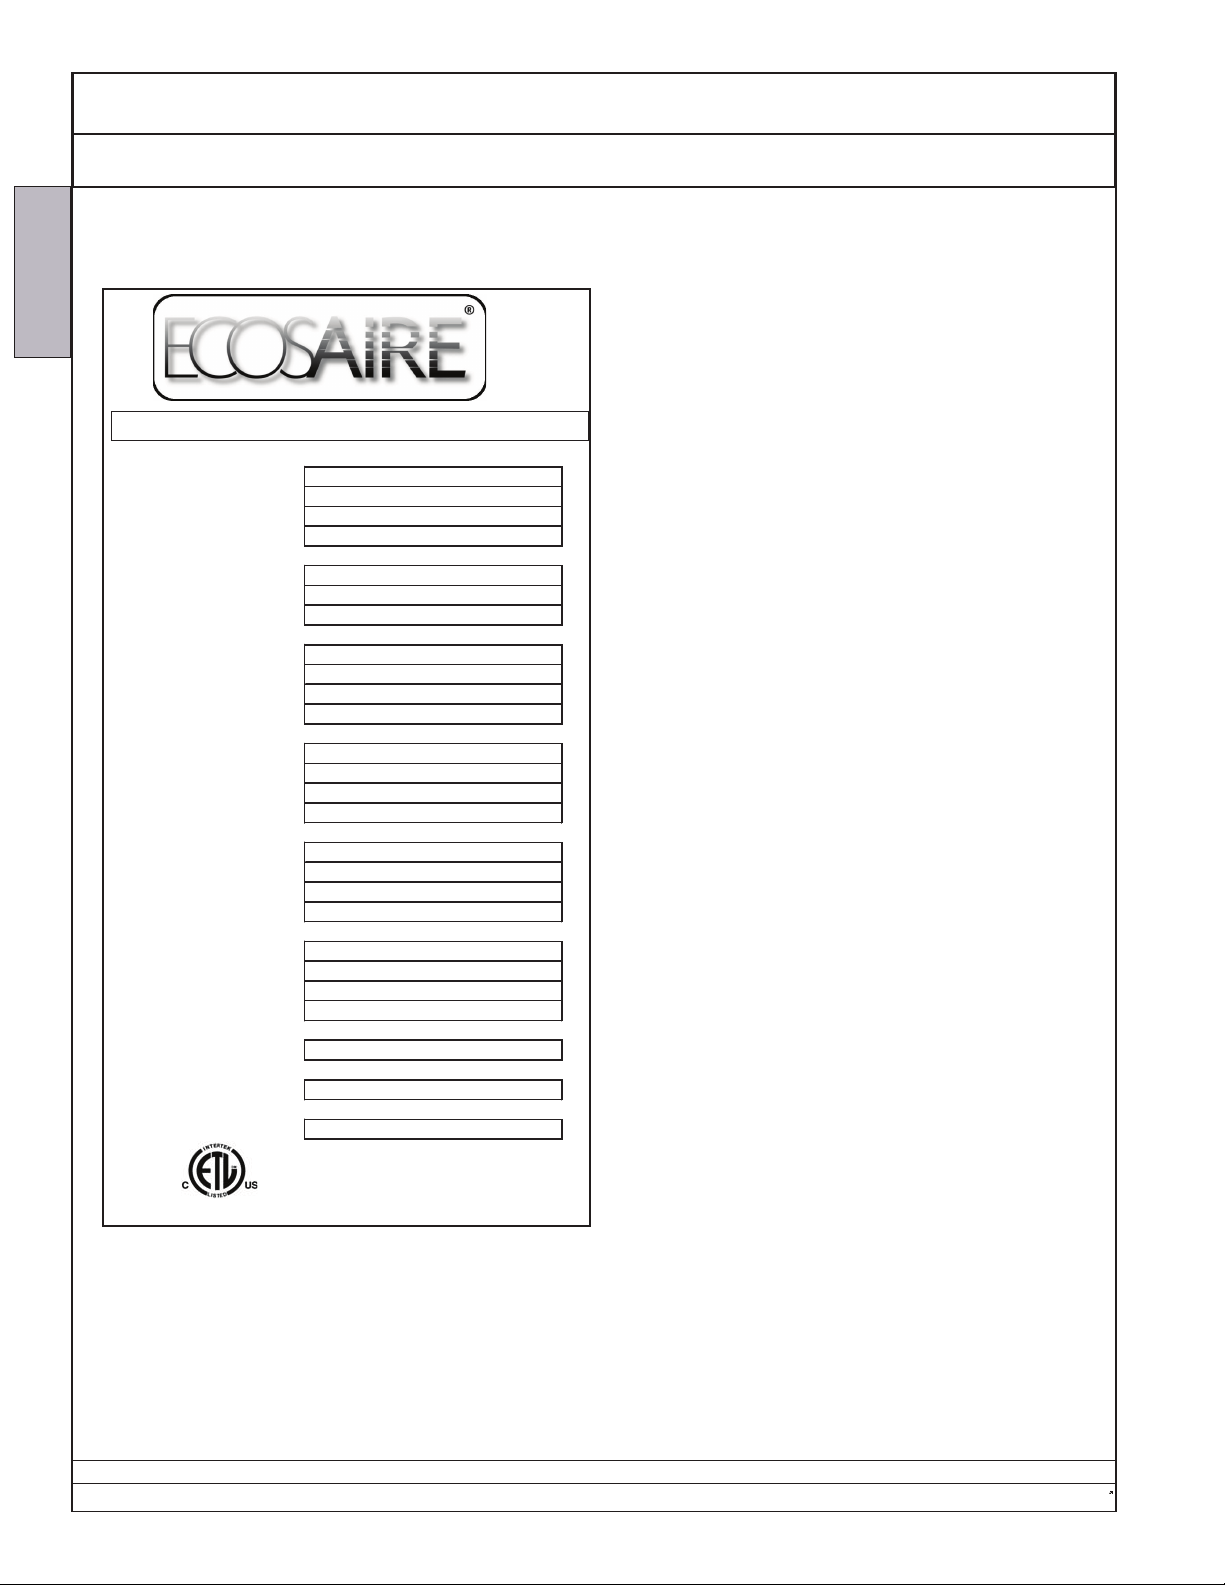
PRECISION CONTROL AIR CONDITIONER
UNIT MODEL
SERIAL #
TAG
JOB
ELECTRICAL RATING
MCA
MOP
COMPRESSOR
RLA
LRA
QTY
FAN MOTOR
HP
FLA
QTY
ELECTRIC HEATER
KW
AMPERAGE
QTY
HUMIDIFIER
KW
FLA
QTY
ECOSAIRE
SAMPLE
may vary.
Number, location, and
appearnce of components
Before calling for assistance, be sure to have the
model, serial, and tag numbers available for the
}
service department.
Be sure the voltage and current ratings of the unit
branch circuit match these values.
}
This is important compressor electrical information
for those units so equipped.
}
This is important blower electrical information.
}
This is important heater electrical information for
those units so equipped.
}
This is important humidifier electrical information
for those units so equipped.
}
REFRIGERANT TYPE
REFRIGERANT
FACTORY CHARGE
DESIGN PRESSURE
HIGH/LOW
3065764
COMFORMS TO ANSI/UL STD 1995
CERTIFIED TO STD CAN/CSAC22.2 NO. 236
This is important refrigerant information for those
units so equipped.
}
Nameplate specifications supersede any other specifications or
statements found in this manual.
Data subject to change without notice.
14 Ecosaire
®
July 2007
Page 15
Owners Manual Ecosaire®CM Series Precision Air Conditioner
Moisture Migration Building Construction
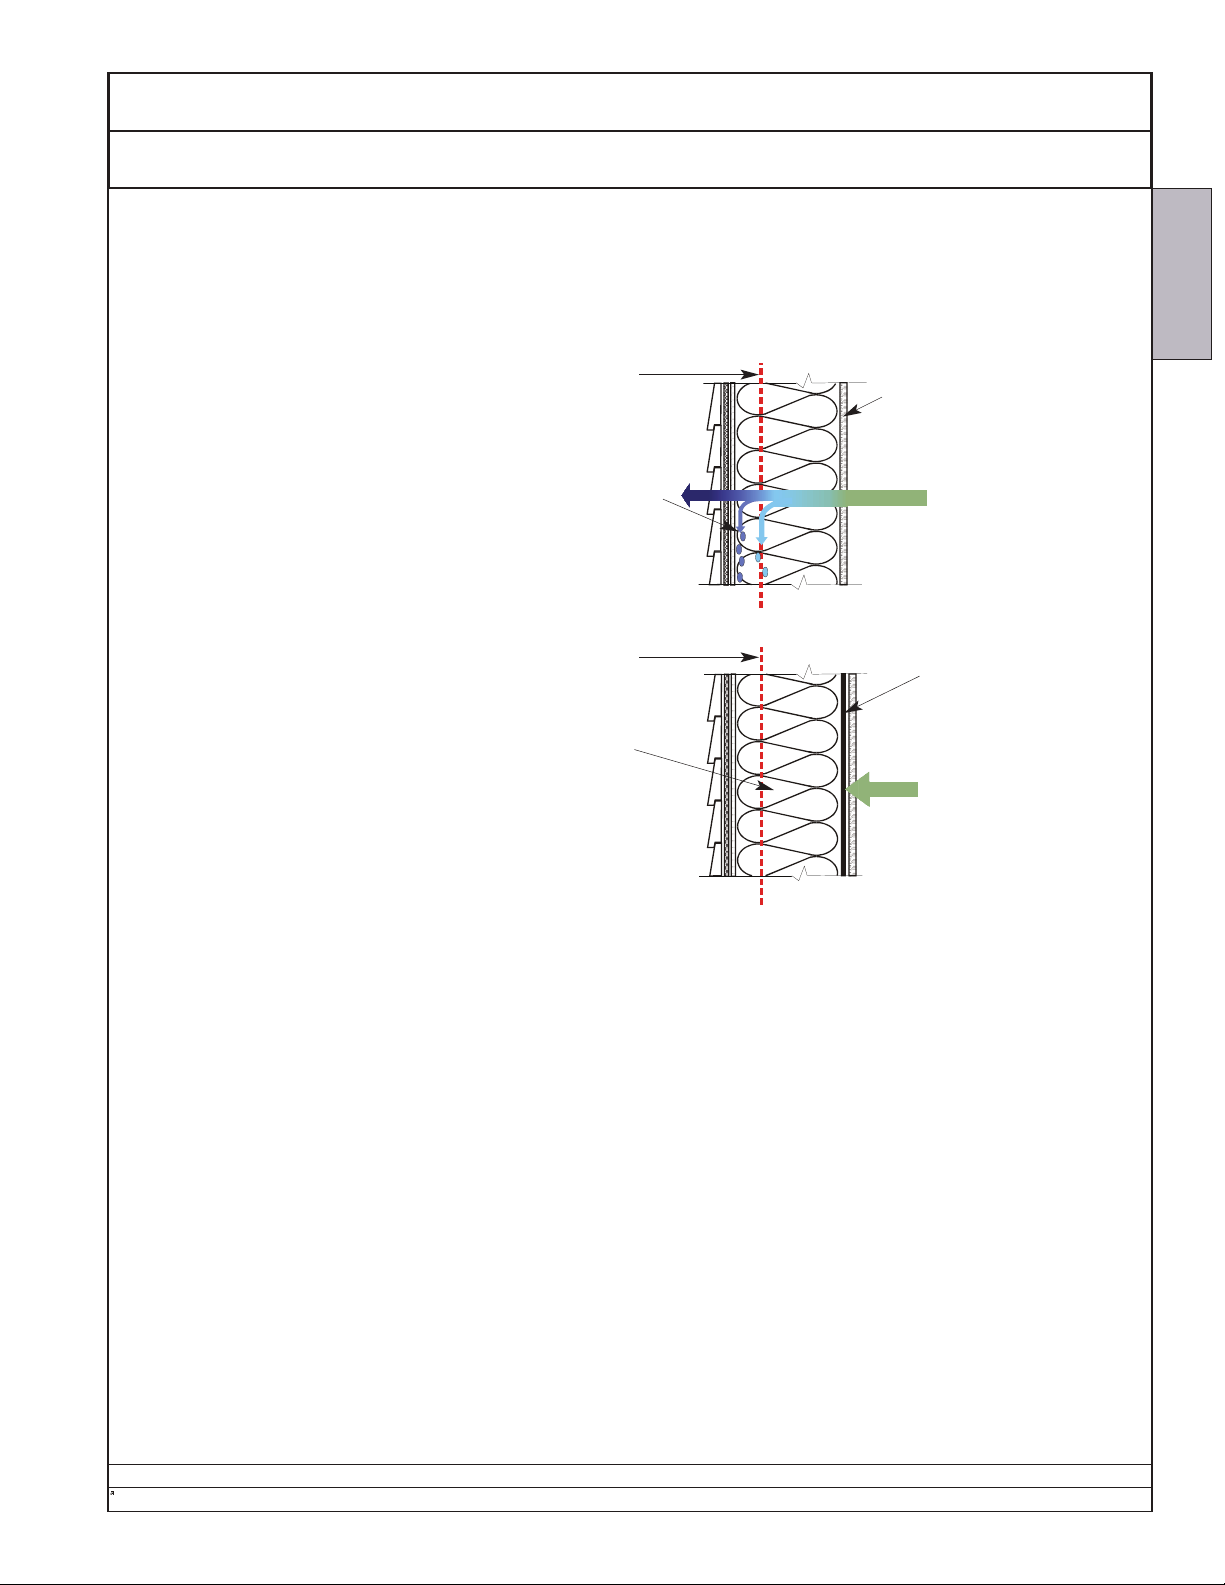
In order to prevent moisture migration, the room (including the ceiling
plenum, if any) must have a sealed
vapor retarder. Rooms with concrete
walls or floor should be painted with a
rubber- or plastic-based paint. Doors
should seal tightly and must not have
grilles in them.
Light fixtures must be selected to prevent overheating, and should not allow
room air to escape into the ceiling
plenum.
Because of the small number of personnel in a typical computer site, outdoor air should be reduced to less than
5% of the total circulated air. If outdoor
air is introduced, it must be filtered. The
effect of bringing in outdoor air must be
added to the cooling and dehumidification loads.
DEW
POINT
CONDENSATION
RESULTS IN
SOGGY
INSULATION
OUTDOOR 32°F
DEW
POINT
NO VAPOR
RETARDER
INDOOR AIR 70°F
VAPOR
RETARDER
DESCRIPTION
Measures should be taken to prevent
dirt and dust from affecting equipment
reliability. Printers, bursters, copy
machines and other paper handling
equipment should be located in areas
removed from disc drives and similar
equipment.
DRY
INSULATION
OUTDOOR 32°F
INDOOR AIR 70°F
Ecosaire
Data subject to change without notice.
®
July 2007 15
Page 16
Ecosaire®CM Series Precision Air Conditioner Owners Manual
•
•
•
1
3
2
Installation Unpacking and Locating Ecosaire® Unit
Important!
Inspect your unit immediately
for shipping damage. Claims for
shipping damage must be made
with the shipping company.
Inspect the unit carefully upon
INSTALLATION
arrival.
Notify the carrier immediately if
shipping damage is suspected. If
internal damage is suspected, indicate “contingent on internal inspection” when signing for the shipment.
Keep copies of all documents, including photographs of any damage.
Storage
It is best not to store your
Ecosaire®unit for long periods. If it
must be stored, it should be stored
indoors in a space that is safe from
accidental damage or vandalism.
NOTE: Do not stack units.
Where more than one Ecosaire
unit are stored together, maintain
proper inventory identification since
each Ecosaire®is designed to a
particular job specification.
Ecosaire®room units
must be stored in a clean and
dry place
must not be stacked
must be stored in an upright
position
Important!
Locate your unit where it will be
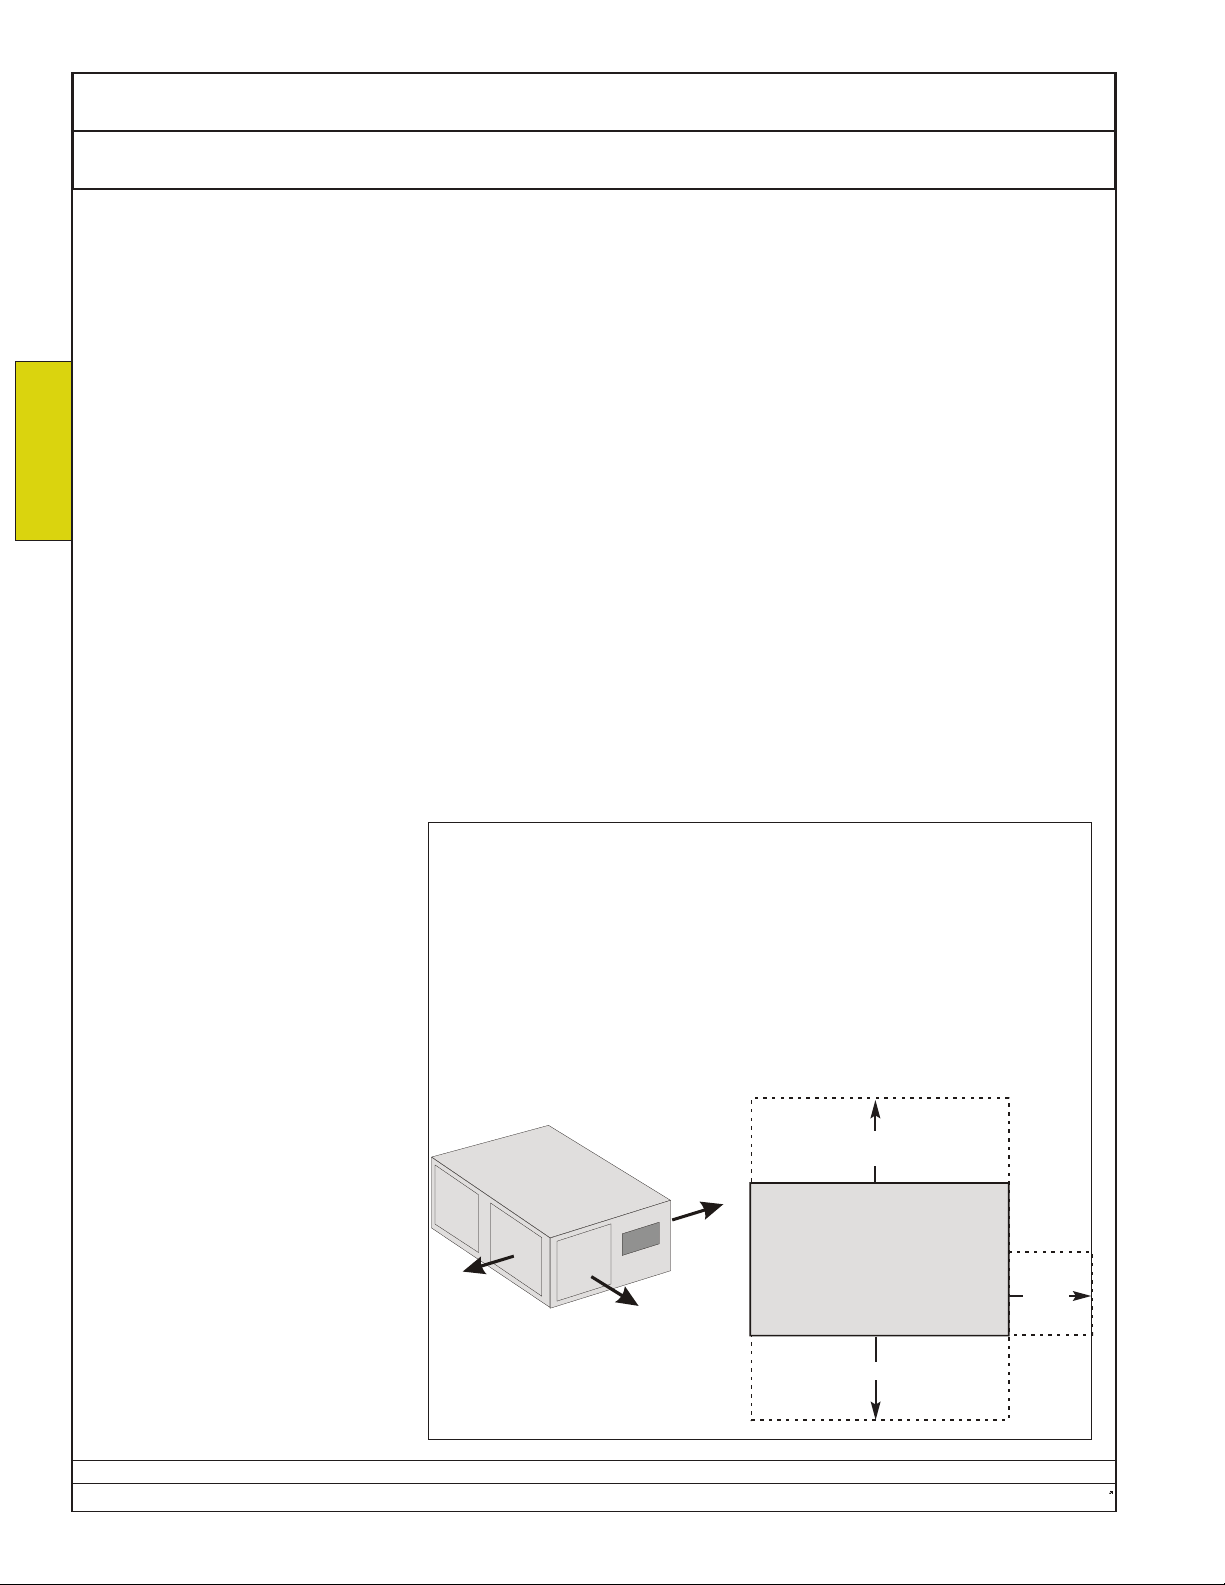
Clearances
Allow clearances as shown below.
protected from damage. Allow
adequate space for service.
Unpacking
On a level surface, remove exter-
If the room unit is positioned or
installed in an area where painting,
plastering, etc., are underway, it
must be covered with the shipping
carton or plastic film in order to keep
the filters and internal components
clean.
nal crating materials. Remove any
fasteners securing the unit to the
freight skid.
Be sure that the unit is in its
final location and will not have to
be moved or adjusted before
making connections.
Do not allow water, plaster, concrete, dusts, or other foreign materials to enter any open pipes or tubes.
Do not operate the unit or otherwise allow construction dust to enter
Drain Pan
A secondary drain pan is recommended for all overhead installations.
the unit. The resulting damage is not
covered by the Ecosaire® warranty.
DX units (Cooling Type = A)
The maximum one-way length of
tube connecting the Ecosaire unit
and the remote condenser is 100 ft.
(30 m).
®
Completing
After the unit is positioned remove
any internal shipping braces or
pads. Release or remove any blower restraints. Confirm that the blower turns freely. Confirm the blower
belt tension. Release or remove
any compressor locks or restraints.
Clearances
1 - 3 ft. (1 m)
2 - 3 ft. (1 m)
3 - Canada - 1 meter
USA - 36 inches for 208/230 V
42 inches for 460 V
or per NEC Table 110-26, whichever is greater
Lifting
It is recommended that the unit be
moved as close as possible to the
final position with the skid attached.
SAMPLE
may vary.
Number, location, and
appearnce of components
TOP VIEW
3
1
Data subject to change without notice.
16 Ecosaire
3 ft.
(1m)
Note 3
3 ft.
(1m)
®
July 2007
Page 17
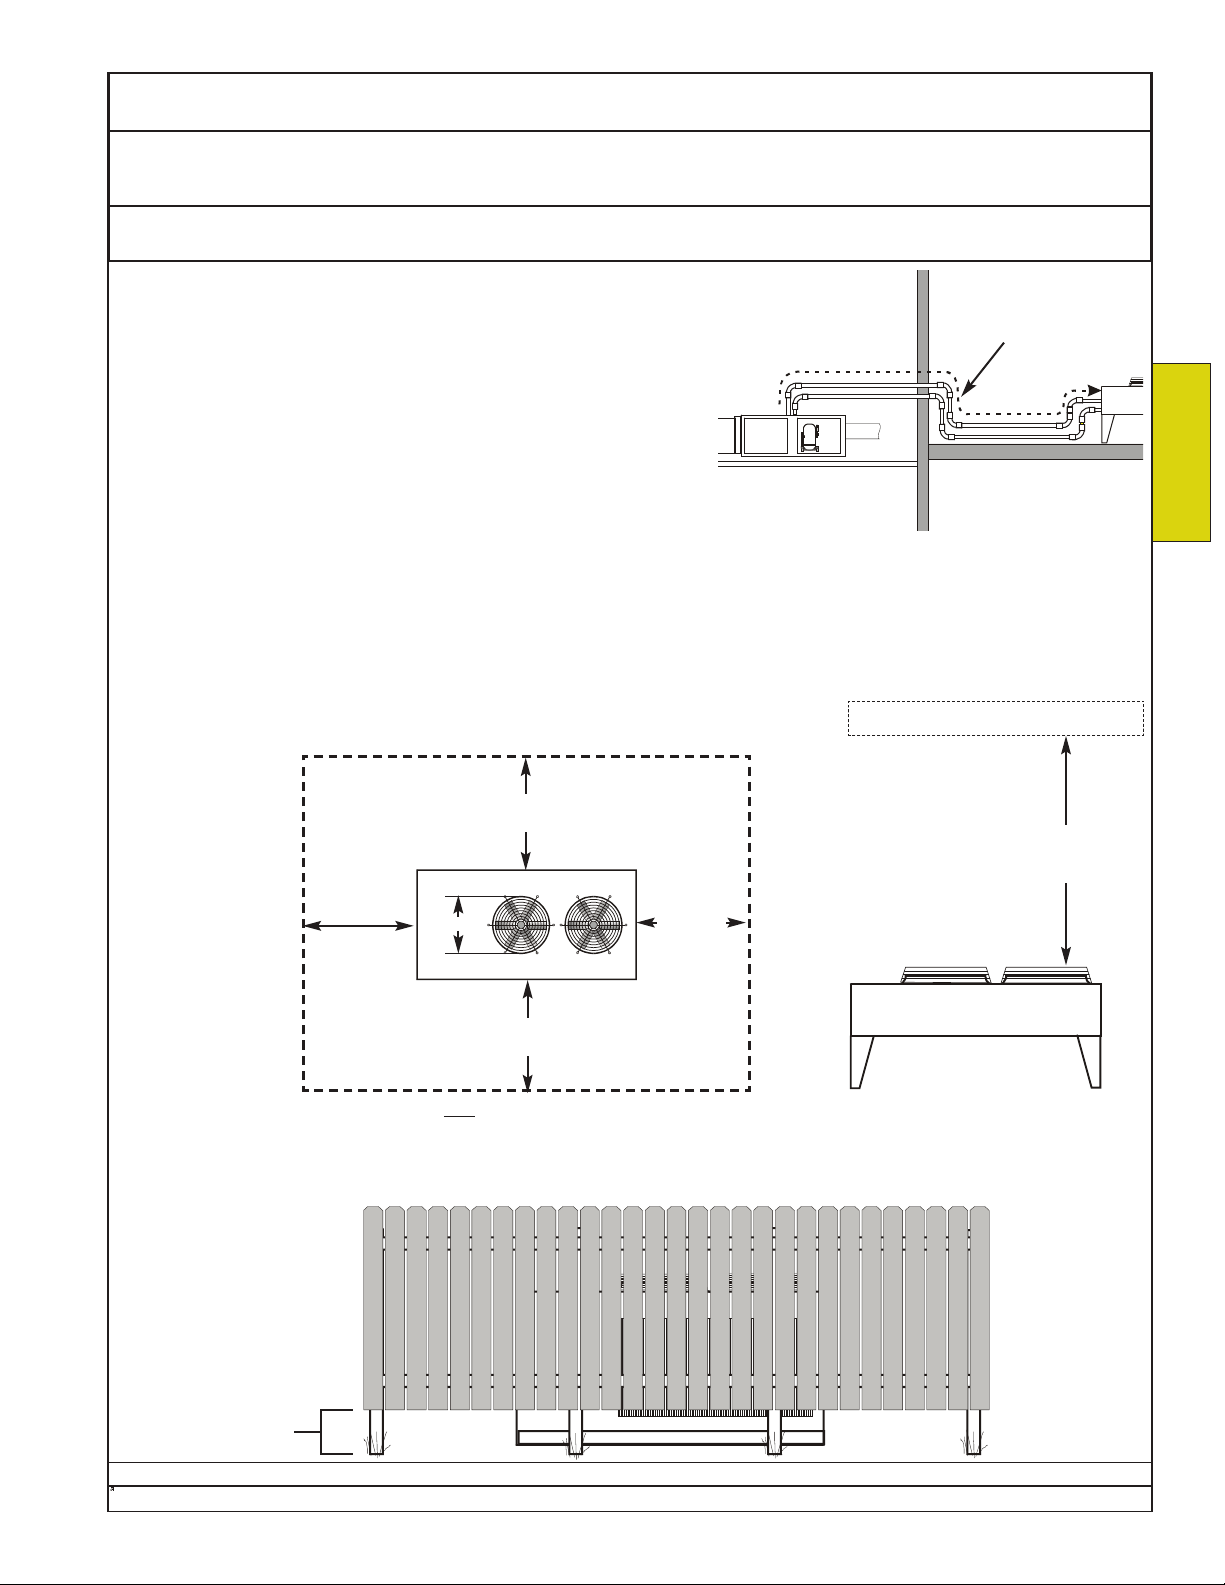
Owners Manual Ecosaire®CM Series Precision Air Conditioner
Air-Cooled Direct Expansion, Glycol-Cooled Direct Expansion,
Installation
Air-Cooled DualCool, & Glycol-Cooled DualCool Units Only
Outdoor Heat Exchanger, Vertical Flow Unpacking and Locating
Important! - Inspect your unit immediately for shipping damage.
Claims for shipping damage must be made with the shipping compa-
Notify the carrier immediately if shipping damage is suspected. If inter-
ny.
nal damage is suspected, indicate “contingent on internal inspection” when
signing for the shipment. Keep copies of all documents, including photographs of any damage.
For units with a remote heat exchanger, select a suitable location for the
outdoor unit, where it will not be subject to damage. Outdoor condensers
(with Ecosaire unit of Cooling Type = A) must have no more than 100 ft.
(30 m) of tube (one way) connecting to the Ecosaire unit. Areas subject to
heavy snow and ice accumulation should be avoided. Areas subject to
public access should be avoided. Locate outdoor units in an area of clean
air away from steam, hot air, or fume exhausts.
Units installed on roofs should be mounted on steel supports in accordance with local codes. A concrete pad is
sufficient for ground installations.
Provide clearances as shown below. Insulate hot-gas tubes where they might be accidentally touched.
Lifting holes are provided at the top of the support legs. The nuts and bolts securing the unit to the crate are
used to mount the lower support leg sections and horizontal braces to the unit. Assemble the outdoor unit according to the instructions provided with it.
Allow clear space around the condenser equal to at
least at least twice the diameter of the fan.
Control enclosure end
2W
minimum:
Canada 1m
USA 36 in. for 230V
42 in. for 460V
or per NEC
110-26,
whichever is greater)
Top View
2W
(min 3ft.)
W
2W
(min 3ft.)
any overhanging obstruction
Allow clear space
above the condenser.
Side View
Total length of
tubes ≤ 100 feet.
INSTALLATION
min. 10 ft
(3 m)
2W
(min 3ft.)
The outdoor heat exchanger should not be enclosed within a solid fence or wall, since such structures prevent
Sample
Appearance may vary.
adequate air flow. If a fence or wall must be installed, it must be no closer to the condenser than shown above,
no highwer than 6 ft (2 m) and must not extend lower than 12 inches (30 cm) above grade. Fences lower than
12 inches above grade may cause recirculation of heated air and a corresponding reduction in performance.
Vegetation must be
kept short.
minimum 12 in.
(30 cm)
Data subject to change without notice.
®
Ecosaire
July 2007 17
Page 18
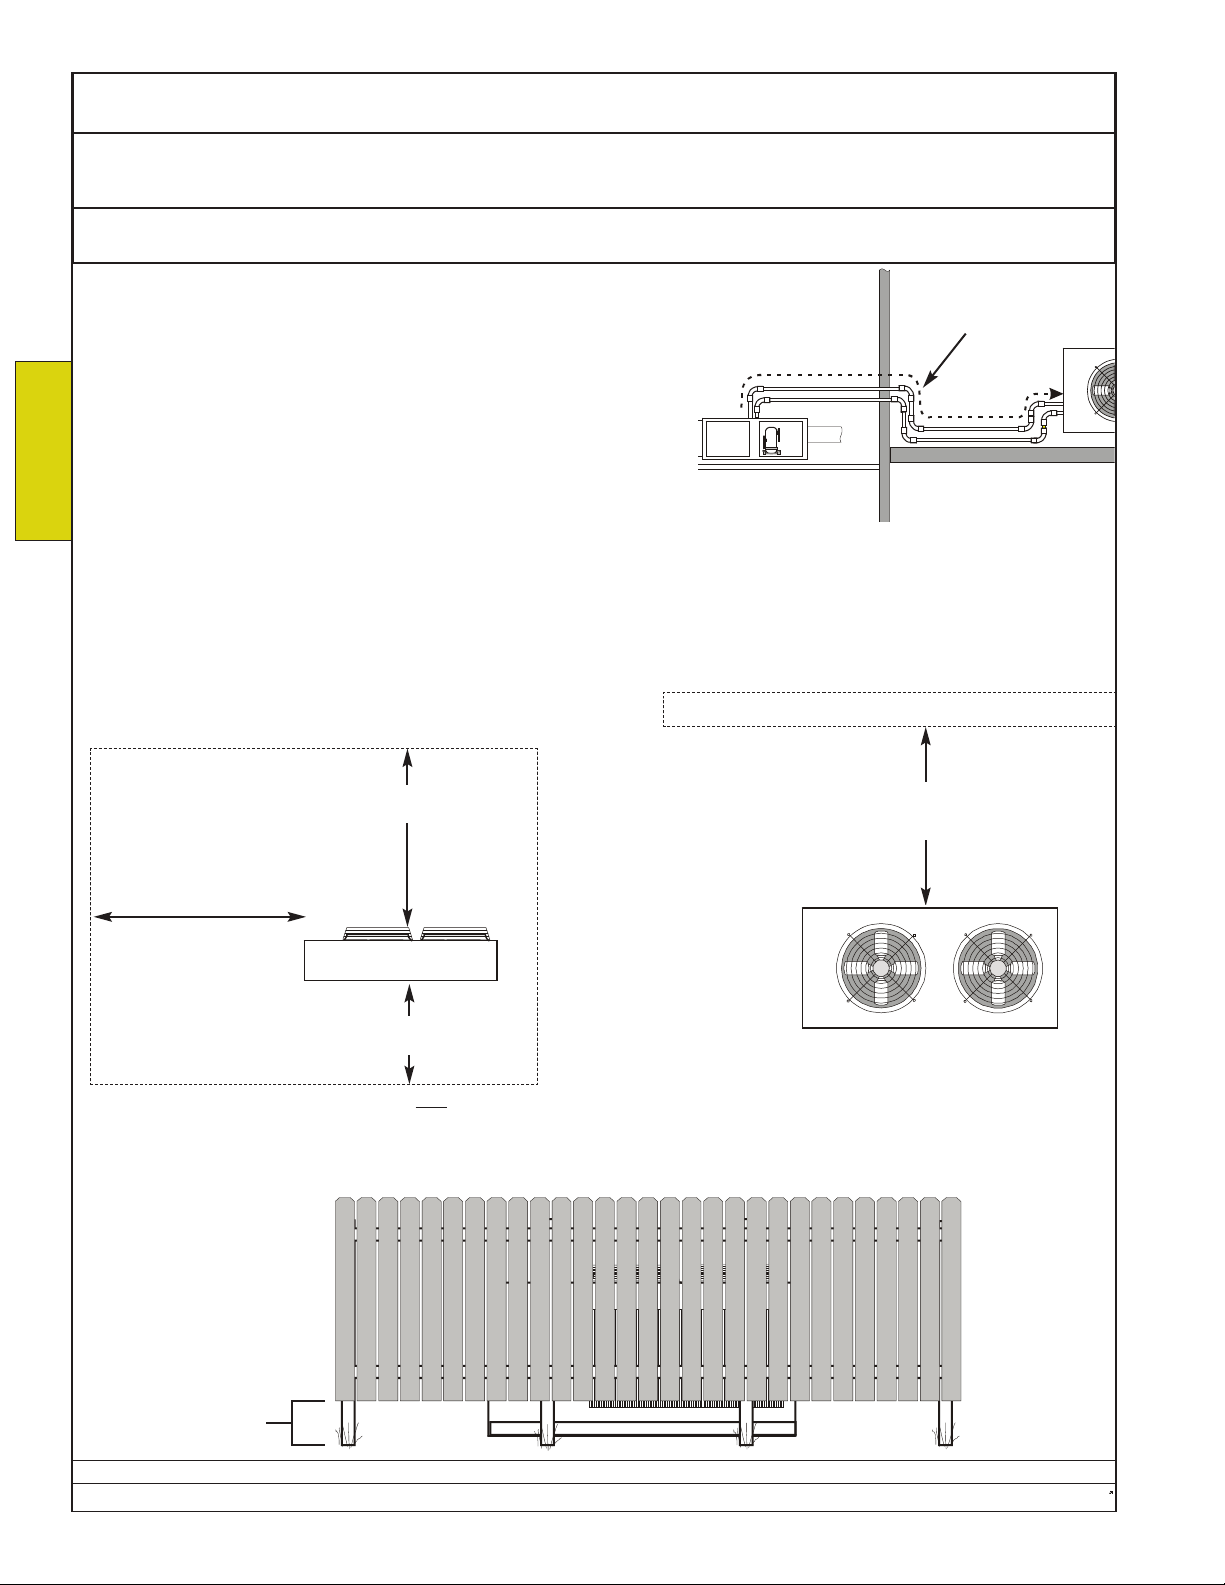
Ecosaire®CM Series Precision Air Conditioner Owners Manual
Installation
Air-Cooled Direct Expansion, Glycol-Cooled Direct Expansion,
Air-Cooled DualCool, & Glycol-Cooled DualCool Units Only
Unpacking and Locating Outdoor Heat Exchanger, Horizontal Flow
Important! - Inspect your unit immediately for shipping damage.
Claims for shipping damage must be made with the shipping company.
NOTE: Horizontal-flow and Vertical Flow Condensers are not inter-
INSTALLATION
changeable.
the prevailing wind.
Notify the carrier immediately if shipping damage is suspected. If internal damage is suspected, indicate “contingent on internal inspection” when signing for
the shipment. Keep copies of all documents, including photographs of any
damage.
For units with a remote heat exchanger, select a suitable location for the
outdoor unit, where it will not be subject to damage. Outdoor condensers
(with Ecosaire unit of Cooling Type = A) must have no more than 100 ft. (30 m) of tube (one way) connecting to the Ecosaire
unit. Areas subject to heavy snow and ice accumulation should be avoided. Areas subject to public access should be avoided. Locate outdoor units in an area of clean air away from steam, hot air, or fume exhausts.
Units installed on roofs should be mounted on steel supports in accordance with local codes. A concrete pad is sufficient for
ground installations.
Provide clearances as shown below. Insulate hot-gas tubes where they might be accidentally touched.
Assemble the outdoor unit according to the instructions provided with it.
Allow clear space around the condenser equal to at
The fans of horizontal-flow condensers must not face into
any overhanging obstruction
least at least twice the diameter of the fan.
Total length of
tubes ≤ 100 feet.
Top View
Control enclosure end
(minimum by code:
Canada 1m
USA 36 in. for 230V
42 in. for 460V
or per NEC 110-26,
whichever is greater)
10 ft
(3 m)
40 in
(1 m)
Sample
Appearance may vary.
min. 10 ft
(3 m)
Side View
The outdoor heat exchanger should not be enclosed within a solid fence or wall, since such structures prevent
adequate air flow. If a fence or wall must be installed, it must be no higher than 6 ft (2 m), no closer to the con-
denser than shown above, and must not extend lower than 12 inches (30 cm) above grade. Fences lower than
12 inches above grade may cause recirculation of heated air and a corresponding reduction in performance.
Vegetation must be
kept short.
minimum 12 in.
(30 cm)
Data subject to change without notice.
18 Ecosaire
®
July 2007
Page 19
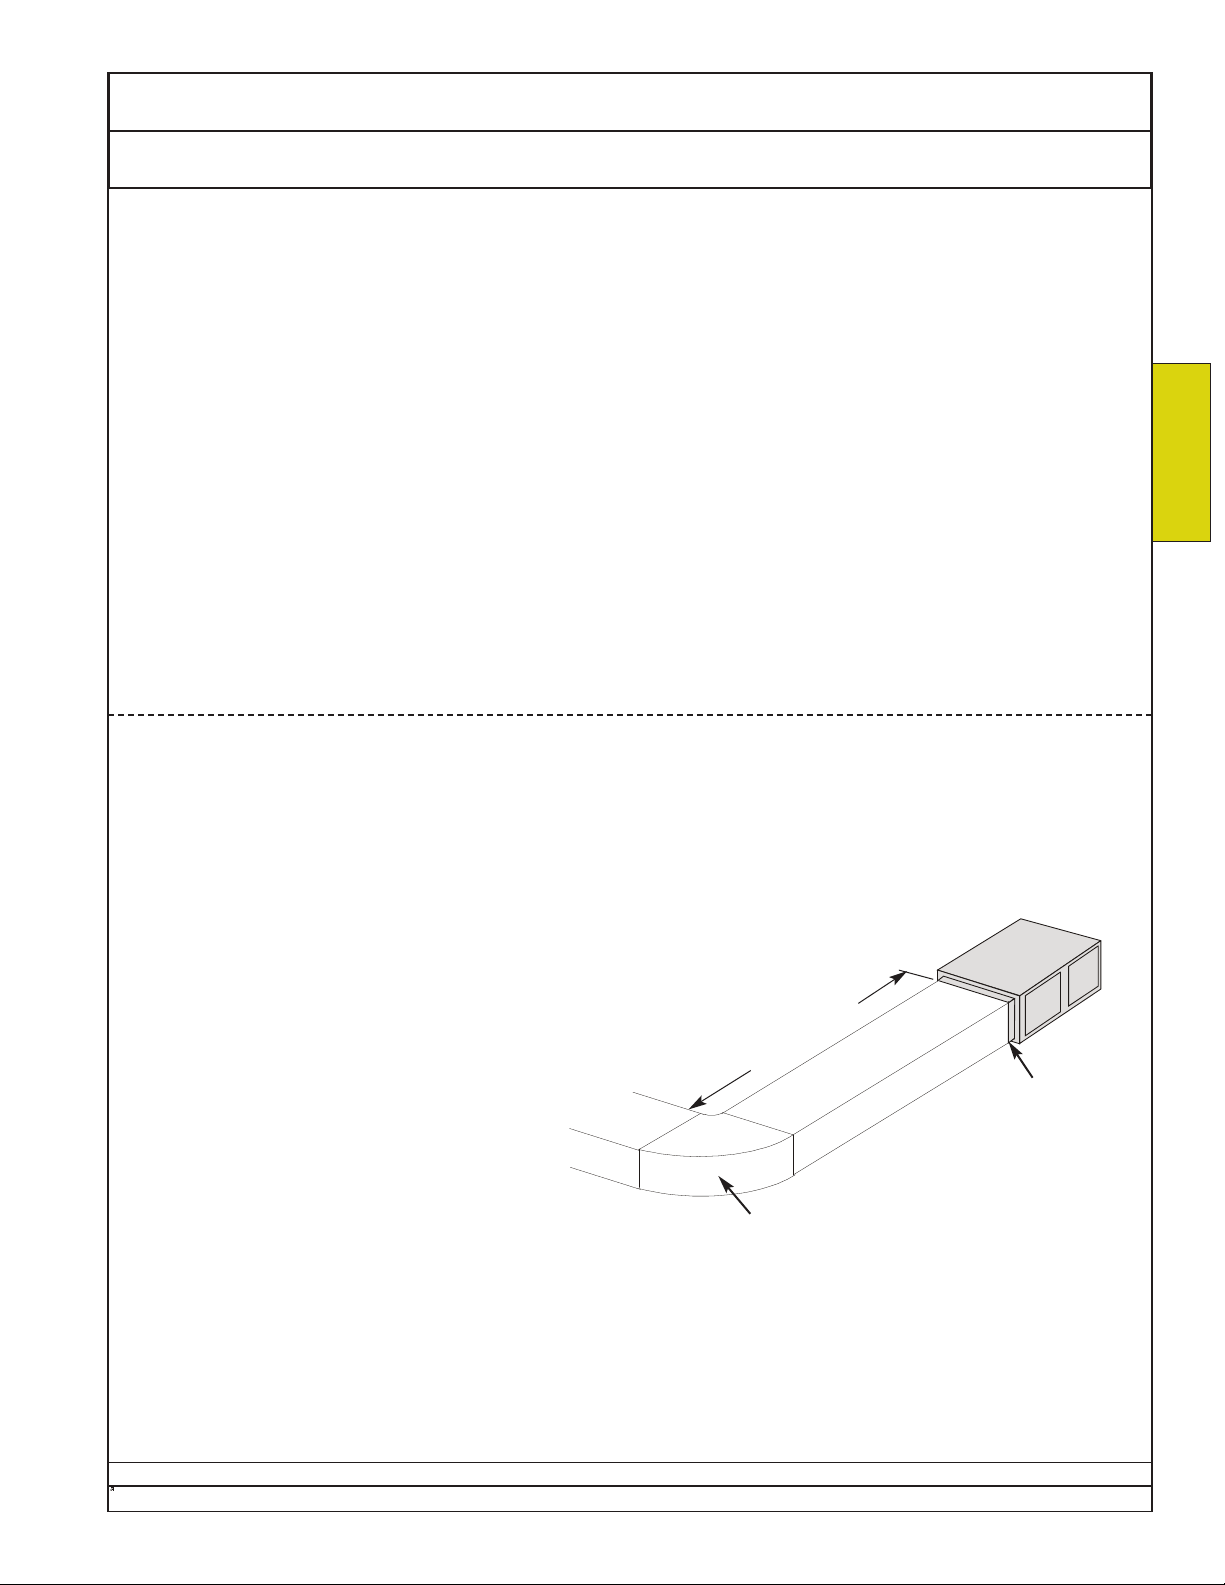
Owners Manual Ecosaire®CM Series Precision Air Conditioner
Δ
Δ
Unit-Duct Connection Ductwork Installation
Important!
Poor duct design can
reduce the amount of air
delivered.
Duct design must conform to the
ASHRAE low-pressure, low-velocity
duct standards. If there is a question concerning duct design, sizing,
choice of materials, air velocities,
or static pressures contact
Ecosaire for assistance.
Air velocities should be kept low
to allow good air movement and
low noise. Higher static pressures
result in higher power requirements
and increased noise. The maximum external static pressure is
specified for each unit. Static
pressures higher than specified
may reduce air flow below the minimum acceptable value.
Select grilles, registers, and diffusers for low static pressure loss,
required throw, and specified air
flow. Choose hardware resistant to
deterioration due to chemicals in
the pool enclosure.
Duct material
The Ecosaire®unit is suitable for
use with any duct material, subject
to the requirements of this section
and standard practice. Standard
galvanized steel duct is recommended.
All elbows must be equipped with
Return Duct
Poor return-duct design can prevent proper
dehumidification by causing uneven air distribution over the evaporator. Reduced
capacity and/or equipment damage may
result.
It is very important to allow straight length
in the return duct as shown. There should
be no elbows, transitions, offsets, or other
flow interruptions closer than 2.5 X WIDTH of
the return duct opening.
If turning vanes are not used in elbows,
allow a length of straight duct equal to at
least 5 X WIDTH.
The straight length is not required for units
with top or bottom return air connections.
aerofoil turning vanes and acoustic
insulation.
Where located in areas below
room temperature, ductwork must
be insulated on the outside with 2
inch fiberglass wrap with FSK facing. All ducts must be designed to
be dry. All seams must be sealed.
Flexible duct connectors
Use flexible duct connectors to
attach the ducts to the Ecosaire
unit. Install the flexible duct in
such a way as to prevent mechanical loads from being applied to the
unit, and to prevent unit vibration
from being transmitted to the ductwork.
2.5 X Effective
Duct Diameter
SAMPLE
may vary.
Number, location, and
appearnce of components
Duct Isolator
®
INSTALLATION
Ecosaire
Turning Vanes
Data subject to change without notice.
®
July 2007 19
Page 20
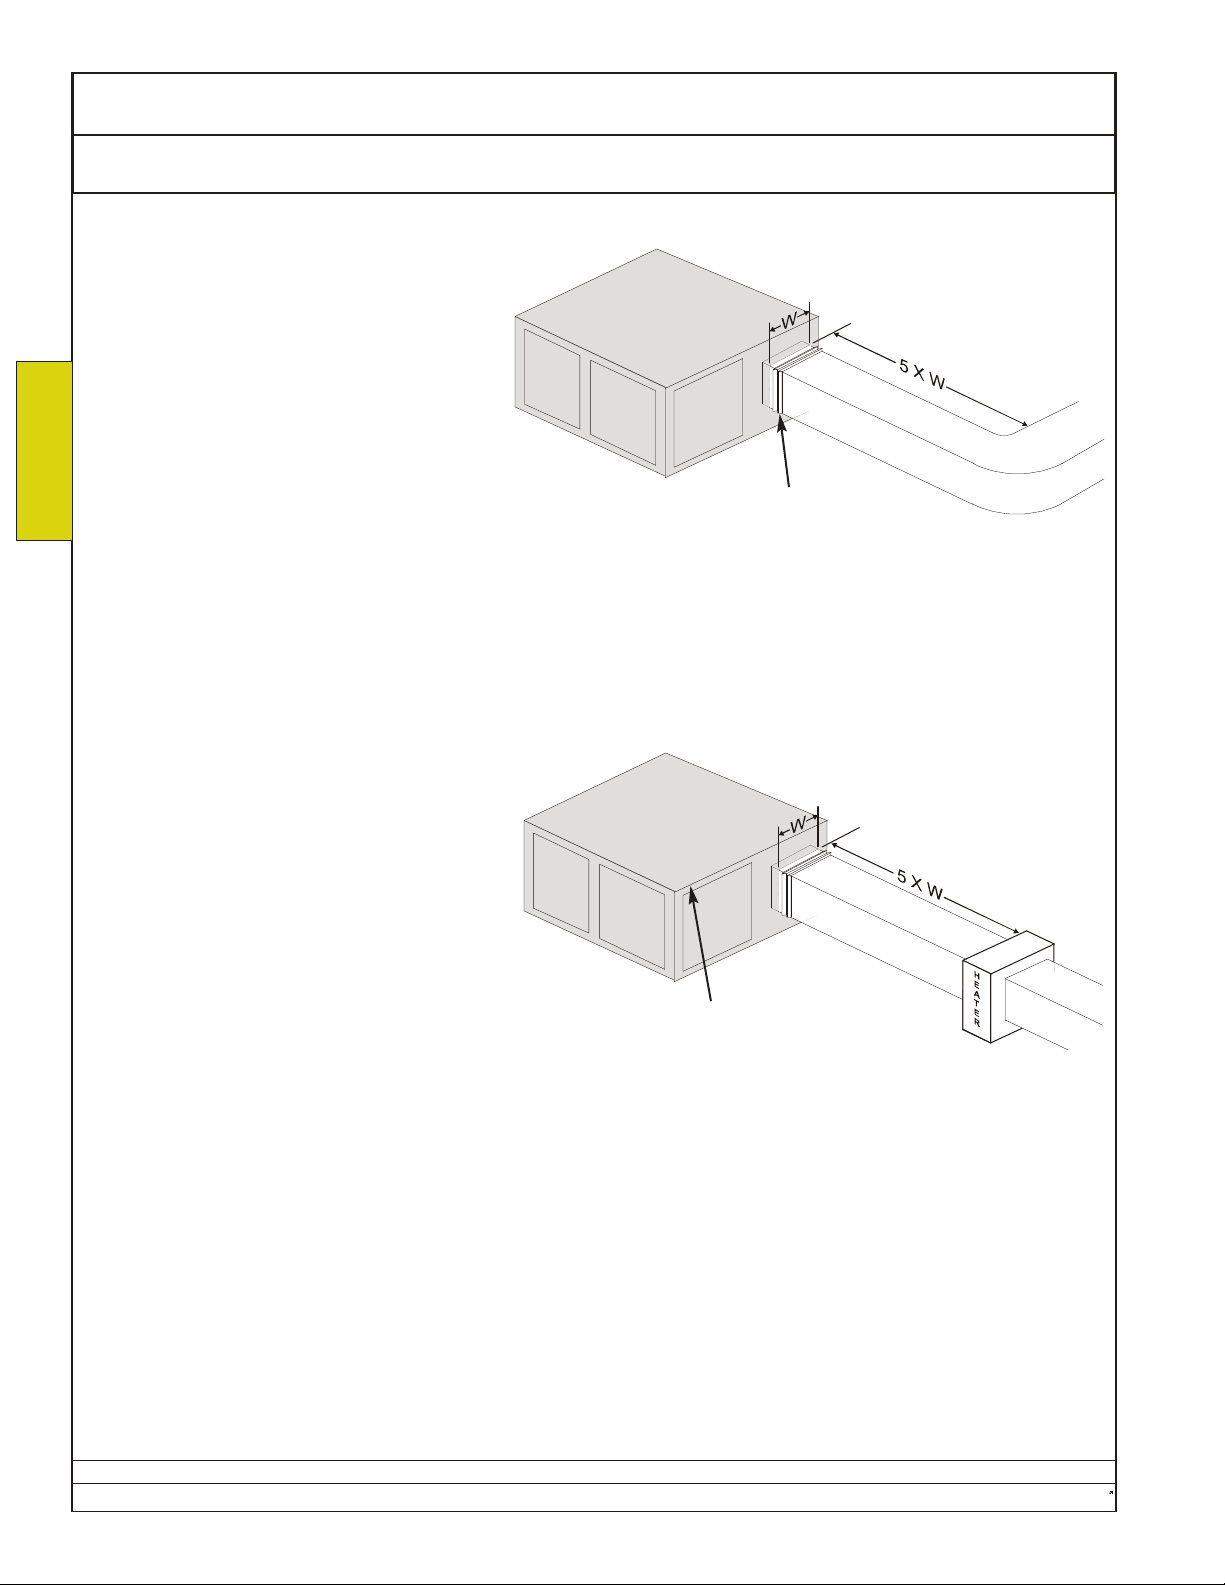
Ecosaire®CM Series Precision Air Conditioner Owners Manual
Installation Ductwork Unit-duct Connection
Supply Duct
Refer to AMCA1guidelines for system effect
considerations.
To prevent unexpected external energy
INSTALLATION
loss, allow a section of straight duct with a
length five times the blower width leaving
the ECOSaire®. There should be no
elbows, transitions, offsets, duct heaters,
or other flow interruptions closer that 5 X
the width of the blower.
On special order, Dectron may be able to
provide bottom, top, or side discharge blowers. On special order, Dectron may be able to
offer reversed blower rotation.
Duct Isolator
Some units may have external duct
heaters (by others). To prevent heater failures and hot spots, locate the heater at
least 5 X the duct width away from the
blower, or any air flow interruptions such as
elbows and transitions.
SAMPLE
may vary.
Number, location, and
appearnce of components
Duct Isolator
1. Air Movement and Control Association International, Inc.
30 West University Drive
Arlington Heights, Illinois 60004-1893
Data subject to change without notice.
20 Ecosaire
®
July 2007
Page 21
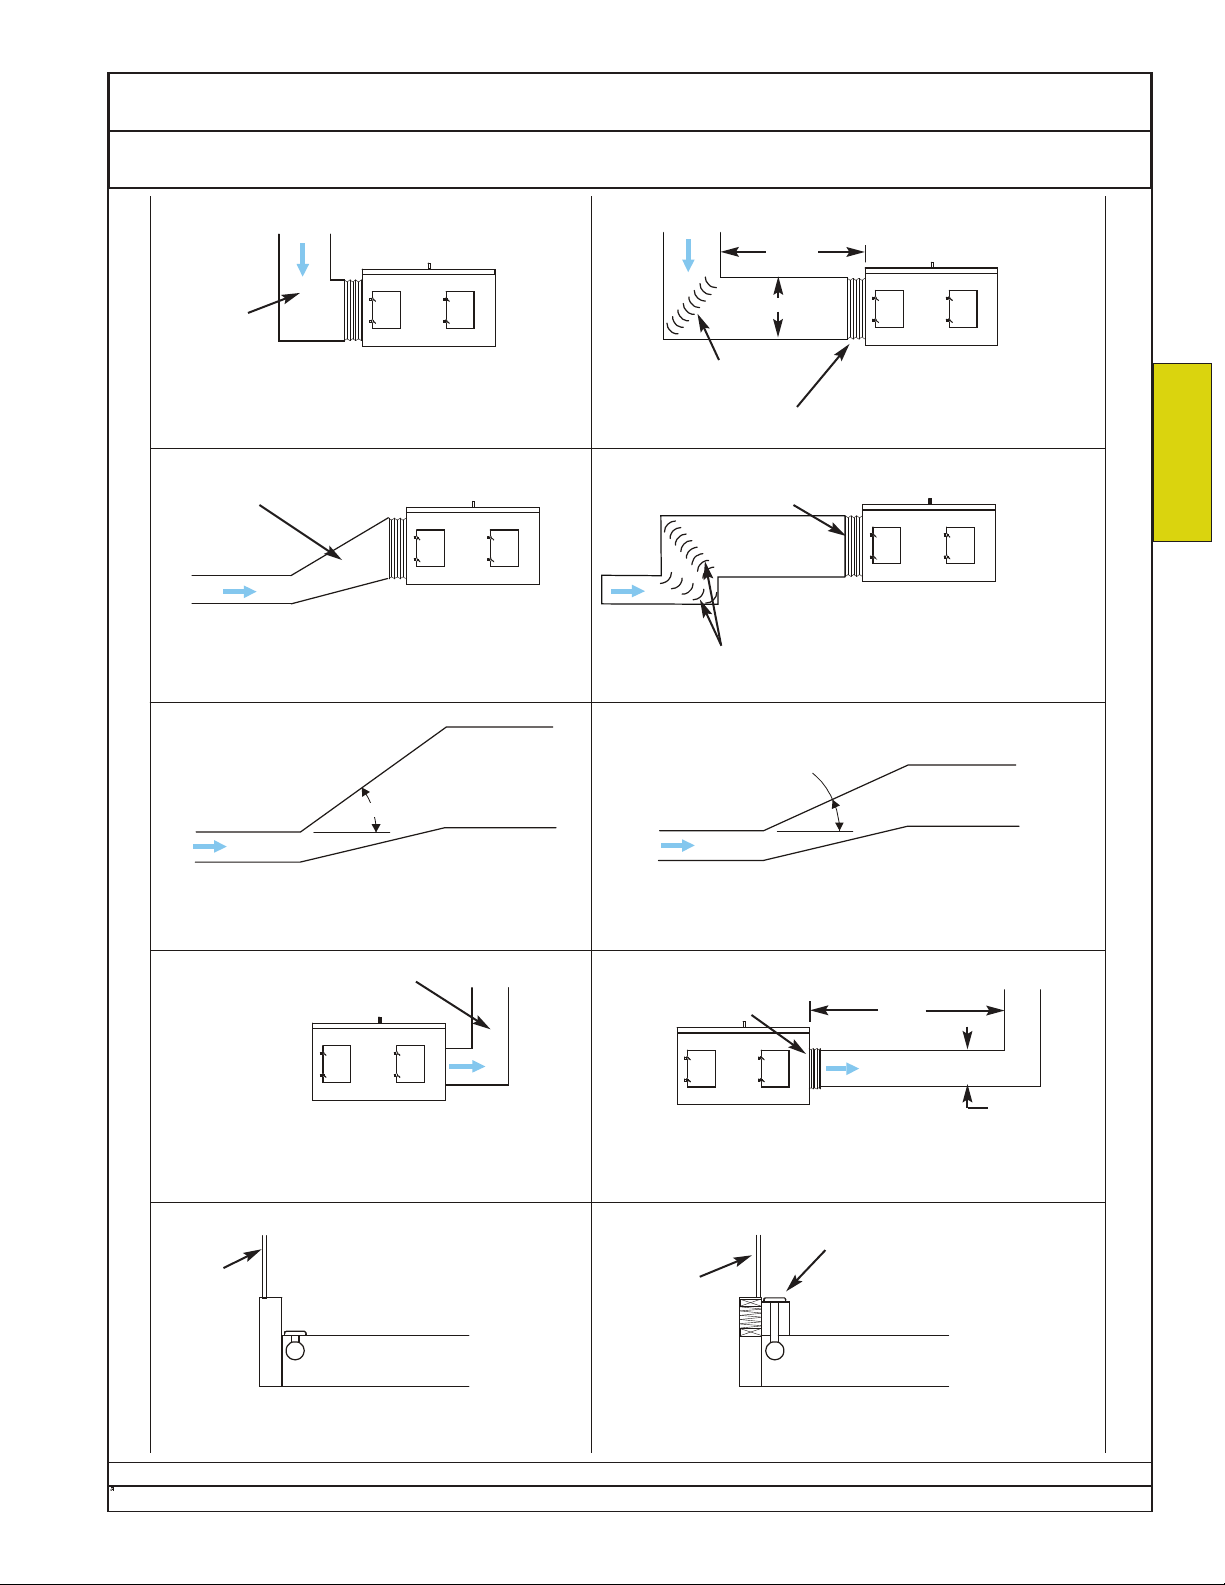
Owners Manual Ecosaire®CM Series Precision Air Conditioner
Standard Practice Ductwork Installation
2.5 W
or more
RETURN
DUCT
W
RETURN
DUCT
WRONG
The air will not be evenly distributed over the evaporator.
WRONG
The air will not be evenly distributed over the evaporator.
30° or more
WRONG
Air cannot follow this steep angle.
Turning Vanes
Always install
vibration isolator.
Always install
vibration isolator.
Turning Vanes
20° or less
RIGHT
Vanes and straight length
allow air to flow evenly.
INSTALLATION
RIGHT
Vanes and straight length
allow air to flow evenly.
RIGHT
Air can follow this transition.
Window set
to outside
Ecosaire
SUPPLY DUCT
WRONG
Reduction of airflow will result
from the elbow being too close.
WRONG
Air cannot reach the lower part of the window.
®
July 2007 21
Always install flexible
duct connection.
Sufficient straight length allows proper air flow.
Flexible duct connection absorbs vibration.
Window
set to inside
5W
or more
W
RIGHT
Δ Linear grills with volume control.
Δ Register with double deflection and
volume control.
RIGHT
Dry air reaches all the window.
Data subject to change without notice.
Page 22
Ecosaire®CM Series Precision Air Conditioner Owners Manual
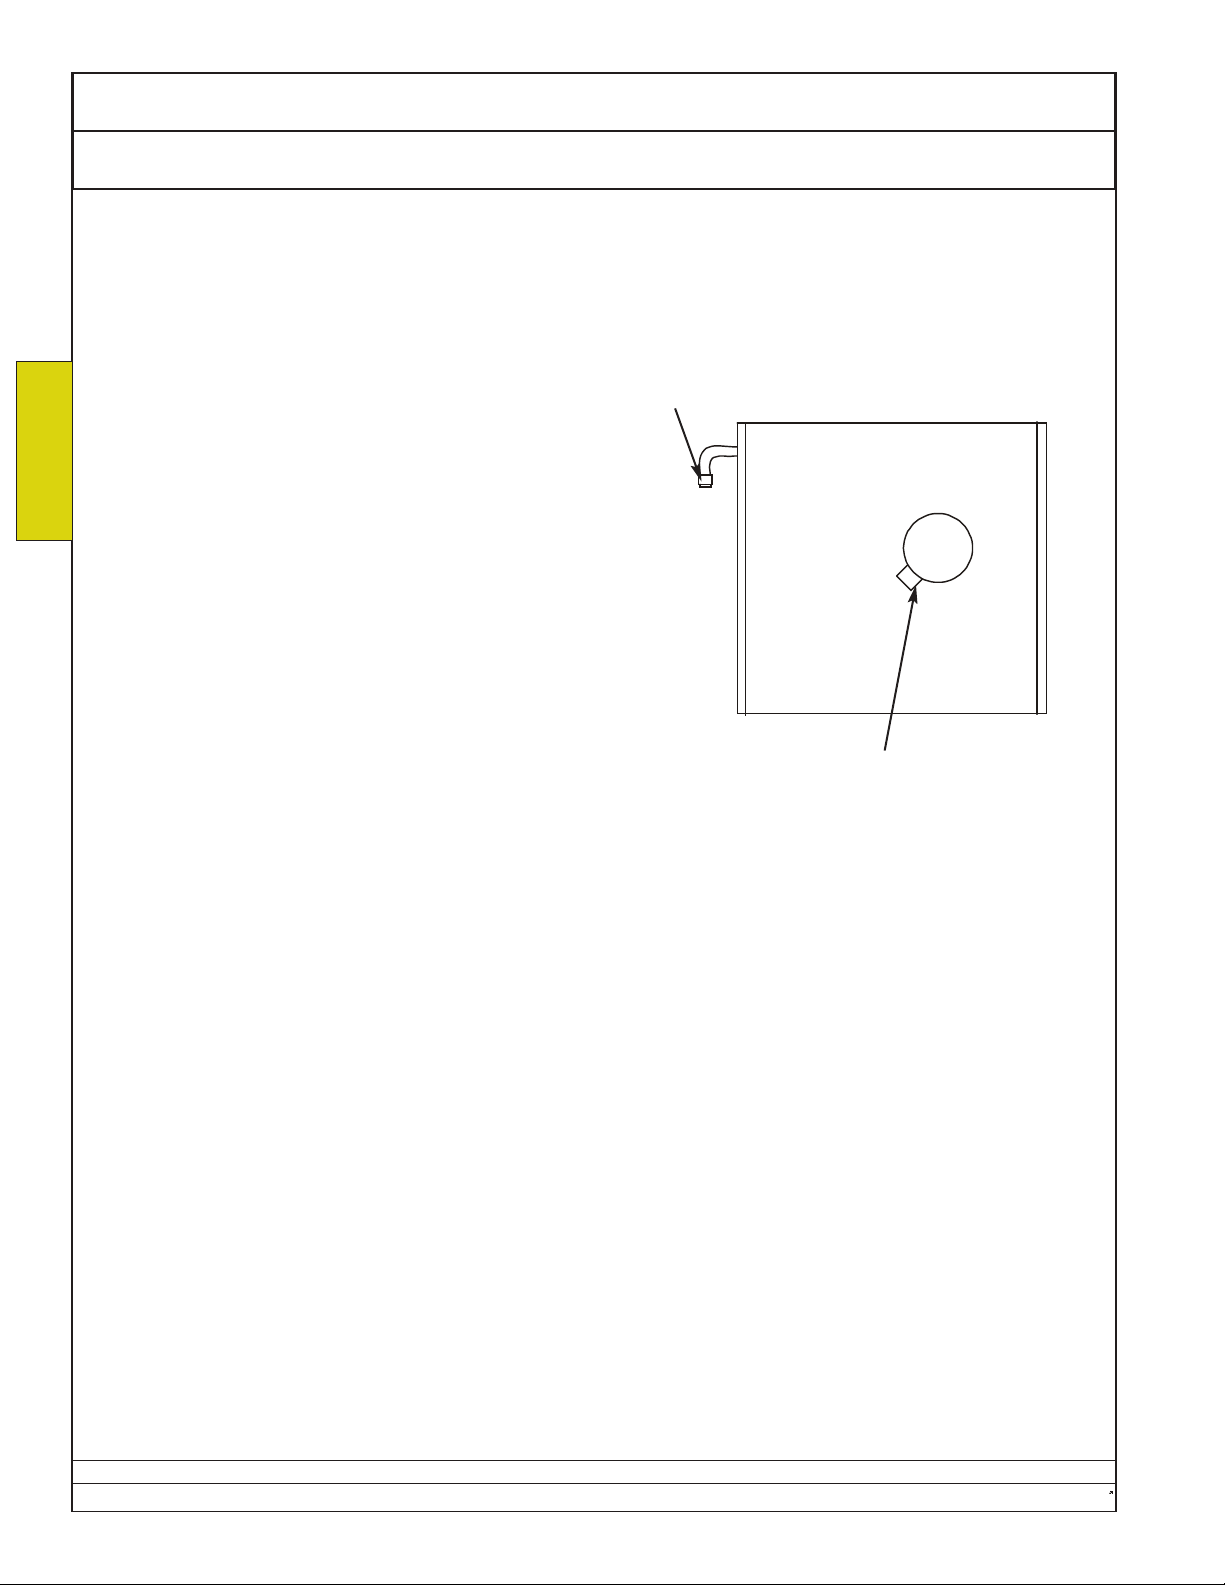
Installation Piping Humidifier
IMPORTANT!
The fill-valve orifice is designed for a water
pressure range of 30 to 85 psig (ideally 55 to 60
psig). Contact the factory for water pressures
outside of this range.
INSTALLATION
The humidifier is designed to operate on cold hard
water.
DO NOT connect to a demineralized or distilled
water supply. (Demineralized water will prevent
operation.)
DO NOT use softened water or hot water.
An isolation valve MUST be installed in the supply
line ahead of the humidifier inlet.
Use at least 1/2” copper tube to within four feet of
the Ecosaire® unit. Reduce to 1/4”O.D. and connect
to the 1/4” compression fitting on the supply port as
shown.
IMPORTANT!
Be sure the shut-off valve is closed after the
connections are complete. Do NOT open it until
the humidifier checkout procedure.
The humidifier is equipped with a 7/8” O.D.
unthreaded drain outlet on the underside of the drain
canal on the bottom of the humidifier.
Keep drain lines as short as possible. Keep drain
lines sloped down, not level and not sloped up
since low spots in drain lines will accumulate sediment and cause backup. The drain line should be
7/8” O.D. copper pipe or larger. Do Not use plastic
pipe for drain lines.
1/4” O.D compression
cold water connection
Bottom view of humidifier
7/8” Drain Connection
Use 7/8” I.D. hose
provided.
Data subject to change without notice.
22 Ecosaire
®
July 2007
Page 23
Owners Manual Ecosaire®CM Series Precision Air Conditioner
Condensate Piping Installation
IMPORTANT!
The condensate drain must be
installed and the P-trap must be
filled before starting the unit.
Location
The condensate drain is a 3/4”
FPT connection in the bottom of the
unit.
Select materials
Ordinary schedule 40 PVC or ABS
plastic pipe is adequate in most
cases. Do not reduce the pipe size
below that provided on the unit.
Install P-trap
If there is no condensate pump, a
drain trap must be installed. The
trap must be at least two (2) inches
deep to maintain a water seal. For
long runs or possible unintentional
traps, a vacuum breaker on the outlet side of the P-trap may be necessary. Follow standard procedures.
Route drain pipe
Route the drain pipe so that the
only trap is the P-trap. In horizontal
runs, slope the pipe downward at
least 1/4” per foot (2 cm per meter).
Deliver the condensate to a suitable point. Check local codes for
allowable procedures.
Fill P-trap
To prevent air from being drawn
through the condensate drain pipe,
the P-trap must be filled with water
before starting the unit blowers.
Failure to do this will cause the
drain pan to overflow during
operation.
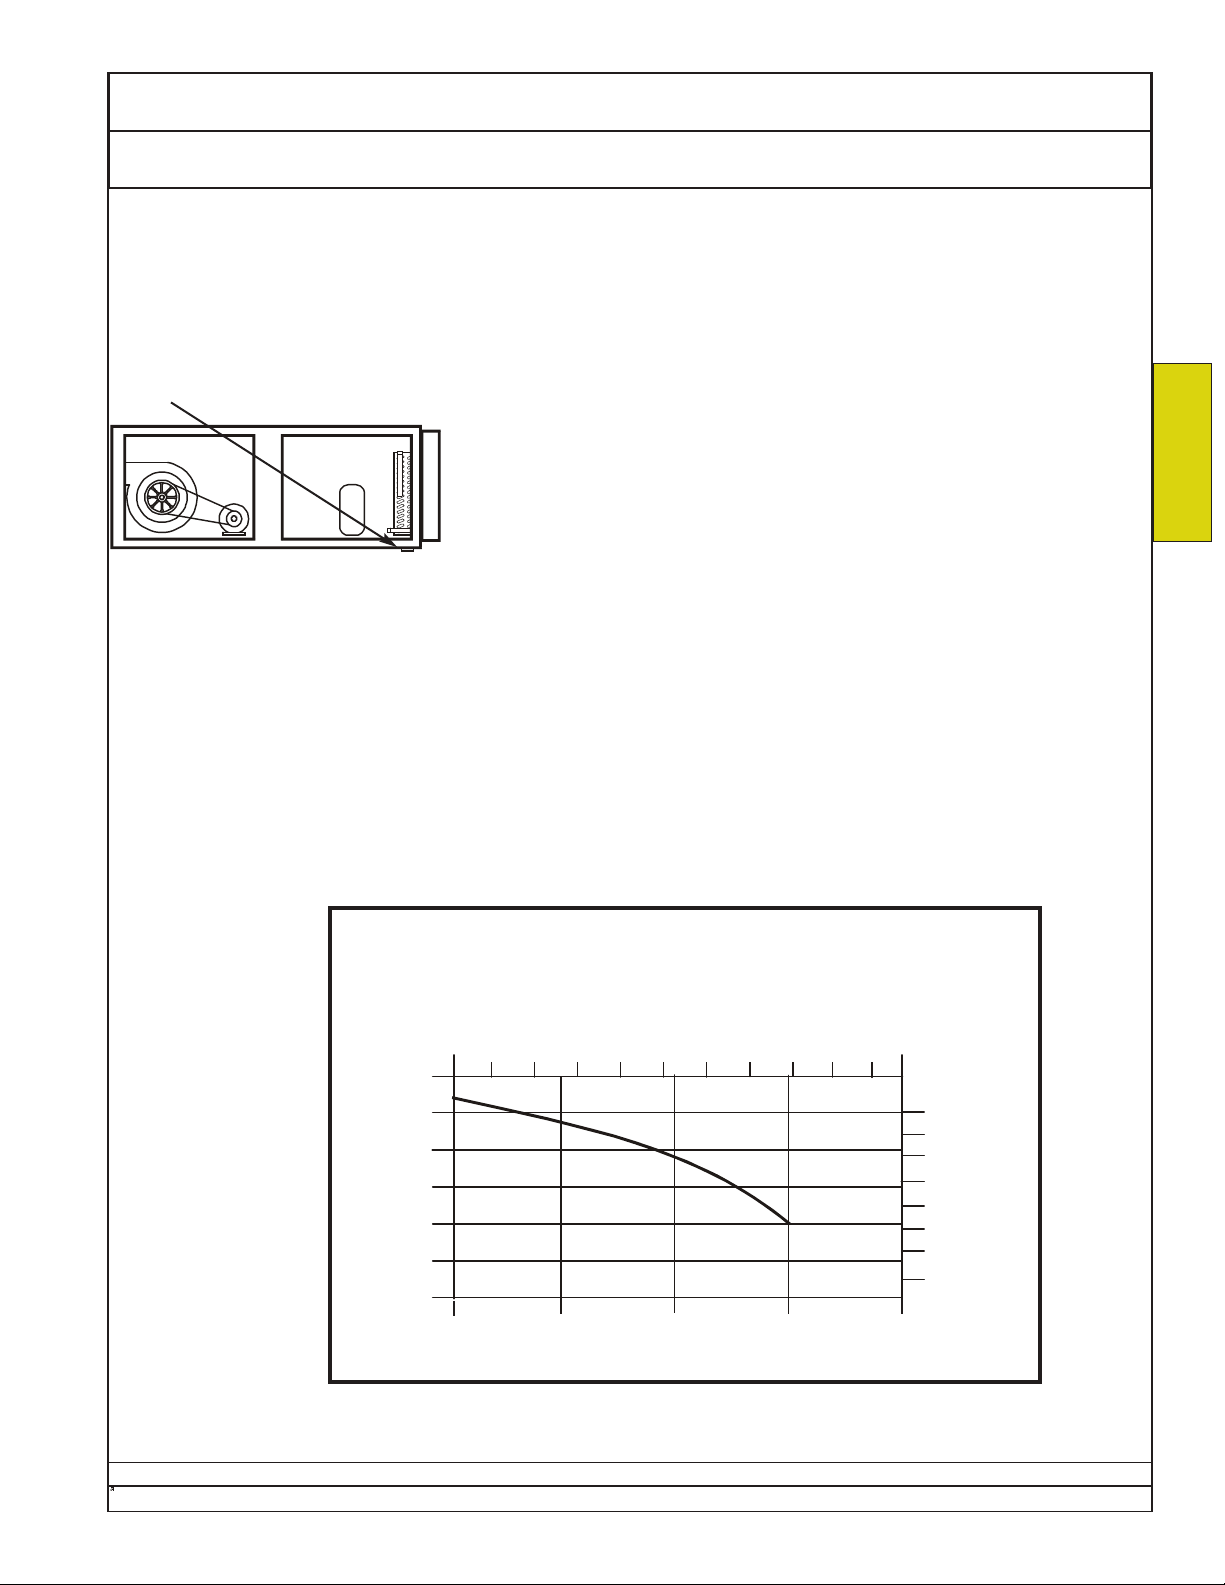
Condensate pump
Condensate pumps are available,
with the curve shown below.
If the condensate is to be delivered to a pipe that might be pressurized above atmospheric pressure, install a check valve to prevent backflow.
INSTALLATION
Ecosaire
Condensate Pump
Average Curve
US gph
10
20 30 40 50 60 70 80
6
5
H (m)
®
July 2007 23
4
3
2
1
0
0
100 200 300 400
L/h
90
100
16
14
12
10
H (ft.)
8
6
4
2
Data subject to change without notice.
Page 24
Ecosaire®CM Series Precision Air Conditioner Owners Manual
Installation Piping Refrigerant
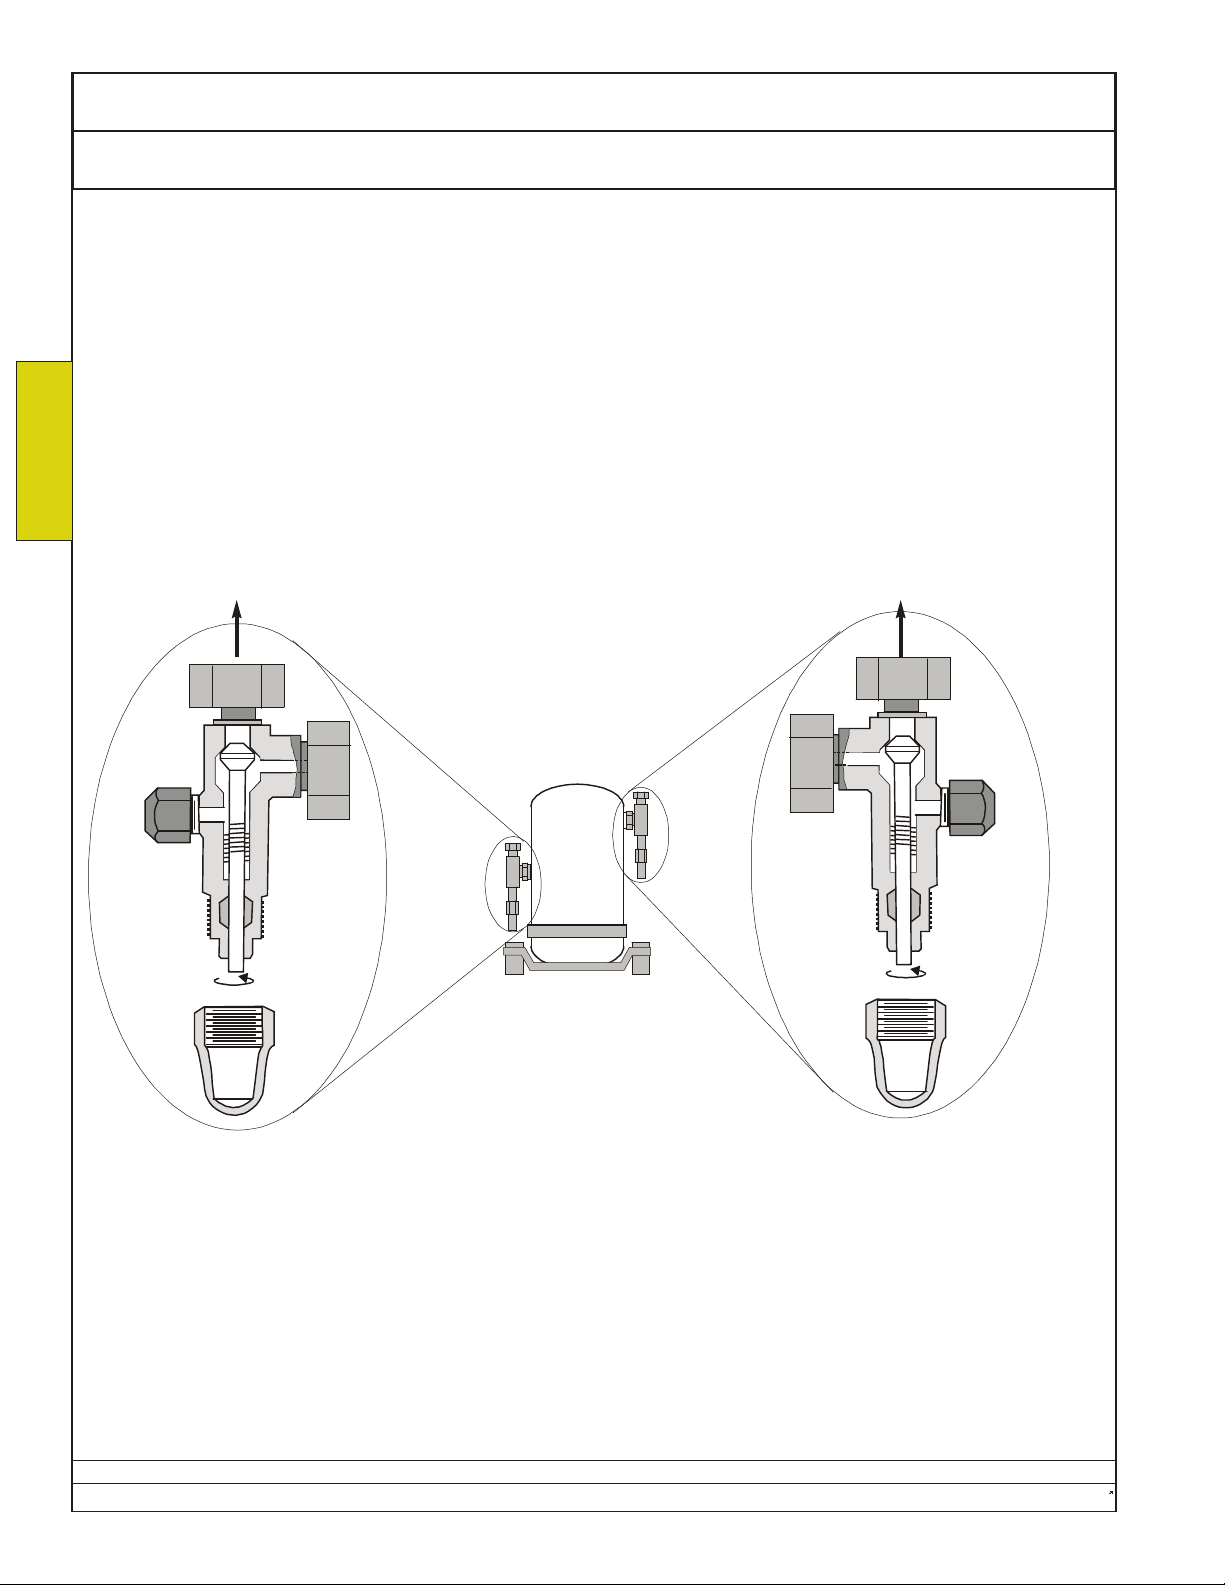
Note below the operation of rotalock service valves, as
found on Ecosaire® compressors and receivers.
INSTALLATION
To System
To System
If pressure testing, be sure
to isolate the compressor
from high pressure.
Sample
Components and their
locations may vary.
Data subject to change without notice.
24 Ecosaire
®
July 2007
Page 25
Owners Manual Ecosaire®CM Series Precision Air Conditioner
Refrigerant Piping Installation
Air-Cooled Direct Expansion and DualCool Units Only
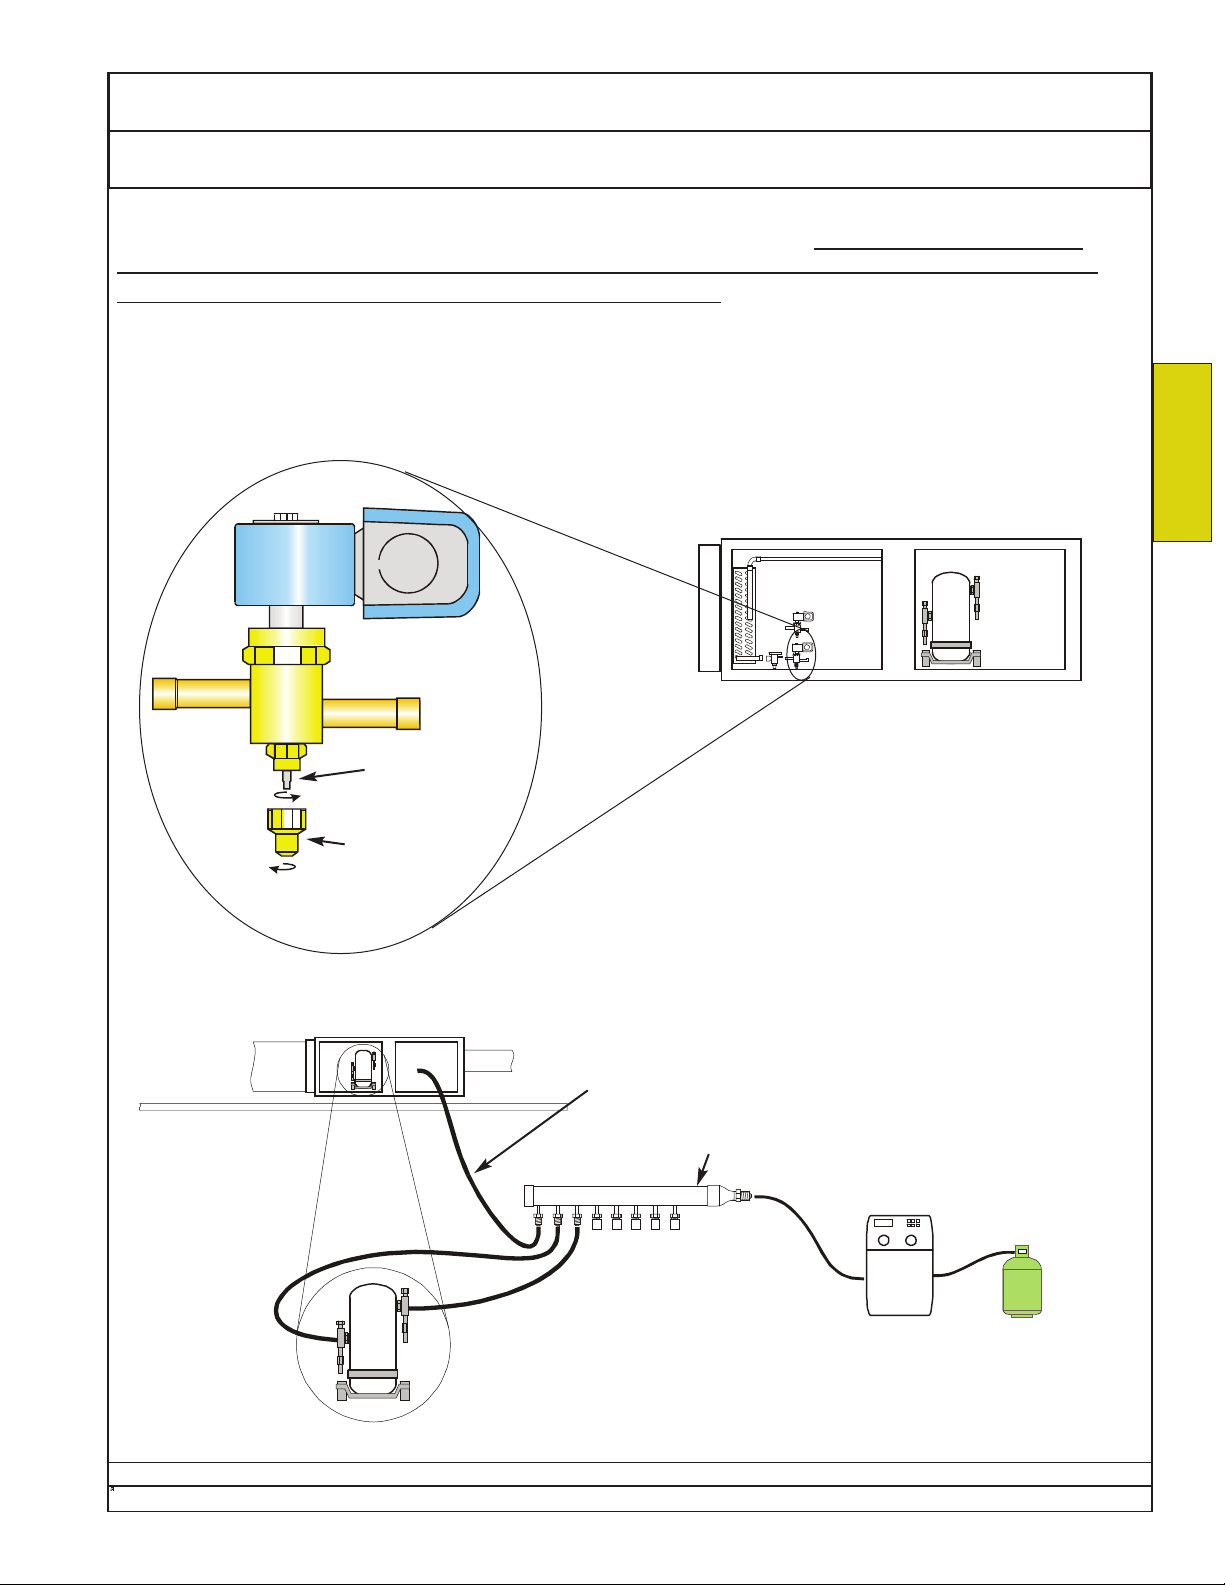
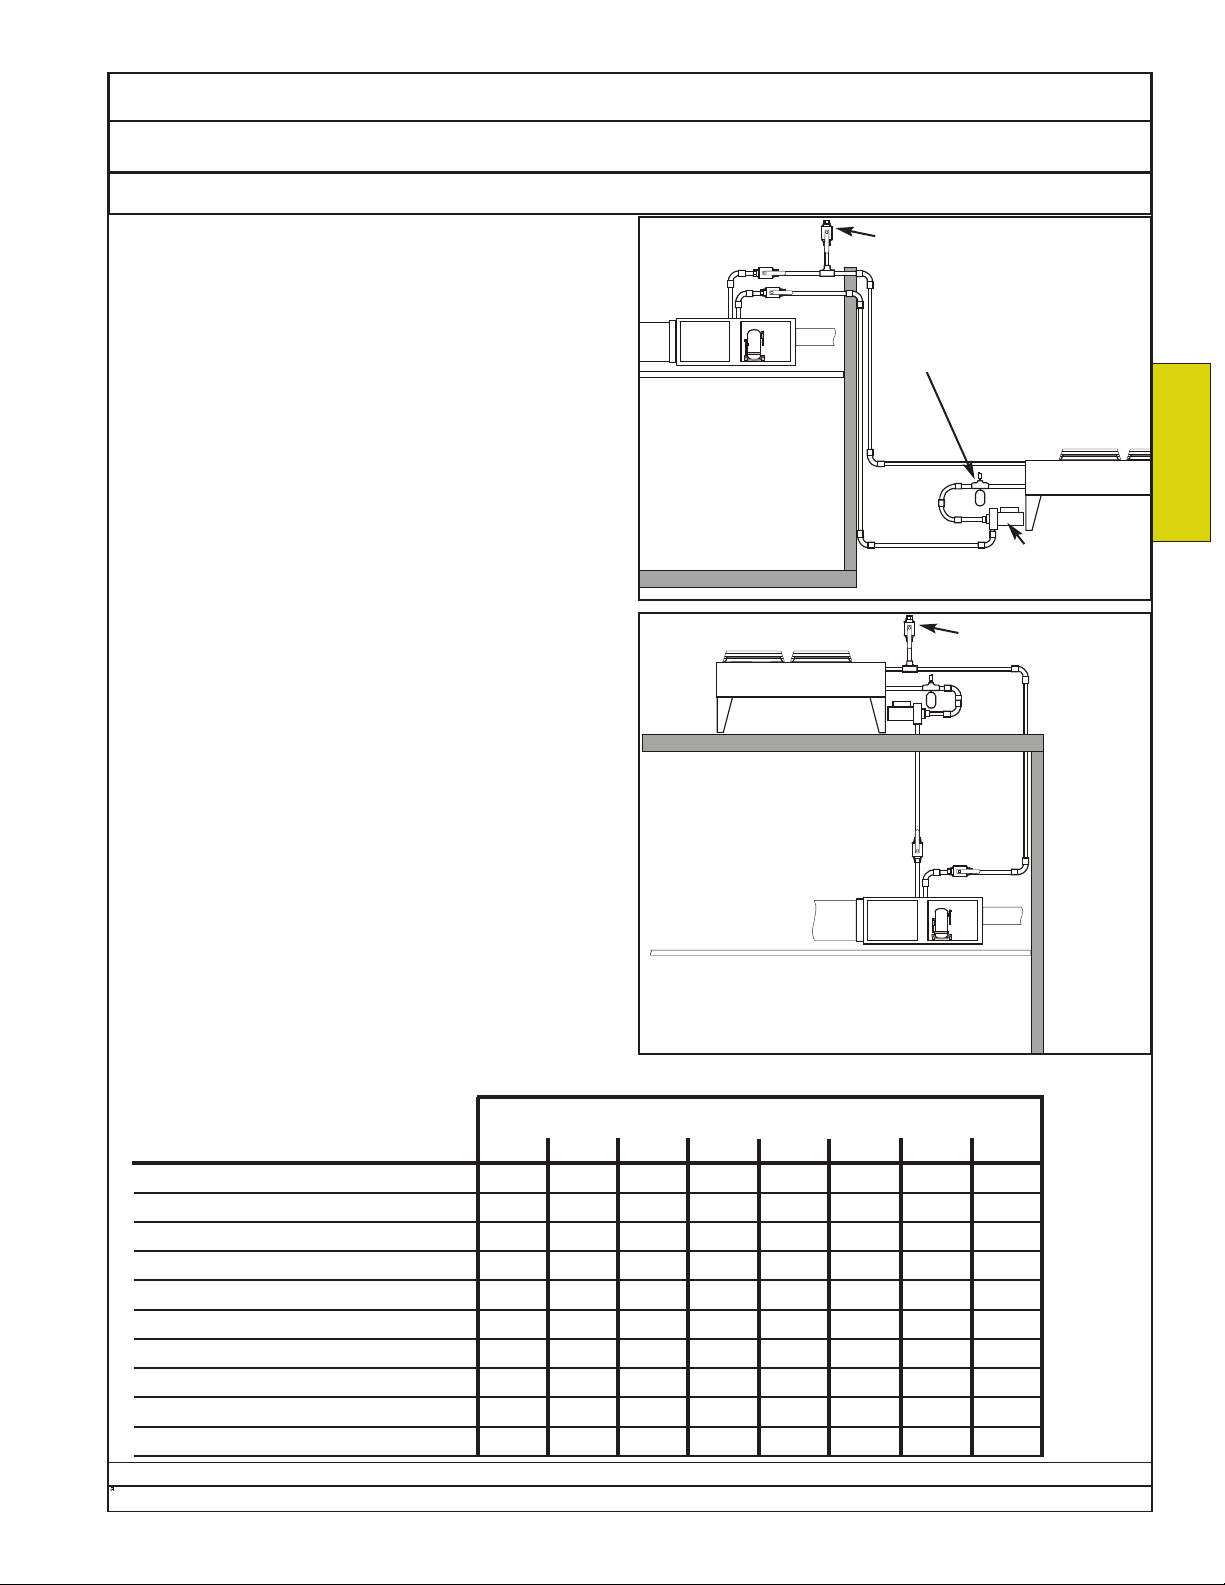
When shipped, remote air-cooled units contain a refrigerant holding charge. The holding charge must be
reclaimed before removing the caps on the remote-condenser tube stubs. Failure to reclaim the hold-
ing charge can lead to property damage and/or personal injury.
Locate the refrigerant liquid-line solenoid valves. Some units may
be equipped with manual-lift valves. Where this is the case:
1. Using two wrenches, remove the manual-stem covers.
2. Turn the manual stems clockwise to open the valves.
INSTALLATION
SAMPLE
may vary.
Number, location, and
appearnce of components
manual stem
stem cover
Locate the compressor and attach reclaim hoses to the compressor rotalock-valve access ports.
This hose will be connected
in the next step.
reclaim manifold
(by others)
Ecosaire
SAMPLE
may vary.
Number, location, and
appearnce of components
Do not open rotalock
valves yet.
Data subject to change without notice.
®
July 2007 25
Page 26
Ecosaire®CM Series Precision Air Conditioner Owners Manual
Installation Piping Refrigerant
air-cooled Direct Expansion and DualCool units only
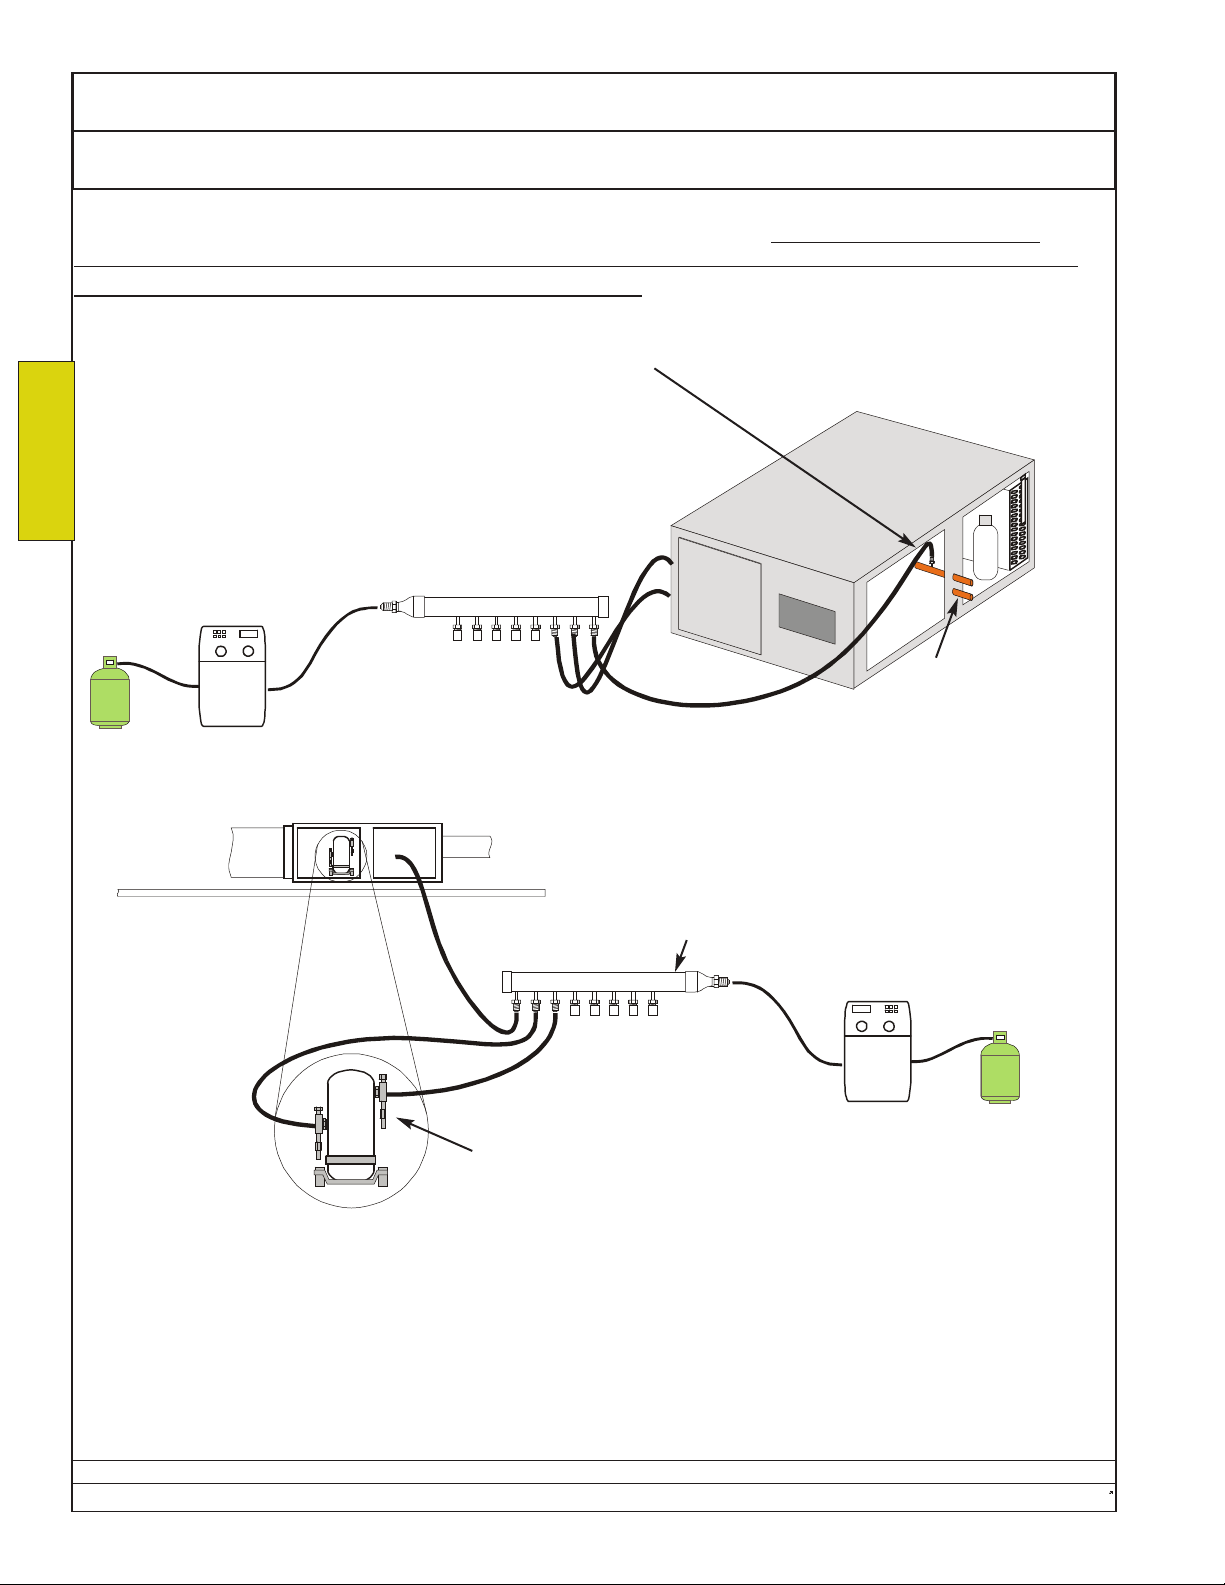
When shipped, remote air-cooled units contain a refrigerant holding charge. The holding charge must be
reclaimed before removing the caps on the remote-condenser tube stubs. Failure to reclaim the holding
charge can lead to property damage and/or personal injury.
Open the access panels near the refrigerant tube stubs. Locate the hot-gas tube stub.
INSTALLATION
Locate the Schraeder-type access valve on the hot-gas tube inside the cabinet.
The position shown is not typical.
Attach a reclaim hose to the Schraeder valve.
SAMPLE
may vary.
Number, location, and
appearnce of components
Open the compressor rotalock valves and reclaim the holding charge.
reclaim manifold
(by others)
Refrigerant tubes are
capped when shipped.
Open the compressor rotalock
valves for reclaiming.
NOTE: After the following step, installation must proceed immediately and rapidly, since the filterdrier will be exposed to atmosphere.
Close the rotalock valves and remove the reclaim equipment. Remove the condenser tube-stub caps with
a tube cutter. To prevent the introduction of foreign materials into the refrigeration system, do not use a
hack saw.
Data subject to change without notice.
26 Ecosaire
®
July 2007
Page 27
Owners Manual Ecosaire®CM Series Precision Air Conditioner
Refrigerant Piping Installation
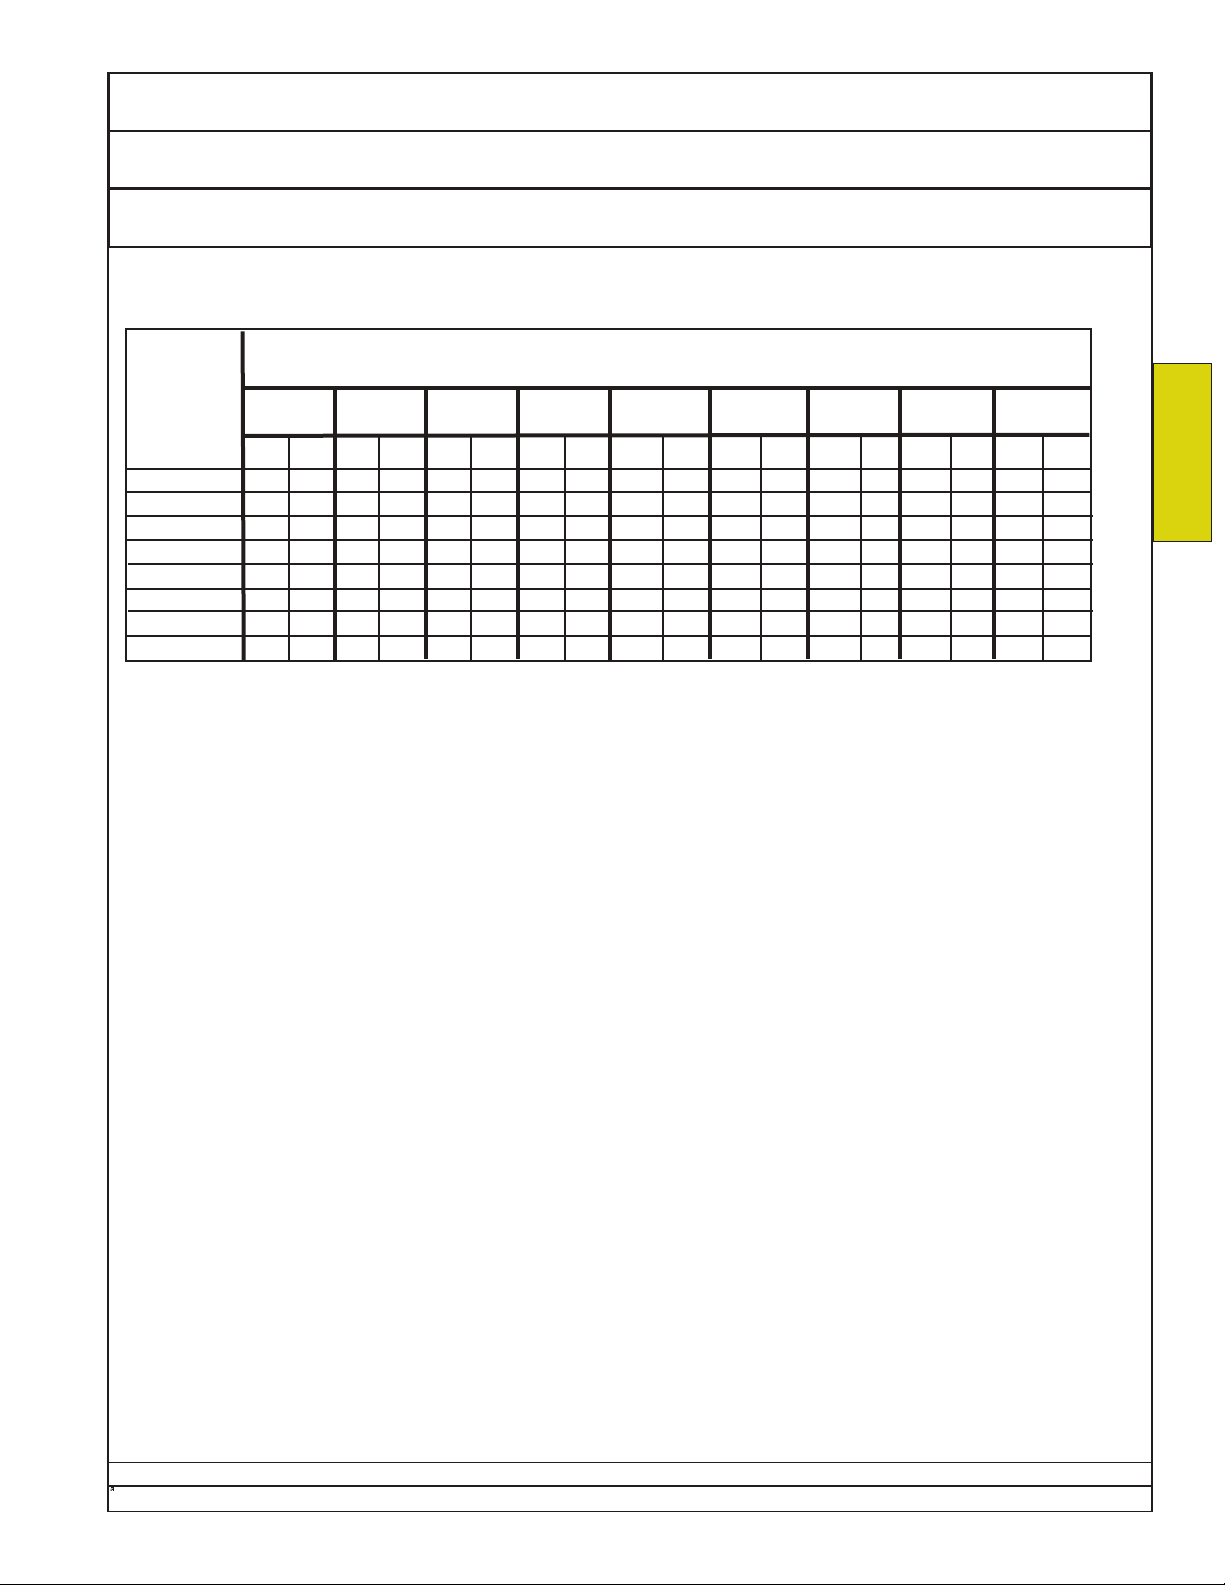
Air-Cooled Direct-Expansion and Air-Cooled DualCool Units Only
Equivalent
Condenser-connecting tube sizes, inches O.D.*
length
of tube, ft.,
one way
20
30
40
50
75
100
125
150
CM-X-010
Gas Liq. Gas Liq. Gas Liq. Gas Liq. Gas Liq. Gas Liq. Gas Liq. Gas Liq. Gas Liq.
1/2
1/2
1/2
1/2
1/2
1/2
5/8
5/8
CM-X-015 CM-X-020 CM-X-030 CM-X-050 CM-X-060 CM-X-070 CM-X-080
3/8
1/2
3/8
1/2
3/8
5/8
3/8
3/4
1/2
3/4
1/2
3/4
5/8
3/8
1/2
3/8
5/8
3/8
5/8
3/8
3/4
1/2
3/4
1/2
7/8
5/8
3/8
1/2
3/8
5/8
3/8
5/8
1/2
3/4
1/2
7/8
5/8
7/8
5/8
3/8
5/8
3/8
5/8
1/2
3/4
1/2
7/8
1/2
7/8
5/8
7/8
5/8
1/2
5/8
1/2
5/8
1/2
3/4
1/2
7/8
5/8
7/8
5/8
1 1/8
5/8
1/2
5/8
1/2
3/4
1/2
3/4
1/2
7/8
5/8
1 1/8
5/8
1 1/8
3/4
1/2
5/8
1/2
3/4
1/2
7/8
5/8
1 1/8
5/8
1 1/8
5/8
1 1/8
3/4
1/2
5/8
1/2
3/4
1/2
7/8
5/8
1 1/8
5/8
1 1/8
3/4
1 1/8
3/4
7/8
7/8
7/8
1 1/8
1 1/8
1 1/8
1 1/8
1 1/8
5/8
5/8
5/8
5/8
3/4
3/4
3/4
3/4
CM-X-100
7/8
1 1/8
1 1/8
1 1/8
1 1/8
1 1/8
1 3/8
1 3/8
* Based on pressure drops of 4 PSI on hot gas line and 3 PSI on liquid line.
NOTE: Long indoor tube runs may vibrate and may thus transfer noise to the structure. Discharge mufflers
(by others) on hot-gas lines may be necessary to reduce such noise. Where noise is objectionable, tubes
should be supported by vibration-damping clamps (by others) or other suitable devices.
3/4
3/4
3/4
3/4
3/4
3/4
7/8
7/8
INSTALLATION
Ecosaire
Data subject to change without notice.
®
July 2007 27
Page 28
Ecosaire®CM Series Precision Air Conditioner Owners Manual
Installation Piping Refrigerant Tube
Air-Cooled Direct-Expansion and Air-Cooled DualCool Units Only
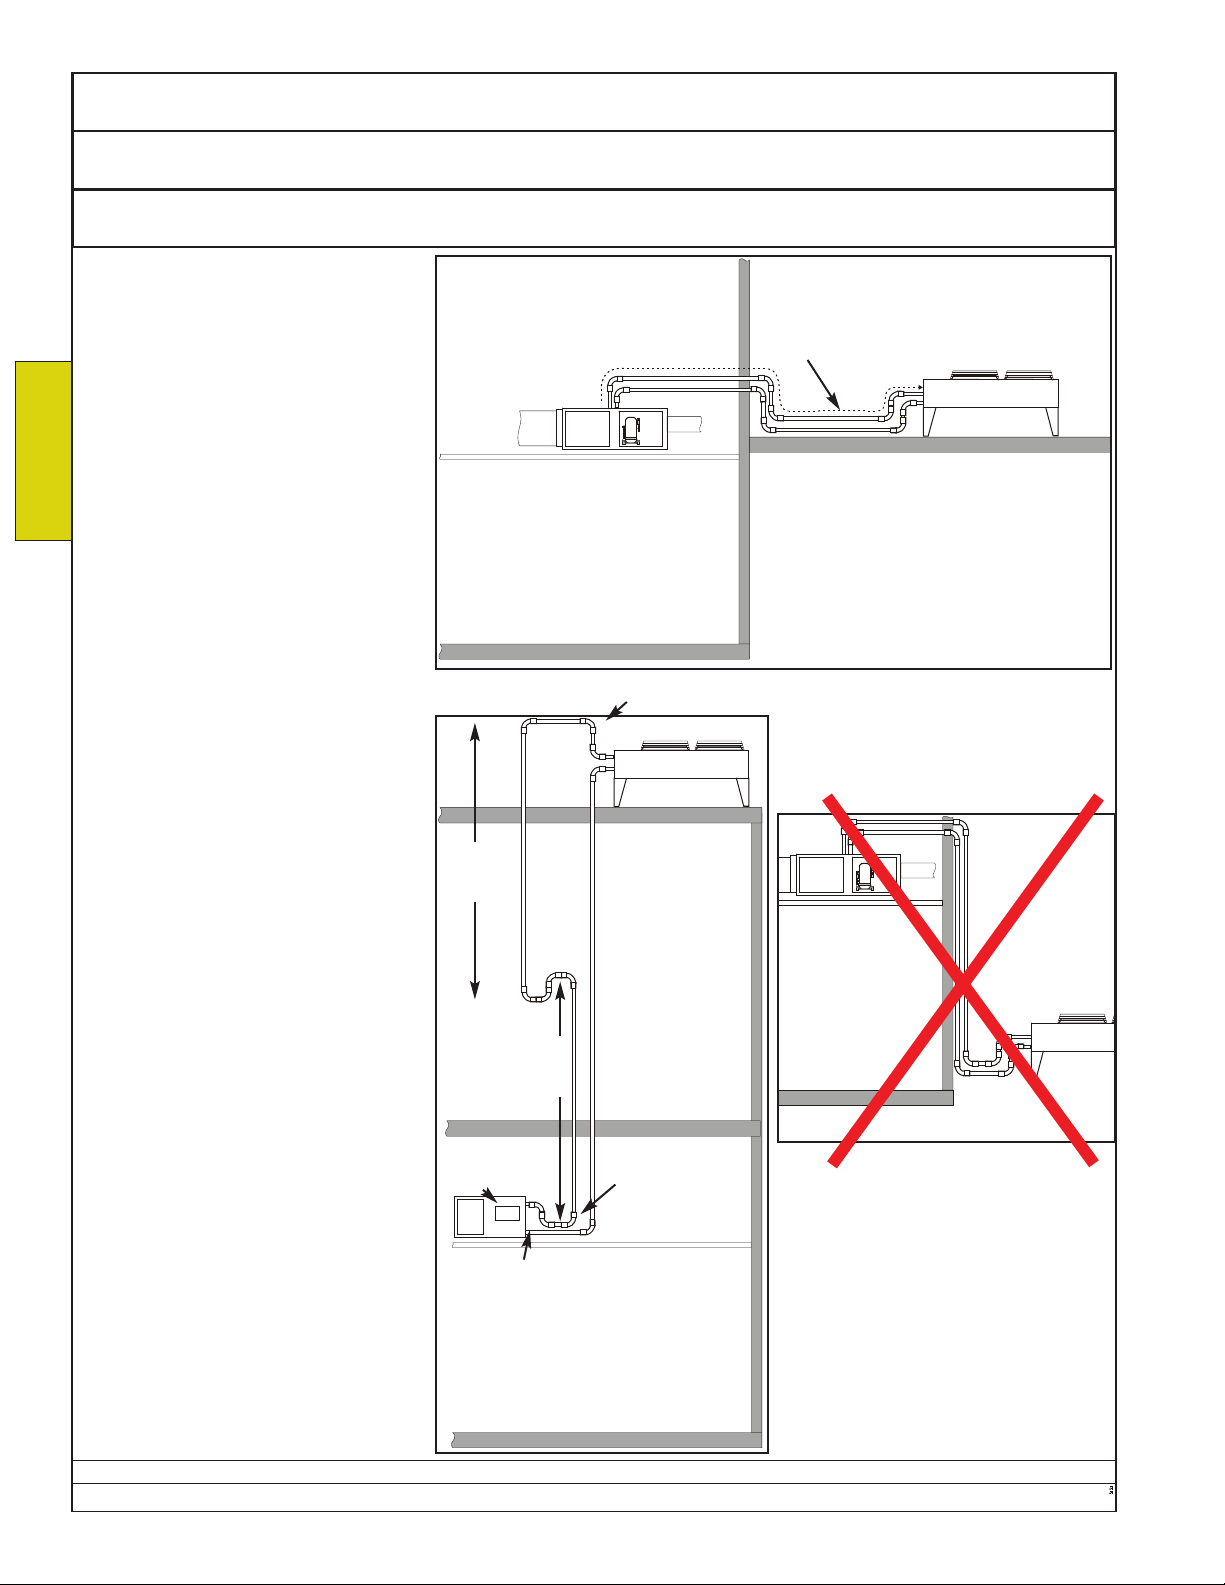
IMPORTANT:
Cut tubes as necessary using a tube-
cutter only. DO NOT use a saw.
Never apply heat to a refrigerant line
until all pressure has been released -
INSTALLATION
unsafe pressures could result, causing
violent explosion and serious personal
injury or death. Be sure the area is
well ventilated.
Air-cooled systems must be installed
by qualified refrigeration technicians,
using industry-standard practices.
Dectron assumes no responsibility
for improper installations or for the
results of failure to follow instructions
in this manual.
IMPORTANT:
The total length of tube one way
must not be greater than 100 ft. (30
m). The total equivalent length must
not be greater than 150 ft. (45 m).
The remote condenser must not be
located below the Ecosaire® unit.
IMPORTANT:
Never allow dirt or other foreign
materials to enter the remote condenser or the tubes connecting it to
the Ecosaire® unit. Foreign material
may damage valves and other components.
If the inside of the tubes is contaminated with dirt, oil, sludge, rust, or
other materials, then they must be
thoroughly cleaned.
IMPORTANT:
Never allow liquid water to enter the
remote condenser or the tubes connecting it. Water must be removed
from the remote condenser and the
tubes that connect it to the
Ecosaire®. Evacuation will take
much longer if liquid water is present.
15 ft
or
less
15 ft
less
Ecosaire
unit
Install an access valve in the liquid
tube near the Ecosaire unit.
Ecosaire
CM
inverted P-trap
Remote Condenser
The total vertical rise
must not exceed 30 feet.
P-traps must be installed
in the hot-gas riser tubes to
break up the lift into segments of not more than 15ft.
Tube sizes appear on next
page.
The total length of tube
must not exceed 100 feet
one way.
The total equivalent
length of tube must not
exceed 150 feet one way.
or
P-trap
Total length of tube not to exceed 100 ft one
way.
Horizontal runs of the hot-gas tube should
slope downward 1/4” per 10 ft in the direction
of flow.
Remote Condenser
Use clean and dry type ACR tube only.
Ecosaire
CM
Data subject to change without notice.
28 Ecosaire
®
July 2007
Page 29
Owners Manual Ecosaire®CM Series Precision Air Conditioner
Calculate Refrigerant Charge Piping Installation
Air-Cooled Direct-Expansion and Air-Cooled DualCool Units Only
For options, see Product Description - Model Designation Chart.
Note: Water- and Glycol-cooled units are shipped with a full refrigerant charge.
The necessary refrigerant charge is made up of three parts - that required to fill the unit, that required to fill the
liquid line, and that required to fill the remote condenser.
Abbreviations:
HGBV = hot-gas bypass valve
TFC = thermostatic fan cycling
FSC = fan speed control
HM = headmaster
INSTALLATION
Ecosaire Unit
with without
HGBV HGBV
Model (lb.) (lb.)
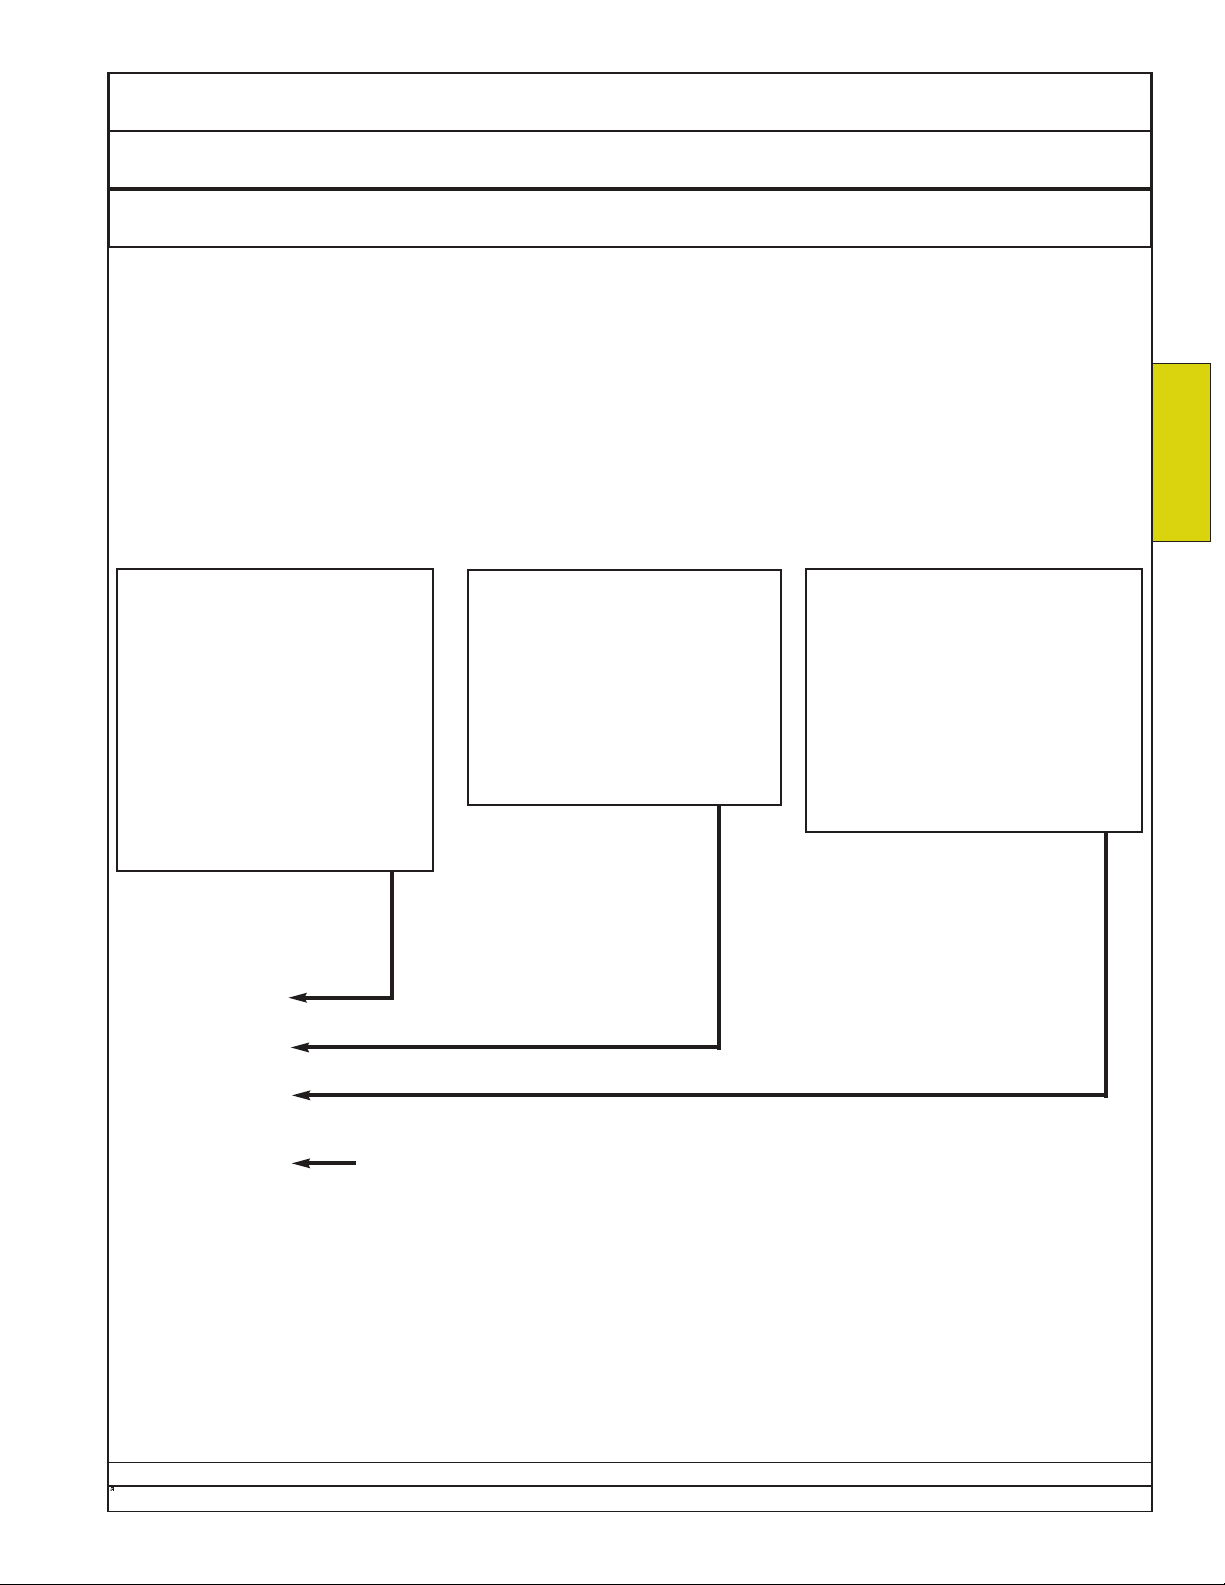
CM010 1.5 1.0 =______
CM015 1.5 1.0 =______
CM020 3.0 2.0 =______
CM030 4.5 3.0 =______
CM050 6.5 4.5 =______
CM070 7.5 5.0 =______
CM080 15.0 10.0 =______
CM100 15.0 10.0 =______
____
+ ____
+ ____
_________
Liquid Line
O.D. lb./ length
(in.) (ft.) (ft.)
3/8 0.04 X _____ = ______lbs.
1/2 0.08 X _____ = ______lbs.
5/8 0.13 X _____ = ______lbs.
3/4 0.20 X _____ = ______lbs.
7/8 0.26 X _____ = ______lbs.
Condenser
TFC HM
FSC
(lb.) (lb.)
DCM18 3.3 11.0 = _____
DCM25 4.9 16.0 = _____
DCM28 6.5 22.0 = _____
DCM32 6.3 21.0 = _____
DCM39 9.5 31.0 = _____
Total _____
Example:
A CM050 with hot-gas bypass has a DCM18 remote condenser with thermostatic fan cycling.
They are connected with 60 feet of 1/2” O.D. liquid line. The required amount of R-22 is
6.5 lb + (0.08 lb/ft X 60 ft) + 3.3 lb = 14.6 lb.
®
Ecosaire
July 2007 29
Add this much R-22 (by others).
Data subject to change without notice.
Page 30
Ecosaire®CM Series Precision Air Conditioner Owners Manual
Installation Piping Refrigerant-Tube Joining
Air-Cooled Direct-Expansion and Air-Cooled DualCool Units Only
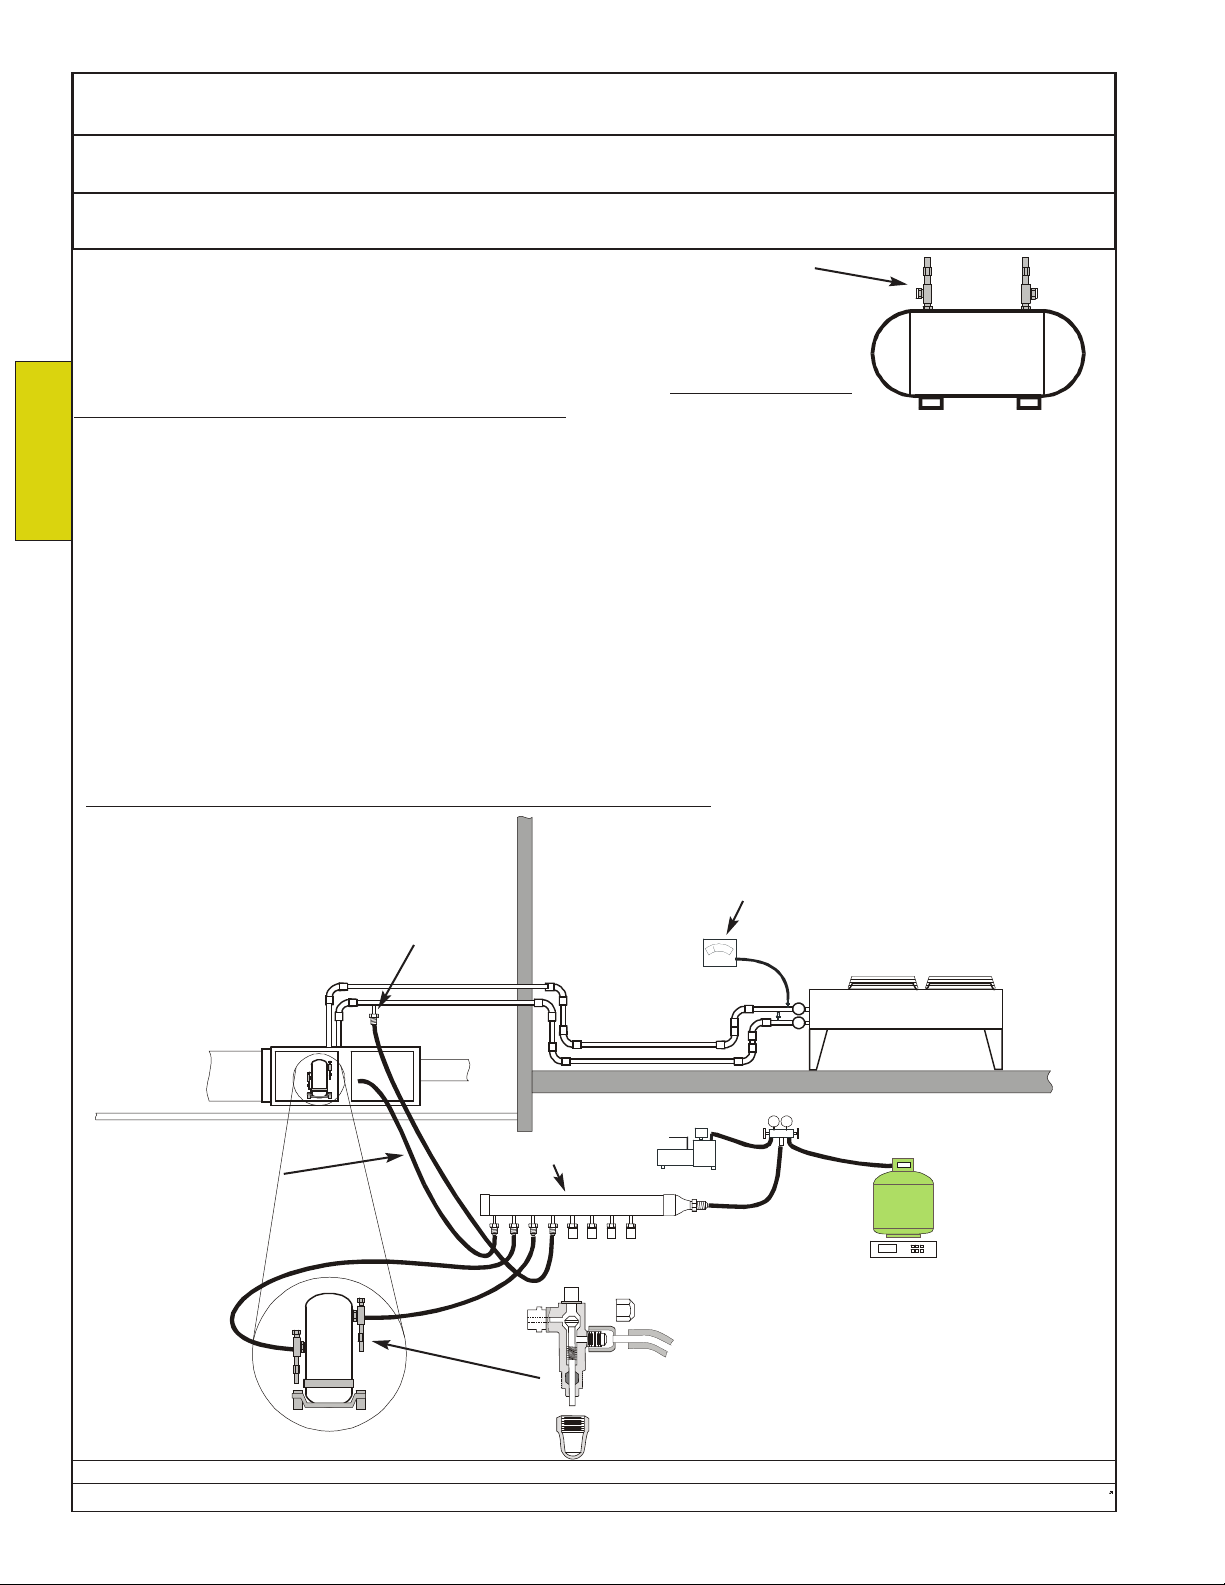
After eliminating all leaks, locate the refrigerant receiver in the remote condenser
unit. Open the rotalock valves on the receiver.
Open the compressor service valves (if any) to the access (middle) position. The
INSTALLATION
Ecosaire® unit, condenser, and tubes must be evacuated to a pressure below 500
microns of mercury as measured by an electronic vacuum gauge. Compound gauges
as found on refrigeration manifolds are inadequate.
IMPORTANT!
Under no circumstances use the compressor as a vacuum pump or apply power to a compressor under
vacuum. Damage to the motor windings will result.
Connect a good set of refrigeration service gauges, an electronic micron-level vacuum gauge, and a vacuum pump
as shown below. Use core-removal adapters to remove the cores from Schraeder-type access valves.
To insure a correct vacuum reading, install the electronic vacuum gauge far away from the vacuum pump
or use a reliable vacuum valve to isolate the gauge and system from the pump while reading the vacuum.
Colder ambient temperatures require longer evacuation times. Allow enough time at low pressures to remove any
water from the tubes. The triple-evacuation method can be helpful.
After proper evacuation, break the vacuum with vapor refrigerant until a positive pressure is reached.
Replace the access valve cores and remove the adapters.
Close the compressor rotalock valves.
Add the specified weight and type of refrigerant (by others), as calculated on previous page, through the high-
pressure access valve.
DO NOT put liquid refrigerant into the low-pressure access valve.
essential electronic
evacuation gauge
liquid-line access valve
added previously
(by others)
(by others)
SAMPLE
Number and location of
components may vary.
hose (by others) to
hot-gas-tube access
valve
SAMPLE
may vary.
Number, location, and
appearnce of components
Data subject to change without notice.
30 Ecosaire
evacuation manifold
(by others)
Open compressor
rotalock valves to
access position during
evacuation.
®
July 2007
Page 31
Owners Manual Ecosaire®CM Series Precision Air Conditioner
Piping Installation
Air-Cooled Direct-Expansion and Air-Cooled DualCool Units Only
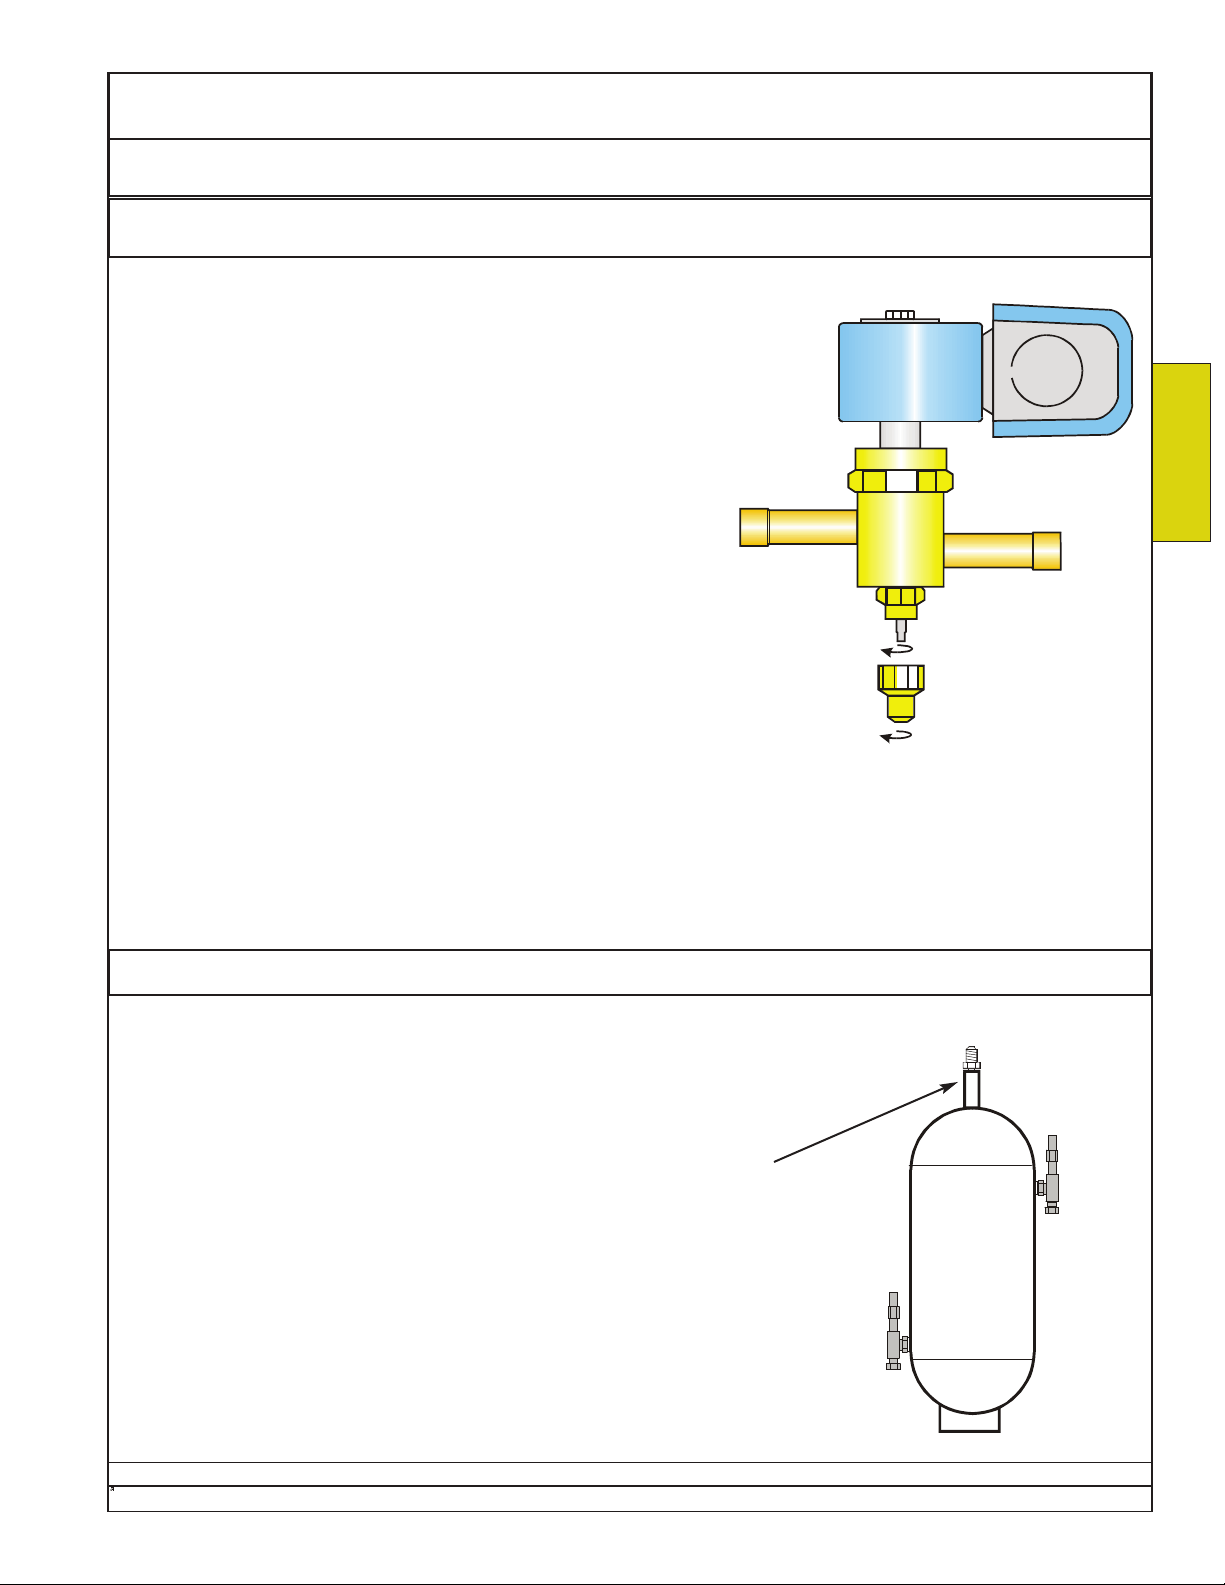
Release the liquid-line solenoid valve from the locked-open
position by turning the manual stem counter-clockwise all the
way.
Replace and tighten the stem cap.
INSTALLATION
SAMPLE
may vary.
Number, location, and
appearnce of components
Water-Cooled Direct-Expansion, Water-Cooled DualCool, and FreeCool Units Only
Water-Cooled Direct-Expansion, Water-Cooled DualCool, and FreeCool
Units are shipped with refrigerant. Note the amount from the unit nameplate.
Some applications may require that the relief-valve outlet be
routed outdoors. In this case:
Locate the refrigerant receiver inside the air-handler unit. The relief
valve is on top of the receiver.
Attach a suitably-sized tube to the relief-valve outlet, taking care not to
damage the relief valve. Use mechanical connectors only, do not sweat
or braze.
Route the tube through a cabinet knockout near the water or
glycol tubes, and to a suitable point of release.
Ecosaire
Data subject to change without notice.
®
July 2007 31
Page 32
Ecosaire®CM Series Precision Air Conditioner Owners Manual
Installation Piping Water
Water-Cooled Direct-Expansion and Water-Cooled DualCool Units Only
IMPORTANT:
Contact the factory before using
a flow rate or temperature outside the ranges in the chart
INSTALLATION
below.
IMPORTANT:
Never allow dirt or other foreign
materials to enter the tubes connecting to the
Ecosaire®unit. Foreign
material may cause damage to
valves and other components.
If the inside of the tube is contaminated with dirt, oil, sludge, rust, or
other materials, then the pipes must
be thoroughly cleaned.
Where connection must be made
to metal tube other than copper
tube, install a dielectric union
between the different tubes to
reduce corrosion.
If tubes are silver-soldered, the
inside of the tube must be
protected from oxidation by
flooding the tube with an inert
gas such as nitrogen, argon, or
carbon dioxide. Silver soldering
copper tubes with air inside will produce a flaky copper oxide scale that
can contaminate the system and
damage components.
If flux must be used, use only
enough flux to solder. Excess flux
can contaminate the heat transfer
fluid.
IMPORTANT:
Constant water flow is essential.
All pumps, cooling towers, fans,
etc., involved in cooling the water
must be enabled whenever the
Ecosaire®unit is operational. Do
not allow a timer or other device
to inhibit operation at any time
the Ecosaire®unit is operational.
IMPORTANT:
Cooling water must be
protected from freezing if the
water flow could be interrupted
during low ambient temperatures.
Water-Pressure Switch
The flow-pressure switch must be
adjusted at installation. Adjust the
switch to close as the flow rate
approaches normal and to break as
the flow rate decreases to less than
1/2 of normal.
Condenser water pipes must be
sized to deliver the required condenser water flow. Pipe size is
determined by the available water
pressure, pressure drop within the
pipe and unit, length of run, maximum velocity, maximum water temperature and flow requirements.
The table below lists the flow
requirements over a 65°F to 85°F
temperature range.
Connection sizes and locations
are shown on the unit dimensional
drawings.
The inlet header is connected to
the water regulating valves which
feed the top of the condensers.
The outlet header connects to the
bottom of the condensers.
To prevent condensation on the
pipes, insulate them if the water
temperature is likely to drop below
room-air dew point.
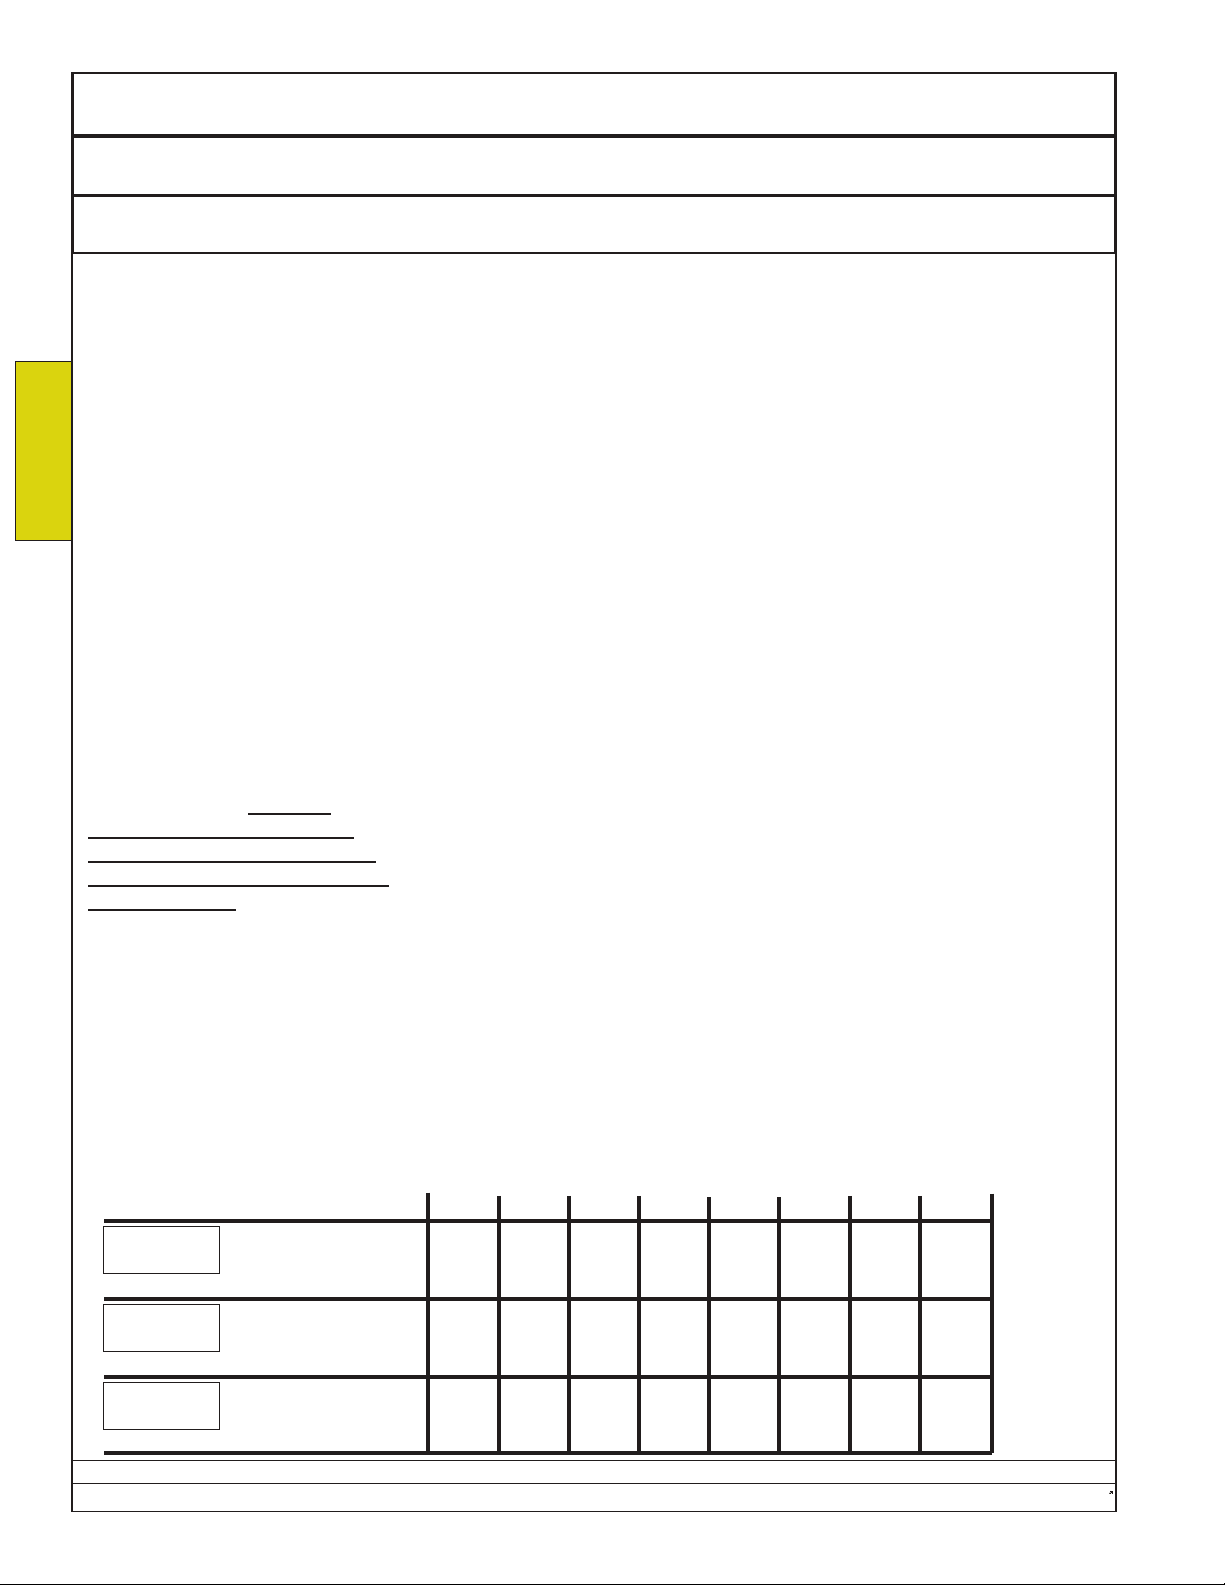
Model
CM010
85°F Entering
Water Temp.
75°F Entering
Water Temp.
65°F Entering
Water Temp.
Data subject to change without notice.
32 Ecosaire
Flow (GPM)
Pressure Drop (ft.W.C.)
Pressure Drop (PSI)
Flow (GPM)
Pressure Drop (ft.W.C.)
Pressure Drop (PSI)
Flow (GPM)
Pressure Drop (ft.W.C.)
Pressure Drop (PSI)
4.0
4.1
1.8
4.0
6.4
2.8
3.9
12.2
5.3
CM015
4.7
4.6
2.0
4.7
7.4
3.2
4.6
11.7
5.1
CM020
6.3
3.0
1.3
6.3
6.0
2.6
6.2
11.7
5.1
CM030
9.1
6.4
2.8
9.0
6.4
2.8
8.9
6.4
2.8
CM050
17.1
17.3
7.5
17.1
17.3
7.5
16.9
17.3
7.5
CM070
25.0
17.5
7.6
25.0
17.5
7.6
24.9
17.5
7.5
CM080
27.1
11.2
4.9
27.0
19.1
8.3
27.0
19.1
8.3
CM100
29.8
10.0
4.4
29.7
17.3
7.5
29.7
17.3
7.5
®
July 2007
Page 33
Owners Manual Ecosaire®CM Series Precision Air Conditioner
Glycol Piping Installation
Glycol-Cooled Direct-Expansion, Glycol-Cooled DualCool, & FreeCool Units Only
On the remote
DryCooler, mount the
pump to its mounting plate
and mount the asembly
between the cooler legs.
An installer trained in
the application of closedloop systems should perform glycol-pipe size
selection. Improper pump
and/or glycol pipe selection can result in excessive noise, inadequate
solution flow or premature
pipe and pump impeller
erosion.
Glycol piping should be
installed according to
standard practice. The
factory-supplied expansion tank should be
installed upstream of the
pump. The air purger and
automatic float-type air
vent should be installed
downstream of the pump ideally at the system high
point. If not, manual or
automatic air vents must
be installed at the high
point along with the fill
funnel. Air vents must
upward in the direction of
flow to prevent trapping
air.
Insulate the pipes where
they run through conditioned spaces if the water
temperature is likely to
drop below room-air dew
point.
Install temperature
gauges (or wells), pressure gauges, valves, and
pipe unions according to
the factory piping diagrams.
Install a fill port at the
highest point of the system. To insure proper glycol/water ratio, never use
automatic fillers.
Where copper tubing
(use Type L only) is used,
joints should be hard soldered.
The inlet header is connected to the top of the
condensers and the outlet
header to the bottom.
FreeCool units include
head-pressure-controlled
glycol regulating valves at
the inlet connections.
also be installed anywhere
air can be trapped in the
system. All horizontal piping runs should be pitched
Flow Rate (40% Glycol, 95°F) (GPM)
Pump Horsepower
Pump Head (ft W.C.)
Pump Head (PSI)
Ecosaire unit Pressure Drop (ft. W.C.)
Ecosaire unit Pressure Drop (PSI)
Glycol Cooler Pressure Drop (ft. W.C.)
Glycol Cooler Pressure Drop (PSI)
Available Head (ft. W.C.)
Available Head (PSI)
Data subject to change without notice.
®
Ecosaire
July 2007 33
Fill port at highest point.
Expansion tank and air separator
SAMPLE
Number and location of
components may vary.
Fill port at
highest point.
SAMPLE
Number and location of
components may vary.
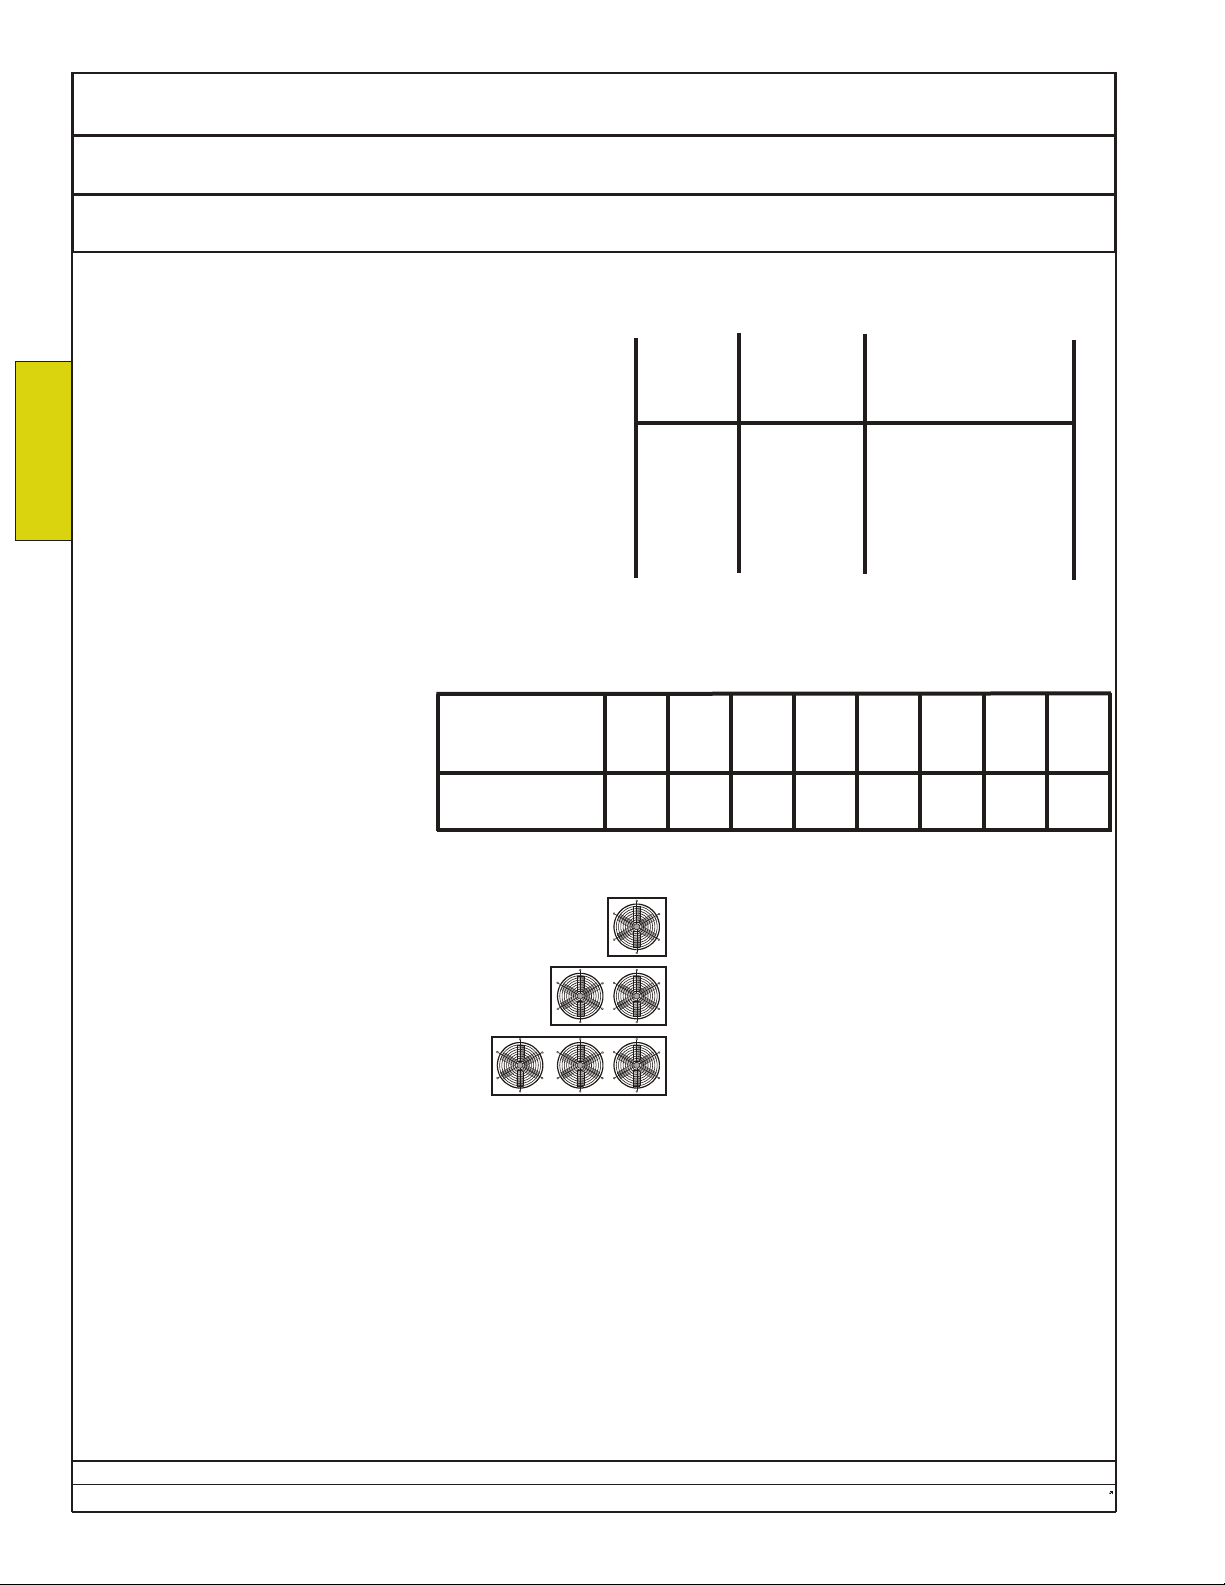
Model
CM010
CM015 CM020 CM030 CM050 CM070 CM080 CM100
5.0 6.5 8.7 9.5 17.7 26.5 37.2 42.0
0.5 0.5 0.5 1 1.5 1.5 1.5 1.5
80 78 76 69 75 73 80 78
34.8 33.9 33.0 30 33 32 34.8 33.9
4.8 18.6 5.3 9.9 15 12.9 20.9 24.2
2.1 8.1 2.3 4.3 6.5 5.6 9.1 10.5
7.1 8.1 4.6 5.8 11.7 9.0 6.9 8.5
3.1 3.5 2.0 2.5 5.1 3.9 3.0 3.7
68.1 51.3 66.1 53.4 49.2 51 52.2 45.3
29.6 22.3 28.7 23.2 21.4 22 22.7 19.7
Glycol Cooler
INSTALLATION
Pump
Page 34
Ecosaire® EC Series Precision Air Conditioner Owners Manual
Installation Piping Glycol Filling
Glycol-Cooled Direct-Expansion, Glycol-Cooled DualCool, & FreeCool Units Only
After all piping connections have
been completed, the system should
be leak tested by pressurizing it with
INSTALLATION
air to approximately 50 psig. Check
each joint with soap solution or perform a pressure-drop vs. time test.
After testing, the system can be
charged with the glycol/water mixture.
First, determine the proper water-toglycol mixture to provide adequate
freeze protection in your area. This
may already have been determined
by a consulting engineer. Do not
exceed the recommended glycol concentration for your area since
increased concentrations reduce heat
exchange efficiency. These concentrations and corresponding freeze
temperatures are listed in the table
included here.
IMPORTANT!
Use only an inhibited ethylene
glycol suitable for HVAC applications, such as Dowtherm SR-1 or
equivalent. DO NOT use automotive antifreeze since it may damage components.
All glycol-cooled and FreeCool
data is based on forty-percent glycol by volume.
If possible use a pre-mixed
glycol/water solution. Where this is
not possible, mix the solution by volume in a clean non-galvanized container.
Open the fill valve and all air vents,
including the petcocks at the top of
the FreeCool coils on the right-hand
side of the unit. The pipe plugs on
the pump impeller housing and at the
top of the room unit inlet and outlet
headers should be carefully loosened
to permit air to escape. Do not
remove the plugs since they can be
GLYCOL SOLUTIONS
Glycol-Cooled
or Free-Cool
Model No.
Room Unit
Expansion Tank
Percent
Ethylene
Glycol
0
10
20
30
40
50
UNIT INTERNAL VOLUMES (GALLONS)
CM
010CM015CM020CM030CM050CM070CM080CM100
0.19
0.17
1.0
1.0
Solution
Freezing
Point (°F)
0.21
Glycol-Cooler Internal Volumes
DDM18 - 2.0 Gallons
DDM28 - 4.1 Gallons
DDM32 - 4.1 Gallons
DDM39 - 5.8 Gallons
DDM63 - 8.5 Gallons
DDM70 - 8.5 Gallons
difficult to replace once glycol reaches the port. The core of the access
valve on the glycol-cooler inlet header must be held open or temporarily
removed.
Pour the glycol mixture into the sys-
tem fill port until full.
1.0
32
25
16
-11
-33
0.25
4
1.0
Gallons of Water
Per Each Gallon
of Ethylene Glycol
All Water
9.0
4.0
2.3
1.5
1.0
0.33
0.39
1.0
0.43
1.0
1.0
0.51
1.0
Data subject to change without notice.
34 Ecosaire
®
July 2007
Page 35
Owners Manual Ecosaire®CM Series Precision Air Conditioner
Chilled-water Piping Installation
Chilled-Water and DualCool Units Only
Chilled Water
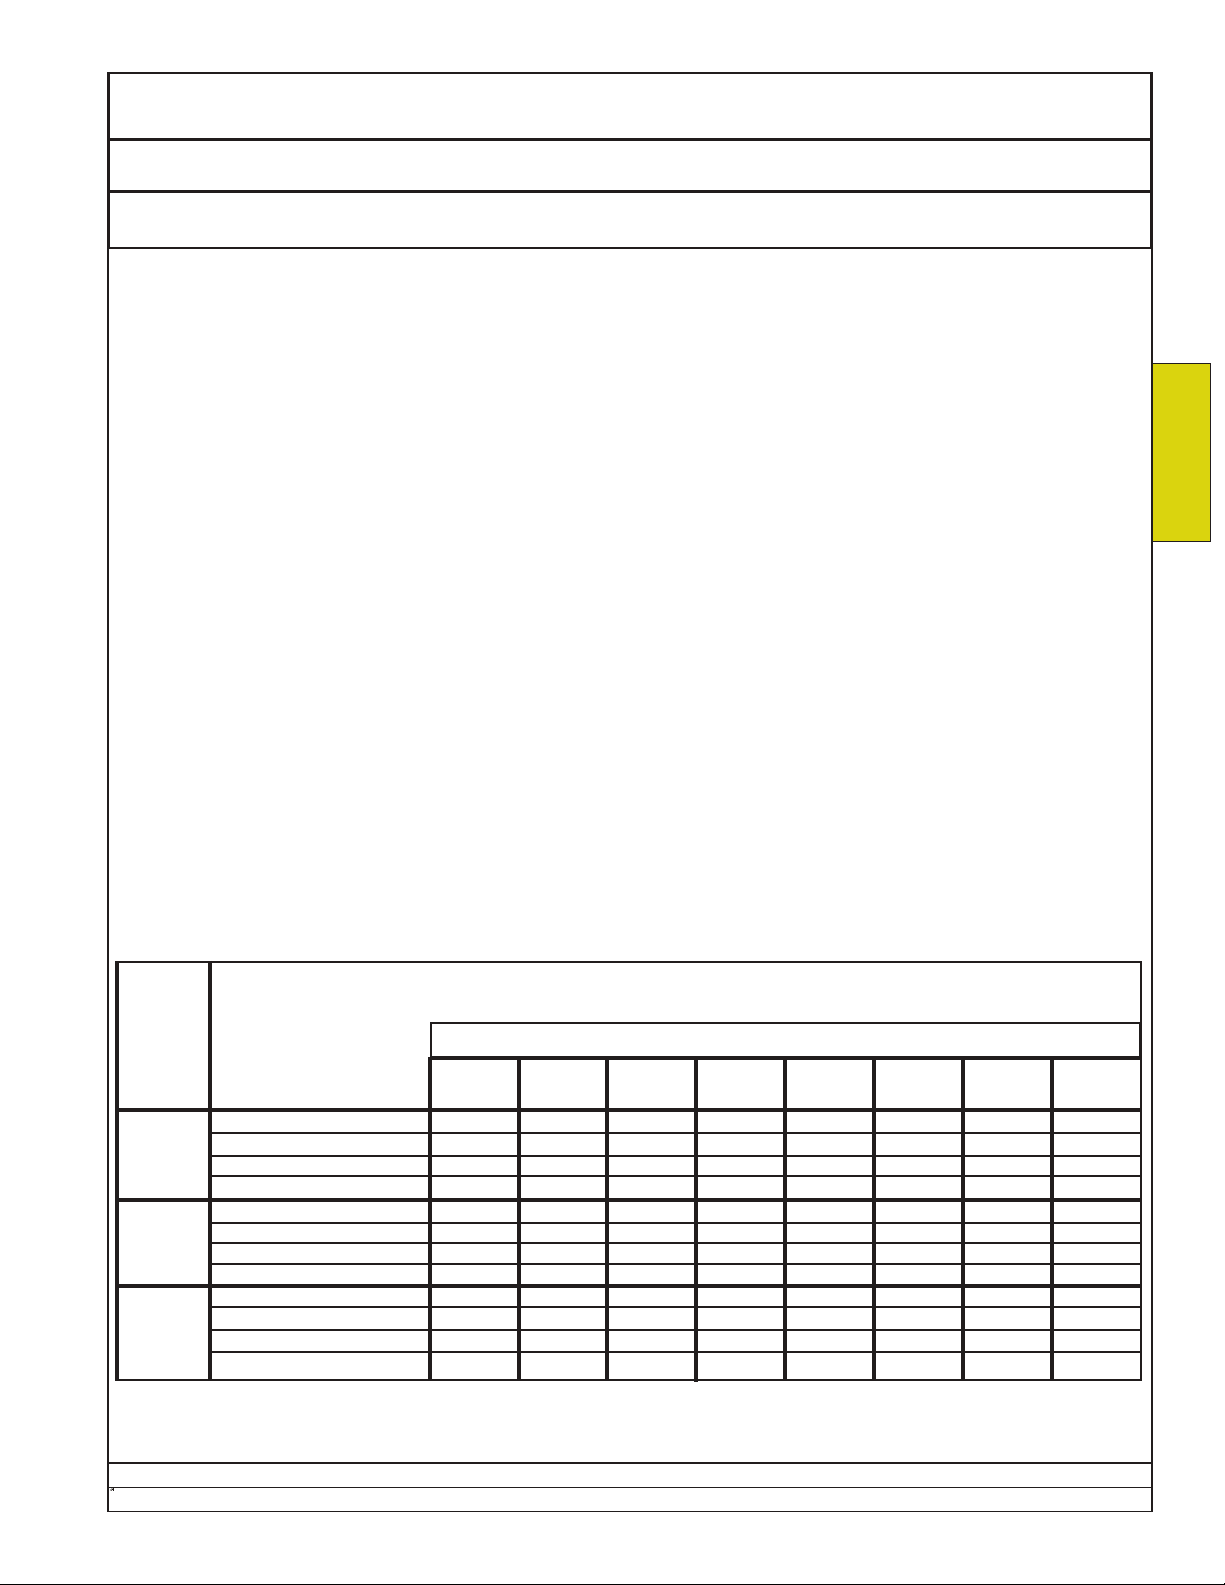
Chilled-water piping must be sized to deliver the required water flow. Pipe size is determined by the available
water pressure, pressure drop within the pipe and unit, length of run, maximum velocity, water temperature and
flow requirements. See the table for capacity and flow-rate data for 45°F entering water at typical computerroom conditions.
Chilled-water connections are FPT and are the same size as the chilled-water valve for both the inlet and outlet. A shut-off valve (by others) should be installed on the the inlet and outlet line.
Insulate the chilled-water lines where they run through conditioned spaces if the water temperature is likely to
drop below the space dew point.
INSTALLATION
Space
Conditions
80°F. DB
50% RH
75°F. DB
50% RH
72°F. DB
50% RH
®
Ecosaire
WATER FLOW DATA
at 45°F Entering Water Temperature
Chilled Water Model No.
CM010 CM015 CM020 CM030 CM050 CM070 CM080 CM100
Flow Rate (GPM)
Pressure Drop (PSI)
Pressure Drop (ft. W.C.)
Flow Rate (GPM)
Pressure Drop (PSI)
Pressure Drop (ft. W.C.)
Flow Rate (GPM)
Pressure Drop (PSI)
Pressure Drop (ft. W.C.)
July 2007 35
5.4
12.0
27.7
3.8
6.8
15.7
2.8
3.7
8.6
6.9
11.6
26.6
4.6
5.3
12.1
3.5
3.8
8.7
8.8
15.6
35.9
6.3
8.4
19.3
4.2
3.8
8.8
11.9
4.7
10.8
8.3
2.4
5.5
6.8
1.8
4.1
22.7
10.5
24.2
16.0
5.3
12.2
13.0
3.6
8.3
31.9
11. 7
26.9
22.7
7.1
16.3
18.5
4.9
11. 3
Data subject to change without notice.
39.4
6.9
15.8
28.8
4.5
10.3
21.0
2.9
6.7
48.0
9.9
22.7
33.0
5.7
13.0
26.0
3.6
8.3
Page 36
Ecosaire®CM Series Precision Air Conditioner Owners Manual
J
•
•
•
•
•
Installation Wiring Power
IMPORTANT!
Before working on this or any
electrical equipment, disconnect
all electrical power. Failure to
do so may result in serious personal injury or death due to
INSTALLATION
accidental electrical shock.
The branch-circuit conductors
should be brought through the unit
cabinet to the high-voltage terminal
strip or factory-mounted disconnect
switch.
Wiring for the unit and remote
heat exchanger (if any) should
comply with applicable codes.
Important!
Always cover the electrical
components with plastic sheet
before drilling or sawing the
electrical enclosure. Do not
allow metal chips to fall into the
enclosure.
Important!
Use only copper conductors to
connect the unit. The power
input lugs are not sized for use
with other conductors. THE USE
OF OTHER THAN COPPER CONDUCTORS WILL VOID THE
EQUIPMENT WARRANTY. For
units with factory-supplied disconnects, follow instructions
inside the disconnect.
Important!
Ground the unit using the
grounding lug provided.
Important!
For
Air-Cooled Direct Expansion,
Glycol-Cooled Direct-
Expansion,
Air-Cooled DualCool,
Glycol-Cooled DualCool, and
FreeCool units
refer to the remote heatexchanger manual.
Wire the remote heat
exchanger according to the
wiring diagram provided with it.
Insure that the fan motors turn
in the correct direction.
Use properly sized wire
Refer to the unit nameplate for
electrical ratings. Size wires
according to applicable codes, with
allowance for voltage drops. Unit
terminal voltage should be nominal
±10% under all conditions, including compressor starting.
Insure phase rotation
All the motors in the unit are connected for the same phase rotation. Be sure the phase rotation is
correct before completing the
installation. Do not move any
factory-installed wires.
NOTE: The blower running direction can be used to test phase
rotation.
Insure phase voltage
The Ecosaire® unit complies with
NEMA MG-1 and other standards
for applied voltage. The applied
voltage should be within ±10% of
the nominal voltage shown on the
nameplate. See ANSI C84.1.
Phase voltages should be balanced within 2%.
208V units
A minimum of 187V at the compressor terminals is required for
compressor starting (see NEMA
MG-1). Allow for voltage drop
under inrush current conditions.
Connect input power as indicated.
Use copper wire only. Torque all connectors per NEC 110-14 or relevant code.
Position of power lugs may vary.
Some Ecosaire®units may have optional
voltage monitors that prevent operation in the
event the branch circuit has voltage that is too
high, too low, has lost a phase, or has reversed
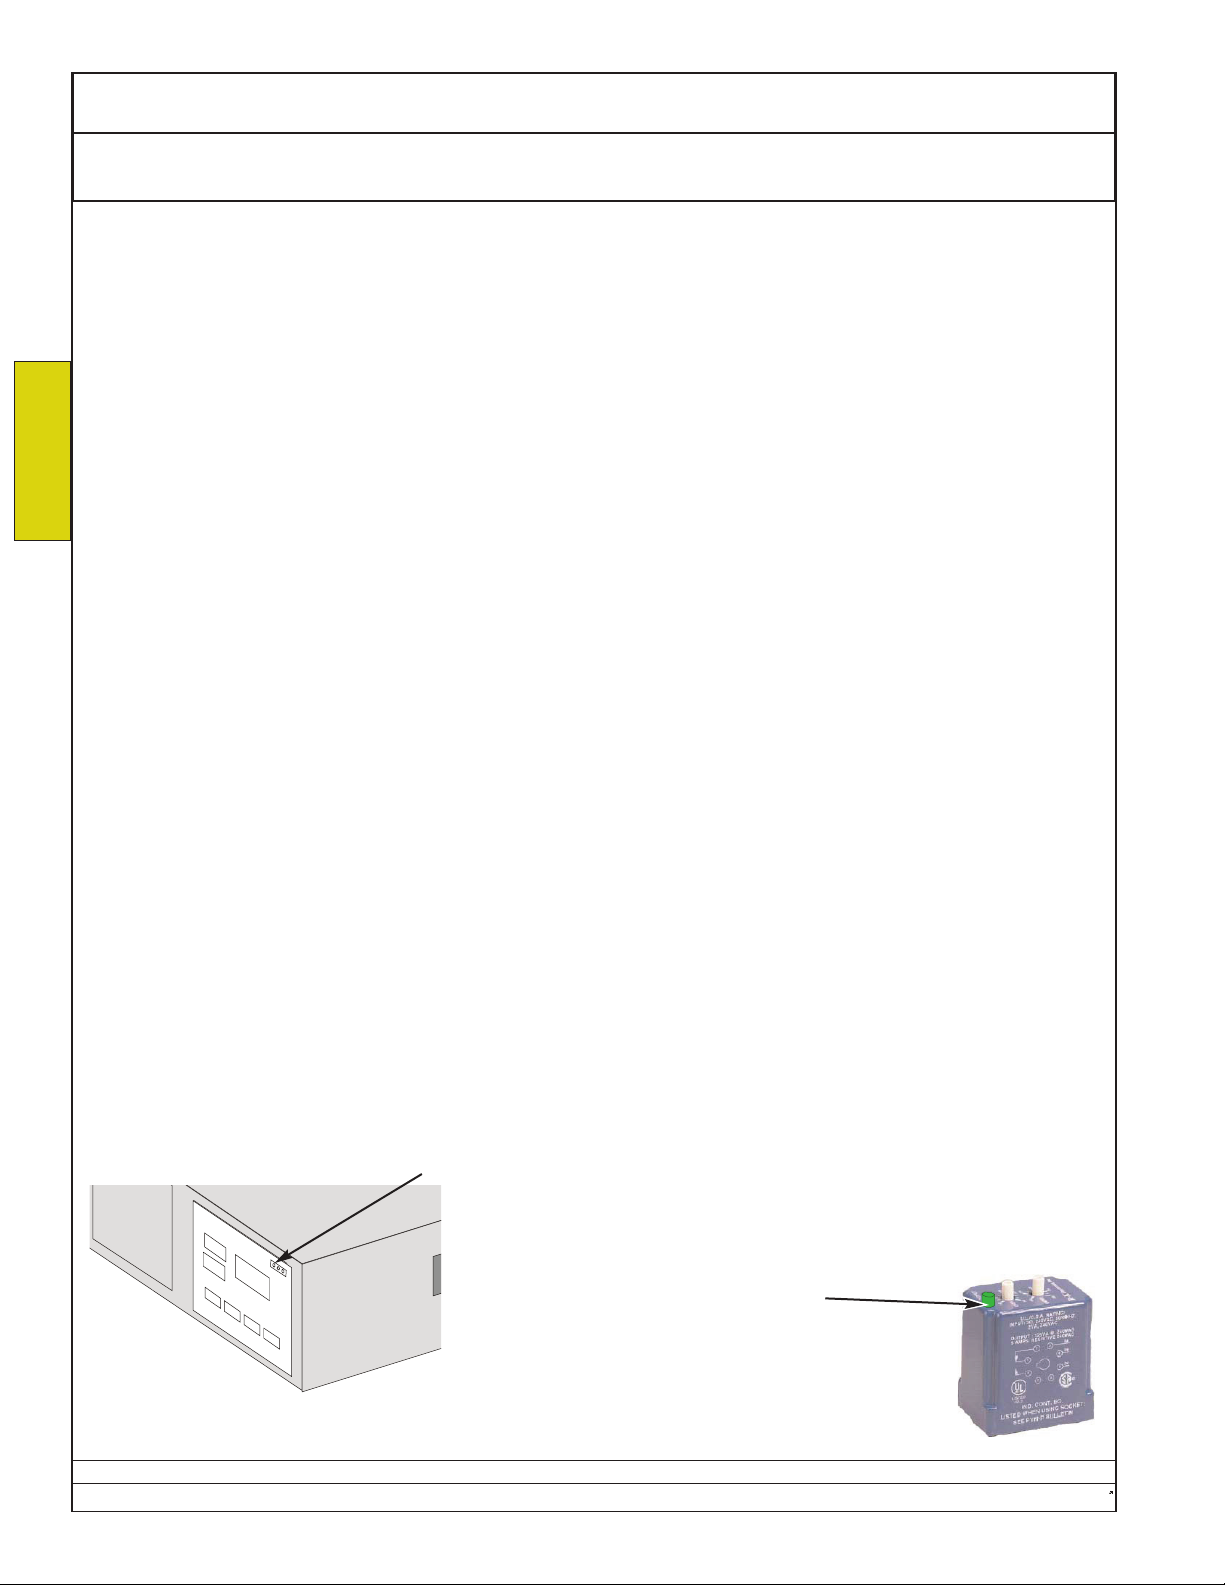
phase rotation. If the green LED
is not lit when power is appied to the unit, confirm that the applied voltage is within ±10% of
SAMPLE
Number and location of
components may vary.
Data subject to change without notice.
36 Ecosaire
the nameplate voltage (NEMA MG-1), that all
three phases are present, and that the phase
rotation is correct.
®
July 2007
Page 37
Owners Manual Ecosaire®CM Series Precision Air Conditioner
Power Wiring Installation
Remote Condensers and Heat Exchangers
Select branch-circuit voltage from the condenser nameplate data.
Select branch-circuit conductors from the condenser nameplate
data.
Connect the conductors as shown. Note that L3 will not be pres-
ent on single-phase condensers.
Single-phase motors inherently turn the correct direction. A three-
phase branch circuit must be tested for proper motor rotation.
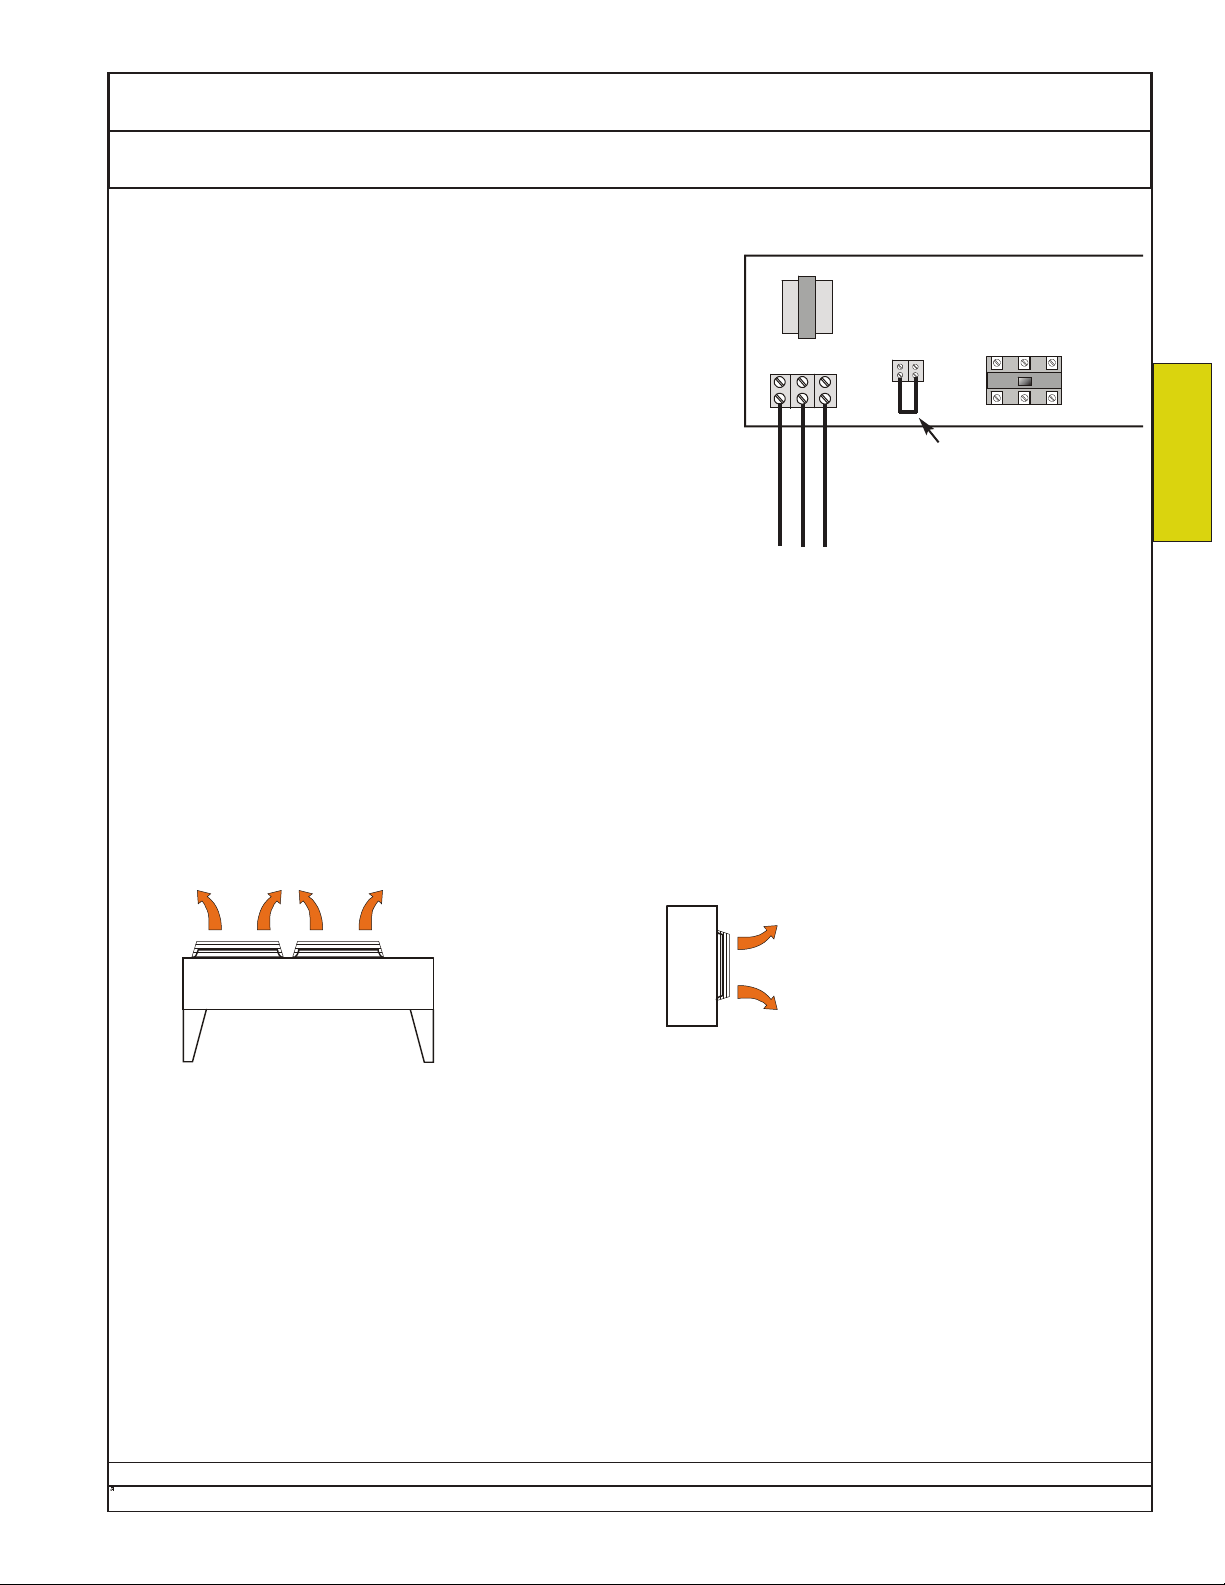
1. Temporarily connect a jumper across the enable contacts as
shown.
2. Apply electric power to the branch circuit connected to
terminals L1, L2, and L3.
3. If the fans do not blow air in the proper direction (see below)
a) disconnect electric power, following all safety precautions
b) a qualified person should interchange any two branch
circuit conductors.
DO NOT CHANGE ANY FACTORY WIRES.
c) return to step 2.
4. If the fans blow air in the proper direction (see below) then
a) disconnect electric power
b) remove the temporary jumper.
L1
L2
L3
L2
L1
Enable
L3
(if any)
SAMPLE
Number and location of
components may vary.
temporary
jumper
INSTALLATION
Proper air-flow direction for vertical-flow Proper air-flow direction for horizontal-flow
Ecosaire
Data subject to change without notice.
®
July 2007 37
Page 38
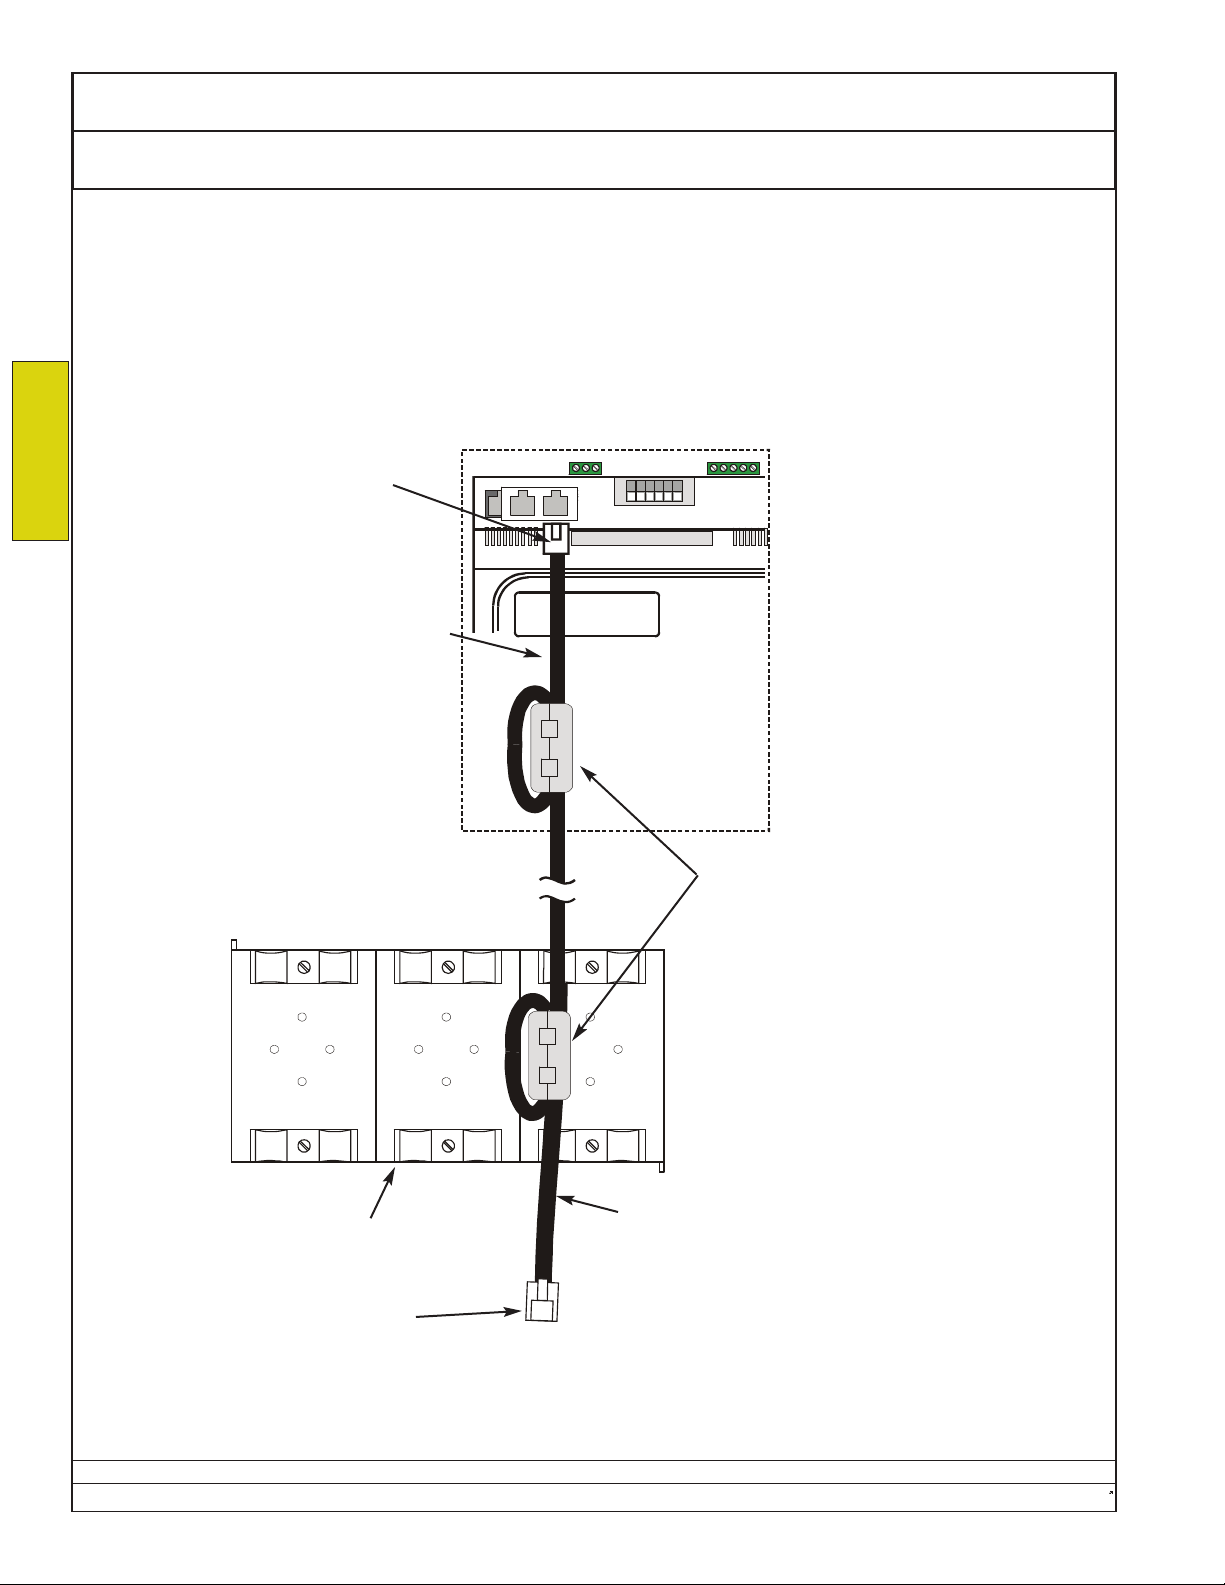
Ecosaire®CM Series Precision Air Conditioner Owners Manual
J11
J12
Expansio n Memory
J9 J10
C1
Rx-/Tx-
NO1
Rx+/Tx+
NO2
GND
NO3
C1
Installation Wiring Control Wiring
Optional Remote Display Note: Cables may be supplied by Dectron, depending on options.
The communication system between the controller and the remote display (if any) is based on ANSI/IEEE RS-
485. For best results, proper RS-485 wiring and splicing methods should be used. These include, but are not limited to the use of shielded RS-485 cable (Z0=120Ω, e.g. Belden 7202A), the use of connectors rated for RS-485,
minimized untwist of conductors, etc.
In some cases, shorter lengths of cable may allow approximations to RS-485 methods. These methods are
INSTALLATION
shown on the folowing pages. Methods for longer cables will work for shorter cables also.
For cable lengths not exceeding 160 ft (50m) -
Insert 6P6C modular telephone
plug (by others) into the modular
port.
Note: Depending on options, cables may
be supplied by Dectron.
For cable lengths not exceeding 160 ft.
(50m), it is possible to use a six-conductor
data (reversed) modular telephone cable
(by others). See next page for cable
details.
Communications between the unit and
the remote display can be disrupted by
external electrical noise. Such noise can
be produced by variable speed motor
drives, light dimmers, electric discharge
lighting, and other non-linear electrical
loads. Where this is the case, use ferrites as described at right.
electrical enclosure
of unit
At each end of the cable, loop the
modular telephone cable once as shown
through clamp-on split ferrite EMI cores
(by others). The cores should have an
impedance near 240Ω at 100MHz.
ex: Steward 28A0640-0A0
available as Digi-Key1240-2065-ND
3-gang wall box (by others)
Allow at least 10 inches of free cable for
connection to the display.
Six-pin modular telephone plug
(by others) to be inserted into display jack.
1. Digi-Key Corp.
1-800-344-4539
www.digikey.com
Data subject to change without notice.
38 Ecosaire
®
July 2007
Page 39
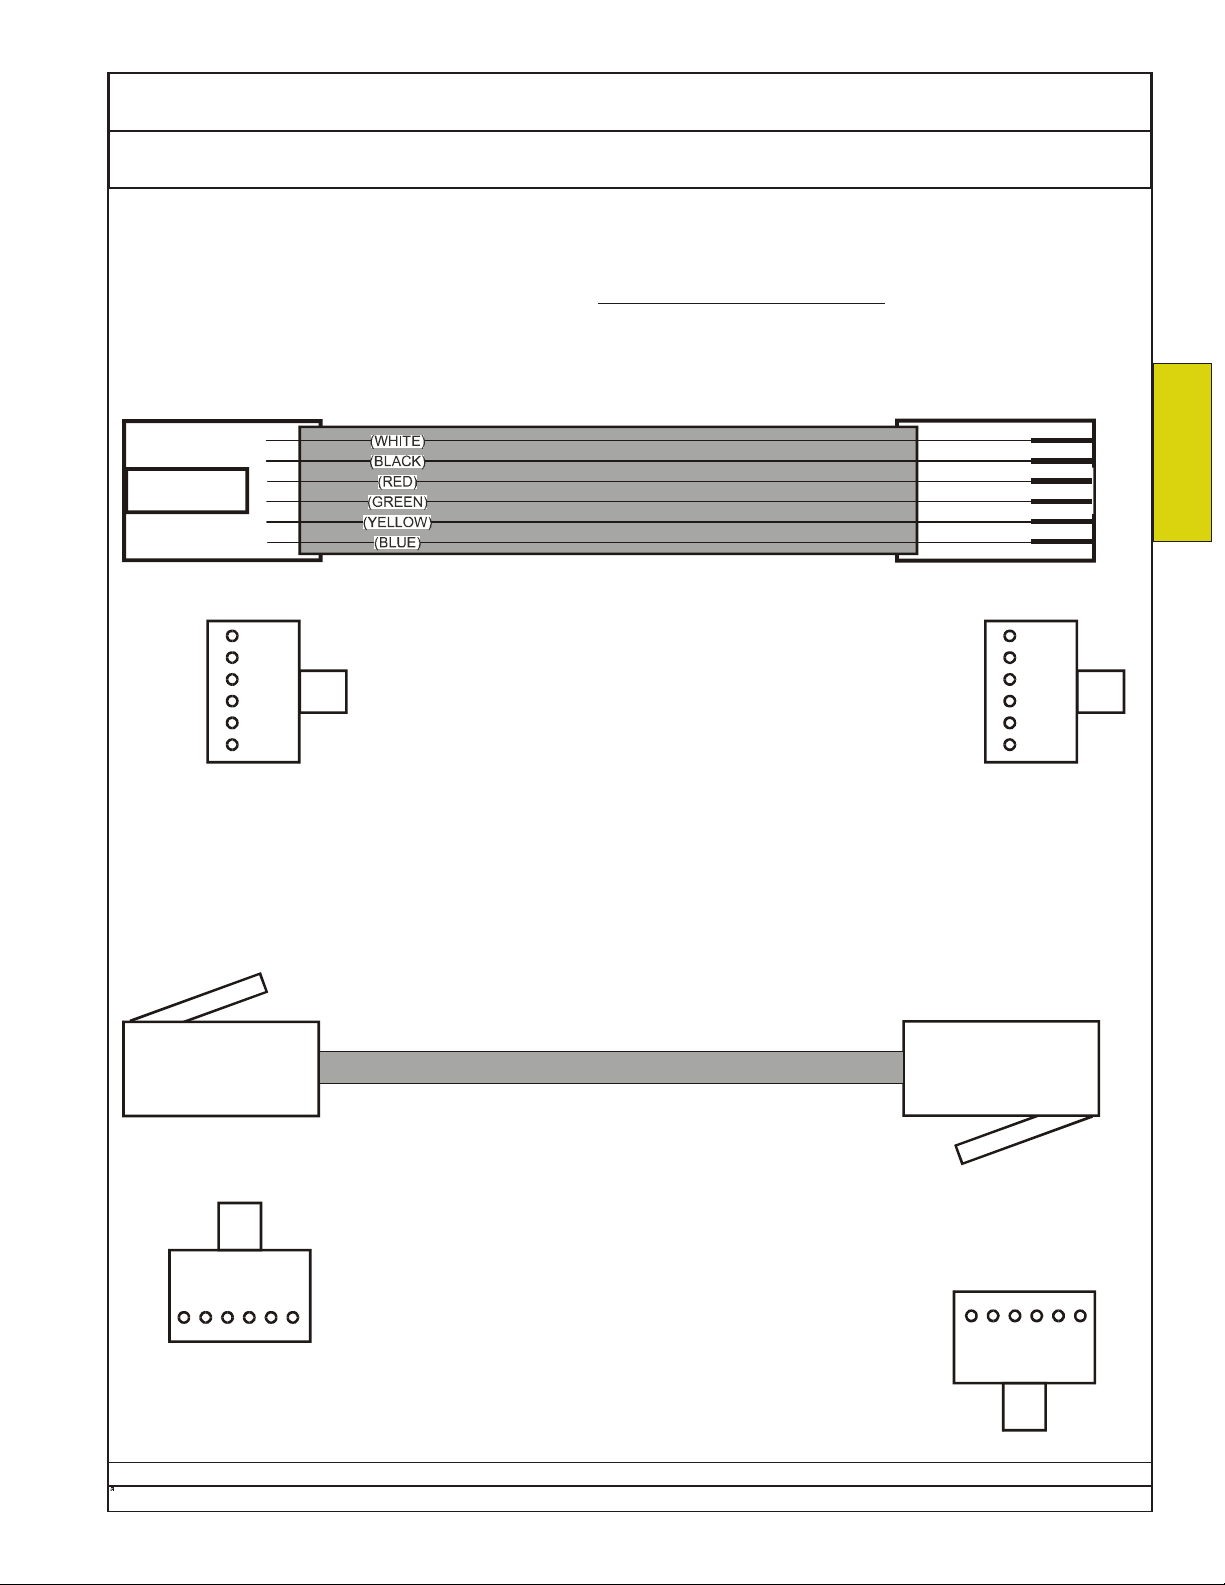
Owners Manual Ecosaire®CM Series Precision Air Conditioner
WHITE
BLACK
RED
GREEN
YELLOW
BLUE
WHITE
BLACK
RED
GREEN
YELLOW
BLUE
WHITE
BLACK
RED
GREEN
YELLOW
BLUE
WHITE
BLACK
RED
GREEN
YELLOW
BLUE
Control Wiring Wiring Installation
Optional Remote Display
Assembling data (reversed) modular telephone cable
Note that the lock tabs of the plugs are on opposite sides of the cable.
(Colors are for example only, colors may vary by cable vendor.)
TOP VIEW
END VIEW END VIEW
INSTALLATION
SIDE VIEW
END VIEW END VIEW
Data subject to change without notice.
Ecosaire
®
July 2007 39
Page 40
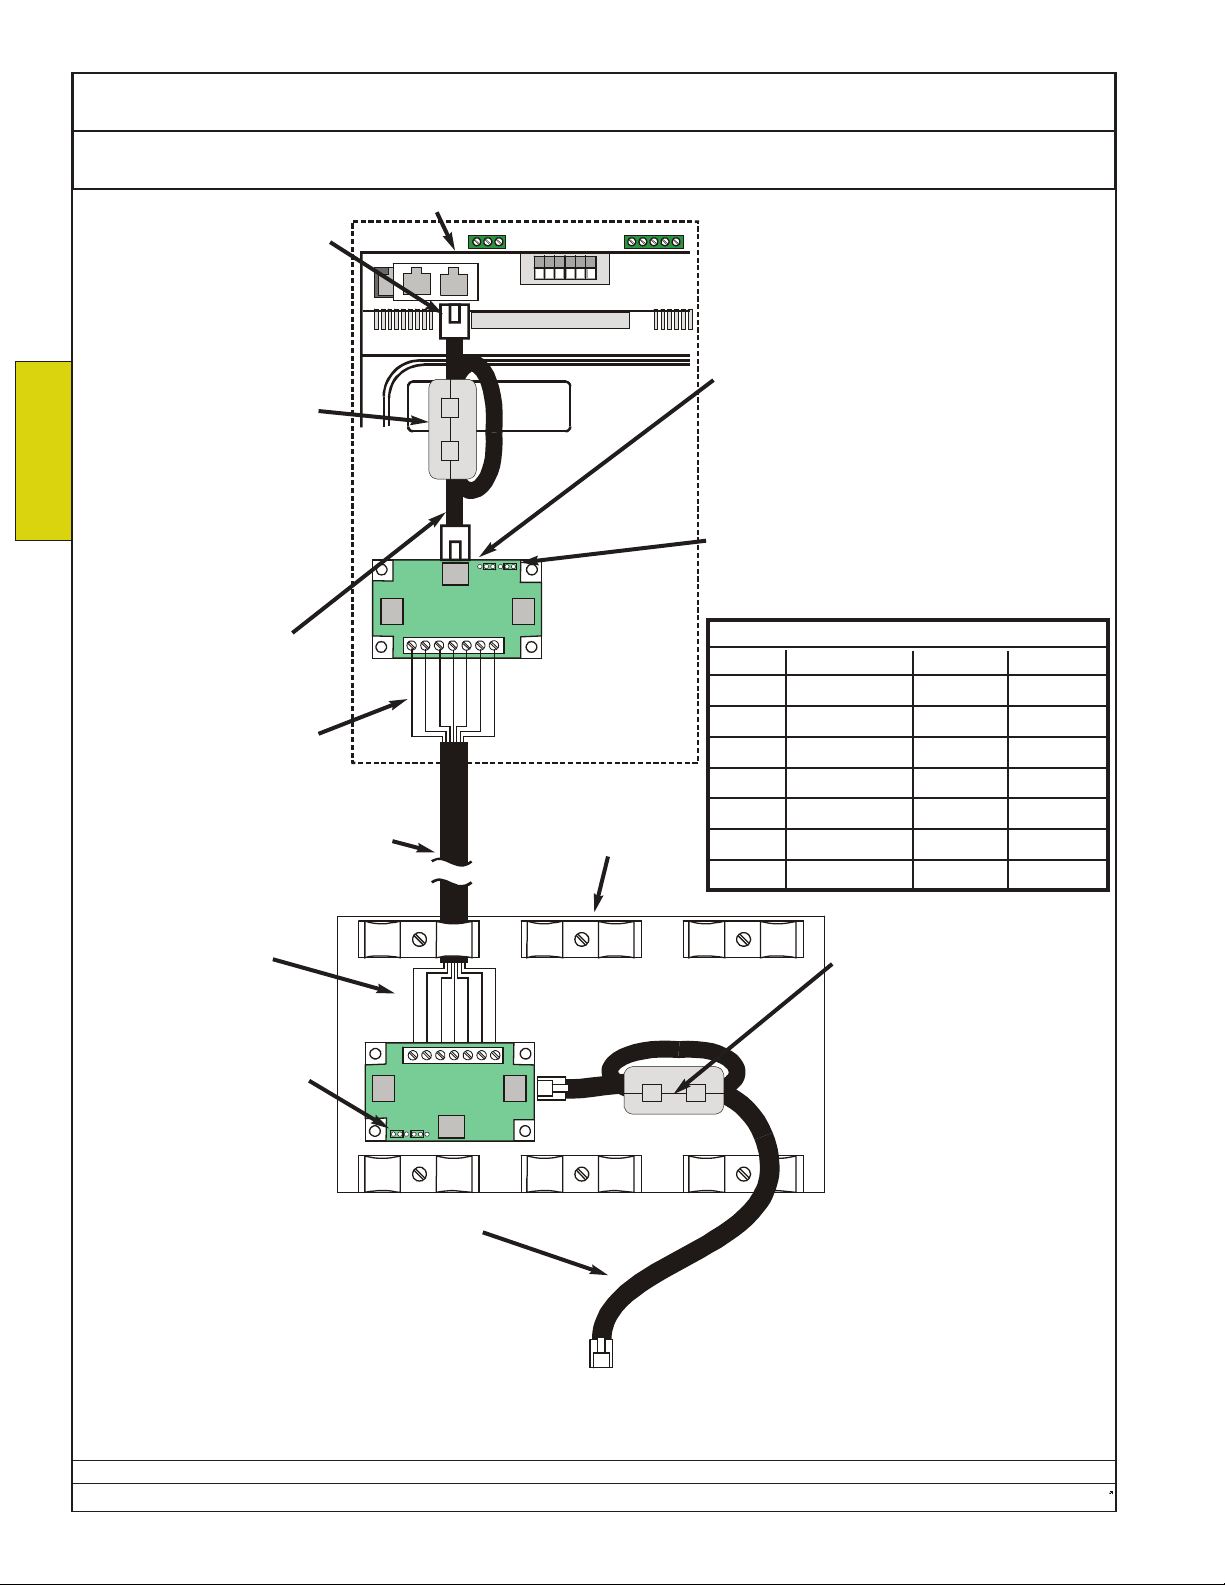
Ecosaire®CM Series Precision Air Conditioner Owners Manual
BLUE/WHITE
WHITE/BLUE
SHIELD
ORANGE/WHITE
WHITE/ORANGE
GREEN/WHITE
WHITE/GREEN
BLUE/WHITE
WHITE/BLUE
SHIELD
ORANGE/WHITE
WHITE/ORANGE
GREEN/WHITE
WHITE/GREEN
J14 J1 5
6543210
J14 J1 5
6543210
J11
J12
Expansion Memory
J9 J10
C1
Rx-/Tx-
NO1
Rx+/Tx+
NO2
GND
NO3
C1
Installation Wiring Control Wiring
Insert 6P6C modular telephone plug (by others) into the
modular port.
Loop the modular telephone
INSTALLATION
cable once as shown
through clamp-on split ferrite EMI core (by others).
The cores should have an
impedance near 240Ω at
100MHz.
ex: Steward 28A0640-0A0
available as Digi-Key
240-2065-ND
Short six-conductor data
(reversed) modular telephone
cable (by others). See previous page for cable details.
Keep pairs together. DO
NOT SPLIT PAIRS.
Minimize untwist.
Minimum 24 AWG copper 3-pair
shielded RS-485 cable, Z0=120Ω
ex: Belden37202A
Maximum length 650 ft (200m)
Keep pairs together. DO
NOT SPLIT PAIRS.
Minimize untwist.
Unit Controller
Optional Remote Display
For cable lengths not
exceeding 650 ft (200m) -
Note: Cables may be supplied by Dectron,
depending on options.
Modular cable to round cable adapter, (by
others), two required
1
3-gang wallbox,
by others)
Ex: Carel1TCONN6J000 (shown)
Ex: Leviton 40276-I, (not shown)
available as Grainger25C381
Where TCONN6000 (shown) is used,
jumpers J14 and J15 must be on pins 1 & 3
as shown.
Cable conductor-terminal assignment
terminal function cable pair conductor
0
1
2
3
4
5
GND
6
SHIELDGND
1A+VRL (~30Vdc)
1BGND
2ARx/Tx-
2BRx/Tx+
3A
3B+VRL (~30Vdc)
Clamp-on split ferrite EMI
core (by others), as
above.
1. CAREL USA LLC
Where TCONN6000
(shown) is used, jumpers
J14 and J15 must be on
pins 1 & 3 as shown.
Short six-conductor data (reversed) modular
telephone cable (by others). See previous
page for cable details. Allow at least 10 inches
2.
USA
Canada
of free cable for connection to the display.
The six-pin modular telephone plug (by others)
is to be inserted into the display jack.
3. Belden
Data subject to change without notice.
40 Ecosaire
Ph: (717) 664-0500
Fax: (717) 664-0449
www.carelusa.com
W.W. Grainger
Ph: 1-888-361-8649
www.grainger.com
Acklands Grainger
Ph. 1-800-668-8989
www.acklandsgrainger.com
Ph. 314-854-8000
www.belden.com
®
July 2007
Page 41
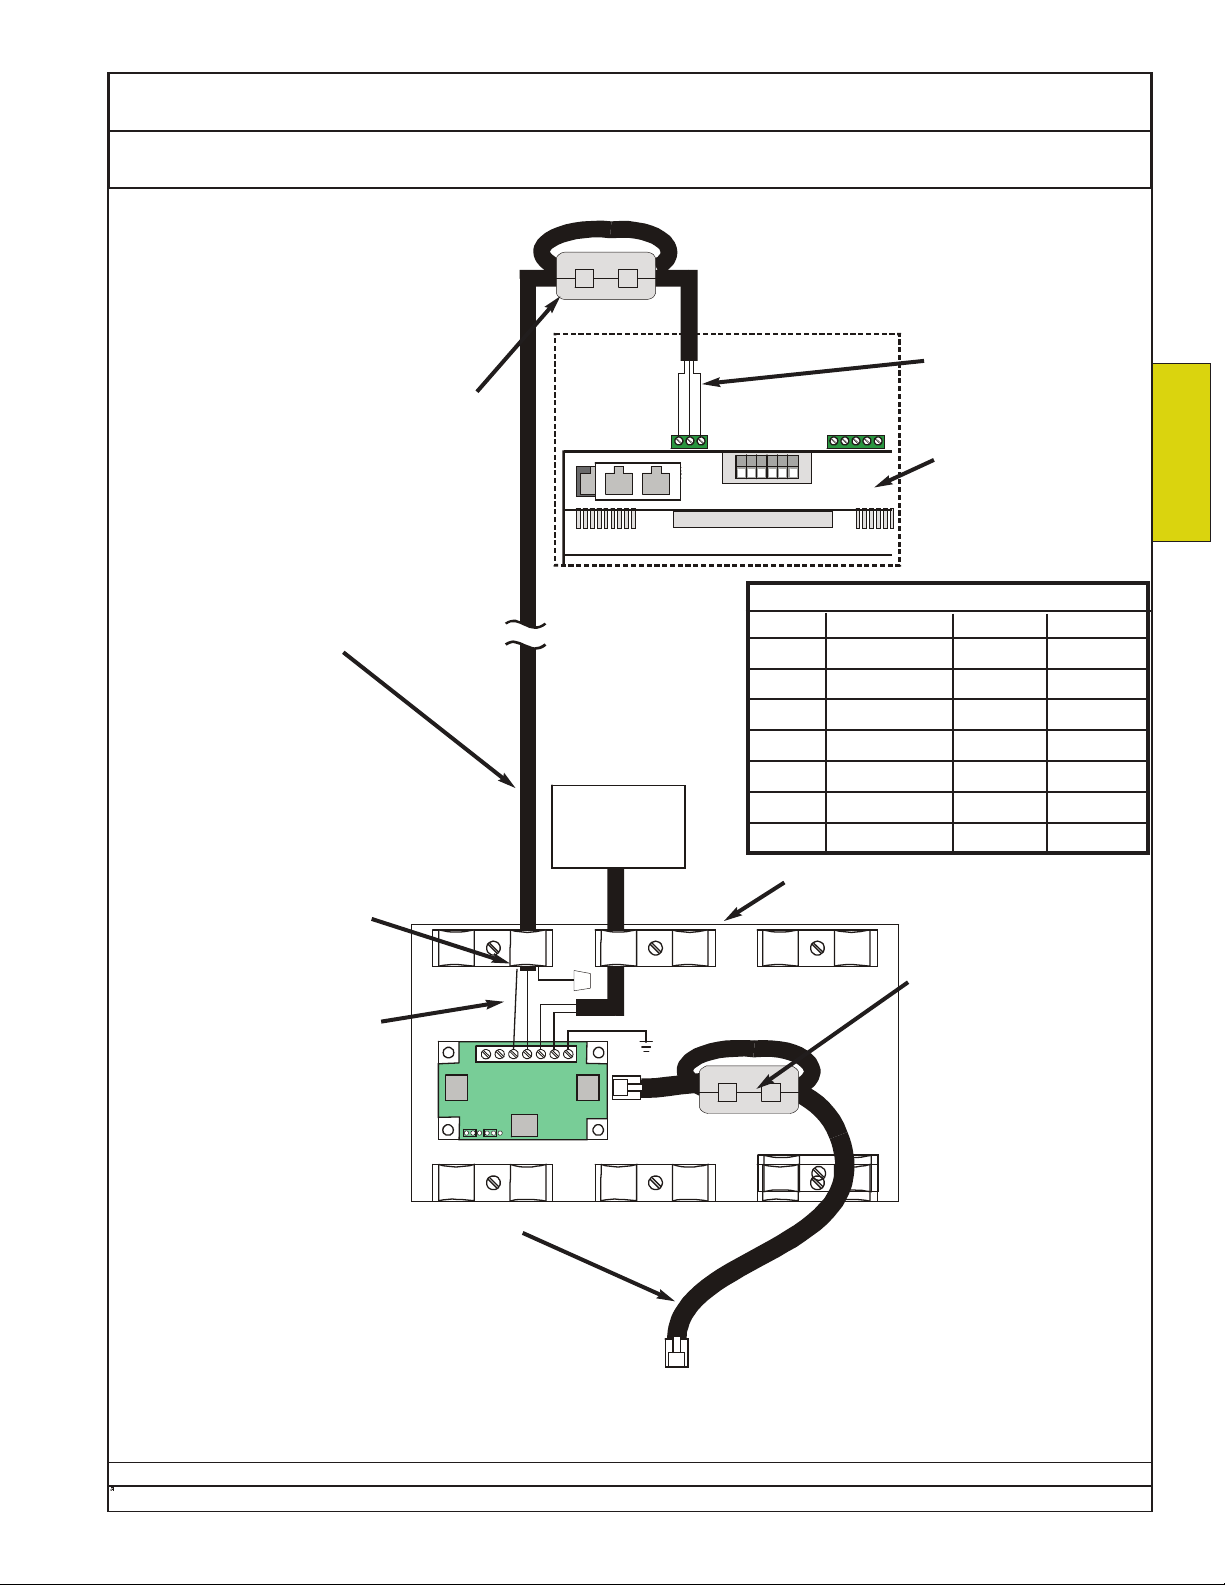
Owners Manual Ecosaire®CM Series Precision Air Conditioner
BLUE
BLUE
WHITE
WHITE
SHIELD
SHIELD
J11
J12
Expansio n Memory
J9 J10
C1
Rx-/Tx-
NO1
Rx+/Tx+
NO2
GND
NO3
C1
J14 J1 5
6543210
+
-
Control Wiring Wiring Installation
For cable lengths not
exceeding 1640 ft (500m) -
Note: Cables may be supplied by
Dectron, depending on options.
Consult factory for longer cable
requirements.
Loop the modular telephone cable once
as shown through clamp-on split ferrite
EMI cores (by others). The cores
should have an impedance near 240Ω
at 100MHz.
ex: Steward 28A0640-0A0
available as Digi-Key
240-2065-ND
Minimum 24 AWG copper 1-pair
shielded RS-485 cable,
Z0=120Ω
ex: Belden37200A
Maximum length 1640 ft (500m)
Insulate shield at this end.
Do not connect shield to a
1
terminal.
Optional Remote Display
Keep pair together.
DO NOT SPLIT
PAIR S.
Minimize untwist.
Unit Controller
INSTALLATION
Cable conductor-terminal assignment
DC Power Supply
24 - 30 VDC
150 mA
(by others)
terminal function cable pair conductor
0
1
2
3
4
GND
+VRL (~30Vdc)
GND
1ARx/Tx-
1BRx/Tx+
5
6
3-gang wallbox,
by others)
Keep pair together.
DO NOT SPLIT PAIRS.
Minimize untwist.
Short six-conductor data (reversed) modular
telephone cable (by others). See previous
page for cable details. Allow at least 10 inches
of free cable for connection to the display.
The six-pin modular telephone plug (by others)
is to be inserted into the display jack.
®
Ecosaire
July 2007 41
Clamp-on split ferrite EMI
core (by others), as
above.
1. CAREL USA LLC
Ph: (717) 664-0500
Fax: (717) 664-0449
www.carelusa.com
2.
USA
W.W. Grainger
Ph: 1-888-361-8649
www.grainger.com
Canada
Acklands Grainger
Ph. 1-800-668-8989
www.acklandsgrainger.com
3. Belden
Ph. 314-854-8000
www.belden.com
Data subject to change without notice.
Page 42
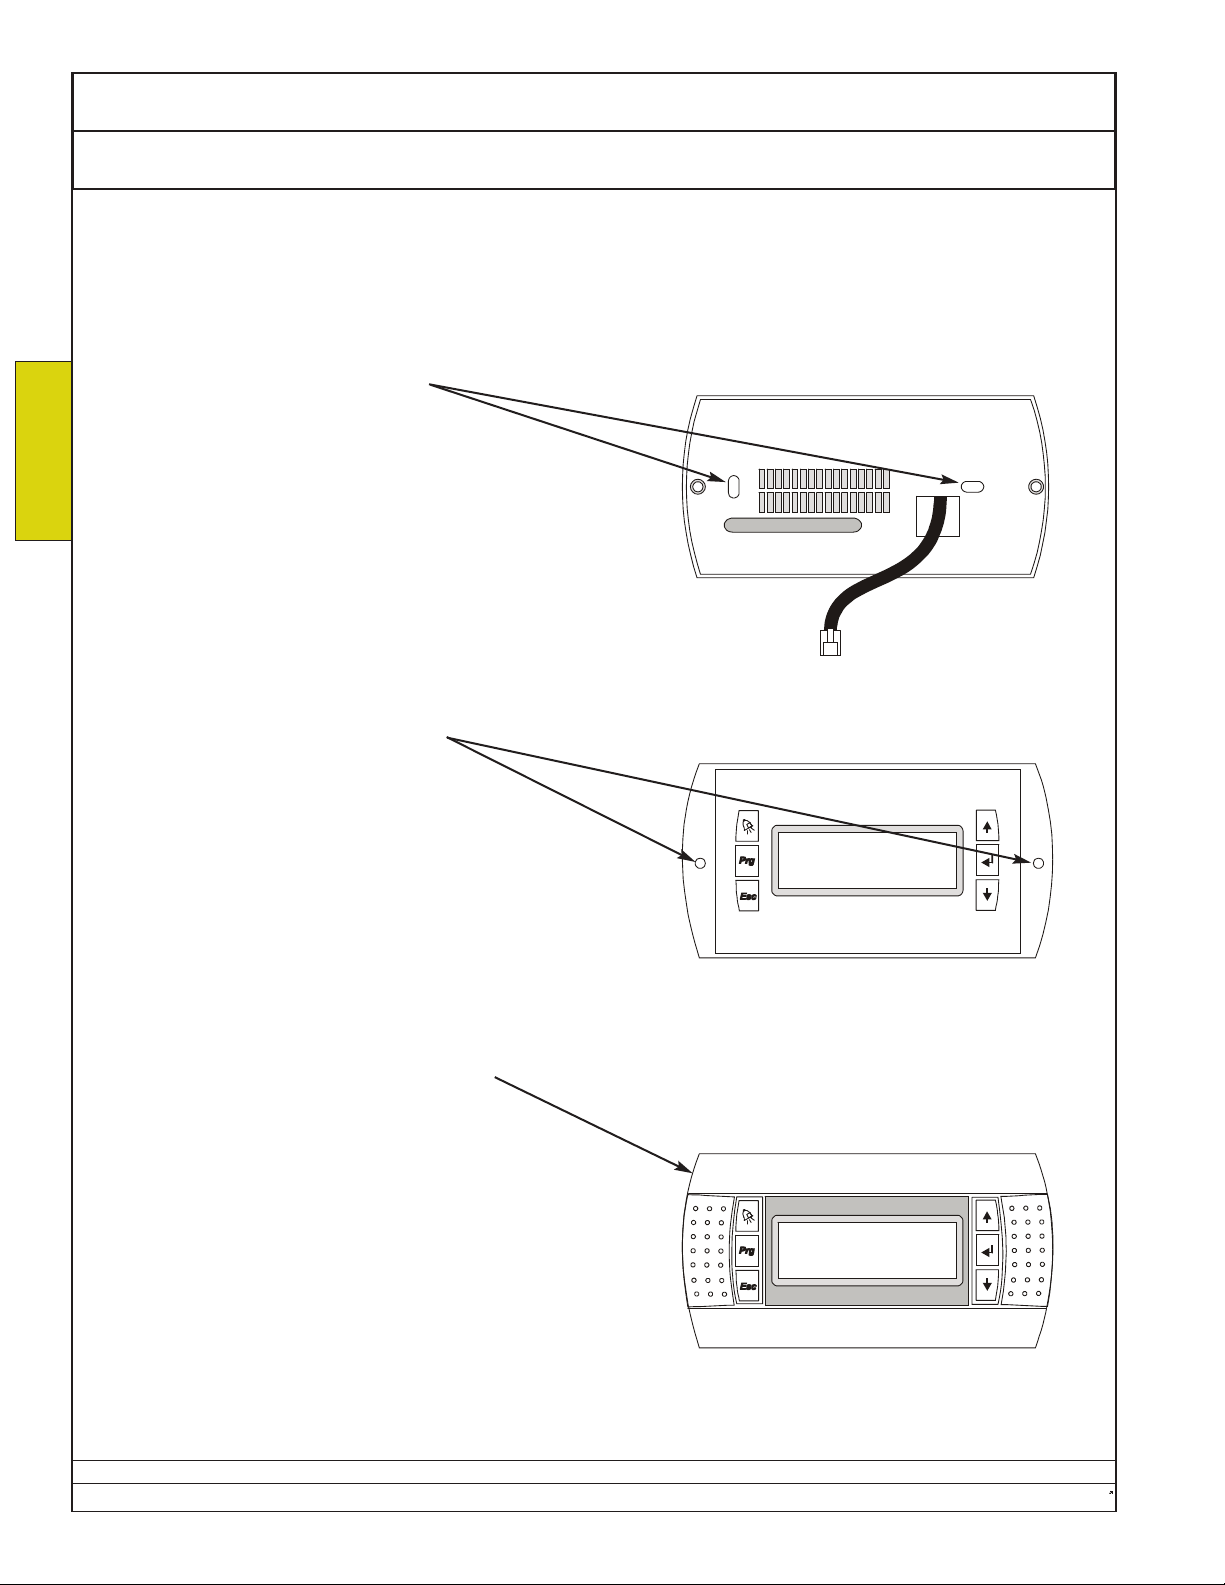
Ecosaire®CM Series Precision Air Conditioner Owners Manual
Installation Wiring Control Wiring
Remove the display from its box. Refer to the instruc-
tions included. Separate the display into its three pieces.
Thread the end of the cable thorugh the hole in the sub-
INSTALLATION
base as shown. Using care to maintain level, screw the
sub-base to the wall box here.
Connect the cable to the modular telephone jack on the
back of the display. Screw the display to its sub-base
here.
Snap the front cover over the display.
NOTE: If power is applied before the Start-up tasks are
accomplished, the display may show “NO LINK”. This is
normal, and will be corrected under the Startup section of
this manual.
Data subject to change without notice.
42 Ecosaire
®
July 2007
Page 43
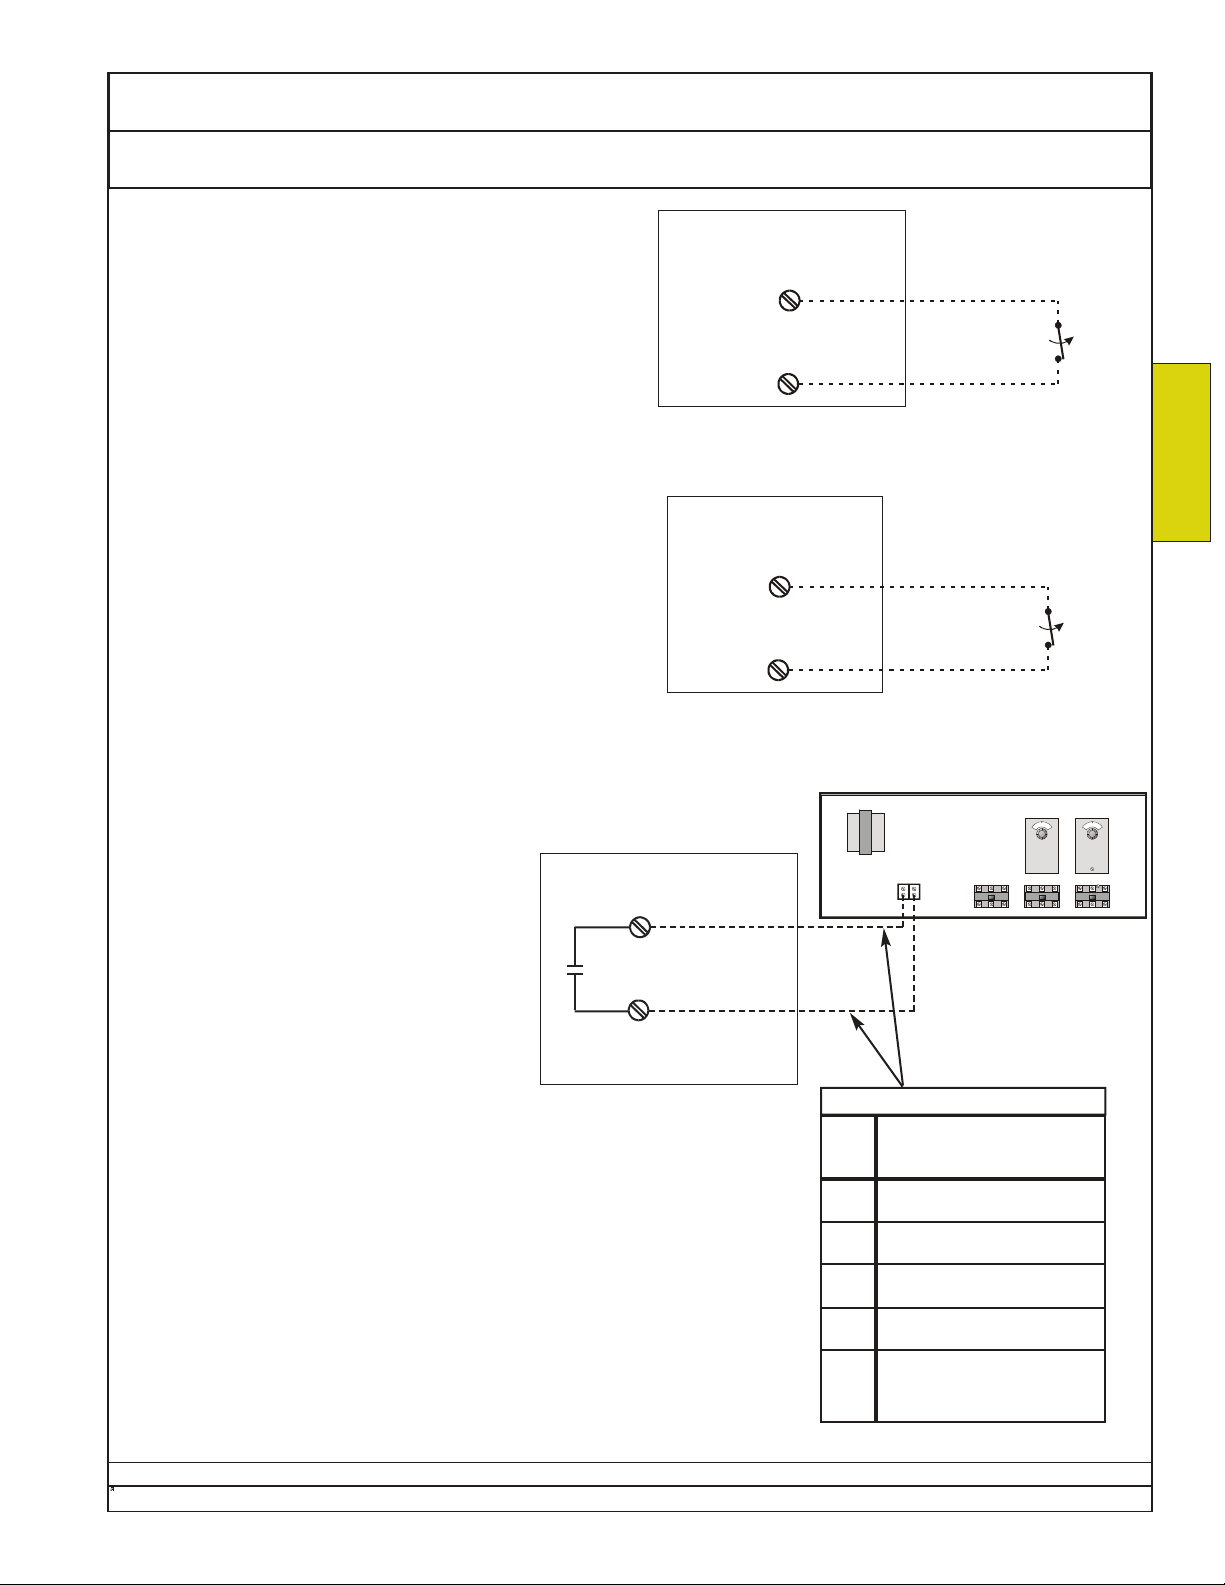
Owners Manual Ecosaire®CM Series Precision Air Conditioner
•
•
•
•
•
x
x
x
x
Control Wiring Wiring Installation
INPUT - FIRE ALARM
For units requiring a fire-alarm interlock, remove the
jumper between terminals 300 and 302, or as shown on
the unit wiring diagram. In the jumper’s place substitute an
isolated normally-closed switch closure from the fire alarm
(by others).
If the fire alarm is triggered, the resulting open circuit
between these terminals will cause the Ecosaire® to shutdown.
OPTIONAL EMERGENCY POWER INPUT
Some installations may use the optional emergency power
input. In this case, an open circuit on the input will register
an alarm and will cause the number of operating Ecosaire®
units in a group to be reduced to a predefined number to
reduce the load on the emergency generator.
Note that a reduction in number of operating units may
allow room temperature and humidity to go outside the
desired range during the emergency.
Ecosaire®
terminal 300
terminal 302
Ecosaire®
terminal 300
terminal 314
SAMPLE
Use terminal numbers in
unit wiring diagram.
SAMPLE
Use terminal numbers in
unit wiring diagram.
remote heat exchanger
Firealarm
or smoke
detector
switch
opens on
alarm.
INSTALLATION
Switch
opens to
cause
alarm
OUTPUT - ENABLE REMOTE
HEAT EXCHANGER
Air-Cooled Direct-Expansion,
Glycol-Cooled Direct Expansion,
Air-Cooled DualCool,
Glycol-Cooled DualCool, and
FreeCool units only
Ecosaire®
terminal J15-C8
contacts close to
enable remote
heat exchanger
terminal J15-NO8
The remote air-cooled heat-exchanger con-
trols must be wired to the Ecosaire® controls (see unit
wiring diagram). The remote heat exchanger has its own
power supply.
Some condensers may require the use of Class 1 Remote
Control and Signalling Circuit wiring methods.
The Ecosaire® dry contacts are rated 5A at 24VAC 60Hz.
Do not overload these outputs. Do not attempt to use an
internal Ecosaire® power source.
The condenser control-wire size must be selected to
allow for contactor coil inrush currents. See the chart at
right. Alternatively, a pilot relay (by others) may be installed.
In some cases temperature switches inside the remote
condenser may have to be adjusted.
SAMPLE
Use terminal numbers in unit
wiring diagram.
Condenser control wire size (AWG)
wire
length Number of fan contactors
(ft) 1 2 3 4 5 6
10 20 20 20 20 20 18
20 20 20 20 20 18 14
30 20 20 20 20 18 14
40 20 20 20 18 16 12
50 20 20 20 18 14 10
60 20 20 20 16 14 10
70 20 20 18 16 14 10
80 20 20 18 16 12 10
90 20 20 18 16 12 10
100 20 20 18 14 12 10
110 202016141210
Ecosaire
®
July 2007 43
Data subject to change without notice.
Page 44
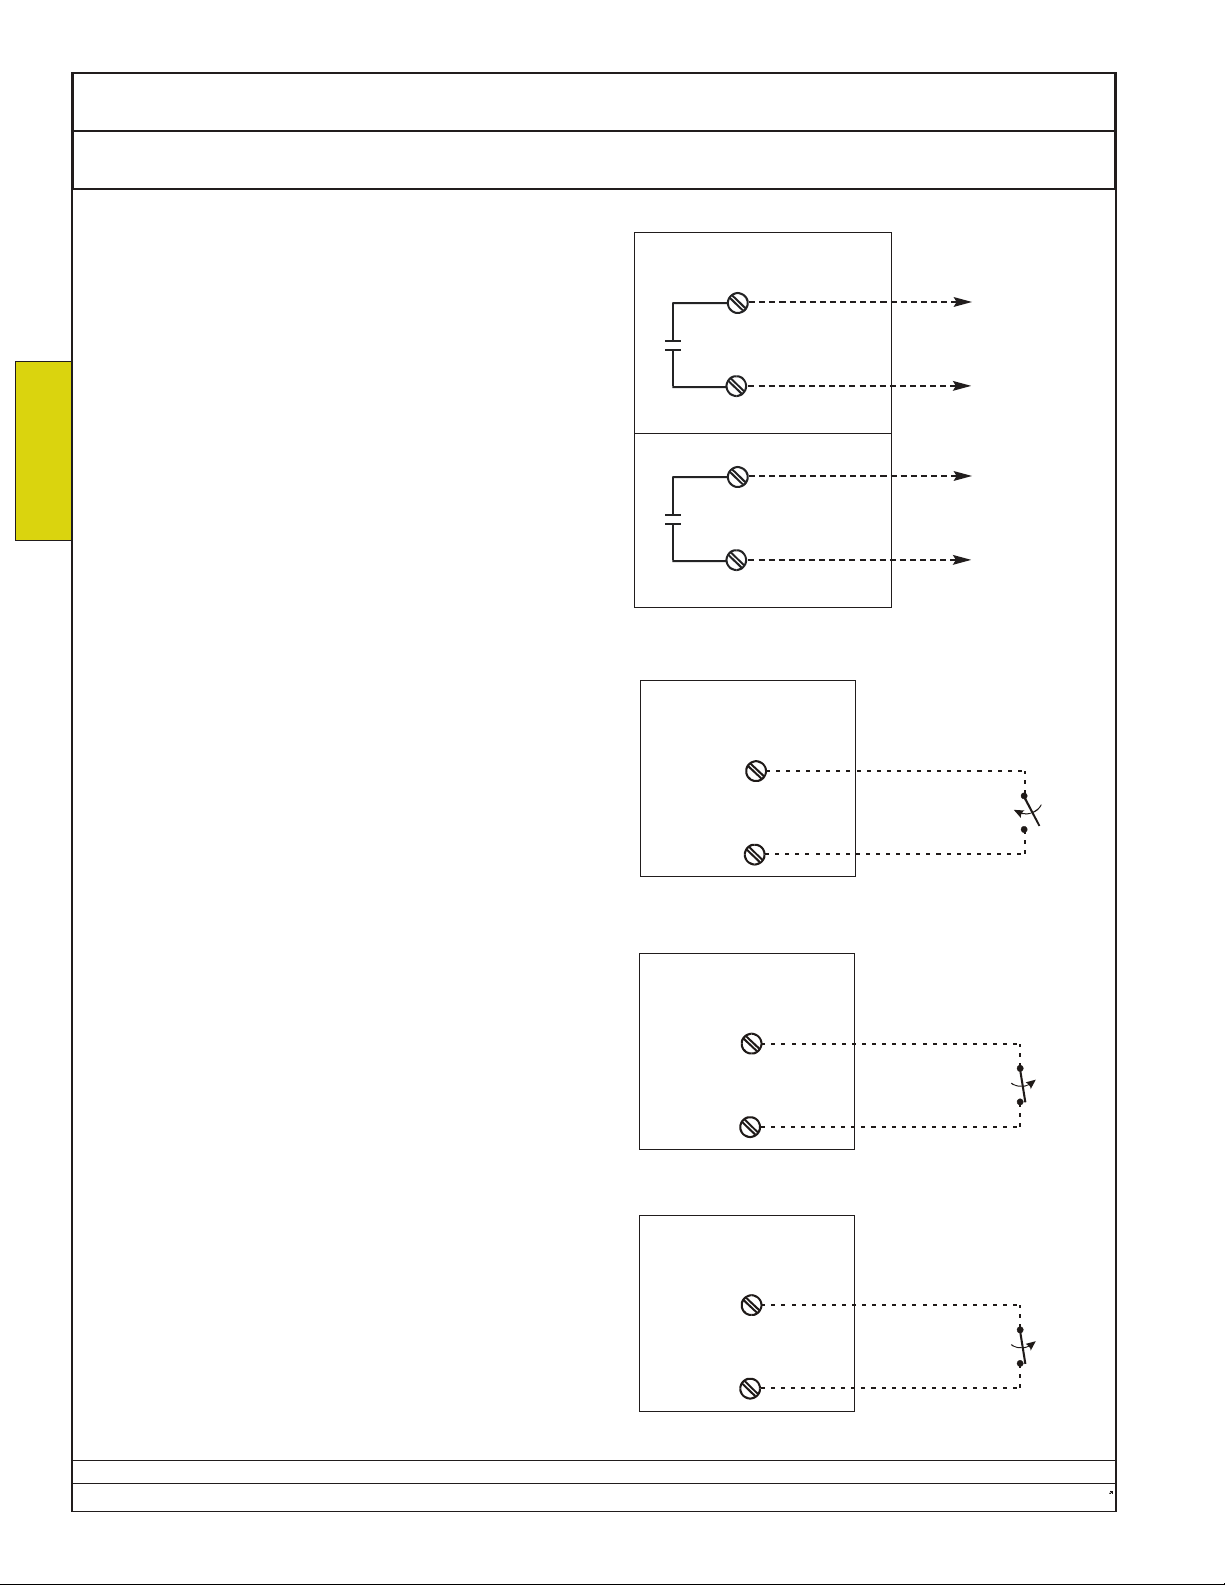
Ecosaire®CM Series Precision Air Conditioner Owners Manual
Installation Wiring Control Wiring
GENERAL ALARM
Ecosaire® units may be provided with an output for a
general alarm. Two dry-contact switch-closures are
provided to enable an alarm (by others) in the event of a
condition that prevents the normal operation of the unit.
INSTALLATION
The Ecosaire® dry contacts are rated 5A at 24VAC 60Hz.
Do not overload these outputs. Do not attempt to use an
internal Ecosaire® power source.
OPTIONAL REMOTE ON/OFF SWITCH
(by others)
Some installations may use remote on/off switches provid-
ed by others. In this case the remote on/off switch must be
wired to the Ecosaire® controls (see unit field-wiring diagram
in unit information package). When dry contacts are open, the
unit will be disabled.
Ecosaire®
terminal 1
contacts close to
enable alarm
(by others)
terminal 2
terminal 3
contacts close to
enable alarm
(by others)
terminal 4
Ecosaire®
terminal 300
terminal 301
to alarm
SAMPLE
Use terminal numbers in
unit wiring diagram.
(by others)
to alarm
(by others)
SAMPLE
Use terminal numbers in
unit wiring diagram.
Switch
closes to
enable
unit.
OPTIONAL SPECIAL ALARM INPUT
Some installations may use the optional special alarm
input. An open circuit on this input will cause an alarm. Use
Ecosaire®
terminal 300
dry contacts only, do not apply voltage from an external
source.
SAMPLE
terminal 313
Use terminal numbers in
unit wiring diagram.
OPTIONAL CUSTOMER ALARM SWITCH
Some installations may use the optional customer alarm
input. An open circuit on this input will cause an alarm. Use
Ecosaire®
terminal 300
dry contacts only, do not apply voltage from an external
source.
SAMPLE
terminal 312
Use terminal numbers in
unit wiring diagram.
Data subject to change without notice.
44 Ecosaire
Switch
opens to
cause
alarm
Switch
opens to
cause
alarm
®
July 2007
Page 45

Owners Manual Ecosaire®CM Series Precision Air Conditioner
Contents Startup
Page
Supervisaire®Controller Interface 46
Pre-Startup Adjustments 49
Airflow 51
Remote Heat Exchanger 52
Humidifier 60
Add Refrigerant 61
Expansion Valve 62
Pre-Startup Checklist 63
Enable Operation 68
Adjust Head Pressure 69
Expansion Valve Adjustment 71
Startup Report &
Warranty Registration 73
Warranty 75
STARTUP
Ecosaire
Data subject to change without notice.
®
July 2007 45
Page 46
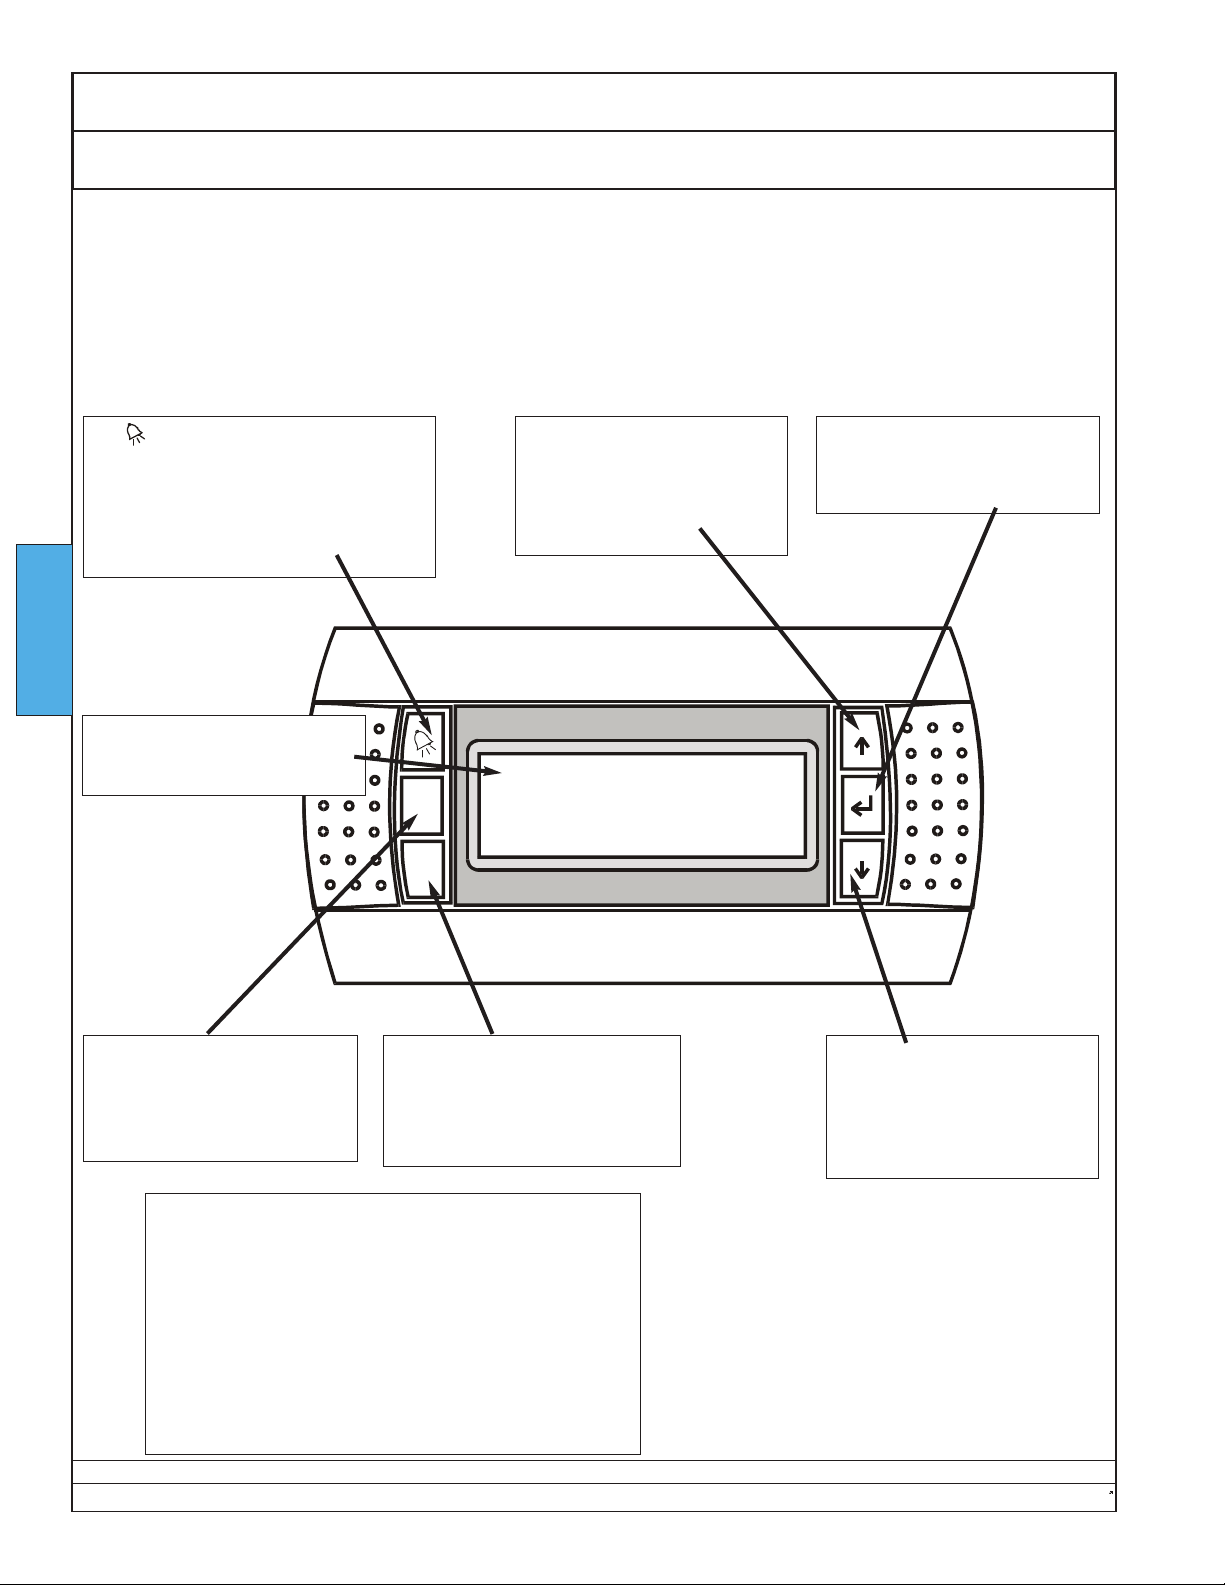
Ecosaire®CM Series Precision Air Conditioner Owners Manual
Startup Controller Interface
NOTE: A remote-mounted display may initially show “NO LINK”. This will be corrected on the next page.
The Supervisaire®controller handles all the functions of the Ecosaire® unit. The initial startup at
installation requires the manual input of the set points and permission to run. After this all functions
are fully automatic.
The button is used to announce and
to access any alarms that might arise.
This button illuminates to indicate a
current alarm condition. Pressing this
button brings up a sequence of current
alarm description screens.
STARTUP
The backlit LCD screen displays any needed information
on the operation of the system.
Prg
Esc
The ↑button is used for
scrolling upward to change
set points, enter passwords,
and to select display screens
and menus.
Room Status
Temperature xx.x°F
Humidity xx.x%rh
The ↵button is used to navi-
gate through menu selections
and to accept changes.
The Prg button is used to
access the set point screens.
It is also used in combination
with the Esc button to access
certain service screens.
The Esc button is used to
revert to an earlier screen. It is
also used in combination with
the Prg button to access certain
service screens.
The ↓button is used for
scrolling downward to change
set points, enter passwords,
and select display screens
and menus.
Security
The Supervisaire®controller is protected by passwords. Set points, run enabling, and site-specific
setup values are protected by a User Password.
Detailed service settings and information are protected
by a Service Password. Model specific operation constants are protected by a Factory Password.
Passwords are automatically cleared after two minutes pass with no button activity.
Data subject to change without notice.
46 Ecosaire
®
July 2007
Page 47
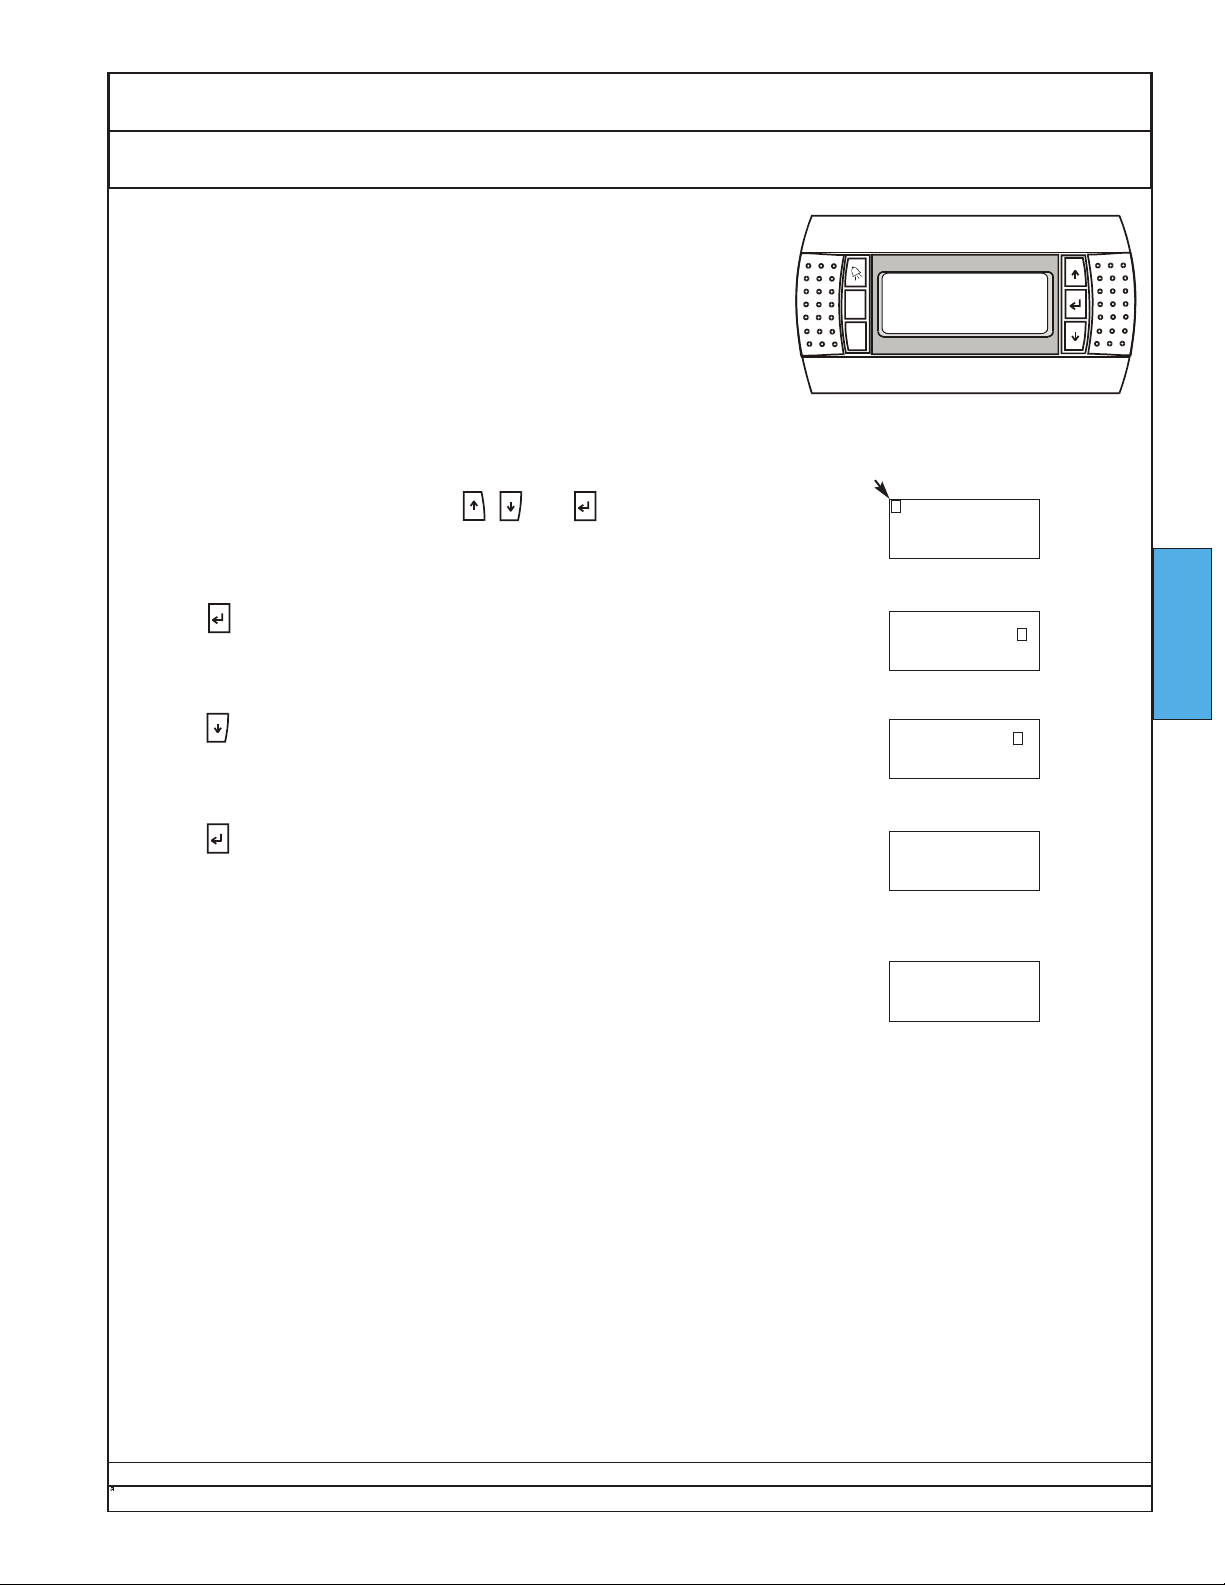
Owners Manual Ecosaire®CM Series Precision Air Conditioner
Set Interface Address Startup
Optional remote displays may show the message “NO LINK”. Where
this is the case, the address of the display must be set.
To set the display address, follow the instructions below, which are
based on the most common configurations.
In some cases, an address other than “0” may be required. When other
addresses are required, the unit will be accompanied by an addendum
specifying those addresses.
1. If safe to do so, turn on the electric power to the unit.
If the display shows “Humidity” and other information, no further action
is needed. If not, proceed to step 2.
2. Simultaneously press and hold the , , and buttons for at least
five seconds. The screen at right will appear, where aa and bb are
numbers.
Prg
Esc
blinking cursor
Display address
setting . . . . . . . . . . . : aa
I/O Board address : bb
3. Press . The cursor will move to aa, as shown.
4. Press until aa equals 0.
5. Press . Note that “I/O Board address : bb” disappears. The screen
at right appears briefly, followed by the unit default screen.
Display address
setting . . . . . . . . . . . : aa
I/O Board address : bb
Display address
setting . . . . . . . . . . . : 0
Display address
changed
Default Screen
HUMIDITY aaa / bbb %
ROOM AIR ccc / ddd F
xxxxxxxxxxxxxxxxxxxxxxx
xxxxxxxxxxxxxxxxxxxx
If possible and safe, leave the electrical power connected to the DRY-O-TRON® and leave the blower
overload ON. This will allow the compressor crankcase heater(s) to function. The crankcase heaters
must be on continuously for at least 10 hours before the compressors are started.
STARTUP
Ecosaire
Data subject to change without notice.
®
July 2007 47
Page 48
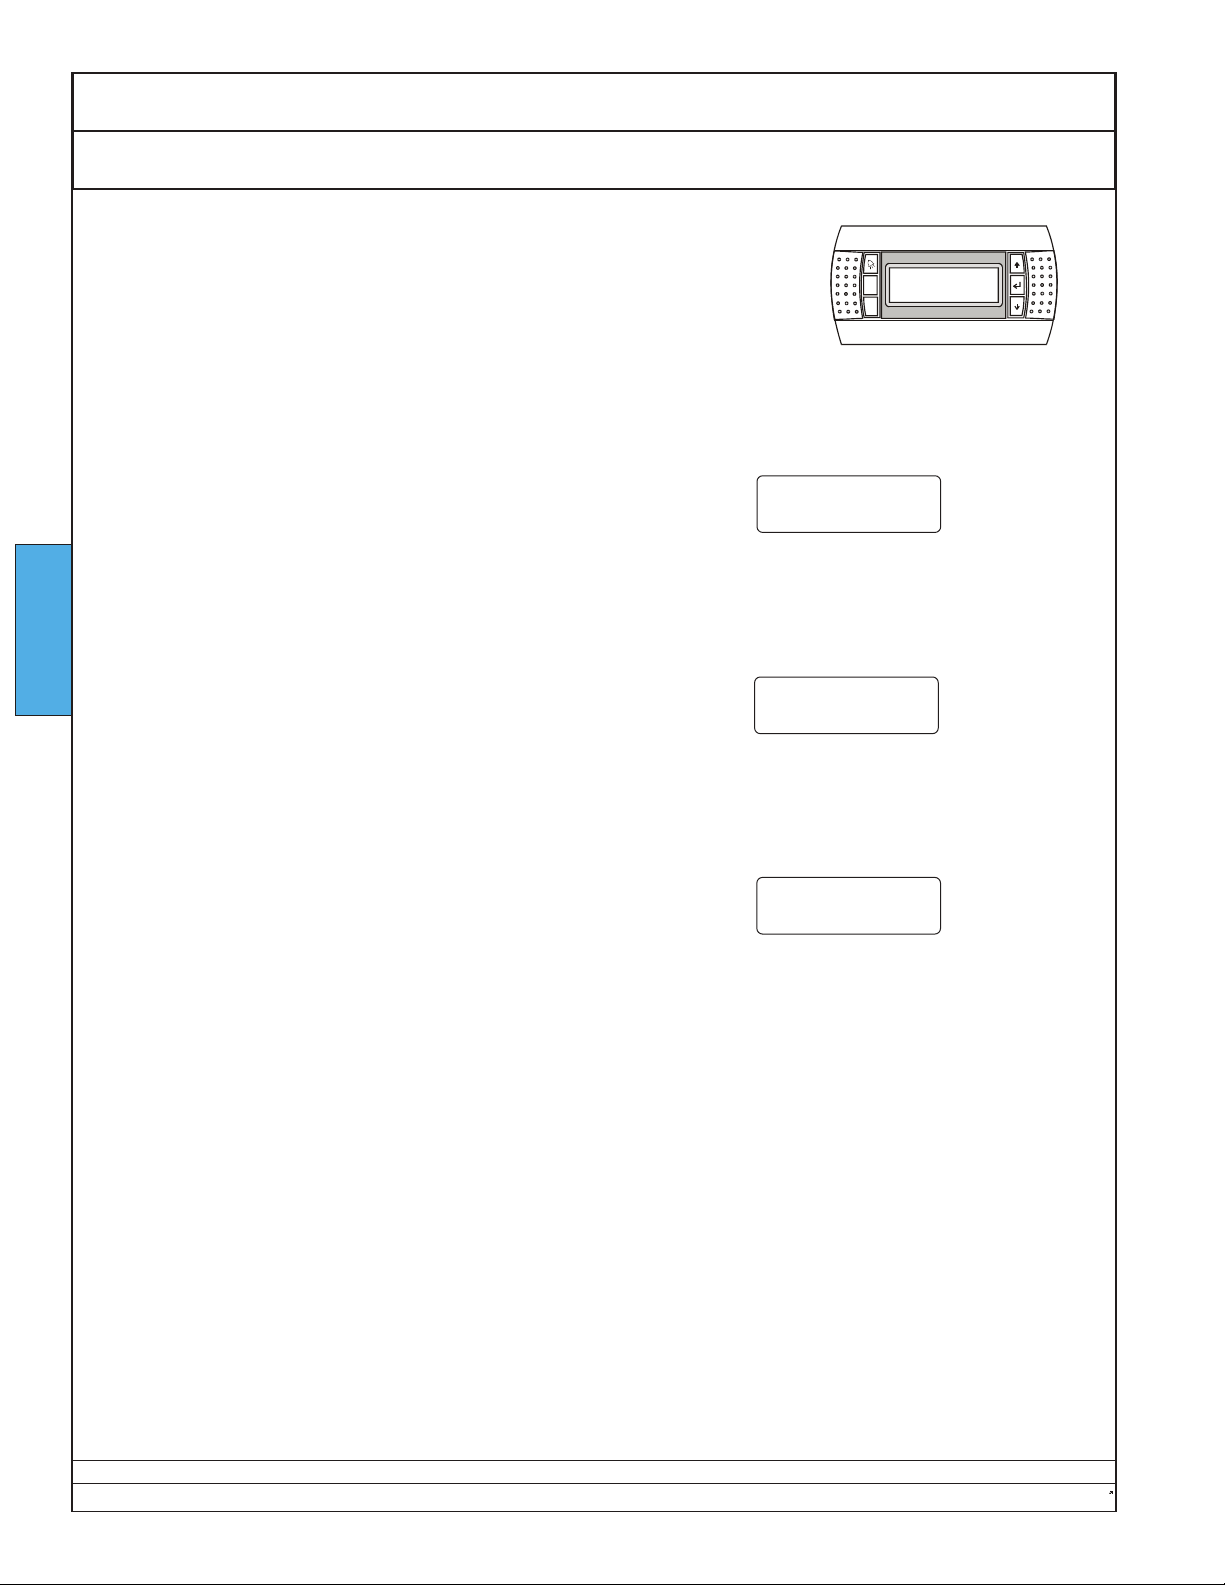
Ecosaire®CM Series Precision Air Conditioner Owners Manual
Startup Controller Interface
Prg
Esc
On initial application of power, the panel will appear as
shown. Wait while the controller checks its internal functions.
STARTUP
The system information is displayed automatically after the
SELF TEST screen. The display will appear as shown.
*****************
self test
please wait
*****************
Dectron
ECOS SuperVisaire
Version: x.x mm/dd/yy
Room Status is the default screen. It appears automatically
after the display of system information. Room Status will
appear automatically after no buttons are pushed for a certain
amount of time.
Room Status
Temperature xx.x°F
Humidity xx.x%rh
Data subject to change without notice.
48 Ecosaire
®
July 2007
Page 49
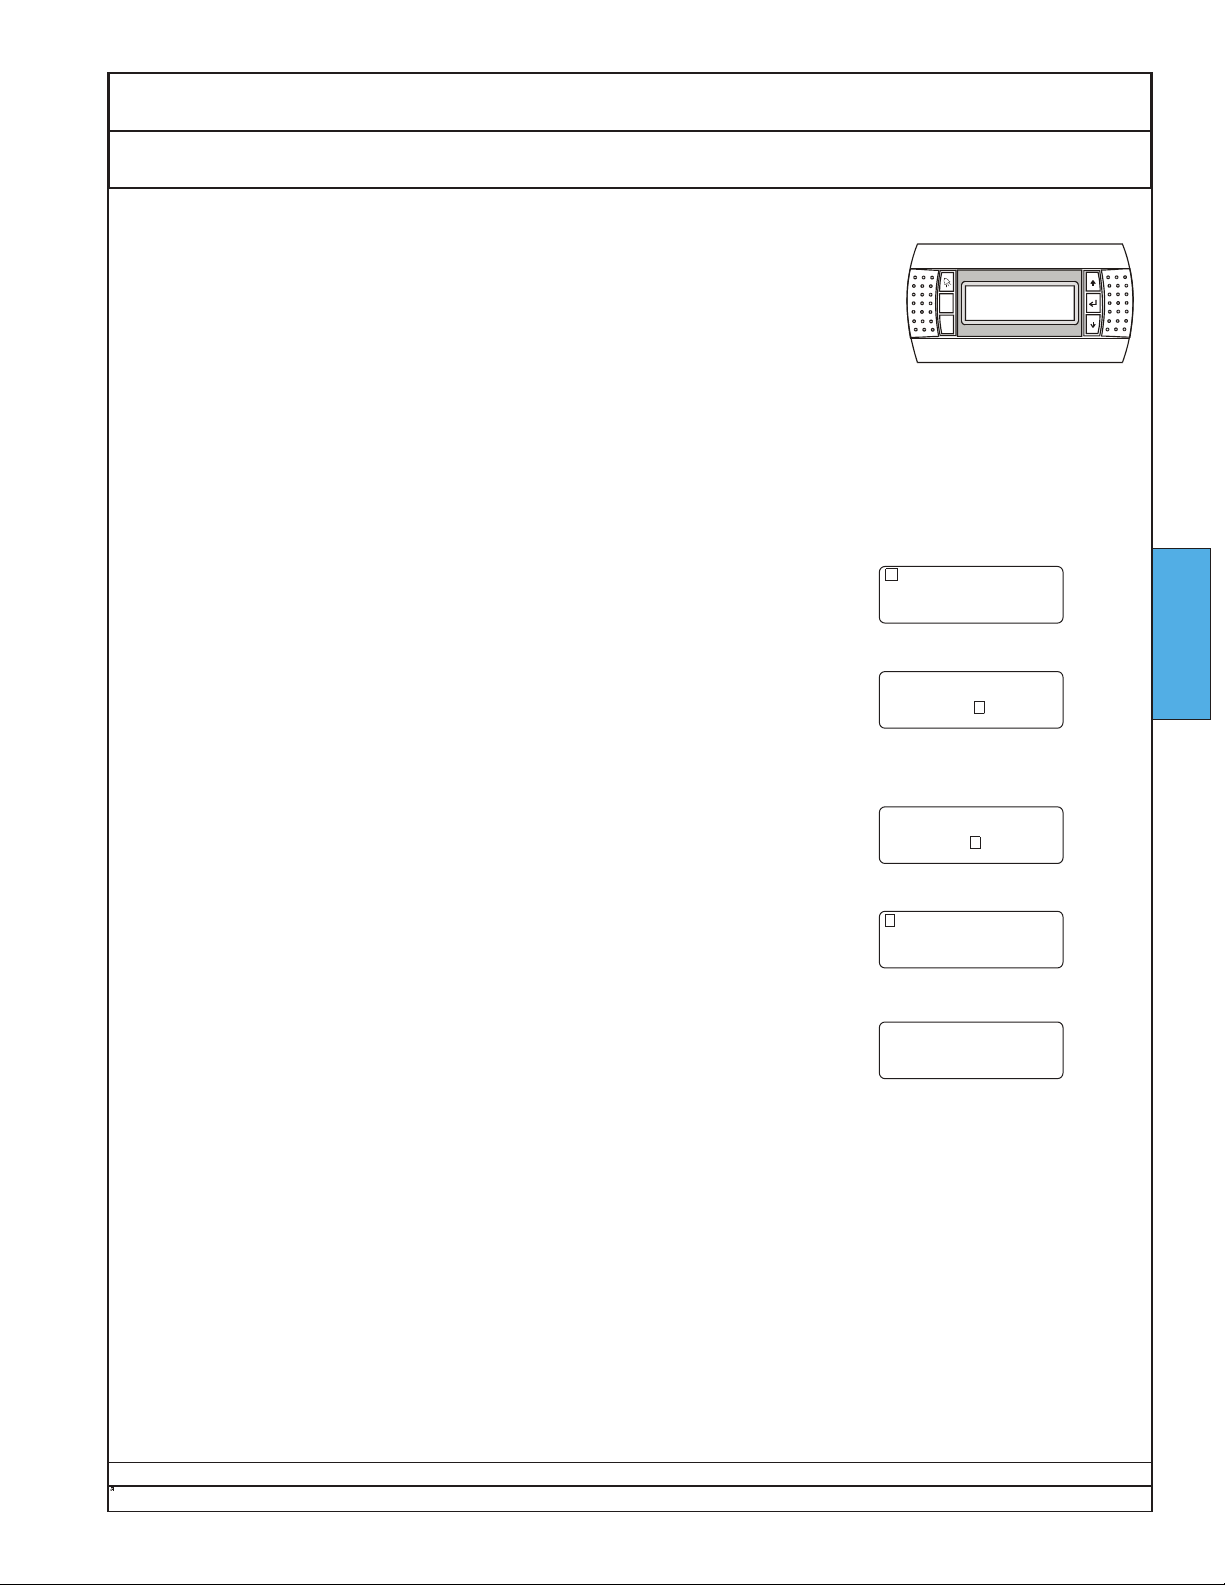
Owners Manual Ecosaire®CM Series Precision Air Conditioner
Check Enable Status Pre-Startup Adjustments Startup
Prg
Esc
Be sure the controller RUN status is set to “OFF”.
Note: This adjustment requires the user password, see Startup - Pre-Startup Adjustments - Controller
Password, on next page.
To access the System ON/OFF menu, press Prg and enter
the password as discussed in Startup - Pre-startup
Adjustments - Controller Password. The screen should
appear as shown.
If System=ON, press ↵to move the cursor under “ON”.
Press ↑to change “ON” to “OFF”.
To store the setting, press ↵to return the cursor to the
upper left corner.
The refrigeration system is not operational. After a short delay, the display will
return to the default Room Status screen. Alternatively, press Esc as necessary to return to the default screen.
System ON/OFF
System = OFF
System ON/OFF
System = ON
System ON/OFF
System =OFF
System ON/OFF
System =OFF
Room Status
Temperature xx.x°F
Humidity xx.x%rh
STARTUP
Ecosaire
Data subject to change without notice.
®
July 2007 49
Page 50
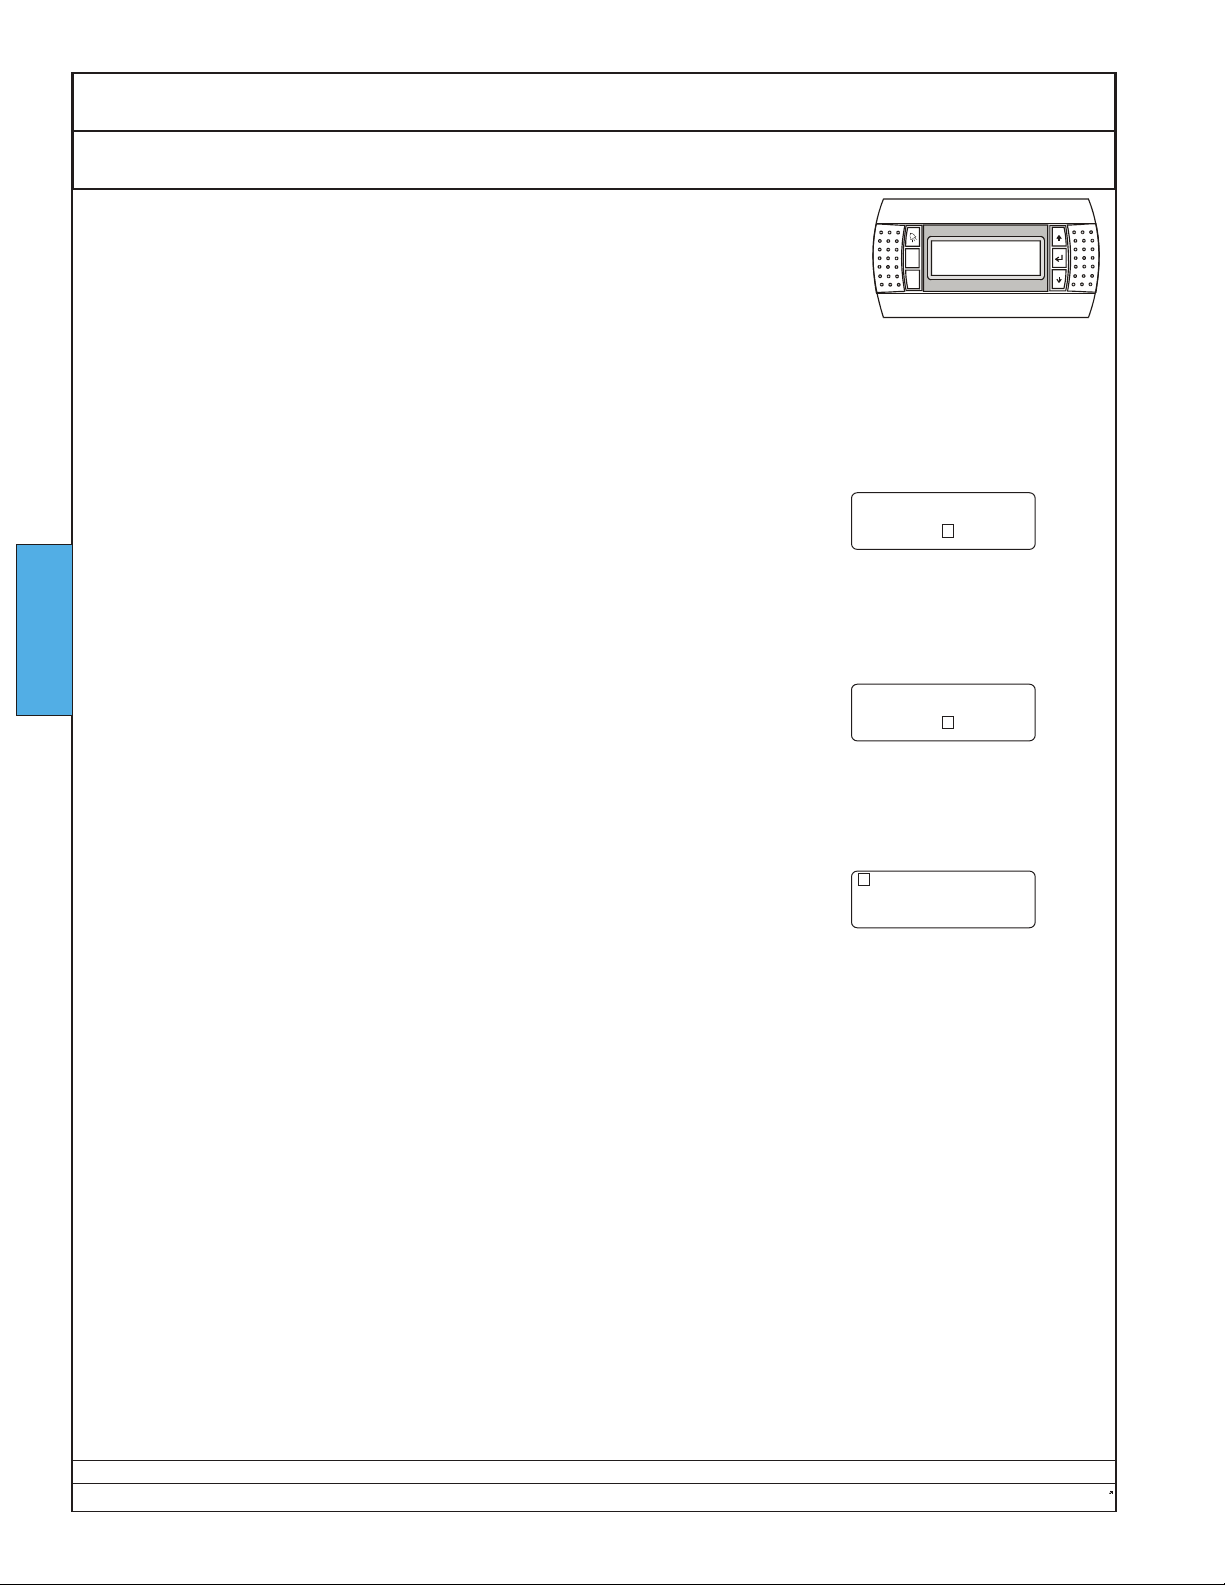
Ecosaire®CM Series Precision Air Conditioner Owners Manual
Startup Pre-Startup Adjustments Enter Password
NOTE: The password will be cleared
automatically after two minutes of no
button activity.
Some settings require the User Password. To enter the password when
prompted - press ↵to move the cursor to the password.
STARTUP
Press ↑until the password reads “0008”. If you overshoot, press ↓.
Prg
Esc
Enter
Password: 0000
Enter
Password: 0008
Press ↵. The password is entered and changes can be made.
System ON/OFF
System = OFF
NOTE: The password will be cleared automatically after
two minutes of no button activity.
Data subject to change without notice.
50 Ecosaire
®
July 2007
Page 51
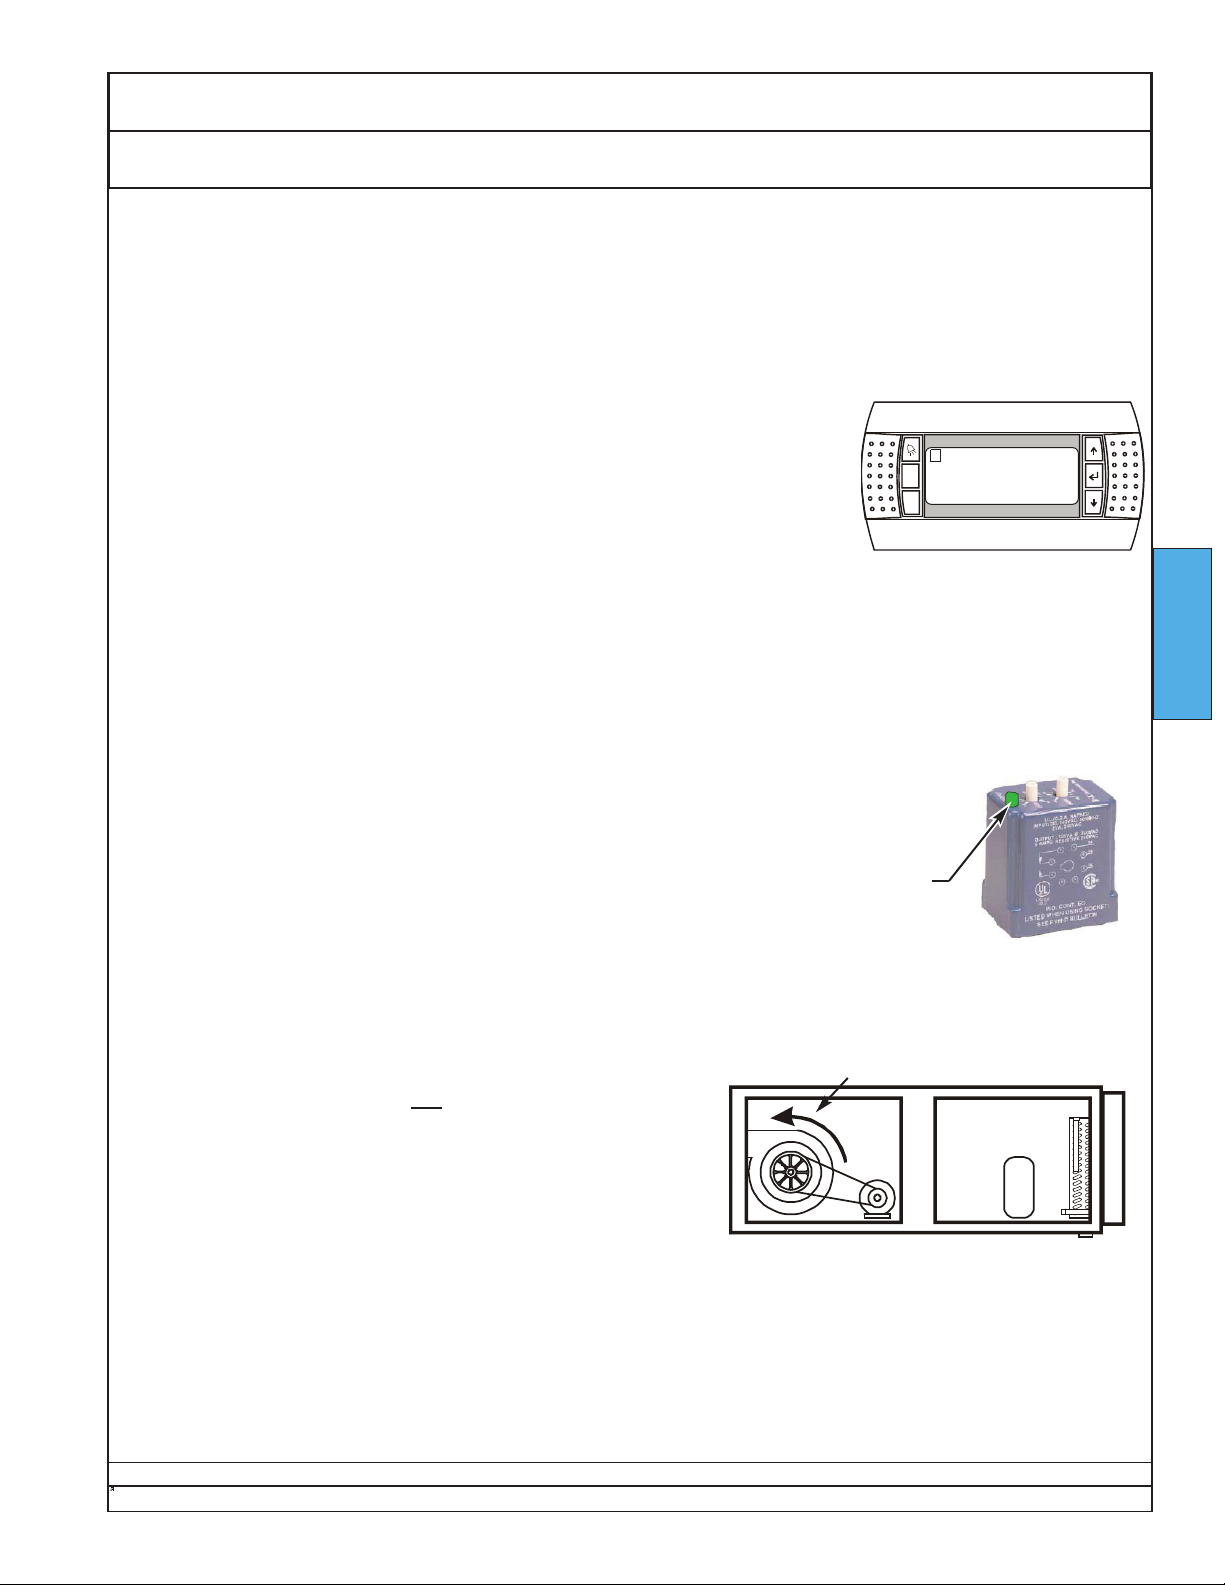
Owners Manual Ecosaire®CM Series Precision Air Conditioner
Prg
Esc
Adjust Airflow Pre-Startup Adjustments Startup
IMPORTANT!
Never run the blower without the filters in place. Regardless of filters, never run the blower when con-
struction dust is present. The resulting heat exchanger damage is not covered by the Ecosaire® warranty.
IMPORTANT!
Airflow must be set and confirmed before the refrigeration system is adjusted.
Turn off electric power to the unit.
Locate the compressor contactor and remove one contactor-coil wire to prevent the compressor from starting.
If possible and safe, turn on electric power to the unit.
Be sure that all air filters are clean and in place.
Note: The following adjustment requires the user password, see Enter Password.
On the controller interface, press Prg. The screen will be as shown.
Press ↵to move the cursor under “OFF”.
Press ↑to change “OFF” to “ON”.
Press ↵to move the cursor back to the top left corner. The blower should start. If it does not, check for alarms
such as Fire Alarm.
A qualified air-balance technician should determine, set, and confirm that the airflow is within ±10% of the specified
value. Airflow must be measured with all access doors closed.
Airflow is adjusted by changing the variable sheave on the blower motor shaft. The airflow rate should be within
±10% of the value stated on the submittal forms.
System ON/OFF
System = OFF
STARTUP
®
Some Ecosaire
units may have voltage monitors that prevent operation in the
event the branch-circuit voltage is too high, too low, has lost a phase, or has
reversed phase rotation. If the green LED is not lit, confirm that the applied voltage is within ±10% of the nameplate voltage (NEMA MG-1), that all three phases
are present, and that the phase rotation is correct.
If the blower does not turn the proper direction, a qualified person
should disconnect electric power and interchange any two of the
branch circuit wires at the Ecosaire
®
input lugs. Torque the con-
green
LED
Direction of Rotation
Blower position and orientation
may vary.
nectors as discussed earlier. Do not move any factory- installed
wires.
When the airflow is set and confirmed:
Disconnect electric power.
Reconnect the compressor contactor wire that was removed in the step above.
Fill out the air balance report and save a copy to be sent to Dectron along with the startup report.
Initial the appropriate box in the Pre-Startup Checklist in this section.
SAMPLE
Number and location of
components may vary.
Ecosaire
®
July 2007 51
Data subject to change without notice.
Page 52
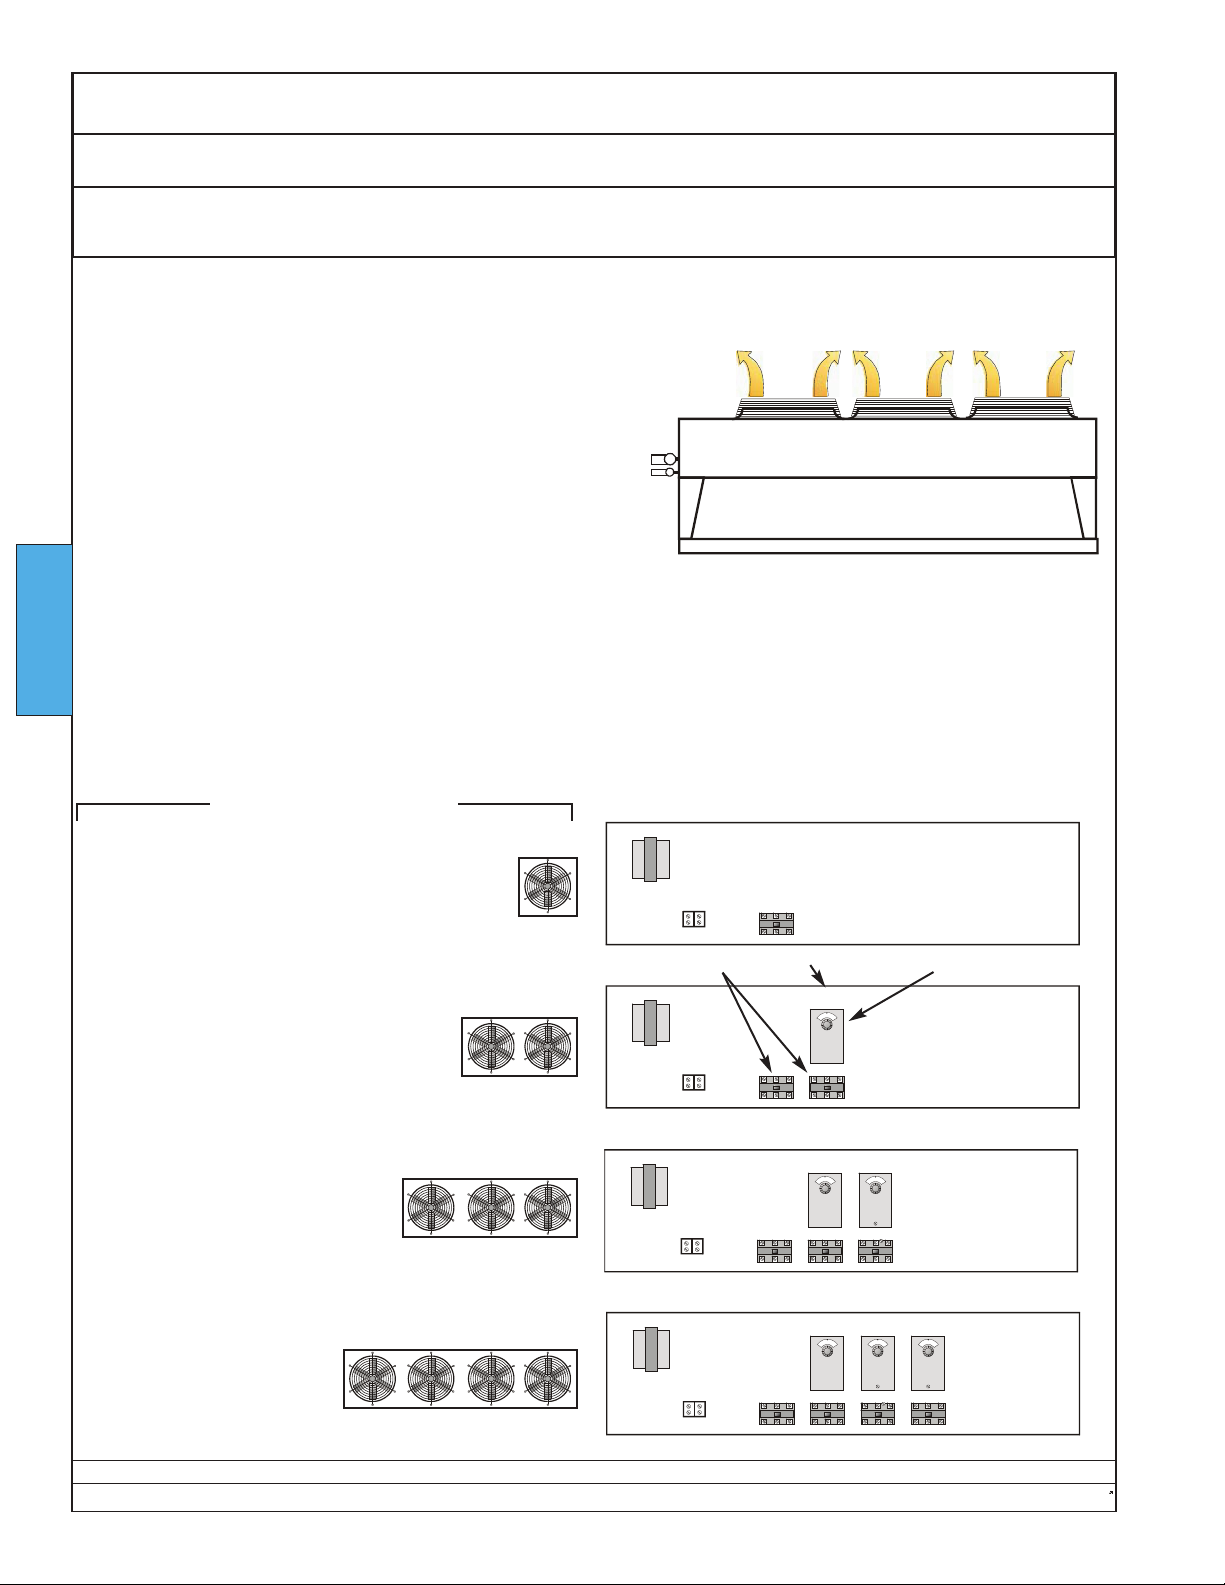
Ecosaire®CM Series Precision Air Conditioner Owners Manual
x
x
x
x
Startup Adjust Remote Heat Exchanger Controls
Air-Cooled Direct Expansion, Glycol-Cooled Direct Expansion,
Air-Cooled DualCool, & Glycol-Cooled DualCool Units Only
HEAT EXCHANGER FAN ROTATION
Discharge air must flow upward.
The remote heat exchanger fans must rotate so as to pro-
duce an upward air discharge as shown.
Single-phase fans will inherently turn the proper direction. If three-phase fans turn the wrong way, a qualified
person should disconnect the branch circuit and inter-
optional remote condenser
change any two wires on the power inlet lugs in the condenser control enclosure. Do not move any factory-
installed wires.
STARTUP
HEAT EXCHANGER FAN THERMOSTATS
Remote heat exchangers have a minimum number of fans that run whenever the Ecosaire® unit is in cooling
mode. Other fans may be controlled by thermostats sensing outdoor air temperature. Where this is the case,
the thermostats must be adjusted at installation, using the diagrams below.
HEAT EXCHANGER
FAN ARRANGEMENT
CONTROL ENCLOSURE
No adjustments necessary.
fan contactors
Data subject to change without notice.
52 Ecosaire
set point (°F)
75
x
x
-30
-30 75 80
x
x
75
x
x
fan thermostat
SAMPLE
Number and location of
components may vary.
x
x
®
July 2007
Page 53
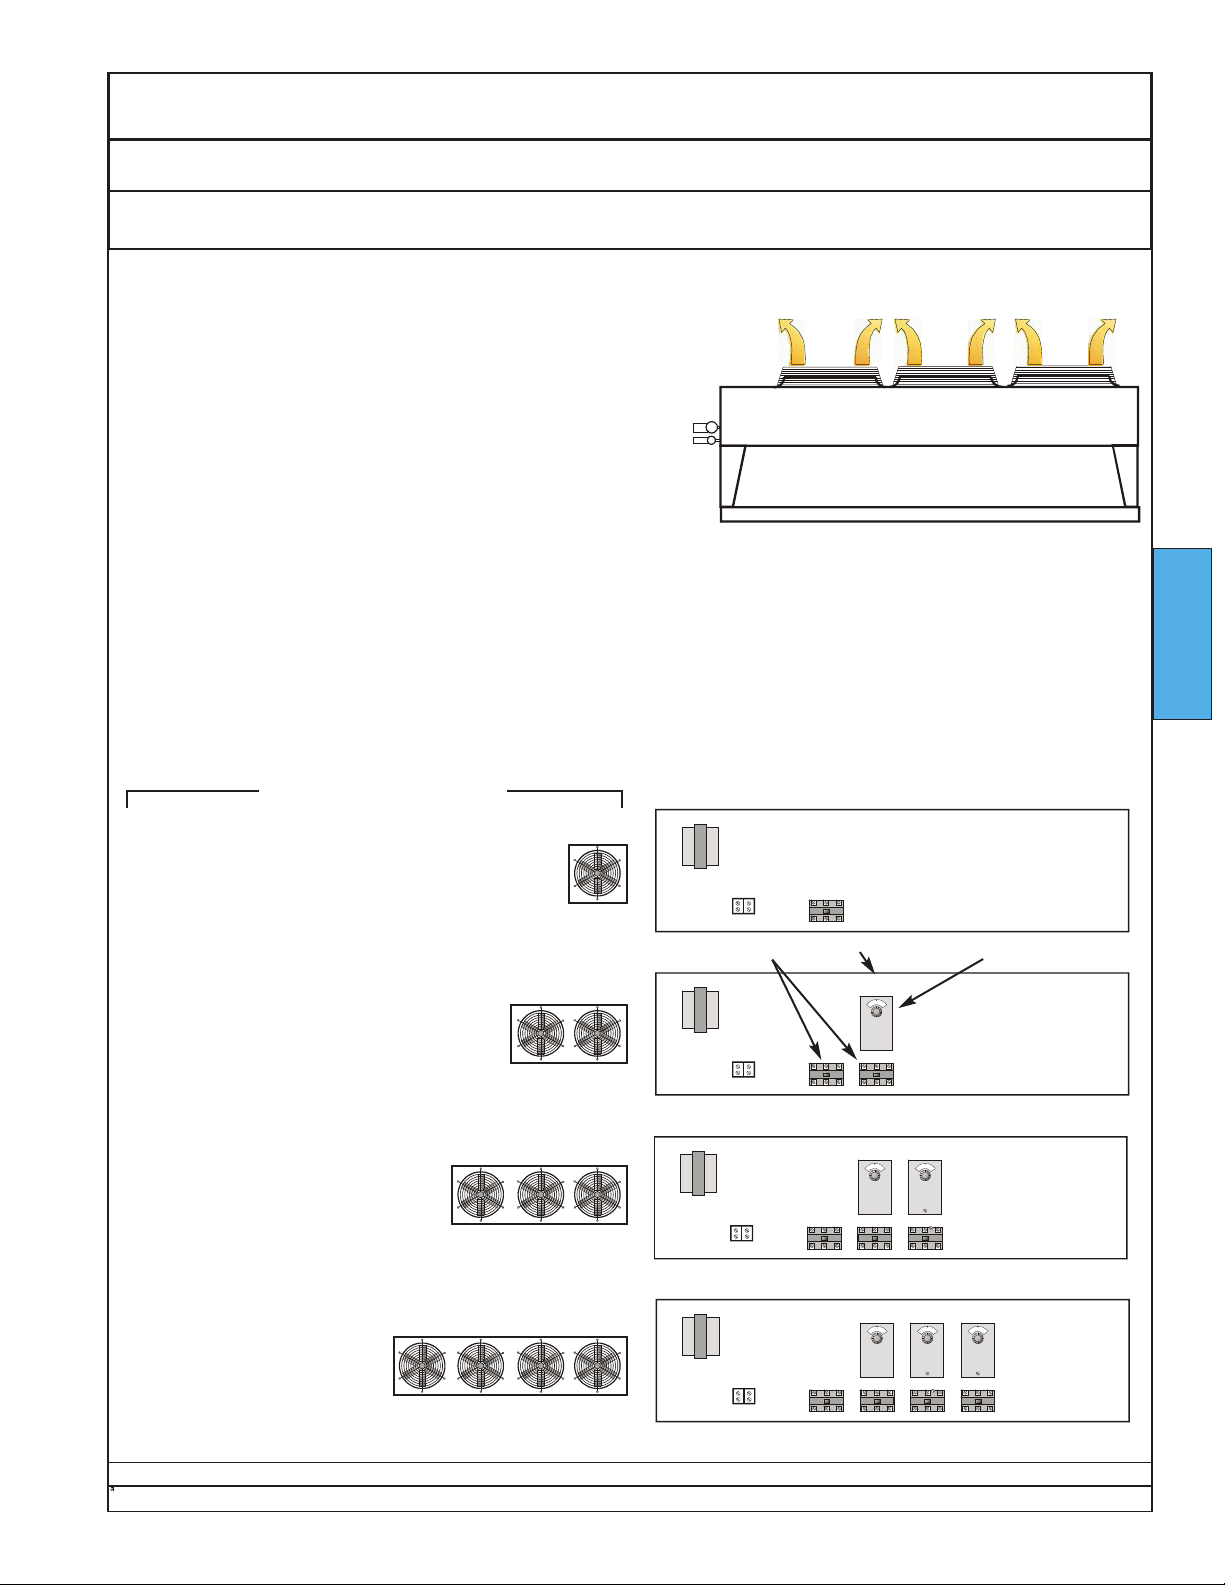
Owners Manual Ecosaire®CM Series Precision Air Conditioner
x
x
x
x
Adjust Remote Heat Exchanger Controls Startup
FreeCool Units Only
HEAT EXCHANGER FAN ROTATION
Discharge air must flow upward.
The remote heat exchanger fans must rotate so as to pro-
duce an upward air discharge as shown.
Single phase fans will inherently turn the proper direction. If three-phase fans turn the wrong way, a qualified
person should disconnect the branch circuit and inter-
optional remote condenser
change any two wires on the power inlet lugs in the condenser control enclosure. Do not move any factory-
installed wires.
HEAT EXCHANGER FAN THERMOSTATS
Remote heat exchangers have a minimum number of fans that run whenever the Ecosaire® unit is in cooling
mode. Any other fans will be controlled by thermostats sensing outdoor air temperature.
The thermostats must be adjusted at installation, using the diagrams below.
FAN ARRANGEMENT
CONDENSER CONTROL ENCLOSURE
No adjustments necessary.
STARTUP
Ecosaire
fan contactors
set point (°F)
45
x
x
-30
45
fan thermostat
SAMPLE
Number and location of
-30 45 50
®
July 2007 53
x
x
x
Data subject to change without notice.
x
x
x
components may vary.
Page 54
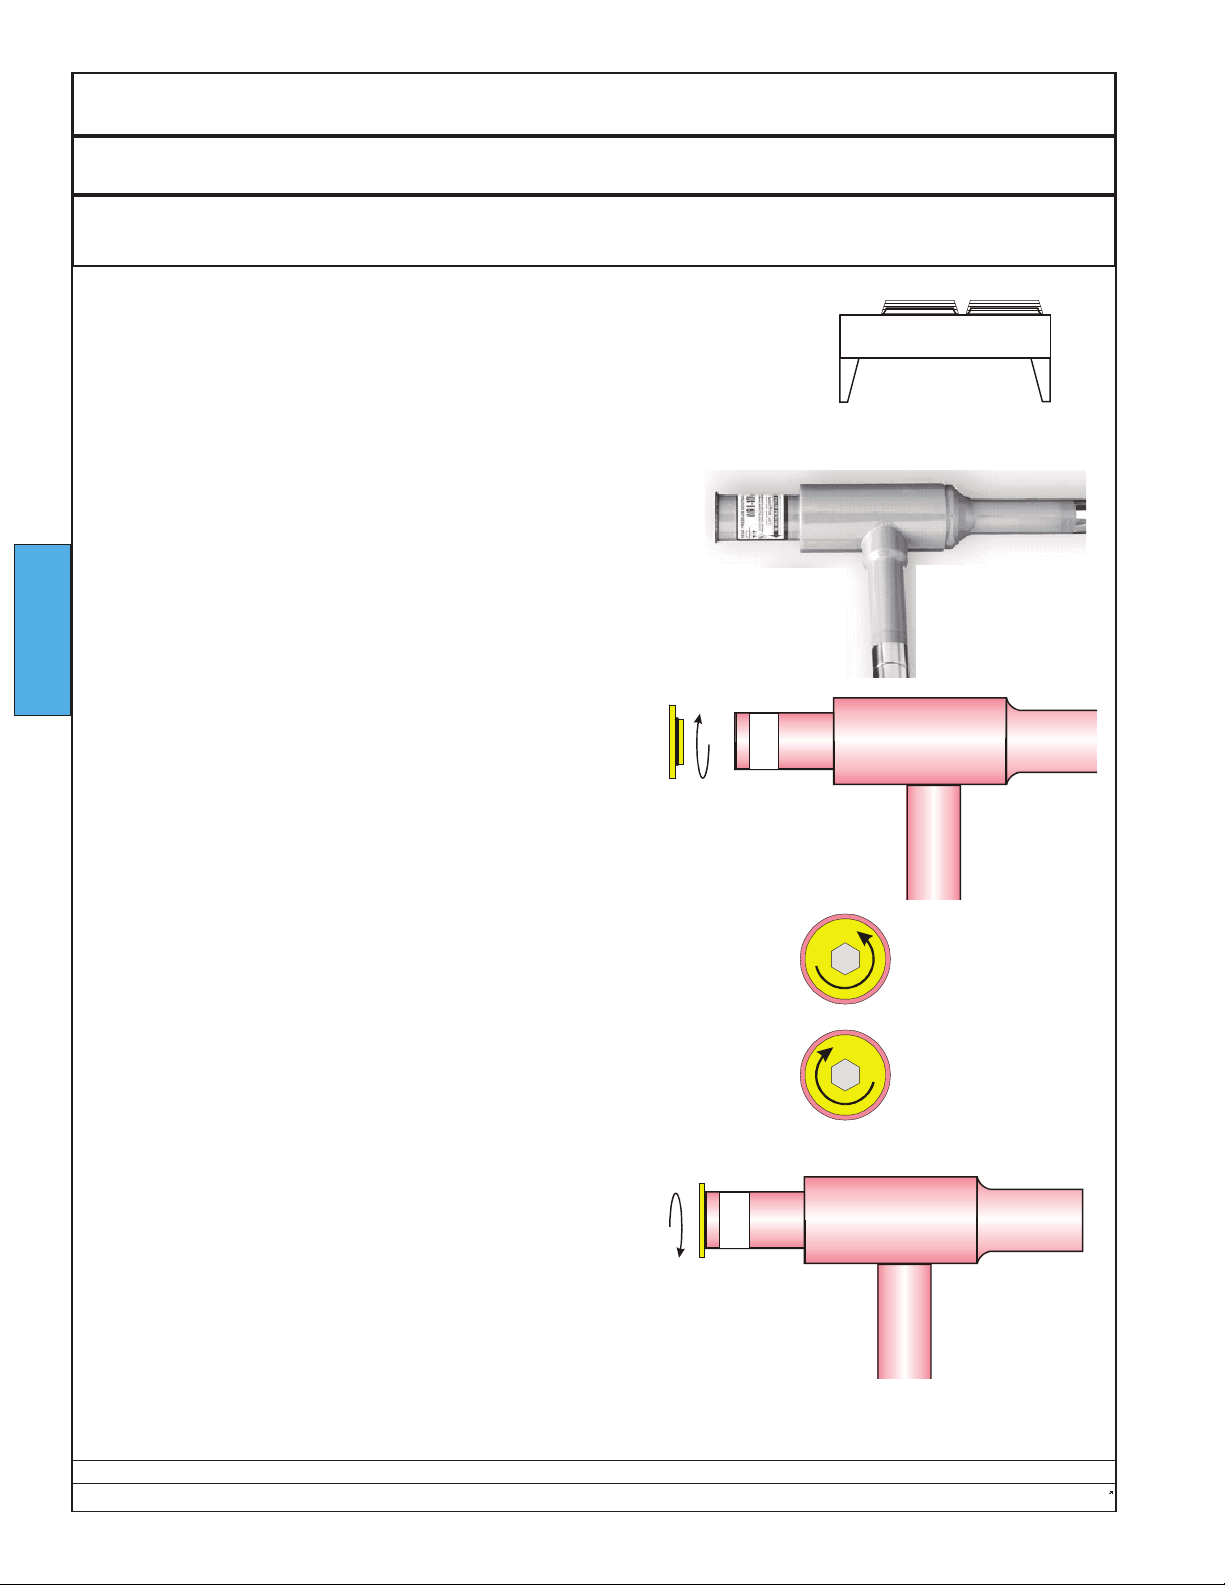
Ecosaire®CM Series Precision Air Conditioner Owners Manual
Startup Adjust Remote Heat Exchanger Controls
Air-Cooled Direct Expansion Units Only
Locate the remote condenser.
In the remote condenser, locate the head-pressure control valve,
as shown at right.
STARTUP
Open the plug on the end of the valve by turning it counter-
clockwise. Save the plug for future use. Keep the O-ring clean.
Locate the hex-broached adjusting screw inside the valve
barrel.
Using an Allen wrench, turn the adjusting screw counter-clockwise just until
the end of the screw is flush with the end of the valve barrel.
Turn the adjusting screw clockwise seven (7) turns.
Return the plug to the valve barrel and tighten by turning it
clockwise.
Data subject to change without notice.
54 Ecosaire
®
July 2007
Page 55
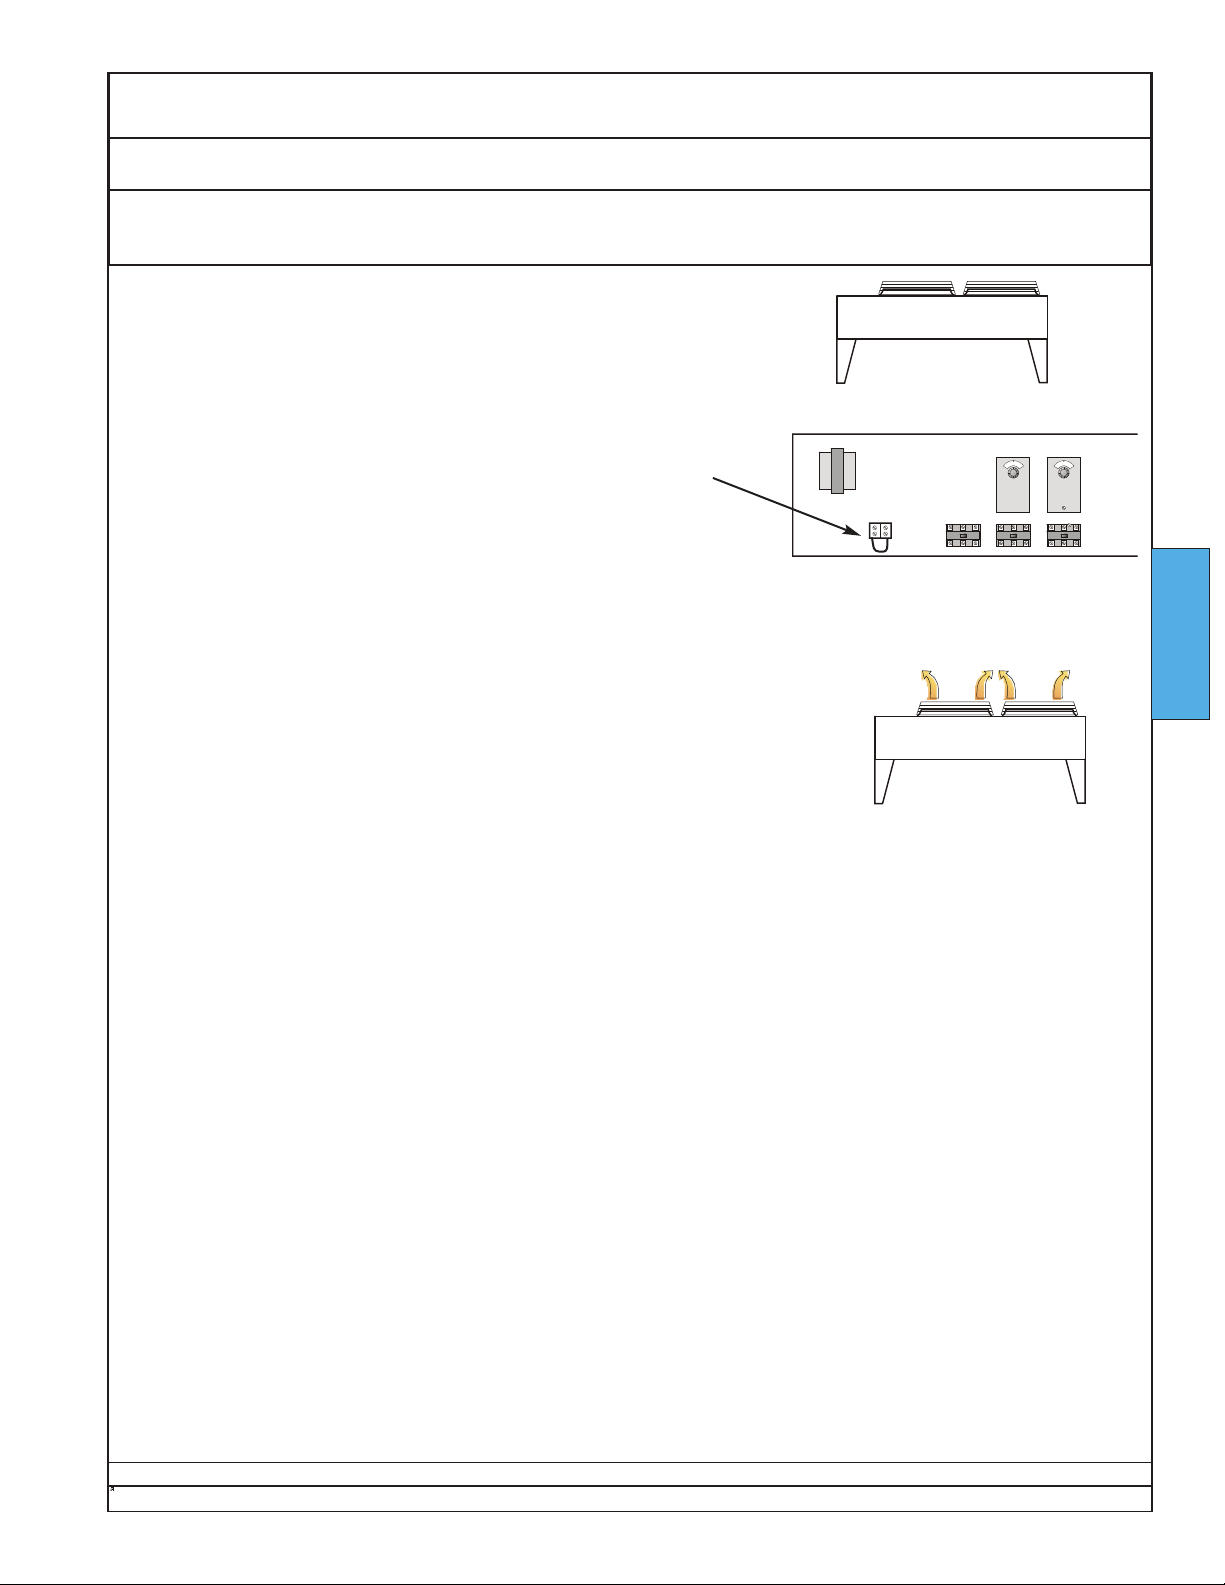
Owners Manual Ecosaire®CM Series Precision Air Conditioner
x
x
x
x
Adjust Remote Heat Exchanger Controls Startup
Air-Cooled Direct Expansion, Glycol-Cooled Direct Expansion,
Air-Cooled DualCool, & Glycol-Cooled DualCool Units Only
For glycol coolers, be sure that the system is full of glycol solution.
Turn off electrical power to the remote heat exchanger.
Carefully attach a temporary jumper to the enable input of the remote
heat exchanger, as shown.
Close the electrical enclosure of the remote heat exchanger.
Turn on the electrical power to the remote heat exchanger.
SAMPLE
Number and location of
components may vary.
Confirm that the fans (and pumps, if any) of the remote heat exchanger
operate.
For remote heat exchangers with three-phase fans, confirm that the
fans turn in the proper direction to blow air upward. If they do not, a
qualified person should disconnect power from the remote heat
exchanger, swap any two branch-circuit wires, and re-connect electrical
power to the remote heat exchanger. Do not move any factory-
installed wires.
For Air-Cooled Direct Expansion and Air-Cooled DualCool units,
remove the temporary jumper installed in step above. For all others,
leave jumper in place and go to next page.
STARTUP
Ecosaire
®
July 2007 55
Data subject to change without notice.
Page 56
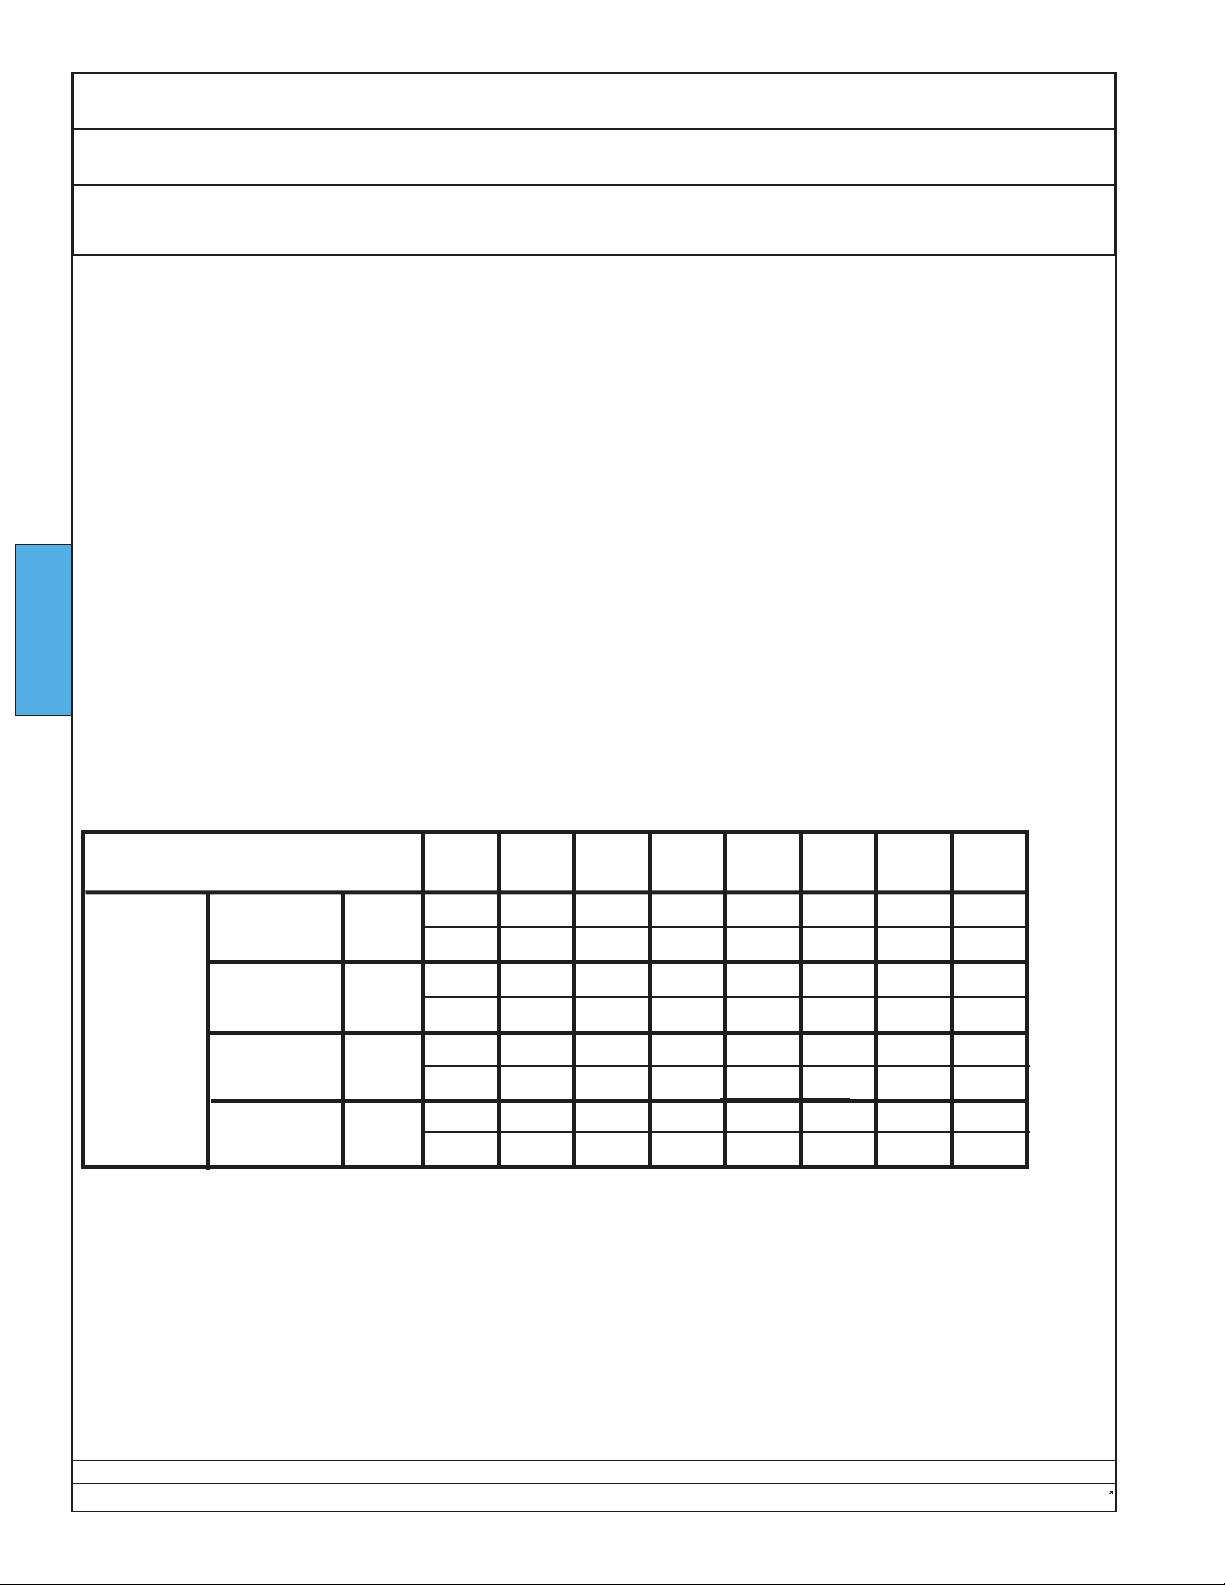
Ecosaire®CM Series Precision Air Conditioner Owners Manual
Startup Check Remote Heat Exchanger Operation
Glycol-Cooled Direct Expansion, Glycol-Cooled DualCool,
& FreeCool Units Only
(continued from previous page)
Check that the glycol solution is flowing at the proper flow rate. See table below.
After the pump(s) run for a while, residual air may be removed. Check that the system is still full of glycol
solution.
Turn off the electrical power to the remote heat exchanger.
Remove the jumper from step 2 (previous page).
STARTUP
Glycol-Cooled
Direct
Expansion
or
Glycol-Cooled
DualCool
or
FreeCool
Model No.
Outdoor
Temp. 95°F
Outdoor
Temp. 100°F
Outdoor
Temp. 105°F
Outdoor
Temp. 110°F
REQUIRED GLYCOL FLOWS (GPM)
CM010 CM015 CM020 CM030 CM050 CM070 CM080 CM100
GPM
lpm
GPM
lpm
GPM
lpm
GPM
lpm
5.0
18.9
5.0
18.9
5.0
18.9
10.1
38.2
6.5
24.6
6.5
24.6
6.5
24.6
13.0
49.2
8.7 9.5 17.7 37.2 42.0
32.9 36 67.0 141 159
8.7 9.5 17.7 37.2 42.0
32.9 36 67.0 141 159
8.7 9.5 17.7 37.2 42.0
32.9 36 67.0 141 159
17.4 21.9 41.5 74.4 84.0
65.9 82.9 157
26.5
100
26.5
100
26.5
100
50.9
193 282 318
Data subject to change without notice.
56 Ecosaire
®
July 2007
Page 57
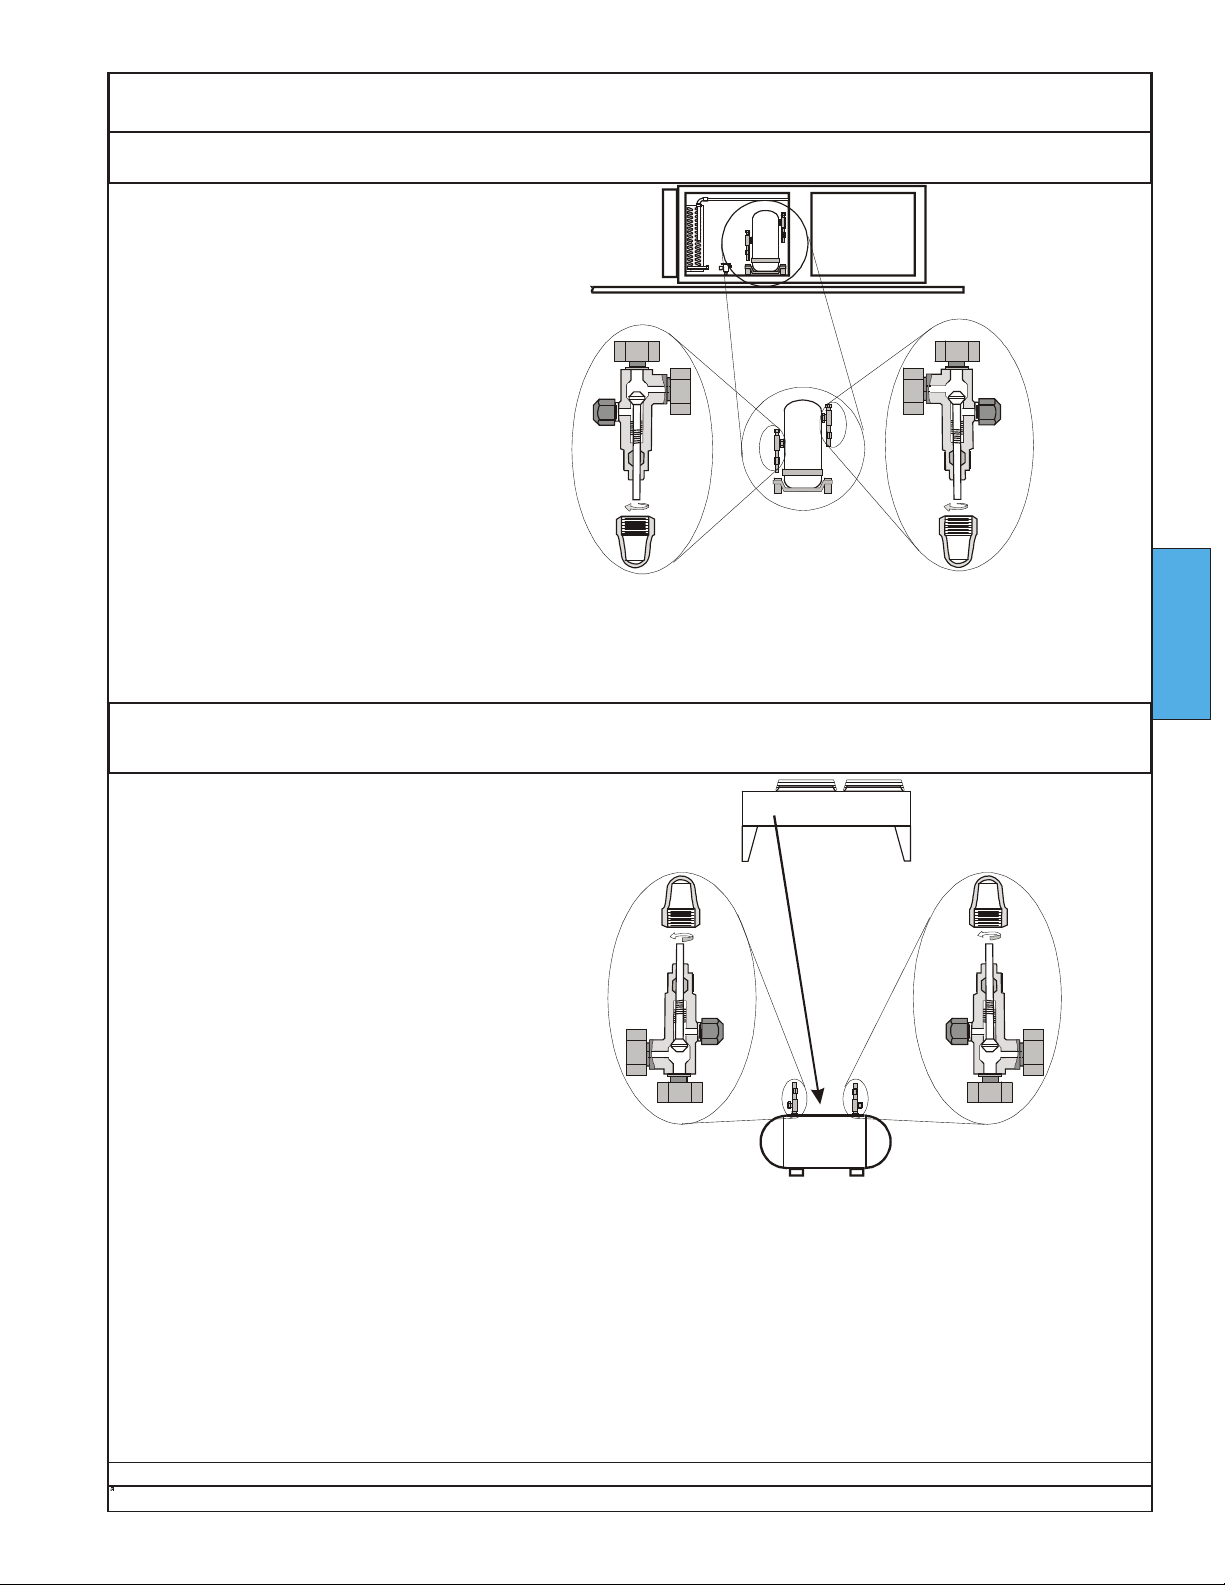
Owners Manual Ecosaire®CM Series Precision Air Conditioner
Open Refrigerant Valves Startup
For all units, be sure the compressor rotalock
valves are open.
SAMPLE
Number and location of
components may vary.
STARTUP
Air-Cooled Direct Expansion and Air-Cooled DualCool Units Only
Locate the refrigerant receiver in the remote
condenser.
Be sure the rotalock valves on the receiver
are open by turning the stems counterclockwise.
Replace the stem caps.
SAMPLE
Number and location of
components may vary.
Ecosaire
Data subject to change without notice.
®
July 2007 57
Page 58
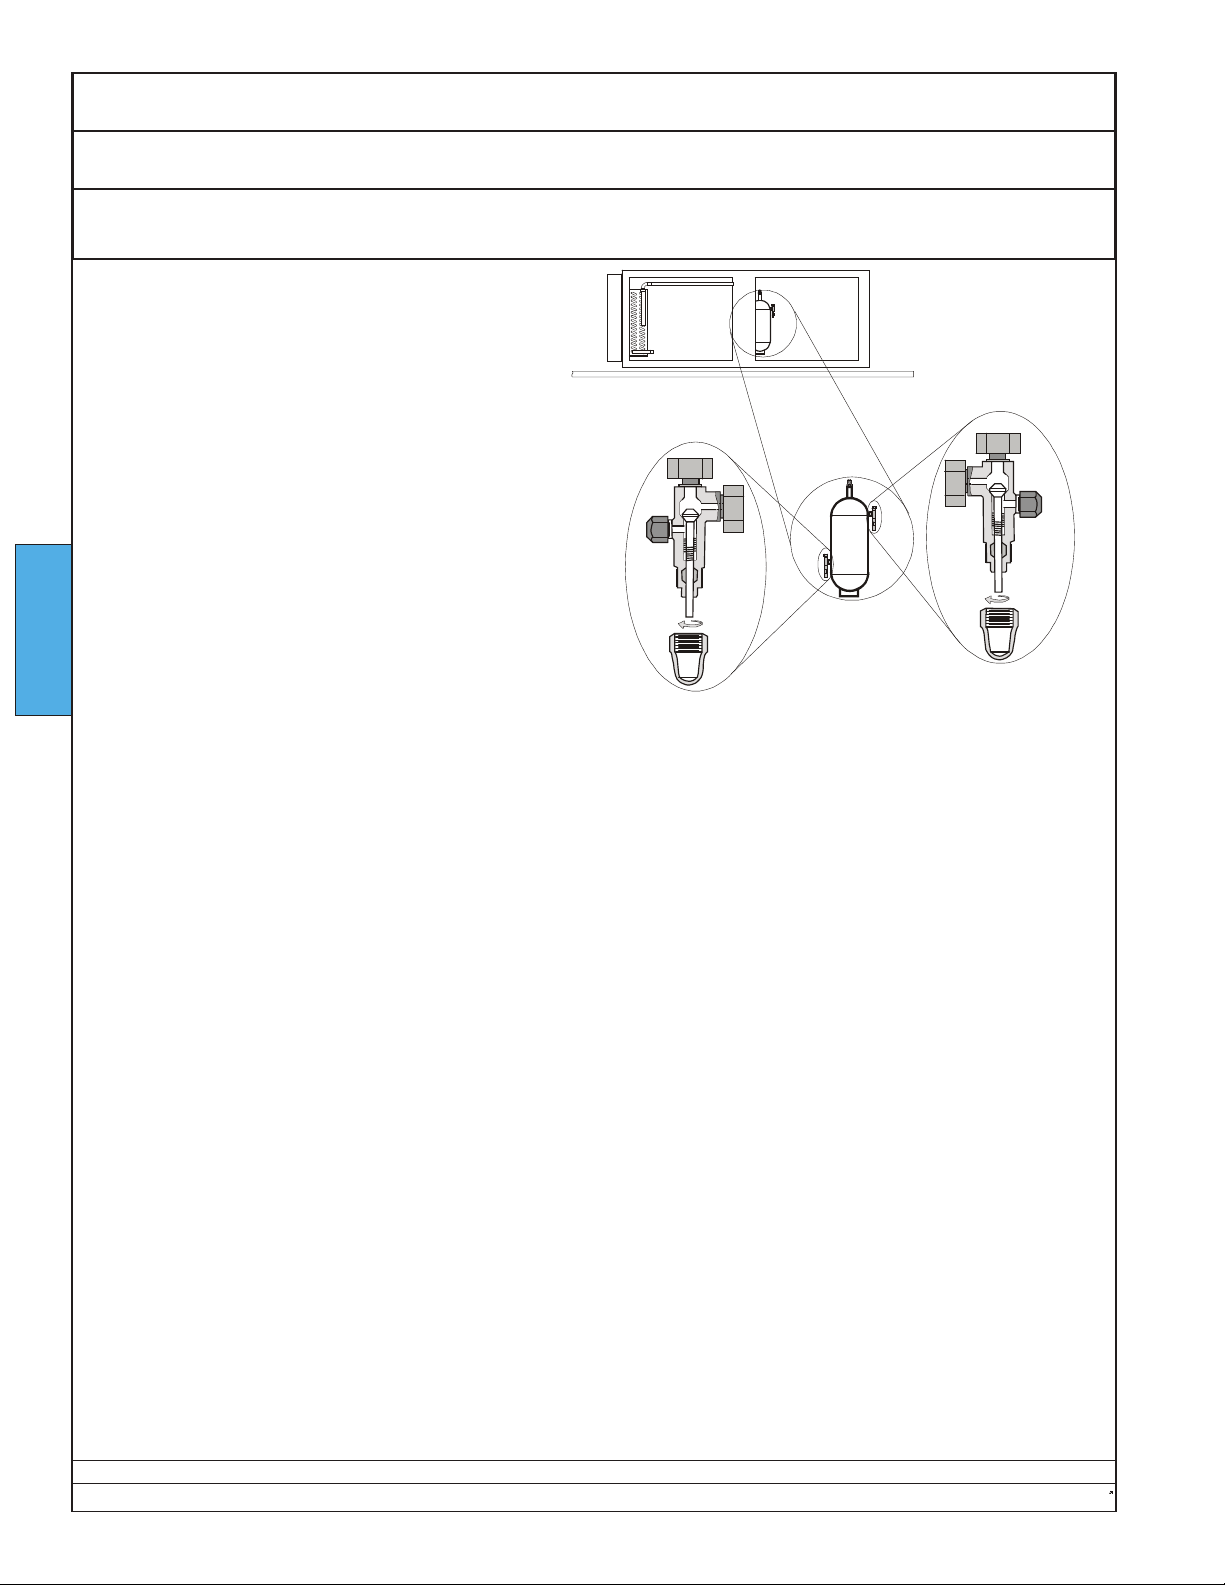
Ecosaire®CM Series Precision Air Conditioner Owners Manual
Startup Open Refrigerant Valves
Glycol-Cooled Direct Expansion, Glycol-Cooled DualCool,
& FreeCool Units Only
Locate the refrigerant receiver in the unit.
Be sure the rotalock valves on the receiver
are open by turning the stems counterclockwise.
Replace the stem caps.
STARTUP
SAMPLE
Number and location of
components may vary.
Data subject to change without notice.
58 Ecosaire
®
July 2007
Page 59
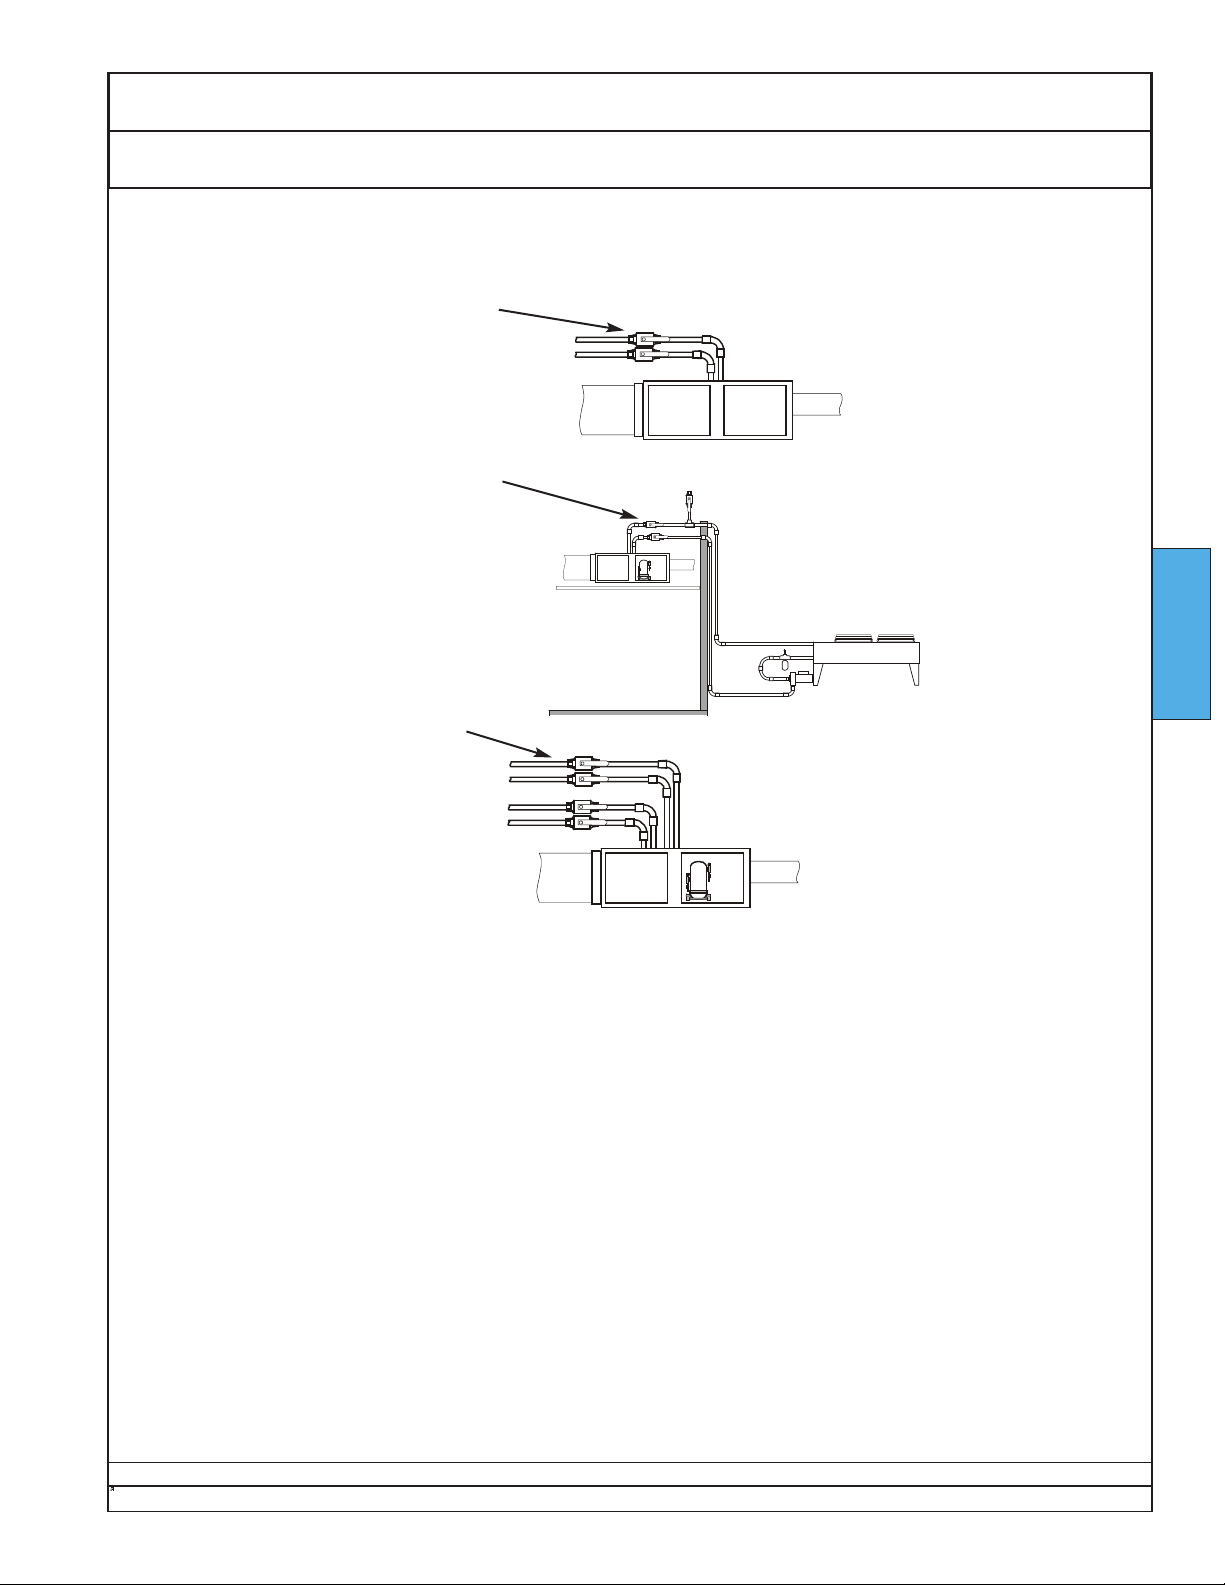
Owners Manual Ecosaire®CM Series Precision Air Conditioner
Check Valve Positions Pre-Startup Adjustments Startup
For Water-Cooled Direct-Expansion
units, be sure any water valves (by
others) are open.
For Glycol-Cooled Direct-Expansion
units, be sure any glycol valves (by
others) are open.
STARTUP
For Glycol-Cooled DualCool,
FreeCool, or Chilled-Water units,
be sure that any fluid valves
(by others) are open.
Ecosaire
Data subject to change without notice.
®
July 2007 59
Page 60
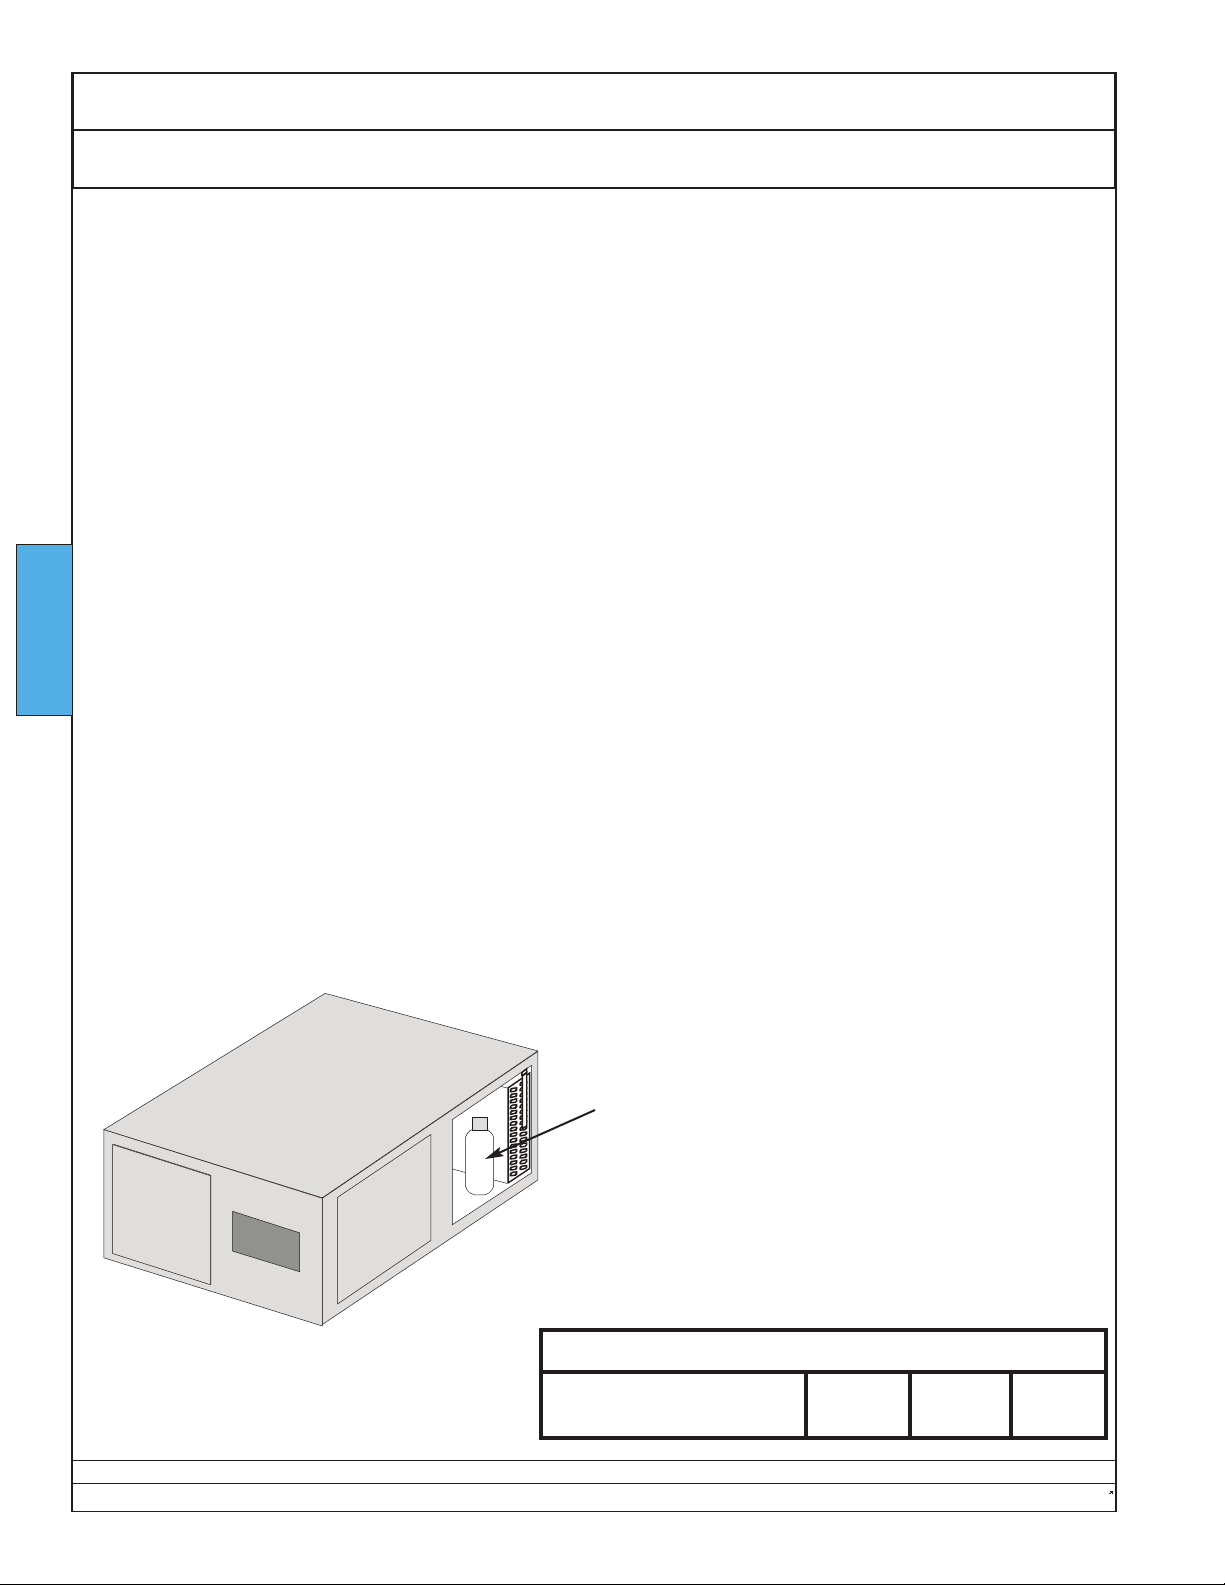
Ecosaire®CM Series Precision Air Conditioner Owners Manual
Startup Humidifier
Humidifier (if any)
Some units may be equipped
with electrode-type humidifiers.
Access the humidifier as shown in
the diagram below.
IMPORTANT!
The electrode plugs on top of
the cylinder must be pressed firmly
onto the electrode pins. If a plug is
loose, temporarily disconnect electric power and squeeze the plug
with pliers. Loose plugs will
cause overheating and prossible
melting of the plugs.
Components burnt due to loose
STARTUP
connections are not covered under
warranty.
Open the field-installed shut-off
valve on the water inlet line. Push
the AUTO/ON/OFF/DRAIN switch
to “ON.”
The humidifier light will come on.
The humidifier contactor and the fill
solenoid valve will energize, slowly
filling the cylinder with water. The
water level will rise until the current
draw through the electrodes reaches the pre-set value determined by
the capacity control setting.
Normally, this is before the water
reaches the top.
While the cylinder is filling, locate
the three power leads on the top of
the cylinder and check that the line
voltage is present at all leads.
IMPORTANT!
Low conductivity water will
cause the water level to rise to
the top of the cylinder activating
the High Water Level alarm light.
This is NOT a concern. The
cylinder will continue to heat,
boil and refill in short cycles
until the mineral concentration
within the cylinder increases to
normal. As it does, the water
level will also drop to normal.
The water cylinder will begin to
boil shortly after it stops filling. As
the water boils away, the water
level in the cylinder will drop.
When it has dropped a preset
amount, the fill valve will open to
refill the cylinder. Optimum conductivity is automatically maintained with short drain cycles only
when necessary.
Check the current on all power
lines to the cylinder. The current
will vary with water level. The maximum current will be reached just
as the fill valve closes and should
agree with the nominal amps listed
below.
Should normalization of the unit
be required immediately after startup, the installer may speed up the
process by artificially increasing
water conductivity. During a fill
cycle, the installer should dissolve
half a teaspoon of table salt (NO
MORE) in a cup of water and add it
to the cylinder by means of the fill
cup attached to the plumbing section.
Open the plumbing compartment
and add salt solution through the
cylinder outlet. Excessive amounts
of salt will result in erratic operation
of the unit; however, normalization
of the unit will occur automatically
through the solid-state control
sequence.
Humidifier
SAMPLE
Unit Voltage
Number and location of
components may vary.
Data subject to change without notice.
60 Ecosaire
Humidifier Nominal Amps
Humidifier Amp Draw
200 v
18.5
230 v
16.1
®
460 v
8.0
July 2007
Page 61
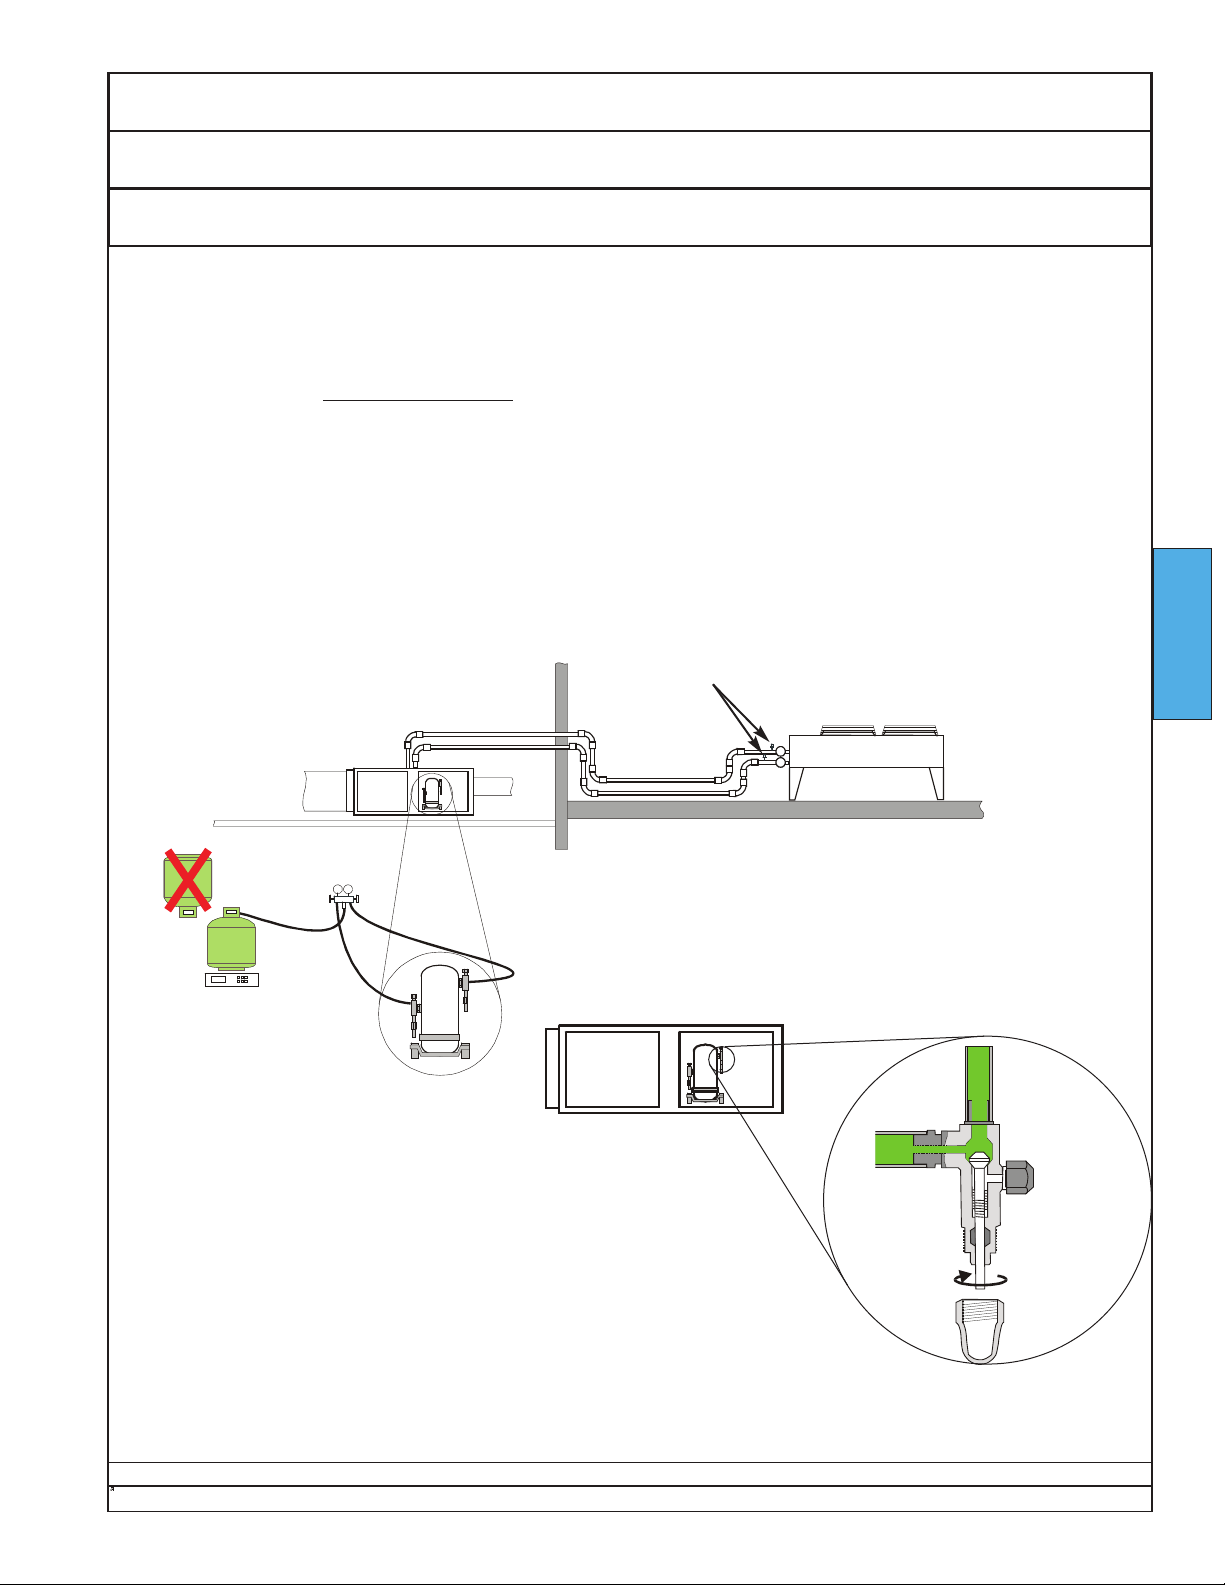
Owners Manual Ecosaire®CM Series Precision Air Conditioner
Prepare to Add Refrigerant Startup
Air-Cooled Direct Expansion & Air-Cooled DualCool Units Only
For Air-Cooled Direct Expansion or Air-Cooled DualCool units, the required weight of refrigerant should
have been added when the remote condenser was installed in Installation - Piping - Refrigerant. If all
the necessary refrigerant was not added during installation, it must be added at startup.
If the total amount of refrigerant cannot be pumped into the high-pressure access valve while the com-
pressor is OFF, then refrigerant vapor only can be added to the unit through the suction access valve while
the compressor is running. NEVER ADD LIQUID REFRIGERANT TO THE SUCTION ACCESS VALVE.
Units with two refrigeration circuits will have two sight glasses and two suction access valves.
Arrange as below to add refrigerant. Close the access panels as far as possible and temporarily tape
them in place for operation later.
preferred refrigerant-adding ports (by others)
Compressor must be OFF.
STARTUP
Ecosaire
SAMPLE
Number and location of
components may vary.
Be sure that the following manual valves
have been opened:
For all units, be sure that the compressor
isolation valves (if any) are
a) in the run (backseated) position, or
b) in the access (middle) position if
pressure gauges are connected.
Data subject to change without notice.
®
July 2007 61
Page 62
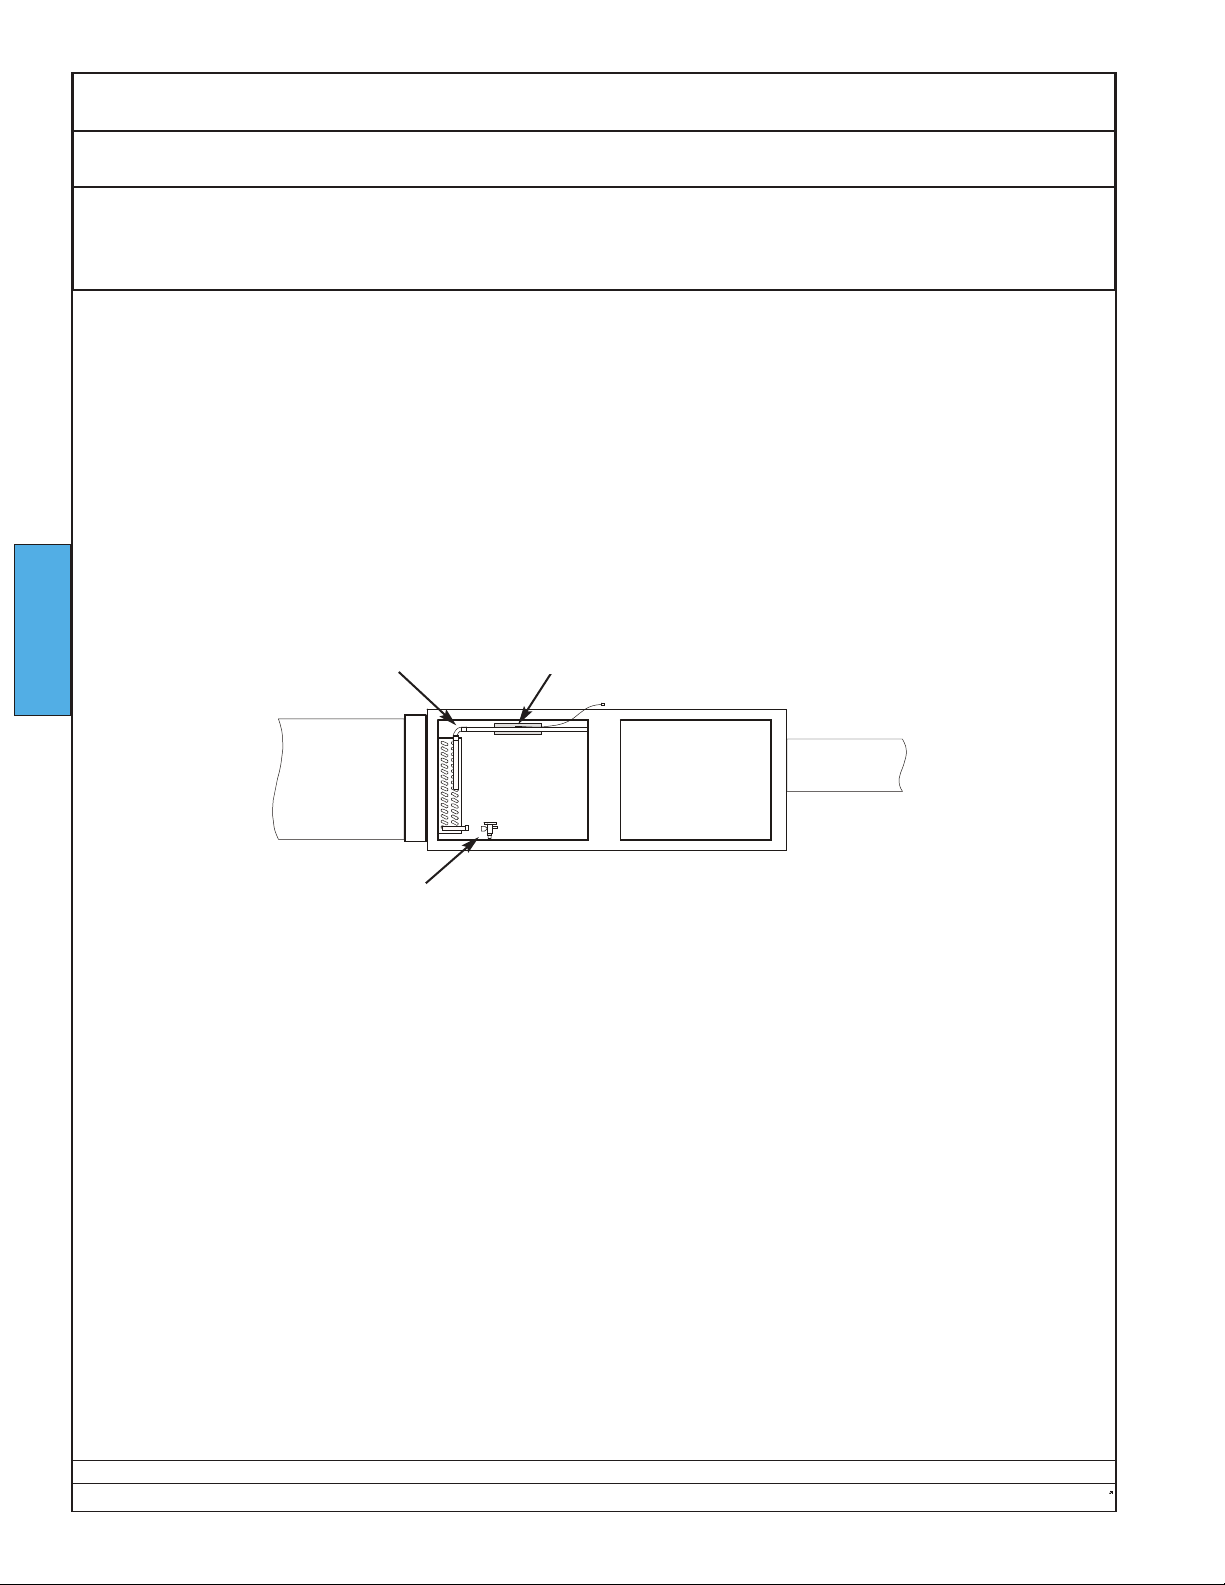
Ecosaire®CM Series Precision Air Conditioner Owners Manual
Startup Prepare to Adjust Expansion Valves
Air-Cooled Direct Expansion, Water-Cooled Direct Expansion, Glycol-Cooled
Direct Expansion, Air-Cooled DualCool, Glycol-Cooled DualCool,
& FreeCool Units Only
The refrigerant expansion valves must be adjusted at startup.
Firmly attach a thermocouple or other temperature sensor to the suction
tube.
Insulate the sensor and all around the suction tube with 1/2” thick
insulation for at least three inches on either side of the temperature sensor.
Tape the insulation to prevent air flow from changing the temperature
reading.
Locate and identify the refrigerant sight glass.
STARTUP
Locate and identify the expansion valve.
Attach temperature sensor here. Route the sensor
Suction Tube
cable out of the cabinet. Replace the access panel.
Expansion Valve
SAMPLE
may vary.
Number, location, and
appearnce of components
Data subject to change without notice.
62 Ecosaire
®
July 2007
Page 63
Owners Manual Ecosaire®CM Series Precision Air Conditioner
________ Model _____________ Serial Number
Print your initials in the
boxes to indicate completion. Print “N/A” for items
which are not applicable to
the installation.
Space
Confirm that the walls and ceiling have been adequately
insulated and have a proper
vapor barrier (see Building -
Moisture Migration).
Confirm that any windows are
constructed and installed to
allow proper air flow over the
glass (see Building -
Moisture Migration).
Confirm that adequate space
has been left around the
Ecosaire® (see Installation Unpacking and Locating).
Confirm that no construction
dust or other debris is in the
return duct.
Confirm that no construction
dust or other debris will be
drawn into the return duct or
the outdoor-air duct (if any).
Humidifier
Check all electrical connections for wires which may have
become loose in shipping.
Components damaged due to
loose connections are NOT
covered by the warranty.
Check electrode plugs to ensure
they are pressed firmly onto the
electrode pins. IMPORTANT:
Loose connections will cause
overheating of the cylinder
plugs, possible melting the
plugs and/or cylinder.
Open the isolating valve in the
feed water line to the unit.
initials
initials
initials
initials
initials
Piping
For Air-Cooled Direct
Expansion & Air-Cooled
DualCool units, confirm that
refrigerant piping is installed
and free of leaks.
For Air-Cooled Direct
Expansion & Air-Cooled
DualCool units, confirm that
both circuits have been evacu-
your
ated to 500 microns of mercury
or less, and filled with R-22
and oil as specified.
For water-cooled, glycolcooled or FreeCool units, con-
your
firm that the water or fluid flow
is within tolerance according to
the unit specifications.
your
Confirm that the condensate
drain pipe is properly connected with a P-trap, and is free of
leaks.
your
Confirm that the condensate
drain P-trap has been filled
with water and that the drain
your
works.
For units with humidifiers, confirm that the water-supply tube
is complete and tested.
For units requiring a condensate pump, confirm that the
pump is operating.
your
Make sure copper lines,
initials
including the capillary tubes at
the thermal expansion valves,
are not touching each other.
For chilled-water units, air
must be purged from the
chilled water coil the first time
your
water is introduced into the
initials
system. A petcock is provided
at the top of the coil for this
purpose.
your
initials
Pre-Startup Checklist Startup
Wiring
Confirm that the voltage to be
applied to the Ecosaire® corresponds to that specified on
the unit nameplate and to the
your
initials
initials
initials
initials
initials
initials
initials
initials
other requirements of
Installation - Wiring - Power.
Confirm that the size of the
wire supplying electric power
to the Ecosaire® is adequate
for the circuit ampacity shown
on the nameplate.
your
For long lengths of power
wiring or marginal voltage,
confirm that the wire size is
adequate for less than 10%
voltage drop under compres-
your
initials
sor starting current.
Confirm that only copper wire
was used for any connections
to the Ecosaire® unit.
your
Confirm that the unit is properly grounded.
Confirm that all electrical connections have been checked
your
for tightness and re-torqued as
necessary.
Confirm that all electrical
your
enclosures are clean and dry.
For 3-phase units, confirm that
the phase sequence is correct
your
for proper blower rotation.
See Startup - Airflow.
Confirm that the control signal
wiring is complete, as shown
your
in the unit field-wiring diagram.
Where applicable, confirm that
inter-unit circuits are complete.
Where applicable, confirm that
unit-supervisory circuits are
complete.
your
your
initials
your
initials
your
initials
your
initials
your
initials
your
initials
your
initials
your
initials
your
initials
your
initials
your
initials
STARTUP
Completed by _________________________________ Ph. ( ) _ _ _ - _ _ _ _
Data subject to change without notice.
®
Ecosaire
July 2007 63
Page 64
Ecosaire®CM Series Precision Air Conditioner Owners Manual
Startup Pre-Startup Checklist Model ________ Serial No. ____________
Unit preparation
Confirm that the Ecosaire
unit is properly supported.
Confirm that all shipping
blocks, shipping braces, compressor locks, etc., have been
removed or released for normal operation.
Confirm that the blower belts
are properly installed, tensioned and aligned.
Confirm that the air volumes
have been measured and are
STARTUP
correct (see
Distribution - Adjust Airflow
Confirm that a copy of the airbalance report is available.
Confirm that all air filters are
clean and in place.
Confirm that the air heat
exchangers are clean.
Confirm that power has been
applied to the crankcase
heaters for at least 12 hours.
Check that the blower(s)
rotates freely.
Check that the blower wheel
is securely tightened to the
shafts.
Installation - Air
Air distribution
®
initials
initials
initials
initials
).
initials
Confirm that all ducts and
your
plenums have been sized and
installed correctly to limit the
external static pressure to no
more than the specified
amount.
your
Confirm that all grilles and diffusers are unobstructed.
your
Confirm that all construction
dust and debris has been
removed from ducts and
plenums.
your
For glycol-cooled and FreeCool units, make sure all pipe
air vents are closed tightly.
your
initials
initials
initials
initials
Remote Heat
Exchanger (if any)
Confirm that the heat
exchanger is located properly
for good airflow (see
your
Installation- Locate Remote
Heat Exchanger).
your
Confirm that the voltage
applied to the heat exchanger
corresponds to that specified
on the nameplate, NEMA MG1 and ANSI C84.1.
your
Confirm that the heat
exchanger tubes have been
tested for refrigerant leaks.
your
Confirm that the top and side
clearances are at least as
your
initials
your
initials
your
initials
large as specified in
your
initials
your
initials
Installation - Locate Remote
Heat Exchanger.
Confirm that no construction
your
initials
dust, leaves, or other debris
your
initials
will be drawn into the heat
exchangers.
your
initials
Confirm that any shipping
your
initials
blocks, spacers, or retainers
have been removed.
your
initials
Check that the heat exchangers are clean, the fins are
your
initials
straight, and there are no
obstructions to airflow.
your
initials
Completed by _________________________________ Ph. ( ) _ _ _ - _ _ _ _
Data subject to change without notice.
64 Ecosaire
®
July 2007
Page 65
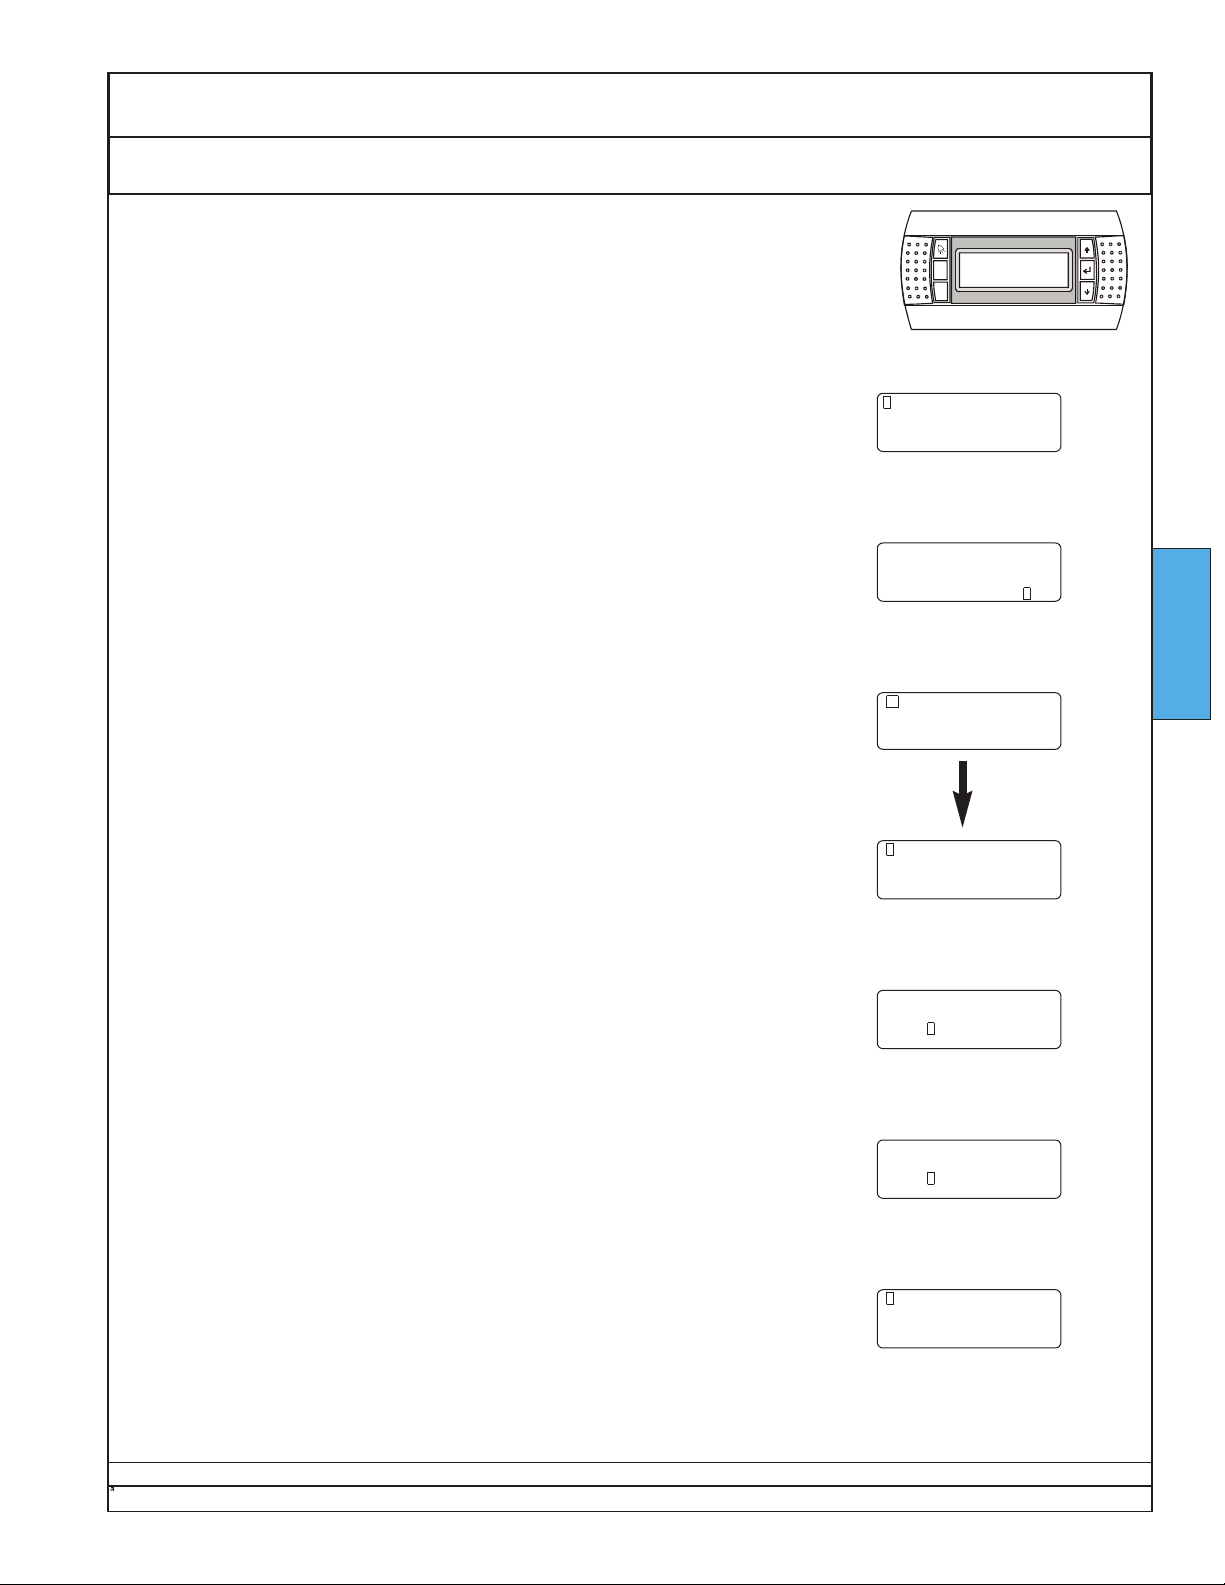
Owners Manual Ecosaire®CM Series Precision Air Conditioner
Set Clock Pre-Startup Adjustments Startup
Note: This adjustment requires the user password, see Startup - Pre-startup Adjustments - Controller Password.
The clock is set at the factory for date and Eastern Time. These settings can be
changed as below.
Prg
Esc
To access Configuration Menu 1, press Prg and Esc at the same time.
To select Control Setup, press ↵three times.
Press ↓to view the CLOCK menu. If the password has cleared automatically, as discussed on the Enter User Password page, you will be asked
for it again. Follow the instructions in Startup - Pre-startup Adjustments-
Controller Password.
Config Menu 1
System Run Hours . . . . >
Alarm History . . . . . . . .>
Control setup . . . . . . . >
Config Menu 1
System Run Hours . . . . >
Alarm History . . . . . . . .>
Control setup . . . . . . . >
Enter
Password: 0000
CLOCK
Date = mmm/dd/yyyy
Time = hh:tt
Day = DOW
STARTUP
To change the clock, press ↵repeatedly until the cursor is at the desired
value. The example is to change the hour.
Press either ↑or↓to change the selected value.
To store the setting, press↵until the cursor is back in the upper left corner.
®
Ecosaire
July 2007 65
CLOCK
Date = mmm/dd/yyyy
Time = hh:tt
Day = DOW
CLOCK
Date = mmm/dd/yyyy
Time = xx:xx
Day = DOW
CLOCK
Date = mmm/dd/yyyy
Time = hh:tt
Day = DOW
Data subject to change without notice.
Page 66
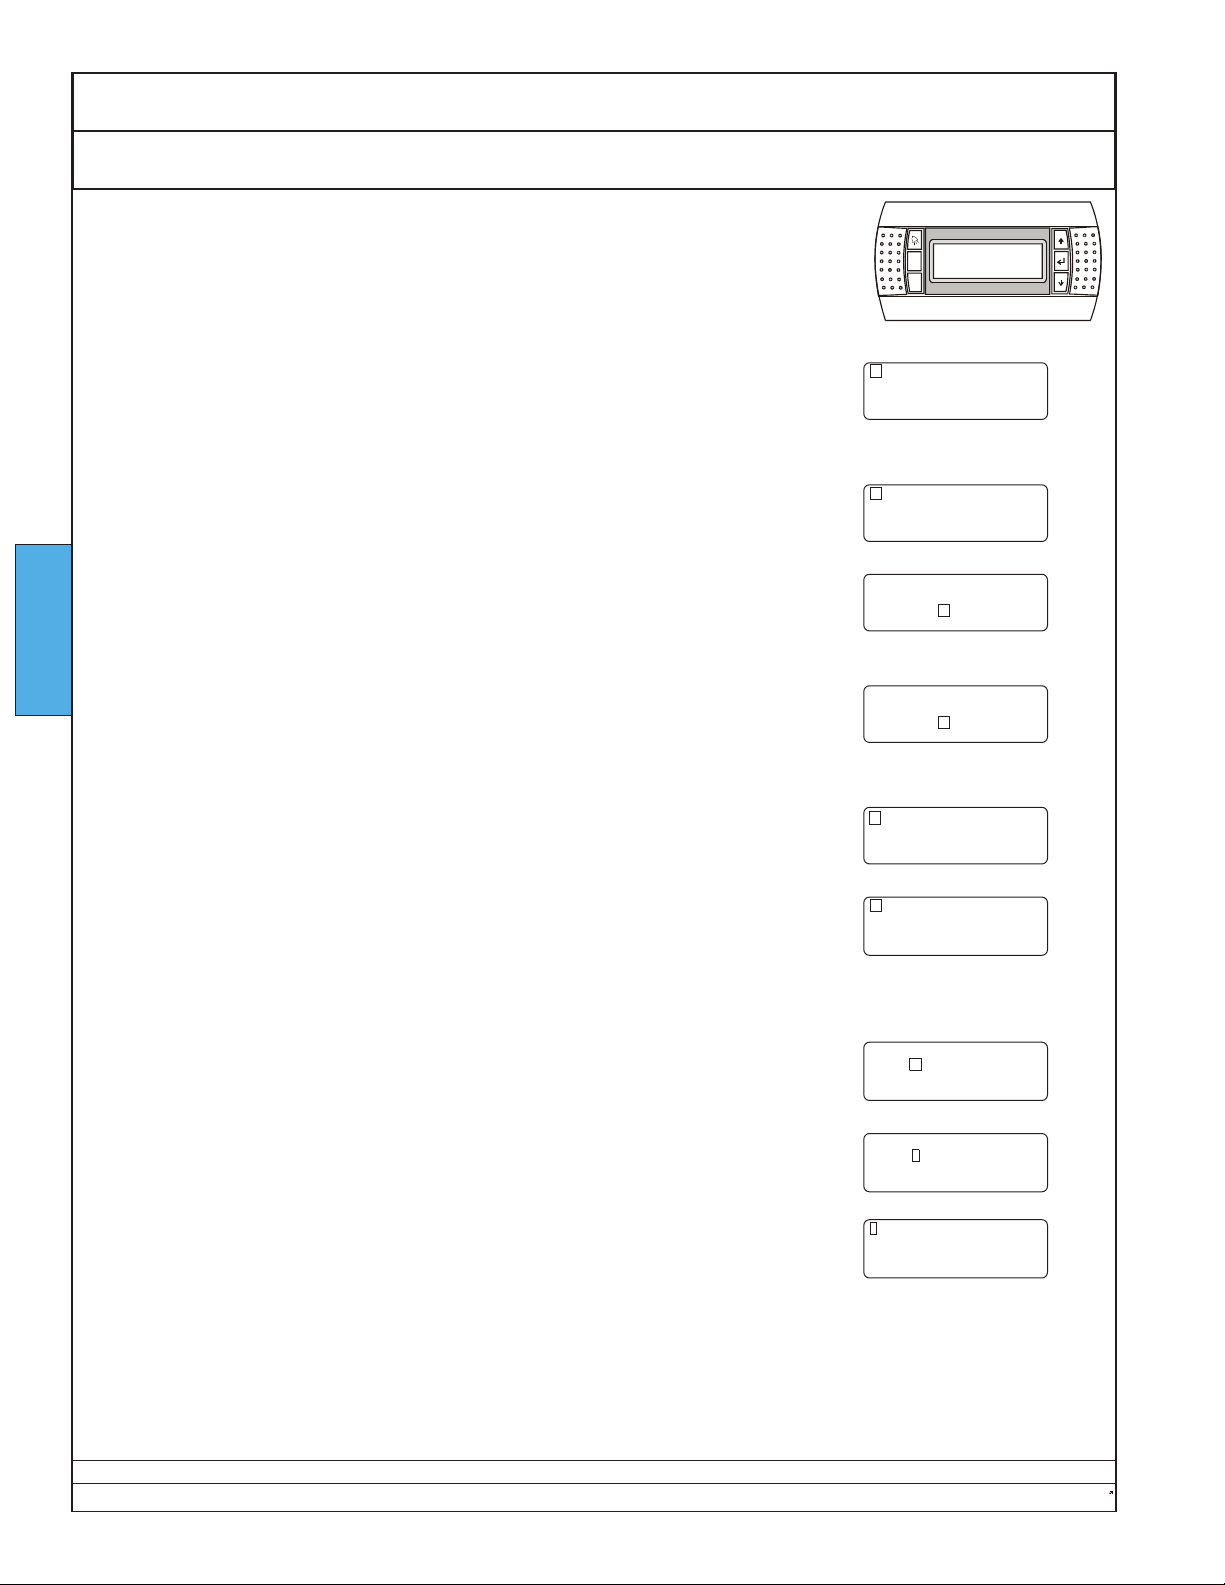
Ecosaire®CM Series Precision Air Conditioner Owners Manual
↓
Startup Pre-Startup Adjustments Humidity Set Points
Note: This adjustment requires the user password, see Startup - Pre-startup
Adjustments - Controller Password.
Press Prg, enter the password, and press ↵, as discussed in Startup - Prestartup Adjustments - Controller Password. The screen will appear as
shown.
Press
repeatedly to access Humidity Set Points.To access the humidity set point
screen, press ↓ three times.
STARTUP
To select the humidity set point press ↵ to move the cursor to the set point.
To change the humidity set point, press either the↑or the↓button to select the
desired temperature. The longer the button is held, the faster the set point
changes.
To store the new set point, press ↵. The cursor moves to the top left corner.
Prg
Esc
System ON/OFF
System = OFF
Humidity set pts
Set point xx.x%rh
Humidity set pts
Set point XX.X%rh
Humidity set pts
Set point XX.X%rh
Humidity set pts
Set point XX.X%rh
Press ↓to access the humidity alarm set point screen. The humidity alarms are
factory set for High=80% and Low=20%. If the room temperature goes over
“High” or under “Low” for a period greater than “Delay”, an alarm will be regis-
Humidity Alarms
High = 80.0%RH
Low = 20.0%RH
Delay = 015 sec
tered. Unit operation will not be affected. These settings can be changed as
below.
To select the alarm set point to change, press ↵repeatedly to move the cursor to
the desired position. The example is for the High humidity alarm set point.
To change the set point, press either the ↑or the ↓button.
To store the new value, press ↵repeatedly to move the cursor back to the top left
corner.
Data subject to change without notice.
66 Ecosaire
Humidity Alarms
High = 80.0%RH
Low = 20.0%RH
Delay = 015 sec
Humidity Alarms
High = XX.X%RH
Low = 20.0%RH
Delay = 015 sec
Humidity Alarms
High = XX.X%RH
Low = 20.0%RH
Delay = 015 sec
®
July 2007
Page 67
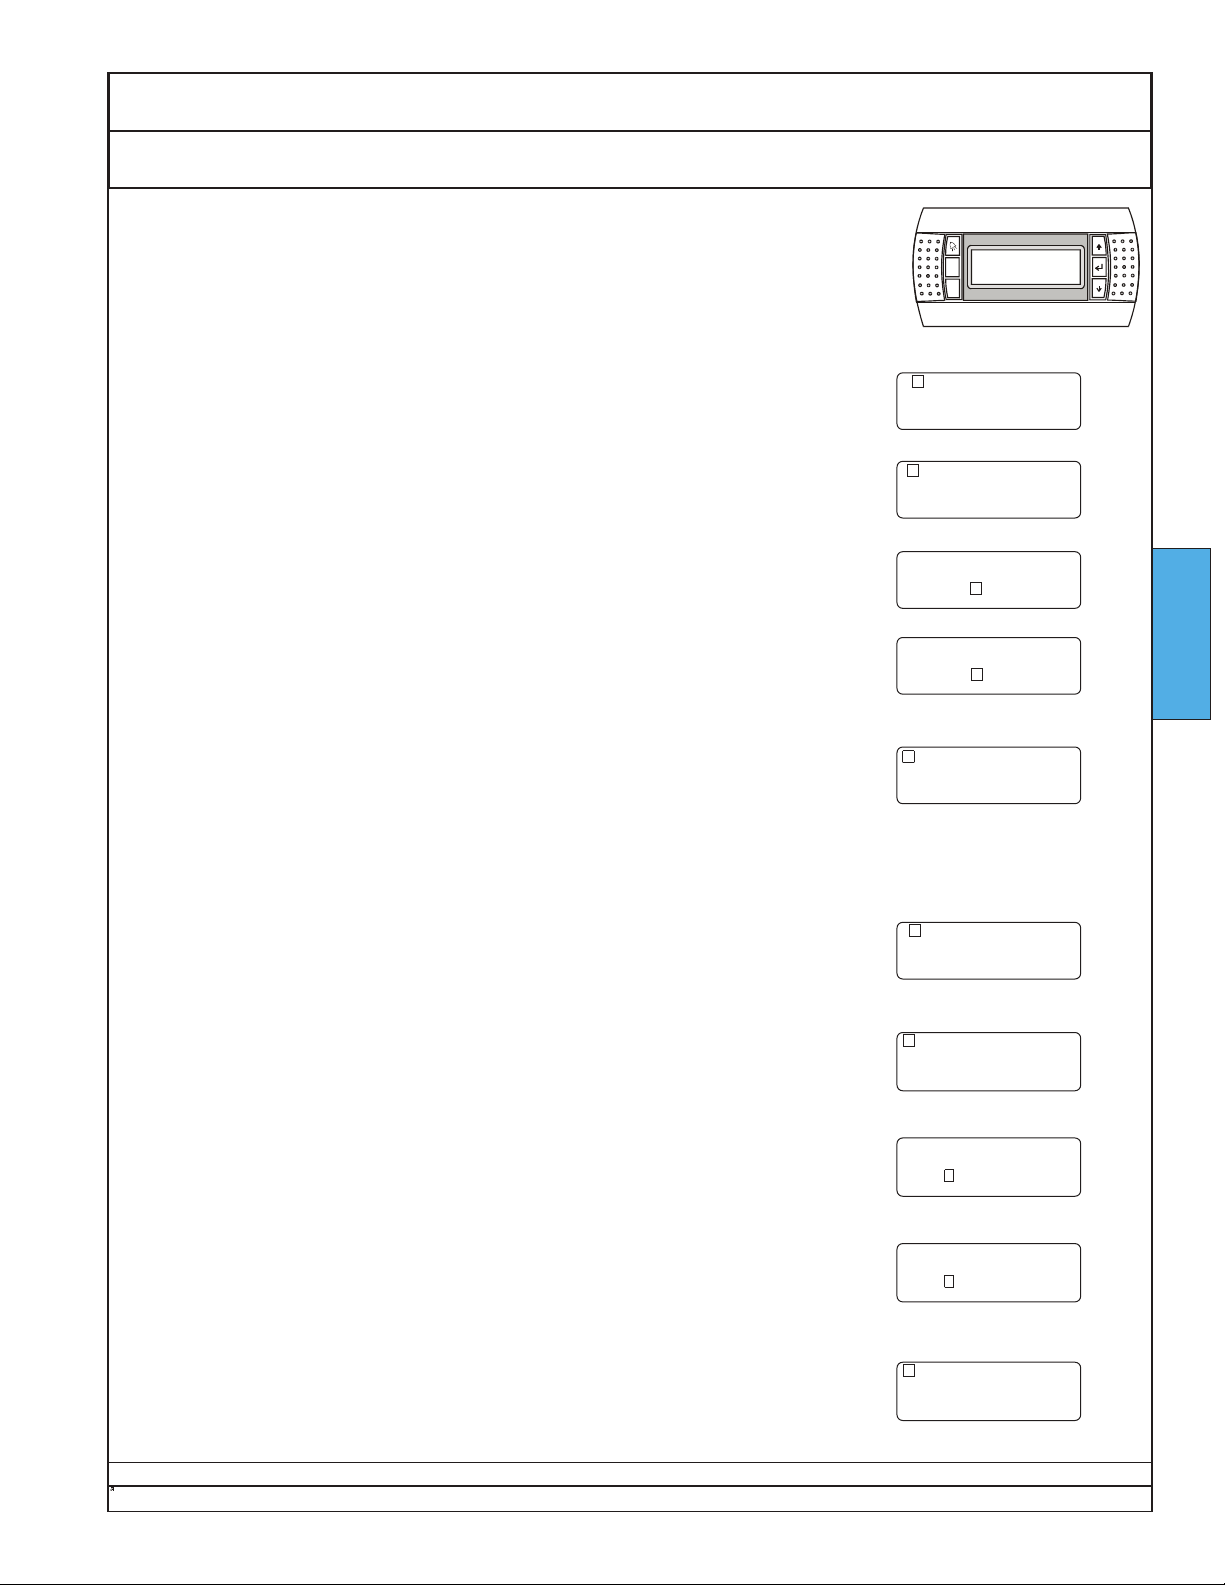
Owners Manual Ecosaire®CM Series Precision Air Conditioner
↵
↓
Temperature Set Points Pre-Startup Adjustments Startup
Note: This adjustment requires the user password, see Startup - Pre-startup
Adjustments - Controller Password.
Prg
Esc
To adjust the temperature set point screen, first press Prg, enter the password,
and press
, as discussed in Startup - Pre-startup Adjustments - Controller
System ON/OFF
System = OFF
Password. The screen will appear as shown.
Press ↓to access Temperature Set Pts.
Press ↵to move the cursor to the set point.
To change the temperature set point, press either ↑or↓to select the desired
temperature. The longer the button is held, the faster the set point changes.
Press ↵to store the new set point. The cursor moves to the top left corner.
Temperature set pts
Set point xx.x°F
Temperature set pts
Set point xx.x°F
Temperature set pts
Set point xx.x°F
Temperature set pts
Set point xx.x°F
The temperature alarms are factory set for High=80oF and Low=60oF. If the room temperature goes over
“High” or under “Low” for a period greater than “Delay”, an alarm will be registered. Unit operation will not be
affected. These settings can be changed as below.
Press Prg, enter the password, and press ↵, as discussed in Startup - Pre-start-
up Adjustments - Controller Password. The screen will appear as shown.
System ON/OFF
System = OFF
STARTUP
To access the temperature alarm set point screen, press ↓twice.
To select the alarm set point to change, press ↵repeatedly to move the cursor to
the desired position. The example is for low temperature alarm set point.
To change the set point, press either↑or
.
To store the new value, press ↵repeatedly to move the cursor back to the top left
corner.
®
Ecosaire
July 2007 67
Temperature Alarms
High = 80.0°F
Low = 60.0°F
Delay = 015 sec
Temperature Alarms
High = 80.0°F
Low = 60.0°F
Delay = 015 sec
Temperature Alarms
High = 80.0°F
Low = X X.X°F
Delay = 015 sec
Temperature Alarms
High = 80.0°F
Low = X X.X°F
Delay = 015 sec
Data subject to change without notice.
Page 68
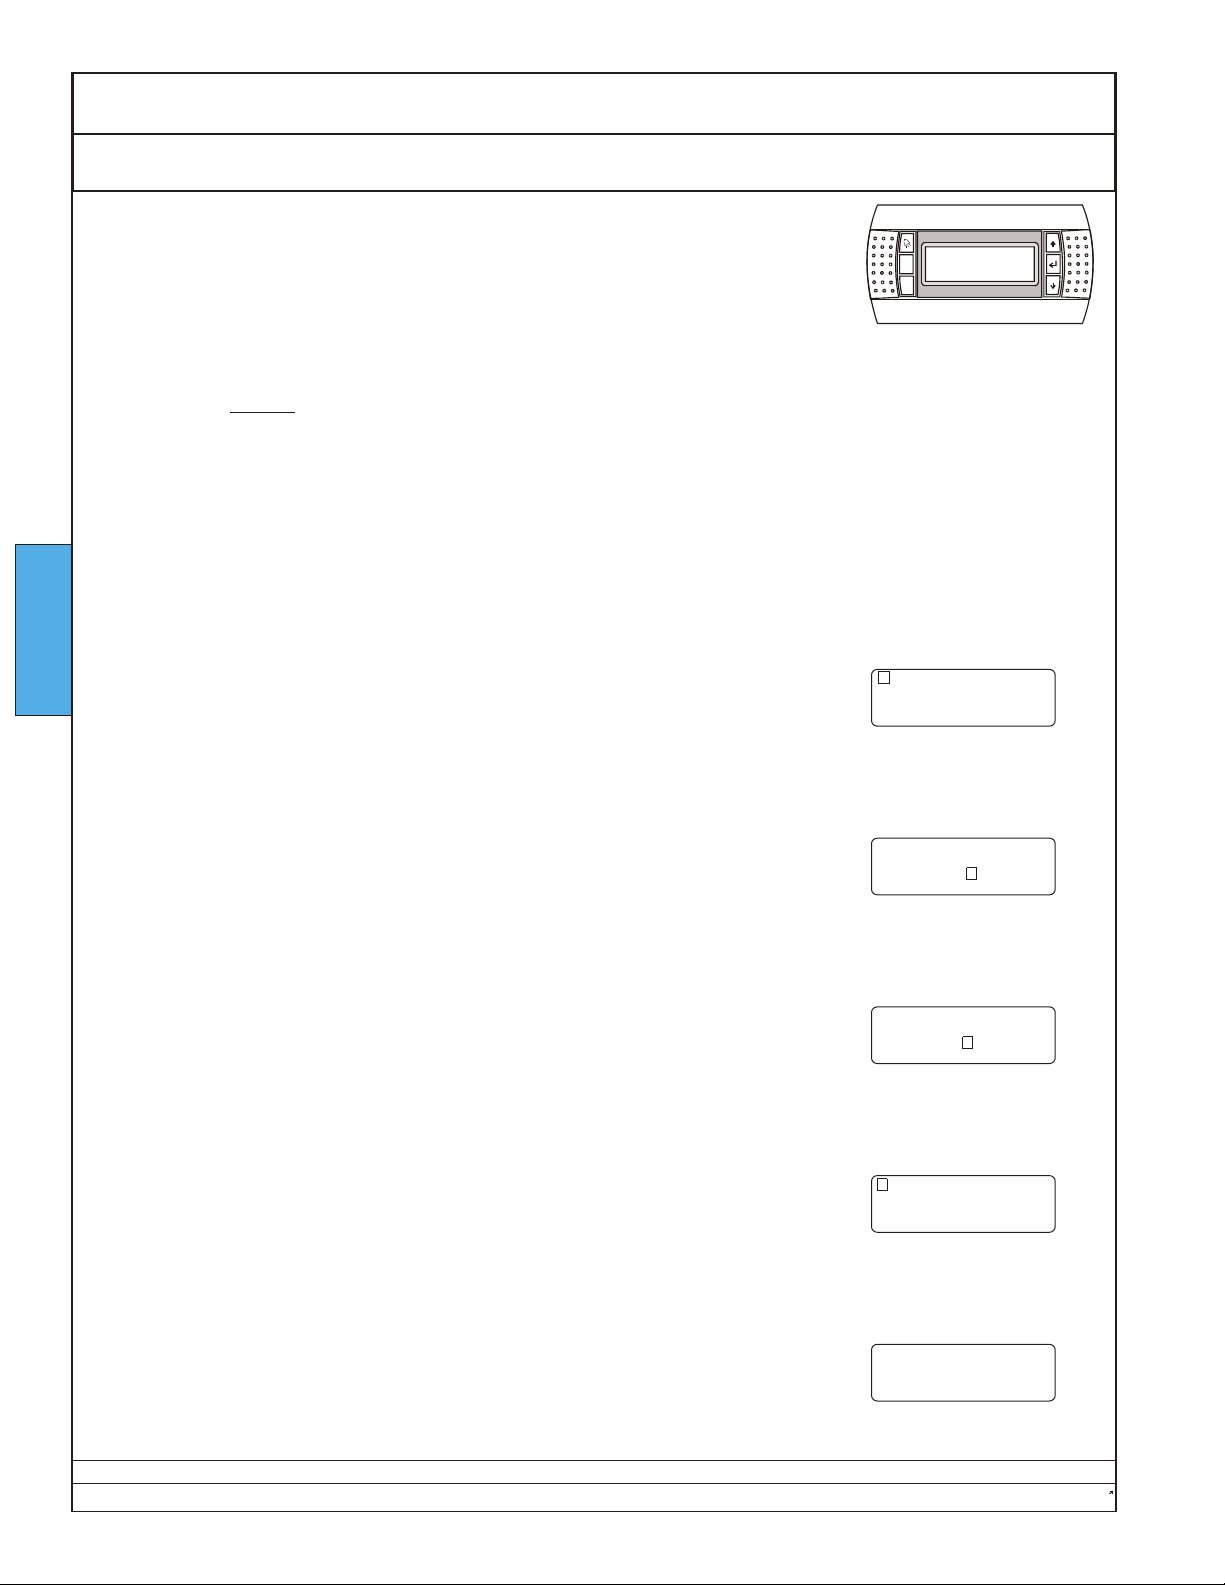
Ecosaire®CM Series Precision Air Conditioner Owners Manual
Startup Enable Operation
IMPORTANT!
Start-up must be performed by a qualified factory-trained service and
installation technician.
Once startup is completed, all portions of the “Startup Report and Warranty
Registration” form must be completely filled in and a copy must be sent to the
factory in order to register and validate the warranty.
IMPORTANT!
Do NOT turn on the electric power unless the power supply voltage matches that specified on the unit
nameplate. Be certain that there is no construction dust in the space, ducts, or plenums.
1. Apply electric power.
Allow at least 10 hours of crankcase heater operation before enabling a
compressor.
2. Do not allow a compressor to run without adequate refrigerant.
STARTUP
Note: This adjustment requires the user password, see Startup - Pre-startup Adjustments - Controller
Password.
Prg
Esc
To access the System ON/OFF menu, press Prg and enter the password as discussed in Startup - Pre-startup Adjustments - Controller Password. The screen
will appear as shown.
Press ↵to move the cursor under “OFF”.
Press ↑to change “OFF” to “ON”.
To store the setting, press ↵to return the cursor to the upper left corner.
System ON/OFF
System = OFF
System ON/OFF
System = OFF
System ON/OFF
System =ON
System ON/OFF
System =ON
The unit is now operational. After a short delay, the display will return to the
default Room Status screen.
Data subject to change without notice.
68 Ecosaire
Temperature xx.x°F
Humidity xx.x%rh
Room Status
®
July 2007
Page 69
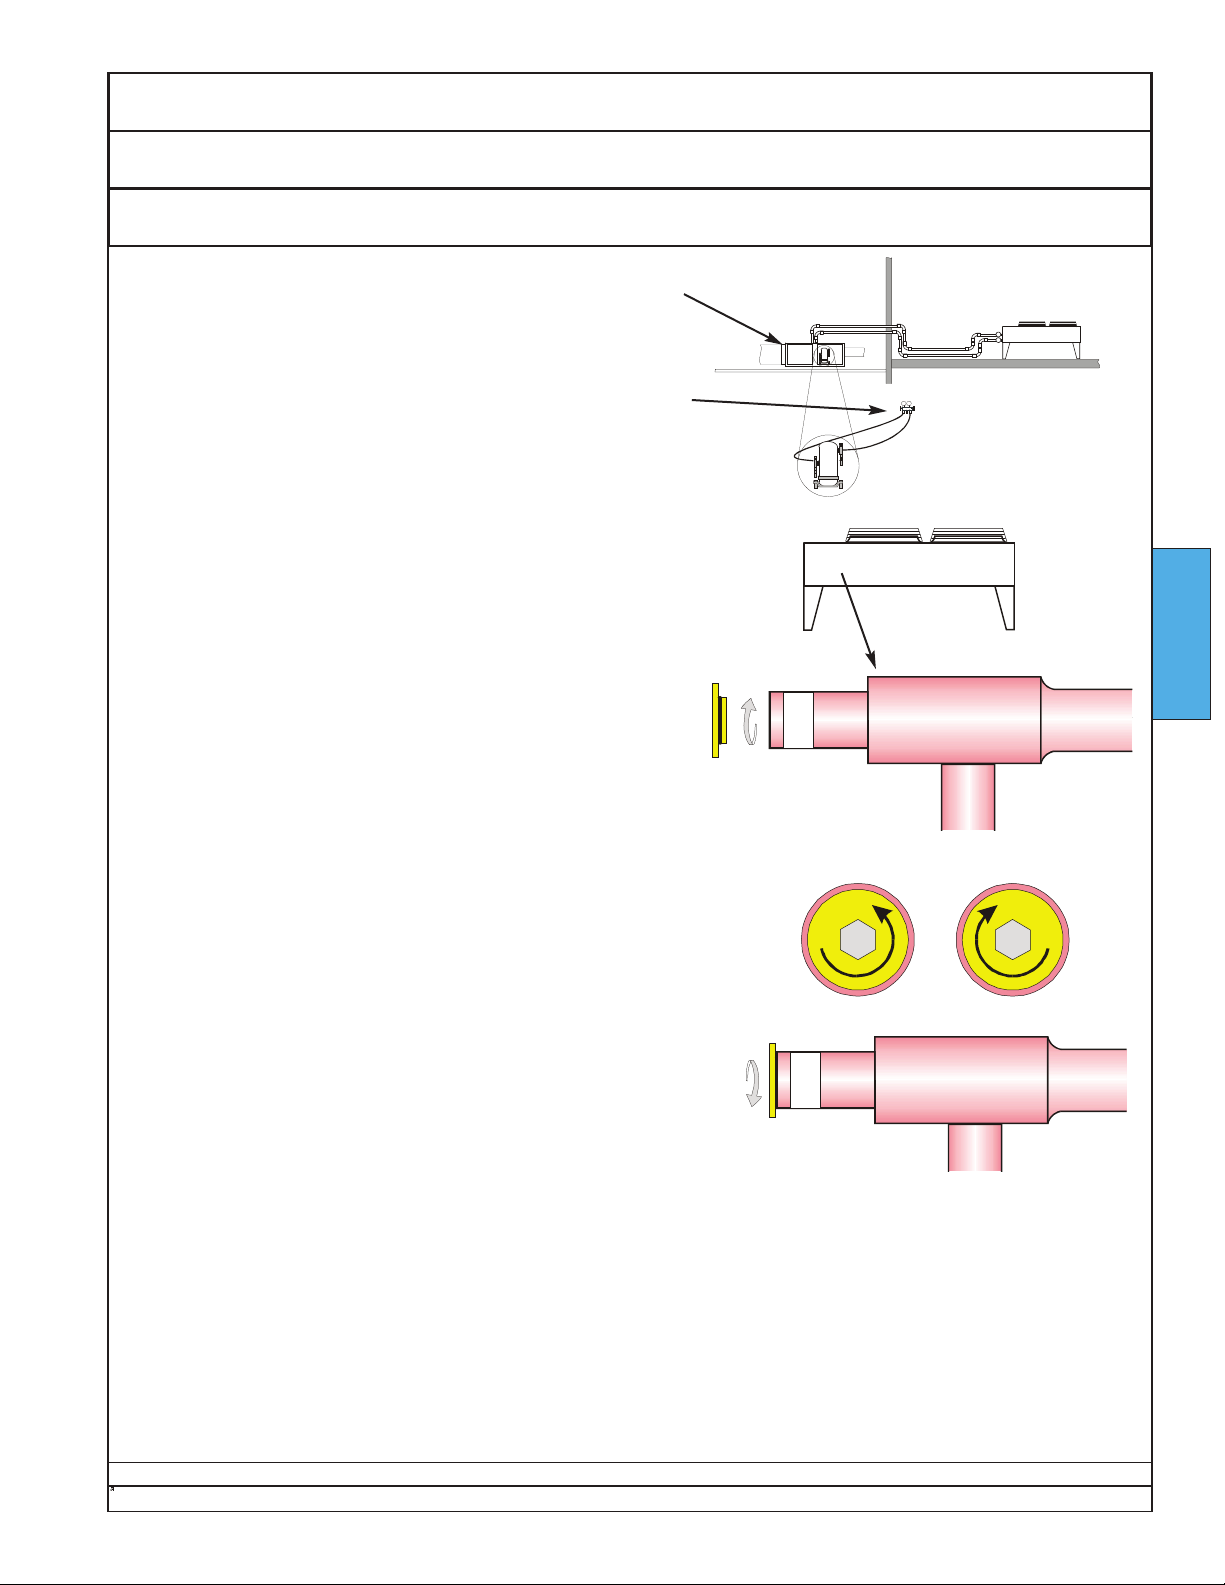
Owners Manual Ecosaire®CM Series Precision Air Conditioner
Adjustments Startup
Adjust Head Pressure Air-Cooled Direct Expansion Units Only
With the compressor running, check that refrigerant sight glass
is full.
Check the suction pressure and the discharge pressure at the
compressor. The suction pressure should be above 50 PSI. If it
is not above 50 PSI, stop and determine the cause.
The discharge pressure should be 250 PSI ± 15 PSI. If it is
not, then:
Locate the remote air-cooled condenser.
Locate the head-pressure control valve. Remove the
plug by turning it counter-clockwise as shown. Save the
plug for future use. Keep the O-ring clean.
Locate the hex-broached adjusting screw inside the
valve barrel.
Using an Allen wrench, turn the adjusting screw counterclockwise to lower the head pressure or clockwise to raise the
head pressure, as needed to make the head pressure at teh
compressor be 250PSI ± 15 PSI.
decrease
SAMPLE
may vary.
Number, location, and
appearnce of components
STARTUP
increase
Return the plug to the valve barrel and tighten by turning it
clockwise.
®
Ecosaire
July 2007 69
Data subject to change without notice.
Page 70
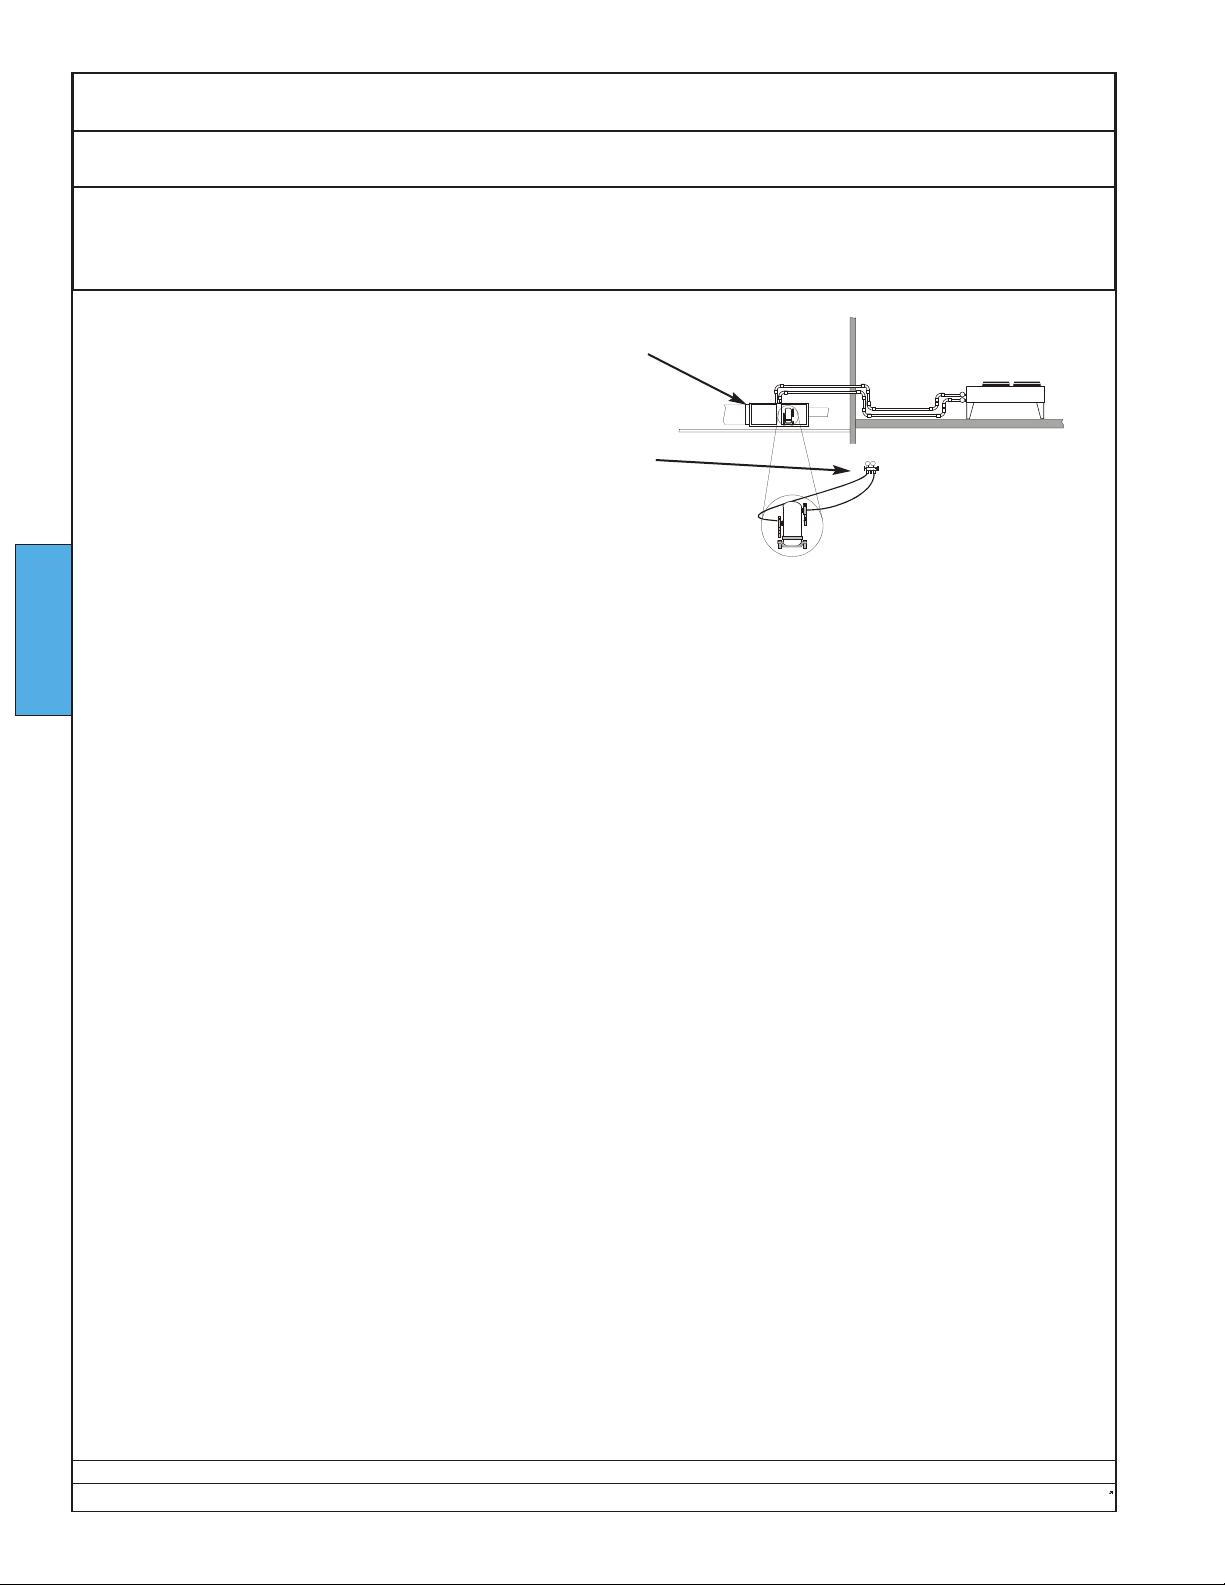
Ecosaire®CM Series Precision Air Conditioner Owners Manual
Startup Adjustments
Air-Cooled Direct Expansion, Water-Cooled Direct Expansion, Glycol-Cooled
Direct Expansion, Air-Cooled DualCool, Glycol-Cooled DualCool,
& FreeCool Units Only
With the compressor running, check that refrigerant sight glass
is full.
Check the suction pressure and the discharge pressure at the
compressor. The suction pressure should be above 50 PSI. If it
is not above 50 PSI, stop and determine the cause.
The discharge pressure should be 250 PSI ± 15 PSI. If it is
not, then check that the coling fluid temperature and flow rate
are within specifications.
STARTUP
SAMPLE
may vary.
Number, location, and
appearnce of components
Data subject to change without notice.
70 Ecosaire
®
July 2007
Page 71
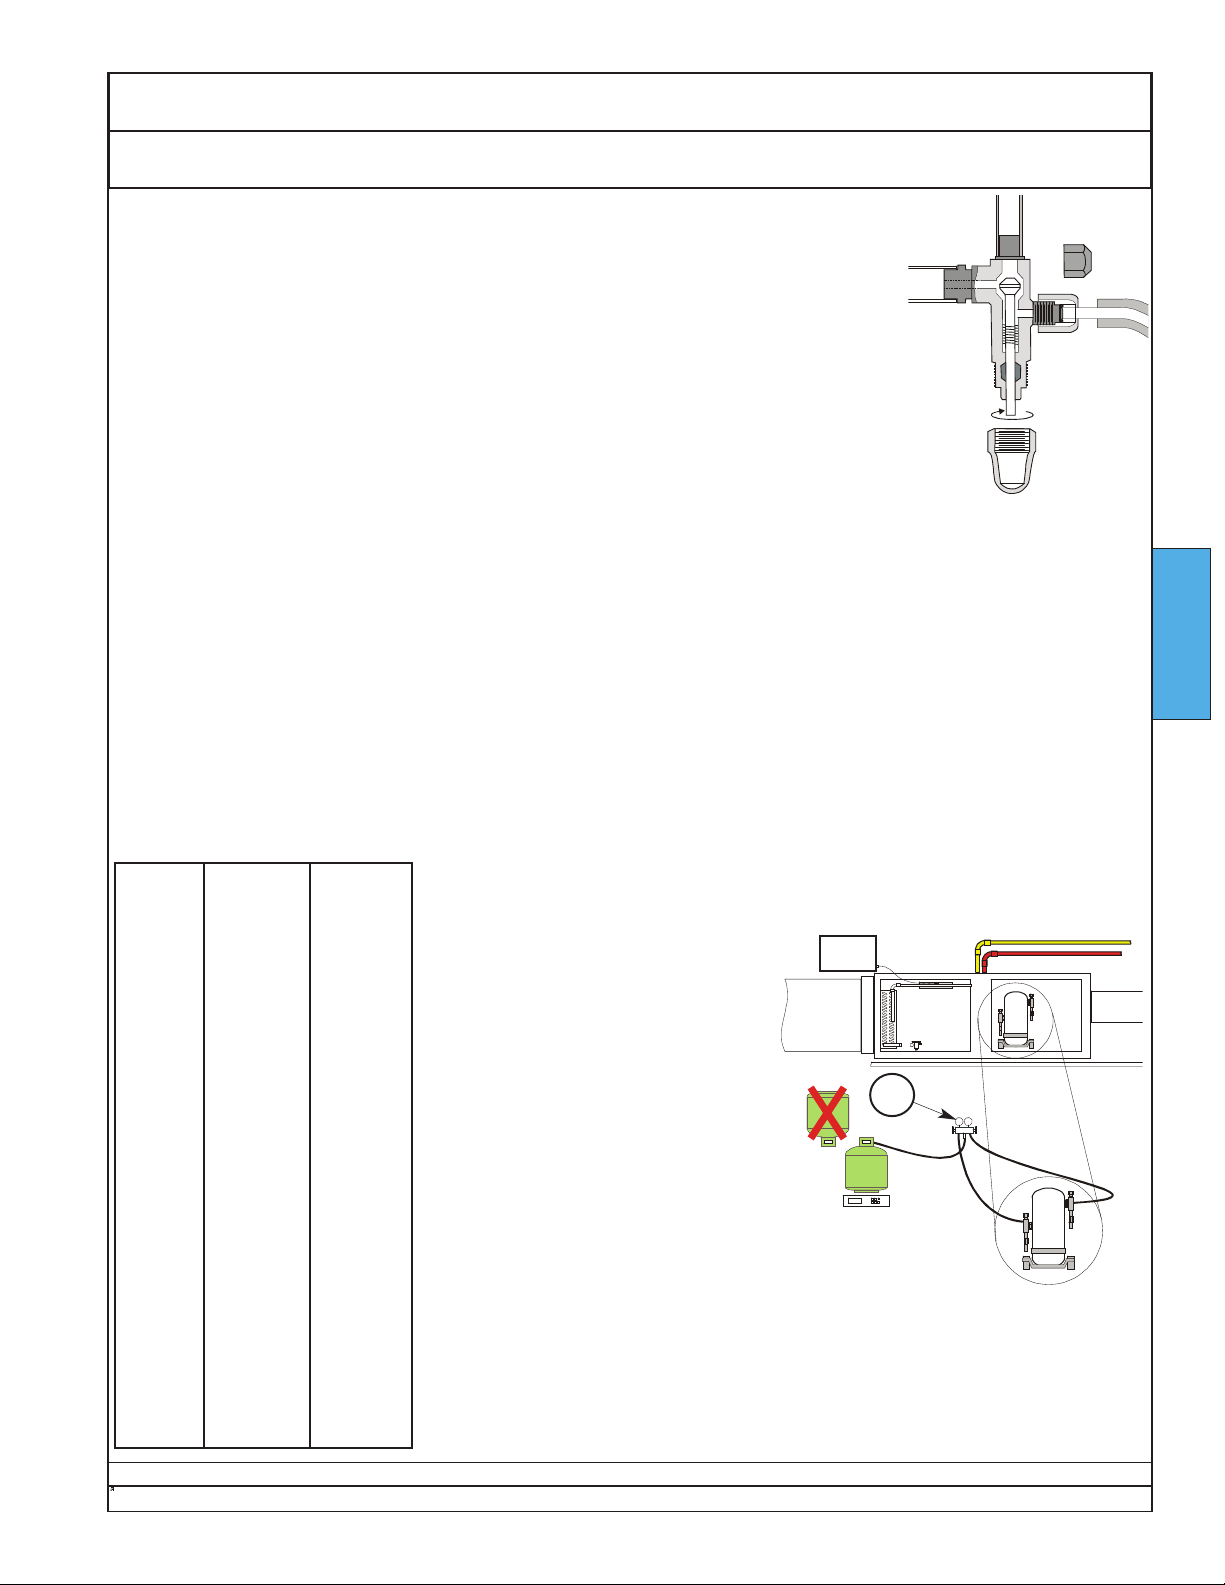
Owners Manual Ecosaire®CM Series Precision Air Conditioner
Add Refrigerant and Adjust TXV Startup
Compressor Isolation Valves
Compressor isolation valve
service valves (if any) do not
have Schraeder cores. All service
valves are shipped in the back-seat
position (service port closed).
When viewed from the valve-stem
end, turning the valve stem clockwise will front-seat the valve, opening the compressor to the service
port while closing off the tube
Turning the stem counterclockwise
will back-seat the valve, opening
the compressor or condenser to the
incoming line while closing off the
service port to both the compressor
and the attached tube.
Leaving the valve stem in a middle position will allow flow to and
from the connected tubes to the
compressor, and connects the service port to that flow.
attached to the valve.
The evaporator superheat must be adjusted at startup. It should be 12°F ± 2°F
(6°C ±1°C) for room temperatures between 68°F (20°C) and 73°F (23°C).
The temperature sensors and pressure gauges were connected under Startup - Prepare to Adjust TXV.
C)1. Adjust the set points to cause a compressor to operate for at least 15 minutes.
2. Be sure the refrigerant sight glass shows all liquid. If bubbles are present, additional refrigerant may be needed.
3. Read the temperature of the suction tube by the temperature sensor.
4. Read the suction pressure. NOTE: The expansion valves cannot be adjusted if the suction pressure
is over 85 psig. Decrease the room temperature and start over.
5. Use the chart below to determine the suction saturation temperature.
6. Subtract the suction saturation temperature from the temperature sensor temperature.
7. Adjust the expansion valve to cause the difference in step 5 to be 12°F ± 2°F (6°C ±1°C).
8. Repeat steps 1 through 7 for a other refrigerant circuit, if any.
9. When the room temperature reaches 68°F (20°C) to 73°F (23°C), run the unit for an additional 15 minutes, then
confirm the superheat.
10. For glycol-cooled units, leave the refrigerant gauges in place for the next page.
STARTUP
suction
pressure
(psig)
R-22
saturation
temp. (°F)
saturation
temp. (°C)
54.9 30 -1.1
57.5 32 0
60.1 34 1.1
62.8 36 2.2
65.6 38 3.3
68.5 40 4.4
71.5 42 5.5
74.5 44 6.6
77.6 46 7.8
80.8 48 8.9
84.0 50 10
87.4 52 11.1
90.8 54 12.2
94.3 56 13.3
97.9 58 14.4
101.6 60 15.5
105.4 62 16.6
109.3 64 17.8
113.2 66 18.9
117.3 68 20
121.4 70 21.1
R-22
Ex:
After 15 minutes, the conditions are
as shown at right.
As shown at left, a suction pressure of
75 psig corresponds to about 44°F
(6.7°C) saturation temperature.
Subtracting 44°F (6.7°C) from the
62°F (16.7°C) measured by the thermocouple yields a difference of 18°F
(10°C).
Since this is more than 12°F (6.7°C),
the expansion valve should be opened
a little by removing its cap and turning
its stem counter-clockwise about 1/2
turn.
Repeat as needed to get about 12°F
(6.7°C) difference.
62°F
(16.7°C)
75
PSI
SAMPLE
Number, location, and
appearnce of components
may vary.
Ecosaire
Data subject to change without notice.
®
July 2007 71
Page 72
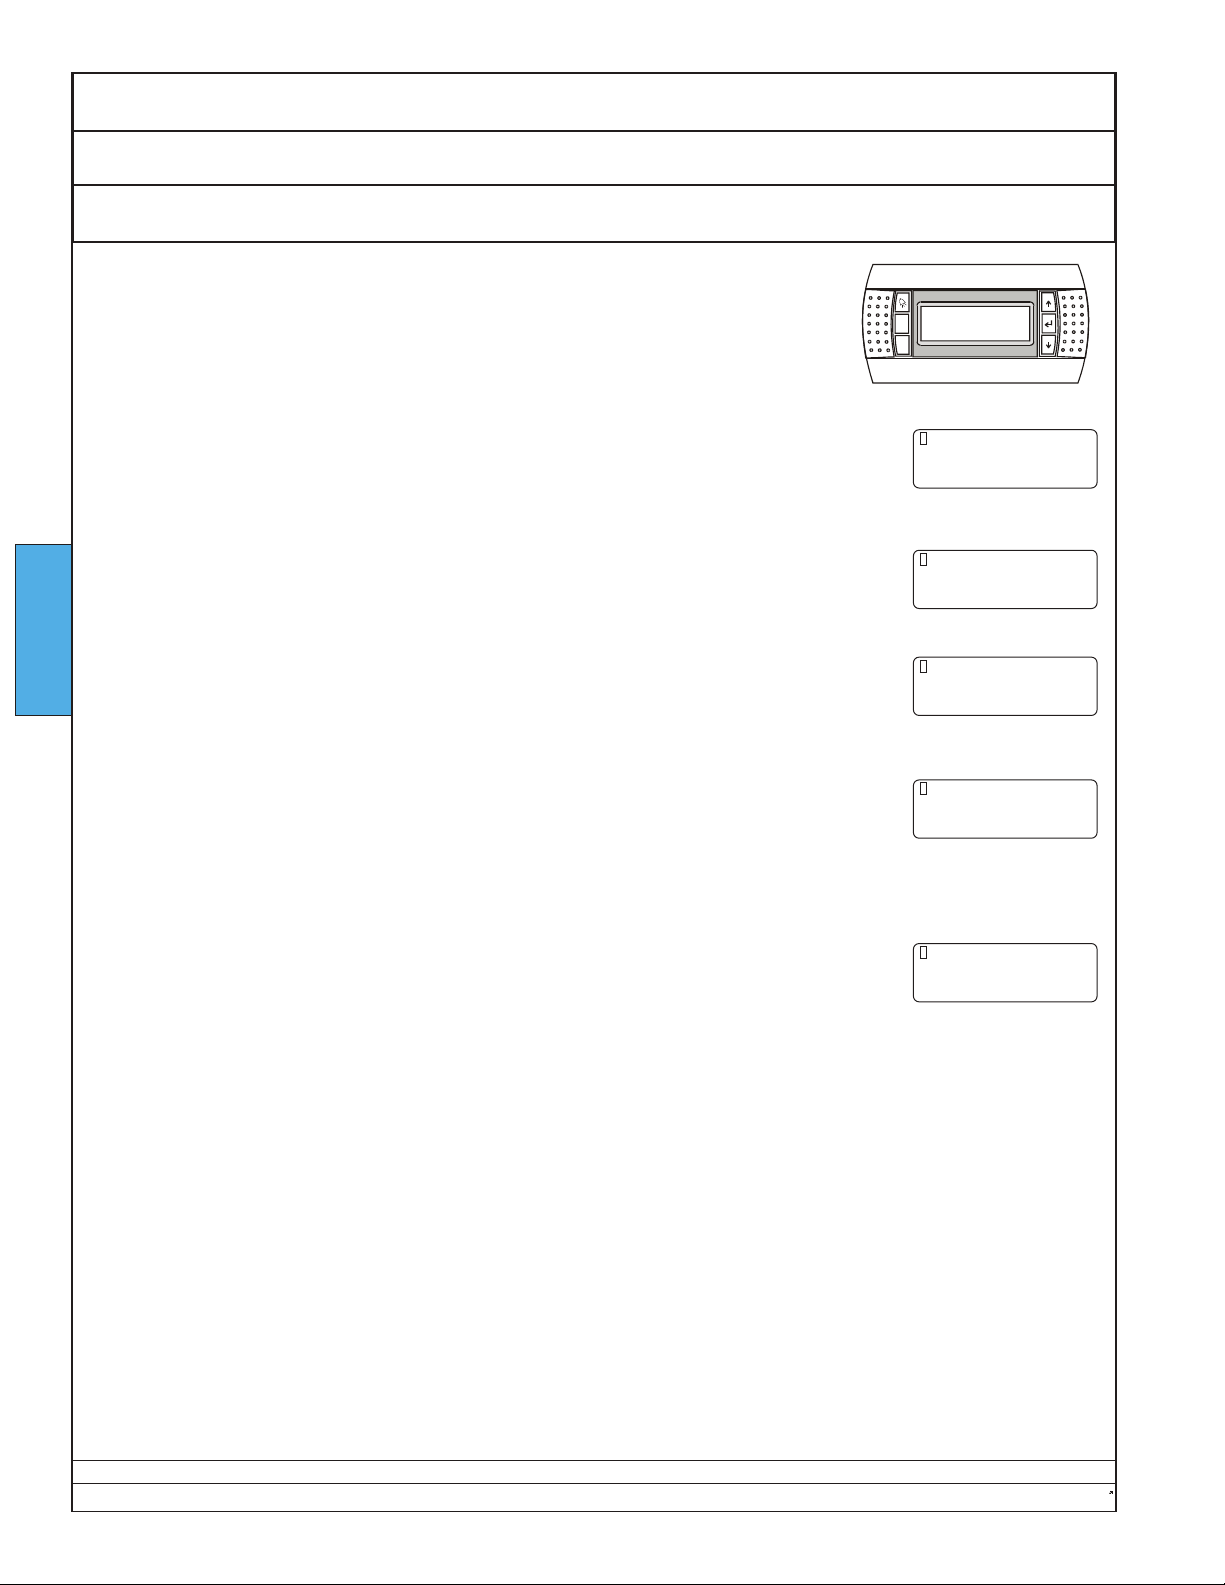
Ecosaire®CM Series Precision Air Conditioner Owners Manual
Startup View Status
FOR GLYCOL-COOLED AND FREE-COOL UNITS ONLY
Prg
Esc
In operation, Room Status is the default display.
“aa.a” is the present room temperature.
“bb.b” is the present room relative humidity in percent.
To access supply air temperature (“aa.a”) or fluid temperature (if any) (“bb.b”), press ↓.
STARTUP
FreeCool and DualCool units only
To access evaporator coil 1 temperature (“aa.a”) or evaporator coil 2 temperature
(“bb.b”), press ↓.
To access a customer temperature (if any) (“aa.a”) press ↓.
To access UNIT STATUS, press ↓.
“aaa” is the blower status.
“bbb” is the operating mode of the unit.
“ff” will be “C1” if the No.1 compressor (if any) is ON. If not, “ff” will be
blank.
“gg” will be “C2” if the No. 2 compressor (if any) is ON. If not, “gg” will be blank.
If the unit has electric heaters, and if either heater is ON, “hh” will be “HT:”. If not, “hh”
will be blank.
If the unit has electric heaters, and if No. 1 heater is ON, “c” will be “1:”. If not, “c” will
be blank.
If the unit has electric heaters, and if No. 2 heater is ON, “d” will be “2:”. If not, “d” will
be blank.
Room Status
Temperature = aa.a°F
Humidity = bb.b%rh
Temperatures
Discharge = aa.a°F
Fluid = bb.b°F
Temperatures
Coil 1 = aa.a°F
Coil 2 = bb.b°F
Temperatures
Customer = aa.a°F
Valve Position = bbb%
UNIT STATUS
UNIT= aaa
MODE= bbb
ff gg hh: c d
Data subject to change without notice.
72 Ecosaire
®
July 2007
Page 73
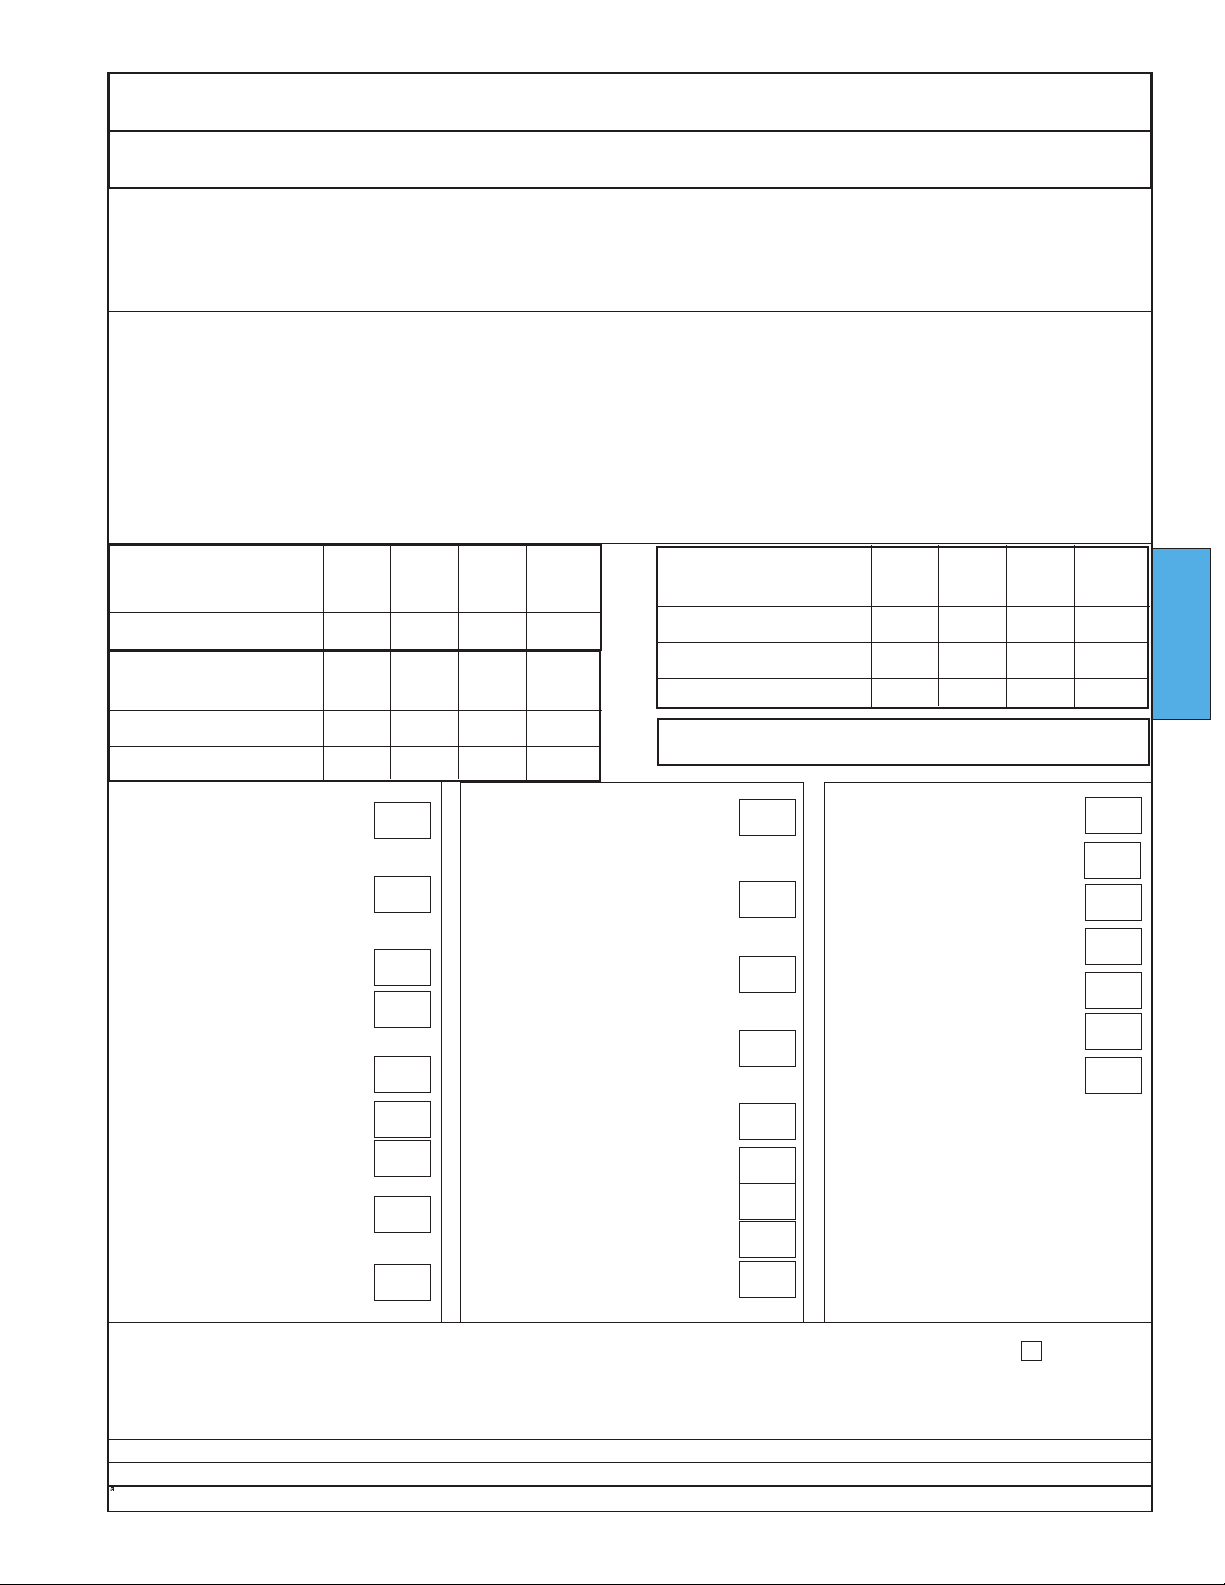
Owners Manual Ecosaire®CM Series Precision Air Conditioner
Startup
ECOSaire®
Startup Report & Warranty Registration
Warranty void unless this form is completed and a copy returned to factory within 2 weeks after start-up!
Installation Name..................................................................................................................................................................................
Installation Address ..............................................................................................................................................................................
Ecosaire
Model # ......................................................................................................................Serial #..............................................................
Compressor 1 (if any) Serial #...................................................................................Blower Belt Size................................................
Compressor 2 (if any) Serial #...................................................................................Software date . . . . . . . . . . . . . Rev. . . . . . . . .
Compressor 3 (if any) Serial #...................................................................................
Compressor 4 (if any) Serial #...................................................................................
®
Representative.................................................................................................................................................................
L1-L2
Blower volts (V)
Remote HX (if any) volts (V)
Blower 1 amps (A)
Blower 2 (if any) amps (A)
Remote HX (if any) amps (A)
Proper air distribution provided?
(See Installation - Air
Distribution.)
Vapor retardant installed properly? (See Building - Moisture
Migration.)
Adequate service access pro-
(See Installation -
vided?
Unpacking & Locating.)
Unit level?
Main disconnect switch
installed?
Wiring - Power.)
(See Installation -
Optional fire alarm tested?
Water detectors tested?
Condensate drain connected,
P-trap installed, filled and
tested?
Condensate pump (if any)
operating?
L1
your
initials
your
initials
your
initials
your
initials
your
initials
your
initials
your
initials
your
initials
your
initials
L2-L3 L3-L1
L2 L3
Remote heat exchanger
installed properly? (See HX manu-
al.)
Wire connections checked for
tightness? (See Installation -
Wiring - Power.)
Pre-Startup check list complete?
(See Startup - Pre-Startup
Checklists.)
Blower rotation on 3-phase units
correct? (See Installation - Wiring
- Power.)
Airflow and blower speed adjusted? (See Installation - Air
Distribution - Adjust Airflow.)
Airflow . . . . . . . . . . . . . . .cfm
Refrigerant charge OK?
No alarms displayed?
Set points at design conditions?
NAME
PLATE
NAME
PLATE
L1
Humidifier amps (A)
Heater Stage 1 amps (A)
Heater Stage 2 amps (A)
Heater Stage 3 amps (A)
Transformer 1 (smaller) output voltage ________
Transformer 2 (larger) output voltage ________
your
initials
Loss-of-airflow alarm tested?
L2 L3
Dirty filter alarm tested?
your
initials
Humidifier jumpers correct?
Humidifier connectors tight?
your
initials
your
initials
All sensor readings true?
Date and time set?
All alarms cleared?
your
initials
your
initials
your
initials
your
initials
your
initials
NAME
PLATE
STARTUP
your
initials
your
initials
your
initials
your
initials
your
initials
your
initials
your
initials
Optional outdoor air-cooled heat exchanger location Above ECOS . . . . ft Below ECOS . . . . ft Same level as ECOS
Refrigerant connection size
®
Ecosaire
July 2007 73
.....................Hot gas ...................Liquid Pipe length from Ecosaire® to remote heat exchanger . . . . . . ft
Data subject to change without notice.
Page 74
Ecosaire®CM Series Precision Air Conditioner Owners Manual
Startup
Ecosaire® EC Series
Start-up Report & Warranty Registration
Warranty void unless this form is completed and a copy returned to factory within 2 weeks after start-up!
Operational Data
Place measured values in
the boxes. Put “N/A”
where not applicable.
Air Temperature Set Point
Air Humidity Set Point
Entering Air Temperature
Leaving Air Temperature
STARTUP
Room Relative Humidity
Chilled Water Temp.
Cooling Water Temp.
Glycol Temp.
Sight Glass Clear?
TX Valve Bulb Temperature
Condenser Pressure
Evaporator Pressure
Compressor voltage
Compressor Current
NOTE: To obtain adequate readings, a delay of ten (10) minutes is required after
every operation or adjustment.
1st stage
Dehumidification Only
2nd stage
Dehumidification Only
1st stage
Cooling
Only
2nd stage
Cooling
Only
°F
%
°F
°F
%
°F
°F
°F
Y/N
°F
PSIG
PSIG
#1
#1
#1
#1
L1-L2 L2-L3 L3-L1
#2
#2
#2
#2
#1
#1
#1
#1
L1-L2 L2-L3 L3-L1
#2
#2
#2
#2
V
Comp1 Comp2 Comp3 Comp4
L1
L2
A
L3
Comp1 Comp2 Comp3 Comp4
Humidi-
fication
Only
See previous page.
Heating
Only
See previous page.
Comments:
Form completed by ......................................................................Signature ...............................................
Company Name ..........................................................................................................................................
Date..............................................................................................Telephone ( ) ............................
Data subject to change without notice.
74 Ecosaire
®
July 2007
Page 75

Owners Manual Ecosaire®CM Series Precision Air Conditioner
Dectron Internationale Terms and Conditions of Sale for Products Installed in the United States of America
and Canada
Ecosaire® CM Series Units and Factory-Supplied Accessories
1. This Contract constitutes the entire
agreement between the parties relating
to the transaction described herein and
shall prevail over the terms of the
Buyer's purchase order and the Seller's
acknowledgment, except that quantities,
prices, dates, places of delivery and
means of transportation shall be fixed by
the terms of the Seller's acknowledgment. No modification, waiver or discharge of this Contract shall bind the
Seller, unless made in writing and signed
by Seller's authorized representative at
its home office in Montreal, Quebec,
Canada.
This Contract shall be governed and
2.
interpreted in accordance with the applicable laws of the State of New York, U.S.A.
3. If any of the terms of this Contract
are held to be invalid, illegal or unenforceable, the validity and enforceability
of the remaining portions shall not in any
way be affected or impaired thereby.
4. The prices quoted are F.O.B.
Montreal, Quebec, Canada. It is agreed
that the term F.O.B. is a price term only
and imposes no obligation upon Seller
apart from price.
5. Transfer of the equipment from the
Seller to a common carrier or a licensed
public trucker shall constitute delivery.
Upon such delivery, title shall pass to the
Buyer, subject to the Seller's right of stoppage in transit. In the instance of equipment held subject to Buyer's instructions,
equipment for which the Buyer has failed
to supply shipping instructions, or in any
case where Seller, in its sole discretion,
determines that any part of the equipment
purchased by Buyer shall be held for
Buyer's account, Seller may invoice the
equipment and Buyer agrees to make payment at the maturity of the invoice so rendered. Equipment invoiced and held at
any location, for whatever reason, shall be
at Buyer's risk and Seller may charge for
insurance and storage at prevailing rates.
Partial deliveries shall be accepted by
the Buyer and paid for at contract prices
and terms. When Buyer has declared or
manifested an intention that it will not
accept delivery in accordance with the
provisions of this Contract, no tender of
delivery shall be necessary, but Seller
may, at its option, give notice in writing to
Buyer that Seller is ready and willing to
®
Ecosaire
July 2007 75
deliver in accordance, with the provisions of the Contract and such notice
shall constitute a valid tender of delivery.
6. Seller assumes responsibility, up to
the time of delivery to a common carrier
or licensed public trucker. All risk of loss
or damage, including damage caused by
the carrier's negligence, is assumed by
the Buyer.
7. Seller shall not be liable for damages
arising out of its failure to make, or delay
in making, delivery because of fire, flood,
strikes, riots, accidents, insurrections,
lockouts, breakdown of machinery, loss
or damage of goods in transit, Acts of
God, inability to obtain component parts,
or any other circumstance or cause
beyond the Seller's control, except for its
own negligence.
8. The remedies provided in this Contract
for breach thereof shall constitute the
exclusive remedy available to Buyer and
all other remedies which might otherwise
be available under the law of any jurisdiction are hereby waived by Buyer.
9. Seller warrants that the title conveyed
under the terms of this Contract shall be
good and marketable and that the goods
shall be delivered free from any lien,
encumbrance or security interest whatsoever.
10. Seller warrants that the sale or use
of its products will not infringe any United
States patent, and undertakes to indemnify Buyer against all judgments,
decrees, costs or expenses resulting
from such alleged infringement, and
covenants that, upon receipt of timely
written notification and request from
Buyer and at Seller's own expense, it will
defend, or assist in the defense of, any
suit or action which may be brought
against Buyer by reason of any alleged
infringement of any United States patent
in the sale or use of Seller's product.
11.(a) Material Replacement. Subject to
the terms and conditions contained herein, Seller warrants all equipment to Buyer
for a period of 18 months from shipment
or 12 months from the date of start-up,
whichever is earlier, to be free from
defects in material and workmanship.
Seller's responsibility under the foregoing
warranties shall be limited to supplying,
at its option, new or remanufactured
parts to replace parts containing defects
in material or workmanship discovered
within the above warranty periods. The
warranty on such new or remanufactured
parts shall not extend beyond the original
warranty period. (b) Labor. Seller shall
provide labor to repair any defect in
material or workmanship in precision air
conditioning products within the 30 day
period following a purchased factory
start-up , but only if such start-up is purchased from Seller, (with such labor warranty not to extend beyond the expiration
of the material replacement warranty
period described in the first section of
this paragraph).
12. Subject to the terms and conditions
contained herein, Seller warrants all separately purchased replacement parts to
Buyer for a period of 90 days following
shipment to be free from defects in
material and workmanship. Within the
90 day period following shipment,
Seller's sole responsibility hereunder
shall be to provide replacement parts
upon request by Buyer and evidence
satisfactory to Seller of the existence of
a bona fide defect covered by this warranty. No part may be returned until
Buyer has obtained a signed goods
return authorization from Seller's home
office in Montreal, Quebec, Canada.
Parts are to be returned to Seller prepaid and must be received by Seller
within 90 days after the issuance of
Seller's goods return authorization.
Upon inspection by Seller confirming
coverage under this warranty, a replacement part credit will be issued.
13. Buyer may, at its option, prior to
delivery of the equipment by Seller, purchase an Extended Four (4) Year
Warranty on any purchased refrigeration
compressors. If this Extended Four (4)
Year Warranty is purchased, Seller warrants the compressor to be free from
defects in materials and workmanship.
This obligation is limited to providing
replacement parts or replacing the compressor at Seller's option for four (4)
years following the expiration of the standard warranty described in this Contract.
This warranty extends only to the Buyer
as defined above and it cannot be transferred unless authorized in a writing
signed by the Seller.
Data subject to change without notice.
STARTUP
Page 76

Ecosaire®CM Series Precision Air Conditioner Owners Manual
Dectron Internationale Terms and Conditions of Sale for Products Installed in the United States of America
and Canada
Ecosaire® CM Series Units and Factory-Supplied Accessories
14. The conditions below apply to all warranties offered hereunder and failure to
comply with any of the following shall render the applicable warranty null and void:
(a) All repairs shall be performed in
accordance with Seller's standard warranty labor authorization procedures,
as the same may be revised from time
to time and which are available from
Seller upon request. Equipment or
defective components may be returned
only at Seller's discretion, upon prior
written goods return authorization from
Seller's home office in Montreal,
Quebec, Canada.
(b) Failure to make payment in full in
accordance with Seller's credit terms
STARTUP
shall void all warranties extended by
Seller or set forth herein until payment
in full has been received.
(c) Warranty claims must be received
by Seller in writing prior to the expiration of the applicable warranty period in
order to be valid.
(d) ALL WARRANTIES, EXCEPT AS
EXPRESSLY SET FORTH HEREIN,
WHETHER THEY BE OF MERCHANTABILITY, FITNESS FOR A
SPECIFIC PURPOSE OR OTHERWISE, OR WHETHER OR NOT THEY
ARE EXPRESS OR IMPLIED, ARE
HEREBY DISCLAIMED. SELLER
SHALL NOT BE RESPONSIBLE FOR
SPECIAL, INDIRECT OR CONSEQUENTIAL DAMAGES FROM ANY
CAUSE WHATSOEVER. SELLER
SHALL NOT BE LIABLE FOR
PROSPECTIVE PROFITS OR SPECIAL, INDIRECT OR CONSEQUENTIAL DAMAGES, NOR SHALL ANY
RECOVERY OF ANY KIND AGAINST
SELLER BE GREATER IN AMOUNT
THAN THE PURCHASE PRICE OF
THE SPECIFIC EQUIPMENT SOLD
AND CAUSING THE ALLEGED LOSS,
DAMAGE OR INJURY TO THE
BUYER OR OTHERS.
(e) Seller shall not be liable for claims,
damages, losses or charges of any
kind either for labor, labor expenses or
otherwise, suffered or incurred by
Buyer in replacing or repairing defective equipment, or occasioned by such
defective equipment, except charges
authorized by Seller in accordance with
its standard labor authorization proce-
dures. Unauthorized service work performed upon any product shall void all
warranties.
(f) No warranty may be extended
beyond the terms described herein
unless expressly agreed to in writing
and signed by Seller's authorized representative at its home office in
Montreal, Quebec, Canada.
(g) All equipment start-up must be
supervised by a party authorized by
Seller following instructions provided
by Seller.
(h) This warranty does not cover: (i)
inadequate or interrupted electrical
service from an outside source; (ii)
unless specifically agreed to in writing
at the time of sale, product delivered
outside of the United States of America
or Canada; (iii) product not supplied by
Seller or damage or loss occasioned
by the use thereof; (iv) damage or loss
caused by misuse, alteration or abuse
of the product; (v) excessive labor
costs due to inaccessible equipment or
other factors beyond the control of
Seller; (vi) overtime, holidays, travel
time and mileage, emergency calls or
anything other than straight labor time
authorized hereunder; (vii) damage to
product after it has been delivered to a
common carrier, licensed public trucker
or Buyer or its agent; (viii) any loss or
damage caused by failure to install or
maintain equipment in accordance with
Seller's instructions, including without
limitation, failure to replace filters and
belts, or clean, lubricate or properly
calibrate equipment; (ix) consumables,
such as, but not restricted to, humidifier bottles, filters, fuses, refrigerant,
lubricant, sundries and shop supplies;
(x) air freight, next day air, courier
services and similar and related
charges; (xi) defects due to faulty
specifications or drawings; (xii) any
other loss or damage not specifically
covered by this warranty, or beyond
the reasonable control of Seller, and
(xiii) maintenance and service including
replacing filters and belts, and cleaning, lubricating, calibrating and adjusting the equipment.
(i) The warranties contained herein
may not be transferred unless authorized in writing by Seller.
(j) Seller may, at its option, allow a credit against all or part of the purchase
price in lieu of replacement or repair of
any product covered by the warranty
set forth herein. IN ANY EVENT, SELLER'S MAXIMUM EXPOSURE UNDER
THE WARRANTIES DESCRIBED
HEREIN SHALL BE THE ORIGINAL
PURCHASE PRICE OF THE COVERED EQUIPMENT OR PART.
15. Unless otherwise agreed in writing
by the Seller, the purchase price, for
credit approved Buyers, shall be paid to
the Seller net cash 30 days from the
date of Seller's invoice. Upon failure of
the Buyer to pay within 30 days, interest
on the balance due will be charged at
the rate of 1 ½% per month, or the maximum rate permitted by law, whichever is
less, and the Seller, without prejudice to
any other lawful remedies, reserves the
right to suspend further shipments and
deliveries to the Buyer whether provided
for in this or any other agreement, and
further reserves the right, either with or
without legal process and using such
force as may be reasonably necessary,
to enter into and onto the premises
where the equipment may be or is
believed to be and take possession
thereof. Upon default by Buyer in any
credit terms extended by Seller, Seller
shall be entitled to recover from Buyer its
reasonable costs in collection of any outstanding indebtedness of Buyer to Seller,
including, without limitation, reasonable
attorney's fees and disbursements.
16. The terms of this Contract shall
govern the liability and obligations of
Seller with regard to this order whether
the sale was procured directly by Seller
or indirectly through its authorized sales
representatives. No oral or written representation of any sales representative
of the Seller shall be binding upon or
enforceable against Seller unless such
representation is specifically recited and
included in this Contract.
17. Unless Buyer shall notify Seller in
writing to the contrary with five business
days after receipt of this acknowledgement form, it will be deemed accepted
and the sale and shipment by the Seller
of the goods covered hereby shall be
conclusively deemed to be subject to the
terms of sale herein set forth.
Data subject to change without notice.
76 Ecosaire
®
July 2007
Page 77

Owners Manual Ecosaire®CM Series Precision Air Conditioner
Contents Operation
Page
Maintenance Schedule 78
Maintenance Record 80
Maintenance Tasks 83
Logical Flow Charts 90
Supervisaire
Password 92
Enable / Disable 93
Clock 94
Set Point Adjustment 95
Alarms 97
Alarm History 98
Component Run Times 99
Supervisaire
Sensor Response Curves 108
®
Controller Interface 91
®
Diagnostics 100
OPERATION
Ecosaire
Data subject to change without notice.
®
July 2007 77
Page 78

Ecosaire®CM Series Precision Air Conditioner Owners Manual
Operation Maintenance Schedule
The following list is IMPORTANT to the proper function and long life of the unit.
Every Week
Check for Alarms
· Check that the red alarm light is not activated. If the alarm light comes on at any time, call a service
technician.
Check Room Temperature and Relative Humidity
· Check that the room temperature and relative humidity are within acceptable limits.
Every Month
Check the Air Filters
For units equipped with Dirty Filter alarm, change filters immediately upon alarm, then reset.
· All units have return air filters. The unit cannot work properly with dirty filters.
· All dirty filters should be replaced with identical new filters.
· Do not operate the unit for any amount of time without all filters in place.
Check the Humidifier
· Make sure the strainer is clean.
· If the High Water Sensor light on the humidifier is illuminated (except during startup, see Startup Humidifier), the cylinder must be replaced. For replacement instructions, see Operation Maintenance - Humidifier.
Check the blower belt
OPERATION
· Check for excessive wear. Be sure the belt will operate another month.
· Check the blower belt tension. Belts should not be so loose as to cause increased slip, nor so tight as
to cause excessive shaft bearing wear. See Operation - Maintenance - Blower.
Check that the condensate drain pan(s) is clean.
For units so equipped, check that the remote heat exchanger is clean.
Clean any trash or leaves that might interfere with proper airflow.
Check remote heat exchanger (if any) fan operation.
See Operation - Maintenance - Remote Heat Exchanger.
Every Six Months
For units with mechanical refrigeration, check that there are no bubbles in the sight glass after 10
minutes of compressor operation. See Startup - Adjustments.
Check the evaporator superheat. See Startup - TXV Adjustment.
With the unit disconnect switch open, check that all power connections and terminal screws are tight.
Refer to NEC 110.14 or other applicable codes.
Every Twelve Months
Check for blower bearing wear.
Grease the blower bearings.
· Use a high quality grease for HVAC applications.
· Do not over-grease. Add grease until just a little oozes out from the bearing shield.
Check the condensate drain pan for any accumulated residue. Clean as necessary.
Check the air heat transfer coils for dirt and/or trash.
· If the coils are dirty
-- Clean the coils with a solution of mild soap in warm water. Do not use corrosive cleaning agents.
-- Increase the frequency of filter replacement. Dirty filters leak dirt onto the coils.
In the event of a future shutdown, leave power on the unit for the crankcase heaters if safe to do so. To
start the Ecosaire® unit again, follow the steps in the STARTUP section of this manual.
Data subject to change without notice.
78 Ecosaire
®
July 2007
Page 79

Owners Manual Ecosaire®CM Series Precision Air Conditioner
Maintenance Record Maintenance Operation
Photostat the next two pages as needed.
Tape the spine edges of the copies together.
Post the copies as appropriate to be filled out by
maintenance personnel.
OPERATION
Ecosaire
Data subject to change without notice.
®
July 2007 79
Page 80
Ecosaire®CM Series Precision Air Conditioner Owners Manual
Operation Maintenance Maintenance Record
DATES
No alarms?
Room
temperature
Room
humidity
Air filters
clean?
Humidifier
strainer clean?
Humidifier
high-water
sensor not lit?
Blower belt
wear OK?
Blower belt
tension OK?
Condensate drain-
pan clean?
Remote heat-
exchanger clean?
Remote heat-
exchanger
fans OK?
Sight glass
clear?
Evaporator
superheat
Electrical
terminals tight?
Blower bearings
OK?
Blower bearings
greased?
Internal air
heat-exchangers
clean?
Data subject to change without notice.
80 Ecosaire
®
July 2007
Page 81
Owners Manual Ecosaire®CM Series Precision Air Conditioner
Maintenance Record Maintenance Operation
DATES
Ecosaire
Data subject to change without notice.
®
July 2007 81
Page 82

Ecosaire®CM Series Precision Air Conditioner Owners Manual
Operation Maintenance
This page intentionally left blank.
OPERATION
Data subject to change without notice.
82 Ecosaire
®
July 2007
Page 83
Owners Manual Ecosaire®CM Series Precision Air Conditioner
Air Filters Maintenance Operation
Air filters should be checked at least every month. Dirty filters can prevent proper operation
and can lead to expensive repairs. If filters are dirty, replace them with filters of equal performance. If filters are extremely dirty after a month of operation, replace them more often.
CHECK THAT ALL FILTERS
ARE CLEAN AND IN PLACE
The size and number of filters may vary.
Some units may have intakes for outdoor air.
CHECK THAT ALL FILTERS
ARE CLEAN AND IN PLACE
The size and number of filters may vary.
OPERATION
Ecosaire
Data subject to change without notice.
®
July 2007 83
Page 84
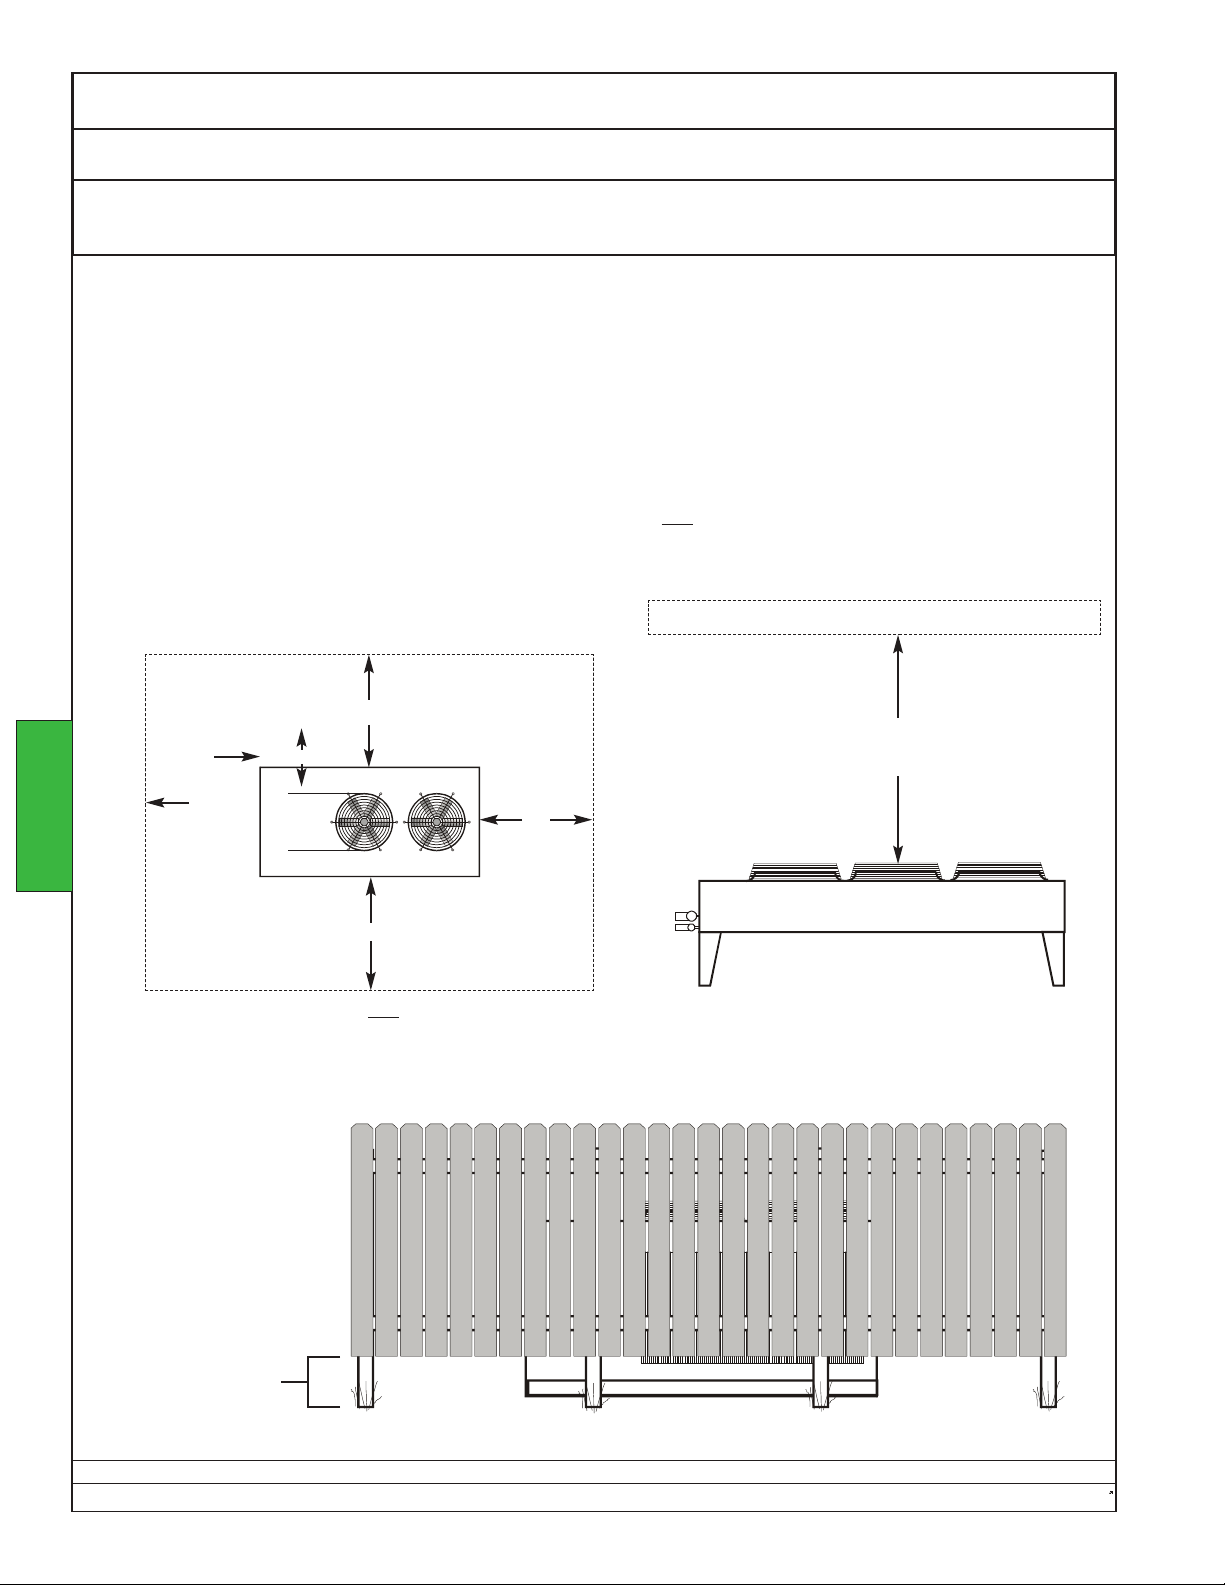
Ecosaire®CM Series Precision Air Conditioner Owners Manual
Operation Maintenance Remote Heat Exchanger
Air-Cooled Direct Expansion, Glycol-Cooled Direct Expansion, Air-Cooled
DualCool, Glycol-Cooled DualCool, & FreeCool Units Only
NOTE: Units must be completely disconnected before servicing.
1. Be sure the remote condenser has not been damaged.
2. Be sure that nothing has been stored closer to the condenser than twice the fan width.
3. Be sure that no plants have grown closer to the remote condenser than twice the fan width.
4. Be sure that nothing has been built or stored within 10 feet above the condenser.
5. For remote condensers surrounded by a wall or fence (see ground clearance below), be sure that any grass
under the fence is cut short.
6. Be sure the remote condenser is clean. There should be no leaves or dirt interfering with good airflow. Periodic
cleaning of finned surfaces can be done by washing down with warm water spray and a mild non-foaming
detergent. To protect the heat exchangers from corrosion, do not use alkaline or acidic cleaning solution.
OPERATION
Allow clear space around the condenser equal to at
least at least twice the width of the condenser fan.
Allow clear space
above the condenser.
2W
any overhanging obstruction
10 ft
2W
W
2W
Side View
(3 m)
SAMPLE
2W
The condenser should not
recirculation of air. If a fence or wall must be installed, it must be no closer to the condenser than
“2W” (twice the width of the condenser fan) shown above, and must not extend lower than 12 inches (30 cm) above grade. Fences lower than 12 inches above grade may cause recirculation of
heated air and a corresponding reduction in performance. Be sure any grass is kept short.
be enclosed within a solid fence or wall, since such structures promote
Number, location, and
may vary.
appearnce of components
minimum 12 in.
(30 cm)
Data subject to change without notice.
84 Ecosaire
®
July 2007
Page 85
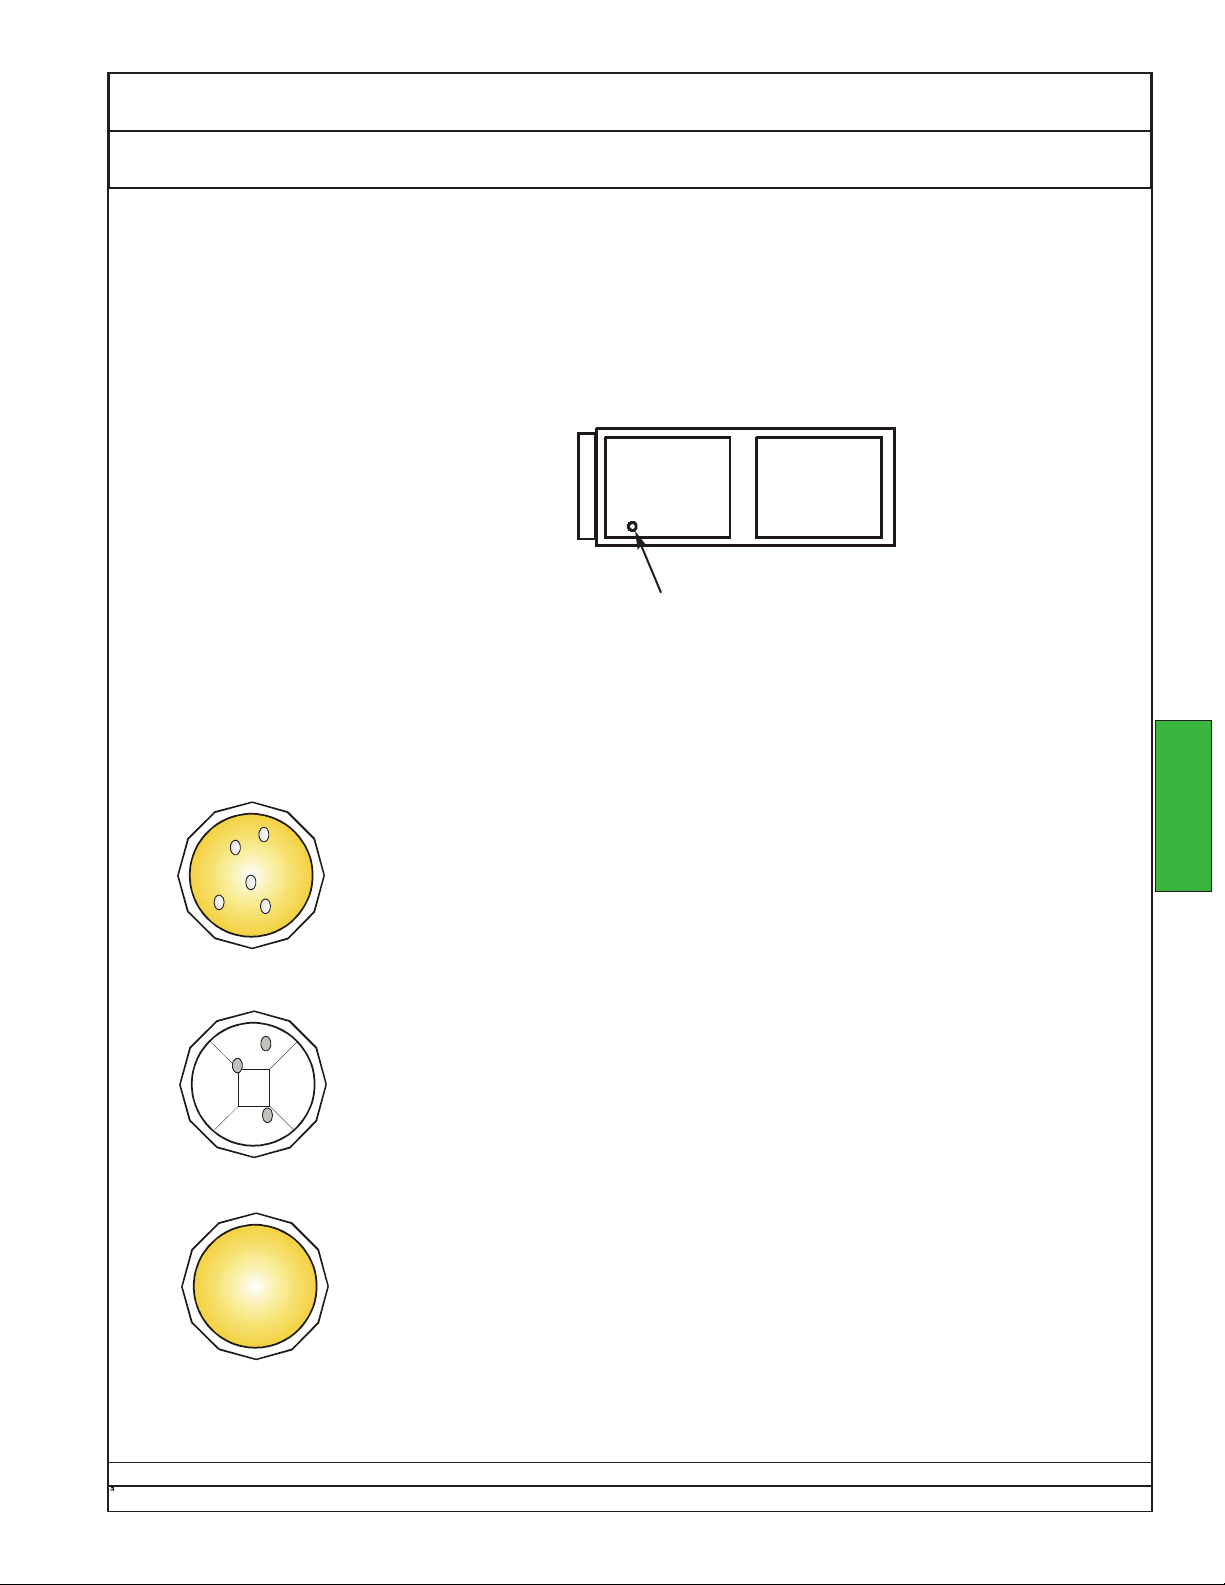
Owners Manual Ecosaire®CM Series Precision Air Conditioner
Refrigerant Sight Glasses Maintenance Operation
Be sure there are no bubbles or droplets in the refrigerant sight
glasses after five minutes of compressor operation.
If bubbles or droplets are noted, contact a service technician or the
factory.
left side of unit
sight
glass
Bubbles in the sight glass
indicate problems such as a
possible loss of refrigerant.
Oil droplets in the sight glass
may indicate severe problems
such as loss of refrigerant.
After 5 minutes of compressor
operation, the sight glass
should be clear and full of liquid
refrigerant.
OPERATION
Ecosaire
Data subject to change without notice.
®
July 2007 85
Page 86
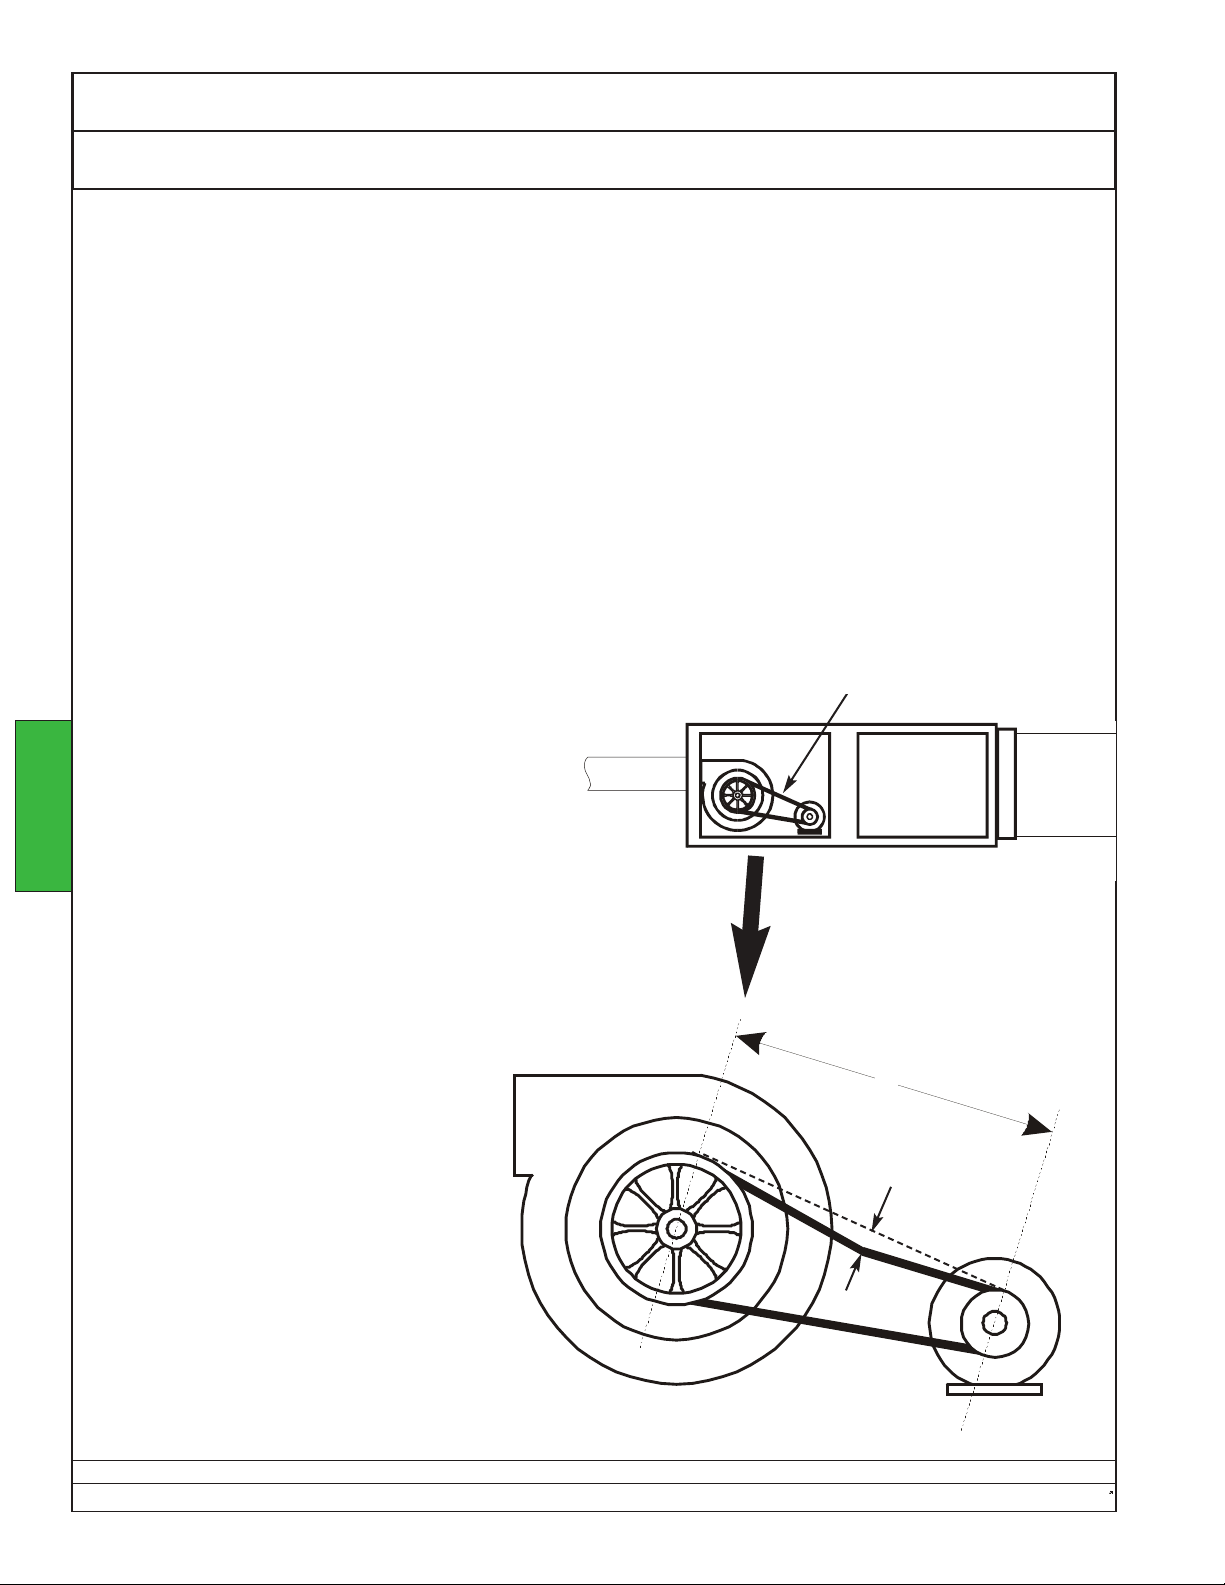
Ecosaire®CM Series Precision Air Conditioner Owners Manual
Operation Maintenance Blower
Belts should not be frayed, glazed, or excessively worn. Follow standard belt inspection procedures recom-
mended by the belt manufacturer.
To check belt tension, first disconnect electric power from the unit and follow all recommended safety precautions. Obtain a V-Belt tension gauge and use it according to the instructions provided with it. Most major belt
manufacturers provide or recommend a suitable gauge for their belts.
In an emergency, the guidelines below may help until a belt tension gauge is obtained.
Measure the distance in inches between
the shaft centers. Multiply the number of
inches by 1/64. This will be the deflection
(D) in the diagram at right.
ex: For S=32 inches,
D= 32in x 1/64 = 1/2 in.
Measure the diameter of the smaller
sheave.
OPERATION
Read the V-belt cross-section size from
the belt label.
Adjust the belt tension to cause the
force needed to produce the deflection D
to be near that shown in the table on the
next page.
ex: For the above example of 32 inches
between shaft centers, assume that
the belt is a new B60 and that the
smaller sheave is 7 inches in
diameter. From the table on the
next page, a new B60 belt with a 7inch small sheave should require
6.3 pounds of force to produce the
1/2 inch deflection.
Adjust the belt tension until the
measured force necessary to produce the
1/2 inch deflection is about 6.3 pounds.
Belt(s)
S
D
SAMPLE
may vary.
Number, location, and
appearnce of components
Data subject to change without notice.
86 Ecosaire
®
July 2007
Page 87
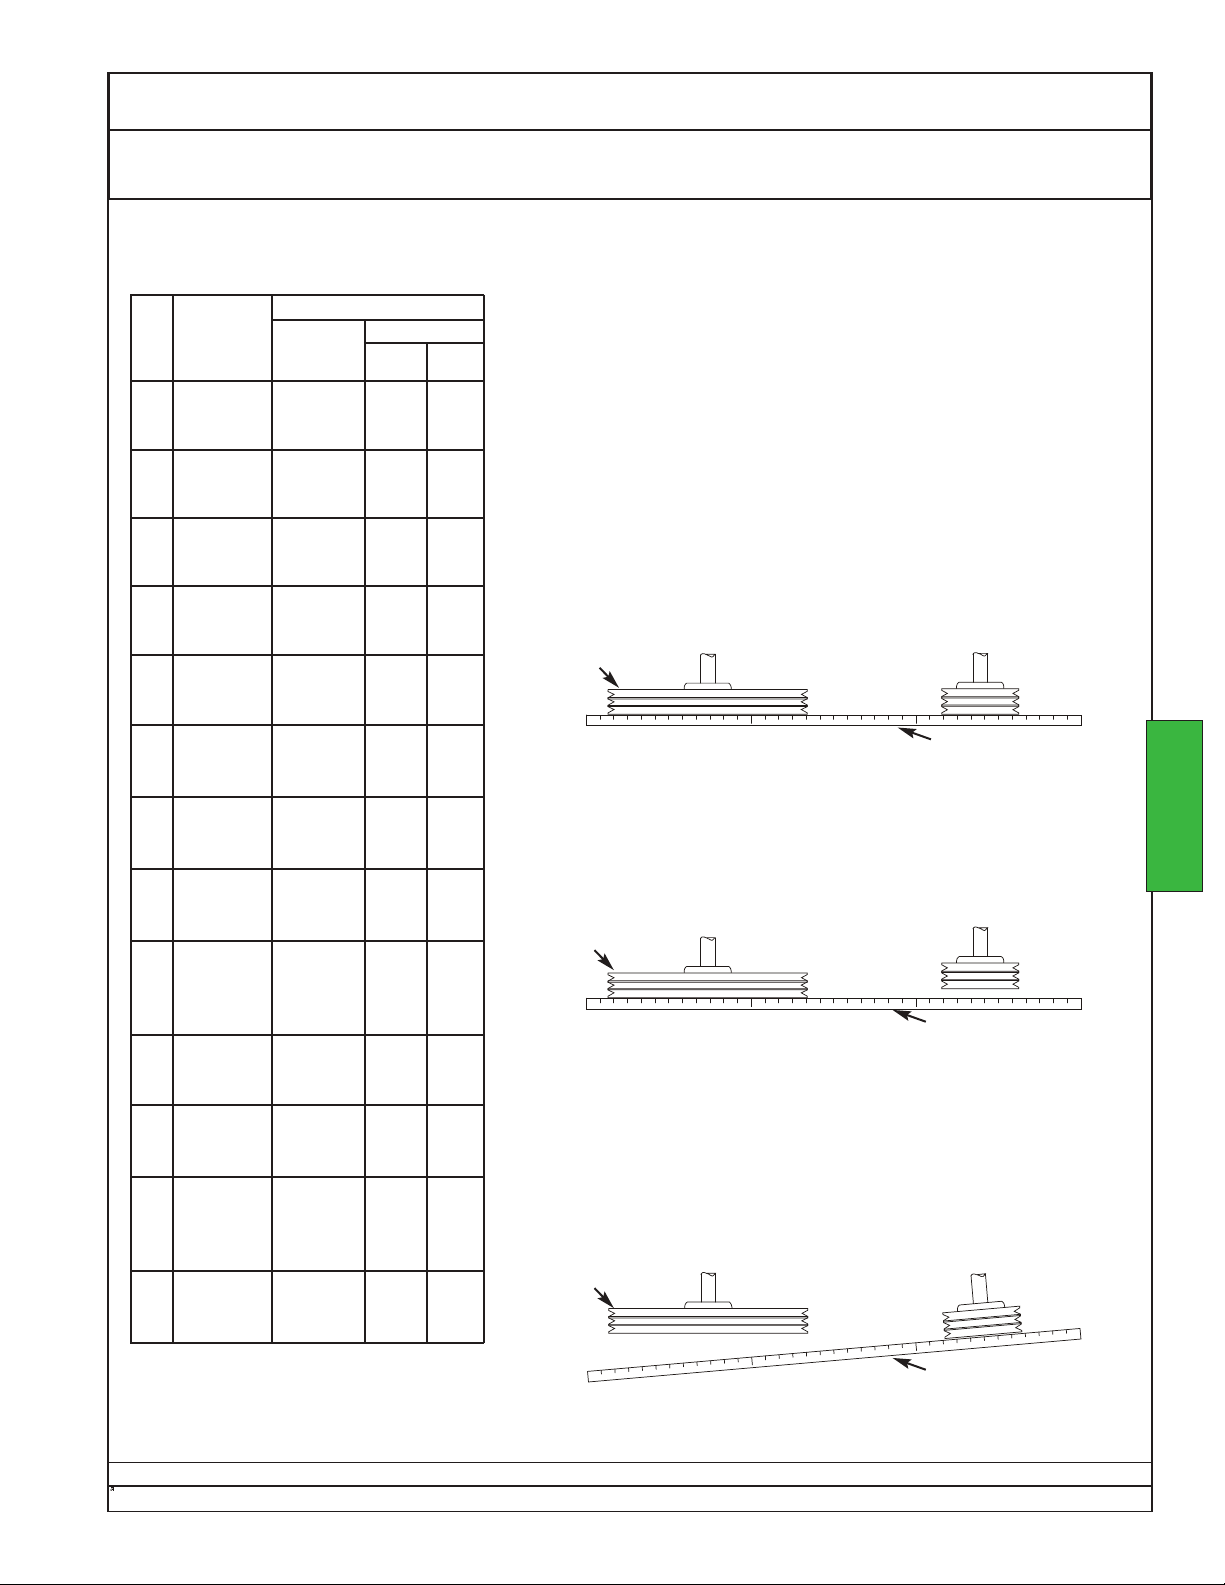
Owners Manual Ecosaire®CM Series Precision Air Conditioner
Blower Maintenance Operation
Belt
size
A
B
C
D
E
AX
BX
CX
3V
5V
8V
3VX
5VX
V-Belt Tensioning
Small
sheave
diameter
(in)
3.0 - 3.4
3.6 - 4.2
4.6 - 6.0
4.6 - 5.4
5.6 - 7.4
8.6 - 9.4
7.0 - 8.5
9.0 - 12.0
13.0 - 16.0
12.0 - 15.5
16.0 - 18.0
22.0 - 27.0
17.7 - 23.6
23.7 - 31.5
31.6 - 39.3
2.1 - 3.4
3.6 - 4.2
4.6 - 6.0
3.7 - 5.4
5.6 - 7.4
8.6 - 9.4
5.8 - 8.5
9.0 - 12.0
13.0 - 16.0
2.65 - 3.35
3.65 - 4.12
4.5 - 5.6
6.0 - 10.6
7.1 - 8.5
9.0 - 11.8
12.5 - 16.0
12.5 - 16.0
17.0 - 20.0
21.2 - 24.8
2.2 - 3.35
3.65 - 4.12
4.5 - 5.6
6.0 - 10.6
4.4 - 8.5
9.0 - 11.8
12.5 - 16.0
Deflection force (lbs.)
Initial
Installation
3.3
3.5
3.7
6.0
6.3
6.6
13.2
13.9
14.6
26.5
27.8
29.1
39.7
41.7
43.7
4.4
4.6
4.9
7.7
8.2
8.6
17.2
18.1
19.0
5.5
6.4
7.5
8.6
19.2
23.3
27.3
50.9
57.1
61.3
5.5
6.4
7.5
8.6
19.2
23.3
27.3
Re-tensioning
Max. Min.
2.9
2.2
3.1
2.4
3.3
2.5
5.1
4.0
5.5
4.2
5.7
4.4
11.5
12.1
12.6
22.9
24.3
25.6
34.4
36.2
37.9
15.0
15.7
16.5
16.7
20.3
23.8
44.3
49.8
53.3
16.7
20.3
23.8
3.7
4.0
4.2
6.6
7.1
7.5
4.8
5.7
6.6
7.5
4.8
5.7
6.6
7.5
8.8
9.3
9.7
17.6
18.7
19.6
26.5
27.8
29.1
2.9
3.1
3.3
5.1
5.5
5.7
11.5
12.1
12.8
3.9
4.4
5.1
5.7
13.0
15.6
18.5
34.4
38.6
41.4
3.9
4.4
5.0
5.7
13.0
15.6
18.5
Where sheaves carry more than one belt, never replace only
one belt. If any belt must be replaced, replace all the belts
with new ones. When replacing multiple belts use only new
belts from the same manufacturer and the same lot number, or
use matched belts. Failure to do this will result in severe belt
wear.
When removing or replacing belts, always relieve the belt tension to position the belts. Never prize the belts with a screwdriver or other tool.
Belt sheaves must be properly aligned, as shown below.
Sheave
Straight edge
While the sheaves were aligned at the factory, future adjustments may cause varying degrees of misalignment. A common
problem is parallel misalignment, as shown below. Parallel misalignment causes excessive belt, sheave, and bearing wear.
Sheave
Straight edge
Another common problem is angular misalignment, as shown
below. Angular misalignment causes excessive belt, sheave,
and bearing wear.
Sheave
OPERATION
Ecosaire
Straight edge
Data subject to change without notice.
®
July 2007 87
Page 88
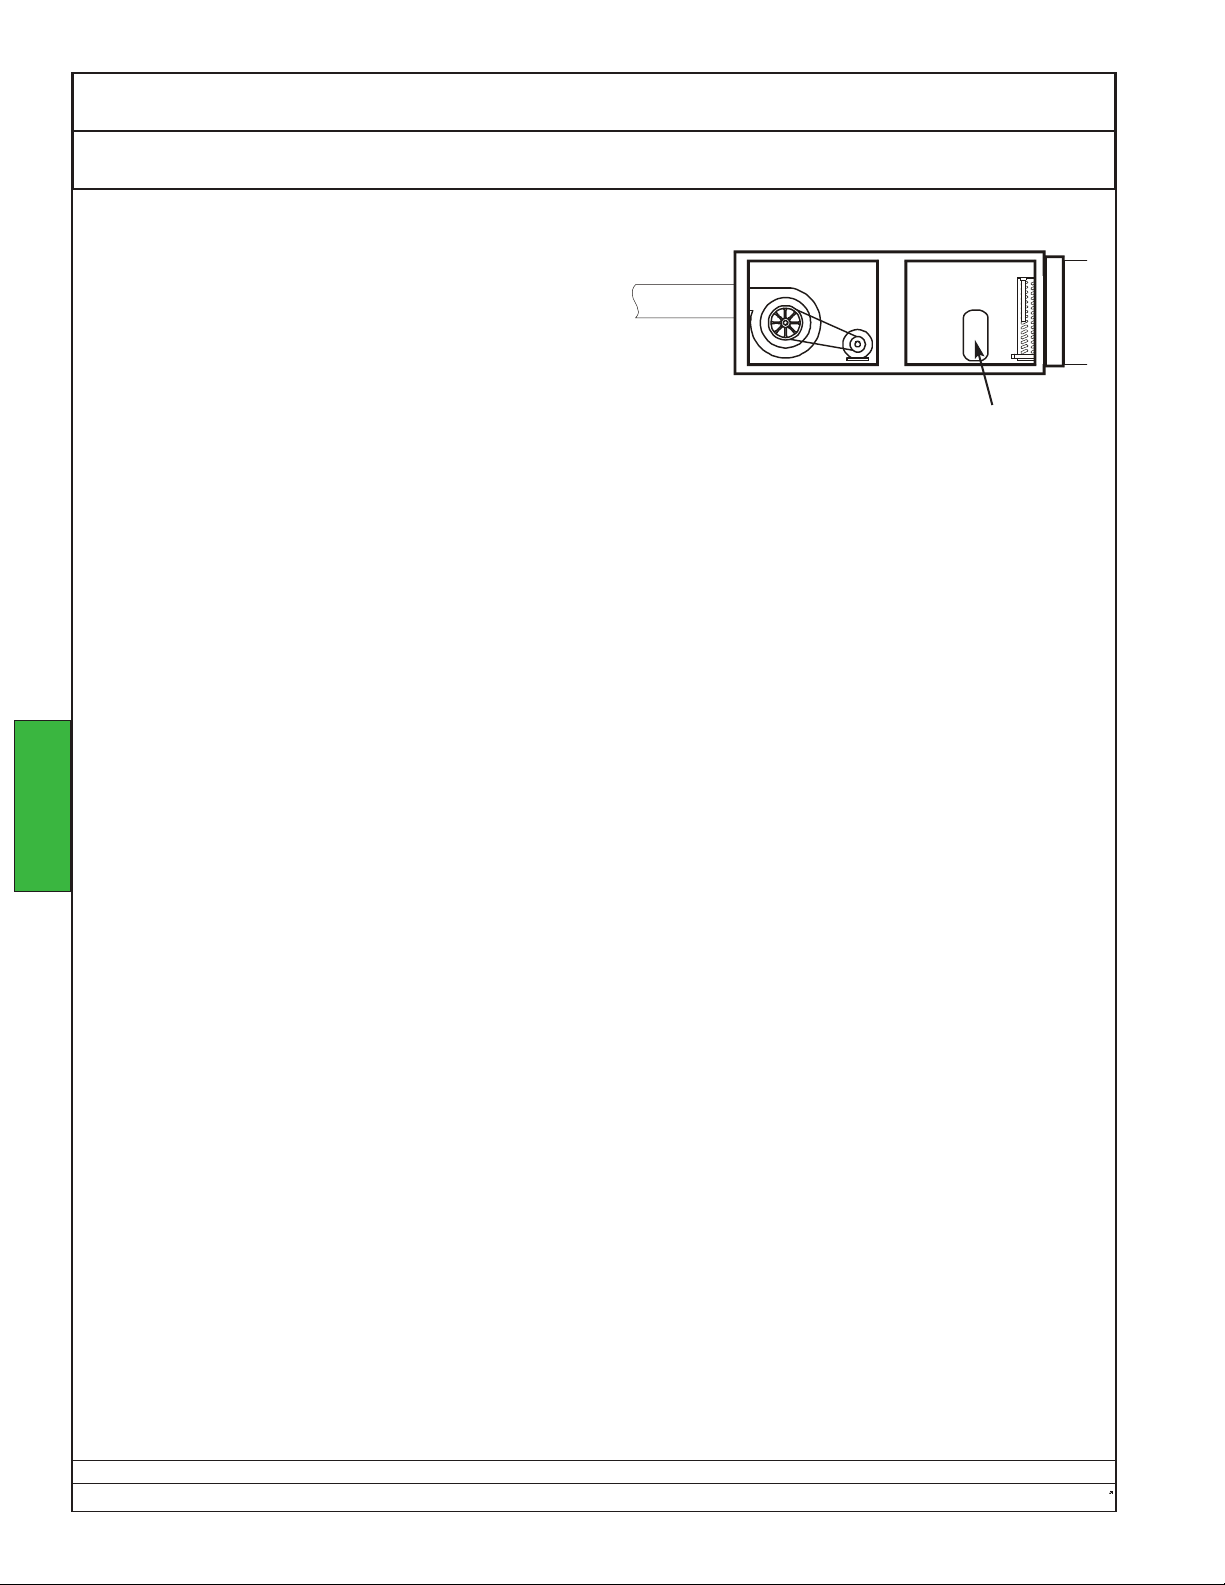
Ecosaire®CM Series Precision Air Conditioner Owners Manual
Operation Maintenance Humidifier
The steam cylinder is disposable and must be replaced
at the end of cylinder life. Cylinder life is dependent on
left side of unit
water supply conditions and humidifier usage.
HOW TO REMOVE THE STEAM CYLINDER
1. Turn off water supply to unit.
2. Turn off branch circuit disconnect for unit. Take all safety
precautions.
3. The used cylinder must be drained completely before
removal. If the water has just been boiling, allow it to
cool before draining. Push the ON/OFF/DRAIN switch to
the MANUAL DRAIN position. Leave it in this position
SAMPLE
may vary.
Number, location, and
appearnce of components
humidifier
just long enough to drain the cylinder (usually less than ten minutes).
4. When completely drained, push the main ON/OFF/DRAIN switch back to the OFF position.
5. Open the acess door.
6. Cylinder plugs are attached to the primary voltage cylinder wires. (The plugs remain attached to the wires
unless they have to be replaced due to damage.) The plugs are press-fitted over the electrode pins
protruding from the top of the cylinder. Remove cylinder plugs from cylinder by pulling vertically.
7. Using a flat screwdriver, loosen the steam hose clamp(s) and pull steam hose off the cylinder vertically.
8. Using a small flat screwdriver, depress the tab on the reusable tie wrap (if present) around the middle of the
cylinder. This will loosen the tie wrap to come apart for re-use later on.
9. Cylinder is now ready to be lifted out of the unit.
CAUTION: Cylinder and any undrained water might still be HOT.
OPERATION
MANDATORY CLEANING OF THE DRAIN VALVE
Always clean the drain valve before installing a new cylinder since the valve port may be as dirty as the used
cylinder.
1. Note that the ring terminal for the drain valve green ground wire is sandwiched between the drain valve body
and the drain pan.
2. Remove two screws securing the drain valve body to the drain pan. Disconnect the two slip-on terminals from
the two tabs on the (24VAC) drain valve coil.
3. Remove the hose clip and hose connection from drain valve body.
4. Drain valve assembly is now free to be taken to a sink for disassembly and cleaning.
5. Remove the snap-fit red cap from coil assembly and slide coil off the actuator.
6. Loosen actuator with wrench and unscrew from the plastic valve body.
7. Clean the exposed core and spring and plastic drain valve port.
8. IMPORTANT! The tapered end of the spring MUST BE INSTALLED TOWARD THE SOLENOID.
Reassemble, tighten the actuator 1/4 turn past hand-tight.
9. Clean out the end of the hose, then reconnect it to the drain valve body with the clamp.
10. Fit mounting screws through the drain valve body, one through the ring terminal on the green ground wire.
11. IMPORTANT! To prevent the possibility of electrical shock the green ground wire must be installed
before the power is restored.
12. Push the two slip-on terminals back onto the two tabs on the coil. The terminals, although not identical, are
reversible.
Data subject to change without notice.
88 Ecosaire
®
July 2007
Page 89

Owners Manual Ecosaire®CM Series Precision Air Conditioner
Humidifier Maintenance Operation
HOW TO INSTALL THE REPLACEMENT CYLINDER
1. Reverse procedure should be followed to install the new cylinder. The branch-circuit disconnect is to be left
open until the cylinder is completely installed and reconnected.
2. Ensure that the cylinder is secured properly by the re-usuable tie wrap and mounting brackets within the unit.
3. The cylinder plug wires are color-coded in accordance with the colored dots beside the electrode pins on top of
the cylinder. This color-coding MUST be adhered to when replacing cylinder plugs on pins.
4. With cylinders having six primary voltage cylinder plugs, it should be noted that there are two of each color.
5. Care MUST be taken so that the cylinder leads of the same color are always directly opposite each other
as indicated by the dot formation on the top of the cylinder.
6. The white cylinder plug on all units is for the sensor electrode which always goes on the single pin surrounded
by a plastic shoulder.
7. Ensure that cylinder plugs fit snugly on the pins.
8. If cylinder plugs become loose, it is best to obtain a new replacement plug.
EXTENDED SHUTDOWN
Before disconnecting power to the humidifier for a period of extended shutdown, ALWAYS DRAIN the cylinder
first. Otherwise, the electrodes are subject to harmful corrosion which drastically shortens cylinder life. DO NOT
leave the switch in the DRAIN position indefinitely as the drain coil could burn out. Leave the switch in the OFF
position and “open” the main external fused disconnect to stop power to the humidifier. Close the shut off valve in
the water supply line feeding the humidifier.
OPERATION
Ecosaire
Data subject to change without notice.
®
July 2007 89
Page 90
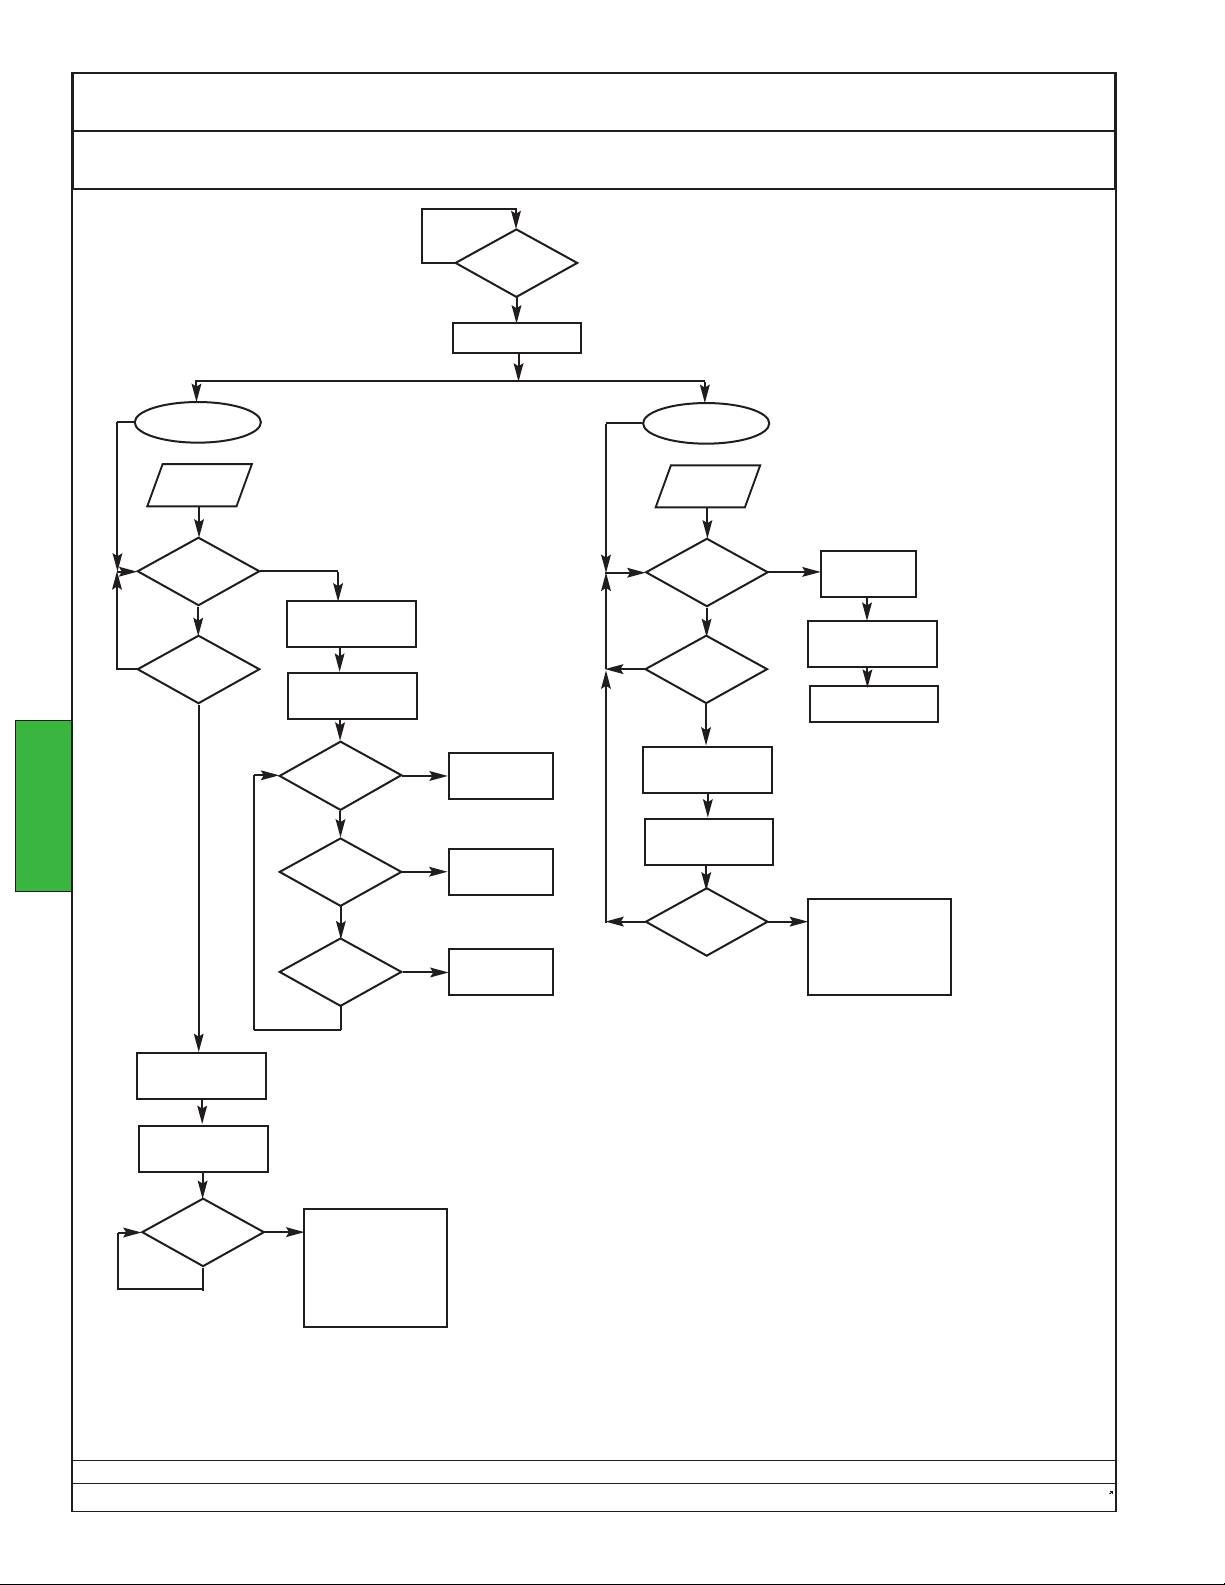
Ecosaire®CM Series Precision Air Conditioner Owners Manual
Operation Logical Flowchart
OPERATION
NO
Temperature
set point
Room air
temp.
Temperature
< set point?
NO
Temperature
> set point?
YES
YES
Determine propor-
tional response
Output proportional
heating signal
Response
> 33%?
Response
> 66%?
Response
> 99%?
NO
NO
NO
YES
YES
YES
NO
Enabled?
Run blower
Heater 1 ON
Heater 2 OFF
Heater 1 OFF
Heater 2 ON
Heater 1 ON
Heater 2 ON
YES
Humidity
set point
Room air
humidity
Humidity
< set point?
NO
Humidity
> set point?
Determine propor-
tional response
Output proportional
cooling signal
NO
Response
> 50%?
General Flowchart
Specific units may vary.
YES
NO
YES
YES
Enable
humidifier
Determine propor-
tional response
Add humidity
Run Compressor
(if any)
Enable DH
Run Remote HX
(if any)
Determine propor-
tional response
Output proportional
cooling signal
NO
YES
Run Compressor
(if any)
Run Remote HX
(if any)
Response
> 99%?
Data subject to change without notice.
90 Ecosaire
®
July 2007
Page 91
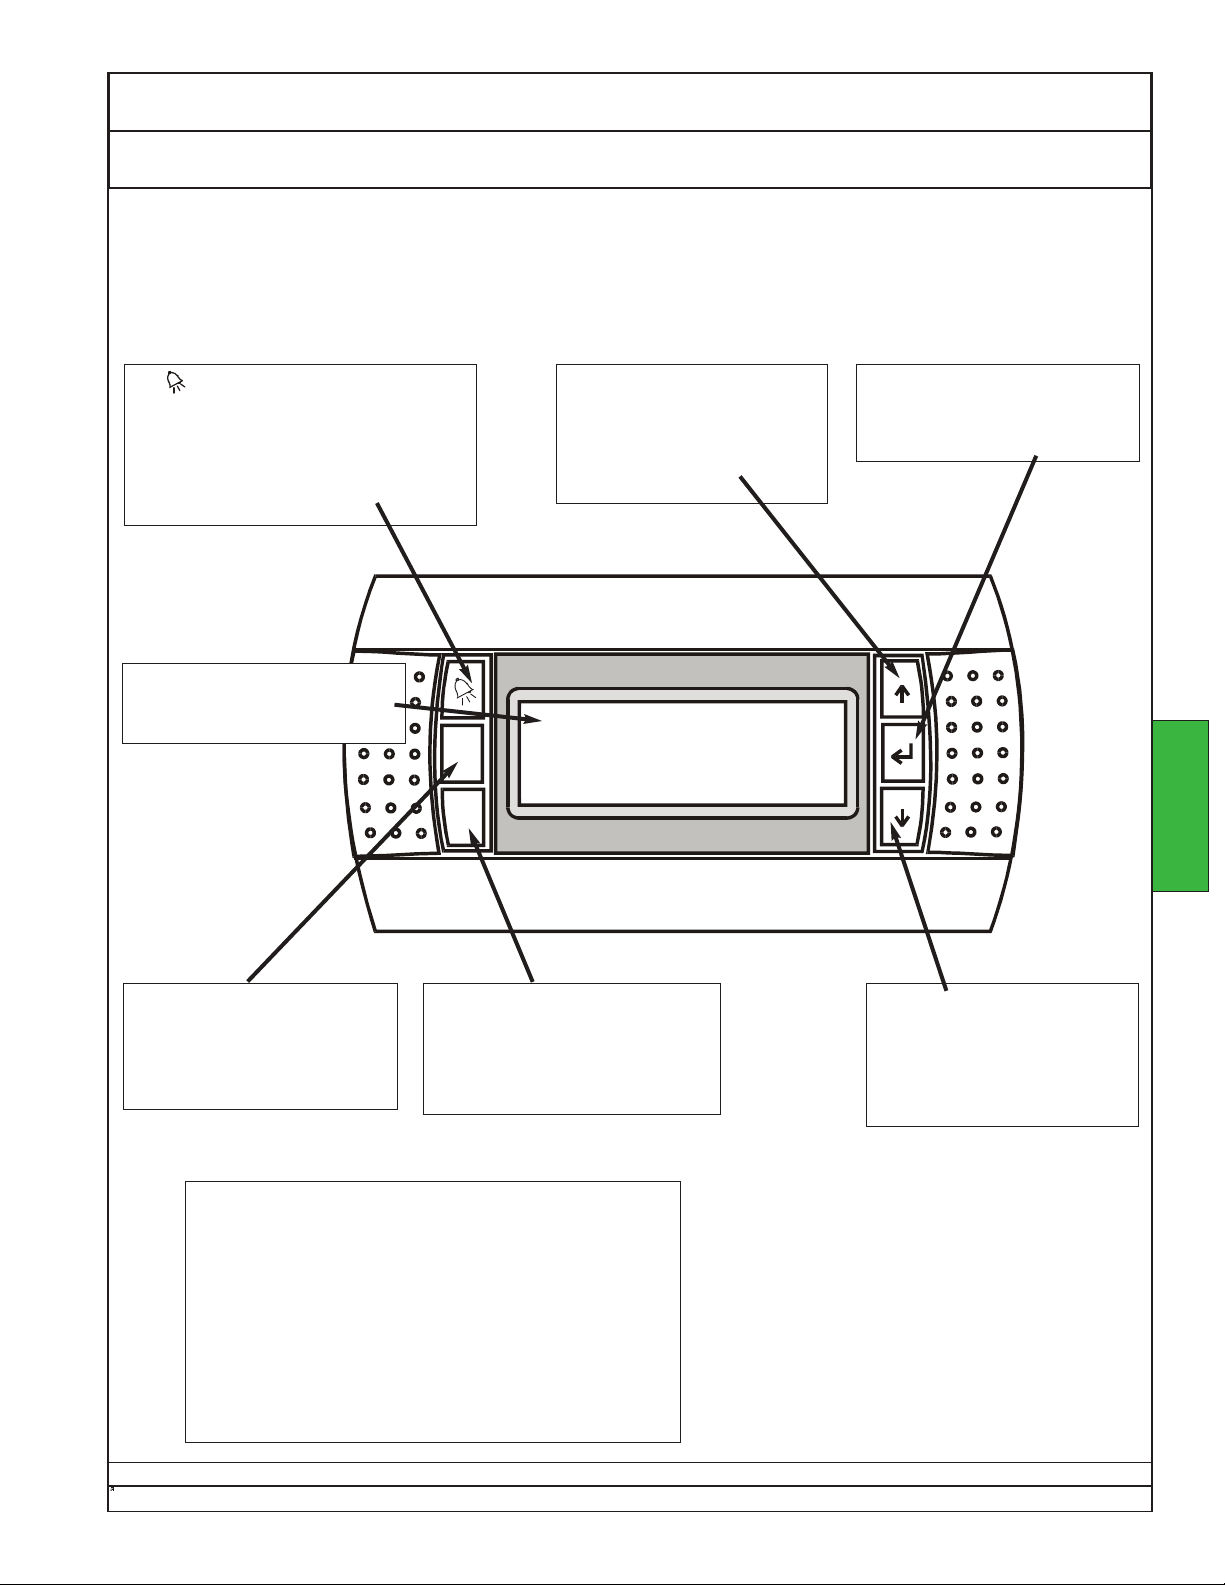
Owners Manual Ecosaire®CM Series Precision Air Conditioner
Controller Interface Operation
The Supervisaire®controller handles all the functions of the Ecosaire® unit. The initial startup at
installation requires the manual input of the set points and permission to run. After this all functions
are fully automatic.
The button is used to announce and
to access any alarms that might arise.
This button illuminates to indicate a
current alarm condition. Pressing this
button brings up a sequence of current
alarm description screens.
The backlit LCD screen displays any needed information
on the operation of the system.
Prg
Esc
The ↑button is used for
scrolling upward to change
set points, enter passwords,
and to select display screens
and menus.
Room Status
Temperature xx.x°F
Humidity xx.x%rh
The ↵button is used to navi-
gate through menu selections
and to accept changes.
OPERATION
The Prg button is used to
access the set point screens.
It is also used in combination
with the Esc button to access
certain service screens.
The Supervisaire®controller is protected by three
password levels. Set points, run enabling, and sitespecific setup values are protected by a User
Password. Detailed service settings and information
are protected by a Service Password. Model specific
operation constants are protected by a Factory
Password.
Passwords are automatically cleared after two minutes pass with no button activity.
®
Ecosaire
July 2007 91
The Esc button is used to
revert to an earlier screen. It is
also used in combination with
the Prg button to access certain
service screens.
Security
The ↓button is used for
scrolling downward to change
set points, enter passwords,
and select display screens
and menus.
Data subject to change without notice.
Page 92
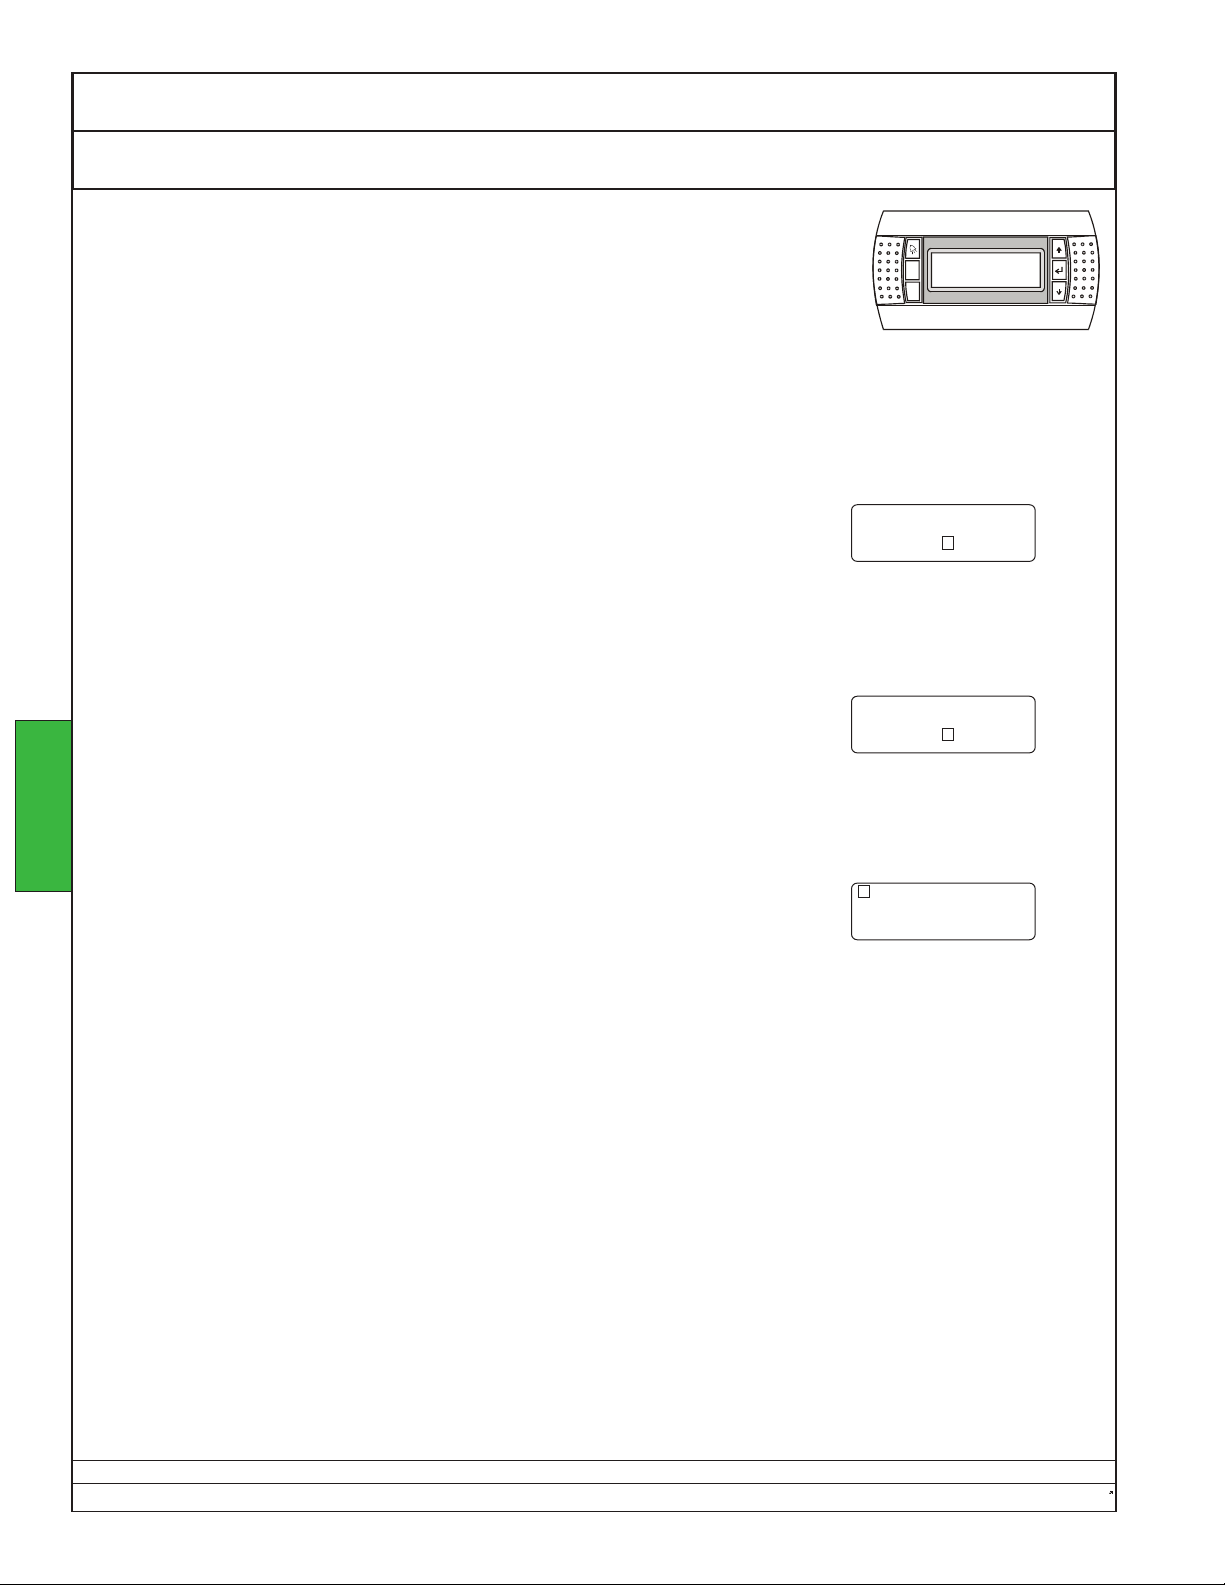
Ecosaire®CM Series Precision Air Conditioner Owners Manual
Operation Controller Password
NOTE: The password will be cleared
automatically after two minutes of no
button activity.
Some settings require the User Password. To enter the password when
prompted - press ↵to move the cursor to the password.
Press ↑until the password reads “0008”. If you overshoot, press ↓.
OPERATION
Prg
Esc
Enter
Password: 0000
Enter
Password: 0008
Press ↵. The password is entered and changes can be made.
System ON/OFF
System = OFF
NOTE: The password will be cleared automatically after
two minutes of no button activity.
Data subject to change without notice.
92 Ecosaire
®
July 2007
Page 93
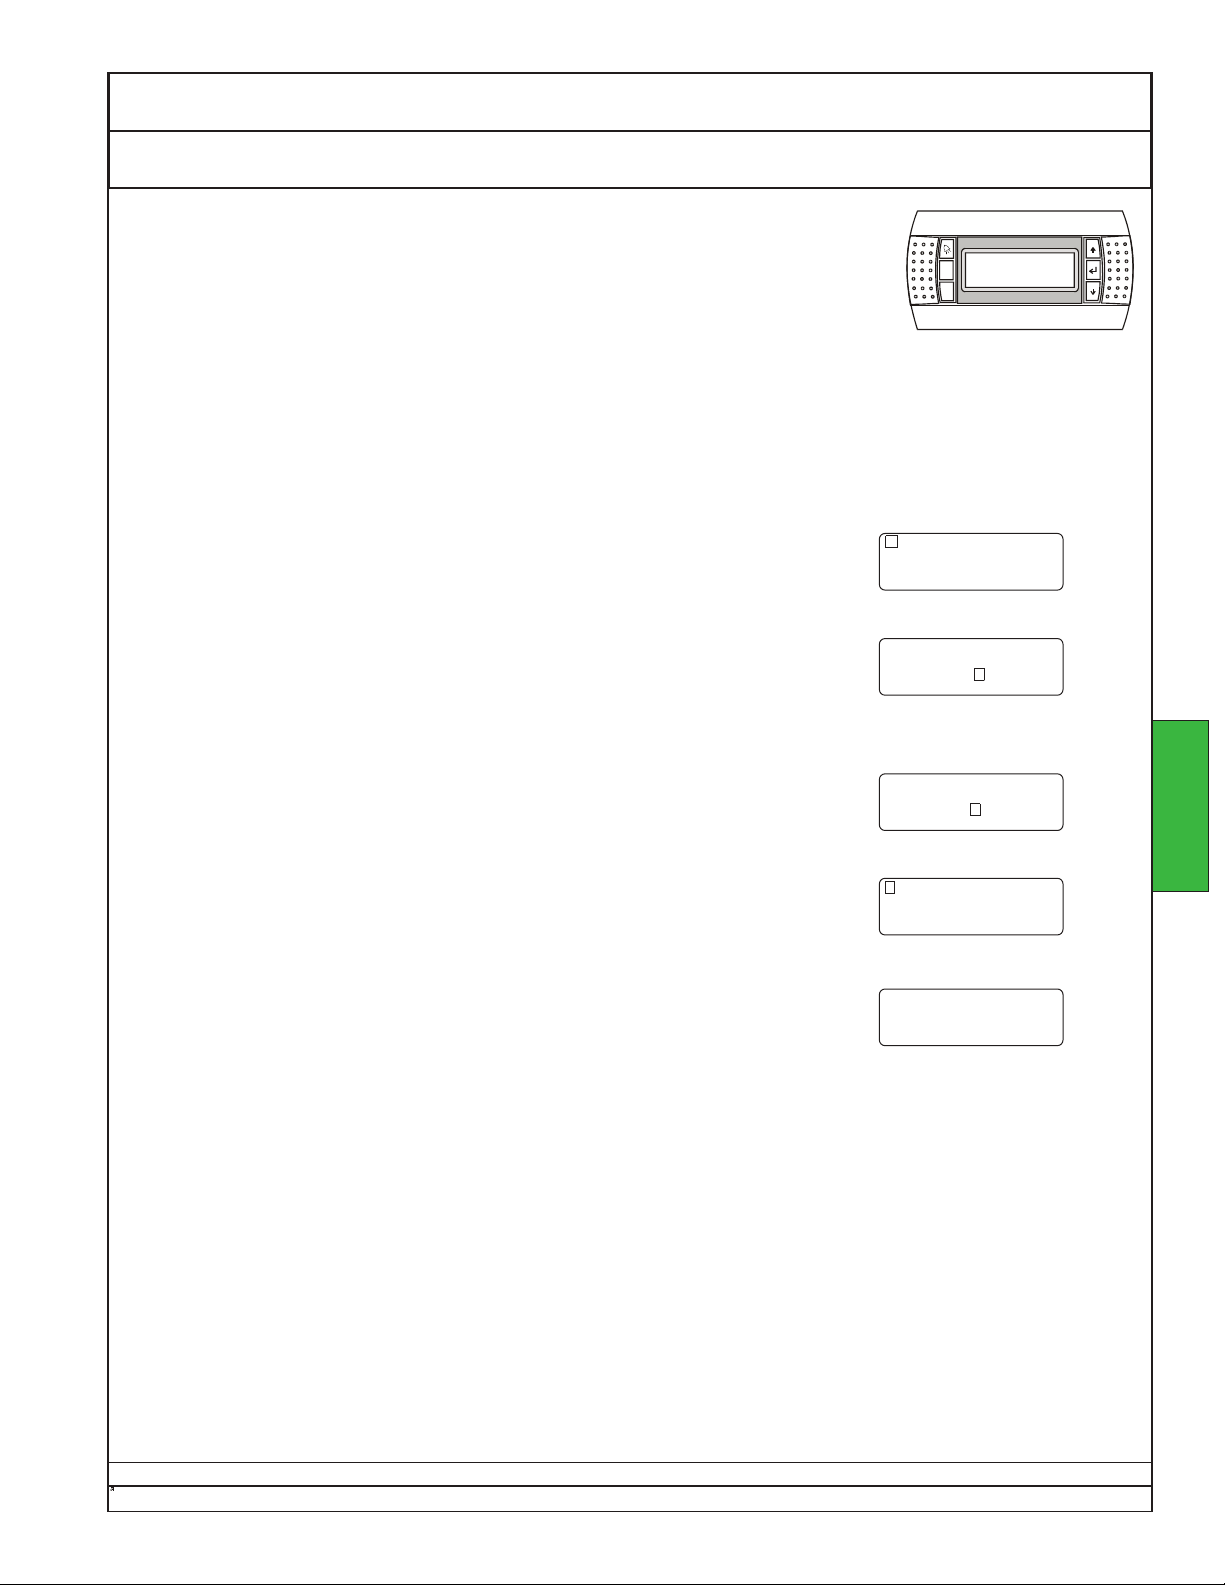
Owners Manual Ecosaire®CM Series Precision Air Conditioner
Enable and Disable Unit Operation
Prg
Esc
Be sure the controller RUN status is set to “OFF”.
Note: This adjustment requires the user password, see Startup - Pre-Startup Adjustments - Controller
Password.
To access the System ON/OFF menu, press Prg and enter
the password as discussed in Startup - Pre-startup
Adjustments - Controller Password. The screen should
appear as shown.
If System=ON, press ↵to move the cursor under “ON”.
Press ↑to change “ON” to “OFF”.
To store the setting, press ↵to return the cursor to the
upper left corner.
The refrigeration system is not operational. After a short delay, the display will
return to the default Room Status screen. Alternatively, press Esc as necessary to return to the default screen.
System ON/OFF
System = OFF
System ON/OFF
System = ON
System ON/OFF
System =OFF
OPERATION
System ON/OFF
System =OFF
Room Status
Temperature xx.x°F
Humidity xx.x%rh
Ecosaire
Data subject to change without notice.
®
July 2007 93
Page 94
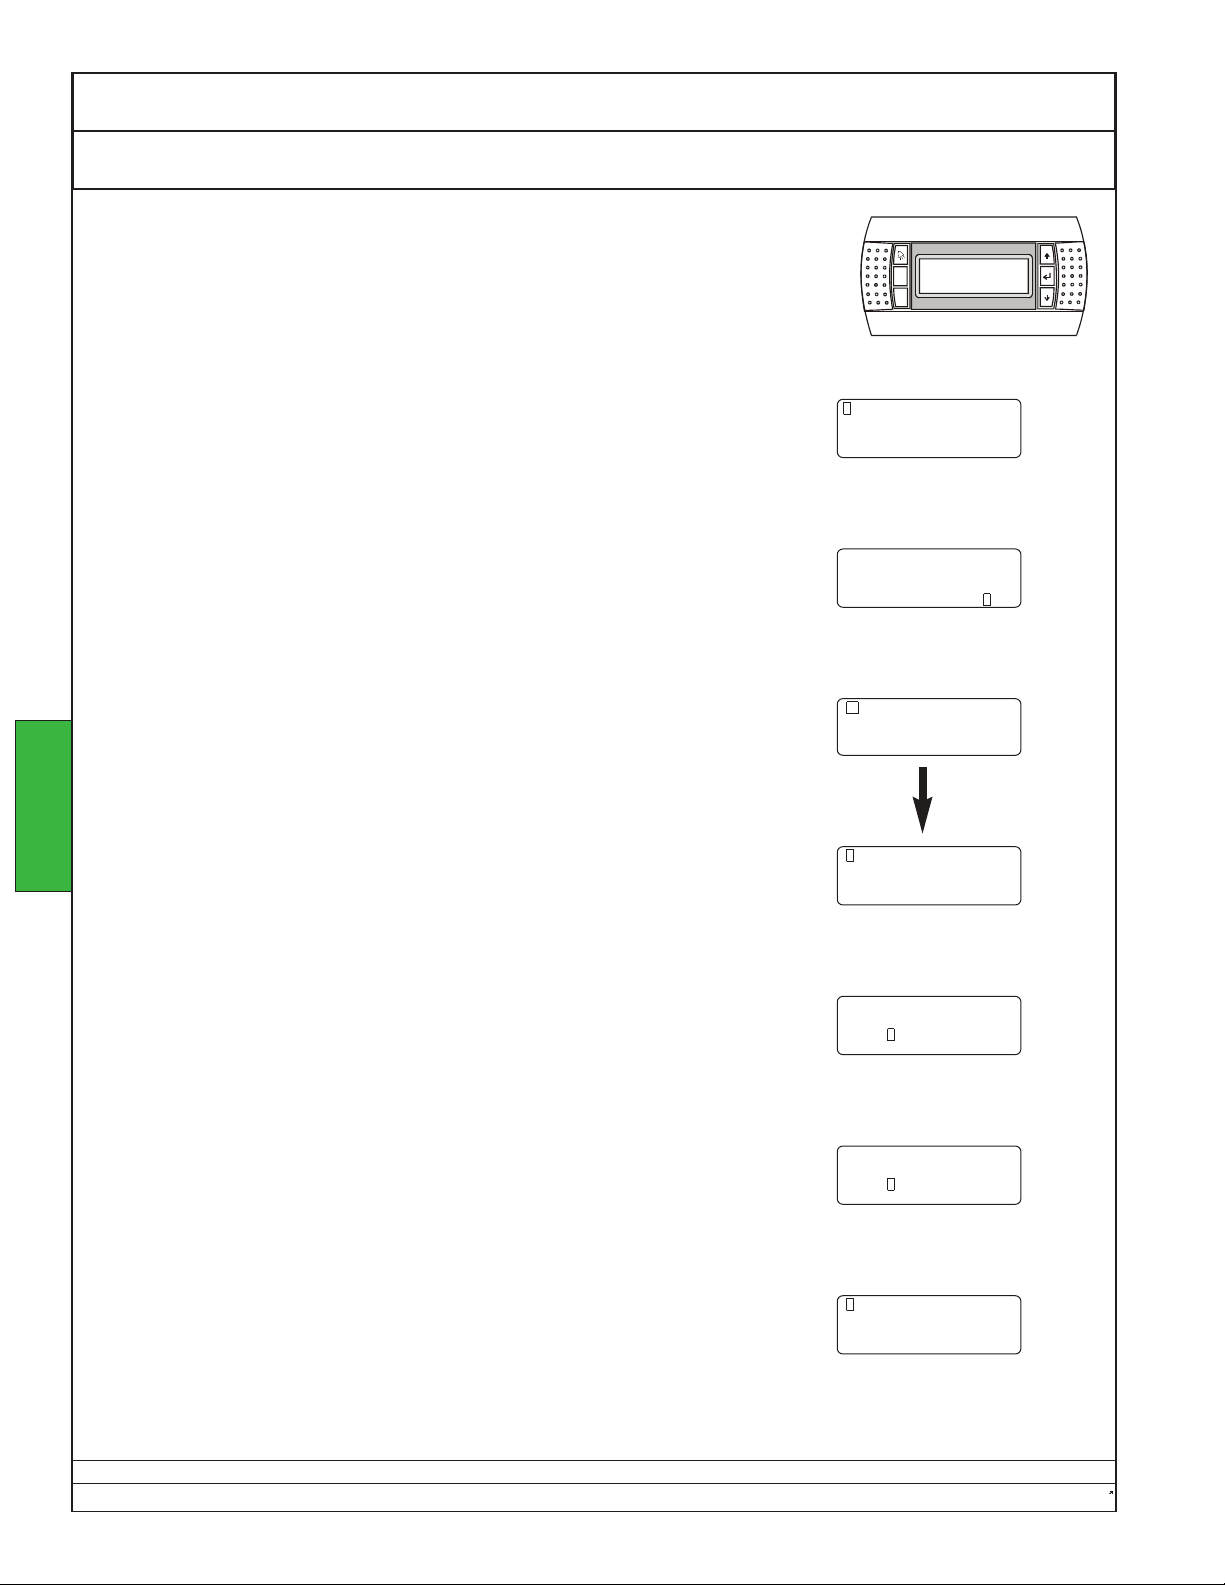
Ecosaire®CM Series Precision Air Conditioner Owners Manual
Operation Clock Change Date and/or Time
Note: This adjustment requires the user password, see Startup - Pre-startup Adjustments - Controller Password.
The clock is set at the factory for date and Eastern Time. These settings can be
changed as below.
Prg
Esc
To access Configuration Menu 1, press Prg and Esc at the same time.
To select Control Setup, press ↵three times.
Press ↓to view the CLOCK menu. If the password has cleared automatically, as discussed on the Enter User Password page, you will be asked
OPERATION
for it again. Follow the instructions in Startup - Pre-startup AdjustmentsController Password.
Config Menu 1
System Run Hours . . . . >
Alarm History . . . . . . . .>
Control setup . . . . . . . >
Config Menu 1
System Run Hours . . . . >
Alarm History . . . . . . . .>
Control setup . . . . . . . >
Enter
Password: 0000
CLOCK
Date = mmm/dd/yyyy
Time = hh:tt
Day = DOW
To change the clock, press ↵repeatedly until the cursor is at the desired
value. The example is to change the hour.
Press either ↑or↓to change the selected value.
To store the setting, press↵until the cursor is back in the upper left corner.
Data subject to change without notice.
94 Ecosaire
CLOCK
Date = mmm/dd/yyyy
Time = hh:tt
Day = DOW
CLOCK
Date = mmm/dd/yyyy
Time = xx:xx
Day = DOW
CLOCK
Date = mmm/dd/yyyy
Time = hh:tt
Day = DOW
®
July 2007
Page 95
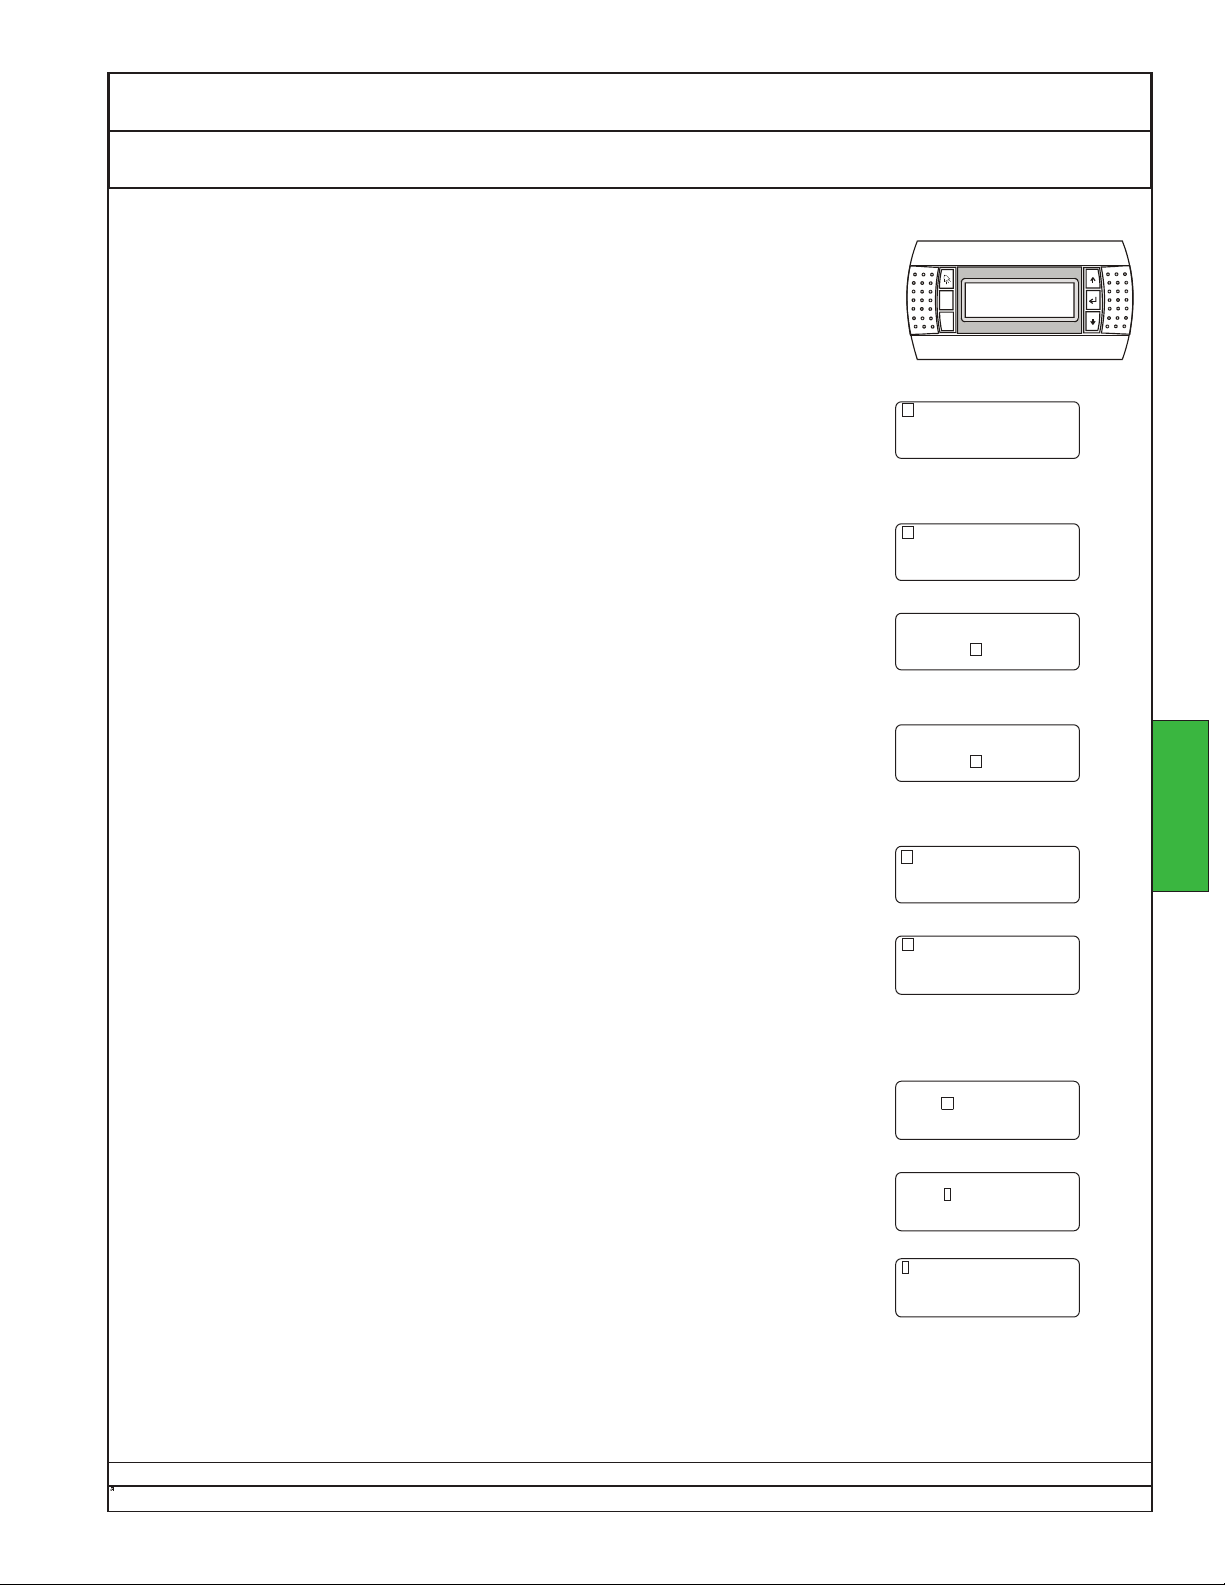
Owners Manual Ecosaire®CM Series Precision Air Conditioner
↓
Change Room Humidity Set Points Operation
Note: This adjustment requires the user password, see Startup - Pre-startup
Adjustments - Controller Password.
Press Prg, enter the password, and press ↵, as discussed in Startup - Prestartup Adjustments - Controller Password. The screen will appear as
shown.
Press
repeatedly to access Humidity Set Points.To access the humidity set point
screen, press ↓ three times.
To select the humidity set point press ↵ to move the cursor to the set point.
To change the humidity set point, press either the↑or the↓button to select the
desired temperature. The longer the button is held, the faster the set point
changes.
To store the new set point, press ↵. The cursor moves to the top left corner.
Prg
Esc
System ON/OFF
System = OFF
Humidity set pts
Set point xx.x%rh
Humidity set pts
Set point XX.X%rh
Humidity set pts
Set point XX.X%rh
Humidity set pts
Set point XX.X%rh
OPERATION
Press ↓to access the humidity alarm set point screen. The humidity alarms are
factory set for High=80% and Low=20%. If the room temperature goes over
“High” or under “Low” for a period greater than “Delay”, an alarm will be registered. Unit operation will not be affected. These settings can be changed as
below.
To select the alarm set point to change, press ↵repeatedly to move the cursor to
the desired position. The example is for the High humidity alarm set point.
To change the set point, press either the ↑or the ↓button.
To store the new value, press ↵repeatedly to move the cursor back to the top left
corner.
®
Ecosaire
July 2007 95
Humidity Alarms
High = 80.0%RH
Low = 20.0%RH
Delay = 015 sec
Humidity Alarms
High = 80.0%RH
Low = 20.0%RH
Delay = 015 sec
Humidity Alarms
High = XX.X%RH
Low = 20.0%RH
Delay = 015 sec
Humidity Alarms
High = XX.X%RH
Low = 20.0%RH
Delay = 015 sec
Data subject to change without notice.
Page 96
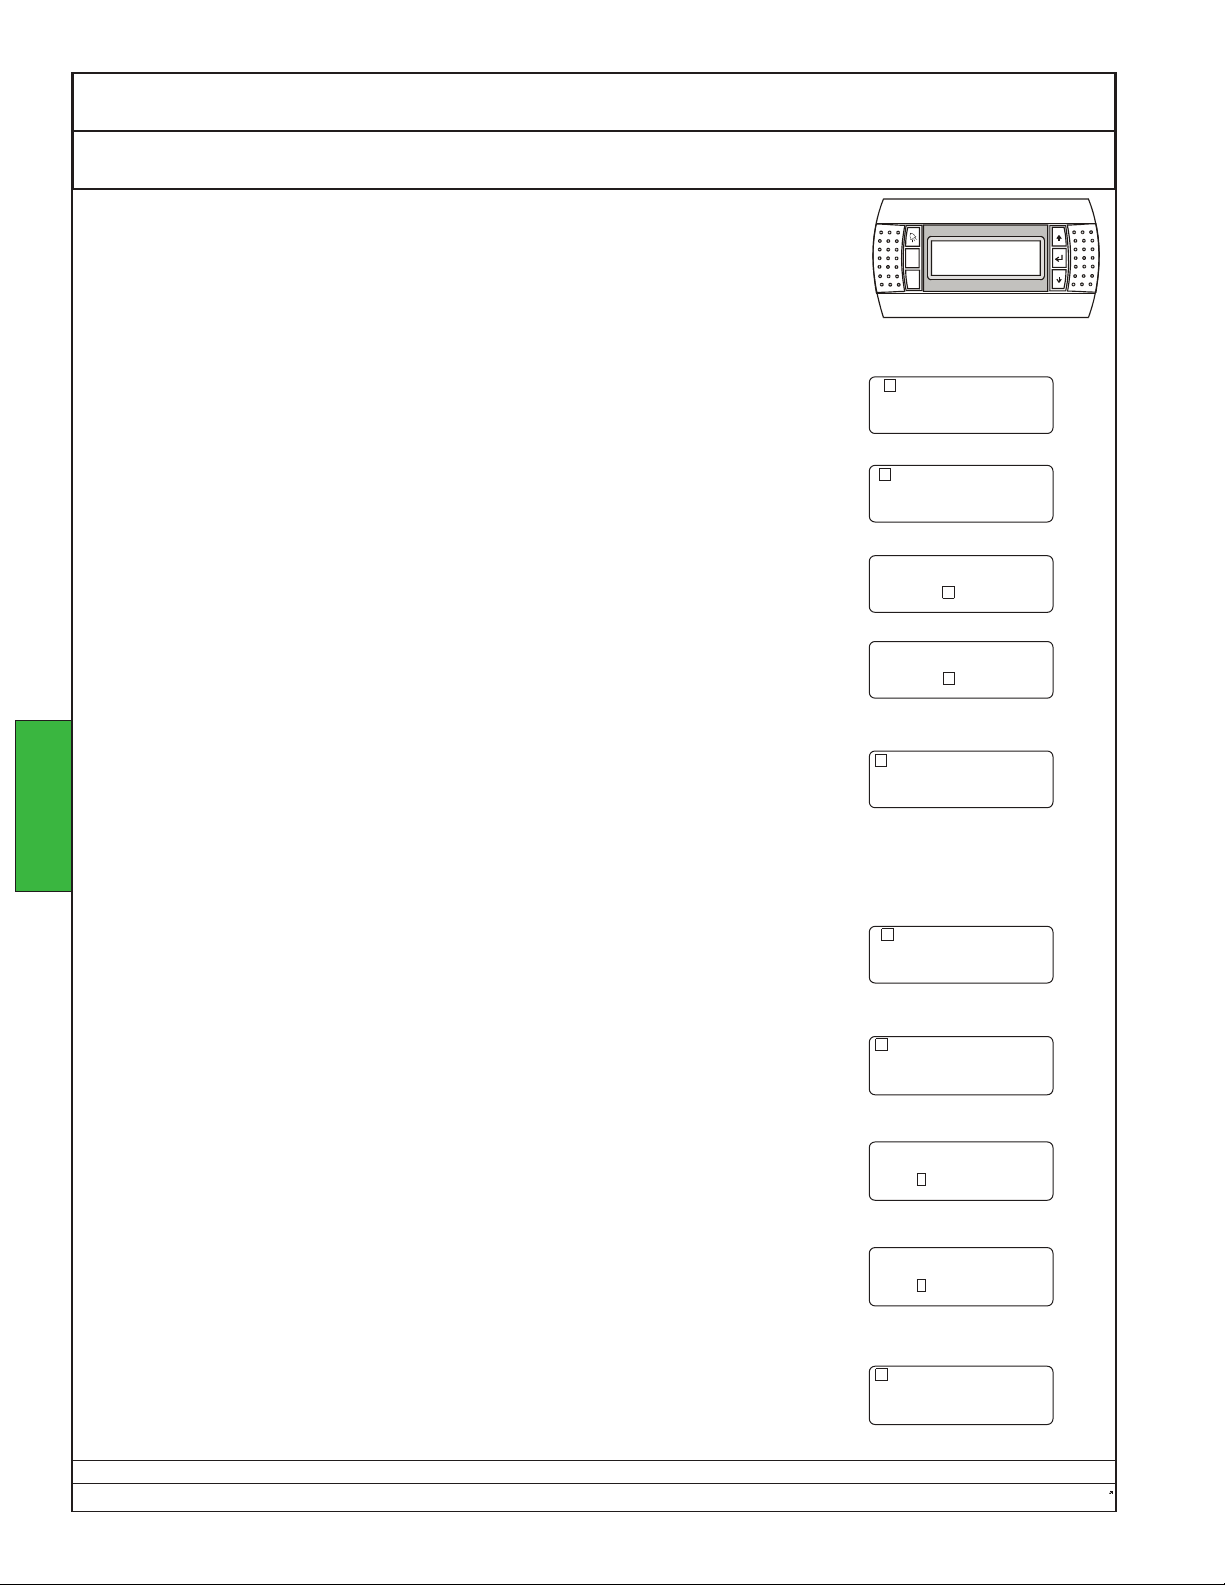
Ecosaire®CM Series Precision Air Conditioner Owners Manual
↓
Operation Change Room Temperature Set Points
Note: This adjustment requires the user password, see Startup - Pre-startup
Adjustments - Controller Password.
Prg
Esc
To adjust the temperature set point screen, first press Prg, enter the password,
and press ↵, as discussed in Startup - Pre-startup Adjustments - Controller
System ON/OFF
System = OFF
Password. The screen will appear as shown.
Press ↓to access Temperature Set Pts.
Press ↵to move the cursor to the set point.
To change the temperature set point, press either ↑or↓to select the desired
temperature. The longer the button is held, the faster the set point changes.
Temperature set pts
Set point xx.x°F
Temperature set pts
Set point xx.x°F
Temperature set pts
Set point xx.x°F
OPERATION
Press ↵to store the new set point. The cursor moves to the top left corner.
The temperature alarms are factory set for High=80oF and Low=60oF. If the room temperature goes over
“High” or under “Low” for a period greater than “Delay”, an alarm will be registered. Unit operation will not be
affected. These settings can be changed as below.
Press Prg, enter the password, and press ↵, as discussed in Startup - Pre-start-
up Adjustments - Controller Password. The screen will appear as shown.
Temperature set pts
Set point xx.x°F
System ON/OFF
System = OFF
To access the temperature alarm set point screen, press ↓twice.
To select the alarm set point to change, press ↵repeatedly to move the cursor to
the desired position. The example is for low temperature alarm set point.
To change the set point, press either↑or
.
To store the new value, press ↵repeatedly to move the cursor back to the top left
corner.
Data subject to change without notice.
96 Ecosaire
Temperature Alarms
High = 80.0°F
Low = 60.0°F
Delay = 015 sec
Temperature Alarms
High = 80.0°F
Low = 60.0°F
Delay = 015 sec
Temperature Alarms
High = 80.0°F
Low = XX.X°F
Delay = 015 sec
Temperature Alarms
High = 80.0°F
Low = XX.X°F
Delay = 015 sec
®
July 2007
Page 97
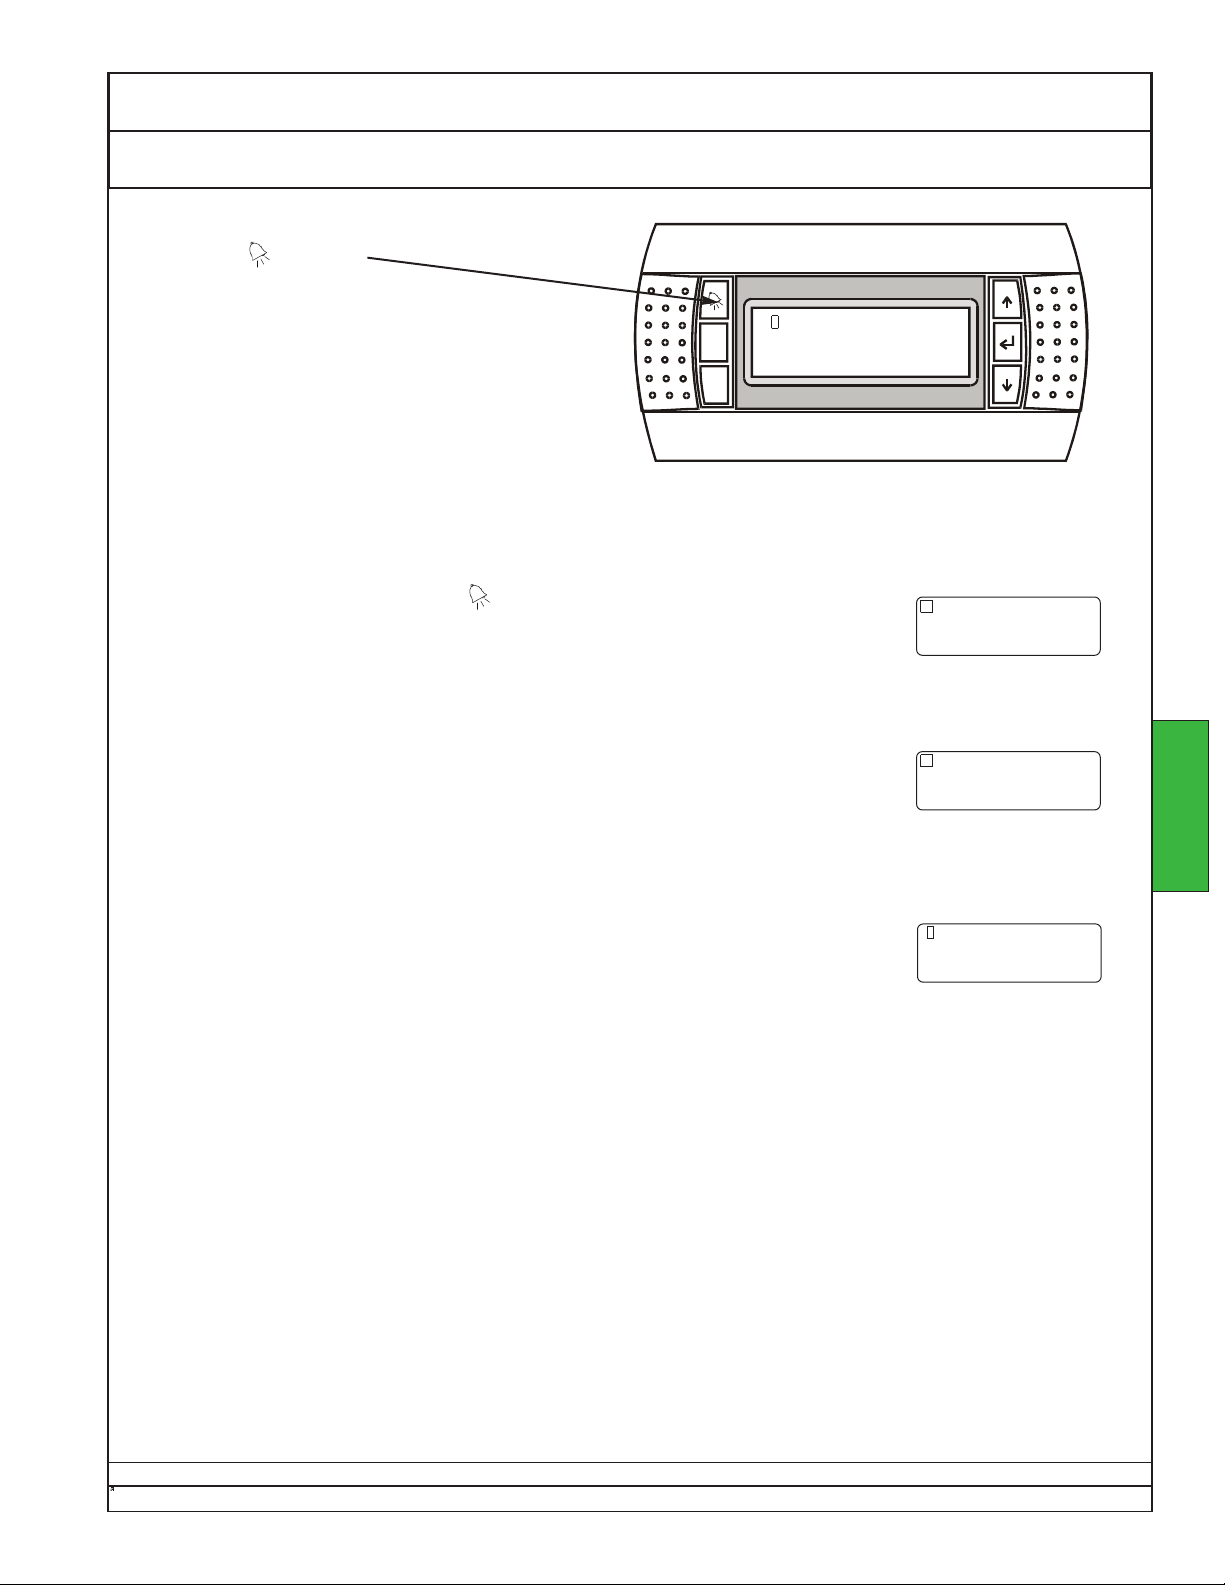
Owners Manual Ecosaire®CM Series Precision Air Conditioner
Alarms Operation
If an alarm other than Power Restart is registered, the
ALARM button will light.
Room Stat us
Prg
Esc
Temperature xx.x°F
HUmidity xx.x%rh
To view the alarm information, press . In the example, the hour of occur-
rence is “hh”, the minute of occurrence is “tt”, the month of occurrence is “mm”,
the day of occurrence is “dd”, and the name of the alarm is “xxxxxxxxx”.
To view all the current alarms, press ↓repeatedly, noting each alarm.
Eventually the screen will show “No more alarms”.
To clear the current alarms, press ↵. The alarms are stored in the Alarm
History for later viewing if needed. The default ROOM STATUS screen is shown.
*** Alarm ***
hh:tt mm/dd
xxxxxxxxxxxxx
NO MORE ALARMS
Press ENTER to clear
Press ALARM to view
Room Status
Temperature xx.x°F
HUmidity xx.x%rh
For the meanings of these alarms, along with checks and corrections, see Operation -
Controller Diagnostics.
OPERATION
Ecosaire
Data subject to change without notice.
®
July 2007 97
Page 98
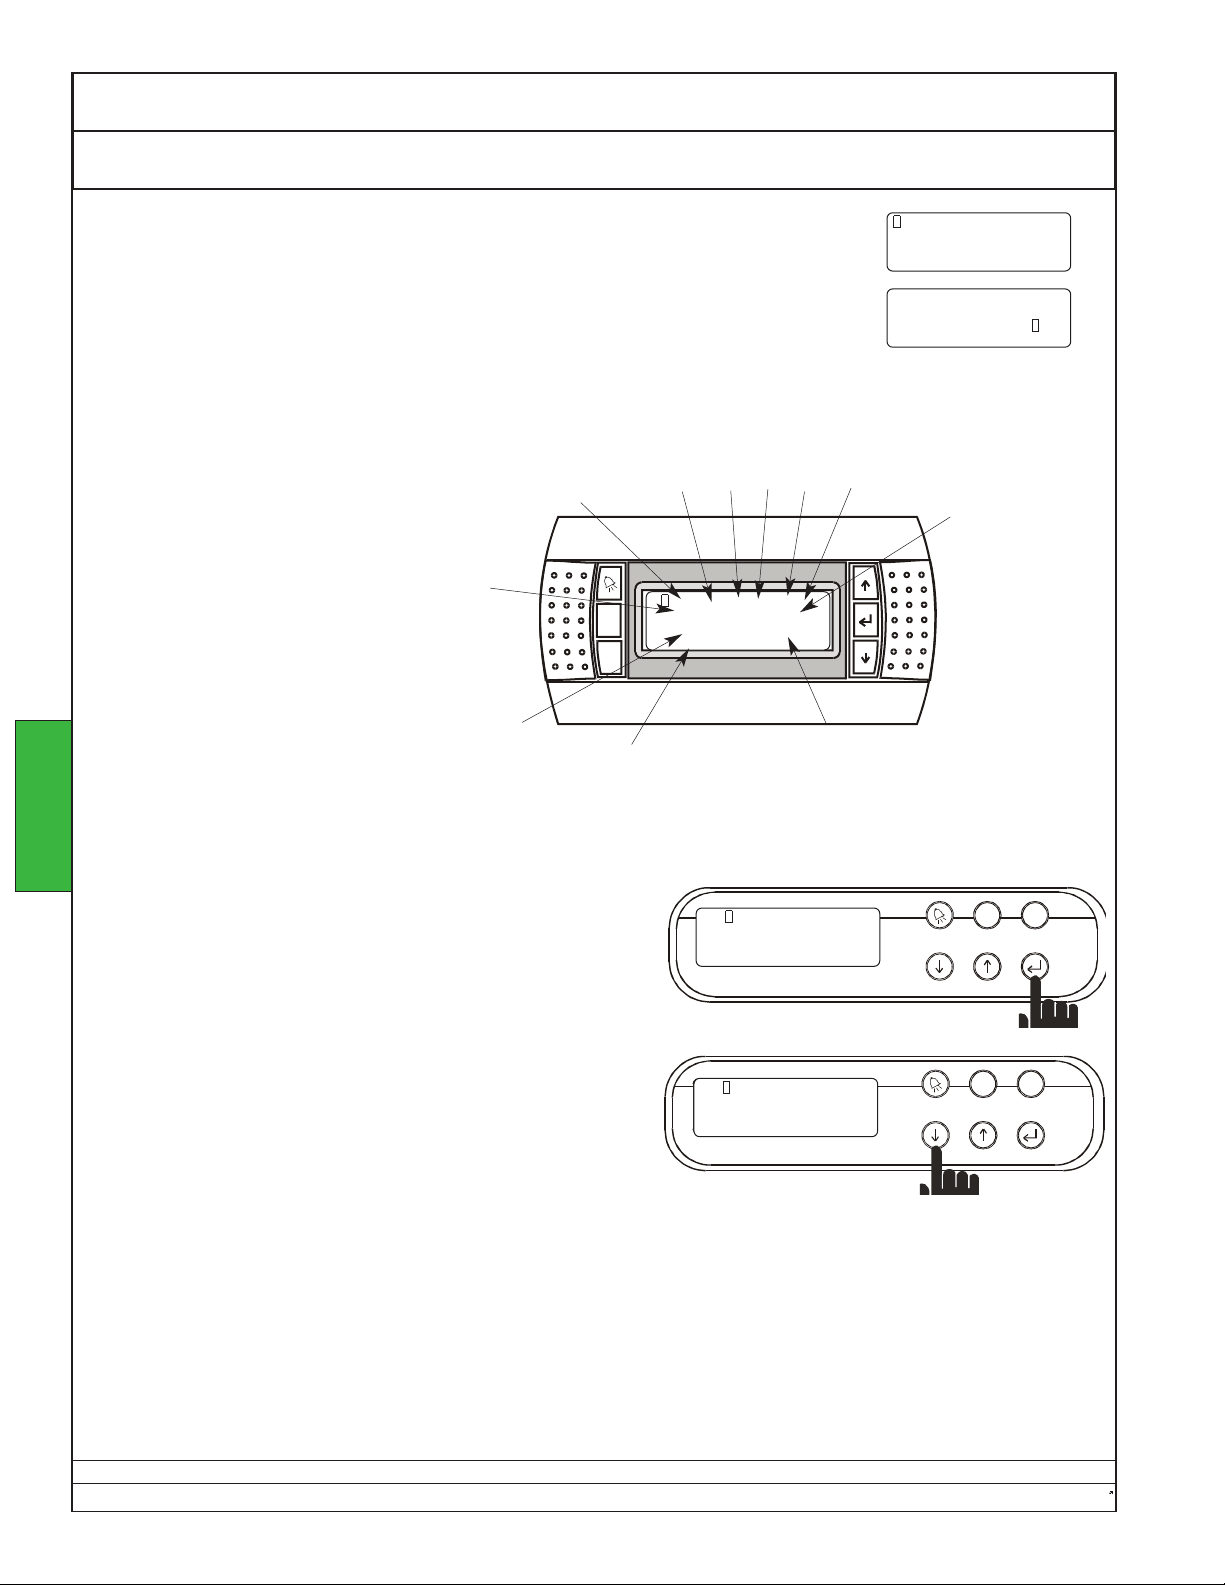
Prg
Esc
Ecosaire®CM Series Precision Air Conditioner Owners Manual
Prg
Esc
Prg
Esc
Operation Alarm History
Select Configuration Menu 1 by pressing Prg and Esc at the same time.
To select Alarm History, press ↵twice.
To view the last alarm, press ↓.
alarm identification
room temperature
at time of alarm
OPERATION
room temperature
set point at time of alarm
name of alarm
Time of Occurrence
Month Day Ye ar Hour Minute
AL:xx mm/dd/yy hh:tt
TMP: ff°F HUM: rr %
SET: ss.s°F SET: uu.u%
Nnnnnnnnnnnn
room humidity set point
at time of alarm
Config Menu 1
System Run Hours . . . . >
Alarm History . . . . . . . .>
Control setup . . . . . . . >
Config Menu 1
System Run Hours . . . . >
Alarm History . . . . . . . .>
Control setup . . . . . . . >
room humidity at
time of alarm
To view previous alarms, press ↵to move the cursor to
AL:xx mm/dd/yy hh:tt
the alarm identification, then press ↓repeatedly.
TMP: ff°F HUM: rr %
SET: ss.s°F SET: uu.u%
Nnnnnnnnnnnn
AL:xx mm/dd/yy hh:tt
TMP: ff°F HUM: rr %
SET: ss.s°F SET: uu.u%
Nnnnnnnnnnnn
The display will return to
ROOM STATUS
after a short delay.
Data subject to change without notice.
98 Ecosaire
®
July 2007
Page 99
Owners Manual Ecosaire®CM Series Precision Air Conditioner
View Component Run Times Operation
Select Configuration Menu 1 by pressing Prg and Esc at the same time.
Select System Run Hours by pressing ↵.
To view the run times for the BLOWER and the HEATERS, press ↓.
To view the run times for the HUMIDIFIER and the FreeCool VALVES (if any),
press ↓again.
Config Menu 1
System Run Hours . . . . >
Alarm History . . . . . . . .>
Control setup . . . . . . . >
Config Menu 1
System Run Hours . . . . >
Alarm History . . . . . . . .>
Control setup . . . . . . . >
EQUIPMENT RUN HOURS
Blower: xxxxxhrs
Heat 1: xxxxxhrs
Heat 2: xxxxxhrs
EQUIPMENT RUN HOURS
Humidifier: xxxxxhrs
FreeCool 1: xxxxxhrs
FreeCool 1: xxxxxhrs
To view the run times for the COMPRESSORS and the number 1 refrigerant
Liquid Line VALVE, press ↓again.
To view the run times for the number 2 Liquid Line VALVE, the reheat
valves (if any), and BLOWER 2, press ↓again.
The display will return to ROOM STATUS after a short delay.
EQUIPMENT RUN HOURS
Comp 1: xxxxxhrs
Comp 2: xxxxxhrs
LL1: xxxxxhrs
EQUIPMENT RUN HOURS
LL2: xxxxxhrs
ReHeat: xxxxxhrs
Humidity: xxxxxhrs
OPERATION
Ecosaire
Data subject to change without notice.
®
July 2007 99
Page 100
Ecosaire®CM Series Precision Air Conditioner Owners Manual
Operation Controller Diagnostics
OPERATION
*** ALARM ***
00:00 00/00
Change Air Filters
*** ALARM ***
00:00 00/00
Loss of Airflow
Check Fan
CHECKS
1. Be sure that the airflow was correctly adjusted at installation.
2. Check filters
3. Check blower operation
4. Check blower belt for slipping
5. Check blower motor operation
Operate motor contactor
Measure contactor terminal
voltage
Check blower fuses
6. Check controller output
7. Check external duct dampers
(by others)
8. Check that diffusers are open
9. Check airflow sensor and connections
CORRECTIONS
• Consult air balancing records. Correct as
necessary.
• Filters must be kept clean. Replace as necessary
• Blowers must turn in proper direction.
• Tighten or replace belt as necessary.
• Reset motor overloads.
• Correct as necessary.
• Replace as necessary.
• Check by wiring diagram.
• Open as necessary for proper airflow.
• Open as necessary.
• Be sure all tubes and wires are connected.
• Re-adjust set point if necessary. Consult factory
for method.
*** ALARM ***
00:00 00/00
Compressor 1
High Pressure
1. Check that remote condenser (if
any) operates on controller
demand.
2. Check that remote condenser (if
any) has adequate clearance
• Check remote control wires for continuity. The
voltage between C8 and NO8 should be zero in
cooling mode and 24VAC at other times.
• See Installation - Unpacking and Locating -
Outdoor Heat Exchanger.
from air obstructions.
3. Check that remote condenser (if
any) has sufficient flow of air and
that the air is less than 105°F.
• Check for leaves or trash obstructing airflow. Be
sure condenser is located in an area that will not
cause re-circulation of heated air through the
condenser.
4. For water-cooled units, check that
water is flowing and of proper
• Water temperature and flow rate should be as
specified in the installation guidelines.
temperature.
5. Check that all refrigerant isolation
• Open as necessary.
valves are open.
Data subject to change without notice.
100 Ecosaire
®
July 2007
 Loading...