

Page 1
DOCUMENTATION
Page 2
Introduction
This is the user manual for the app ”R0Verb - Multi Delay-Line Space
Machine”, developed by Klevgränd produktion. The iOS app can be
downloaded from App Store, and the VST / Audio Unit is available for
purchase at Klevgränd’s web page. There you can also find other
music apps made by Klevgränd.
Get the iOS version at the App Store!
Get the VST/AU version at klevgrand.se
The name R0Verb originates from the head developer Johan
Sundhage, who comes from the south-western parts of Sweden.
With his dialect, ”Reverb” would be pronounced ”Rôverb”, a bit like
”Röverb”. Which would mean ”Butt-erb” (Röv = Butt). Yeah, we know.
Happy!!
Contents
1. The delay-line concept & surface 4
2. Toolbox 5
2.1. Time change 5
2.2. Delete 5
2.3. Volume 5
2.4. High shelf gain 5
3. Equalizer 5
4. Mix 6
1
2
3
4
5
6
Page 3

5. Randomizer 6
Tail Time 6
Room Size 6
Predelay 6
Complexity 6
6. Zoom 6
Page 4

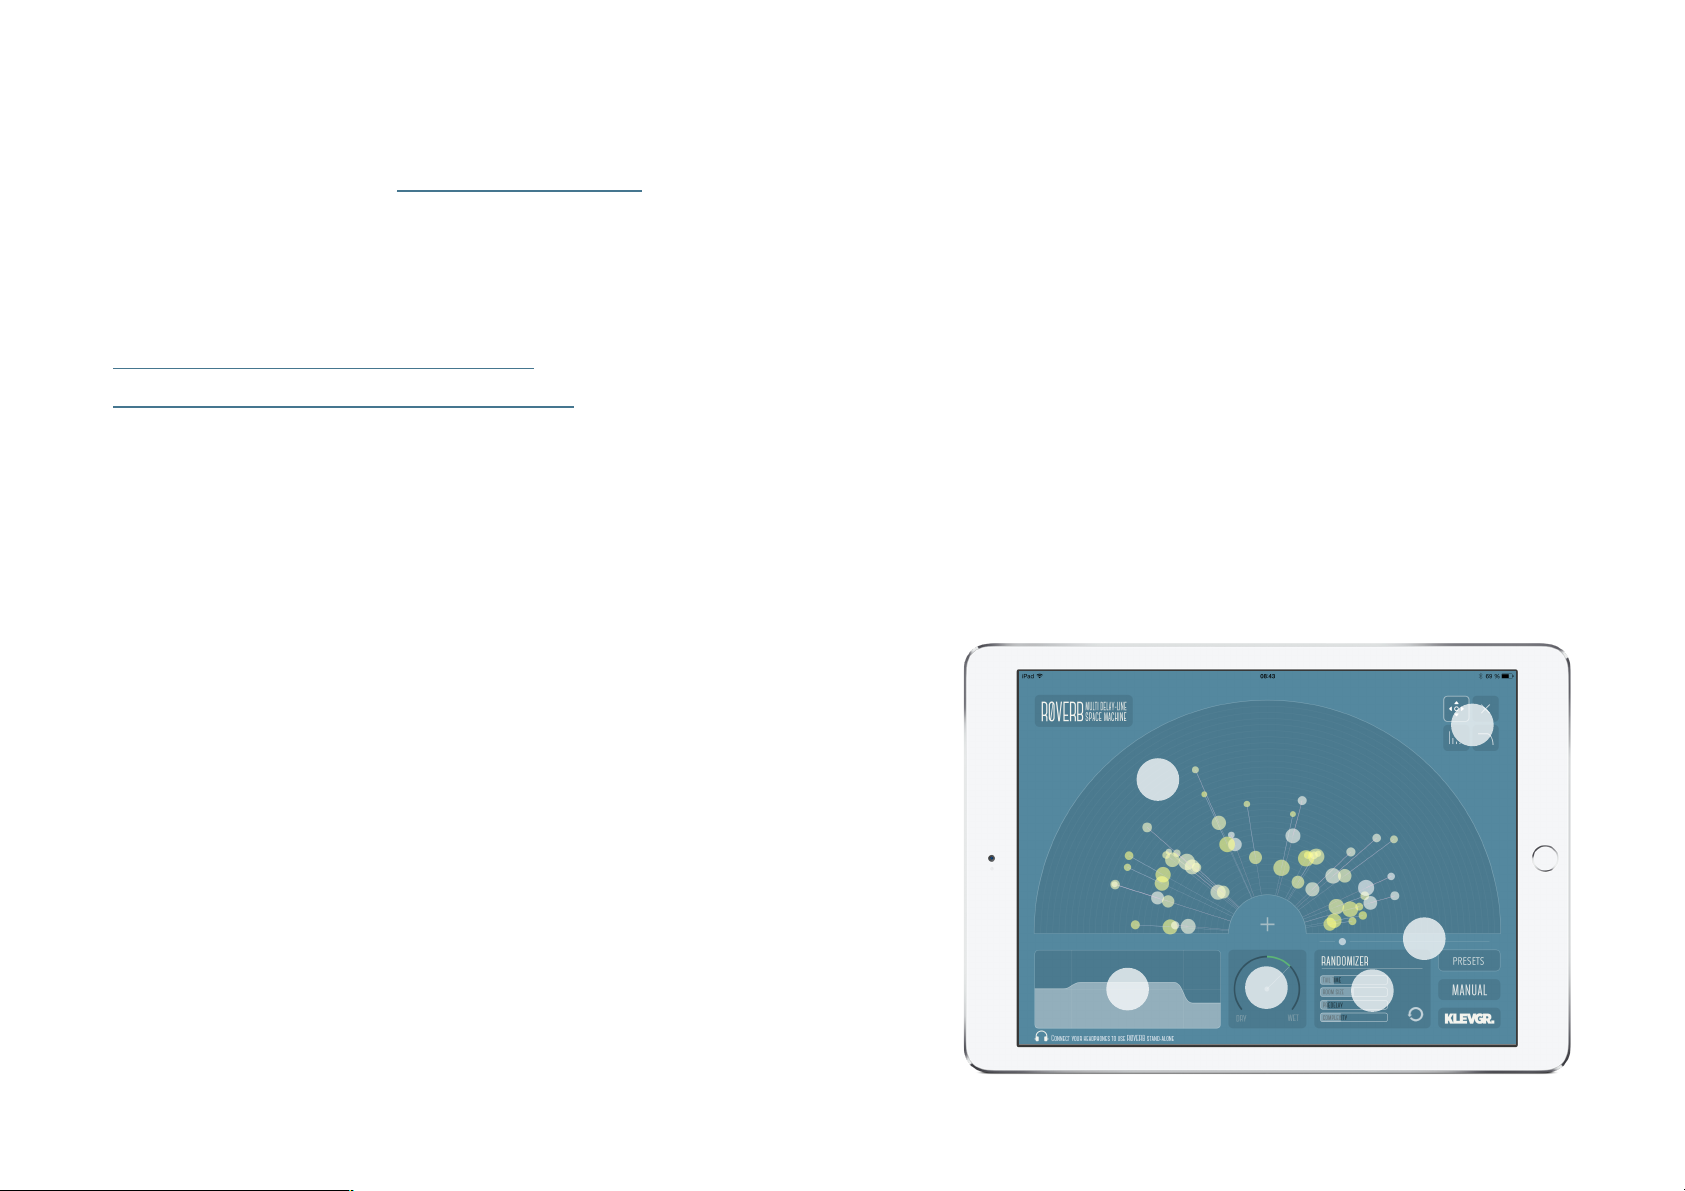
1. The delay-line concept & surface
R0Verb consists of multiple delay units, or delay-lines. Every delay-
line has separate parameters for pan, predelay time, delay time,
gain, decay & high-shelf. The big arc-shaped field on the screen
holds all the delay-lines. The direction of each delay-line tells how
the output will be panned; if it points to the left, the output will be
panned to the left and vice versa.
The size of the circles denotes gain levels. The first circle (from
origin) is the gain value. The outer circle represents the decay.
The circle’s color represents high shelving filter; white equals 0dB,
yellow -96dB (or silent). The high shelving filter frequency is set in
the EQ view.
To create a new delay-line, press the cross near origin and drag to a
position where the outer circle should be placed on screen.
To multi-select several delay-lines, touch an empty space on the
surface and drag over the delay-lines to be selected. After releasing,
touch one of the delay-lines and drag to manipulate all selected
items.
The number of delay lines you can have depends on your hardware."
Decay
Decay
Time
Gain
Predelay
Time
Page 5

2. Toolbox
These are the four different edit modes:
2.1. Time change
Use this mode to edit pre-delay times and delay times by dragging
the circles on the delay-line surface.
2.2. Delete
Use this mode to remove a delay-line from the delay-line surface.
2.3. Volume
Use this mode to change the gain and decay of a delay-line. Touch a
circle and drag upwards for higher gain and downwards for lower
gain.
2.4. High shelf gain
Use this mode to change the gain of the high shelf filter on each
delay-line. Touch a circle and drag upwards for a higher gain and
downwards for a lower gain.
3. Equalizer
The three band equalizer affects the processed sound only. Change
the frequencies by touching near the vertical lines and drag left or
right. To change the gain levels touch and drag (up or down) within
the frequency regions."
124
3
Page 6

4. Mix
This knob sets how the dry and wet signals should blend. Change its
value by touch and drag up or down.
5. Randomizer
This tool makes it possible to create a new reverb with user-defined
bounds. The sliders represents the following parameters:
Tail Time
A higher value means a longer reverb time.
Room Size
A higher value means longer predelay times and longer delay times.
Predelay
Sets minimum pre-delay time.
Complexity
A higher value activates more delay-lines.
Press the button to create a new reverb. (Obs! The current reverb
settings will be destroyed, make sure they’re saved if you don’t want
to loose it)
6. Zoom
Drag the indicator to zoom the whole delay-line surface.
Page 7

©2015
KLEVGRÄND PRODUKTION AB
ALL RIGHTS RESERVED
VST and VST3 are trademarks of Steinberg Media Technologies GmbH. AAX is a trademark of Avid Technology, Inc. AU and Audio Units are trademarks of Apple Inc.
 Loading...