

Kleton PC939 Instruction Manual

Instruction Manual
PC939
Polypropylene and Polyester
Strapping Tensioner
Windlass
Cutter
Base Handle
Tightening Handle
Gripper Plate
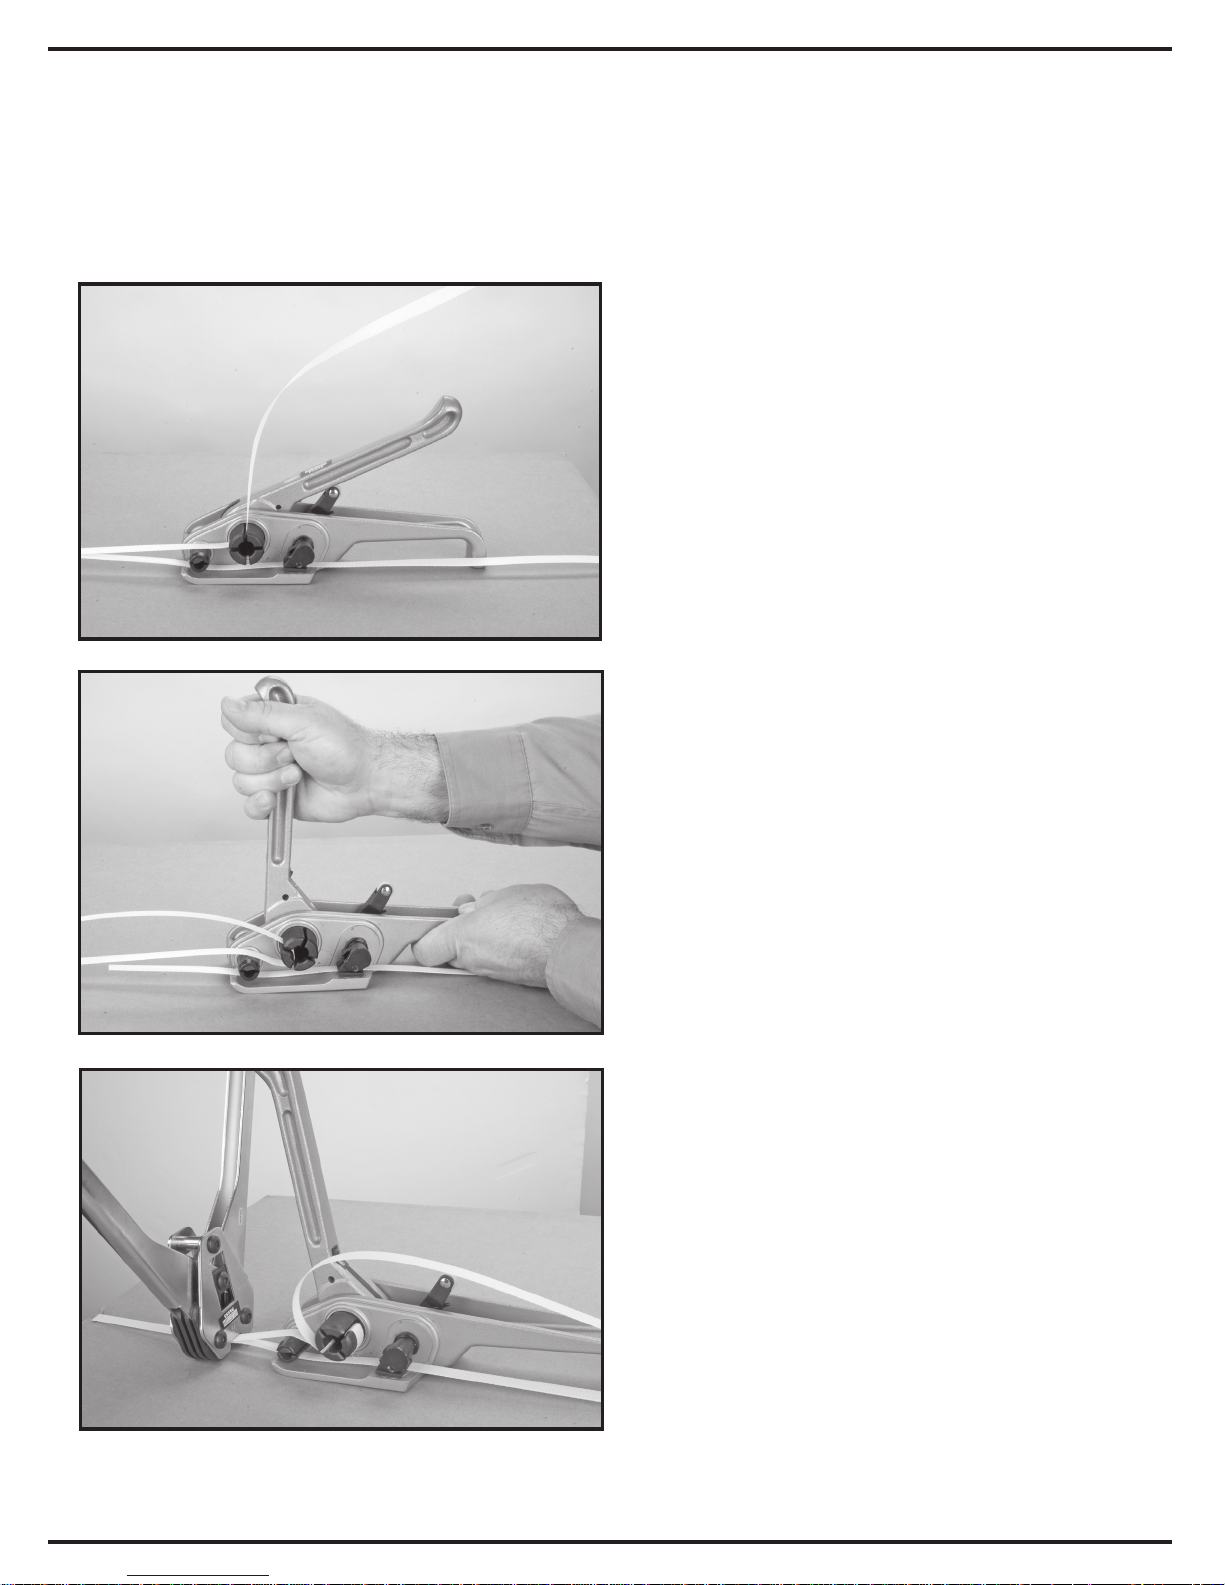
1. Threading tensioner
• Wrap both ends of strapping around
product.
• Squeeze handle and base together.
• Insert the shorter end of strapping under
the gripper plate and cutter wheel
leaving approximately 5” of strapping off
the front end.
• Release handle and base.
• Feed the other end through the cutter
wheel and up through the windlass.
• Put strapping as tight as possible.
2. Tensioning
• Move tightening handle forward and
back to begin tensioning.
• Continue back and forth motion until
strapping has reached desired tension.
3. Placing the seal
• Seal should be placed open side down
on top of the ends of strapping.
4. Sealing
• Close nose of sealer around seal.
• Crimp tightly around strapping.
5. Removing excess
• Squeeze handle and base together to
cut strapping.
• Slide tool off to the right.
Maintenance
Tools do need to be cleaned and maintained
periodically with a steel brush or dry compressed air. Lubricate all moving parts with
light machine oil.
PC939 INSTRUCTIONS
How to use a polypropylene & polyester strapping tensioner
 Loading...