

Page 1
7070°
ENGLISH
CONTENTS
• 60156 Headlamp
• 3× AAA alkaline batteries
• 2.5 mm hex key
• Dimensions: 3.31"x2.44"x1.89" 84.1 × 61.9 × 48.0 mm)
• Weight (batteries installed): 5.9 oz. (168 g)
• Battery Type: 3× AAA, 1.5V (Alkaline)
• Batteries Certied For Use With This Headlamp:
• Energizer® E92
• Duracell® MN2400
• Panasonic® AAA LR03
• Battery Life: Low Mode (75 Lumens): 12 hours,
High Mode (216 Lumens): 5 hours
• Operating Temperature: 32°F to 104°F (0°C to 40°C)
• Storage Temperature: 14°F to 131°F (-10°C to 55°C)
• Drop Protection: 6.6 ft. (2 m)
• Ingress Protection (IP) Rating: IP67
• Standards: UL 913 7th Edition (US and Canada), CSA 22.2
No.157-92, Reaffirmed 2012, CLASS I, DIV 1&2, GRP ABCD;
CLASS II, DIV 1&2, GRP EFG; CLASS III, TEMP CODE: T4.
File number: E516235.
GENERAL SPECIFICATIONS
Specifications subject to change.
Energizer® is a registered trademark of Energizer Brands, LLC.
®
Duracell
is a registered trademark of Duracell U.S. Operations, Inc.
®
Panasonic
This intrinsically safe product is tested to standards listed. It provides
limited protection under these tested standards. Understand the variety
and duration of environments the product will be exposed to. The user
must consult and get approval from their safety supervisor before using
this product.
Read, understand, and follow these instructions to ensure safe operation.
Failure to observe these warnings can result in injury or even death. The
headlamp is specifically designed to be used on Klein Tools had hats and
safety helmets only. Keep these instructions for future reference.
•
•
•
•
•
•
•
•
•
•
•
•
•
is a registered trademark of Panasonic Corporation.
WARNINGS
WARNING: DO NOT place this headlamp on any equipment
that generates heat, open flame, corrosive liquids, unknown
fumes, and vibrations that could damage the headlamp
housing and its components.
WARNING: DO NOT change batteries in hazardous locations.
WARNING: To reduce risk of explosion, DO NOT mix old
and new batteries, different brands of batteries, or different
types of batteries. Replace ALL the batteries together.
WARNING: DO NOT use rechargeable AAA batteries of any
kind - Use standard one-time use Alkaline batteries.
WARNING:
for a long period of time to prevent battery leakage in the device.
WARNING: DO NOT attempt to repair or modify this
headlamp. There are no user-serviceable parts.
WARNING: Substitution of components may impair
intrinsic safety.
WARNING: DO NOT expose to prolonged direct sunlight
or extreme environmental temperature during operation or in
storage, beyond product specification.
WARNING: Avoid spilling liquids or exposing to dusty
environments on a regular basis-Ingress protection design is
to help minimize risk. The user needs to take proper steps to
maintain the headlamp to ensure maximum ingress protection.
WARNING: DO NOT use this product for recreational or
sport use.
WARNING: DO NOT point this light directly at another
person's eyes.
WARNING: Always use the device following the regulations
of each country.
WARNING: Clean the flashlight only with damp cloth to
avoid static electricity.
Remove the batteries when the headlamp is unused
Intrinsically Safe LED Headlamp - Instructions
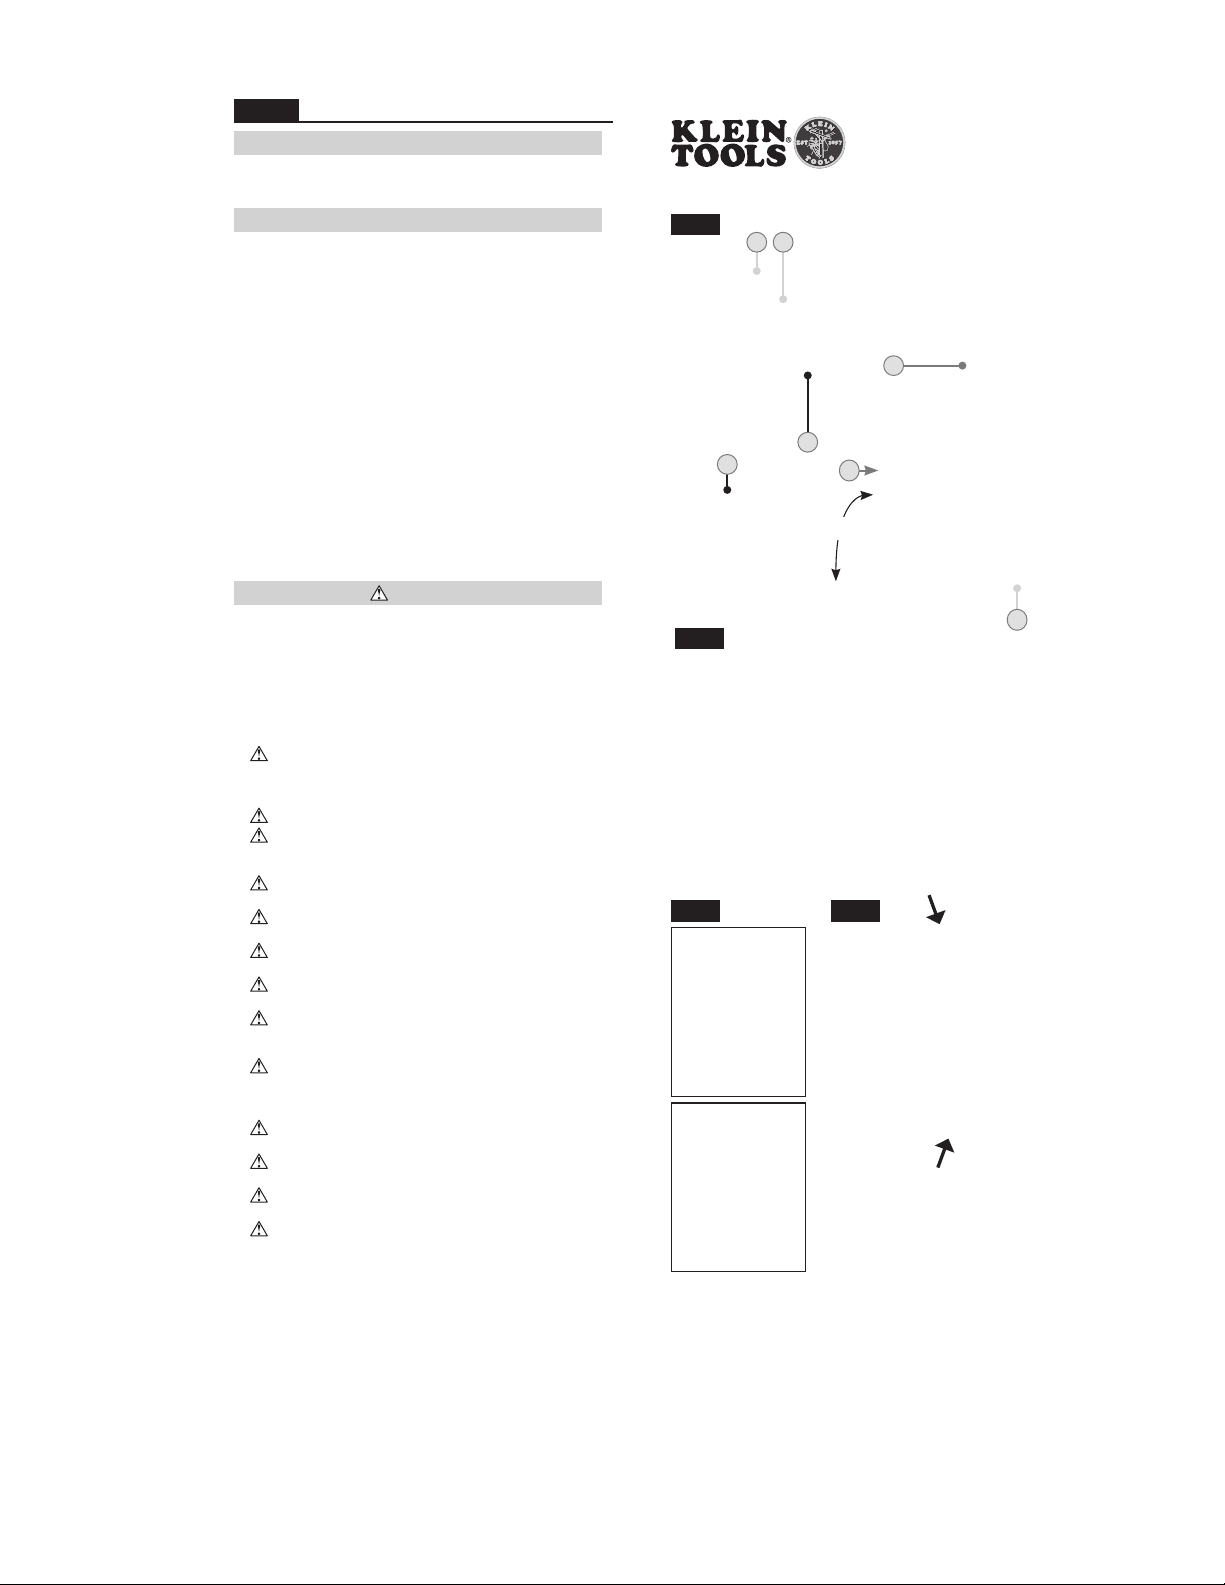
FIG. A
14
FRONT
3
2
7
6
BACK
°
FIG. B
FIG. C FIG. D
60156
BOTTOM
5
Find Quality Products Online at: [email protected]
www.GlobalTestSupply.com
Page 2
ENGLISH
FEATURE DETAILS (FIG.A)
1
On/Off, High/Low-power button
2
Spotlight LED
3
Pressure relief valve
4
Release tab
5
Pivoting attachment bracket
6
Battery cover screw (×4)
7
2.5 mm hex key
SYMBOLS ON PRODUCT (FIG.B)
Warning or Caution
Read Instructions
This product has been independently tested by
UL and meets applicable published standards
Explosion Intrinsic Safety
Battery Polarity
OPERATING INSTRUCTIONS (FIG. C)
1.
Install headlamp on hard hat by mounting the pivot bracket
onto the front or rear Klein Tools accessory slot. Slide in the
headlamp until it clicks in place.
2.
Push the On/Off, High/Low-power button 1 once to turn on
High (216 lumens) then again to Low (75 Lumens). (NOTE:
Both settings are Spotlight only). Press again to turn off.
3.
Remove headlamp by pushing the release tab 4 forward and
pulling the headlamp up.
MAINTENANCE
INSPECTION
Inspect daily, before and after use. Dispose of the entire headlamp
assembly immediately if cracks, rips, gauges, deep scratches,
discoloration, deformation, melted/burnt housing are seen on ANY
part of the headlamp.
headlamp.
CLEANING
Be sure flashlight is turned off. Clean the flashlight only with damp
cloth to avoid static electricity. DO NOT use abrasive cleaners or
solvents.
STORAGE
Store in cool, dry, location away from sunlight, caustic conditions,
fluctuating temperature extremes, and vibrations. If storing for a
lengthy period of time, remove batteries prior to placing in storage.
DO NOT store batteries and headlamp close together.
DO NOT attempt to repair or modify this
BATTERY REPLACEMENT (FIG. D)
WARNING: Before opening the battery compartment make
sure you are in a safe environment away from any explosive or
volatile fumes, liquids, gases, or fine airborne particulate.
NOTE: It is advisable to replace batteries regularly, especially if
there are noticeable signs of degradation of light output, runtime or
intermittent behavior. Aging alkaline batteries can leak and begin to
degrade the internal components of the headlamp.
1.
Unscrew the four screws 6 on the back of headlamp body
using the hex key 7 provided. NOTE: It helps to hold the
headlamp downwards to ensure the screws stay in the battery
cover.
WARNING: If a screw is lost, DO NOT use any other type of
screw or other fastening method such as glue or tape. Intrinsic
functionality will be compromised.
IMMEDIATELY.
2.
Install new batteries. DO NOT mix and match old and new or
different branded batteries.
3.
Place the battery cover down on the headlamp housing
and hold firmly. Install and tighten all 4 screws. DO NOT
OVERTIGHTEN.
4.
Inspect the gap between the headlamp housing and battery
cover, ensure it is even all the way around the headlamp as
shown. If the gap is not even, remove any debris that may be
preventing an even gap.
CAUTION: If the battery housing itself is damaged, DO NOT
attempt to fix.
5.
Test headlamp to ensure proper operation.
REPLACE HEADLAMP IMMEDIATELY.
REPLACE HEADLAMP
Find Quality Products Online at: [email protected]
www.GlobalTestSupply.com
 Loading...