

Page 1
ENGLISH
The 56063 red Safety Lamp provides supplemental visual alert
in busy, noisy, dark, and bright environments. It is designed
to attach to Klein Tools' hard hat/safety helmet front or back
accessory mounts. The Safety Lamp can also be attached to
magnetic surfaces to serve as a stationary alert beacon. The
Safety Lamp has four user-selectable modes and is rechargeable.
CONTENTS
• 56063 Safety Lamp
• 15" (381 mm) USB-A to USB-C Cable
• Instruction Sheet
GENERAL SPECIFICATIONS
• LED Color: Red
• Visibility:
• Dimensions: 2.53" × 1.87" × 1.27" (64.3 × 47.5 × 32.3 mm)
• Weight (Safety Lamp only): 2.34 oz. (66 g)
• Battery Type: Internal, Lithium-Ion, 3.7V / 1200mAh
• Battery Life: Low ON: 22 hrs Low PULSE: 52 hrs
High ON: 5 hrs High PULSE: 10 hrs
• Lumens: Low SOLID ON / Low PULSE: 4
• Charging Requirements: Maximum 5V DC, Minimum 0.5A
• Certications: NRCan, CEC-BC, UL1642 (Battery)
• Operating/Charging Temperature:
• Storage Temperature: 14°F to 131°F (-10°C to 55°C)
• Drop Protection: 10 ft. (3.05 m)
• Ingress Protection (IP) Rating: IP64
Up to 1/4 mile (0.4 km) in low light and clear weather
High SOLID ON / High PULSE: 22
32°F to 113°F (0°C to 45°C)
Specifications subject to change.
WARNINGS
Read, understand, and follow these instructions to ensure safe
operation. Check with your safety supervisor prior to using this
product. Follow local safety codes.
•
This safety lamp is NOT a headlamp. Its primary purpose is to
serve as visual alert to the immediate surroundings. DO NOT use
this as the primary light source.
•
Visibility can be impacted by environmental conditions (fog,
flashing/bright lights, barriers, moving objects), mode selected,
viewing angles, and viewer's visual acuity.
•
No user-serviceable parts. DO NOT open enclosure or attempt to
repair this safety lamp or charging cable. REPLACE SAFETY LAMP
OR CABLE with new, if damaged or not functioning properly.
•
This safety lamp is NOT intended to be a replacement for any
personal protective equipment, high visibility apparel, reflective
markers/signs, lockout-tagout devices, construction warning
lights or other safety devices.
•
This product is NOT designed to be charged or used in
environments where volatile gases, fumes and fine dust are present.
•
Never place this safety lamp on other electrical/electronic
equipment that is sensitive to magnets.
•
DO NOT expose to open flame, vibration, corrosive fumes or
extreme temperature.
•
NEVER immerse in water or other liquids. Avoid spilling liquids or
falling foreign objects into openings on the safety lamp enclosure.
•
Water-resistant cover must be properly sealed to achieve
specified water & foreign object ingress protection. Keep seal
free of dirt, oil, sand, or other material that interferes with proper
sealing. Failure to do so can result in risk of fire or electric shock.
•
DO NOT open water-resistant cover if wet or in a wet environment.
Dry the Safety lamp thoroughly and the seal around water-resistant
cover completely before opening water-resistant cover.
•
Use safety-rated power supply. Never use power supply or
charging cable that does not meet the specified charging voltage
and current listed in the specifications here or on the Safety Lamp.
56063
Safety Lamp –
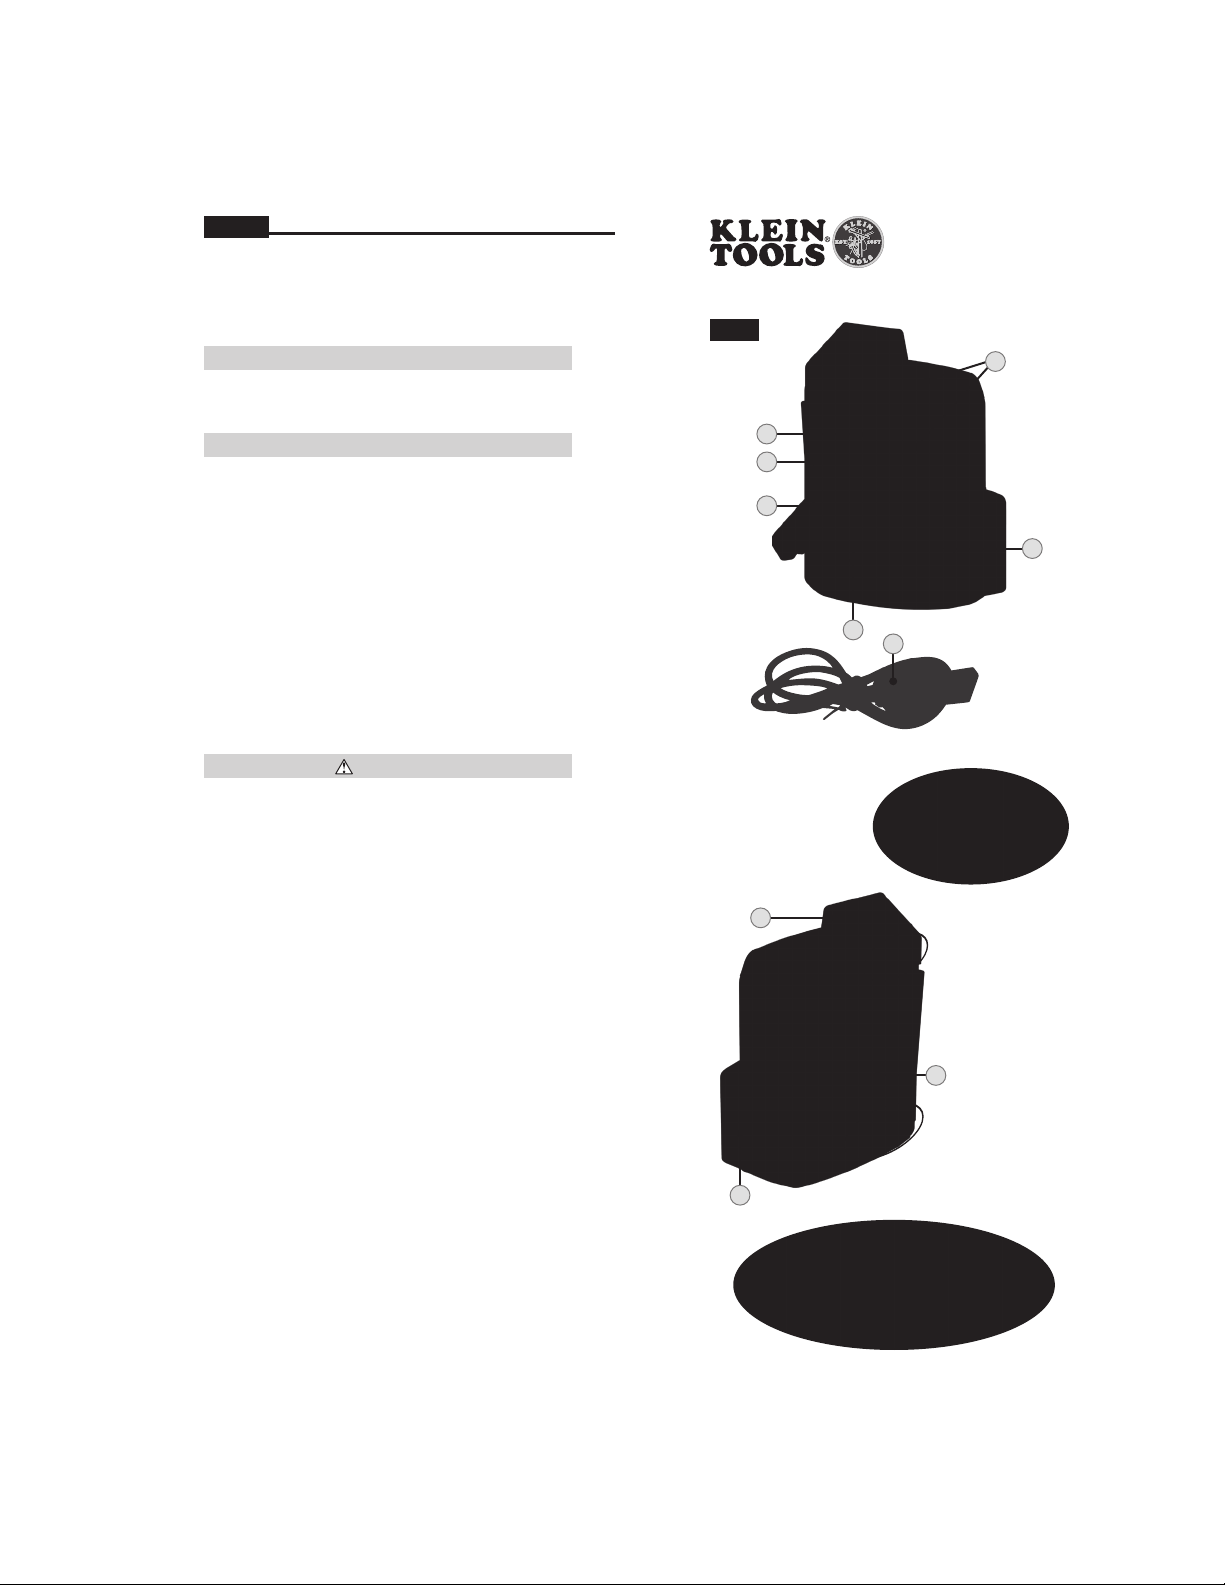
FIG. A
FRONT
BACK
1
8
6
9
3
Instructions
5
7
4
10
2
Find Quality Products Online at: [email protected]
www.GlobalTestSupply.com
Page 2
BC
ENGLISH
1
.
Power/Mode button
2
Magnet
3
Release Tab
4
Battery Status Indicator9Charging Port Cover
5
USB-C Charging Port
CHARGING BATTERY
Fully charge Safety Lamp before use. First-time charge
°C)
should be at least 6 hours.
Connect USB-C cable connection to Safety Lamp, plug the
other end of cable into USB-A port (2.0 or higher) of USB
power supply. USB adapter/power supply should meet specified
charging voltage and current (Max. 5.0V DC, min. 0.5A)
requirements. Normal charging time is approximately 6 hours.
BATTERY STATUS INDICATOR 4:
Press the Power/Mode button
battery status (Only when the safety lamp is off):
•
GREEN: 11%-100% battery charge.
•
RED: 1%-10% battery charge (NOTE: when the Safety
Lamp is being used and capacity is under 10%, the
main LEDs will flash 3 times every 30 minutes to
remind user of low battery level).
•
No LEDs: Battery is fully discharged. Must leave unit
plugged in to charge for a minimum of 6 hours. If the
unit is fully discharged, the battery indicator may not
light up immediately when charge adapter is inserted.
ON/OFF/MODE SELECTION:
•
TURN ON: Press and hold the Power/Mode button 1
button on for about 2 seconds (NOTE: The safety lamp
will turn ON in the last mode selected prior to shutoff).
•
CHANGE MODE: Once ON, press the power/mode
button again to cycle through to the desired mode.
•
TURN OFF: Press and hold the Power/Mode button 1
for 2 seconds (NOTE: The safety lamp will recall the
mode in which it was turned off, when turned ON again).
ATTACHING / REMOVING SAFETY LAMP ON KLEIN
TOOLS HARDHAT OR SAFETY HELMET:
•
To release, push the Release Tab 3 above the Safety
Lamp AWAY from the hard hat/safety helmet shell and
lift the Safety Lamp upward.
•
To reinsert the Safety Lamp, align the slot on the back of the
Safety Lamp with the slot on the hardhat / safety helmet and
push the Safety Lamp down until it clicks in place.
•
The magnet 2 on the back of Safety Lamp can be
affixed onto magnetically attractive surfaces to use as
stationary alert beacon.
FEATURE DETAILS (FIG.A)
6
Reective Tape
7
LEDs (Top, Back)
8
LEDs (Side)
10
USB Charging Cable
SYMBOLS ON PRODUCT
Warning or Caution
Risk of Electrical Shock
WEEE – Battery disposal
Conforms with BCS regulations of California
Energy Commission
Direct Current (DC)
Read Instructions
Recycle
1
momentarily to check
NOTE: The safety lamp is primarily designed to be
attached to the back accessory slot of Klein Tools hard
hats or safety helmets.
MAINTENANCE
CLEANING: Be sure safety lamp is turned off and wipe with
a clean, dry lint-free cloth.
Do not use abrasive cleaners or
solvents.
STORAGE: If the safety lamp is to be left unused for an
extended period of time, charge for approximately 2 hours
before storing, and recharge periodically during storage to
maintain battery's charging capacity. Store in dry and cool
environment, away from direct sunlight and extreme caustic
environments.
DISPOSAL / RECYCLE
Do not place equipment and its accessories in the trash.
Items must be properly disposed of in accordance with
local regulations. Please see www.epa.gov or
www.erecycle.org for additional information.
OPERATING INSTRUCTIONS
SEE OTHER SIDE.
Find Quality Products Online at: [email protected]
www.GlobalTestSupply.com
 Loading...