

Page 1

Owner’s
Manual
Multi-function Oven
Model TO60X (Stainless Steel)
T060W (White)
T060B (Black)
MANUFACTURED BY
Page 2

Using this appliance makes cooking a real pleasure!
This Owners Manual contains important information on the safety, use and what you can expect
from your Kleenmaid Multifunction Oven.
We advise you to read this book carefully to get the best use of this appliance’s technical qualities.
To ensure that your oven remains in perfect condition, we have provided important advice for you
on its care and cleaning.
FOR THE USER
2
Page 3

IMPORTANT NOTES
● As a contribution to the protection of the environment, we have used non-chlorine bleached and recycled paper
for your appliance’s documentation.
● Please consider the environment when disposing of the packaging from your new appliance.
● The packaging is designed not to be harmful to the environment; it can be recovered or recycled: these are
environmentally friendly products. By recycling the packaging, you are contributing to a saving in the
consumption of raw materials and a reduction in the volume of industrial and household waste.
● Render your old appliance unusable before disposing of it. Contact your local authority or a disposal centre about
scrapping the appliance.
● Your appliance should be installed by a specialist in accordance with the recommendations in the installation
section of this instruction manual.
● The measurement instructions for building-in the oven which are given in this instruction manual must be followed
precisely.
● We advise you to read the following pages very carefully to enable you to get the best from your cooking appliance.
Caring for the environment
Connecting the appliance
● This appliance is exclusively for domestic use.
● When cooking with fat or oil, stay close by, as these materials can catch fire if they overheat.DO NOT STORE
FLAMMABLE OBJECTS IN THE OVEN OR ON THE HEATING ZONES.
● When plugging domestic electrical appliances into a socket nearby, make sure that the power cable is not
touching the heating zones or caught in the door.
● Do not use the oven door handle to dry linen as this will prevent the oven’s front ventilation from working.
● In the event of a malfunction, remove the mains fuses.
● To prevent a build-up of heat, which will affect cooking results and damage the enamel and the housing unit:
Do not place any utensils on the floor of the oven.
Do not line the interior of the oven with aluminium foil.
● Use the temperatures suggested in the cooking guide, to prevent excessive fat splashes in your oven.
● To protect the enamel on your oven and ensure its air-tightness:
Do not lean on the open door.
Keep the door seals clean.
● For all cooking on the grill:
Place the items to be cooked onto the shelf.
Slide the dripping pan under the shelf to collect the cooking juices and prevent splashing.
● Cooking should be done with the door closed.
Advice on safety
Practical advice
3
Page 4
THE LAYOUT OF THE CONTROL PANEL
Control panel
55˚
100˚
150˚
75˚
180˚
210˚
240˚
265˚
125˚
0
MANUFACTURED BY
Turn the selector knob clockwise to the position corresponding to the function required (see cooking guide).
The cooling fan will operate and the light will come on.
0 Off position for the oven
The oven light only
Conventional oven
This function is for conventional cooking and uses the top and bottom elements.
Suggested cooking items ; casseroles, fruit cakes and souffles.
Fan forced:
Use in conjunction with the temperature selector.
Fan assisted grilling :
This function combines the grill element with fan assistance to ensure even cooking and browning.
Traditional
Fan assisted :
No heat defrost :
Fan only.The temperature selector.MUST NOT be used with this function.
Conventional grilling.:
Use in conjunction with temperature selector.Grill with door closed.
Note : it is recommended that you do not grill for longer than 30 minutes at any one time.
For additional information on cooking modes turn to page 13.
Programmer
Cooking function selector
4
Cooking function selector
Temperature
Indicator lights
Selector
Suggested cooking items; chicken breast/wings,
kebabs, fish and cutlets. Grill with the door closed.
This function utilises the bottom oven element
Suggested cooking items; yeast dough, bread, fruit tarts and brioche.
This function utilises the top and bottom oven elements with hot air circulated by
the fan.
0
Page 5
5
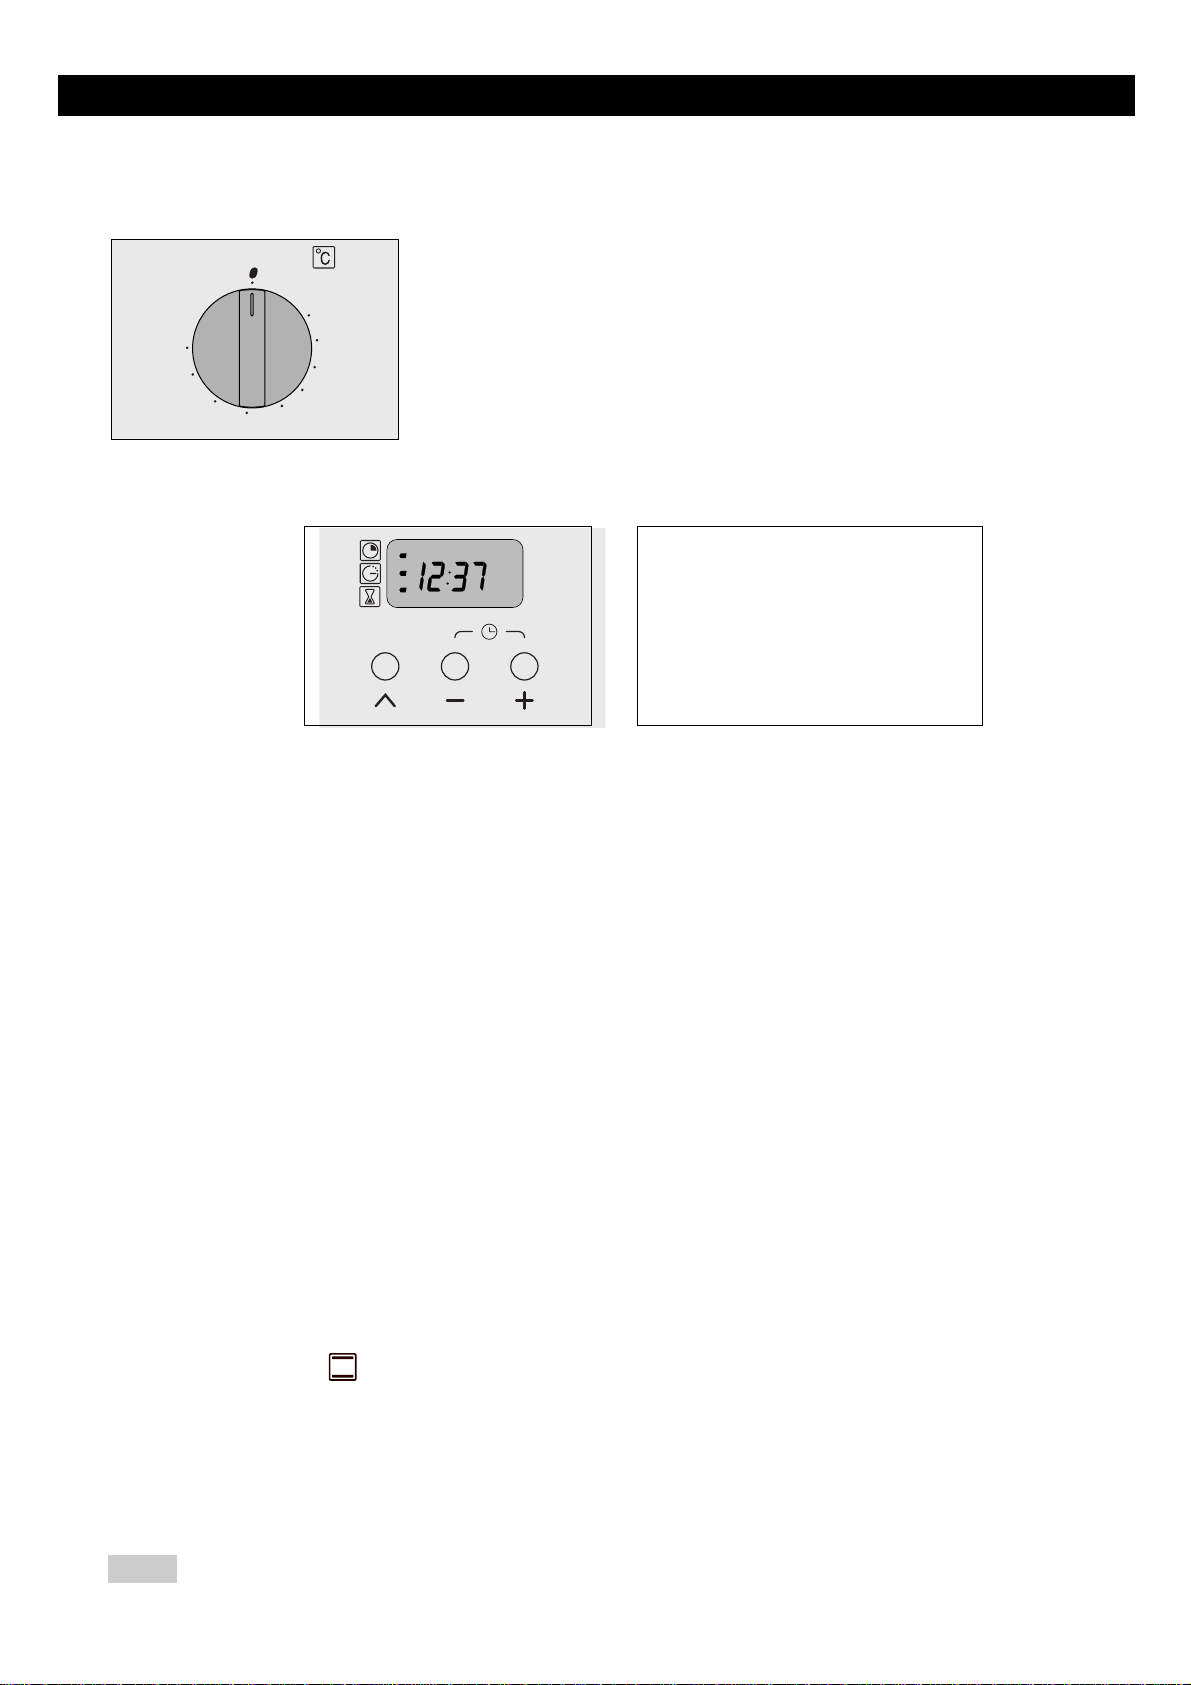
Thermostat
THE LAYOUT OF THE CONTROL PANEL
Turn the thermostat knob to the right to the setting required
(see cooking guide enclosed with the instruction book).
Programmer
1 - Time (display from 0.00 to 23.59)
2 - Cooking time
3 - End of cooking time
4 -Timer (59 min. 30 sec.)
5 - Programming button
6 -Buttons for cooking time (+ or -)
a) When the oven is first connected
•
Adjust the time using the + and
-
Buttons (6)
(keep pressing on the button to change the numbers more quickly).
Example : 12h30.
•
Press the "PROGRAMMING" Button (5) to validate
NOTE: If the "PROGRAMMING"
Button (5) is not pressed, the oven will automatically validate the numbers set after a few
seconds.
b) Changing the time on the clock
•
Press the + and
-
Buttons (6) at the same time for a few seconds until the display flashes.
•
Adjust the time indicated using the + and
-
Buttons (6)
.
•
Press the "PROGRAMMING" Button (5) to validate.
If the "PROGRAMMING"
Button (5) is not pressed, the oven will automatically validate the numbers set after a few seconds.
Setting the clock
The programmer should only be indicating the time; the figures should not be flashing.
•
Select the cooking method
Turn the cooking selection knob to the position you require.
Example : "Conventional" position.
•
Select the cooking temperature
Turn the thermostat knob (temperature selection) to the temperature recommended in your recipe.
Example : 200°C temperature mark.
The oven will then heat up and the thermostat indicator will come on.
ALL COOKING IS DONE WITH THE OVEN DOOR CLOSED
After a cooking cycle, the cooling fan keeps working for some time to ensure the reliability of your oven.
Nb :
Cooking straight away
55˚
265˚
240˚
210˚
180˚
75˚
100˚
125˚
150˚
1
2
3
5
4
6
6
Page 6

6
THE LAYOUT OF THE CONTROL PANEL
Cooking for a specific length of time
•
Select the cooking method.
Turn the cooking selection knob to the position you require
Example :"CONVENTIONAL"position.
•
Select the cooking temperature.
Turn the thermostat knob (temperature selection) to the temperature recommended in your recipe.
Example: 200°C temperature mark.
•
Select the cooking time.
Press the "PROGRAMMING"
Button (5).
The cooking time (indicating 0.00) and the cooking time symbol flash to show that the time can be adjusted.
The cooking time may be adjusted to any time up to 23 hours and 59 minutes.
Press the
+and -
Buttons (6)
to adjust to the time you require.
Example: 30 minutes cooking time
The cooking time starts to count down as soon as the
+and -
Buttons (6)
are released.
The cooking time symbol stops flashing and the time on the clock is displayed again.
Cooking will then stop when the programmed cooking time is up.
You can:
- change the cooking time at any point by repeating the operations described above,
- check how much cooking time remains at any point by pressing the "PROGRAMMING"
Button (5)
- cancel the programming at any point by pressing the "PROGRAMMING" Button (5)for a few seconds
until you hear a bleep.
At the end of the cooking time,
- the oven stops,
- the cooking time symbol goes out,
- the cooking time display indicates 0.00,
- the oven beeps for a few minutes.
Stop the beeping by pressing any button; the display shows the time on the clock again.
WARNING : your oven then starts to heat up again.
To stop the oven heating up, turn the temperature and function selection knobs to the "off" position.
Nb :
Cooking using the programmer
Page 7

•
Adjust the temperature and select the cooking method .
Example :"CONVENTIONAL", position, 200°C temperature mark.
•
Press the "PROGRAMMING" Button (5) once.
The cooking time (indicating 0.00) and the cooking time symbol flash to show that the time can be adjusted.
The cooking time may be set to any time up to 23 hours and 59 minutes.
•
Press the +and -Buttons (6)to adjust to the time you require.
Example: 25 minutes cooking time
Press once on
+, to stop the flashing.
•
Press the "PROGRAMMING" Button (5) until the time for the end of cooking and the corresponding symbol flash.
This may now be adjusted.
•
Press the +and - Buttons (6) to adjust to the time you want cooking to end.
Example: cooking to end at 1 pm (13.00).
The time for cooking to end is registered automatically after a few seconds.
The display shows the time on the clock again.
The oven will then defer heating up so that the cooking time will end at the time programmed (eg 1 pm (13.00).
When cooking starts, the "end of cooking" symbol goes out.
You can :
- change the cooking time at any point by repeating the operations described above,
- check how much cooking time remains at any point by pressing the "PROGRAMMING"
Button (5)
- cancel the programming at any point by pressing the "PROGRAMMING" Button (5) for a few seconds
until you hear a bleep.
At the end of the cooking time,
- the oven stops,
- the cooking time symbol goes out,
- the cooking time display indicates 0.00
- the oven bleeps for a few minutes.
Stop the bleeping by pressing any button; the display shows the time on the clock again.
WARNING : your oven then starts to heat up again.
To stop the oven heating up, turn the temperature and function selection knobs to the "off" position.
Nb:
Your oven is fitted with an electronic timer not dependent on the operation of the oven, for counting down a
given time.
•
Press the "PROGRAMMING" Button (5) a number of times until the timer symbol and the corresponding display flashes
•
Set the time required by pressing on the +and - Button (6). Adjustment is by blocks of 30 seconds; the time displayed
is in minutes and seconds (from 0 to 59 mins. 30 secs.).
Keep pressing on the button to change the numbers more quickly.
The countdown will start a few seconds after the timer has been set; it remains visible at all times on the display.
It is possible to cancel the programming of the timer
When the time is up, the timer bleeps (the display indicates 0.00).
Stop the bleeping by pressing any button
Nb :
THE LAYOUT OF THE CONTROL PANEL
Cooking for a specific length of time with a set time for the end of cooking
Using the timer
7
Page 8
8
Für den Benutzer
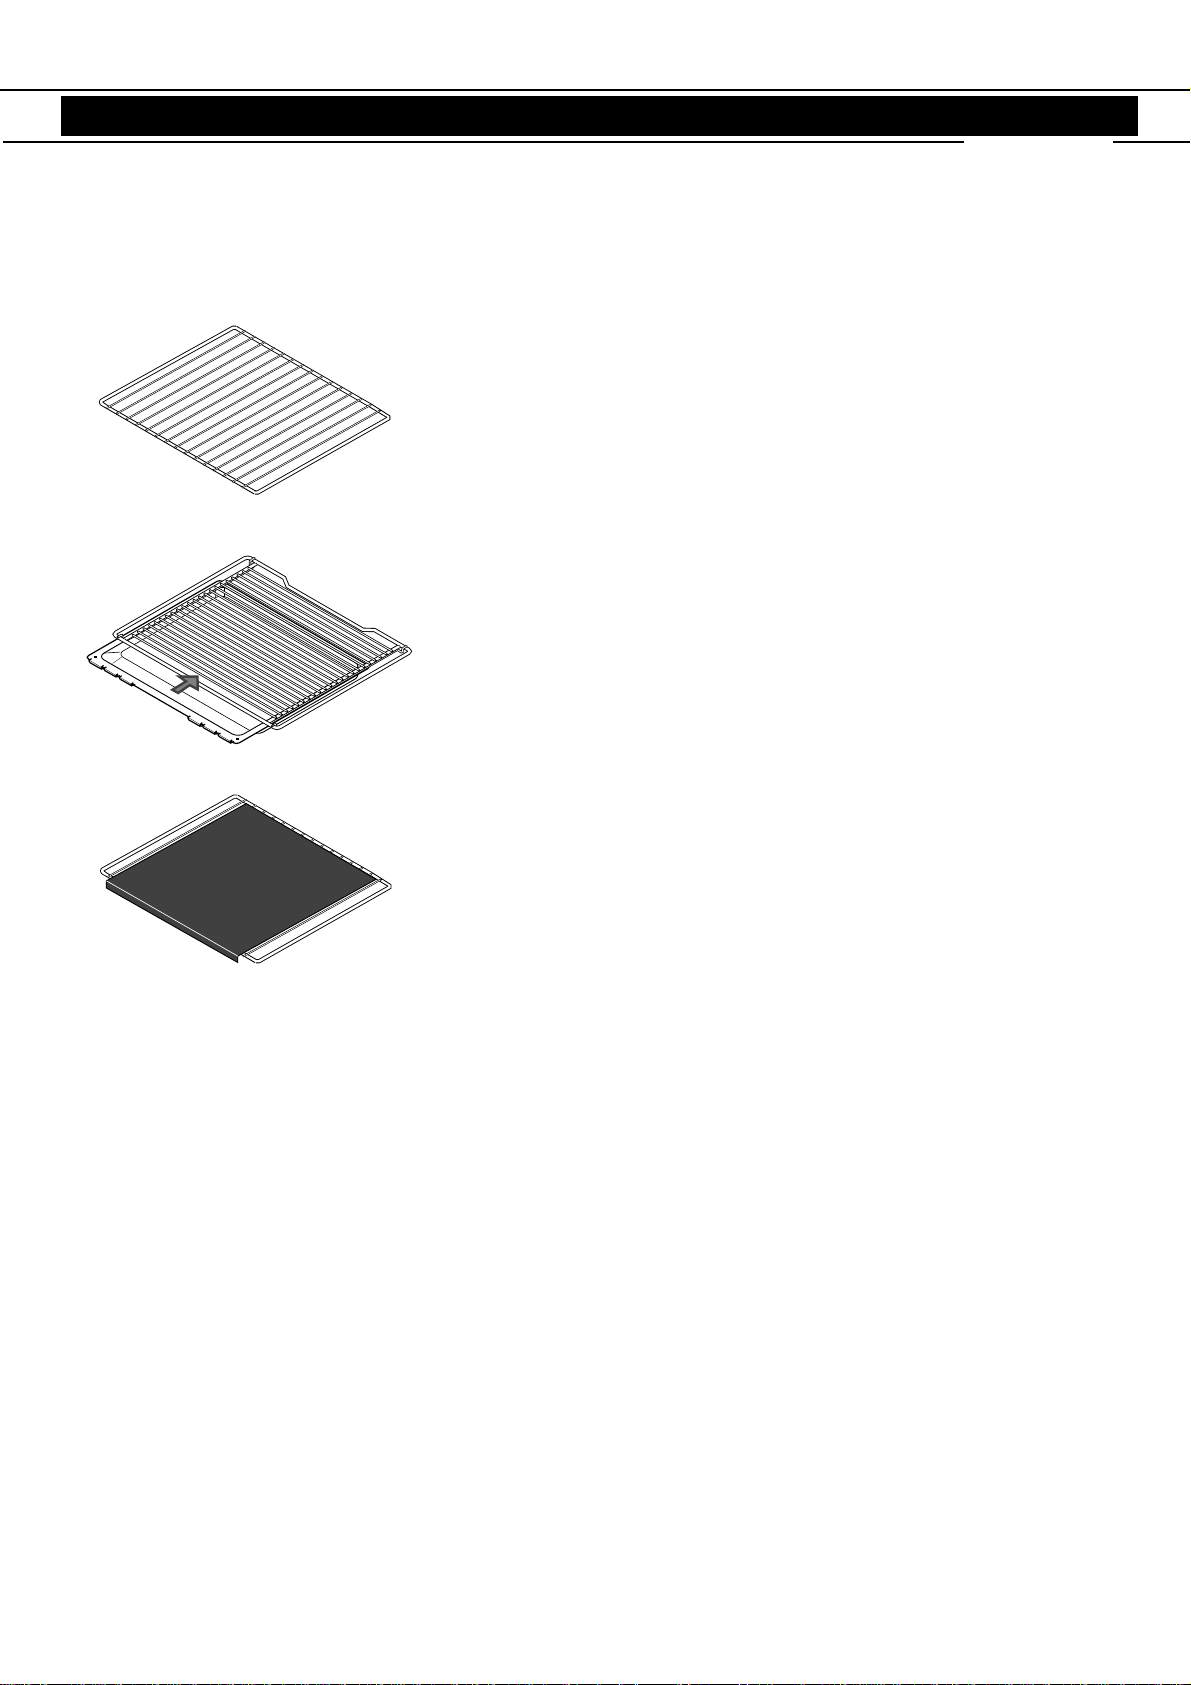
ACCESSORIES
ALL COOKING IS DONE WITH THE OVEN DOOR CLOSED, INCLUDING GRILLING.
Your oven has runners which enable the following accessories to be positioned on four levels.
1 x shelf
This is used for holding all dishes and tins which contain food for
cooking or browning.
1 x grill shelf for dripping pan
You can place items to be grilled directly onto this shelf.
1 x support for dripping pan
1 x dripping pan
1 x flat baking tray
Placed directly on the shelf, this is used for cooking pastries, tarts,
pizzas, etc...
1 Grilling Shelf Includes:
Page 9

9
General cleaning
Polished, painted or enamelled metal surfaces.
Use non caustic cleaning products designed for cleaning polished metal.
Oven door glass.
When cooking has caused staining, you are strongly advised to clean the inner glass with a non-abrasive commercial cleaner. The
metal cross-pieces on the oven door must not be cleaned with a scouring sponge or a harsh cleaning product.
Control knobs
Clean the control knobs with soapy water. They can be removed if necessary, by pulling them towards you.
Shelf and baking tray
Use a sponge with a non-abrasive cleaner and never use sharp objects.
As a general rule, scouring powders and metal scouring pads should never be used.
Before starting to clean your oven by hand, allow the appliance to cool down and check that the selector knob is at the 0
position.
Changing the bulb
Warning!
Disconnect the appliance from the power supply before replacing the bulb .
Turn the cover B one quarter turn to the left.
Unscrew the bulb and replace it with a heat-resistant (300 °C) bulb of the same size available
from all Kleenmaid St George Stores or Kleenmaid St George Spare Parts on 1300 652 100.
B
CARE AND MAINTENANCE
WARNING: USE OF ALUMINIUM FOIL IN OVENS
The use of aluminium foil on the base of the oven to collect spills and improve cleaning IS NOT RECOMMENDED.
Foil or dishes with reflective qualities must never be placed on the base of the oven during cooking as the
concentration of the direct and relected heat will damage the enamel surface. Damage resulting from such use
is not covered under the provisions of the warranty.
Page 10

Für den Benutzer
FOR THE INSTALLER
As a specialist, you are the only person qualified to carry out the installation and connection of cooking appliances.
For this reason, our guarantee applies solely and exclusively to appliances for which you have carried out the installation and
connection in accordance with current regulations.
Non-compliance with this condition will be the installer's responsibility and Kleenmaid will not be liable in any way.
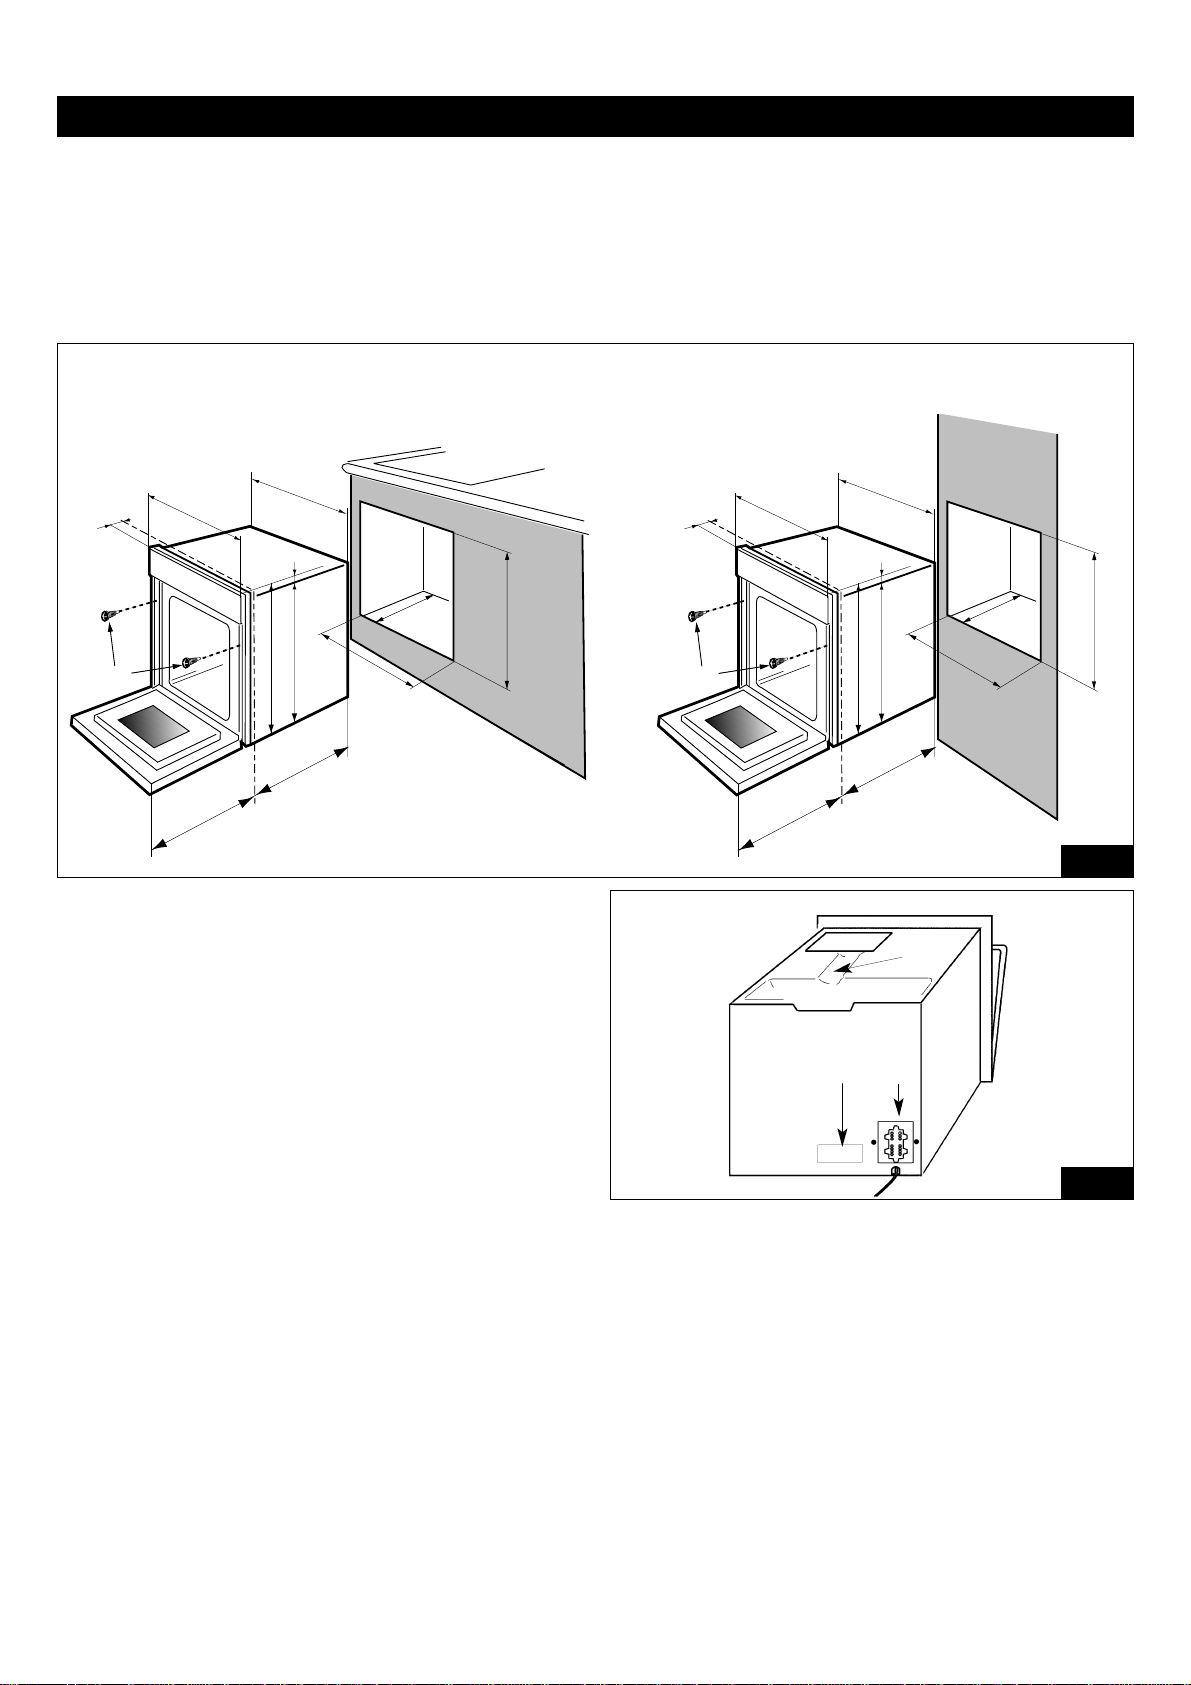
Building-in the oven ( fig. 1)
The oven has an optimised air circulation system which enables the achievement of excellent cooking
results and easy cleaning.
The total control of this air circulation system means that you should take note of the following:
● The oven may be installed with equal success under a worktop or in a column unit, as the hot air outlet is at the
front.
● The fitting dimensions must be appropriate (see fig. 1).
●
The material used for the housing unit must be heat resistant (or be covered with such a material).
●
The distance between the oven and the sides of the unit, to the left and the right, must be the same so that it is
correctly centred in relation to the doors of the neighbouring unit; this distance must be at least 2 mm.
For greater stability, fix the oven into the unit using 2 screws in the holes provided in the lateral uprights (see fig.1).
Drill a 3 mm hole beforehand in the wall of the unit to prevent the wood splitting.
Technical data
Operating voltage ........................... 240 V ~ 50 Hz
Total electrical power consumption ........ 3.065 kW
Power rating of grill ...................................2.635 kW
Energy consumption
- heating to 200 °C ................................. 0.55 kWh
- running for one hour at 200 °C ............ 0.87 kWh
TOTAL .................................................... 1.42 kWh
Usable dimensions of oven
Width ............................................................ 43 cm
Height ........................................................ 31.5 cm
Depth ............................................................ 40 cm
Usable volume .......................................... 54 litres
Connecting the oven
(Fig. 2)
● Before carrying out the connection, make sure that the cable from your mains supply have a sufficient rating to
supply the appliance correctly.
● Electrical connection must be carried out before the appliance is fitted into the unit.
● The appliance must be connected to the power supply of 240V single phase, 20 AMP-circuit minimun.
The earth wire (yellow/green) must be connected to the earth terminal on the appliance.
● Kleenmaid will not be liable in the event of an accident resulting from non-existent, faulty or incorrect earthing.
● The neutral supply must be connected to the neutral terminal on the terminal block.
To gain access to the terminal block :
● Using a pair of pliers, cut the fixings on the four corners of the access flap on the rear panel of the oven.
● Replace the access flap in such a way that the opening is completely covered, using two metal screws with a
diameter of 4 mm and length of 15 mm.
10
Page 11
1
C
D
E
2
CUT OUT DIMENSIONS
9
24
560
595
18
550
577
B
450
595
560
545
585
24
B
595
450
18
595
577
545
560
560
550
585
Page 12

12
Cooking meat
1 -
If your meat is cooked through without being browned on the outside:
• Try using the or function instead.
• Place the meat closer to the grill
• Do not pre-heat when using the function.
• Increase the thermostat setting.
2 -
If your meat is too brown on the outside but undercooked in the centre:
• Try using the function instead.
• Move the meat further away from the grill when using the or functions.
• Pre-heat for less time.
• Lower the thermostat setting.
3 -
If your oven is very dirty you have cooked at too high a temperature:
• Lower the thermostat setting.
• Do not use the dripping pan with the function.
4 -
If you use the dripping pan and the shelf:
• Add a small amount of liquid to the dripping pan to prevent the fat which runs off the meat from burning.
Successful baking
1 -
If the top of the cake is a dark colour and the bottom is a very light colour,you have not cooked with enough heat from below:
• Move the cake lower down the oven.
• Use a dark-coloured tin.
• Lower the thermostat setting.
2 -
If the top of the cake is a light colour and the bottom is dark, you have cooked with too much heat from below:
• Place the cake higher up the oven.
• Use a light-coloured tin.
• Lower the thermostat setting.
3 -
If the outside is overdone, while the inside is undercooked or it is unevenly browned, you are cooking at too a high a temperature:
• Lower the thermostat setting.
• Increase the cooking time.
4
-
If the outside is too dry but is a good colour, you have cooked it for too long and at too low a temperature:
• Reduce the cooking time.
• Increase the thermostat setting.
Multiple cooking
It is possible to cook several dishes (the same or different types) simultaneously, without flavour or odour being passed
from one to the other, as long as you choose dishes cooked at the same temperature. (They do not have to be placed
in the oven or taken out at the same time).
Depending on the number of levels used, you may have to purchase additional equipment.
Note: The cooking guide gives the cook time for a single dish. When cooking several dishes increase this time by 10 to
20 minutes.
Additional information
Tins made of black metal with a non-stick interior and gilded metal tins are the most suitable because they absorb heat
rapidly and transmit it to the dough. This means that cooking time is reduced and less energy is required.
Baking utensils made of tin reflect the heat, which means they reject it. Cakes and pies baked in these tins will not
brown properly and take longer to cook. This type of utensil is not recommended for baking in a convection oven.
With respect to the temperatures given in recipe books for conventional cooking, when cooking dishes using the fanassisted settings, the temperature should be reduced by 10 to 25°C for baking and by 20 to 40°C for meat. The cook
time should then be decreased slightly.
ADVICE ON USING THE OVEN
Page 13

DISHES COOK FUNCTION SUGGESTED
SHELF POSITION
ACCESSORIES TIME NOTES
SELECTOR TEMPERATURE
STARTERS
VEGETABLES
Pizza
Combined 205°C 2nd Baking tray 18 -20 min. Depending on thickness
Quiche lorraine
✺
Combined 205°C 1st Tin on shelf 30-35 min. 28 cm tin
Cheese soufflé
Fan-forced 180°C1stTin on shelf35 min.
Potato bake
Fan-forced 180°C1stDish on shelf45-50 min.
Depending on quantity - Lower heat after 30 min.
Stuffed tomatoes
Fan-forced 180°C1stDish on shelf40-45 min.
Provencal tomatoes
Fan-assisted grill 230°C 2nd Dish on shelf 20 min.
FISH
Sea bream
Fan-assisted heat 180°C 1st Dish on shelf 25-30 min. Depending on thickness
Mackerel
✺
Grill 275°C 3rd or 4th Placed on shelf 6-7 min. a side Dripping pan on 1st shelf position
MEAT
Lamb chops
✺
Grill 275°C 4th Meat on shelf 5-6 min. a side Dripping pan on 1st shelf position
Leg of lamb
Fan forced 190°C 2nd Meat on shelf 15-20 min./500g Dripping pan on first shelf position
-
Roast beefor
Fan-forced 235° or 220°C1stDish on shelf10-15 min./500gDuring cooking pre-heat the oven
Roast pork/veal
Fan-forced 180°/200°C1stDish on shelf35-40 min./500g
Chicken
Fan-forced 180°/200°C1stDish on shelf25 min./500g
Guinea fowl/rabbit
Fan-forced 180°/200°C1stDish on shelf20-25 min./500g
BAKING
Brioche
Fan-forced 160°C1stTin on shelf35 min.
Fruit cake - Pound cake
Fan-forced 170°C1stTin on shelf45-50 min.
Shortbread
Fan-forced 165°C2ndBaking tray15-18 min.
Apple pie
Combined 160°C 1st Tin on shelf 60 min.
Soft fruit tart
Combined 205°C 1st Tin on shelf 35-40 min. 28 cm diameter tin
Apple tart
Fan-forced 205°C1stTin on shelf35-40 min.28 cm diameter tin
Puff pastry
✺
Conventional 225°C 2nd Baking tray 15 min. Pastry without filling
Choux pastry
✺
Conventional 200°C 2nd Baking tray 30 min.
Egg custard
Conventional 160°C 2nd Baking sheet 20 min. 6 ramekins in a bain-marie
✺
These dishes are best placed in a hot oven.
4
3
2
1
Mark°C1
50°C270°C390°C4120°C5150°C6180°C7210°C8240°C9270°C
MAXI
275°C
Conversion mark °C
13
SUGGESTED COOKING GUIDE
Page 14

14
WARRANTY AND SERVICE
Domestic Warranty - Full Five Year Warranty
In addition to all statutory rights which you, the Consumer, have under all the relevant laws in respect to this appliance,
during your first five years of ownership as the purchaser of this Kleenmaid appliance, we guarantee that any fault
caused by faulty material or workmanship becoming apparent will be rectified free of charge for parts and labour
provided that all service is performed during normal working hours by Kleenmaid or their designated Agents. Where the
Appliance is installed outside the normal servicing area of the above, the Purchaser must pay the cost of transporting the
Appliance to and from the Agent or the Agent’s travelling cost to and from the Purchaser’s home.
Commercial Warranty - One Year Warranty
In addition to all statutory rights which you, the Consumer, have under all the relevant laws in respect to this appliance,
during your first one year of ownership as the purchaser of this Kleenmaid, we guarantee that any fault caused
by faulty material or workmanship becoming apparent will be rectified free of charge for parts and labour provided that
all service is performed during normal working hours by Kleenmaid or their designated Agents. Where the Appliance is
installed outside the normal servicing area of the above, the Purchaser must pay the cost of transporting the Appliance
to and from the Agent or the Agent’s travelling cost to and from the Purchaser’s home.
What This Warranty Does Not Cover
We are not responsible for any damage or malfunction unless by a defect in material or workmanship.This includes but is
not limited to abuse, misuse, improper installation and transportation damage. We are not responsible for any
consequential damages resulting from any malfunction.
This Warranty does not cover replacement of light bulbs or glass breakage due to impact.
In case of fractured glass do not use your appliance
Warranty Registration
Please complete the enclosed warranty card and retain with purchase docket.
Service Assistance
To assist you when phoning our After Sales Service number to arrange a service call, please complete the following and
have these details ready.
Model No.*....................................................................................................................................................
Kleenmaid Store purchased from..............................................................................................................................
Date of purchase.........../................./.............. Date of Installation............/...................../............
*The Model No is shown on the underside of the control panel.
KLEENMAID ST GEORGE AFTER SALES SERVICE
1300 652 100
Page 15

ongratulations on the purchase of your new appliance. This appliance
has been designed and manufactured to give you years of reliable
C
install your new appliance. Correct installation will avoid delays and
unnecessary service calls.
Once installation is complete, read this booklet carefully and get to know the
controls and the features of your new appliance.
We reserve the right to alter the specifications with no influence on the
operation of the appliance. This instruction manual cannot be reason for
claim.
performance. For best results, carefully read the instructions on how to
For appliance please phone
1300 652 100
Kleenmaid St George Store
131308
Page 16

Other products in Kleenmaid St George
range of world’s best appliances:
Washers
Dryers
Dishwashers
Ovens
Cooktops
Rangehoods
Sinks
Waste Disposals
Taps
Cookware
Refrigerators
Freezers
Vacuum Cleaners
For sales information on the full range of quality kitchen and laundry
appliances, phone 13 13 08.
For service related enquires, phone 1300 652 100
 Loading...