

Page 1
SS5000 Kleenmaid Maxi Tub
INSTALLATION INSTRUCTION
560
170
85
NOTES
House Plumbing supplied by
the customer
Washing Machine Drain System
supplied with the laundry tub
All dimensions are in
millimeters
PHOTO A
PHOTO B
888
Max 25
562
991
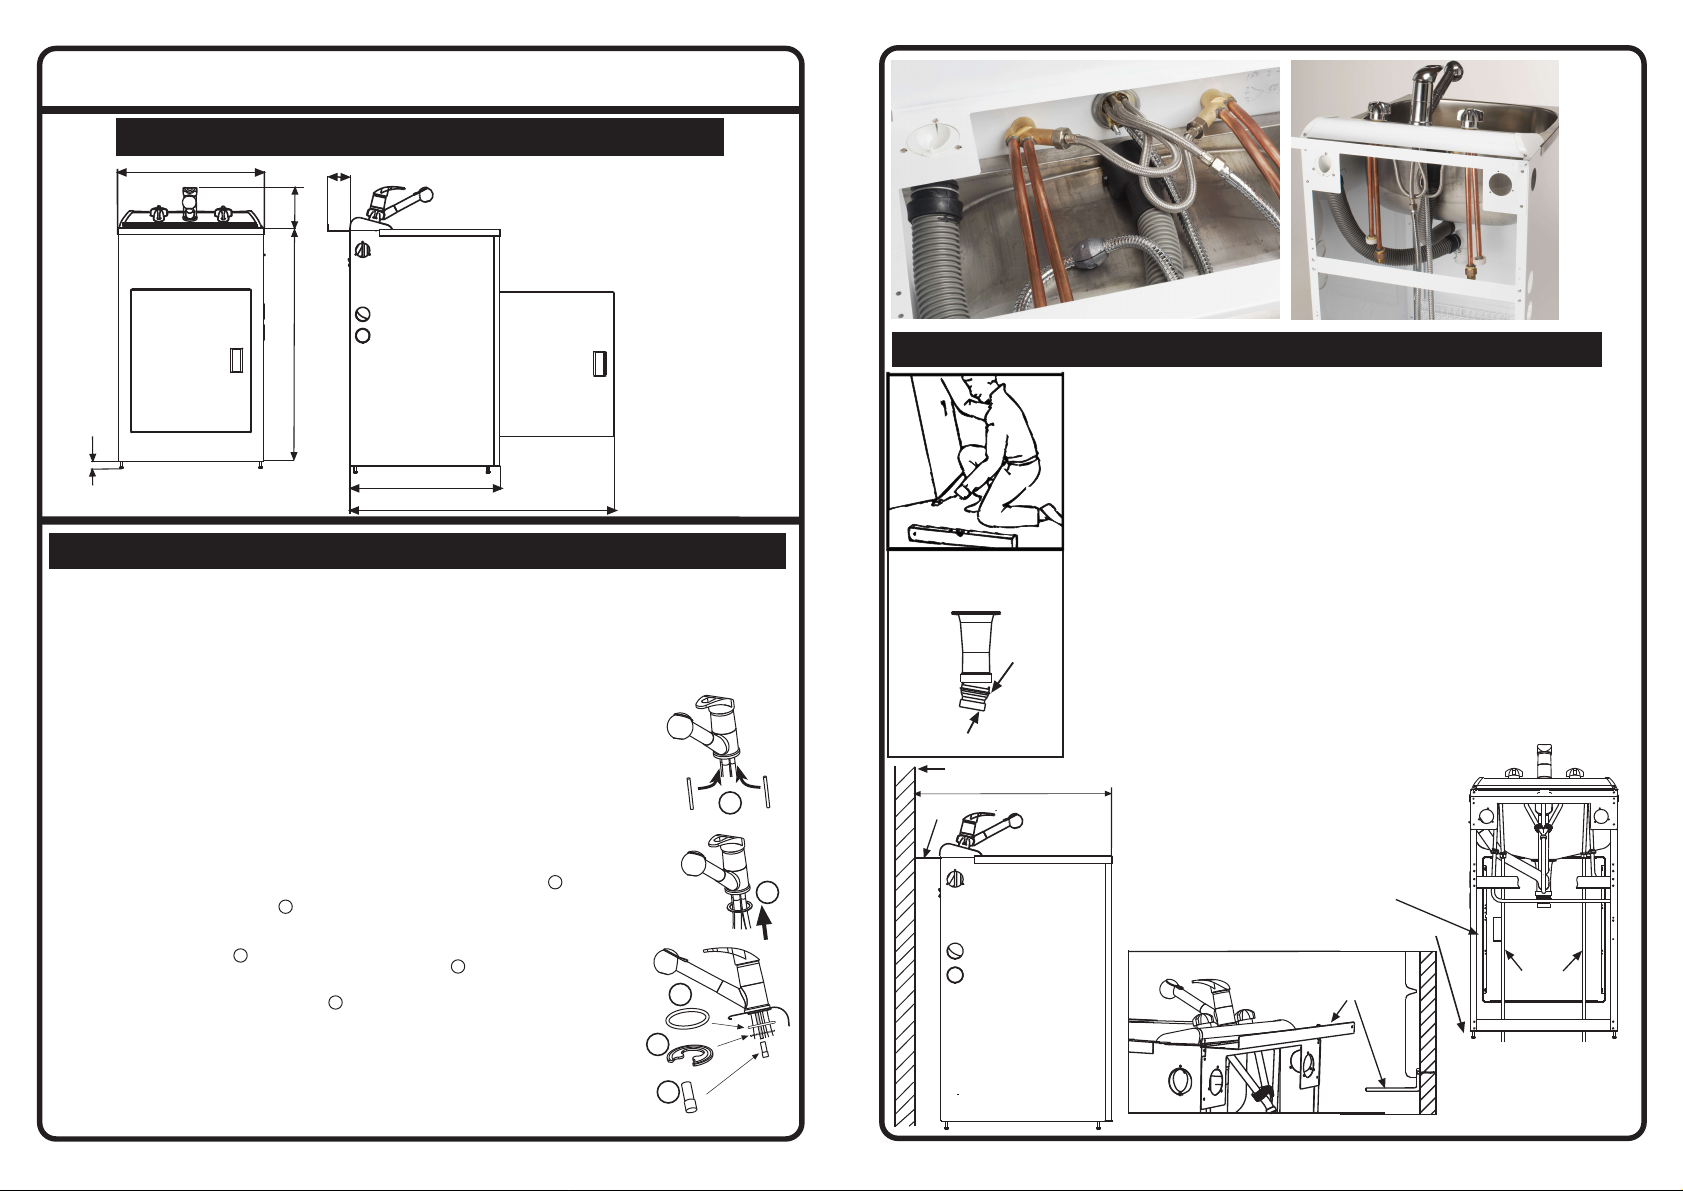
1 PRE-INSTALLATION INSTRUCTIONS
IMPORTANT
Please ensure Household pipes are thoroughly flushed to remove debris before
connecting your laundry tub to pipeworks. To prevent foreign particles damaging the
ceramic cartridge an “ In line” filter is recommended to be installed prior to the mixer.
Maximum temperature 80° C, recommended 5°C to 65°C
Maximum pressure 175 PSI, Minimum 15 PSI.
If hot and cold water presures are significantly different, then a regulator / flow control
devise should be fitted.
REGULATION COMPLIANCE
Comply with current Drainage and Plumbing Regulations as required by your local authority.
Sanitary plumbing shall only be carried out by a Registered Plumber.
DETERMINE SITE
Determine the most suitable position for the laundry tub. It may be used either to the left or right of the
Washing Machine. Allow 10mm clearence between the units. Mark the position on the floor as reference.
MOUNTING SINGLE LEVER UNIT INTO CONSOLE
Remove Mixer and Spray handle from box.
Screw mounting studs firmly into base of mixer unit.
Then thread the flat rubber washer up the flexible hoses to
the base the Mixer unit.
Place Mixer unit into console by threading flexible hoses
through mounting hole. Mounting studs need to pass through
2 small holes inside the mounting hole.
Thread the 'o' ring up the flexible hoses to the base of
theMixer unit then place clamping washer around flexible
hoses and slide over mounting studs ensuring the 'o' ring
is sitting in the pressed groove.
Take the 2 brass sleeve nuts and screw onto studs with
the hex. portion away from the Mixer base. Tighten with
the right size spanner.
Before connecting flexiable hoses check all seals have
remained in the coupling nuts, now connect fitting to
taps and pullout spray hose.
Place spray handle into mixer body and allow hose to
hang free at the rear. Place the weight supplied on to
the hose at the lowest part. This is to help the hand
piece to return to the holder. Photo “A”
PLEASE READ THE ENTIRE INSTRUCTION
BEFORE INSTALLING THE LAUNDRY TUB
1
2
3
5
4
1
2
3
4
5
2 Securing laundry tub
A:Fit the four leveling feet supplied to the bottom of the cabinet and
adjust to align with Washing Machine height. Tilt laundry tub slightly
to assist with access. Check top of laundry tub with spirit level.
Ensure the cabinet does not rock.
B:Position laundry tub then cut the house Waste Pipe which
should already be installed to the exact height. The final height
will depend on the Waste Trap dimensions. Connect Waste
Trap to your laundry tub.The extra waste adapter is not required for use
in Australia.
C:To connect hot and cold water pipes to the mains, use suitable
connectors. Standard fittings are available at most Plumbing
Supplies.
NOTE: For installations in Australia an
approved stopcock must be fitted to both hot and cold water
Apply
Plumbing
PVC glue
Waste Adaptor
( NZ Only)
Wall
Rear
Shelf
647
inlet pipes.
D: Unscrew Rear Shelf which for transportation purposes is
mounted at the rear of cabinet (refer diagram below &
PHOTO B).
Fasten the cabinet to the wall either through the holes in the
back flange of the cabinet sides or by the Rear Shelf which in
turn enables the laundry tub to align with the front of the
Washing Machine. Ensure Rear Shelf is fastened to the cabinet
with four screws (supplied). Alternative fastening can be
achieved through the floor.
Rear shelf transport
mounting position.
Adjustable
Feet
Rear
Shelf
Rear shelf flange can be tiled over
WATER
MAINS
NOTE: For installations
in Australia an approved
stopcock must be fitted
to both hot and cold
water inlet pipes
750873 Issue A
ECN: 04053
Page 2
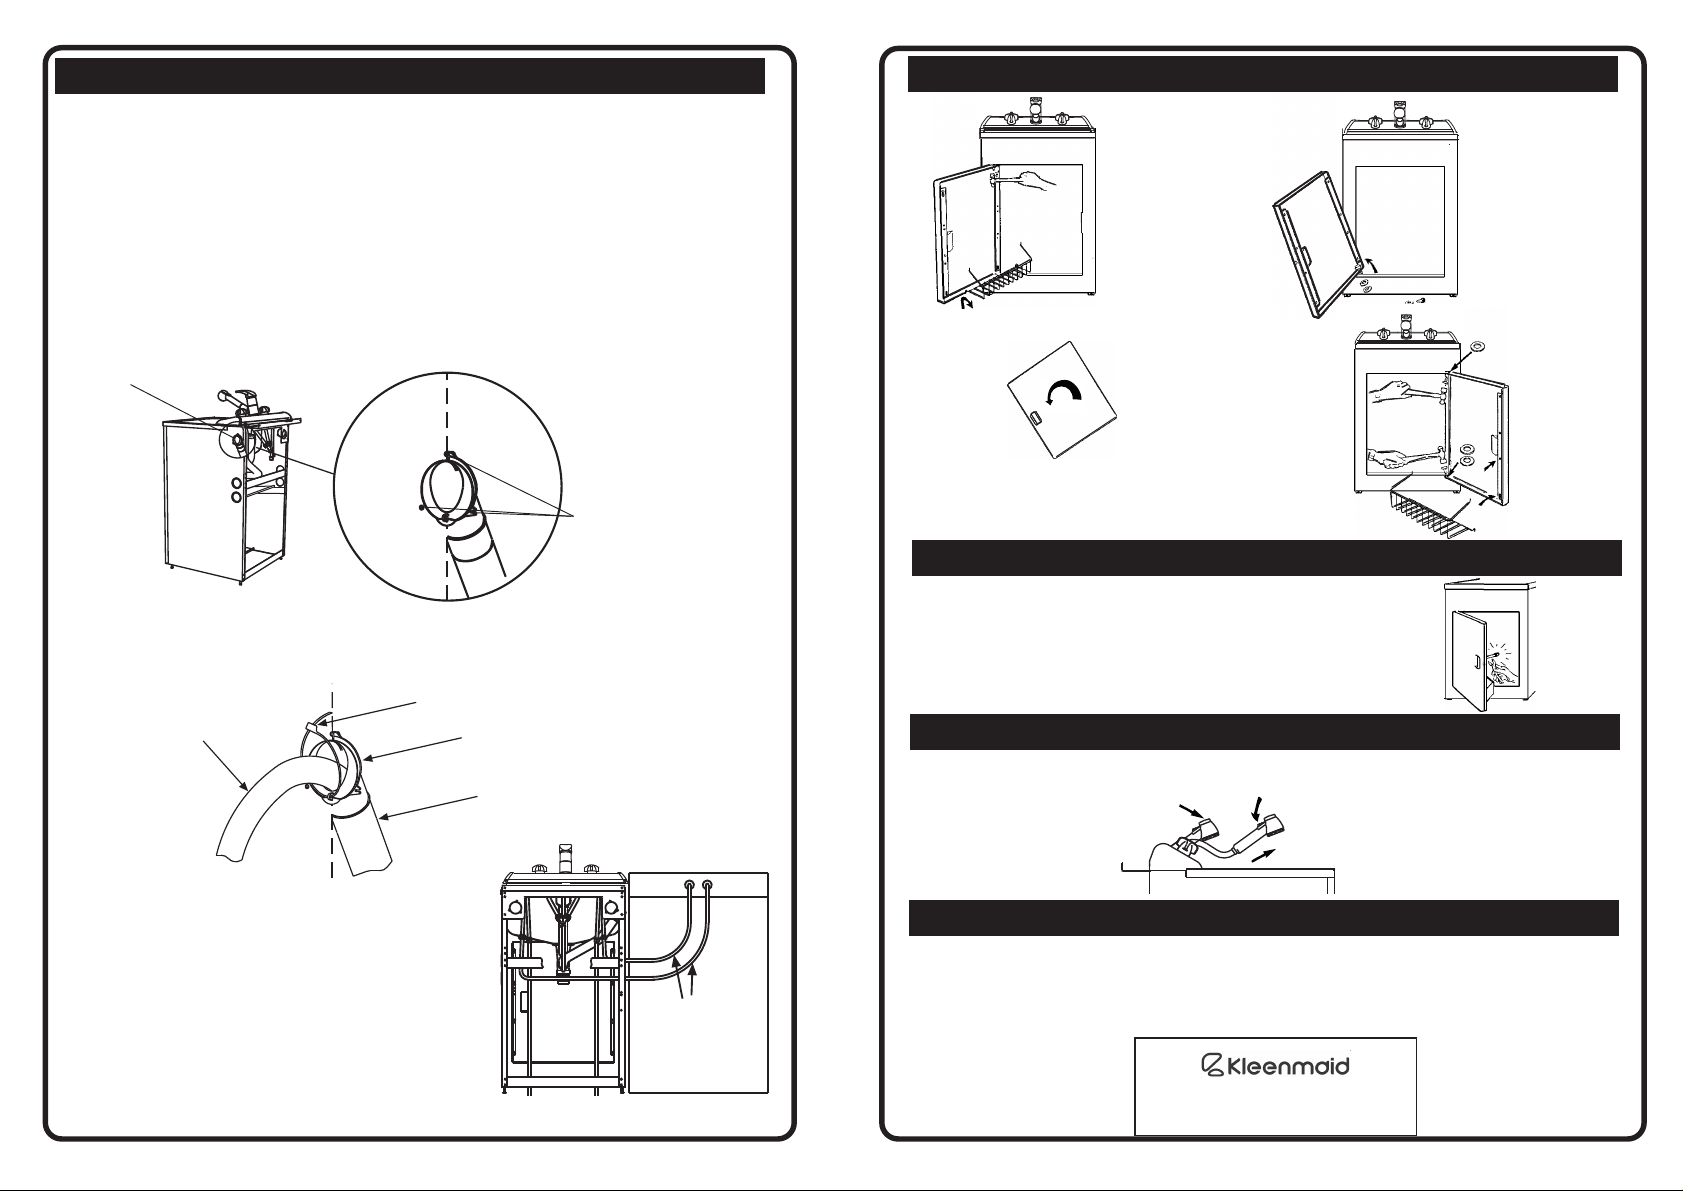
3 Connect Washing Machine
The Washing Machine Waste Hose can be connected to either the side or rear
of the laundry tub.
A1: Rear Mounted.
Place the Washing Machine Connector from the inside of the laundry tub to either
the L/H or R/H holes beneath the Rear Shelf. Fasten from the outside with the
3 screws supplied. (PHOTO A & B) Insert the Grommets in all 6 holes in the
side panels.
A2: Side Mounted.
Fit Grommets supplied from installation kit into side panel holes. Insert Grommets
in the 3 holes that are not to be used for plumbing. On the opposite side fit
Grommet to the bottom 2 holes only, and tap the centre section inward to
produce a hole for the Washing Machine Hoses.
Place the Washing Machine Waste Hose from inside the laundry tub to the
required side hole fastening it from the outside with the 3 screws supplied.
(Pictured)
Holes
Washing Machine
Waste Connector
Fixed with 3 Screws
Alternatively it can be
fitted to the rear
shelf.
4 Change Door
2. Knock
out top
hinge pin
1. Remove
door rack
4. Turn door
around
5 Safety Latch
3. Lever lower
hinge pin out
with door
(keep 3
washers)
5. Tap in
hinge pins
with
washers
in position
one at
top, two
at bottom
6. Refit door rack
(top first)
IMPORTANT: Ensure flexible hose is correctly fitted to the plastic waste outlet and
the plastic washing machine connector and that the spring clip is firmly in place.
B: To prevent the Washing Machine Waste Hose from coming loose use the Tie
provided to fasten the hose firmly to the Washing Machine Waste Connector.
Washing
Machine
Waste
Hose
Tie
Washing Machine Waste Connector
Washing Machine Inlet Hose
D: Pass the Washing Machine Inlet Hoses through
the gap, fastening them firmly to Pipe Work
Connectors.
E: On completion of installation check the
complete system for water leaks.
Washing Machine
Hoses
The Safety Latch comes as a standard
fitting in the interests of child protection
against dangerous chemicals and
cleaning fluids. However, should you
not require the latch it can easily be
snipped off with sidecutters or similar
hand tool.
6 Pullout Spout Handle
To use the spray
function, press the
engage button
To return pullout
spout to standard
flow press the
release button
Pull out the hand unit for
flexibility in cleaning or
general use.
7 CLEANING
Powder coated surfaces must not be cleaned with abrasive or chemical cleaners. To keep
the Tapware products looking their best, wipe regularly with a damp soft
cloth. Sometimes a mild soap and water solution maybe necessarry to shift
the stubborn dirt. Under no circumstances use harsh detergents
(including chemical cleaners) bleaches, scourers or any abrasive cleaner.
These products may irreparably damage many tapware finishes, especially
gold and colour coated.
NB. Their use will render the warranty void.
MANUFACTURED FOR:
BY:
ROBINHOOD LIMITED
6 ZELANIAN DRIVE, EAST TAMAKI
AUCKLAND, NEW ZEALAND
ISO9001 Certified
750873 Issue A
ECN: 04053
 Loading...