

Page 1
Stacked Washers
W
and Dryers
Model LTKA6A*N4350
Use and Care Guide
Keep These Instructions for Future Reference.
(If this machine changes ownership, this manual must accompany machine.)
SWD451C
S
Part No. 802726
December 2006
Page 2

Page 3

Read complete Installation and Operation Instructions before using unit.
The maximum washing load (dry weight) shall not exceed 8.1 kg (18 pounds).
The maximum drying load (dry weight) shall not exceed 9.0 kg (20 pounds).
WARNING
FOR YOUR SAFETY, the information in this manual must be followed to minimize
the risk of fire or explosion or to prevent property damage, personal injury or
death.
• Do not store or use gasoline or other flammable vapors and liquids in the vicinity of this
or any other appliance.
• WHAT TO DO IF YOU SMELL GAS:
– Do not try to light any appliance.
– Do not touch any electrical switch; do not use any phone in your building.
– Clear the room, building or area of all occupants.
– Immediately call your gas supplier from a neighbor’s phone. Follow the gas supplier’s
instructions.
– If you cannot reach your gas supplier, call the fire department.
• Installation and service must be performed by a qualified installer, service agency or the
gas supplier.
W033
W052
IMPORTANT: Purchaser must consult the local gas supplier for suggested instructions to be followed if the
dryer user smells gas. The gas utility instructions plus the SAFETY and WARNING note directly above
must be posted in a prominent location near the dryer for customer use.
FOR YOUR SAFETY
Do not store or use gasoline or other flammable vapors and liquids in the vicinity of this or
any other appliance.
W053
© Copyright, Alliance Laundry Systems LLC – DO NOT COPY or TRANSMIT802726
1
Page 4

Notes
2
© Copyright, Alliance Laundry Systems LLC – DO NOT COPY or TRANSMIT
802726
Page 5

Table of
Contents
Safety Information.............................................................................. 5
Explanation of Safety Messages........................................................... 5
Important Safety Instructions ............................................................... 5
Washer Use and Care......................................................................... 9
Before Washing .................................................................................... 9
Prepare Wash Load .......................................................................... 9
Sort................................................................................................... 9
Pretreat ............................................................................................. 10
Load Articles.................................................................................... 10
Load Sizes........................................................................................ 10
Water..................................................................................................... 10
Water Level...................................................................................... 10
Water Hardness................................................................................ 10
Iron................................................................................................... 11
Energy .............................................................................................. 11
Washing Special Items ......................................................................... 12
Common Washer Sounds .................................................................... 12
Washing Concerns................................................................................ 13
Laundry Tips......................................................................................... 14
Special Care .......................................................................................... 15
Starching .......................................................................................... 15
Knits................................................................................................. 15
Permanent Press ............................................................................... 15
Stain Removal....................................................................................... 16
Washer Operation .............................................................................. 19
Determine Proper Cycle ....................................................................... 19
To Wash Clothes.............................................................................. 20
To Change Cycles ............................................................................ 21
To Pump Out Water After Aborting Cycle...................................... 22
DOOR Light..................................................................................... 22
WASH Light .................................................................................... 22
RINSE Light .................................................................................... 22
FINAL SPIN Light .......................................................................... 22
HEATER Light (Red Light) ............................................................ 22
Out of Balance Load ........................................................................ 22
Available Washing Cycles............................................................... 23
Using Your Dispenser Drawer.............................................................. 25
Detergent Compartment................................................................... 25
Liquid Bleach Compartment............................................................ 25
Fabric Softener Compartment.......................................................... 25
Available Water Temperatures ............................................................. 26
Dryer Use and Care ............................................................................ 27
Before Drying ....................................................................................... 27
Energy Saving Tips.......................................................................... 27
Helps and Hints................................................................................ 27
Sort................................................................................................... 28
Load ................................................................................................. 28
© Copyright 2006, Alliance Laundry Systems LLC
All rights reserved. No part of the contents of this book may be reproduced or transmitted in any form or by any
means without the expressed written consent of the publisher.
802726
© Copyright, Alliance Laundry Systems LLC – DO NOT COPY or TRANSMIT
3
Page 6

Drying Special Items ............................................................................ 29
Dryer Operation.................................................................................. 33
Available Drying Cycles....................................................................... 33
AUTOMATIC REGULAR/DELICATE Cycle............................... 33
TIME DRY Cycle ............................................................................ 33
AUTOMATIC PERMANENT PRESS/KNITS Cycle .................... 33
To Dry Clothes ..................................................................................... 34
Drying Rack ..................................................................................... 35
Motor Overload Protector ................................................................ 35
Lint Filter ......................................................................................... 36
Maintenance ........................................................................................ 37
User Maintenance ................................................................................. 37
Lubrication....................................................................................... 37
Cold Weather Care........................................................................... 37
Vacations and Extended Non-Use ................................................... 37
Care of Your Washer ....................................................................... 37
Replacing Hoses ................................................................................... 37
Filter Screens ........................................................................................ 37
Care of Your Dryer .......................................................................... 37
Exhaust System................................................................................ 38
Reinstallation of Shipping Materials .................................................... 38
Before You Call for Service ................................................................. 39
If Service Is Required ........................................................................... 40
Automatic Stacked Washer and Dryer Warranty ................................. 41
Domestic Warranty .......................................................................... 41
Commercial Warranty...................................................................... 41
Information for Handy Reference......................................................... 42
4
© Copyright, Alliance Laundry Systems LLC – DO NOT COPY or TRANSMIT
802726
Page 7
Safety Information
Explanation of Safety Messages
Throughout this manual and on machine decals, you
will find precautionary statements (“DANGER,”
“WARNING,” and “CAUTION”) followed by specific
instructions. These precautions are intended for the
personal safety of the operator, user, servicer, and
those maintaining the machine.
DANGER
Indicates an imminently hazardous
situation that, if not avoided, will cause
severe personal injury or death.
WARNING
Indicates a hazardous situation that, if not
avoided, could cause severe personal
injury or death.
CAUTION
Indicates a hazardous situation that, if not
avoided, may cause minor or moderate
personal injury or property damage.
Additional precautionary statements (“IMPORTANT”
and “NOTE”) are followed by specific instructions.
IMPORTANT: The word “IMPORTANT” is used
to inform the reader of specific procedures where
minor machine damage will occur if the procedure
is not followed.
NOTE: The word “NOTE” is used to communicate
installation, operation, maintenance or servicing
information that is important but not hazard
related.
Important Safety Instructions
Save These Instructions
WARNING
To reduce the risk of fire, electric shock,
or injury to persons when using your
stacked washer and dryer, follow these
basic precautions.
W287
1. Read all instructions before using the unit.
2. Refer to the EARTHING INSTRUCTIONS in
the INSTALLATION manual for the proper
earthing of the unit.
3. Do not wash or dry articles that have been
previously cleaned in, washed in, soaked in, or
spotted with gasoline, dry-cleaning solvents, or
other flammable or explosive substances as they
give off vapors that could ignite or explode.
Highly flammable substances commonly used in
domestic environments include acetone,
denatured alcohol, petrol/gasoline, kerosene, spot
removers (some brands), turpentine, waxes and
wax removers. This appliance shall not be used to
dry off solvents or dry-cleaning fluids.
4. Under certain conditions, hydrogen gas may be
produced in a hot water system that has not been
used for two weeks or more. HYDROGEN GAS
IS EXPLOSIVE. If the hot water system has not
been used for such a period, before using a
washing machine or combination washer-dryer,
turn on all hot water faucets and let the water
flow from each for several minutes. This will
release any accumulated hydrogen gas. The gas is
flammable, do not smoke or use an open flame
during this time.
5. Do not allow children to play on or in the unit.
This appliance is not intended for use by young
children or infirm persons without supervision.
Young children should be supervised to ensure
that they do not play with the appliance.
802726
© Copyright, Alliance Laundry Systems LLC – DO NOT COPY or TRANSMIT
5
Page 8

Safety Information
6. Before the unit is removed from service or
discarded, remove the doors to the washing and
drying compartments.
7. Do not reach into the washer or dryer if the
cylinders are revolving.
8. Do not install or store the unit where it will be
exposed to water and/or weather.
9. Do not tamper with the controls.
10. Do not repair or replace any part of the unit, or
attempt any servicing unless specifically
recommended in the User-Maintenance
instructions or in published user-repair
instructions that you understand and have the
skills to carry out.
11. Do not add gasoline, dry-cleaning solvents, or
other flammable or explosive substances to the
wash water. These substances give off vapors that
could ignite or explode.
12. Do not use fabric softeners or products to
eliminate static unless recommended by the
manufacturer of the fabric softener or product.
13. To reduce the risk of an electric shock or fire, DO
NOT use an adapter to connect the unit to the
electrical power source.
14. To reduce the risk of fire, DO NOT DRY plastics
or articles containing foam rubber (also known as
latex foam) or similarly textured rubberlike
materials. Foam rubber materials can, when
heated, produce fire by spontaneous combustion.
15. ALWAYS clean the lint filter after every load. A
layer of lint in the filter reduces drying efficiency
and prolongs drying time.
16. Keep area around the exhaust opening and
adjacent surrounding area free from the
accumulation of lint, dust and dirt.
17. The interior of the dryer and the exhaust duct
should be cleaned periodically by qualified
service personnel.
19. Washer and dryer will not operate with the
loading door open. DO NOT bypass the door
safety switches by permitting the washer or dryer
to operate with the doors open. The washer and
dryer will stop tumbling when the doors are
opened. Do not use the washer or dryer if they do
not stop tumbling when the doors are opened or
start tumbling without pressing the START
mechanisms. Remove the unit from use and call
the service person.
20. Do not put articles soiled with vegetable or
cooking oil in the washer or dryer. Due to the oil,
the fabric may catch on fire by itself. Oil-affected
items can ignite spontaneously, especially when
exposed to heat sources such as in a tumble dryer.
The items become warm, creating an oxidation
reaction in the oil. Oxidation creates heat. If the
heat cannot escape, the items can become hot
enough to catch fire. Piling, stacking or storing
oil-affected items can prevent heat from escaping
and so create a fire hazard.
If it is unavoidable that fabrics contain vegetable
or cooking oil or have been contaminated by hair
care products be placed in a tumble dryer, they
should first be washed in hot water with extra
detergent – this will reduce, but not eliminate, the
hazard. The “cool down” cycle of tumble dryers
should be used to reduce the temperature of the
items. They should not be removed from the
tumble dryer or piled or stacked while hot.
21. To reduce the risk of fire, DO NOT put clothes
which have traces of any flammable substances
such as machine oil, flammable chemicals,
thinner, etc., or anything containing wax or
chemicals such as in mops and cleaning cloths, or
anything dry-cleaned at home with a drycleaning solvent in the dryer.
22. Use your washer only for its intended purpose,
washing clothes.
23. Use the dryer only for its intended purpose,
drying clothes.
18. If not installed, operated and maintained in
accordance with the manufacturer’s instructions
or if there is damage to or mishandling of this
product’s components, use of this product could
expose you to substances in the fuel or from fuel
combustion which can cause death or serious
illness.
6
© Copyright, Alliance Laundry Systems LLC – DO NOT COPY or TRANSMIT
24. Always disconnect the electrical power to the
washer and dryer before attempting service to
either unit. Disconnect the power cords by
grasping the plug, not the cord.
25. If the supply cord is damaged, it must be replaced
with a special cord or assembly by a suitably
qualified service agent.
802726
Page 9

Safety Information
26. Install this unit according to the
INSTALLATION INSTRUCTIONS. All
connections for water, drain, electrical power,
earthing and gas supply must comply with local
codes and be made by licensed personnel when
required. Do not do it yourself unless you know
how!
27. Keep your unit in good condition. Bumping or
dropping the unit can damage safety features. If
this occurs, have your unit checked by a qualified
service person.
28. Remove laundry immediately after the dryer
stops.
29. Always read and follow manufacturer’s
instructions on packages of laundry and cleaning
aids. Heed all warnings or precautions. To reduce
the risk of poisoning or chemical burns, keep
them out of reach of children at all times
(preferably in a locked cabinet).
30. Do not tumble fiberglass curtains and draperies
unless the label says it can be done. If they are
dried, wipe out the cylinder with a damp cloth to
remove particles of fiberglass.
31. Be sure water connections have a shut-off valve
and that fill hose connections are tight. CLOSE
the shut-off valves at the end of each wash day.
32. ALWAYS follow the fabric care instructions
supplied by the garment manufacturer.
33. Never operate the unit with any guards and/or
panels removed.
34. DO NOT operate the unit with missing or broken
parts.
35. DO NOT bypass any safety devices.
36. Failure to install, maintain, and/or operate this
machine according to the manufacturer’s
instructions may result in conditions which can
produce bodily injury and/or property damage.
37. Do not operate washer and dryer if the units have
been separated.
38. The tumble dryer is intended only for drying
textile material washed in water.
39. If this appliance is supplied from a cord
extension set or an electrical portable outlet
device, the cord extension set or electrical
portable outlet device must be positioned so that
it is not subject to splashing or ingress of
moisture.
40. Undergarments that contain metal reinforcements
should not be placed in a tumble dryer.
Damage to the tumble dryer can result if metal
reinforcements come loose during drying. When
available, a drying rack could be used for such
items.
41. Plastic articles such as shower caps or babies’
waterproof napkin covers should not be placed in
a tumble dryer.
42. Rubber-backed articles, clothes fitted with foam
rubber pads, pillows, galoshes and rubber-coated
tennis shoes should not be placed in a tumble
dryer.
IMPORTANT: Solvent vapors from dry-cleaning
machines create acids when drawn through the
heater of the drying unit. These acids are corrosive
to the dryer as well as to the laundry load being
dried. Be sure make-up air is free of solvent vapors.
IMPORTANT: Have your unit installed properly.
Don’t do it yourself unless you know how!
NOTE: The WARNINGS and IMPORTANT
SAFETY INSTRUCTIONS appearing in this
manual are not meant to cover all possible
conditions and situations that may occur. Common
sense, caution and care must be exercised when
installing, maintaining, or operating the dryer.
Always contact your dealer, distributor, service agent
or the manufacturer about any problems or conditions
you do not understand.
802726
© Copyright, Alliance Laundry Systems LLC – DO NOT COPY or TRANSMIT
7
Page 10

Notes
8
© Copyright, Alliance Laundry Systems LLC – DO NOT COPY or TRANSMIT
802726
Page 11
Washer Use and Care
Before Washing
Prepare Wash Load
Empty Pockets and Cuffs
Make sure all pockets are empty and turn them inside
out. One bobby pin, metal or plastic toy, support wires
from bras (recommended to be washed in a garment
bag), nail or sharp object in a load can catch laundry
and cause tears or damage the machine. Facial tissue
left in a pocket will produce extreme “lint.” A crayon
or lipstick in a wash load may cause stains that cannot
be removed. Roll down cuffs and shake out grass,
sand, and gravel.
Mend Rips and Tears
Little holes can become bigger in the washer. Mend
holes and tears before placing garments in the washer.
Close Zipper and Fasten Hooks
These can catch on garments in a wash load and tear
them. Tie belts and sashes so they won’t wind around
clothes.
Put Small Items In Bag
Small items such as baby socks may get stuck around
the door. Put them inside a mesh garment bag.
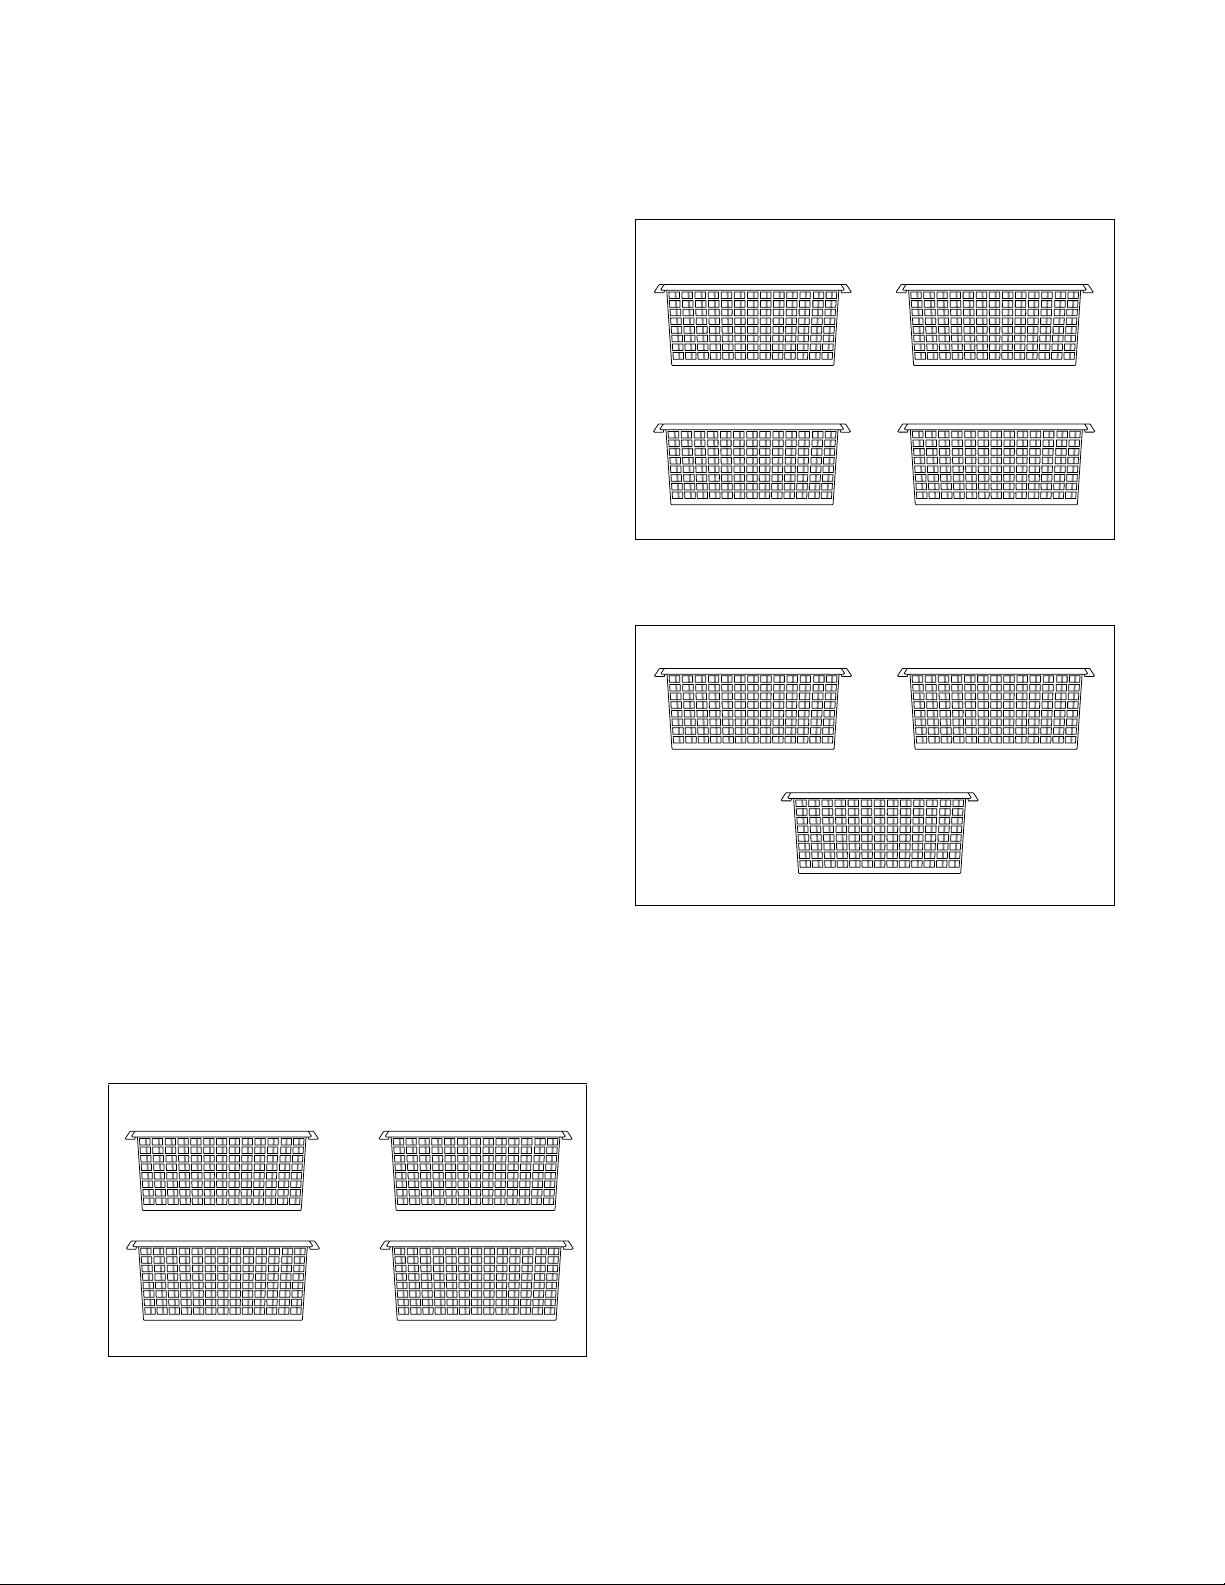
2. Sort by fabric and construction.
COTTONS AND
LINENS
SYNTHETICS, BLENDS
& POLY KNITS
Figure 2
PERMANENT
3. Sort by care label.
COLD
HOT
PRESS
DELICATES
W309I
WARM
Remove Nonwashable Trim
Check for colourfastness by squeezing a portion of
garment in warm or hot sudsy water. If the colour
bleeds or runs, wash the item separately in cold water.
Sort
Proper sorting is easy if you follow a few guidelines:
1. Sort by colour.
WHITES
LIGHTS
Figure 1
DARKS
NON-COLOURFAST
W308I
W310I
Figure 3
4. Sort by type and amount of soil.
Children’s play clothes, as well as work clothes,
will need extra treatment. Lightly soiled clothes
can become dingy if washed with heavily soiled
items.
802726
© Copyright, Alliance Laundry Systems LLC – DO NOT COPY or TRANSMIT
9
Page 12
Washer Use and Care
Pretreat
Pretreat shirt collars and cuffs with a pre-wash product
or liquid detergent when placing them in the washer.
Before washing, treat special stains with bar soap,
liquid detergent or a paste of water and granular
detergent. Use a pretreat soil and stain remover.
Load Articles
Load items by the amount of space they take up, not by
their weight. Mix large and small items in a load to get
the best washing results.
Load items loosely into the wash drum. The bulk of
the clothes rather than the weight will determine load
size.
Load Sizes
Load sizes vary. Small and large items should be
washed together to create a balanced load. If washing
a large item, two bath towels should be added to even
the load. Smaller loads can create an unbalanced
condition and cause premature wear on the washer. Do
not hesitate to fill the entire inner drum of the washer.
The load will compress a great deal when wet. This
allows room for proper tumbling.
Water
Water Level
The washer will automatically adjust the water level to
the type and size of the load during any fill.
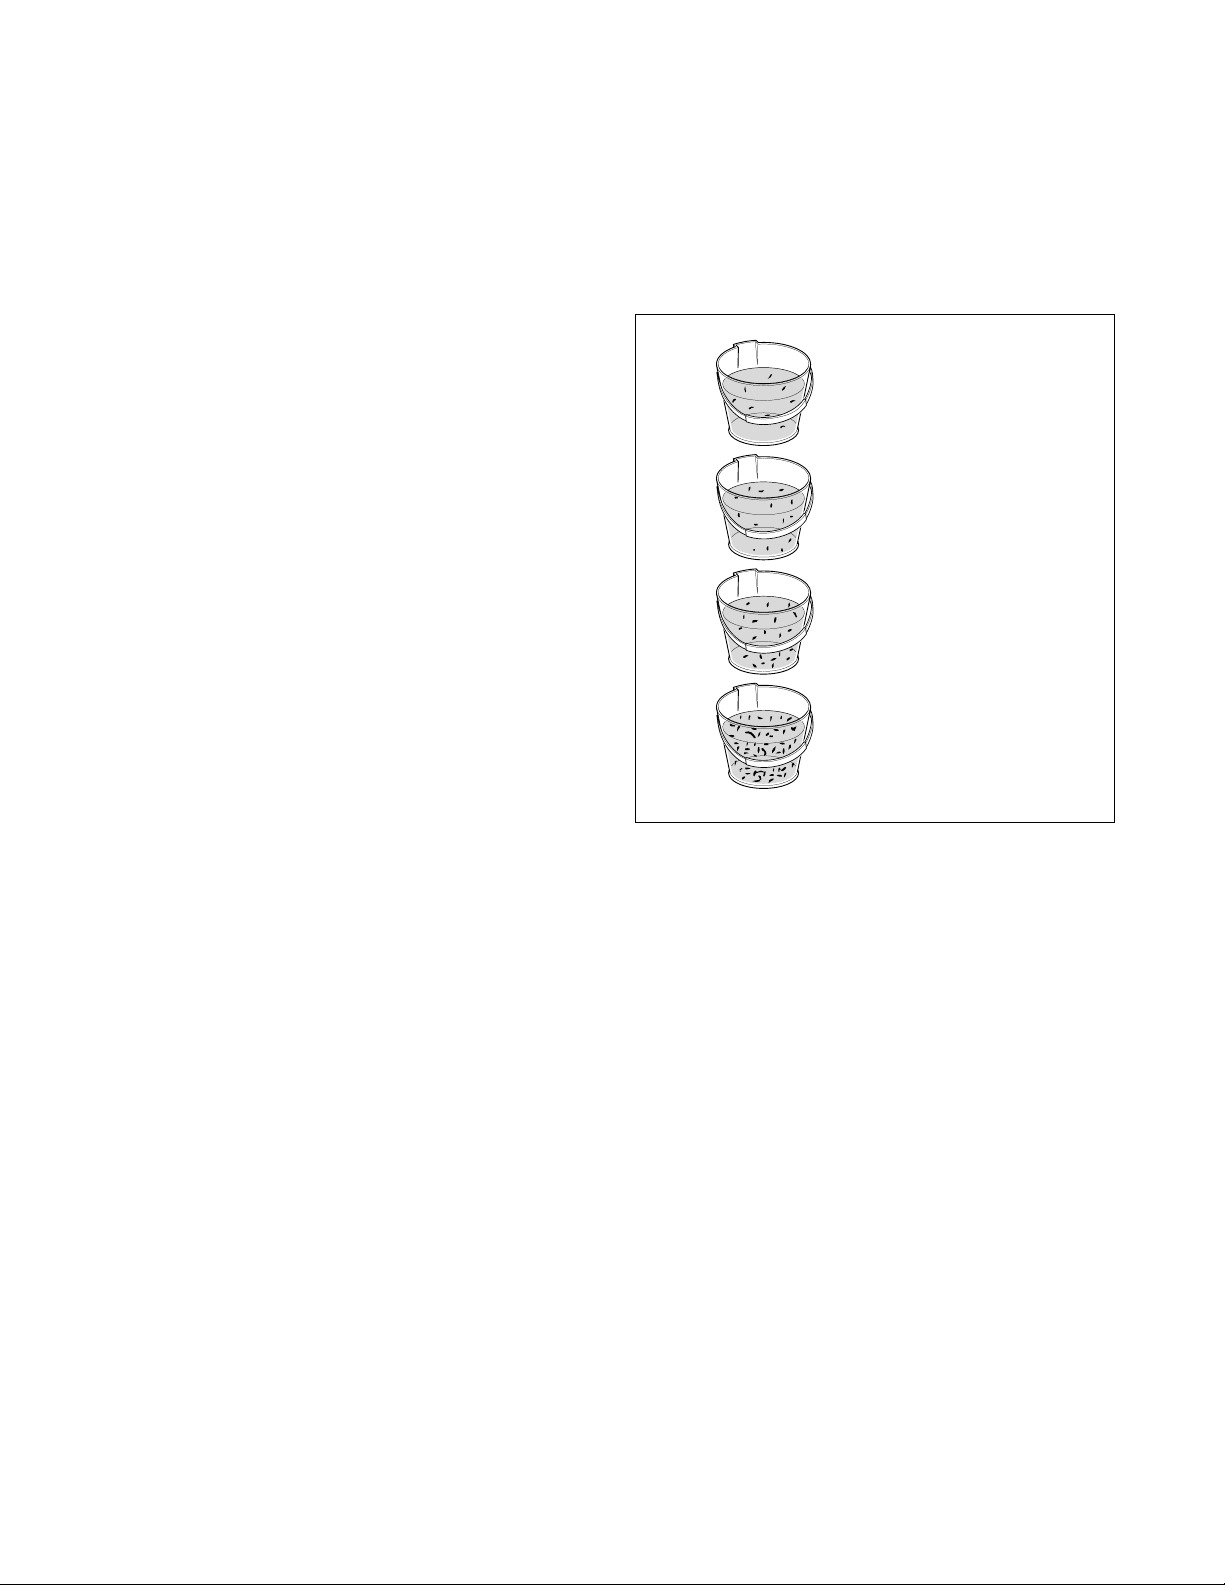
Water Hardness
SOFT WATER
0 to 10 milligrams per litre
MODERATELY HARD WATER
300 milligrams per litre
HARD WATER
500 milligrams per litre
VERY HARD WATER
Over 500 milligrams per litre
W120I
Figure 4
Water hardness is measured in grains per gallon
(G.P.G.) or parts per million (P.P.M.). Hard water will
not remove soil as well as soft water and can result in
grey, dingy laundry. To get clothes clean in hard water,
use more detergent but avoid oversudsing. Do not use
soap.
Hard Water May Be Softened By:
1. A mechanical water softener installed in your
home.
2. The use of a packaged non-precipitating water
conditioner.
Soft Water
Water should be soft enough to allow soaps and
detergents to remove soil effectively. Clothes will be
whiter and brighter when washed and rinsed in soft
water.
10
© Copyright, Alliance Laundry Systems LLC – DO NOT COPY or TRANSMIT
802726
Page 13

Washer Use and Care
Iron
If iron is present in the water, the clothes may become
an all-over yellow or they may be stained with brown
or orange spots or streaks. Iron is not always visible in
the water.
Solutions to Iron Problems
The installation of a water softener will remove small
amounts of iron from the water supply. The
installation of an iron filter may be necessary for more
severe cases. If the iron comes from the pipes, it may
be sufficient just to let the water run into the empty
washer for about one minute. This may help to clear
the pipes. Spin this water out of the wash drum before
starting the wash.
If iron comes from the water heater, drain the heater
occasionally to remove the rust.
Iron with Chlorine Bleach
The use of chlorine bleach with water that contains
iron will make the rust discolouration worse. Use an
“all fabric” bleach.
Energy
You can save energy when washing by following a few
guidelines:
1. Heating water accounts for the greatest energy
expense when washing. Save on heating water by
using cold rinses.
2. Wash full loads, but do not overload.
802726
© Copyright, Alliance Laundry Systems LLC – DO NOT COPY or TRANSMIT
11
Page 14

Washer Use and Care
Washing Special Items
NOTE: Always follow manufacturer’s care label
instructions.
Bedding ● Warm wash and warm rinse.
● PERMANENT PRESS cycle.
● Pretreat heavily soiled areas before washing.
● When washing an electric blanket, protect the plug by stitching the edge of the
blanket over the plug. Only dry in the dryer if manufacturer says it can be done.
Nappies
Draperies, Curtains,
Slip Covers
Pillows (Feather and Down)
Rugs
Slips and Nightgowns
● Rinse out nappies immediately in cold water and soak in a nappies pail with a small
amount of detergent or enzyme presoak. Soak before washing.
● Limit wash load to two dozen nappies.
● Recommend an all-purpose, low-sudsing detergent.
● Shake to remove dust. Remove hooks and close zippers.
● Do not wash sun-damaged draperies and curtains. They will not withstand washing.
● Use warm water.
● Wash curtains frequently. They can be weakened from soil, fumes, dust and the sun.
● Fibreglass curtains need gentle care. Read care label to see if washable. Some
fibreglass curtains should be hand washed.
● Do not wash pillows unless they can be dried in the dryer. They may mildew if not
dried completely.
● Use warm wash and low-sudsing detergent.
● Shake before washing. Do not use hot water on rubber-backed rugs.
● Wash two or three rugs to balance the washer.
● Using fabric softener will help eliminate static.
● Wash often using all-purpose detergent, warm or hot water and cold rinse on the
PERMANENT PRESS cycle.
● To keep nylons and polyesters white, wash only with whites and use chlorine bleach
occasionally.
● Use fabric softener to remove static electricity.
Small Items
● Wash small items such as baby socks in a mesh garment bag.
Common Washer Sounds
Sounds Cause
Accelerating This sound is heard during the spin portion of every cycle.
Tap pi ng These sharp sounds may come from metal fasteners, zippers, belt buckles or coins hitting
the wash drum or door glass.
Thumping Washer may be out of balance. Washer is designed to balance the load. If the washer is
severely unbalanced, turn cycle selector knob to OFF and redistribute the load.
Rumbling Washer may not be level. Stop washer and adjust leveling legs. Refer to INSTALLATION
INSTRUCTIONS for details.
12
© Copyright, Alliance Laundry Systems LLC – DO NOT COPY or TRANSMIT
802726
Page 15

Washer Use and Care
Washing Concerns
on them, use proper washing practices at all times. If
you notice that your clothes are not as bright as they
To keep clothes looking white or bright and to prevent
a gradual build-up of soil or water hardness minerals
Problem Cause Solution
Grey or Dingy
Clothes
Yellowed Clothes Unremoved Soil Skin soil is hard to remove. Check hem edge of sheets and
Too Little or Too Much Detergent Add recommended amount of low-sudsing detergent to
Improper Sorting Wash whites separately. Separate light from heavily soiled
Water Not Hot Enough White clothes will stay whiter with hot wash water. Increase
Clothes Stained from Iron in the
Water
should be, take corrective measures immediately.
dispenser drawer before loading clothes. Mild detergents are
not suitable for average soil.
items. Clothes can pick up soil from dirty wash water.
temperature.
pillowcases, bottom end of t-shirts, etc. If this portion is white
and centre is yellow, the fabric contains unremoved soil. Use
sufficient detergent and a hot wash. Chlorine bleach or
powdered bleach may be needed.
To test for an iron stain, use a rust remover that is
recommended for use with washing machines on a portion of
the garment. Follow bottle directions for larger items.
Older Clothes Some white fabrics turn yellow with age and cannot be
whitened.
Clothes Tearing or
Damaged
Improper Use of Chlorine Bleach No correction for bleach damaged clothes. Always keep level
at or below maximum in bleach dispenser compartment.
Insufficient Precare Fasten all hooks and zippers. Mend tears. Remove objects
from pockets.
Overloaded Machine Load less laundry into washtub. Wash small items in a wash
garment bag.
Excessive Lint Improper Sorting Fabrics which shed lint should not be washed with fabrics
that receive lint.
Insufficient Detergent Use enough detergent so lint remains suspended in water and
flushed out. Do not oversuds the water.
Mixing Fabric Types Knits and permanent press attract lint. Wash these only with
similar items. Use fabric softener in dispenser drawer.
802726
© Copyright, Alliance Laundry Systems LLC – DO NOT COPY or TRANSMIT
13
Page 16

Washer Use and Care
Laundry Tips
Laundry Aids Use Comments
Pretreat
Products
Detergents/Soaps
Bleaches
Fabric Softeners
● Use a pretreating agent and soak overnight to remove
stains and soils.
● Always follow manufacturer’s instructions with any
pretreatment product.
● Use low-sudsing detergent (recommended for high
efficiency or front loading washers) in your washer.
● When using detergents made for topload washers, use
1/2 of the recommended amount to prevent
oversudsing. Using these detergents may decrease
cleaning performance.
● Use to remove certain stains, disinfect, and keep
clothes white.
● Do not use powdered bleach in the bleach dispenser
compartments. Powdered bleach can be used in the
detergent compartment only.
● Use liquid bleach in the proper dispenser compartment
only. Do not add bleach to the wash load.
● Follow directions on care label of garment.
● Do not use bleach as a substitute for detergent.
● Use to soften clothes and remove static electricity
from permanent press knits and other fabrics of
manufactured fibres.
● Add to the fabric softener dispenser compartment.
Follow bottle directions carefully.
● Do not use a pretreating agent with
chlorine bleach.
● Do not use pretreaters around the
washer or dryer control panel.
They may harm the finish or panel
markings.
● Soap and powdered detergents will
not give good washing results in
hard water. Soap in hard water will
form sticky deposits.
● We do not recommend the use of
powdered soap when washing in
cold water.
● Always measure the bleach. Never
exceed maximum level on bleach
dispenser.
● Never use chlorine bleach and
ammonia in the same wash cycle.
● Add powdered bleach along with
the detergent.
● Do not add fabric softener directly
to load. Use fabric softener
dispenser.
● Do not mix with detergent or
bleach.
● Do not fill past maximum level on
dispenser compartment.
Water
Conditioners
Non-precipitating
Type
Precipitating Type
14
● These products soften water by tying up the hardness
minerals and are recommended if using soap when
water is over three grains hard.
● These products settle out hardness minerals by
converting them into particles that will not dissolve in
the water.
© Copyright, Alliance Laundry Systems LLC – DO NOT COPY or TRANSMIT
● Use water conditioner when
necessary.
802726
Page 17

Washer Use and Care
Special Care
Starching
We do not recommend starching in this washer.
Knits
A variety of knits are used for many types of clothing
and household furnishings. Many knits are machine
washable, some are hand washable, and some must be
dry-cleaned. When buying, make sure the garment has
a care label with care instructions. These directions
must be followed. Some knits are stretched during
their manufacture and may shrink or relax when
exposed to water.
Cotton Knits
Unless the label indicates that it is preshrunk, cotton
knits will probably shrink to some degree. Overdrying
contributes to shrinkage of cotton knits. Wash water
should be hot or warm, suitable for colour and soil.
The rinse water should be cold.
Rayon Knits
Rayon stretches and shrinks easily. Treat as a delicate
fabric and wash gently.
Synthetic Fibre Knits
Knits made from synthetic fibres or blends containing
a high percentage of synthetics will generally keep
their shape. When buying, make sure the trimmings
(including belts) are machine washable, seams are not
puckered, and zippers and trimmings are well
fastened.
Knits of Manufactured Fibres
In general, follow the rules for permanent press fabrics
as they tend to have the same characteristics. Set
machine to PERMANENT PRESS cycle. Set the wash
water warm, or suitable for colour and soil. Rinse
water should be cold. Do not wash with lint-shedding
fabrics. Separate items for colour, washing whites
separately.
Sweaters of Manufactured Fibres
Follow directions for comparable knits. Button
sweaters and turn inside out. The ribbon behind the
buttons and button holes may shrink. Stretch to shape
after washing. Orlon sweaters may stretch. Avoid
pulling them when wet. Dry items in dryer.
Woollens
The Delicate cycle on your Kleenmaid is specially
designed for machine washable woollens. Follow
these guidelines for woollens.
● Check the care label on all garments – follow its
instructions. Never wash woollens in your
machine if they don’t have a MACHINE
WASHABLE label.
● Select the DELICATE cycle, set water level to
LARGE and WASH/RINSE temperature to
WARM/WARM. Don’t overload – woollens (in
particular) need freedom to tumble in plenty of
water.
● Choose a mild detergent recommended for
washing wool.
● Dry woollens by lying them flat on a towel. Ease
them back into original shape and size while still
wet. Avoid direct sunlight.
Delicates
The Kleenmaid Delicate cycle pauses frequently to
avoid tangling fine and delicate garments.
Nonetheless, it is recommended that you take the extra
care of placing your most delicate items (e.g. lace)
inside a washing bag.
Permanent Press
Permanent or durable press garments and household
items will usually not need pressing when washed and
dried properly. However, some will be more wrinkle
resistant than others.
The care needed for permanent press is a little
different than for cottons. Permanent press garments
will soften or become pliable when heated. This
softening in warm or hot wash water will allow wear
wrinkles to be removed. This will also cause the fabric
to wrinkle if it is crushed, squeezed or spun when hot.
Permanent press cycles of washers, when washer
controls are properly set, will cool the clothes before
the wash spin to avoid wrinkling. Because the clothes
soften when heated, it is important to remove them
from the washer as soon as tumbling stops.
802726
© Copyright, Alliance Laundry Systems LLC – DO NOT COPY or TRANSMIT
15
Page 18

Washer Use and Care
How to Wash Permanent Press
1. Sort loads correctly. Refer to Before Washing
section.
2. Do not wash with lint-shedding loads. Permanent
press attracts lint in the wash water.
3. Pretreat grease stains and oily areas. This is
especially important for shirt collars and cuffs.
Rub liquid detergent or a paste of detergent into
the area.
4. Use the PERMANENT PRESS cycle, hot or
warm water, cold rinse, and sufficient detergent.
5. Use fabric softener in the dispenser. This will
reduce the static electricity which attracts lint and
makes garments cling.
To Dry Permanent Press
For best results, permanent press should be dried in the
dryer. Refer to garment care labels. Ironing may be
necessary. Use low heat setting on iron or steam
setting on a steam iron.
Stain Removal
Many soils will not become stains if treated promptly.
Older stains may be difficult or impossible to remove.
Hot water will set some stains, particularly proteinbased stains. Use cold or warm water on these before
washing in hot water.
WARNING
Never put highly flammable substances like
gasoline, kerosene, waxes, cooking oils,
dry-cleaning solvents, etc. into a washer or
dryer. Never put articles that have been
cleaned with such substances into a washer
or dryer. Failure to comply with these
warnings could result in a fire, explosion,
and/or serious burns or death. All items with
these substances on them should be
thoroughly hand-washed with a detergent
so that no trace of the flammable
substances remains. The articles can then
be machine washed and/or dried.
When using any kind of a dry-cleaning fluid,
follow the manufacturer's
recommendations. The fumes should never
be inhaled. Use in a well ventilated room
away from sparks and flames. Air dry before
washing or drying. Dry-cleaning fluid may
cause a “ring” to be formed on some
permanent press fabrics. This will not wash
out. To remove, clean the garment in a coinoperated dry-cleaning unit, or by a
professional dry-cleaner.
W024E
Stain Treatment
Adhesive Tape Place face down on paper towels and sponge with a dry-cleaning solvent (refer to
WARNING above). Launder.
Airplane Glue Place face down on paper towels and sponge with fingernail polish remover until stain
dissolves. Launder.
Alcoholic Beverages Sponge stain immediately with cold water or soak stain 30 minutes in cold water.
Apply detergent to any trace of stain while still wet. If safe for the fabric, launder in
hot water using chlorine bleach.
Blood Treat stain immediately. Soak 30 minutes or more in cold water. Rub detergent into
stain. If stain persists, place a small amount of household ammonia on the stain and
rub again with detergent. If safe for fabric, launder in hot water and chlorine bleach if
traces of the stain persist.
16
© Copyright, Alliance Laundry Systems LLC – DO NOT COPY or TRANSMIT
802726
Page 19

Washer Use and Care
Stain Treatment
Candle Wax Rub with ice and scrape off excess wax. Place stain between paper towels and press
with warm iron. Then place stain face down on paper towels and sponge with drycleaning solvent (refer to WARNING on previous page). Let dry, launder. If traces of
colour remain, launder with a commercial colour remover (Rit, Putnam, etc.) or if
safe for the fabric, hot water and chlorine bleach.
Catsup, Tomato-based
Products
Scrape off excess. Soak in cold water 30 minutes. Rub detergent into the stain and if
safe for fabric, launder in hot water and chlorine bleach.
Chewing Gum Rub with ice and scrape off excess gum. Place face down on paper towels and sponge
with a dry-cleaning solvent.
Cocoa or Chocolate Soak in cold water. Rub detergent into stain, rinse. If greasy stain remains, sponge
face down on paper towels with a dry-cleaning solvent. If traces of the stain remain,
launder in hot water and chlorine bleach (if safe for fabric).
Coffee, Tea Soak in cold water. Rub detergent into stain, rinse. If traces of the stain remain,
launder in hot water with chlorine bleach (if safe for fabric).
Crayon Treat the same as candle wax or wash in hot water (if safe for fabric) using soap (not
a detergent) and 1-2 cups baking soda. If stains remain, professional dry-cleaning
may be necessary.
Deodorants and
Anti-perspirants
Some of these products contain substances that can change the colour of some dyes.
The colour can sometimes be restored if the area is sponged with ammonia then
rinsed. To remove stains, apply white vinegar. Rub, rinse. If stains remain, rub
detergent into stain and launder with hot water and chlorine bleach (if safe for fabric).
Dye Treat with a commercial dye remover (Rit, Putnam, etc.) or if safe for fabric, bleach
with chlorine bleach.
Egg If dried, scrape off excess. Soak in cold water. Rub detergent into damp stain and if
safe for fabric, launder in hot water and chlorine bleach.
Fabric Softener Dampen stain and rub with bar soap. Launder as usual.
Fruit Juices Soak in cold water. Launder in hot water with chlorine bleach (if safe for fabric).
Grease, Oil Place face down on paper towel and sponge with dry-cleaning fluid (refer to
WARNING on previous page). Dampen stain with water and rub with bar soap or
detergent. Launder in hot water (if safe for fabric).
Ink Saturate the stain with hair spray or place the fabric face down on paper towel and
sponge with cleaning fluid or rubbing alcohol (refer to WARNING on previous page).
Rinse. If traces of the stain remain, rub detergent into the dampened stain and launder.
Some inks may be impossible to remove.
Iodine Rinse from the back side of the stain with cold water. Then soak in a commercial
colour remover (Rit, Putnam, etc.) or rub in a paste of water and starch. Let stand for
15-30 minutes and launder.
Lipstick Place on paper towel and sponge with cleaning fluid (refer to WARNING on previous
page). Rinse. Rub dampened stain with bar soap and launder.
Mildew Treat promptly. Mildew damages fabric and sometimes cannot be removed. Launder
with chlorine bleach. For items that cannot be washed with chlorine bleach, soak in
an all-fabric bleach, then launder.
802726
© Copyright, Alliance Laundry Systems LLC – DO NOT COPY or TRANSMIT
17
Page 20

Washer Use and Care
Stain Treatment
Milk and Milk Products Soak in cold water. Launder in hot water and chlorine bleach (if safe for fabric).
Sponge with a cleaning fluid (refer to WARNING on page 14), if a stain is noticeable.
Rewash.
Miscellaneous
Eye and Face Make-up,
Tar, Gravy, Felt-tip
Marker, Pitch,
Typewriter Ribbon
Place stain side down on paper towel and sponge with dry-cleaning fluid (refer to
WARNING on page 14). Apply dry spotter (one part mineral water and eight parts
dry-cleaning solvent). Tap on the stain with a spoon to loosen it. Keep stain moist
with dry spotter and blot occasionally with toweling. Continue until stain is removed.
Allow to dry completely, rinse in warm water, and launder as usual.
Mud Scrape off excess. Soak in solution of one quart warm water, half teaspoon liquid
hand dishwashing detergent and one tablespoon vinegar for 15 minutes. Rinse.
Launder in hot or warm water with enzyme product.
Mustard Rub dampened stain with bar soap. Launder in hot water and chlorine bleach (if safe
for fabric).
Nail Polish Place face down on paper towel. Sponge with nail polish remover (non-oily) until
stain disappears. Launder. Do not use nail polish remover on Acetate or Arnel fabrics.
Paint Water-based – Treat by rinsing fabric in cool water while stains are still wet. Then
launder. Dried paint cannot be removed.
Oil-based – Pretreat with a solvent recommended on the paint container. If not
available, use mineral spirits. Rinse. Pretreat with a stain remover or detergent, rinse
and launder.
Perspiration Rub dampened stain with detergent. Launder in hot water and chlorine bleach (if safe
for fabric). If the fabric is discoloured, you can try to restore it by treating fresh stains
with ammonia or old stains with vinegar.
Rust Apply a commercial rust remover (Whink, Rit, RoVer, etc.). Follow manufacturer’s
directions and launder as usual.
Scorching Launder using hot water and chlorine bleach (if safe for fabric). Fabrics can be
damaged by being scorched. If this has happened, you may not be able to remove the
marks.
Shoe Polish Rub dampened stain with detergent. Launder in hot water and chlorine bleach (if safe
for fabric).
Soft Drinks Rinse stain with cold water immediately. Launder in warm water and chlorine bleach
(if safe for fabric).
Tobacco Dampen stain and rub with bar soap. Rinse. If necessary, soak in an all-fabric bleach
solution. If stain remains, launder with chlorine bleach (if safe for fabric).
Urine Rinse with cold water. Soak with an enzyme soaking product. Launder in hot water
with chlorine bleach (if safe for fabric). If the colour of the fabric has changed,
sponging the area with ammonia may restore the colour.
Vo mi t Soak in a solution of one quart warm water, half teaspoon liquid hand dishwashing
detergent, and one tablespoon ammonia (if safe for fabric). Soak 15 minutes. Use
sponge to loosen stain. Blot with toweling. Launder in hot water (if safe for fabric)
with an enzyme product.
18
© Copyright, Alliance Laundry Systems LLC – DO NOT COPY or TRANSMIT
802726
Page 21

Washer Operation
Figure 5
DRY2076N
DRY2076N
Determine Proper Cycle
WARNING
To reduce the risk of fire, electric shock,
serious injury or death to persons, read the
IMPORTANT SAFETY INSTRUCTIONS
before operating your washer.
W484
NOTE: Always follow manufacturer’s care labels.
NOTE: The cycle times may be longer if a
BOOSTED HOT wash is selected.
REGULAR Cycle
Use for sturdy items, like play or work clothes, towels,
T-shirts, etc. This cycle includes a wash tumble for 24
minutes. The cycle has two rinses with an optional
third rinse. The final spin starts with a two-minute
medium spin and finishes with a three-minute high
spin. The total cycle time is approximately 44 minutes
without the extra rinse.
PERMANENT PRESS Cycle
DELICATE Cycle
Wash delicate items usually washed by hand on this
cycle. The cycle includes a wash tumble of 12
minutes. The cycle has two rinses with an optional
third rinse. The final spin extracts moisture at a low
spin for four minutes. The total cycle time is
approximately 30 minutes without the extra rinse.
RINSE & SPIN Cycle
Use to quickly rinse items. The rinse is followed by a
high spin. The total cycle time is approximately
12 minutes.
NOTE: In some cases, the RINSE & SPIN cycle
may not be enough to completely remove soap. In
these cases, an additional RINSE & SPIN setting
may be necessary.
SPIN ONLY Cycle
Use to extract water from wet items. This cycle uses
the high spin. The total cycle time is approximately
10 minutes.
Use for permanent press items and synthetics. This cycle
includes a wash tumble of 20 minutes. The cycle has
two rinses with an optional third rinse. The final spin
starts with a three-minute medium spin and finishes
with a two-minute high spin. The total cycle time is
approximately 40 minutes without the extra rinse.
802726
© Copyright, Alliance Laundry Systems LLC – DO NOT COPY or TRANSMIT
19
Page 22

Washer Operation
To Wash Clothes
IMPORTANT: Before using your new washer,
make sure the washer cord is plugged into a
240 Volt electrical outlet that has the proper
earthing and polarity. Make sure the washer hoses
are connected to the hot and cold water faucets,
and that the faucets are turned on. Be sure the
drain hose is not kinked and is inserted into a
drain. Refer to the INSTALLATION
INSTRUCTIONS for details of proper washer
installation.
IMPORTANT: Prior to first wash, use an allpurpose cleaner, or a detergent and water solution,
and a damp cloth to remove shipping dust from
inside of washtub.
IMPORTANT: Remove all sharp objects from
laundry to avoid tears and rips to items during
normal machine operation.
1. Get the clothes ready for washing. Empty pockets
and cuffs. Sort items into separate loads. Pretreat
stains and heavily soiled areas.
3. Load clothes into wash drum (8.1 kg maximum
dry clothes load). Refer to section on Load Sizes.
SWD874N
Figure 8
4. Close the loading door tightly. The washer will
not operate with the loading door open.
D305I
Figure 6
2. Measure and add low sudsing detergent, fabric
softener, and bleach to the dispenser drawer.
Refer to section on Using Your Dispenser
Drawer.
SWD873N
Figure 7
IMPORTANT: If using detergents made for
topload washers, avoid oversudsing by using only
1/4 cup regular detergent (1/2 of the recommended
amount).
SWD875N
Figure 9
WARNING
To reduce the risk of serious injury, do not
bypass the loading door switch by
permitting the washer to tumble or spin with
the loading door open.
W095
5. Set WASH/RINSE temperatures.
DRY2069N
Figure 10
20
© Copyright, Alliance Laundry Systems LLC – DO NOT COPY or TRANSMIT
802726
Page 23

Washer Operation
There are five WASH/RINSE temperatures available –
BOOSTED HOT WASH/COLD RINSE, HOT WASH/
COLD RINSE, WARM WASH/COLD RINSE,
WARM WASH/WARM RINSE, and COLD WASH/
COLD RINSE.
The ENERGY SAVER settings, marked with a dot (•),
show which temperature settings will use the least
energy.
Refer to the Available Water Temperatures section for
the temperature that works best for your garments.
WARNING
Window may be hot in the Boosted Hot and
Hot wash cycles.
W325
6. Select EXTRA RINSE if desired.
8. Press and hold the START button for two seconds
to start the washer. The DOOR light will come on
after a short delay, water fill will begin, and wash
drum will begin tumbling.
NOTE: Washer door MUST be closed tightly to
start washer.
If items need to be added or removed after a cycle has
started, turn the Cycle Selector knob to the OFF
position. Wait until the DOOR light goes off
(approximately 45 seconds after cycle has been
stopped), open door, add or remove items, and start the
cycle again.
There is no agitator on this washer. Instead, the
clothing gently tumbles through the water. The wash
action consists of a period of tumbling in one
direction, a brief pause, and then a reverse tumble in
the opposite direction. The pauses are part of the
tumble action and add to the uniqueness of the washer.
They are part of the cycle.
NOTE: There will be extended pauses when
BOOSTED HOT wash is selected because the
water is being heated.
DRY2070N
Figure 11
The extra rinse control is useful for detergent
sensitive skin. By pressing the EXTRA RINSE to
ON, the REGULAR, PERMANENT PRESS,
and DELICATE cycles will each provide an
additional rinse. If the extra rinse is desired, press
the switch to ON. When the extra rinse is not
wanted, OFF should be selected.
7. Select the cycle according to the type of fabric
being washed. Use the indicator dot on the knob
as a guide.
To Change Cycles
If the selected cycle is not the correct cycle for the
fabric being washed, you may change the cycle
selection at any time until the first wash fill is
complete. Once the washer has filled for the first part
of the cycle (the wash portion), the current cycle must
be aborted and a new cycle must be started.
To change the cycle before the first fill is complete:
Change the cycle selected on the cycle selector switch.
To change the cycle after the first fill is complete
and before the first wash is complete:
1. Abort the current cycle by changing the cycle
selector switch to the OFF position.
2. Set the WASH/RINSE temperature selector.
3. Set cycle selector.
4. Turn on extra rinse, if desired.
5. Press and hold the START button for two
seconds.
802726
DRY2071N
Figure 12
© Copyright, Alliance Laundry Systems LLC – DO NOT COPY or TRANSMIT
21
Page 24

Washer Operation
To change the cycle after the first wash is complete:
NOTE: This should only be done if the speed of the
final extract is incorrect for the fabric being
washed. For example, if washing delicate items on
the REGULAR cycle, the high speed extract may
damage the fabric. If washing towels or jeans on
the DELICATE cycle, the lower speed extract
would increase drying time.
1. Abort the current cycle by changing the cycle
selector switch to the OFF position.
2. Restart the cycle from the beginning. Refer to the
To Wash Clothes section.
To Pump Out Water After Aborting Cycle
Run a SPIN ONLY cycle. This cycle will perform a
high speed extract operation that will pump all of the
water out of the washer.
DOOR Light
When the washer is started, the DOOR light will come
on after a short delay. The light will turn off
approximately 45 seconds after the cycle is complete.
RINSE Light
This light comes on for the rinse portion of each cycle.
FINAL SPIN Light
This light comes on while the wash load is in the final
spin of the cycle.
HEATER Light (Red Light)
This light comes on during the BOOSTED HOT
setting only. While the washer is heating, the HEATER
light will turn on.
Out of Balance Load
If at the end of the cycle, the load is dripping wet, the
washer has limited the spin speed. This is to prevent
damage to the unit if there is a severely unbalanced
load.
If this condition occurs, redistribute the load manually
and run a RINSE & SPIN cycle.
If the condition persists, consider steps discussed in
the section Loading the Washer.
WASH Light
This light comes on during the wash part of each
cycle.
22
© Copyright, Alliance Laundry Systems LLC – DO NOT COPY or TRANSMIT
802726
Page 25

Available Washing Cycles
The cycles of your washer include several different
settings. Refer to Tabl e 1 for what can be expected
during the cycles that you select.
Regular Cycle
Activity Water Temperatures
Was h Fill & Tumble Boosted Hot, Hot, Warm or Cold
Spin Pulse Spin
Rinse Fill & Tumble Cold
Spin Pulse Spin
Extra Rinse (Optional) Fill & Tumble Cold
Spin Pulse Spin
Final Rinse Fill & Tumble Warm or Cold
Spin Pulse Spin
Spin Medium Spin (650 rpm)
Final Spin High Spin (1000 rpm)
Washer Operation
Fluff Tumble
Permanent Press Cycle
Activity Water Temperatures
Was h Fill & Tumble Boosted Hot, Hot, Warm or Cold
Spin Pulse Spin
Rinse Fill & Tumble Cold
Spin Pulse Spin
Extra Rinse (Optional) Fill & Tumble Cold
Spin Pulse Spin
Final Rinse Fill & Tumble Warm or Cold
Spin Pulse Spin
Spin Medium Spin (650 rpm)
Final Spin High Spin (1000 rpm)
Fluff Tumble
Table 1 (Continued)
802726
© Copyright, Alliance Laundry Systems LLC – DO NOT COPY or TRANSMIT
23
Page 26

Washer Operation
Table 1 (Continued)
Delicate Cycle
Activity Water Temperatures
Was h Fill & Tumble Boosted Hot, Hot, Warm or Cold
Spin Pulse Spin
Rinse Fill & Tumble Cold
Spin Pulse Spin
Extra Rinse (Optional) Fill & Tumble Cold
Spin Pulse Spin
Final Rinse Fill & Tumble Warm or Cold
Spin Pulse Spin
Final Spin Low Spin (500 rpm)
Fluff Tumble
Rinse & Spin Cycle
Activity Water Temperatures
Rinse Fill & Tumble Warm or Cold
Spin Pulse Spin
Spin Medium Spin (650 rpm)
Final Spin High Spin (1000 rpm)
Fluff Tumble
NOTE: The Rinse setting will give a cold rinse when the optional Extra Rinse is selected.
24
© Copyright, Alliance Laundry Systems LLC – DO NOT COPY or TRANSMIT
802726
Page 27

Washer Operation
Using Your Dispenser Drawer
3
1
2
SWD876N
1 Detergent
2 Bleach
3 Fabric Softener
Figure 13
Detergent Compartment
The detergent compartment is located on the right side
of the dispenser drawer. Refer to compartment 1 of
Figure 13.
Use low sudsing powdered or liquid detergents that are
recommended for use with high efficiency or front
loading washers. Powdered bleach can also be used in
the dispenser along with the detergent.
NOTE: If using detergents made for topload
washers, avoid oversudsing by using 1/2 of the
recommended amount.
When adding detergent, use only the recommended
amount. Adding too much detergent or using regular
sudsing detergent could result in an oversudsing
condition, which would require additional rinsing with
cold water. Use care when adding detergent so as not
to spill into the other compartments. Detergent mixed
with fabric softener can make the softener gummy.
NOTE: The normal level of suds should be below
center of the door.
Liquid Bleach Compartment
The bleach compartment is located in the left front
corner of the dispenser drawer. Refer to compartment 2
of Figure 13. It has been designed to prevent the
dispensing of undiluted bleach onto the clothes load.
Use liquid bleach in the dispenser. Powdered bleach
must not be used in this compartment. Powdered
bleach can be used in the detergent compartment
only and can be added along with the detergent.
DO NOT use more than the maximum level
indicated for the bleach compartment. Adding more
than the maximum amount could result in early
dispensing of the product and possible damage to
fabrics.
Carefully pour recommended amount of bleach into
the compartment before starting wash load.
Be careful not to spill undiluted bleach. It is a strong
chemical and can damage some fabrics if it is not
properly diluted. Follow bleach manufacturer’s label
for proper use.
Carefully close dispenser door. Do not allow bleach to
spill into other compartments.
Fabric Softener Compartment
The fabric softener compartment is located in the
left rear corner of the dispenser drawer. Refer to
compartment 3 of Figure 13.
Use no more than the maximum level indicated for the
fabric softener compartment. Adding more than the
maximum amount could result in early dispensing of
the product and possible staining of fabrics.
Add fabric softener to compartment before beginning
washload. The fabric softener will be dispensed during
the last rinse cycle.
Carefully close dispenser door. Do not allow softener
to spill into other compartments.
To Clean the Dispenser
Remove the dispenser drawer from the washer by
firmly pulling the drawer straight out, past the stop
position. Rinse dispenser drawer in hot water. A small
brush may be used to thoroughly clean out any
residue. After cleaning, reinstall the dispenser drawer.
802726
From time to time, water may be discovered in the
dispenser drawer. This condition is normal. To remove
the water, simply remove the dispenser drawer and
pour out the water.
© Copyright, Alliance Laundry Systems LLC – DO NOT COPY or TRANSMIT
25
Page 28

Washer Operation
Available Water Temperatures
The Boosted Hot Wash will boost the water
temperature in the tub to 60°C (140°F) and is useful
for improved cleaning of some loads. The red
HEATING light will light up when heating. The cycle
will not advance until 60°C (140°F) has been reached.
The time needed to reach this temperature may add an
additional 30 to 60 minutes to the cycle time. Hot
water is the most effective for cleaning but it is not
recommended for all fabric types (read labels).
NOTE: The Boosted Hot Wash can be turned off by
changing the cycle selector knob to OFF and
restarting a cycle with a different water
temperature setting.
The Hot Wash temperature is determined by the actual
temperature of the hot water supplied to the washer.
The heater element will not be on.
Boosted Hot
Approxmiately 60°C (140°F)
The Warm Wash is useful for providing a thorough
cleaning on lightly soiled clothing without damaging
fabric or adding to colour fading.
The Warm Rinse is useful in preventing wrinkles on
certain fabrics. Check labels for fabric manufacturer’s
recommendations.
The Cold Wash is ideal for delicate items. Although its
cleaning abilities are not as great as with hot or warm
water, it is useful for colours that bleed easily and for
sensitive fabrics.
The Cold Rinse is optional in every cycle and is the
most beneficial for fabrics. Cold rinses reduce
wrinkling and colour fading. In addition, cold
rinses will save money and energy.
NOTE: Always follow manufacturer’s care labels.
● Sturdy whites and colourfast items.
● Work clothes.
● Heavily soiled items.
● Nappies.
Hot
Approximately 49°C (120°F)
(or as determined by outside hot water supply)
Warm
Approximately 38°C (100°F)
Cold
Approximately 18°C (65°F)
● Sturdy whites and colourfast items.
● Work clothes.
● Soiled items.
● Nappies.
● Light and moderately soiled items.
● Non-colourfast or dark colours.
● Permanent press.
● Silks, woolens, nylon, acrylic.
● Rinsing of some items.
● Non-colourfast items.
● Extra sensitive clothing.
● Rinsing of most items.
26
© Copyright, Alliance Laundry Systems LLC – DO NOT COPY or TRANSMIT
802726
Page 29

Dryer Use and Care
Before Drying
Energy Saving Tips
● Make sure the lint filter is always clean.
● Do not overload the dryer.
● Do not overdry items.
● Remove items to be ironed while still damp.
● Large loads of similar fabrics dry the most
efficiently. However, dry permanent press in
smaller loads to prevent wrinkling.
● Use the correct cycle for the type of fabric being
dried.
● Locate your dryer so the exhaust duct is as short
and straight as possible.
● Do not open the door during the drying cycle.
● Plan to do your laundry on low humidity days;
your clothes will dry faster.
● Dry multiple loads of clothes one right after
another so dryer interior does not have to be
reheated for each load.
Helps and Hints
WARNING
To reduce the risk of fire, explosion, serious
injury or death, clothes which have traces of
any flammable substances such as cooking
oil, machine oil, flammable chemicals,
thinner, etc. must not be put into the dryer.
W131
● The necessary suggestions and directions for
installation and proper exhausting are given in
the INSTALLATION INSTRUCTIONS which
are included with the dryer.
● Static electricity may cause garments of synthetic
fibres (as in lingerie) to cling together, especially
if they are overdried. The use of a liquid fabric
softener in the rinse water of the washer, or a
fabric softener sheet in the dryer, will soften
clothes and reduce static electricity.
● Do not wash or dry clothes that shed lint in the
same load with permanent press or knit garments.
● Remove permanent press loads immediately after
dryer stops.
● Follow the CARE LABELS on FLAME
RETARDANT, Scotchgard™, etc., garments for
the proper washing and drying.
802726
© Copyright, Alliance Laundry Systems LLC – DO NOT COPY or TRANSMIT
27
Page 30

Dryer Use and Care
Sort
If you have correctly sorted the items for washing,
they should be properly sorted for drying too.
Separate:
Separate:
Lights
Darks
Lint Shedding
Fabric
Lint Receiving
Fabric
In any kind of drying, lightweight fabrics will dry
faster than heavyweight fabrics. If mixed loads are
dried together (such as sheets and towels), remove the
lighter weight fabrics when they are dry to prevent
overdrying and wrinkling. The best method is to dry
clothes which require the same time and temperature
in the same load.
Load
Do not overload your dryer. If the dryer is overloaded,
it could cause discoloration or permanent heat damage
to the load. There should be space in the dryer for the
clothes to tumble freely. This helps to reduce wrinkles.
Large and small pieces together make up loads which
will tumble well. Permanent press loads should be
smaller to provide room for tumbling. Proper tumbling
allows for fewer wrinkles. Figure 15 and Figure 16
show the ideal loads sizes for fabrics. The average
load will fill the cylinder one third to half full when
wet.
Separate:
No Heat Items
Low Heat Items
High Heat Items
D250IE0A
Figure 14
Towels, flannels, chenille, cottons, rugs, etc., shed lint.
Corduroys, knits (including socks), permanent press,
and synthetics attract lint.
D665I
CYLINDER WITH WET
COTTONS AND LINENS
D665I
Figure 15
D666I
CYLINDER WITH WET
PERMANENT PRESS
D666I
Figure 16
A load can be too small. Just a few small pieces will
not tumble properly. They will take longer to dry and
they may be wrinkled. For small loads, add a couple of
large towels or non lint shedding items to aid in
tumbling.
28
© Copyright, Alliance Laundry Systems LLC – DO NOT COPY or TRANSMIT
802726
Page 31

Dryer Use and Care
Drying Special Items
Type of Load Special Instructions
Bedspreads Choose heat for fabric. Dry one double or two single spreads. Chenille and tufted
spreads will shed lint and should be dried by themselves. New spreads especially, will
contain loose lint. Tumble on NO HEAT setting before washing to remove loose lint.
These spreads may be dried completely.
Blankets
Electric
Synthetic Fibres
Thermal Cotton
Wool
Curtains
Cotton
DELICATE or AIR FLUFF/NO HEAT Fabric Selector settings. If drying items in
dryer is recommended by the manufacturer, dry as for wool. Do not stretch the blanket
because of the wiring. Some electric blankets may have an insulation on the the
thermostats or on the wiring which will not withstand dryer heat. Do not dryer dry
unless the blanket manufacturer says it can be done.
DELICATE or AIR FLUFF/NO HEAT Fabric Selector settings. Some of these
blankets are fluffy and will shed lint. Tumble on AIR FLUFF/NO HEAT Fabric
Selector setting before washing to remove loose lint. Use a gentle wash method, then
dry in dryer until just dry. The lint filter may need to be cleaned during the drying.
AUTOMATIC REGULAR/DELICATE cycle.
Agitation and tumbling contribute to the shrinkage and felting of wool. We cannot
guarantee that wool will not shrink. However, if care is taken and the blanket
manufacturer’s instructions are followed, satisfactory results should be obtained. Wash
by the soak method with as little agitation as possible. After washing, stretch blanket
gently in both directions. Use approximately five dry bath towels and place them
between folds in blanket. This will “cushion” it to lessen the tumbling. Set dryer for
20 minutes on the TIME DRY cycle. Use REGULAR Fabric Selector setting, if it is
available on your dryer. Check blanket when timer reaches 10. Wool blankets must be
removed from the dryer when damp. Stretch gently to shape and finish drying over two
clothes lines or in a flat position.
AUTOMATIC REGULAR/DELICATE or TIME DRY cycles. Remove damp items for
ironing or dry completely, then steam iron.
Fibreglass
Synthetic Fibres
Denim, Corduroy AUTOMATIC REGULAR/DELICATE cycle. Dry completely and remove from dryer
802726
© Copyright, Alliance Laundry Systems LLC – DO NOT COPY or TRANSMIT
DO NOT DRY IN THE DRYER unless recommended by the manufacturer. Fibreglass
may shred. Particles may remain in the dryer and rub off on the next load. This could
irritate the skin. “Beta” fibreglass may be dryer dried if recommended by the
manufacturer.
DELICATE or AIR FLUFF/NO HEAT Fabric Selector settings. Allow room for
tumbling to prevent wrinkling. Delicate or sheer curtains must be dried by themselves
so they will not be snagged by hooks or crushed by other clothes in the load. Some
sheer curtains are heat sensitive. Dry 10 minutes only, plus the cool down period.
Remove from dryer immediately and hang. If the dryer has been heated from a
previous load, AIR FLUFF/NO HEAT Fabric Selector setting may be sufficient.
when seams are slightly wet to minimize shrinkage.
29
Page 32

Dryer Use and Care
Type of Load Special Instructions
Draperies Remove hooks and weights before washing. Choose heat for fabric and allow space in
the dryer for tumbling. Some draperies may be removed when slightly damp and hung
immediately. Lined draperies should be dry cleaned because they have a tendency to
pucker.
Knit Articles
Cottons
Synthetic Fibres
Wool
Lingerie
Cotton
Elastic
Foam Rubber
Spandex
Stretch Fabrics
Synthetic Fibres
Knit fabrics are usually manufactured under tension (stretching). Cotton knits
especially may relax or draw together if every bit of moisture is removed from them. It
is best to take them out of the dryer with a trace of moisture remaining, then stretch to
shape. If they do shrink from overdrying, rewet them and dry properly.
AUTOMATIC REGULAR/DELICATE or TIME DRY cycle. Remove slightly damp to
minimize ironing. Reshape, smooth seams and pockets, etc.
AUTOMATIC REGULAR/DELICATE or AUTOMATIC PERMANENT PRESS/
KNITS cycle. Turn inside out to prevent “pilling” (the rolling up of the fibre ends from
friction). Dry sweaters only with similar things because they tend to attract lint. Make
sure the load is large enough for tumbling. Dry completely and remove from dryer
immediately to minimize wrinkling.
DELICATE or AIR FLUFF/NO HEAT Fabric Selector settings. For wool labeled
“machine washable,” follow manufacturer’s directions. For other wool, use wool
blanket method. Do not dryer dry loosely knit wool or hand knits. Dry these flat and
stretch to shape from a pattern drawn before washing.
AUTOMATIC REGULAR/DELICATE cycle.
Body oils can cause elastic to deteriorate. Wash garments containing elastic frequently.
Elastic in such things as shorts may be dried as for fabric, but avoid overdrying.
Bras, bathing suits, sun suits, etc. DO NOT DRY THESE ITEMS IN THE DRYER
WITH HEAT, FIRE MAY RESULT. AIR FLUFF/NO HEAT Fabric Selector setting
may be used.
Most girdles (control briefs or shapers) today are made from Spandex. Use DELICATE
or AIR FLUFF/NO HEAT Fabric Selector setting. Do not overdry.
Choose heat for the most delicate fibre. These may be dried completely as they will
stretch into shape. Avoid drying with lint-shedding fabrics.
TIME DRY cycle. Use DELICATE Fabric Selector setting. Some sheer fabrics,
especially sheer knits, can be heat sensitive. Dry these until they are just dry (about 10
minutes) and remove from dryer immediately. Sheer fabrics should not be washed and
dried with garments containing hooks or zippers. Man-made fabrics will create static
electricity if overdried. To prevent this, use fabric softener and avoid overdrying.
Mattress Pads The materials in mattress pads is made of either cotton or synthetic fibres. Read the
fibre content label, found on your mattress pad, to determine what type of fibre was
used to manufacture the pad. READ AND CAREFULLY FOLLOW the fabric care
instructions supplied by the mattress pad manufacturer. Some pads made of synthetic
fibres are very heat sensitive. These pads can be flammable if overheated or overdried.
TO AVOID A FIRE HAZARD, DO NOT OVERDRY mattress pads. Remove pads
from the dryer while they are still damp.
30
© Copyright, Alliance Laundry Systems LLC – DO NOT COPY or TRANSMIT
802726
Page 33

Pillows
Dryer Use and Care
Type of Load Special Instructions
Feather and Down-
Filled
Ticking must be strong and seams secure. If in doubt, sew pillow into a case or use a
zippered pillowcase to prevent feathers from coming out. After washing, shake pillow
to fluff feathers. Dry one large or two smaller pillows. Use TIME DRY cycle. Use
DELICATE or REGULAR/PERM PRESS Fabric Selector settings. Shake and
reposition pillows several times during drying. Pillows must be dry in the center to
prevent mildew. Drying may take two hours or longer. Reset dryer timer if necessary.
The odor of wet feathers is not pleasant. However, the odor will disappear once the
pillows dry.
Fibre-Filled (polyester)
Foam Rubber
Follow manufacturer’s directions.
Do not dry in the dryer.
Quilts Choose heat and cycle for fabric. Filling and cover must be completely washable. Old
quilts may be too fragile to machine wash or dry. Quilts filled with cotton may become
lumpy. Quilting should be close together. Remove from dryer slightly damp and stretch
gently to shape. Quilted articles may shrink if overdried.
Rugs
Cotton With Cotton
Backing
Rubber-backed
AUTOMATIC REGULAR/DELICATE or TIME DRY cycles. Dry one large or several
small rugs. For one small rug only, add towels for buffers.
Hot water and heat tend to deteriorate many types of rubber. Some types of rubber-like
materials are flammable under certain conditions. DO NOT DRY FOAM RUBBER
AND RUBBER-LIKE MATERIALS WITH HEAT.
Synthetic Fibres
DELICATE or AIR FLUFF/NO HEAT Fabric Selector settings. Follow manufacturer’s
suggestions. Some of these rugs are heat sensitive and should be removed from the
dryer when damp, or dried with no heat.
Slip Covers Choose heat for fabric. Close zippers. Dry one couch cover, two chair covers or five or
six pillow covers at one time. Remove from dryer when slightly damp. Press pleats if
necessary and replace on furniture immediately. Stretch fabrics and knits should be
dried completely so they will fit snug when replaced on furniture.
Stuffed Animals and Toys Make sure the filling and covering are washable and can be dryer dried. Cotton filling
may become lumpy. Protect glass eyes by covering with a stocking or tie toy into a
pillowcase. Choose heat for most sensitive fibre. Dry enough clothes in the load for
good tumbling. DO NOT DRY TOYS STUFFED WITH FOAM RUBBER OR
KAPOK IN THE DRYER WITH HEAT.
Tennis Shoes DELICATE or AIR FLUFF/NO HEAT Fabric Selector settings. Use a drying rack or
tumble with at least four old bath towels.
802726
© Copyright, Alliance Laundry Systems LLC – DO NOT COPY or TRANSMIT
31
Page 34

Notes
32
© Copyright, Alliance Laundry Systems LLC – DO NOT COPY or TRANSMIT
802726
Page 35

Available Drying Cycles
WARNING
Dryer Operation
SWD740N
Figure 17
The COOL DOWN period at the end of each cycle
provides items a chance to tumble with no heat and
cool down to room temperature. This prevents
wrinkles from setting if items cannot be cared for
immediately.
To reduce the risk of fire, electric shock,
serious injury or death to persons, read the
IMPORTANT SAFETY INSTRUCTIONS
before operating the dryer.
W429
NOTE: Use the automatic cycle for drying items
that can be dried with heat. This cycle
automatically drys loads to the dryness level
selected.
MORE DRY will dry very small loads and some heavy
items, such as blue jeans, but will overdry lightweight
items, such as sheets and shirts. Overdrying can cause
wrinkling, shrinking, excessive lint conditions, and
will use more energy than necessary.
LESS DRY, which uses the least energy, will dry large
loads and lightweight items, such as sheets and shirts,
but might leave other items, such as denim and heavy
bath towels, more damp.
To increase energy savings and to make sure loads are
dried without overdrying, set your loads on LESS DRY.
If items are damp at the end of a cycle, the timer knob
needs to be set closer to the MORE DRY setting the
next time these loads are dried. If items are overdry at
the end of a cycle, the timer knob should be set closer
to COOL DOWN when these loads are dried again.
Remember the settings that work best to get ideal
drying results.
The ENERGY SAVER/DAMP DRY settings, marked
with a dot (•), show which settings will use the least
energy and will leave items damp for easier ironing.
NOTE: The timer knob will not advance as quickly
in the AUTOMATIC cycles as it does in the TIME
DRY cycle. The time it takes for the timer to
advance depends on the type and size of the load
being dried.
AUTOMATIC REGULAR/DELICATE Cycle
Use for sturdy items like play or work clothes and also
for delicate items. The type of heat is determined by
choosing the proper FABRIC SELECTOR option. There
are two settings in the AUTOMATIC REGULAR/
DELICATE cycle – MORE DRY and LESS DRY.
TIME DRY Cycle
This cycle will operate dryer for up to 75 minutes.
Cottons and heavyweight items dry best between
50 and 75 minutes, and lightweight items dry best
between 20 and 40 minutes.
AUTOMATIC PERMANENT PRESS/KNITS
Cycle
Use for permanent press items and synthetics. The
type of heat is determined by selecting the proper
FABRIC SELECTOR option. There are two settings in
the AUTOMATIC PERMANENT PRESS/KNITS
cycle – MORE DRY and LESS DRY.
802726
© Copyright, Alliance Laundry Systems LLC – DO NOT COPY or TRANSMIT
33
Page 36

Dryer Operation
To Dry Clothes
IMPORTANT: Refer to the INSTALLATION
INSTRUCTIONS before using dryer.
IMPORTANT: Before using dryer for the first time,
use an all-purpose cleaner, or a detergent and
water solution, and a damp cloth to remove
shipping dust from inside dryer drum.
IMPORTANT: Remove all sharp objects from
laundry to avoid tears and rips to items during
normal machine operation.
1. Sort items into separate loads.
D305IE1A
Figure 18
2. Remove lint filter cover, clean lint filter and
replace cover.
3. Add clothes loosely into dryer drum (9.0 kg
maximum dry clothes load). Add fabric softener
sheet, if desired.
IMPORTANT: To avoid damage to dryer, do not
use more than one fabric softener sheet per load.
D666IE0A
D666IE0A
Figure 20
4. Close loading door. Dryer will not operate with
the door open.
Figure 19
D689IE0A
D689IE0A
D668IE0A
D668IE0A
Figure 21
5. Set FABRIC SELECTOR. Follow garment
manufacturer’s care labels for recommended
temperature settings.
6. Select timer setting in cycle desired:
AUTOMATIC REGULAR/DELICATE, TIME
DRY, or AUTOMATIC PERMANENT PRESS/
KNITS. These cycles control the drying time.
The ENERGY SAVER/DAMP DRY settings, marked
with a dot (•), show which dryer settings will use the
least energy and will leave items damp for easier
ironing.
7. Push timer knob in to start dryer.
NOTE: To stop dryer at any time, open the door or
turn timer knob to an OFF position. To restart
dryer, close door, reset timer if necessary, and push
in the timer knob.
34
© Copyright, Alliance Laundry Systems LLC – DO NOT COPY or TRANSMIT
802726
Page 37

Dryer Operation
Drying Rack
The drying rack is useful for items that require notumble drying, such as tennis shoes, sweaters, stuffed
toys or other delicate items.
The timer knob must be set on a timed cycle to ensure
that items dry properly. DO NOT use the automatic
cycle.
WARNING
Do not let items hang below or over the
sides of the rack. Never tumble items
while rack is inside the dryer.
W166
After articles have been dried, remove dryer rack.
The rack can be installed by placing front pegs of rack
onto the inner door frame and snapping rear of rack
into back of dryer. Refer to Figure 22.
Motor Overload Protector
The dryer’s motor overload protector stops the motor
automatically in the event of an overload. After
cooling, the overload protector will reset itself. Dryer
can be restarted by pushing the timer knob in. If
overload protector cycles again, remove the dryer
from use and call the service person to correct the
problem.
802726
Cylinder Drying Rack
Figure 22
© Copyright, Alliance Laundry Systems LLC – DO NOT COPY or TRANSMIT
DRY2021N
DRY2021N
35
Page 38

Dryer Operation
Lint Filter
The lint filter is located at the front of the dryer in the
lower part of the door opening.
CLEAN THE LINT FILTER BEFORE DRYING
EACH LOAD. Remove lint filter cover, clean lint
filter and replace cover. Annually remove lint filter
and screw to vacuum the duct under it.
IMPORTANT: The lint filter must be in place in
the door opening when using dryer or loading and
unloading dryer. If the filter is not in place, clothing
could fall into the front air duct and get into the
exhaust system, causing damage to the motor.
1 Lint Filter
1
SWD547N
SWD547N
Figure 23
36
© Copyright, Alliance Laundry Systems LLC – DO NOT COPY or TRANSMIT
802726
Page 39

Maintenance
User Maintenance
Lubrication
All moving parts are sealed in a permanent supply of
lubricant or are equipped with oilless bearings.
Additional lubrication will not be necessary.
Cold Weather Care
If the washer is delivered on a cold day (below
freezing), or is stored in an unheated room or area
during the cold months, do not attempt to operate it
until the washer has had a chance to warm up.
Vacations and Extended Non-Use
IMPORTANT: To avoid possible property damage
due to flooding, turn off the water supply to the
washer whenever there will be an extended period
of non-use.
Care of Your Washer
Use only a damp or sudsy cloth for cleaning the
control panel. Some cleaning product sprays may
harm the finish on the control panel or damage the
interior of the hood.
Wipe the washer cabinet as needed. If detergent,
bleach or other washing products are spilled on the
cabinet, wipe immediately. Some products will cause
permanent damage if spilled on the cabinet.
Do not use scouring pads or abrasive cleansers.
The wash drum and window will need no particular
care although they may need rinsing or wiping after an
unusual load has been washed. Outside of door
window can be cleaned with household window
cleaner.
Cleaning Glass Sealing Area
In order to assure that the door properly seals against
water leaks, the following surfaces should be wiped
off periodically:
● The outside perimeter of the door glass where the
seal contacts the glass.
● The front surface of the door seal lip.
Replacing Hoses
Hoses and other natural rubber parts deteriorate after
extended use. Hoses may develop cracks, blisters or
material wear from the temperature and constant high
pressure they are subjected to.
All hoses should be checked on a yearly basis for any
visible signs of deterioration. Any hose showing the
signs of deterioration listed above should be replaced
immediately.
Filter Screens
Check the filter screens in the fill hoses for debris or
damage annually. Clean or replace them if necessary.
If the washer is filling with water slower than normal,
check the filter screens. Clean or replace them if
necessary.
Order filter screen from the nearest authorized parts
distributor.
Care of Your Dryer
WARNING
To reduce the risk of an electric shock,
serious injury or death, disconnect the
electrical service to the dryer before
cleaning the interior.
W132
Clean the lint filter before drying each load. The lint
filter may be washed if needed. Annually remove lint
filter and screw to vacuum the duct under it.
Ordinarily, the dryer cylinder will need no care.
Wipe the dryer cabinet as needed. If detergent, bleach
or other washing products are spilled on the cabinet,
wipe immediately. Some products will cause
permanent damage if spilled on the cabinet.
Use only a damp or sudsy cloth for cleaning the
control panel. Some spray prewash products may harm
the finish on the control panel.
NOTE: The wiring diagram is located inside the
control panel.
Usually a mild soap solution will work. If there is an
extreme build-up of minerals from a hard water
supply, the surfaces may need to be cleaned with a
lime removal chemical.
802726
© Copyright, Alliance Laundry Systems LLC – DO NOT COPY or TRANSMIT
CAUTION
Label all wires prior to disconnection when
servicing controls. Wiring errors can cause
improper and dangerous operation.
W049
37
Page 40

Maintenance
Exhaust System
The exhaust duct should be inspected after one year of
use and cleaned if necessary by a qualified service
person to remove any lint build-up. Inspect and clean
exhaust duct every one to two years as required
thereafter.
The weather hood should be checked frequently to
make sure the dampers move freely, dampers are not
pushed in and that nothing has been set against them.
Keep dryer area clear and free from combustible
materials, gasoline and other flammable vapors and
liquids.
Do not obstruct the flow of combustion and ventilation
air.
NOTE: Verify proper operation after servicing.
CAUTION
Any disassembly requiring the use of tools
must be performed by a suitably qualified
service person.
W299
Reinstallation of Shipping Materials
Remove front access panel by removing two screws.
Place the shock sleeves on all four shock absorbers.
Refer to Figure 24.
Insert hooked end of shipping brace into the open slot
of the motor mount. Attach with bolts and washers.
Refer to Figure 24.
Reinstall front access panel.
1
2
4
H336I
3
H336I
1 Shock Sleeves
2 Motor Mount
3 Bolts and Lockwashers
4 Hooked End of Shipping Brace
Figure 24
Refer to the INSTALLATION INSTRUCTIONS for
proper procedures whenever the washer is moved.
38
© Copyright, Alliance Laundry Systems LLC – DO NOT COPY or TRANSMIT
802726
Page 41

Before You Call for Service
You may save time and money by checking the
following:
If the Washer:
Won’t
Fill
Won’t
Start
Won’t
Tumbl e
Won’t
Spin
Won’t
Drain
•
••••
••••
•
•
•
••
••
•
Water
Leaks
•
Maintenance
Possible Reason
Be sure power cord is plugged all the way into the
electrical outlet.
Close the loading door tightly.
Check the house fuse or circuit breaker.
Turn on the hot and cold water faucets.
Pull timer knob out to start the washer. Check to make
sure timer is not set at an OFF position.
Clean the screens in the water mixing valve and the
filter screens in the fill hoses.
Are controls properly set?
Broken drive belt. Call the service person.
Make sure door latch is properly adjusted, relative to
door lock.
Make sure outside perimeter of the door glass where
seal contacts glass is clean.
– Do This to Correct
If the Dryer:
Does
Not
Start
•
•
•
•
•
Does
Not
Heat
Does Not Dry
Clothes
Satisfactorily
•
•
(Electric Dryers
Only)
•
•
••
••
•
•
•
•
Possible Reason – Do This to Correct
Dryers equipped with power cord – Be sure the power cord is plugged all
the way into the electrical outlet.
Close the loading door.
Be sure timer is not in COOL DOWN setting or AIR FLUFF/ NO HEAT
Fabric Selector setting.
Push timer knob in to start dryer.
Some homes may have two fuses or circuit breakers for an electric dryer;
both fuses or circuit breakers should be checked. Make sure the laundry
room fuse(s) isn’t blown or loose, or that the circuit breakers aren’t open.
The electric dryer itself does not have an electrical fuse.
Has the motor overload protector cycled? Wait 10 minutes and try again.
Is the timer in a heat setting?
Gas Dryer Only – Check to see if equipment and main gas line valve is
turned on.
Check exhaust duct to outside to see if it is kinked, blocked or needs
cleaning.
Check weather hood to make sure flapper moves freely, has not been
pushed in or has not been blocked.
Automatic Cycle – Adjust to more or less dry setting.
Timed Cycle – Allow more or less time.
Clean the lint filter.
Is the load too small? Small loads may not tumble properly or dry evenly.
802726
© Copyright, Alliance Laundry Systems LLC – DO NOT COPY or TRANSMIT
39
Page 42

Maintenance
If Service Is Required
If service is required, contact Kleenmaid Customer
Care Centre at 1300 652 100.
Kleenmaid
P.O. Box 5560
Maroochydore South QLD 4558
or Phone 1300 652 100
When calling or writing about your unit, PLEASE
GIVE THE MODEL AND SERIAL NUMBERS. The
model and serial numbers are located in one of the four
corners of the door well. The door well is the shaded
area shown in Figure 25.
Please include a copy of your bill of sale and any
service receipts you have.
DRY2077N
DRY2077N
Figure 25
WARNING
To reduce the risk of serious injury or
death, DO NOT repair or replace any part of
the dryer or attempt any servicing unless
specifically recommended in the usermaintenance instructions or in published
user-repair instructions that you
understand and have the skills to carry out.
W133
40
© Copyright, Alliance Laundry Systems LLC – DO NOT COPY or TRANSMIT
802726
Page 43

Maintenance
Automatic Stacked Washer and
Dryer Warranty
Domestic Warranty
Full Five Year Warranty
In addition to all statutory rights which you, the
Consumer, have under all the relevant laws in respect
of this appliance, during the first five years of
ownership as the original purchaser of the Kleenmaid
unit, we guarantee that any fault caused by faulty
material or workmanship, becoming apparent will be
rectified free of charge for parts or labour provided
that all service is performed during normal working
hours by Kleenmaid or their designated agent. Where
the unit is installed outside the normal servicing area
of the above, the Purchaser must pay the cost of
transporting the appliance to and from the Agent or the
Agent’s traveling cost to and from the Purchaser’s
home.
Additional Limited Parts Warranty – Domestic
Appliances
We will replace the stainless steel tub if it fails as a
result of a defect in material or workmanship during
the first 20 years. After the first five years, the
Purchaser pays any transport or labour charges.
What These Warranties Do Not Cover
We are not responsible for any damage or malfunction
unless caused by a defect in material or workmanship.
This includes, but is not limited to, abuse, misuse,
improper installation, and transportation damage. We
are not responsible for any consequential damages
resulting from any malfunction.
Commercial Warranty
Full One Year Warranty
In addition to all statutory rights which you, the
Consumer, have under all the relevant laws in respect
of this appliance, during your first one year of
ownership as the purchaser of the Kleenmaid unit, we
guarantee that any fault caused by faulty material or
workmanship becoming apparent will be rectified free
of charge for parts or labour provided that all service is
performed during normal working hours by
Kleenmaid or their designated Agent. Where the unit
is installed outside the normal servicing area of the
above, the Purchaser must pay the cost of transporting
the applicance to and from the Agent or the Agent’s
traveling cost to and from the Purchaser’s home.
Additional Limited Parts Warranty – Commercial
Appliances
We will provide a free replacement part should any of
the washer cabinet parts rust from the inside out,
during the first two years of use. After the first one
year, the Purchaser pays any transport or labour
charges.
We will replace the stainless steel tub if it fails as a
result of a defect in material or workmanship during
the first 10 years. After the first year, the Purchaser
pays any transport or labour charges.
What These Warranties Do Not Cover
We are not responsible for any damage or malfunction
unless caused by a defect in material or workmanship.
This includes, but is not limited to, abuse, misuse,
improper installation, and transportation damage. We
are not responsible for any consequential damages
resulting from any malfunction.
802726
© Copyright, Alliance Laundry Systems LLC – DO NOT COPY or TRANSMIT
41
Page 44

Maintenance
Information for Handy Reference
Kleenmaid
P.O. Box 5560
Maroochydore South QLD 4558
Date Purchased
Model Number Serial Number
Store Name
Store Address Phone Number
Service Agency
Service Agency Address Phone Number
NOTE: Record this information and keep your sales slip. Model and serial numbers are located
on the nameplate.
Customer Care Centre
and Information:
1300 652 100
42
© Copyright, Alliance Laundry Systems LLC – DO NOT COPY or TRANSMIT
802726
 Loading...