

Page 1
Klimaanlage
10029393 10029394
Page 2
Sehr geehrter Kunde,
wir gratulieren Ihnen zum Erwerb Ihres Gerätes. Lesen Sie die folgenden Hinweise sorgfältig durch und befolgen Sie diese, um möglichen Schäden vorzubeugen. Für Schäden, die durch Missachtung der Hinweise und
unsachgemäßen Gebrauch entstehen, übernehmen wir keine Haftung.
Inhaltsverzeichnis
Technische Daten 2
Sicherheitshinweise 2
Geräteübersicht und Bedienfeld 3
Tastenfunktionen 4
Inbetriebnahme und Bedienung 5
Fehlersuche und Fehlerbehebung 6
Hinweise zur Entsorgung 7
Konformitätserklärung 7
Technische Daten
Artikelnummer 10029393, 10029394
Stromversorgung 220-240 V ~ 50-60 Hz
Leistung 65 W
Wassertank-Volumen 6 Liter
Sicherheitshinweise
• Prüfen Sie vor der Benutzung die Spannung auf der Geräteplakette und schließen Sie das Gerät nur an
Steckdosen an, die der Spannung des Geräts entsprechen.
• Wenn Sie das Gerät mit Wasser befüllt haben bewegen Sie es vorsichtig, damit das Wasser nicht überschwappt. Neigen Sie das Gerät nicht.
• Stellen Sie keine Gegenstände auf das Gerät und decken Sie die Lüftungsöffnungen nicht ab. Lassen Sie vor
dem Luftauslass mindestens 1 Meter Platz, damit die Luft ungehindert herausströmen kann.
• Das Gerät eignet sich nicht für sehr heiße Umgebungen. Die Umgebungstemperatur sollte weder zu hoch
noch zu niedrig sein. Das Wasser im Tank muss im Sommer regelmäßig gewechselt werden, damit die Wasserqualität immer gut ist. Falls Sie das Gerät im Winter bei Temperaturen unter 0 °C benutzen, verwenden
Sie warmes Wasser. Nachdem Sie den Raum befeuchtet haben entleeren Sie den Tank und wischen Sie ihn
mit einem Papiertuch aus.
• Reinigen Sie die Oberfläche mit einem feuchten Lappen und etwas Spülmittel. Benutzen Sie keine Scheueroder Lösemittel und sprühen Sie kein Wasser aufs Gerät.
• Wenn Sie das Gerät verstauen möchten lassen Sie es vorher komplett austrocknen und entleeren Sie das
Wasser aus dem Tank.
• Wenn Sie das Gerät länger nicht benutzen, ziehen Sie den Stecker aus der Steckdose.
• Falls das Netzkabel beschädigt ist, muss es vom Hersteller oder einem autorisierten Fachbetrieb oder einer
ähnlich qualifizierten Person ersetzt werden.
2
Page 3

• Da das Gerät viel Feuchtigkeit erzeigt, stellen Sie es nicht in Regale. Falls doch, schalten Sie die Luftbefeuchtung aus und benutzen Sie nur die Kühlfunktion.
• Füllen Sie Wasser nach bevor der Wasserstand die Min-Marke erreicht hat.
• Kinder, physisch und körperlich eingeschränkte Menschen sollten das Gerät nur benutzen, wenn sie vorher
von einer Aufsichtsperson ausführlich mit den Funktionen und den Sicherheitsvorkehrungen vertraut gemacht wurden.
• Achten Sie darauf dass Kinder nicht mit dem Gerät spielen.
• Versichern Sie sich dass der Ventilator still steht, bevor sie den Lüftergrill abnehmen oder das Gerät warten.
• Decken Sie das Gerät niemals ab, damit es sich nicht überhitzt. Verwenden Sie das Gerät nicht in der Nähe
einer Badewanne oder eines Swimmingpools.
• Verwenden Sie das Gerät niemals zusammen mit einem externen Timer oder einer ferngesteuerten Steckdose, damit in Ihrer Abwesenheit nichts passiert.
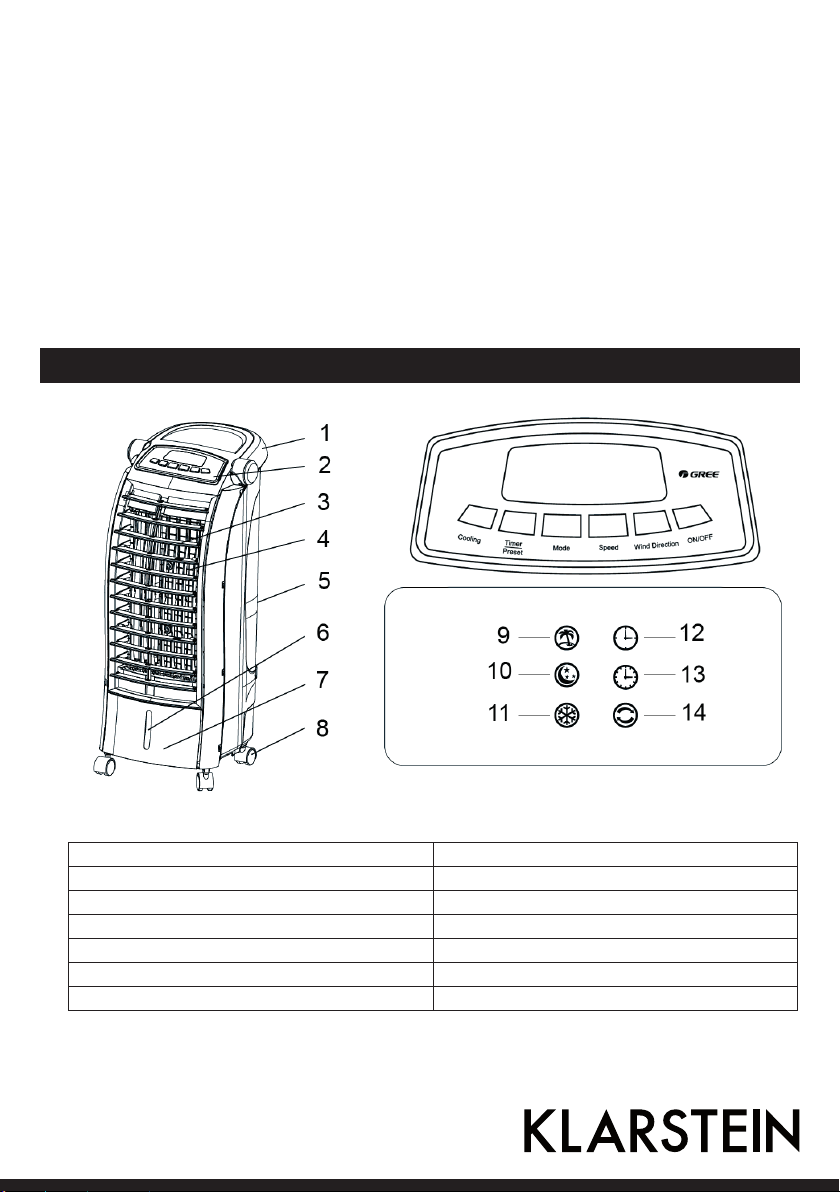
Geräteübersicht und Bedienfeld
1 Handgriff 8 Rollen
2 Bedienfeld 9 natürliche Brise
3 Lüftungslamellen 10 Nachtmodus
4 Schwinglamelle 11 Kühlung
5 Lufteinlass 12 Voreinstellung
6 Transparentes Fenster des Wassertanks 13 Timer
7 Wassertank 14 Schwingen
3
Page 4

Tastenfunktionen
Standby-Modus
Nachdem das Gerät eingeschaltet wurde leuchten alle Lampen kurz auf. Sobald die Lampen wieder aus sind
befindet sich das Gerät im Standby-Modus.
ON/OFF-Taste
Wenn Sie die Taste im Standby-Modus drücken läuft der Ventilator auf Stufe 1. Sobald Sie erneut auf die
Taste drücken stoppt der Ventilator. Das Gerät hält an, alle Lichter gehen aus und das Gerät wechselt in den
Standby-Modus.
SPEED-Taste
Wenn der Ventilator läuft können Sie die Geschwindigkeit mit der SPEED-Taste anpassen. Drücken Sie mehrmals hintereinander auf die Taste, um die Geschwindigkeit anzupassen. Im Display wird die entsprechende
Geschwindigkeitsstufe angezeigt.
Mode-Taste
Drücken Sie diese Taste während der Ventilator läuft um den gewünschten Modus auszuwählen. Drücken Sie
mehrmals hintereinander auf die Taste, um die Modi in der folgenden Reihenfolge auszuwählen: Natürlich >
Nachtmodus > Normaler Modus. Das entsprechende Icon leuchtet auf.
Wind-Direction-Taste
Drücken Sie diese Taste während der Ventilator läuft, um die Windrichtung zu verändern. Drücken Sie
mehrmals hintereinander auf die taste, um die Windrichtung wie folgt zu ändern: Schwingen rechts/links >
Schwingen aus.
Cooling-Taste
Wenn Sie die Taste während des Betriebs drücken wird die Kühlfunktion gestartet. Die Wasserpumpe geht
an und die Kühl-LED geht an. Wenn Sie die Taste erneut drücken wird die Kühlfunktion deaktiviert. Die
Pumpe stoppt und die Kühl-LED erlischt.
Timer/Preset-Taste
Drücken Sie während des Betriebs mehrmals hintereinander auf die Taste, um den Ausschalt-Timer in der
folgenden Reihenfolge einzustellen: 1 h > 2 h > 3 h > ... > 15 h. Drücken Sie die Taste im Standby-Modus, um den
Einschalt-Timer in der folgenden Reihenfolge einzustellen: 1 h > 2 h > 3 h > ... > 15 h. Sobald die voreingestellte
Zeit erreicht ist geht der Ventilator automatisch an. Die voreingestellte laufzeit beträgt 2 Stunden im SchwingModus. Danach geht das Gerät aus. Andere Funktionen sind in dieser Zeit nicht verfügbar.
Wasserauslauf-Schutz
Falls der Wassertank leckt hält die Pumpe an und das Gerät gibt 3 Warntöne von sich. Falls das Gerät im Kühlmodus läuft wird der Ventilator nicht beeinflusst. Falls sich das Gerät im Luftbefeuchtungsmodus befindet
stoppt der Motor, falls das Gerät über die entsprechende Schutzfunktion verfügt. Der Schutz ist nur im Kühl
oder Befeuchtungsmodus aktiv.
4
Page 5
Inbetriebnahme und Bedienung
Installation
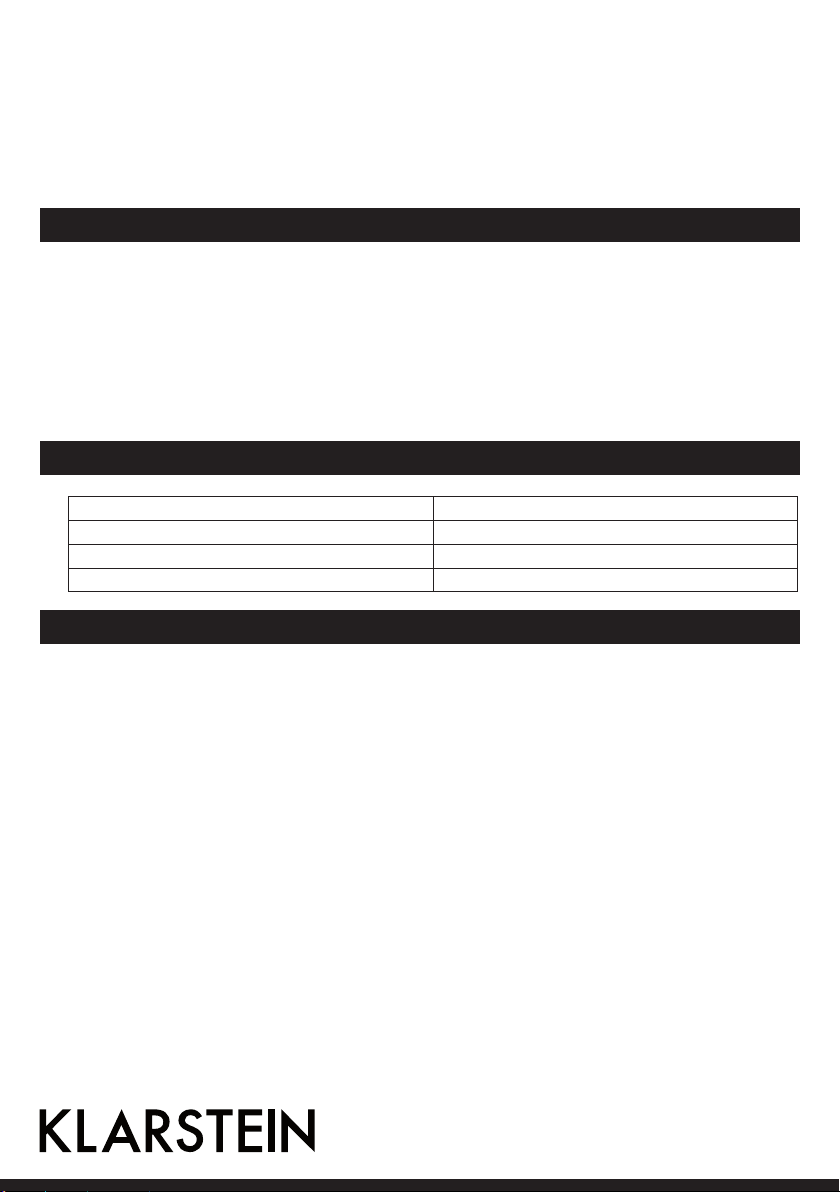
• Entnehmen Sie das Gerät der Verpackung und überprüfen Sie ob das
Gerät, die Fernbedienung, 2 Eisboxen und die 4 Räder enthalten sind.
• Installieren Sie die Räder bevor Sie das Gerät in Betrieb nehmen. Drücken Sie den Schaft am Ende der Rollen dazu in die Aussparungen unten am Gerät (siehe Bild). Drücken Sie den Schaft fest hinein, bis die
Rolle richtig sitzt.
• Stellen Sie das Gerät auf einen ebenen Untergrund. Achten Sie darauf,
dass die Steckdose der angegebenen Spannung auf der Geräteplakette
entspricht.
Wasser einfüllen
• Ziehen Sie den Strecker aus der Steckdose.
• Ziehen Sie den Wassertank aus dem Gerät.
• Entleeren Sie altes Wasser, falls Sie das Gerät länger nicht benutzt haben.
• Füllen Sie den Tank maximal bis zur Max-Markierung, damit der Tank nicht überläuft.
Fernbedienung
Die Tasten auf der Fernbedienung haben die selben Funktionen wie die Tasten auf dem Bedienfeld.
Aufbewahrung
Wenn Sie das Gerät länger nicht benutzen, entleeren Sie das Wasser und lassen Sie den Ventilator eine Weile
bei normaler Temperatur laufen. Nachdem das Gerät komplett trocken ist, ziehen Sie einen Plastiksack darüber
und verstauen Sie es im Originalkarton.
Reinigung
Wenn Sie das Gerät über einen längeren Zeitraum benutzen kann sich im Tank und am Vernebler Schmutz
ansammeln und den Kühleffekt beeinflussen. Wir empfehlen Ihnen daher beide Teile alle 2 Wochen zu reinigen. Ziehen Sie vor der Reinigung immer den Stecker aus der Steckdose. Bevor sie das Gerät wieder in Betrieb
nehmen achten Sie darauf, dass der Vernebler richtig sitzt, andernfalls läuft das Gerät nicht richtig oder der
Motor könnte beschädigt werden.
Falls Sie den Vernebler entnehmen müssen achten Sie darauf, dass das Gerät ausgeschaltet ist. Andernfalls
könnte Wasser herausspritzen oder das Gerät könnte lecken.
5
Page 6
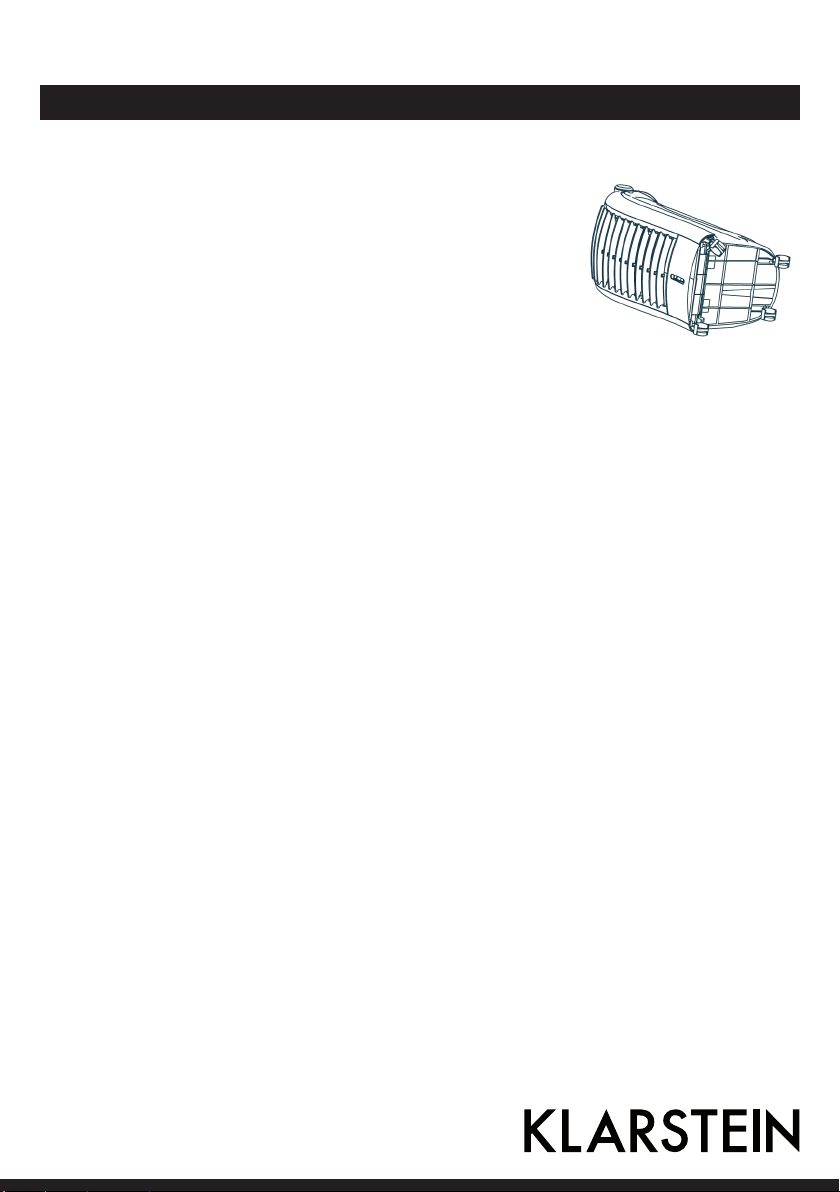
So benutzen Sie die Eisboxen
• Öffnen Sie die Eisbox nicht während des Betriebs und verzehren
Sie die darin enthaltenen Eiskristalle nicht.
• Legen Sie die Eisbox 4 Stunden lang ins Gefrierfach und legen Sie
sie dann in den Wassertank. Der Wassertank sollte befüllt werden
bevor Sie die Eisboxen hineinlegen.
• Die Eisbox kühlt das Wasser herunter, so dass ein kühlerer Luftstrom entsteht.
• Sie können die Eisbox dauerhaft verwenden.
• Legen Sie die Eisbox wie im Bild rechts gezeigt ein, damit Sie die
Wasserpumpe nicht beschädigen.
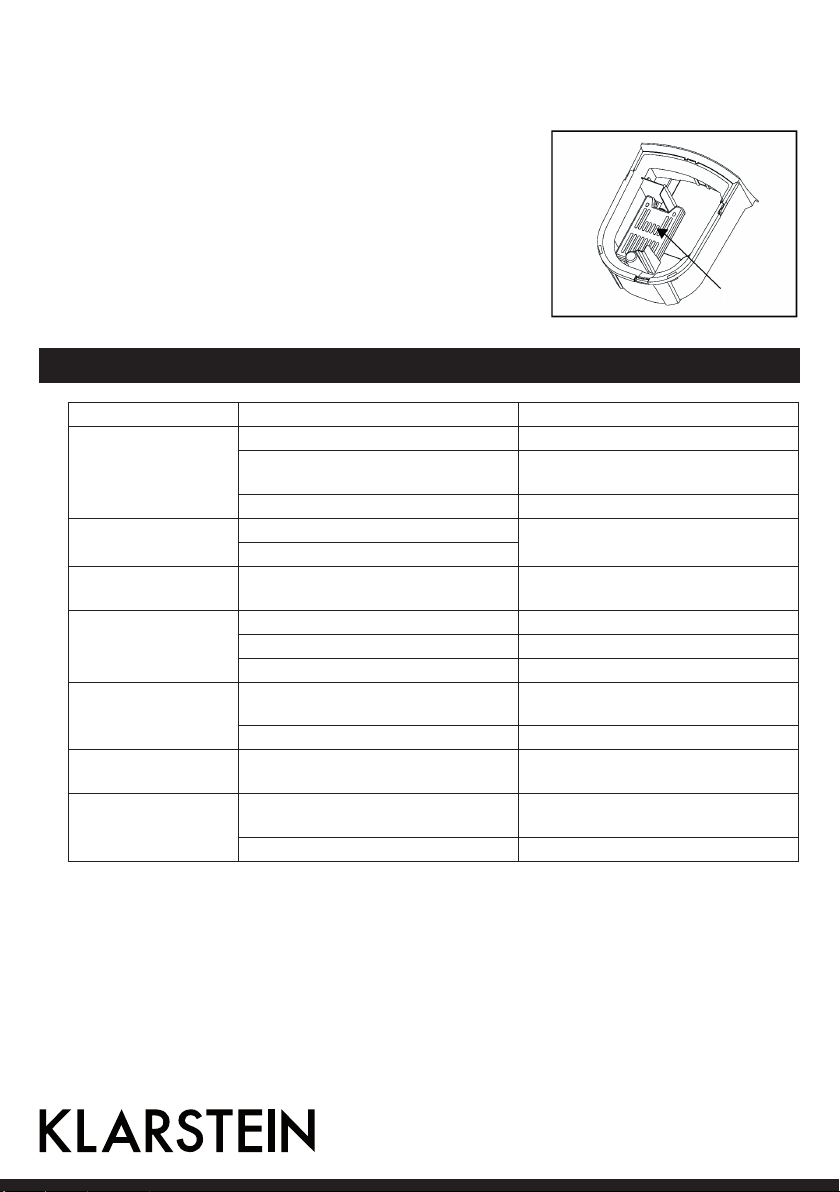
Fehlersuche und Fehlerbehebung
Fehler Mögliche Ursache Lösung
Kein Strom. Stecken Sie den Stecker ein.
Kein Luftstrom
Das Gerät lässt sich
nicht einschalten.
Das Gerät lässt sich
nicht ausschalten.
Unnormale Geräusche
Problem mit der
Befeuchtung und
Kühlung.
Die Lamellen
schwingen nicht.
Die Wasserpumpe ist
sehr laut.
Das Gerät ist nicht eingeschaltet.
Das Gerät ist beschädigt. Wenden Sie sich an den Hersteller.
Der Schalter ist kaputt.
Das interne Verbindungskabel ist locker.
Das Gerät ist kaputt. Wenden Sie sich an den Hersteller.
Fremdkörper im Gerät. Entfernen Sie alle Fremdkörper.
Eine Lamelle ist locker. Wenden Sie sich an den Hersteller.
Der Motor ist kaputt. Wenden Sie sich an den Hersteller.
Der Wasserfilter ist verstopft.
Die Wasserpumpe ist kaputt. Wenden Sie sich an den Hersteller.
Der Sync-Motor ist kaputt. Wenden Sie sich an den Hersteller.
Kein Wasser im Tank oder der
Wasserstand ist zu niedrig.
Die Wasserpumpe ist kaputt. Wenden Sie sich an den Hersteller.
Schalten Sie das Gerät mit der ON/OFF
Taste ein.
Wenden Sie sich an den Hersteller.
Reinigen Sie die Wasserpumpe und den
Tank.
Schalten Sie das Gerät aus un füllen Si
Wasser nach.
6
Page 7
Hinweise zur Entsorgung
Befindet sich die linke Abbildung (durchgestrichene Mülltonne auf Rädern) auf dem Produkt, gilt die Europäische Richtlinie 2002/96/EG. Diese Produkte dürfen nicht mit dem
normalen Hausmüll entsorgt werden. Informieren Sie sich über die örtlichen Regelungen
zur getrennten Sammlung elektrischer und elektronischer Gerätschaften. Richten Sie sich
nach den örtlichen Regelungen und entsorgen Sie Altgeräte nicht über den Hausmüll.
Durch die regelkonforme Entsorgung der Altgeräte werden Umwelt und die Gesundheit
ihrer Mitmenschen vor möglichen negativen Konsequenzen geschützt. Materialrecycling
hilft, den Verbrauch von Rohstoffen zu verringern.
Das Produkt enthält Batterien, die der Europäischen Richtlinie 2006/66/EG unterliegen und nicht mit dem
normalen Hausmüll entsorgt werden dürfen. Bitte informieren Sie sich über die örtlichen Bestimmungen zu
gesonderten Entsorgung von Batterien. Durch regelkonforme Entsorgung schützen Sie die Umwelt und die
Gesundheit ihrer Mitmenschen vor negativen Konsequenzen.
Konformitätserklärung
Hersteller: Chal-Tec GmbH, Wallstraße 16, 10179 Berlin.
Dieses Produkt entspricht den folgenden Europäischen Richtlinien:
2004/108/EG (EMV)
2011/65/EU (RoHS)
2006/95/EG (LVD)
2012/206/EU (ErP)
7
Page 8

Dear Customer,
Congratulations on purchasing this equipment. Please read this manual carefully and take care of the following
hints to avoid damages. Any failure caused by ignoring the mentioned items and cautions mentioned in the
instruction manual are not covered by our warranty and any liability.
Contents
Technical Data 8
Safety Instructions 6
Product Descriptino and Control Panel 9
Controls and Functions 10
Use and Operation 11
Troubleshooting 12
Hints on Disposal 13
Declaration of Conformity 13
Technical Data
Item number 10029393, 10029394
Power supply 220-240 V ~ 50-60 Hz
Power consumtion 65 W
Water tank volume 6 litres
Safety Instructions
• Use normal supply voltage 220-240V- 50Hz.
• After the unit is filled with water, don‘t tilt or crash it when placing or moving the unit. If moving the unit is
necessary, please push it slowly to avoid overflowing. Prohibit overturning the unit during operation, or it
may lead to accidents.
• Do not put anything at the top of the unit. Prohibit covering the air outlet and the air inlet at both sides of the
unit. Keep the unit free from any obstruction within 1 meter from the air outlet and air inlet.
• This unit is not applicable in the condition of high temperature. Do not put it somewhere too hot or too
cold. The water in the water tank needs to be replaced regularly in summer as it is likely to be deteriorated.
• When the unit is to humidify the room in winter under a room temperature lower than O °C, do apply warm
water for dehumidifying. After finishing using, the water in the water tank shall be sucked out with a towel
in time.
• When cleaning the surface, please wipe it with a wet cloth(or add some detergent). Do not wash it with
corrosive abluent or solvent. Do not spray water to the unit.
• When the unit is to be stored or transported, drain the water out and operate the unit under normal wind
mode for some time. Make sure the evaporator is completely dried before packing to avoid off-flavor.
• When this unit won‘t be used for a long time, please unplug the power plug for preventing harm to the unit.
• If the power cord is damaged, please ask the manufacturer or maintenance center or similar professionals
to replace it for preventing hazards.
8
Page 9
• 0n account of its strong humidifying effect, please do not operate the unit in an in closed environment.
Otherwise, please turn off the humidifying and cooling function.
• Charge water before the water level drops to the min. water level.
• This appliance is not available for those in poor health condition, with slow reaction or mentally handicapped
(All children, healthy or not, are included) unless they are under the guidance or with the assistance of the
person responsible for their safety.
• Children should be supervised to guarantee that they won‘t play with the appliance.
• Before maintenance or removing the protective grille, please make sure that the fan has been powered off.
• Never cover the unit for fear of overheating. Do not place the unit under the socket. Do not apply the unit
by the bathtub or swimming pool.
• In order avoid hazard caused by reset error of thermal circuit breaker, the power supply can not be provided
through external switching device, such as timer, etc.
Product Description and Control Panel
1 Handle 8 Castor
2 Operating console 9 Natural wind
3 Air guide louver 10 Sleeping wind
4 Swing louver 11 Cooling
5 Air inlet 12 Preset
6 Transparent window of water tank 13 Timer
7 Watertank 14 Oscillation
9
Page 10

Controls and Functions
Stand by:
After the fan is powered on, all LEDs will be bright. 1 s later, all LEDs will go out and the
unit will tu m to stand by status.
0N/OFF button:
In standby status, the unit will be turned on after pressing this button and the defaulted running status is general wind at the speed of option 1; In the running status, the unit will stop running after pressing this button. The
whole unit will stop running and all lights will go out, then the fan will turn to standby status.
Fan speed button:
In running status, fan speed can be selected by pressing this button. If press this button again successively, you
can select fan speed circularly and the display icon will show the fan speed synchronously.
Mode button:
In running status, fan mode can be selected by pressing this button. If pressing this button successively, you
can select fan mode circularly in the sequence of natural > sleeping > general wind with corresponding icon on
except in general wind mode.
Wind direction button:
In running status, wind direction can be selected by pressing this button. If press this button again successively,
you can select wind direction circularly in the sequence of left&right swing > no swing. When swinging, the
corresponding icon will be bright.
Cooling button:
In running status, cooling function will be started up by pressing this button; the water pump starts running and
cooling LED will be bright. If press this button again, cooling function will stop; the water pump stops running
and cooling LED will go out.
Timer/preset button:
Timer off function: In running status, press this button to select the time of timer off. If repressing this button
successively, you can select the time circularly in the sequence of 1 hr > 2hrs > 3hrs > ... > 15hrs. Preset on function: In standby status, press this button to select preset on time. If repressing this button successively, the
preset on time can be selected circularly in the sequence of 1hr > 2hrs > 3hrs > ... > 15hrs. When the preset time
is reached, the preset LED will go out and the fan will be turned on automatically. The default preset worKing
status is low general wind with 2hrs timer off and right & left swing. Other functions are not available.
Water-lacking protection:
When the water tank is lacking water, the water pump will stop pumping, the buzzer will give out 3 sounds to
warn and the water-lacking LED or the cooling LED will blink. In the cooling mode, when there‘s water-lacking
protection, the fan speed motor won‘t be affected; While in the auto humidifying mode, the main motor will
stop running if there is water-lacking protection. (This function is available only in cooling mode or auto humidifying mode.)
10
Page 11

Use and Operation
Installation
• Take out the unit after opening the carton box, and check whether
there‘s a remote controller, two ice boxes and four castors.
• Install the castors before operating the unit. The unit should be placed
horizontally during installation. Fix the steel shaft of castor at the castor
installation hole at the bottom of unit and then knob the castor into the
installation hole carefully.
• The unit should be placed horizontally. Please don‘t tilt the unit and
check whether the socket power comply with the parameter on the
nameplate when operating the unit.
Fill water
• Draw out the water tank.
• Charge clear tap water for new units or units that haven‘t been used for a long time. Please unplug the power
plug before filling water to avoid damage to the electric parts.
• Charge water within the Max. mark, otherwise water will overflow from the unit.
Remote Controller Operation
The functions of some buttons on the remote controller are the same as those on the control panel. Point the
infrared transmitting tube at the body when operating it. There should be no obstruction between the remote
controller and the body.
Storage:
When the unit won‘t be used for a long time, clean out the water inside the water tank and then let the fan run
at normal temperature for some time. After the evaporator in the unit is dried completely, cover the unit with
plastic bag and then put it into the carton box.
Cleaning
After this unit has been used for a long time, the water tank, the evaporator and the filter of evaporator will
be blocked by dust and sundries, which will affect the air volume and cooling effect. lt is recommended to
clean the water tank, the evaporator and the filter once every two weeks.Note: Unplug the power plug before
cleaning.
When operating the unit, the evaporator must be placed at the appointed position in the unit, otherwise it
will affect the unifs normal operation and service life, even bum out the motor. Befora moving the unit, please check whether there‘s water in water tank. If there‘s water, please drain it out. If you need to take out the
evaporator, please make sure the unit is turned off. Otherwise, it may lead to water leakage or water spout out.
11
Page 12

Operation Instruction for Ice Box
• Do not open the ice box during operation. Prohibit eating the ice
crystal inside the ice box.
• Freeze the ice box in refrigerator for about 4 hours and then put it
into the water tank (water tank should be filled with water before
putting the ice box).
• Lower than temperature of water tank by using energy conversion,
and then increase the temperature of air flow.
• The ice box can be used circularly.
• Position for the ice box: Please put the ice box at the correct position as shown in picture to prevent damage to the water pump.
Troubleshooting
Problem Possible Cause Solution
No power supply Inserl the power cord correctly
No wind
The unit can't be
energized
The unit can‘t be
tumed of
Abnormal sound in unit
Humidifying and
cooling failure
Wind direction cannot
be changed
Abnormal sound in
water pump
The unit hasn‘t been tumed on start the unit by pressing ON/OFF button
The body is damaged Send it to the maintenance center for repairing
The switch is broken
The inlemal connection wire is
loosened
The unit is broken Sand it to the maintenance center for repairing
There are foreign objects inside
the unit
The air guide louver is loosened Send it to the maintenance center for repairing
Malfunction of motor Send it to the maintenance center for repairing
Filter of water inlet is blocked Clean the water tank and water pump sub-assy
Water pump is broken Send it to the maintenance center for repairing
Malfunction of sync motor Send it to the maintenance center for repairing
No water in water tenk or water
level of water tank is lower than
the min. water level
Water pump Is broken Send lt to the maintenance oenter for repairing
Send it to the maintenance center for repairing
Take down the filter and remove the foreign
objects
Tum of the unit and then add water to make
sure the water level is higher than the min.
water level
12
Page 13

Hints on Disposal
According to the European waste regulation 2002/96/EG this symbol on the product
or on its packaging indicates that this product may not be treated as household waste.
Instead it should be taken to the appropriate collection point for the recycling of electrical
and electronic equipment. By ensuring this product is disposed of correctly, you will help
prevent potential negative consequences for the environment and human health, which
could otherwise be caused by inappropriate waste handling of this product. For more detailled information about recycling of this product, please contact your local council or your
household waste disposial service.
Your product contains batteries covered by the European Directive. 2006/66/EG, which cannot be disposed
of with normal household waste. Please check local rules on separate collection of batteries. The correct disposal of batteries helps prevent potentially negative consequences on the environment and human health.
Declaration of Conformity
Producer: Chal-Tec GmbH, Wallstraße 16, 10179 Berlin.
This product is conform to the following European Directives:
2004/108/EC (EMC)
2011/65/EU (RoHS)
2006/95/EC (LVD)
2012/206/EU (ErP)
13
Page 14

Estimado cliente:
Le felicitamos por la adquisición de este producto. Lea atentamente el siguiente manual y siga cuidadosamente las instrucciones de uso con el fin de evitar posibles daños. La empresa no se responsabiliza de los daños
ocasionados por un uso indebido del producto o por haber desatendido las indicaciones de seguridad.
Índice
Datos técnicos 14
Indicaciones de seguridad 14
Descripción del aparato y panel de control 15
Botones de función 16
Puesta en marcha y manejo 17
Detección y resolución de problemas 18
Indicaciones para la retirada del aparato 19
Declaración de conformidad 19
Datos técnicos
Número de artículo 10029393, 10029394
Suministro eléctrico 220-240 V ~ 50-60 Hz
Potencia 65 W
Volumen del depósito de agua 6 litros
Indicaciones de seguridad
• Antes de utilizar el aparato, compruebe la tensión de la placa de especificaciones técnicas y conecte el aparato a tomas de corriente que cumplan con los valores indicados.
• Cuando llene el depósito del aparato, desplácelo con cuidado para que el agua no rebose. No incline el aparato.
• No coloque ningún objeto sobre el aparato ni cubra las ranuras de ventilación. Deje al menos un metro de
espacio en la salida de aire para que este pueda circular sin problemas.
• El aparato no está indicado para entornos a temperaturas muy elevadas. La temperatura ambiente no debe
ser ni muy baja ni muy alta. El agua del depósito debe cambiarse con frecuencia en los meses de verano para
que su calidad sea óptima. Si utiliza el aparato en invierno a temperaturas inferiores a 0 °C, utilice agua tibia.
Cuando haya humidificado la estancia, vacíe el depósito y séquelo con un paño de papel.
• Limpie la superficie con un paño húmedo y un poco de lavavajillas. No utilice productos abrasivos ni disolventes ni pulverice agua sobre el aparato.
• Cuando quiera guardar el aparato, deje que se seque completamente y vacíe el depósito de agua.
• Si no utiliza el aparato en un periodo prolongado de tiempo, desconecte el enchufe de la toma de corriente.
• Si el cable de alimentación está dañado, deberá ser sustituido por el fabricante o por un servicio técnico o
persona debidamente autorizados.
14
Page 15

• Ya que el aparato genera mucha humedad, no lo instale en estanterías. En caso de hacerlo, desactive la
función de humidificación y utilice solamente la función de refrigeración.
• Llene el depósito antes de que el nivel del agua sea inferior a la marca Mín.
• Los niños y las personas con discapacidades físicas o psíquicas no podrán utilizar el aparato salvo que estén
bajo supervisión o hayan sido previamente instruidas sobre su utilización y conozcan las indicaciones de
seguridad.
• Asegúrese de que los niños no juegan con el aparato.
• Asegúrese de que el ventilador se encuentra en posición recta antes de retirar la rejilla del ventilador o de
realizar labores de mantenimiento en el aparato.
• Nunca cubra el aparato para evitar que se sobrecaliente. No utilice el aparato cerca de bañeras o piscinas.
• Nunca utilice el aparato con un temporizador externo o una toma de corriente por control remoto para
evitar que se encienda accidentalmente en su ausencia.
Descripción del aparato y panel de control
1 Asa 8 Ruedas
2 Panel de control 9 Brisa natural
3 Lamas de ventilación 10 Modo noche
4 Lamas de oscilación 11 Modo refrigeración
5 Entrada de aire 12 Modo predeterminado
6 Visor transparente del depósito de agua 13 Temporizador
7 Depósito de agua 14 Oscilación
15
Page 16

Botones de función
Modo standby
Una vez haya encendido el aparato, se encenderán todas las luces brevemente. Cuando las luces se apaguen
de nuevo, el aparato se encontrará en modo standby.
Botón ON/OFF
Si pulsa el botón en modo standby, el ventilador comenzará a funcionar en el nivel 1. Si pulsa de nuevo el
botón, el aparato se detiene, todas las luces se apagan y el aparato pasa al modo standby.
Botón SPEED
Si el ventilador está funcionando, puede ajustar la velocidad del mismo con el botón SPEED. Pulse varias veces
para ajustar la velocidad. En el display se mostrará el nivel de velocidad seleccionado.
Botón MODE
Pulse este botón con el ventilador en marcha para seleccionar el modo de funcionamiento. Pulse varias veces
para seleccionar una de estas opciones: natural > modo noche > modo normal. El icono correspondiente se
iluminará.
Botón Wind Direction
Pulse este botón con el ventilador en marcha para modificar la dirección del aire. Pulse varias veces el botón
para seleccionar una de las siguientes opciones: oscilación derecha/izquierda > oscilación off.
Botón Cooling
Pulse este botón el ventilador en marcha para activar la función de refrigeración. La bomba de agua se enciende y el LED de refrigeración se ilumina. Si pulsa de nuevo el botón, la función de refrigeración se desactivará.
La bomba se detiene y el LED de refrigeración se apaga.
Botón Timer/Preset
Pulse este botón con el ventilador en marcha para configurar el temporizador de apagado en la siguiente secuencia: 1h > 2h > 3h>… >15 h. Pulse el botón en modo standby para configurar el temporizador de encendido
conforme a la siguiente frecuencia: 1h > 2 h > 3 h >… > 15 h. Cuando haya transcurrido el tiempo seleccionado,
el ventilador se encenderá automáticamente. El tiempo predeterminado de funcionamiento es de dos horas
en modo oscilación. A continuación, el aparato se apaga. El resto de funciones no se encuentran disponibles
en este modo.
Protección contra fugas de agua
Si el depósito de agua tiene una fuga, la bomba se detiene y el aparato emite tres pitidos de aviso. Si el aparato
está funcionando en modo refrigeración, el ventilador continuará funcionando. Si el aparato se encuentra en
modo humidificación, el motor se detendrá si el aparato cuenta con la función de protección correspondiente.
La protección solamente se activará en modo refrigeración o humidificación.
16
Page 17

Puesta en marcha y uso
Instalación
• Retire el aparato del embalaje y compruebe si se encuentran todos los
componentes: aparato, mando a distancia, 2 acumuladores de frío y cuatro ruedas.
• Instale las ruedas antes de poner en marcha el aparato. Presione la varilla del extremo de las ruedas dentro del orificio de la parte inferior del
aparato (consulte imagen). Presione la varilla hacia adentro hasta que las
ruedas se encajen.
• Coloque el aparato horizontalmente. Asegúrese de que la toma de corriente cumple con la placa de especificaciones técnicas.
Llenar el agua
• Desconecte el enchufe de la toma de corriente.
• Retire el depósito de agua del aparato.
• Vacíe el agua contenida si no ha utilizado el aparato durante un periodo de tiempo prolongado.
• Llene el depósito hasta la marca Máx. para que el agua no rebose.
Mando a distancia
Los botones del mando a distancia tienen las mismas funciones que los del panel de control.
Almacenamiento
Si no utiliza el aparato durante un periodo de tiempo prolongado, vacíe el agua y active el ventilador a una
temperatura normal durante un rato. Cuando el aparato se haya secado por completo, cúbralo con la bolsa de
plástico e introduzca el aparato en la caja de cartón original.
Limpieza
Si no utiliza el aparato durante un periodo de tiempo prolongado, se puede formar suciedad y moho en el
depósito y afectar negativamente a la función de refrigeración. Le recomendamos limpiar ambos componentes cada dos semanas. Antes de limpiar el aparato, desconecte el enchufe de la toma de corriente. Antes de
poner de nuevo en marcha el aparato, asegúrese de que el pulverizador está colocado correctamente; de lo
contrario, el aparato no funcionará como es debido y el motor podría sufrir daños.
Si tiene que extraer el pulverizador, asegúrese de que el aparato está desconectado. De lo contrario, el agua
podría salir en forma de chorro o el aparato podría producir fugas.
17
Page 18

Cómo utilizar los acumuladores de frío
• No abra el acumulador durante el funcionamiento del aparato ni
ingiera su contenido.
• Introduzca el acumulador durante cuatro horas en el congelador y
a continuación colóquelo dentro del depósito de agua. El depósito
debe estar lleno antes de introducir los acumuladores.
• El acumulador enfría el agua para generar una corriente de aire frío.
• Puede utilizar los acumuladores de manera permanente.
• Coloque el acumulador en la parte derecha como se indica en la
ilustración para no dañar la bomba de agua.
Detección y resolución de problemas
Problema Posible causa Solución
No hay electricidad. Conecte el enchufe.
Sin corriente de aire.
El aparato no se
enciende.
El aparato no se apaga. El aparato está averiado. Contacte con el fabricante.
Sonidos atípicos.
Problema con la
humidificación y
refrigeración.
Las lamas no se
mueven.
La bomba de agua
emite sonidos muy
fuertes.
El aparato no está conectado.
El aparato está averiado. Contacte con el fabricante.
El interruptor está averiado.
El cable de conexión interno está suelto.
Objetos extraños dentro del aparato. Retire todos los cuerpos extraños.
Una lama está suelta. Contacte con el fabricante.
El motor está averiado. Contacte con el fabricante.
El filtro de agua está obstruido. Limpie la bomba de agua y el depósito.
La bomba de agua está averiada. Contacte con el fabricante.
El motor de sincronización está
averiado.
No hay agua en el depósito o el nivel de
agua es demasiado bajo.
La bomba de agua está averiada. Contacte con el fabricante.
Encienda el aparato pulsando el botón
ON/OFF.
Contacte con el fabricante.
Contacte con el fabricante.
Apague el aparato y llene el depósito
de agua.
18
Page 19

Indicaciones para la retirada del aparato
Si el aparato lleva adherida la ilustración de la izquierda (el contenedor de basura tachado)
entonces rige la normativa europea, directiva 2002/96/CE. Este producto no debe arrojarse a un contenedor de basura común. Infórmese sobre las leyes territoriales que regulan la
recogida separada de aparatos eléctricos y electrónicos. Respete las leyes territoriales y no
arroje aparatos viejos al cubo de la basura doméstica. Una retirada de aparatos conforme a
las leyes contribuye a proteger el medio ambiente y a las personas a su alrededor frente a
posibles consecuencias perjudiciales para la salud. El reciclaje ayuda a reducir el consumo
de materias primas.
El producto contiene pilas sujetas a la Directiva Europea 2006/66/CE, según la cual estas no pueden depositarse en los contenedores destinados a la basura común. Compruebe la normativa de su país con respecto al
reciclaje de las pilas usadas. Una gestión adecuada de estos residuos previene consecuencias potencialmente
negativas para el medio ambiente y la salud de las personas.
Declaración de conformidad
Fabricante: Chal-Tec GmbH, Wallstraße 16, 10179, Berlín (Alemania).
Este producto cumple con las siguientes directivas europeas:
2004/108/CE (EMC)
2011/65/UE (refundición RoHS 2)
2006/95/CE (baja tensión)
2012/206/UE (ErP)
19
Page 20

Chère cliente, cher client,
Toutes nos félicitations pour l’acquisition de ce nouvel appareil. Veuillez lire attentivement et respecter les
instructions de ce mode d’emploi afin d’éviter d’éventuels dommages. Nous ne saurions être tenus pour responsables des dommages dus au non-respect des consignes et à la mauvaise utilisation de l’appareil.
Sommaire
Fiche technique 20
Consignes de sécurité 20
Aperçu de l’appareil et panneau de commande 22
Fonctions des touches 22
Mise en marche et utilisation 23
Identification et résolution des problèmes 24
Information sur le recyclage 25
Déclaration de conformité 25
Fiche technique
Numéro d’article 10029393, 10029394
Alimentation électrique 220-240 V ~ 50-60 Hz
Puissance 65 W
Capacité du réservoir 6 litres
Consignes de sécurité
• Avant d’utiliser l’appareil, vérifier la tension sur la plaque signalétique et brancher l’appareil uniquement à une
prise électrique correspondant à la tension de l’appareil.
• Lorsque l’appareil contient de l’eau, le déplacer avec grande précaution afin que l’eau ne déborde pas. Ne pas
incliner l’appareil.
• Ne pas poser d’objet sur l’appareil et ne pas recouvrir les ouvertures d’aération. Maintenir au minimum un
espace de 1 mètre afin de ne pas entraver le débit d’air.
• L’appareil est adapté à une utilisation dans des conditions de grande chaleur. La température ambiante ne
doit être ni trop basse ni trop élevée. L’eau du réservoir doit être régulièrement changée en été pour en
préserver la qualité. Si l’appareil est utilisée par des températures inférieures à 0 °C en hiver, utiliser de l’eau
chaude. Une fois que la pièce a été humidifiée, vider le réservoir et l’essuyer avec un essuie-tout.
• Nettoyer la surface de l’appareil avec une éponge humide et un peu de liquide vaisselle. Ne pas utiliser de
matériel abrasif ou décapant et ne pas asperger l’appareil d’eau.
• Laisser l’appareil sécher complètement avant de le ranger et vider le réservoir d’eau.
• Débrancher l’appareil en cas d’inutilisation prolongée.
• Si le cordon d’alimentation est endommagé, le faire remplacer par le fabricant, un atelier autorisé ou un
professionnel qualifié.
20
Page 21

• Comme l’appareil produit beaucoup d’humidité, ne pas l’installer dans une étagère. Si tel était le cas néanmoins, désactiver la fonction d’humidification et utiliser uniquement la fonction de rafraîchissement.
• Rajouter de l’eau dans le réservoir avant que le niveau de l’eau soit inférieur au repère minimum.
• Les enfants de plus de 8 ans ainsi que les personnes dont les capacités physiques, mentales ou sensorielles
sont réduites doivent utiliser l’appareil uniquement après avoir été entièrement sensibilisées aux consignes
de sécurité et aux fonctions de l’appareil par une personne responsable de leur sécurité.
• Veiller à ce que les enfants ne jouent pas avec l’appareil.
• S’assurer que le ventilateur est immobile avant de retirer la grille de ventilation ou d’entretenir l’appareil.
• Ne jamais couvrir l’appareil pour éviter qu’il ne surchauffe. Ne pas utiliser l’appareil à proximité d’une baignoire
ou d’une piscine.
• Ne jamais utiliser l’appareil avec une minuterie externe ou une prise électrique télécommandée pour éviter
tout incident en cas d’absence.
Aperçu de l’appareil
1 Poignée 8 Roulettes
2 Panneau de commande 9 Brise naturelle
3 Lamelles d’aération 10 Mode nuit
4 Lamelles d’oscillation 11 Rafraîchissement
5 Entrée d’air 12 Préréglage
6 Couvercle transparent du réservoir d’eau 13 Minuteur
7 Réservoir d’eau 14 Oscillation
21
Page 22

Fonctions des touches
Mode veille
Toutes les lampes s’allument brièvement après le démarrage. Quand les lampes s’éteignent de nouveau, cela
signifie que l’appareil se trouve en mode veille.
Touche ON/OFF
En mode veille, appuyer sur cette touche pour que le ventilateur se mette en marche à la vitesse 1. Appuyer de
nouveau sur cette touche pour interrompre le ventilateur. L’appareil s’arrête, toutes les lumières s’éteignent et
l’appareil bascule en mode veille.
Touche SPEED
Lorsque le ventilateur est en marche, il est possible d’ajuster la vitesse grâce à la touche SPEED. Appuyer
plusieurs fois de suite sur cette touche pour adapter la vitesse. La vitesse correspondante s’affiche sur l’écran
d’affichage.
Touche de fonction
Appuyer sur cette touche pendant le fonctionnement du ventilateur pour sélectionner le mode souhaité. Appuyer plusieurs fois de suite sur cette touche pour sélectionner les modes selon l’ordre suivant : naturel > mode
nuit > mode normal. L’icône correspondante s’affiche à l’écran.
Touche de direction de l’air
Appuyer sur cette touche pendant le fonctionnement du ventilateur pour modifier la direction de l’air. Appuyer
plusieurs fois de suite sur cette touche pour modifier la direction de l’air selon l’ordre suivant : oscillation droite/
gauche > pas d’oscillation.
Touche de rafraîchissement
Appuyer sur cette touche pendant le fonctionnement de l’appareil pour démarrer la fonction de rafraîchissement. La pompe à eau se met en marche et le témoin lumineux de rafraîchissement s’allume. Appuyer de
nouveau sur la touche pour désactiver la fonction de rafraîchissement. La pompe s’arrête et le voyant lumineux
s’éteint.
Touche de minuteur/préréglage
Appuyer plusieurs fois de suite sur cette touche pendant le fonctionnement de l’appareil pour régler le minuteur d’éteinte programmée selon l’ordre suivant : 1 h > 2 h > 3 h > … > 15 h. Appuyer sur cette touche en mode
veille pour régler le minuteur d’éteinte programmée selon l’ordre suivant : 1 h > 2 h > 3 h > … > 15 h. Le ventilateur
s’arrête de fonctionner une fois que le temps pré-paramétré est écoulé. La durée préréglée est de 2 heures
pour le mode d’oscillation. Ensuite, l’appareil s’éteint. Les autres fonctions ne sont pas activables pendant cette
durée.
Protection contre les fuites
Si le réservoir fuit, la pompe s’arrête de fonctionner et l’appareil émet 3 signaux sonores. Le ventilateur n’est
pas affecté si l’appareil est en mode rafraîchissement. Si l’appareil se trouve en mode humidification de l’air, le
moteur s’arrête si l’appareil est équipé de la fonction de protection correspondante. Cette protection est active
uniquement en mode rafraîchissement et humidification.
22
Page 23

Mise en marche et utilisation
Installation
• Sortir l’appareil de son emballage et vérifier que le contenu de
l’emballage comprend un appareil, une télécommande, 2 packs réfrigérants et 4 roulettes.
• Installer les roulettes avant de faire fonctionner l’appareil. Enfoncer la
tige des roues dans les trous situés sur le dessous de l’appareil (cf. illustration). Enfoncer entièrement les tiges jusqu’à ce que les roulettes soient
correctement fixées.
• Placer l’appareil sur une surface plane. Veiller à ce que la tension de
la prise électrique corresponde à celle indiquée sur la plaque signalétique.
Remplir le réservoir d’eau
• Débrancher l’appareil.
• Sortir le réservoir de l’appareil.
• Vider l’ancienne eau en cas d’inutilisation prolongée de l’appareil.
• Remplir le réservoir sans dépasser le repère Max, afin que l’eau ne déborde pas du réservoir.
Télécommande
Les touches de la télécommande possèdent les mêmes fonctions que les touches du panneau de commande.
Rangement
Après utilisation, vider l’eau et faire fonctionner le ventilateur pendant un moment à température normale.
Une fois que l’appareil est entièrement sec, le recouvrir d’une bâche en plastique et le ranger dans son carton
d’origine.
Entretien
En cas d’inutilisation prolongée de l’appareil, de la saleté peut s’accumuler au niveau du brumisateur dans le
réservoir et avoir une incidence sur les performances de refroidissement. Par conséquent, il est recommandé
de nettoyer ces deux pièces toutes les deux semaines. Toujours débrancher l’appareil avant de le nettoyer.
Avant de remettre l’appareil en marche, s’assurer que le brumisateur est correctement positionné pour éviter
des dysfonctionnements de l’appareil ou un endommagement du moteur.
S’il est nécessaire de retirer le brumisateur, veiller à ce que l’appareil soit éteint. Dans le cas contraire, de l’eau
pourrait gicler ou de l’eau pourrait fuir de l’appareil.
23
Page 24

Utilisation des packs réfrigérants
• Ne pas ouvrir les packs réfrigérants pendant le fonctionnement de
l’appareil et ne pas consommer les cristaux de glace qu’ils contiennent.
• Placer les packs réfrigérants pendant une durée de 4 heures dans le
compartiment de congélation puis les mettre dans le réservoir d’eau. Le
réservoir doit contenir de l’eau avant d’accueillir les packs réfrigérants.
• Les packs réfrigérants refroidissent l’eau pour permettre un débit
d’air plus frais.
• Les packs réfrigérants sont réutilisables.
• Installer les packs réfrigérants comme illustré ci-contre pour ne
pas endommager la pompe.
Identification et résolution des problèmes
Problème Cause possible Solution
Pas de courant. Brancher l’appareil à une prise.
Pas de débit d’air.
Impossible d’allumer
l’appareil.
Impossible d’éteindre
l’appareil.
Bruits anormaux.
Problèmes
d’humidification et de
refroidissement.
Les lamelles n’oscillent
pas.
La pompe à eau est
très bruyante.
L’appareil n’est pas allumé.
L’appareil est endommagé. Contacter le fabricant.
L’interrupteur est cassé.
Le câble de raccordement interne s’est
désolidarisé.
L’appareil est cassé. Contacter le fabricant.
Corps étranger dans l’appareil. Évacuer le corps étranger.
Une lamelle n’est pas correctement
fixée.
Le moteur est cassé. Contacter le fabricant.
Le filtre est bouché.
La pompe à eau est cassée. Contacter le fabricant.
Le moteur de synchronisation est cassé. Contacter le fabricant.
Pas d’eau dans le réservoir ou le niveau
d’eau est trop bas.
La pompe à eau est cassée. Contacter le fabricant.
Mettre l’appareil en marche à l’aide de la
touche ON/OFF.
Contacter le fabricant.
Contacter le fabricant.
Nettoyer la pompe à eau ainsi que le
réservoir.
Éteindre l’appareil et rajouter de l’eau
dans le réservoir.
24
Page 25

Information sur le recyclage
Vous trouverez sur le produit l’image ci-contre (une poubelle sur roues, barrée d‘une croix),
ce qui indique que le produit se trouve soumis à la directive européenne 2002/96/CE.
Renseignez-vous sur les dispositions en vigueur dans votre région concernant la collecte
séparée des appareils électriques et électroniques. Respectez-les et ne jetez pas les appareils usagés avec les ordures ménagères. La mise au rebut correcte du produit usagé permet de préserver l’environnement et la santé. Le recyclage des matériaux contribue à la
préservation des ressources naturelles.
Ce produit contient des piles qui sont soumises à la directive européenne 2006/66/CE selon laquelle elles
ne doivent pas être éliminées avec les ordures ménagères. Renseignez-vous sur les dispositions en vigueur
concernant la mise en rebut séparée des piles. La mise en rebut correcte du produit usagé permet de préserver
l’environnement et la santé.
Déclaration de conformité
Fabricant : Chal-Tec GmbH, Wallstraße 16, 10179 Berlin, Allemagne.
Ce produit est conforme aux directives européennes suivantes :
2004/108/CE (CEM)
2011/65/UE (RoHS)
2006/95/CE (LVD)
2012/206/UE (ErP)
25
Page 26

Gentile cliente,
La ringraziamo per aver acquistato il nostro prodotto. La preghiamo di leggere attentamente le seguenti istruzioni e di seguirle per evitare eventuali danni. Non ci assumiamo alcuna responsabilità per danni derivati da una
mancata osservazione delle avvertenze di sicurezza e da un uso improprio del dispositivo.
Indice
Dati tecnici 26
Avvertenze di sicurezza 26
Descrizione del prodotto e pannello dei comandi 27
Tasti funzione 28
Messa in funzione e utilizzo 29
Ricerca e risoluzione dei problemi 30
Smaltimento 31
Dichiarazione di conformità 31
Dati tecnici
Articolo numero 10029393, 10029394
Alimentazione 220-240 V ~ 50-60 Hz
Potenza 65 W
Capacità serbatoio 6 litri
Avvertenze di sicurezza
• Collegare il dispositivo ad una presa la cui tensione è conforme a quella indicata sulla targhetta identificativa.
• Spostare il dispositivo con l’acqua nel serbatoio con cautela in modo che l‘acqua non trabocchi.
• Non inclinare il dispositivo.
• Non collocare oggetti sul dispositivo e non coprire le fessure di aereazione. Lasciare almeno 1 metro di spazio
tra l’uscita dell’aria e altri oggetti in modo che l‘aria possa circolare liberamente.
• Il dispositivo non è adatto per ambienti molto caldi. La temperatura ambiente non deve essere né troppo alta
né troppo bassa. In estate, sostituire regolarmente l‘acqua del serbatoio, in modo che la qualità dell‘acqua sia
sempre buona. Se si utilizza il dispositivo in inverno a temperature inferiori a 0°C, utilizzare acqua calda per
deumidificare. Dopo l’uso, svuotare il serbatoio e asciugarlo.
• Pulire le superfici con un panno umido e un po‘ di detersivo. Non utilizzare abrasivi o solventi e non spruzzare
acqua direttamente sul dispositivo.
• Prima di conservare il dispositivo, farlo asciugare completamente e svuotare l‘acqua dal serbatoio.
• In caso di inutilizzo prolungato, staccare la spina dalla presa di corrente.
• Se il cavo di alimentazione è danneggiato, farlo sostituire dal produttore o da un centro assistenza qualificato
o da un tecnico specializzato.
26
Page 27

• Dal momento che il dispositivo produce molta umidità, non collocarlo sui ripiani. In alternativa, disattivare
l’umidificazione dell’aria e utilizzare solo la funzione di raffreddamento.
• Aggiungere l’acqua prima che il livello dell’acqua raggiunga il segno “Min”.
• I bambini, le persone con capacità fisiche e mentali ridotte non devono utilizzare il dispositivo, a meno che
un supervisore ha prima illustrato loro le avvertenze di sicurezza e come utilizzare il dispositivo.
• Prestare attenzione che i bambini non giochino con il dispositivo.
• Assicurarsi che la ventola si sia arrestata prima di rimuovere la griglia o di effettuare la manutenzione.
• Non coprire il dispositivo per evitare che si surriscaldi. Non utilizzare il dispositivo nelle vicinanze di una vasca
o di una piscina.
• Non utilizzare il dispositivo con un timer esterno o con una presa telecomandata per ragioni di sicurezza.
Descrizione del prodotto e pannello dei comandi
1 Impugnatura 8 Rotelline
2 Pannello dei comandi 9 Brezza naturale
3 Lamelle di aereazione 10 Modalità notturna
4 Lamelle oscillanti 11 Raffreddamento
5 Ingresso aria 12 Impostazione predefinita
6 Finestrella del serbatoio 13 Timer
7 Serbatoio acqua 14 Oscillazione
27
Page 28

Tasti funzione
Modalità standby
Una volta acceso il dispositivo, tutte le spie si accendono brevemente. Quando le spie si spengono, il dispositivo passa in modalità standby.
Tasto ON / OFF
Se si preme una volta questo tasto in modalità standby, la ventola si mette in funzione al livello 1. Se si preme
di nuovo il tasto, il ventilatore si arresta. Il dispositivo si arresta, tutte le spie si spengono e il dispositivo passa
in modalità Standby.
Tasto SPEED
Se la ventola è in funzione, è possibile regolare la velocità con il tasto SPEED. Premere ripetutamente il tasto
per regolare la velocità. Sul display compare il livello di velocità corrispondente.
Tasto Mode
Premere questo tasto mentre la ventola è in funzione per selezionare la modalità desiderata. Premere più volte
consecutivamente questo tasto per selezionare le modalità nel seguente ordine: Naturale> Modalità notturna>
Modalità normale. La spia corrispondente si accende.
Tasto direzione flusso aria
Premere questo tasto mentre la ventola è in funzione, per cambiare la direzione del flusso dell’aria. Premere
ripetutamente il tasto per cambiare la direzione come segue: rotazione a sinistra / destra> oscillazione.
Tasto di raffreddamento
Premere questo tasto mentre il dispositivo è in funzione, per avviare la funzione di raffreddamento. La pompa
dell’acqua si mette in funzione e la spia a LED si accende. Premere di nuovo il tasto, per disattivare la funzione
di raffreddamento.
La pompa si arresta e la spia corrispondente si spegne.
Tasto Timer / Preset
Premere il tasto ripetutamente mentre il dispositivo è in funzione per impostare il timer di spegnimento nel
seguente ordine: 1 h> 2 h> 3 h> ...> 15 h. Appena il tempo preimpostato viene raggiunto, la ventola si accende
automaticamente. La durata preimpostata è di 2 ore in modalità oscillazione. In seguito il dispositivo si spegne.
Le altre funzioni non sono disponibili in questo lasso di tempo.
Protezione perdita d’acqua
Se è presente una perdita nel serbatoio dell’acqua, la pompa si arresta e il dispositivo emette 3 segnali acustici.
In modalità di raffreddamento, ciò non ha effetti sul motore della ventola. In modalità di umidificazione, il
motore principale si arresta. La funzione di protezione è disponibile in modalità di raffreddamento o di umidificazione.
28
Page 29

Messa in funzione e utilizzo
Installazione
• Rimuovere il dispositivo dalla confezione e controllare se sono inclusi
nella consegna: l’unita’ principale, il telecomando, 2 siberini e 4 rotelline.
• Prima di mettere in funzione il dispositivo, assemblare le rotelline. Premere l’albero posto sull’estremità delle rotelline nelle scanalature poste nella
parte inferiore (vedere la figura). Inserire l’albero e fissare le rotelline.
• Posizionare il dispositivo su una superficie piana. Collegare il dispositivo
ad una presa la cui tensione è conforme a quella indicata.
Versare l’acqua
• Staccare la spina dalla presa di corrente.
• Rimuovere il serbatoio dell‘acqua.
• Svuotare l’acqua contenuta all’interno se il dispositivo non è stato usato per lungo tempo.
• Riempire il serbatoio fino al segno MAX, in modo che il serbatoio non trabocchi.
Telecomando
I tasti del telecomando hanno le stesse funzioni dei tasti sul pannello dei comandi.
Conservazione
In caso di inutilizzo prolungato, svuotare l‘acqua e lasciare la ventola in funzione per un po’ a temperatura
normale. Una volta che il dispositivo è completamente asciutto, avvolgerlo in una pellicola in plastica e riporlo
nella confezione originale.
Pulizia
Con il tempo è possibile che nel serbatoio e sul nebulizzatore si accumuli sporcizia influenzando negativamente l‘effetto di raffreddamento. Si consiglia pertanto di lavare il serbatoio e il nebulizzatore ogni 2 settimane.
Prima di eseguire ogni operazione di pulizia, staccare la spina dalla presa. Assicurarsi inoltre che il nebulizzatore
sia inserito correttamente, prima di mettere il dispositivo nuovamente in funzione, altrimenti il dispositivo non
funziona correttamente oppure il motore potrebbe danneggiarsi.
Se è necessario rimuovere il nebulizzatore, assicurarsi prima di aver spento il dispositivo. In caso contrario,
l’acqua potrebbe schizzare fuori oppure potrebbero verificarsi delle perdite.
29
Page 30

Come utilizzare i siberini
• Non aprire i siberini e non consumare i cristalli di ghiaccio
all’interno. Lasciare i siberini per 4 ore nel congelatore e in seguito
metterli nel serbatoio. Il serbatoio deve essere riempito prima di
mettere i siberini.
• I siberini raffreddano l‘acqua in modo da creare un flusso d’aria più
fresco.
• È possibile utilizzare i siberini in maniera permanente.
• Posizionare i siberini come mostrato nella figura a destra, in modo
da non danneggiare la pompa dell‘acqua.
Ricerca e risoluzione dei problemi
Problema Causa possibile Soluzione
Assenza di corrente. Inserire la spina nella presa.
Assenza di flusso
dell’aria
Il dispositivo non si
accende.
Il dispositivo non si
spegne.
Rumori insoliti
Problema con
l’umidificazione e il
raffreddamento.
Le lamelle non
oscillano.
La pompa dell’acqua è
troppo rumorosa.
Il dispositivo non è acceso.
Il dispositivo è danneggiato. Rivolgersi al produttore.
L’interruttore è rotto.
Il cavo di connessione interno è rotto.
Il dispositivo è rotto. Rivolgersi al produttore.
Corpi estranei all’intermo del
dispositivo.
Una lamella è allentata. Rivolgersi al produttore.
Il motore è rotto. Rivolgersi al produttore.
Il filtro dell’acqua è ostruito. Pulire la pompa dell’acqua e il serbatoio.
La pompa dell’acqua è rotta. Rivolgersi al produttore.
Il motore è rotto. Rivolgersi al produttore.
Non c’è acqua nel serbatoio oppure il
livello dell’acqua è troppo basso.
La pompa dell’acqua è rotta. Rivolgersi al produttore.
Accendere il dispositivo con il tasto
ON/OFF.
Rivolgersi al produttore.
Rimuovere tutti i corpi estranei.
Spegnere il dispositivo e versare l’acqua
nel serbatoio.
30
Page 31

Smaltimento
Se sul prodotto è presente la figura a sinistra (il cassonetto dei rifiuti mobile sbarrato), si
applica la direttiva europea 2002/96/CE. Questi prodotti non possono essere smaltiti con
i rifiuti normali. Informarsi sulle disposizioni vigenti in merito alla raccolta separata di dispositivi elettrici ed elettronici. Non smaltire i vecchi dispositivi con i rifiuti domestici. Grazie
al corretto smaltimento dei vecchi dispositivi, si proteggono il pianeta e la salute delle persone da possibili conseguenze negative. Il riciclo di materiali aiuta a ridurre il consumo di
materie prime.
Il prodotto contiene batterie che in base alla direttiva europea 2006/66/CE non possono essere smaltite con
i normali rifiuti domestici. Informarsi sulle disposizioni vigenti relative alla raccolta differenziata delle batterie.
Grazie al corretto smaltimento dei vecchi dispositivi, si proteggono il pianeta e la salute delle persone da possibili conseguenze negative.
Dichiarazione di conformità
Produttore: Chal-Tec GmbH, Wallstraße 16, 10179 Berlino, Germania.
Questo prodotto è conforme alle seguenti direttive europee:
2004/108/EC (EMC)
2006/95/EC (LVD)
2011/65/EU (RoHS)
2012/206/EU (ErP)
31
 Loading...