

Page 1
10020108 10028270
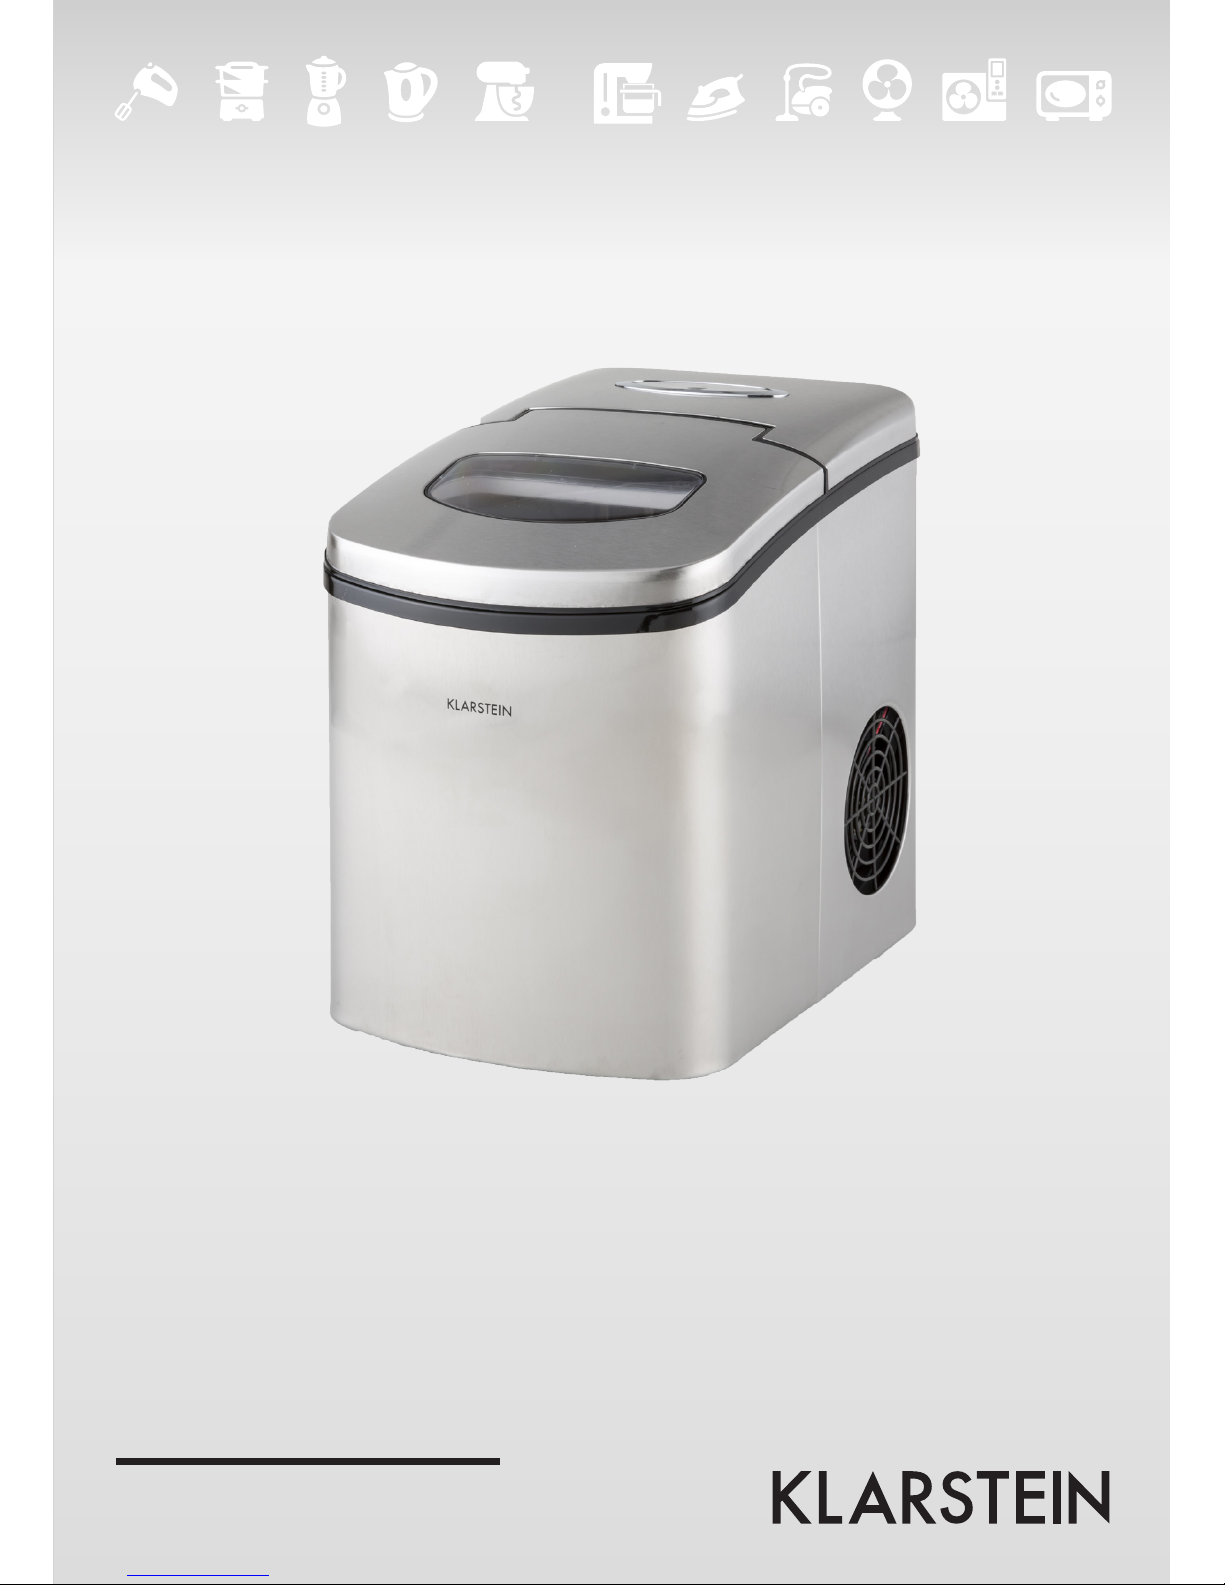
Eiswürfelmaschine
Page 2

2
Inhalt
Technische Daten
Sicherheitshinweise
Sehr geehrter Kunde,
wir gratulieren Ihnen zum Erwerb Ihres Gerätes. Lesen Sie die folgenden Anschluss- und Anwendungshinweise sorgfältig durch und befolgen Sie diese, um möglichen technischen Schäden vorzubeugen. Für Schäden, die durch Missachtung der Sicherheitshinweise und unsachgemäßen Gebrauch entstehen, übernehmen
wir keine Haftung.
Artikelnummer 10020108
10028270
Stromversorgung 220-240 V 50/60 Hz
Leistungsaufnahme 150 W
Gewicht 7,2 kg
Technische Daten . . . . . . . . . . . . . . . . . . . . . . . . . . . . . . . . . . . . . . . . . . . . . . .2
Sicherheitshinweise . . . . . . . . . . . . . . . . . . . . . . . . . . . . . . . . . . . . . . . . . . . . . .2
Geräteübersicht . . . . . . . . . . . . . . . . . . . . . . . . . . . . . . . . . . . . . . . . . . . . . . . . .3
Bedienung . . . . . . . . . . . . . . . . . . . . . . . . . . . . . . . . . . . . . . . . . . . . . . . . . . . .4
Reinigung und Pflege . . . . . . . . . . . . . . . . . . . . . . . . . . . . . . . . . . . . . . . . . . . . .4
Hinweise zur Entsorgung . . . . . . . . . . . . . . . . . . . . . . . . . . . . . . . . . . . . . . . . . . .5
Konformitätserklärung . . . . . . . . . . . . . . . . . . . . . . . . . . . . . . . . . . . . . . . . . . . .5
Bestimmungsgemäßer Gebrauch
• Das Gerät dient dem Produzieren von Eiswürfeln.
• Es ist ausschließlich für diesen Zweck bestimmt und darf nur zu diesem Zweck verwendet werden. Es darf
nur in der Art und Weise benutzt werden, wie es in dieser Gebrauchsanleitung beschrieben ist.
• Dieses Gerät ist nicht dafür bestimmt, durch Personen (einschließlich Kindern) mit eingeschränkten physischen, sensorischen oder geistigen Fähigkeiten oder mit Mangel an Erfahrung und/oder Wissen benutzt
zu werden, es sei denn, sie werden durch eine für ihre Sicherheit zuständige Person beaufsichtigt oder
erhielten von ihr Anweisungen, wie das Gerät zu benutzen ist. Kinder sollten beaufsichtigt werden, um
sicherzustellen, dass sie nicht mit dem Gerät spielen.
Page 3

3
Zur Reduzierung der Gefahr von Brand, elektrischem Schlag und Beschädigung:
• Setzen Sie dieses Gerät nicht dem Regen aus.
• Ausschließlich das empfohlene Zubehör verwenden.
• Reparieren Sie dieses Gerät nicht selbst. Wenden Sie sich zur Wartung an den Kundendienst.
Netzkabel / Netzgerät
• Gewährleisten Sie, dass die Spannung der Stromversorgung dem auf diesem Gerät angegebenen Wert
entspricht.
• Stecken Sie den Netzstecker vollständig in die Steckdose ein.
• Ziehen Sie nicht am Kabel, knicken Sie es nicht und stellen Sie keine schweren Gegenstände darauf.
• Fassen Sie den Stecker nicht mit nassen Händen an.
• Fassen Sie den Stecker beim Herausziehen an seinem Korpus an.
• Verwenden Sie keinen beschädigten Netzstecker oder eine beschädigte Steckdose.
• Installieren Sie dieses Gerät so, dass das Netzkabel sofort aus der Steckdose gezogen werden kann, wenn
Störungen auftreten.
Gerät
• Stellen Sie keine Quellen offener Flammen, z. B. brennende Kerzen, auf das Gerät.
• Reinigen Sie den Flüssigkeitskreislauf in regelmäßigen Abständen. Nehmen Sie das Gerät hierzu mit einer
Lösung aus Essig und Wasser in Betrieb.
Aufstellung
• Stellen Sie das Gerät auf eine trockene, ebene, wasserfeste und hitzebeständige Oberfläche.
• Suchen Sie einen Aufstellort, an dem Kinder nicht an die heißen Oberflächen des Gerätes gelangen können.
• Die Steckdose muss leicht zugänglich sein, um im Notfall das Gerät schnell vom Stromkreis trennen zu
können.
• Installieren oder positionieren Sie dieses Gerät nicht in einem Bücherregal, Einbauschrank oder einem
sonstigen engen Raum. Stellen Sie eine gute Belüftung des Gerätes sicher.
• Stellen Sie das Gerät nicht auf Verstärker oder andere Geräte, die heiß werden können. Diese Hitze könnte
das Gerät beschädigen.
• Setzen Sie dieses Gerät keinem direkten Sonnenlicht, hohen Temperaturen, starker Feuchtigkeit und übermäßigen Erschütterungen aus.
Page 4
4
Bedienung
Geräteübersicht
1 Silikon-Stopfen
2 Wassertank
3 Kompressor
4 Stromkabel
5 Deckel
6 Fenster
7 Abdeckung
8 Armatur
9 Wasserauffänger
10 Verdampfer
11 Schaufel
12 Eisbehälter
Bedienelemente
ON/OFF Schaltet das Gerät ein und aus.
LED
„ADD WATER“
Bei ungenügendem Wasserstand leuchtet
die LED-Anzeige auf und ein Signalton
ertönt.
Füllen Sie Wasser nach, schalten Sie das
Gerät aus und nach 3 Minuten wieder ein.
LED
„ICE FULL“
Bei überfülltem Eisbehäter leuchtet die
LED-Anzeige auf und ein Signalton ertönt.
Entnehmen Sie das überschüssige Eis,
schalten Sie das Gerät aus und nach 3 Minuten wieder ein.
Page 5
5
Fehlerbehebung
Vor dem Gebrauch
• Lassen Sie das Gerät nach dem Entpacken und vor der ersten Inbetriebnahme 2 Stunden auf einer ebenen
Oberfläche stehen.
• Das Gerät ist nicht zur Nutzung mit destilliertem Wasser vorgesehen.
• Nutzen Sie das Gerät nicht mit Wasser, das länger als 24 Stunden gestanden hat.
Bedienung
1. Öffnen Sie den Deckel. Befüllen Sie den Wassertank mit Wasser. Der Wasserstand sollte nicht über den
Eisbehälter hinausgehen,
2. Stellen Sie die Stromverbindung her.
3. Drücken Sie den Ein-/Ausschalter. Das Gerät nimmt den Betrieb auf.
4. Falls die “ADD Water” LED aufleuchtet, füllen Sie Wasser nach. Sollte kein Wasser gepumpt werden,
entfernen Sie kurz den Silikon-Stopfen.
5. Wenn die “ICE FULL”-LED aufleuchtet, entnehmen Sie das Eis.
6. Schalten Sie das Gerät nach dem Gebrauch ab und nehmen Sie es vom Netz.
Hinweise:
• In den ersten drei Betriebszylen werden die Eiswürfel vergleichsweise klein und ungleichmäßig sein.
Problem Mögliche Ursache Lösung
Der Kompressor gibt schnarrende
Geräusche von sich.
Es liegt nicht ausreichend
Spannung an.
Stellen Sie eine adäquate
Stromversorgung her.
Die „ADD Water“-LED leuchtet. Kein Wasser im Tank. Schalten Sie das Gerät ab. Füllen
Sie Wasser nach. Schalten Sie das
Gerät nach 3 Minuten wieder ein.
Luft im Pumpenkreislauf Entfernen Sie den Silikonstopfen
kuzzeitig.
Die Indikator-LEDs des
Bedienfeldes leuchten nicht.
Sicherung kaputt /
keine Stromversorgung
Sicherung wechseln /
Stromversorgung herstellen
Die Eiswürfel sind zu groß und
miteiner verbunden.
Eis von einem früheren
Produktionszyklus ist im
Wassertank verblieben.
Entnehmen Sie das verbliebene
Eis.
Der Verdampfer ist zu niedrig. Ändern Sie die Positions des
Verdampfers leicht.
Es wird kein Eis produziert. Das Kühlmittel ist ausgelaufen. Wenden Sie sich an
sachverständiges Servicepersonal.
Der Kompressor ist defekt.
Page 6
6
Reinigung und Pflege
Hinweise zur Entsorgung
Konformitätserklärung
Befindet sich die linke Abbildung (durchgestrichene Mülltonne auf Rädern) auf dem Produkt,
gilt die Europäische Richtlinie 2012/19/EU. Diese Produkte dürfen nicht mit dem normalen
Hausmüll entsorgt werden. Informieren Sie sich über die örtlichen Regelungen zur getrennten
Sammlung elektrischer und elektronischer Gerätschaften. Richten Sie sich nach den örtlichen
Regelungen und entsorgen Sie Altgeräte nicht über den Hausmüll. Durch die regelkonforme
Entsorgung der Altgeräte werden Umwelt und die Gesundheit ihrer Mitmenschen vor möglichen negativen Konsequenzen geschützt. Materialrecycling hilft, den Verbrauch von Rohstoffen zu verringern.
Hersteller: Chal-Tec GmbH, Wallstraße 16,
10179 Berlin, Deutschland
Dieses Produkt entspricht den folgenden Europäischen Richtlinien:
2014/30/EU (EMV)
2014/35/EU (Niederspannung)
2011/65/EU (RoHS)
Die LED-Leuchten für „ADD
Water“ und „Full Ice“ leuchten
gleichzeitig auf.
Der Eisauffangbehälter ist
überfüllt.
Entnehmen Sie das überschüssige
Eis. Schalten Sie das Gerät ab und
nach 3 Minuten wieder ein.
Das Gerät läuft, ohne Eis zu
produzieren.
Das Ventil ist defekt. Ersetzen Sie das Ventil.
• Reinigen Sie den Inneneinsatz, den Eissammelbehälter, den Wassertank, die Schaufel und den Verdunster
häufig. Ziehen Sie beim Reinigen den Netzstecker und entfernen Sie die Eiswürfel. Verwenden Sie eine in
Wasser verdünnte Essiglösung, um die Eiswürfelmaschine innen und außen zu reinigen. Besprühen Sie das
Gerät nicht mit Chemikalien oder Verdünnern wie Säuren, Benzin oder Öl. Spülen Sie das Gerät gründlich
ab, bevor Sie es wieder einschalten.
• Verwenden Sie keine mechanischen Werkzeuge, um den Entfrostungsvorgang zu beschleunigen.
• Falls Sie die Eiswürfelmaschine nach langer Zeit wieder benutzen, kann es vorkommen, dass die Wasserpumpe durch einen Lufteinschluss nicht genügend Wasser transportiert. In diesem Fall leuchtet die „ADD
Water“-LED auf. Um das zu beheben, drücken Sie die START-Taste einfach noch einmal, und die Eiswürfelmaschine funktioniert wieder.
• Verwenden Sie immer frisches Wasser, bevor Sie mit der Eisherstellung beginnen, gleich ob bei der Erstbenutzung oder nach einer längeren Zeit der Nichtbenutzung.
Page 7
7
Contents
Technical Data
Security Instructions
Dear Customer,
Congratulations on purchasing this equipment. Please read this manual carefully and take care of the following hints to avoid injury and damages. Any failure caused by ignoring the mentioned items and cautions
mentioned in the instructions are not covered by our warranty and any liability.
Item number 10020108
10028270
Voltage 220-240 V 50/60 Hz
Power consumption 150 W
Weight 7.2 kg
Technical Data . . . . . . . . . . . . . . . . . . . . . . . . . . . . . . . . . . . . . . . . . . . . . . . . .7
Security Instructions . . . . . . . . . . . . . . . . . . . . . . . . . . . . . . . . . . . . . . . . . . . . . . 7
Product Overview . . . . . . . . . . . . . . . . . . . . . . . . . . . . . . . . . . . . . . . . . . . . . . .9
Operation . . . . . . . . . . . . . . . . . . . . . . . . . . . . . . . . . . . . . . . . . . . . . . . . . . . .9
Troubleshooting . . . . . . . . . . . . . . . . . . . . . . . . . . . . . . . . . . . . . . . . . . . . . . .10
Cleaning and Care . . . . . . . . . . . . . . . . . . . . . . . . . . . . . . . . . . . . . . . . . . . . . . 11
Disposal Considerations . . . . . . . . . . . . . . . . . . . . . . . . . . . . . . . . . . . . . . . . . . 11
Declaration of Conformity . . . . . . . . . . . . . . . . . . . . . . . . . . . . . . . . . . . . . . . . . 12
Intended use
• This appliance serves the making of ice cream / sorbet.
• It is solely designed for this purpose and may be used only for this pupose. It must be used only the way
described in the instructin manual.
• This appliance is not intended for use by persons (including children) with reduced physical, sensory or
mental capabilities, or lack of experience and knowledge, unless they have been given supervision or instruction concerning use of the appliance by a person responsible for their safety.
• Children should be supervised and not play with this appliance.
Page 8

8
To reduce the risk of fire, electrical shock and damage:
• Do not expose the appliance to rain.
• Use only recommended accessories.
• Do not repair the device yourself. Turn to qualified personnel.
Power cord / power adapter
• Make sure that the voltage or your power supply corresponds to rated voltage of this appliance.
• nsert the power plug completely into the socket.
• Do not pull on the power cord, do not bend it and do not place heavy object on it.
• Do not touch the power cord with wet hands.
• When disconnecting, grab the power plug on its body.
• Do not use a damaged power plug oder a damaged socket.
Appliance
• Do not place sources with open fire, (e.g. burning candles) on the appliance.
• Clean the liquid cycle periodically. Use a solution of vinegar and water during operation.
Positioning
• Place the device on a dry, level, water-resistant and heat-resistant surface.
• Look for a place where the children cannot touch the hot surface of the appliance.
• The socket must be easily accessible to be able to quickly seperate the appliance in case of emergency.
• Install and position the appliance in the shelf, built-in cupboard or any other narrow space. Ensure a good
air circulation for the appliance.
• Do not place the appliance on an ampflier or other devices that could become hot. The heat can damage
the appliance.
• Do not expose the appliance to direct sunlight, high temperatures, high humidity or excessive vibrations.
Page 9

9
Operation
Product Overview
1 Silicon stopper
2 Water tank
3 Compressor
4 Plug and power cord
5 Front Iid
6 View window
7 Back front cover
8 Control Panel
9 Water tray
10 Evaporator
11 Ice shovel
12 Ice basket
Control panel
ON/OFF Press it to turn unit on or off.
LED
ADD WATER
This light will come on with a long noise, DI‘
noise. You will need to add water and press
the ,STOP‘ then the ,START‘ button to restart
the ice maker.
LED
ICE FULL
This light will come on with a ,DI, DI‘ noise when
the ice has reached the maximum capacity of
the storage cabinet. Press ON/OFF button to
restart the Iee maker after some of the ice has
been taken away.
Page 10

10
Troubleshooting
Before use
• Before using the Iee maker for the first time, please wait 2 hours after positioning it, and keep the front Iid
open for at least 2 hours.
• Destilled water is not allowed to be used on this unit.
• Do not use this appliance with water that stood for longer than 24 hours.
Operation
1. Open the Iid and fill the water reservoir with water. Make sure the water Ievei in the water reservoir is not
over the Iee collecting tray.
2. Connect to the power.
3. Press ON/OFF button to turn unit on. The ice maker begins to work.
4. If indicator ICE FULL is in red with ,DI DI‘ noise, please take out the ice with the scoop.
5. Press ON/OFF button to stop the machine. Remove the plug
Notes:
• If no water is pumped up to the water tray over two cycles but the water in water tank is enough,then
please move the unit ahead a little,then remove the silicon stopper,and Iet several drops water runs out.
• Note: When the ice collecting tray is full please remove the ice immediately, Do not allow the ice collecting
• tray to overfill.
Problem Possible Cause Suggested Solutions
The compressor works abnormally
with a buzzing noise.
The voltage is lower than recommended.
Stop the ice maker an do not restart until the voltage is normal.
Water shortage indicator light is on. There is no water. Press the STOP button, fill in wa-
ter, wait 3 minutes and press the
start button to restart. When the
water has reached the fill line the
ice maker will restart automatically.
The pump is full of air. Remove the silicon stopper and let
several drops of water run out.
Indicator lights on display are not
on.
Blown fuse / no power. Replace fuse / Turn power on.
The ice is made too large and with
pieces sticking together.
Ice of previous cycles left in the
water tray.
Stop the unit right away, restart the
unit till the ice in water tray melt
down.
The evaporator is too low. Shift the evaporator a little.
Page 11

11
Cleaning and Care
No ice is made. There is no refrigerant in the com-
pressor.
Call for service.
Compressor is broken down, fan
motor is broken.
The lights of ice full and deficient
come at in the same time.
Water tray is blocked is blocked by
ice cube.
Clar the ice cube under the ice
shovel. Pull out the plug and insert it again. Then press the „ON/
OFF“ button, two minutes later the
michine will restart automatically:
Machine keeps running, but the
water is warmer than the nomal
water.
The magnetic valve is broken. Replace the magnetic valve.
• Clean the inner Iiner, ice collecting tray, water box, ice shovel and evaporator frequently. When cleaning,
unplug the unit and remove the ice cubes. Use a diluted solution of water and vinegar to clean the inside
and the outside surface of the ice maker. Do not spray the ice maker with chemicals or diluted agents such
as acids, gasoline or oil. Rinse thoroughly before starting.
• Do not use mechanical devices to accelerate the defrosting process.
• If the icemaker is reused after a long time, the water pump may not pump sufficient water due to an air
block, the deficient water indicator turns on in this case . To correct this press the START button again, then
the icemaker will work normally.
• To ensure the cleanliness of the ice cubes, water in the water reservoir should be replaced every 24 hours.
• If the compressor stops for any reason such as water shortage, too much ice, power off, etc. Do not start
the system right away, wait 3 minutes, and then re-start the ice maker.
• Always use fresh water before starting ice production either at initial installation or after a long shut-off
period.
Disposal Considerations
According to the European waste regulation 2012/19/EU this symbol on the product or on
its packaging indicates that this product may not be treated as household waste. Instead it
should be taken to the appropriate collection point for the recycling of electrical and electronic equipment. By ensuring this product is disposed of correctly, you will help prevent potential
negative consequences for the environment and human health, which could otherwise be
caused by inappropriate waste handling of this product. For more detailed information about
recycling of this product, please contact your local council or your household waste disposal
service.
Page 12

12
Declaration of Conformity
Producer: Chal-Tec GmbH, Wallstraße 16, 10179 Berlin.
This product is conform to the following European Directives:
2014/30/EU (EMC)
2014/35/EU (LVD)
2011/65/EU (RoHS)
Page 13

13
Indice
Dati tecnici
Avvertenze di sicurezza
Gentile Cliente,
La ringraziamo per aver acquistato il dispositivo. La preghiamo di leggere attentamente le seguenti istruzioni
per l’uso e di seguirle per evitare possibili danni tecnici. Non ci assumiamo alcuna responsabilità per danni
scaturiti da una mancata osservazione delle avvertenze di sicurezza e da un uso improprio del dispositivo.
Codice articolo 10020108
10028270
Alimentazione 220-240 V 50/60 Hz
Potenza assorbita 150 W
Peso 7,2 kg
Dati tecnici . . . . . . . . . . . . . . . . . . . . . . . . . . . . . . . . . . . . . . . . . . . . . . . . . . . 13
Avvertenze di sicurezza . . . . . . . . . . . . . . . . . . . . . . . . . . . . . . . . . . . . . . . . . . . 13
Descrizione del prodotto . . . . . . . . . . . . . . . . . . . . . . . . . . . . . . . . . . . . . . . . . . 15
Utilizzo . . . . . . . . . . . . . . . . . . . . . . . . . . . . . . . . . . . . . . . . . . . . . . . . . . . . . 15
Risoluzione problemi . . . . . . . . . . . . . . . . . . . . . . . . . . . . . . . . . . . . . . . . . . . . 16
Pulizia e manutenzione . . . . . . . . . . . . . . . . . . . . . . . . . . . . . . . . . . . . . . . . . . . 17
Avviso di smaltimento . . . . . . . . . . . . . . . . . . . . . . . . . . . . . . . . . . . . . . . . . . . . 17
Dichiarazione di conformità . . . . . . . . . . . . . . . . . . . . . . . . . . . . . . . . . . . . . . . . 17
Uso previsto
• Il dispositivo serve alla produzione di cubetti di ghiaccio.
• Il dispositivo è progettato esclusivamente a questo fine e non deve essere utilizzato per scopi differenti.
Deve essere utilizzato solamente secondo le modalità indicate nel manuale d’uso.
• Fare attenzione in caso il dispositivo sia in funzione nelle vicinanze di bambini, disabili o anziani. Il dispositivo può essere utilizzato da persone (in particolare bambini) con limitazioni psichiche, sensoriali e fisiche
solo in seguito a precise ed esaurienti indicazioni. Assicurarsi che i bambini non giochino con il dispositivo.
Per ridurre il rischio d’incendio, folgorazione e danneggiamenti:
• Non posizionare il dispositivo sotto la pioggia.
Page 14

14
• Utilizzare esclusivamente gli accessori consigliati.
• Non riparate i dispositivo autonomamente. Rivolgersi sempre per la manutenzione a personale tecnico
specializzato.
Cavo di rete/Alimentatore
Per ridurre il rischio d’incendio, folgorazione e danneggiamenti:
• Assicurarsi che la tensione dell’alimentazione corrisponda a quella indicata sul dispositivo.
• Inserire la spina completamente nella presa di corrente.
• Non tirare il cavo, non piegarlo, non porvi sopra oggetti pesanti.
• Non toccare la spina con le mani bagnate.
• Afferrare la spina dal corpo al momento di scollegarla.
• Non utilizzare spine o prese della corrente danneggiate.
• Installare il dispositivo in modo da poter immediatamente scollegare il cavo di rete dalla presa di corrente
in caso di malfunzionamenti.
Dispositivo
• Non posizionare fiamme libere, come ad es. candele accese, sopra al dispositivo.
• Pulire le zone del circolo d’acqua a intervalli regolari. Utilizzare una soluzione di aceto e acqua all’interno del
consueto circolo per realizzare la pulizia.
Posizionamento
• Posizionare il dispositivo su una superficie piana, asciutta, resistente all’acqua e al calore.
• La spina deve essere facilmente raggiungibile, così da poter essere immediatamente scollegata dalla presa
di corrente in caso d’emergenza.
• Non installare o posizionare il dispositivo in una libreria, mensole a incasso o in spazi stretti. Assicurare una
buona aerazione del luogo di posizionamento del dispositivo.
• Non posizionare il dispositivo sopra ad amplificatori o altri dispositivi. Il calore potrebbe danneggiare il
dispositivo.
• Non posizionare il dispositivo sotto alla luce diretta del sole, ad alte temperature, alti livelli di umidità o in
zone soggette a forti vibrazioni.
Page 15

15
Utilizzo
Descrizione del prodotto
1 Tappi in silicone
2 Serbatoio acqua
3 Compressore
4 Cavo alimentazione
5 Coperchio
6 Finestra
7 Copertura
8 Armatura
9 Contenitore raccolta
acqua
10 Evaporatore
11 Paletta
12 Contenitore ghiaccio
Comandi
ON/OFF Accende e spegne il dispositivo.
LED
„ADD WATER“
In caso di acqua insufficiente si accende
una spia LED e viene emesso un segnale
acustico.
Riempire d’acqua, spegnere il dispositivo e
riaccenderlo dopo 3 minuti.
LED
„ICE FULL“
In caso di ghiaccio eccessivo si accende
una spia LED e viene emesso un segnale
acustico. Rimuovere il ghiaccio in eccesso,
spegnere il dispositivo e riaccenderlo dopo
3 minuti.
Page 16

16
Risoluzione problemi
Prima dell’utilizzo
• Dopo aver disimballato il dispositivo lasciarlo per 2 ore su una superficie piana prima di utilizzarlo..
• Il dispositivo non prevede utilizzo con acqua distillata..
• Non utilizzare il dispositivo con acqua che ha ristagnato per più di 24 ore.
Utilizzo
1. Aprire il coperchio. Riempire il serbatoio d’acqua. Il livello dell’acqua dovrebbe essere tale da non fluire nel
contenitore per il ghiaccio.
2. Collegare all’alimentazione.
3. Premere l’interruttore di accensione/spegnimento. Il dispositivo entra in funzione..
4. Se la spia LED “ADD Water” s‘illumina, aggiungere acqua. Se non viene pompata l’acqua rimuovere
temporaneamente il tappo di silicone.
5. Quando la spia LED “ICE FULL” s‘illumina, rimuovere il ghiaccio.
6. Spegnere il dispositivo dopo l’utilizzo e scollegarlo dall’alimentazione.
Avvertenze:
• Nei primi tre cicli di utilizzo i cubetti di ghiaccio potrebbero risultare irregolari e di piccole dimensioni.
Problema Possibile causa Soluzione
Il compressore emette rumori
stridenti.
La tensione non è sufficiente. Fornire un livello di tensione
dell’alimentazione adeguato.
La spia LED„ADD Water“
s’illumina.
Mancanza d’acqua nel serbatoio. Spegnere il dispositivo. Riempire
d’acqua e riaccenderlo dopo 3
minuti.
Aria nel circuito di pompaggio Rimuovere brevemente il tappo in
silicone.
Le spie LED del pannello di
comando non s’illuminano.
Sicura difettosa / mancanza di
tensione dell’alimentazione.
Sostituire sicura / ricollegare
all’alimentazione
I cubetti di ghiaccio sono troppo
grossi e incollati uno all’altro..
Ghiaccio di un ciclo precedente
rimasto nel serbatoio dell’acqua
Rimuovere il ghiaccio residuo.
L’evaporatore è troppo basso. Modificare leggermente la
posizione dell’evaporatore.
Nessuna produzione di ghiaccio. Perdita di refrigerante. Rivolgersi a personale tecnico
specializzato.
Il compressore è difettoso.
Page 17

17
Pulizia e manutenzione
Avviso di smaltimento
Dichiarazione di conformità
Se sul prodotto è presente la figura a sinistra (il bidone dei rifiuti con le ruote), si applica la direttiva europea 2012/19/EU. Questi prodotti non possono essere smaltiti con i rifiuti normali.
Informarsi sulle disposizioni vigenti per la raccolta di dispositivi elettrici ed elettronici. Attenersi alle disposizioni vigenti e non smaltire i vecchi dispositivi con i rifiuti domestici. Grazie al
corretto smaltimento dei vecchi dispositivi si tutela il pianeta e la salute delle persone da possibili conseguenze negative. Il riciclo di materiali aiuta a diminuire il consumo di materie prime.
Produttore: Chal-Tec GmbH, Wallstraße 16, 10179 Berlin.
Questo prodotto è conforme alle seguenti direttive europee:
2014/30/UE (EMC)
2011/65/UE (RoHS)
2014/35/UE (LVD)
Le spie LED „ADD Water“
e „Full Ice“ s’illuminano
contemporaneamente.
Il contenitore di raccolta del
ghiaccio è eccessivamente pieno.
Rimuovere il ghiaccio in eccesso.
Spegnere il dispositivo e
riaccenderlo dopo 3 minuti.
Il dispositivo funziona, ma senza
produrre ghiaccio.
La valvola è difettosa. Sostituire la valvola.
• Pulire la parte interna, il contenitore di raccolta del ghiaccio, il serbatoio dell’acqua, la paletta e il vaporizzatore con frequenza. Quando si procede alla pulizia scollegare la spina e rimuovere il ghiaccio. Utilizzare una
soluzione acetosa allungata con acqua per pulire la macchina per ghiaccio internamente ed esternamente.
Non utilizzare prodotti chimici o diluenti come acidi, benzina o oli. Risciacquare abbondantemente prima
dell’utilizzo.
• Non utilizzare attrezzi meccanici per velocizzare il processo di sbrinamento.
• Se la macchina per ghiaccio non viene utilizzata per lungo tempo è possibile che la pompa dell’acqua, a
causa di un vuoto d’aria non fornisca acqua sufficiente. In questo caso s’illumina la spia LED „ADD Water“.
Per risolvere questo problema è sufficiente premere una seconda volta il tasto START e il dispositivo riprende a funzionare normalmente.
• Utilizzare sempre acqua fresca per la produzione di ghiaccio. Questo vale per i primi utilizzi come per
l’utilizzo dopo lungo tempo.
Page 18

10020108 10028270
Machine à glaçons
Page 19

19
Table des matières
Données techniques
Consignes de sécurité
Chère cliente, cher client,
Toutes nos félicitations pour l’acquisition de ce nouvel appareil. Veuillez lire attentivement les
instructions de branchement et d’utilisation afin d’éviter d’éventuels dommages techniques. Le fabricant ne
saurait être tenu pour responsable des dommages dus au non-respect des consignes de sécurité et à la
mauvaise utilisation de l’appareil.
Articles n° 10020108
10028270
Alimentation 220-240 V 50/60 Hz
Puissance 150 W
Poids 7,2 kg
Données techniques . . . . . . . . . . . . . . . . . . . . . . . . . . . . . . . . . . . . . . . . . . . . . 19
Consignes de sécurité . . . . . . . . . . . . . . . . . . . . . . . . . . . . . . . . . . . . . . . . . . . . 19
Aperçu de l‘appareil . . . . . . . . . . . . . . . . . . . . . . . . . . . . . . . . . . . . . . . . . . . . . 21
Utilisation et mise en marche . . . . . . . . . . . . . . . . . . . . . . . . . . . . . . . . . . . . . . . 21
Identification et résolution des problèmes . . . . . . . . . . . . . . . . . . . . . . . . . . . . . . . 22
Nettoyage et entretien . . . . . . . . . . . . . . . . . . . . . . . . . . . . . . . . . . . . . . . . . . .23
Informations sur le recyclage . . . . . . . . . . . . . . . . . . . . . . . . . . . . . . . . . . . . . . . 23
Déclaration de conformité . . . . . . . . . . . . . . . . . . . . . . . . . . . . . . . . . . . . . . . . . 23
Utilisation conforme
• Cet appareil a été fabriqué pour Fabriquer de la glace.
• ‚appareil doit uniquement être utilisé pour cela. Il doit être utilisé comme décrit dans cette notice. L‘appareil
ne doit pas être manipulé par des personnes (enfants compris) ne possédant pas de capacités physiques,
sensorielles ou intellectuelles suffisantes ou manquant d‘expérience, à moins d‘être sous la surveillance de
personnes responsables et si elles ont été informées du fonctionnement de l‘appareil. Les enfants devront
être surveillés afin qu‘ils ne jouent pas avec l‘appareil.
Pour réduire les risques d‘incendie, d’électrocution et de causer tout dommage :
• Ne pas exposer l‘appareil à la pluie.
Page 20

20
• N‘utiliser que les accessoires prévus.
Ne pas effectuer de réparations par soi-même. S‘adresser à des personnes qualifiées pour toute r.
Câble d‘alimentation/Prise
• S‘assurer que la tension du secteur et celle requise par l‘appareil correspondent.
Enfoncer la prise de l‘appareil complètement dans la prise de secteur. Ne pas tirer sur le câble, ne pas le
plier et ne pas poser d‘objet lourd dessus. Ne pas toucher la prise avec des mains humides.
Débrancher l‘appareil en tirant sur le corps de la prise.
Ne pas utiliser de prises défectueuses (secteur ou appareil).
Installer l‘appareil de telle sorte qu‘il puisse être débranché immédiatement en cas de problème.
Appareil
• Ne pas poser d‘objets enflammés tels qu‘une bougie par exemple sur l‘appareil.
Nettoyer le circuit d‘eau régulièrement. Pour cela, faire fonctionner l‘appareil avec un mélange d‘eau et de
vinaigre.
Positionnement
• Placer l‘appareil sur une surface plane et sèche, imperméable et résistante à la chaleur.
• Chercher un endroit où les parois chaudes de l‘appareil sont hors de portée des enfants.
• La prise doit être facile d‘accès afin que l‘appareil puisse être rapidement débranché du secteur en cas de
problème.
• Ne pas poser l‘appareil sur une étagère ou dans une commode ou tout autre endroit confiné. S‘assurer
que l‘air peut circuler tout autour de l‘appareil.
• Ne pas poser l‘appareil sur un amplificateur ou tout autre appareil produisant de la chaleur qui pourrait lui
nuire.
• Ne pas exposer l‘appareil aux rayons directs du soleil, à des températures élevées, à une forte humidité ou
à de très fortes vibrations.
Page 21

21
Utilisation et mise en marche
Aperçu de l‘appareil
1 Bouchon en silicone
2 Réservoir à eau
3 Compresseur
4 Câble d‘alimentation
5 Couvercle
6 Fenêtre
7 Rabat
8 Châssis
9 Récipient pour
récupérer l‘eau
10 Évaporateur
11 Pelle
12 Récipient à glace
Panneau de commande
ON/OFF Pour allumer et éteindre l‘appareil.
LED
„ADD WATER“
Si l‘appareil manque d‘eau dans le réservoir, la lumière LED s‘allume et un signal
sonore retentit.
Remplissez le réservoir, éteignez l‘appareil
et allumez-le à nouveau au bout de 3
minutes.
LED
„ICE FULL“
Cette LED s‘allume lorsque le récipient à
lace est plein et un signal sonore retentit.
Retirez la glace, éteignez l‘appareil et allumez-le à nouveau au bout de 3 m.
Page 22

22
Identification et résolution des problèmes
Avant utilisation
• Après avoir retiré l‘appareil de son emballage, laissez-le posé sur une surface plane pendant 2 heures avant
la première utilisation.
• N‘utilisez pas l‘appareil avec de l‘eau distillée.
• N‘utilisez pas de l‘eau qui a stagné pendant plus de 24 heures.
Mise en marche
1. Ouvrez le couvercle. Remplissez le réservoir avec de l‘eau. Le niveau d‘eau ne doit pas dépasser le récipient
à glace.
2. Branchez l‘appareil sur le secteur.
3. Appuyez sur l‘interrupteur. L‘appareil se met en marche.
4. Si l‘indication « ADD WATER » s‘allume, remplissez le réservoir avec de l‘eau. Si l‘eau ne doit pas être
pompée, retirez brièvement le bouchon de silicone.
5. Si l‘indication « ICE FULL » s‘allume, retirez la glace.
6. Après toute utilisation, éteignez l‘appareil et débranchez-le du secteur.
Avertissement:
• Lors des trois premiers cycles de production de glace, les glaçons seront relativement petits et inégaux.
Identification et résolution des problèmes.
Problème Cause probable Solution
Le compresseur fait de drôles de
bruits.
Il n‘y a pas assez de tension. Alimentez l‘appareil avec une
tension suffisante.
L‘indication « ADD WATER »
s‘allume .
Manque d‘eau dans le réservoir. Éteignez l‘appareil puis remplissez
le réservoir. Rallumez l‘appareil au
bout de 3 minutes.
Présence d‘air dans le circuit de la
pompe à eau.
Retirez le bouchon de silicone
brièvement. .
Les lumières LED du panneau de
commande ne s‘allument pas.
Fusible endommagé / Pas
d‘alimentation.
Changer le fusible / branchez
l‘appareil sur le secteur.
Les glaçons sont trop gros et collés
les uns aux autres.
De la glace fabriquée pendant le
cycle précédant est restée dans le
réservoir d’eau.
Retirez la glace du réser.
L’évaporateur est trop faible. Changez légèrement la position
de l’évaporateur.
La machine ne fabrique pas de
glace.
Le produit réfrigérant a fui
Le compresseur est endommagé.
Adressez-vous au service.
Page 23

23
Nettoyage et entretien
Informations sur le recyclage
Déclaration de conformité
Vous trouverez sur le produit l’image ci-contre (une poubelle sur roues, barrée d‘une croix),
ce qui indique que le produit se trouve soumis à la directive européenne 2012/19/UE. Renseignez-vous sur les dispositions en vigueur dans votre région concernant la collecte séparée
des appareils électriques et électroniques. Respectez-les et ne jetez pas les appareils usagés
avec les ordures ménagères. La mise en rebut correcte du produit usagé permet de préserver
l’environnement et la santé. Le recyclage des matériaux contribue à la préservation des ressources naturelles.
Hersteller: Chal-Tec GmbH, Wallstraße 16, 10179 Berlin, Deutschland
Fabricant: Chal-Tec GmbH, Wallstraße 16, 10179 Berlin, Allemagne:
Ce produit est conforme aux directives européennes suivantes :
2014/30/UE (CEM)
2011/65/UE (RoHS)
2014/35/UE (LVD)
Les lumières LED « ADD WATER »
et « ICE FULL » sont allumées en
même temps.
Le récipient à glace est plein. Retirez la glace. Éteignez l‘appareil
puis rallumez-le au bout
La machine fonctionne mais sans
produire de glaçons.
La soupape est défectueuse. Changez la soupape.
• Nettoyez régulièrement l‘intérieur, le récipient à glace, le réservoir, la pelle et l‘évaporateur. Lors du nettoyage, débranchez la machine du secteur et retirez la glace. Utilisez une solution d‘eau et de vinaigre dilué
pour nettoyer l‘intérieur et l‘extérieur de la machine à glaçons. Ne vaporisez pas l‘appareil avec des produits
chimiques et des solvants tels que les acides, essence ou huile. Rincez abondamment l‘appareil avant de
l‘utiliser à nouveau.
• N‘utilisez pas d‘outils mécaniques pour accélérer le processus de décongélation.
• Si vous utilisez la machine à nouveau après une longue période d‘arrêt, il est probable que la pompe ne
fasse pas circuler suffisamment l‘eau à cause de la présence d‘air dans le circuit. Dans ce cas l‘indication
« ADD WATER » s‘allume. Pour corriger ce problème, appuyez à nouveau sur la touche « START » et la
machine à glaçon fonctionnera à nouveau.
• Utilisez toujours de l‘eau fraîche pour fabriquer des glaçons, lors de toutes les utilisations, de la première
comme après une longue période sans utilisation.
 Loading...