

Page 1
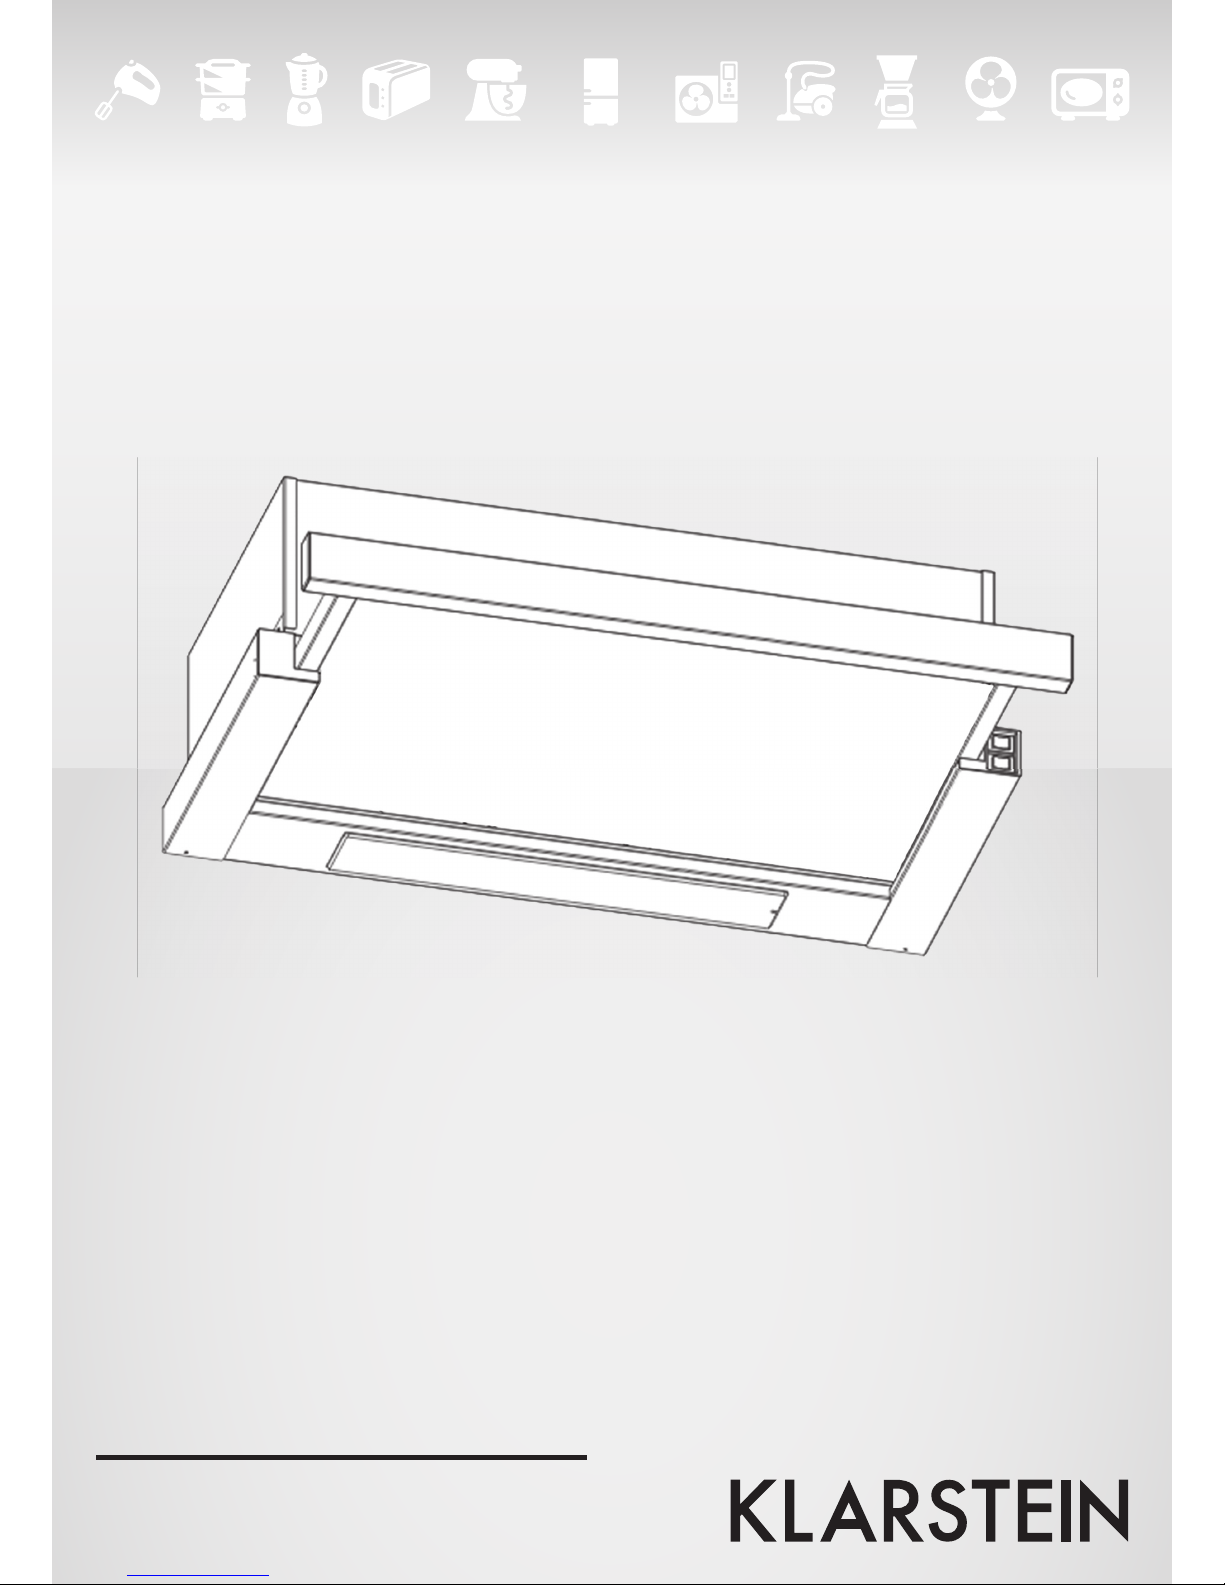
Zitruspresse orange
10008166 10008167 10008168
10027129
Dunstabzugshaube
Page 2

2
Sehr geehrter Kunde,
Wir gratulieren Ihnen zum Erwerb Ihres Klarstein Gerätes. Lesen Sie die folgenden Anschluss- und
Anwendungshinweise sorgfältig durch und befolgen Sie diese, um möglichen technischen Schäden
vorzubeugen. Für Schäden, die durch Missachtung der Sicherheitshinweise und unsachgemäßen Gebrauch entstehen, übernehmen wir keine Haftung.
Inhaltsverzeichnis
Wichtige Sicherheitsvorkehrungen 2
Allgemeine Sicherheitshinweise 2
Montage 2
Inbetriebnahme 3
Pege und Wartung 4
Installation und Wartung von Kohleltern 4
Fehlersuche und Fehlerbehebung 5
Hinweise zur Entsorgung 5
Konformitätserklärung 5
Wichtige Sicherheitsvorkehrungen
• Das Gerät wurde zur externen Ableitung von Abluft oder für den Umluftbetrieb mit Aktivkohleltern entwickelt.
• Geben Sie Acht, wenn Sie die Abzugshaube über einer oenen Feuerstelle oder Brennern benutzen, die auf die Umgebungsluft angewiesen sind. Durch den Luftentzug könnte die Abzugshaube
verhindern, dass sich das Feuer entzündet.
• Damit die Abzugshaube ordnungsgemäß arbeiten kann, achten Sie auf ausreichende Belüftung.
• Halten Sie sich an die geltenden Gesetze zur Abluftableitung.
• Schließen Sie das Gerät nur an Steckdosen an, die der Spannung des Geräts entsprechen.
• Befolgen Sie bei der Reinigung genau die Anweisungen in dieser Anleitung.
Allgemeine Sicherheitshinweise
• Überprüfen Sie die Filter nicht, solange die Abzugshaube in Betrieb ist.
• Fassen Sie die Glühbirnen niemals direkt nach der Benutzung an.
• Trennen Sie das Gerät nicht mit nassen Händen vom Stromkreis und drücken Sie das Netzkabel
nicht ab.
• Achten Sie beim Frittieren darauf, dass sich das Öl nicht überhitzt und entzündet.
• Entfernen Sie das Gerät immer zuerst vom Stromkreis, bevor sie es reinigen oder warten.
• Bringen Sie das Gerät außerhalb der Reichweite von Kindern an und benutzen Sie es, wenn Kinder
dabei sind, nur unter Aufsicht.
• Das Gerät ist ausschließlich für den Betrieb in Innenräumen geeignet.
• Wenn Sie das Gerät nicht benutzen oder reinigen, ziehen Sie vorher den Stecker aus der Steckdose.
Montage
Um die bestmögliche Wirkung zu erzielen, sollte die
Abzugshaube 65-75 cm über der Herdoberäche angebracht werden (siehe Abbildung rechts).
Page 3
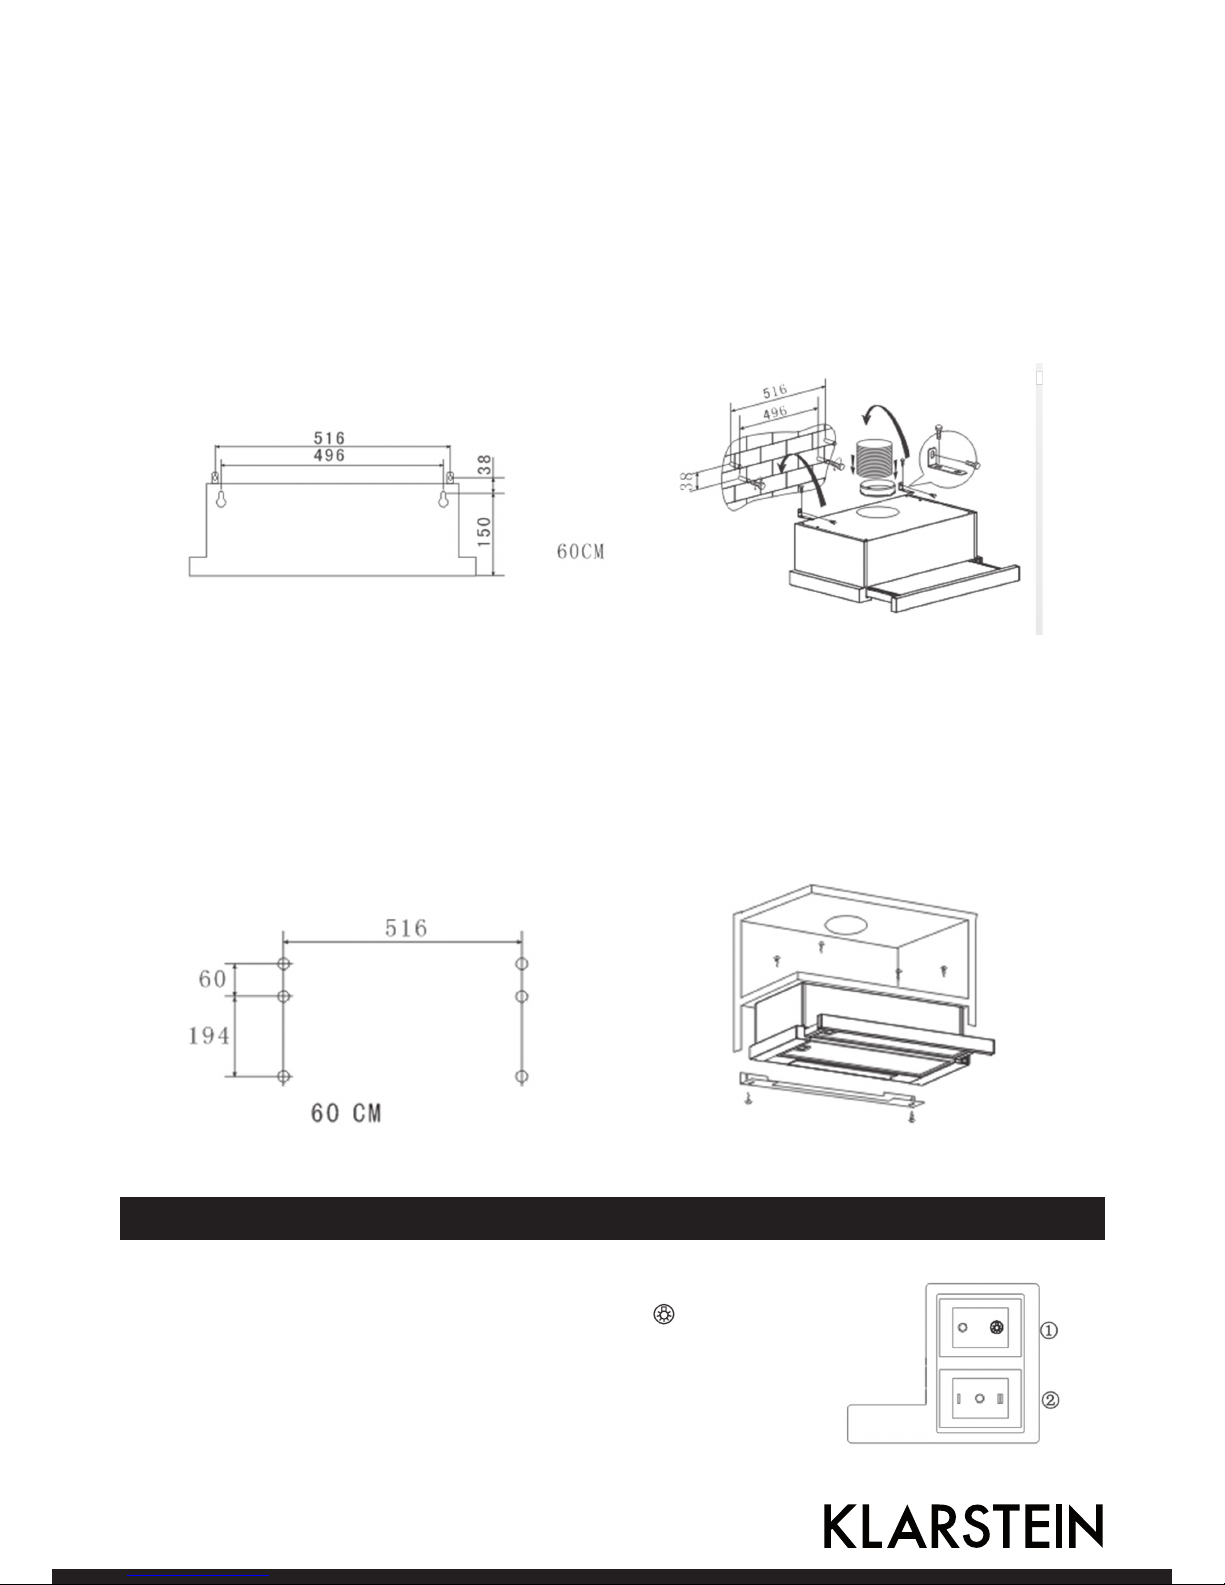
Möglichkeit 1
• Um die Anzugshaube an der Wand anzubringen, bohren Sie 4 Löcher mit einem Durchmesser von
8 mm in die Wand. Achten Sie drauf, dass sich die Abstände der Bohrlöcher mit den den Löchern
auf der Rückseite der Abzugshaube decken.
• Stecken Sie die Dübel in die Bohrlöcher.
• Stecken Sie die Schrauben in die Dübel und ziehen Sie sie fest. Achten Sie darauf einen kleinen
Spalt zwischen Schraubenkopf und Wand zu lassen.
• Setzen Sie die Abzugshaube auf die festgezogenen Schrauben.
• Setzen Sie den Luftauslass und das Abluftrohr auf die Abzugshaube (nicht im Lieferumfang enthalten).
Möglichkeit 2
• Bohren Sie 6 Löcher in den angegebenen Abständen (siehe Abbildung) in die Unterseite des Hän-
geschranks.
• Setzen Sie den Luftauslass auf die Abzugshaube. Bringen Sie das Gerät an der Unterseite des
Hängeschranks an, indem Sie die 6 Schrauben festziehen.
• Bringen Sie anschließen die Ausgleichsschiene an der Rückseite des Hängeschranks an, um die
Lücke zur Abzugshaube auszugleichen.
Inbetriebnahme
1. Stecken Sie den Stecker in die Steckdose.
2. Drücken Sie Schalter (1) um die Beleuchtung
einzuschalten.
Drücken Sie auf O um die Beleuchtung auszuschalten.
3. Drücken Sie auf Schalter (2), um die Motorgeschwindigkeit in drei
Stufen auszuwählen: I (langsam) - O (aus) - II (schnell)
Wenn Sie die Frontblende herausziehen dreht sich der Motor mit
der eingestellten Geschwindigkeit.
3
Page 4

Wichtige Hinweise zum Betrieb
• Wir empfehlen Ihnen das Gerät während des Kochens zu verwenden.
• Achten Sie auf ausreichende Belüftung, wenn Sie das Gerät zusammen mit Herden benutzen, die
Gas oder Flüssigkeiten verbrennen (nicht für Abzugshauben geeignet, die Abluft in den Raum ab-
leiten).
• Falls Sie die Abzugshaube länger nicht benutzen, ziehen Sie den Stecker aus der Steckdose.
• Benutzen Sie die Abzugshaube nicht über o enen Flammen.
• Benutzen Sie das Gerät nicht wenn es beschädigt ist. Das gilt vor allem für Netzkabel und Gehäuse.
• Falls das Netzkabel beschädigt ist, muss es vom Hersteller oder einem autorisierten Fachbetrieb
oder einer ähnlich quali zierten Person ersetzt werden.
• Tauchen Sie das Gerät nicht in Wasser oder andere Flüssigkeiten.
• Die Abluft darf nicht in Räume eingeleitet werden, in denen sich Herde be nden, die Gas oder
Flüssigkeiten verbrennen.
• Befolgen Sie die Vorschriften zur Luftableitung genau.
Pfl ege und Wartung
Wir empfehlen Ihnen den Filter mindestens alle 2 Monate zu reinigen. So reinigen Sie den Filter:
• Ziehen Sie vor der Reinigung den Stecker aus der
Steckdose. Entfernen Sie den Filter aus der Abzugshaube und waschen Sie ihn in einer Seifenlösung aus Wasser und Neutralreiniger und lassen
Sie ihn etwas darin einweichen.
• Spülen Sie den Filter sorgfältig mit klarem Wasser
aus und lassen Sie ihn trocknen. Sie können den
Filter alternativ im Geschirrspüler auswaschen.
• Die Aluminiumrahmen können sich durch das Abwaschen im Laufe der Zeit etwas verfärben. Das
ist kein Grund zu Reklamation oder Auswechslung
der Rahmen.
• Reinigen Sie die Ober äche der Abzugshaube re-
gelmäßig mit einem alkoholhaltigen, nicht scheu-
ernden Reinigungsmittel (Hinweis: Die Innenteile
können nicht gereinigt werden).
• Wechseln Sie die Filter etwa alle 4 Monate aus.
• Führen Sie die Reinigung genau wie beschrieben
durch, um Bränden vorzubeugen.
• Wechseln Sie die Glühbirnen, wie im rechten Bei-
spiel abgebildet.
Installation und Wartung von Kohlefi ltern
Unerwünschte Gerüche können Sie mit Aktivkohle ltern (nicht im Lieferumfang enthalten) eliminieren. Normalerweise sollten Sie Aktivkohle lter
alle drei bis sechs Monate wechseln, abhängig von Ihrem Kochverhalten.
Aktivkohle lter können nicht gewaschen oder recycelt werden. So installieren Sie Aktivkohle lter:
• Ziehen Sie die Frontblende heraus.
• Bevor die den Aktivkohle lter anbringen, entfernen Sie zuerst den Fett-
lter. Drücken Sie auf den Verschluss und drehen Sie ihn heraus.
• Setzen Sie den Aktivkohle lter ein und drehen Sie ihn gegen den Uhrzeigersinn. Wiederholen Sie den Vorgang auf der anderen Seite. Setzen
Sie anschließend den Fett lter wieder ein.
• Hinweis: Mit Aktivkohle lter verringert sich die Absaugleistung.
4
Page 5

Fehlersuche und Fehlerbehebung
Fehler Mögliche Ursache Lösung
Der Abzugsventilator
dreht sich nicht.
Der Netzstecker ist nicht
eingesteckt.
Stecken Sie den Stecker in die Steckdose.
Die Steckdose führt keinen
Strom.
Benutzen Sie eine andere Steckdose.
Unbefriedigende Absaugleistung.
Falsche Geschwindigkeit
oder blockierter Luftauslass.
Falls die Abzugshaube die Luft in die Küche ableitet,
überprüfen Sie den Kohle lter.
Falls die Abzugshaube die Abluft aus der Küche
ableitet, überprüfen Sie, ob der Luftdurch uss blo-
ckiert wird.
Belüften Sie die Küche ausreichend mit frischer
Luft.
Die Abzugshaube geht
während des Betriebs
aus.
Die Sicherheitsabschaltung
wurde ausgelöst.
Schalten Sie die Abzugshaube aus und warten Sie
bis sich das Gerät zurückgestellt hat.
Falls das Gerät niedriger als in der Anleitung angegeben angebracht wurde, wird sich der Motor
regelmäßig abschalten, was das Gerät beschädigen
könnte.
Die Glühbirne leuchtet
nicht.
Die Glühbirne ist durchgebrannt.
Tauschen Sie die Birne aus.
Die Glühbirne ist locker. Drehen Sie die Birne fest.
Öl läuft aus. Einwegventil und Abluft-
schlauch sind nicht richtig
versiegelt.
Versiegeln Sie das Einwegventil mit Klebsto .
Öl läuft aus der Verbindung
zwischen dem U-förmigen
Stück und der Abdeckung.
Versiegeln Sie das Leck mit Seife oder Lack.
Die Abzugshaube
wackelt während des
Betriebs.
Das Ventilatorblatt ist de-
fekt.
Tauschen Sie das Blatt aus.
Gehäuse oder Motogetriebe
sind nicht fest genug xiert.
Fixieren Sie den Motor und das Gehäuse.
Hinweise zur Entsorgung
Be ndet sich die linke Abbildung (durchgestrichene Mülltonne auf Rädern) auf dem
Produkt, gilt die Europäische Richtlinie 2002/96/EG. Diese Produkte dürfen nicht mit
dem normalen Hausmüll entsorgt werden. Informieren Sie sich über die örtlichen
Regelungen zur getrennten Sammlung elektrischer und elektronischer Gerätschaften. Richten Sie sich nach den örtlichen Regelungen und entsorgen Sie Altgeräte
nicht über den Hausmüll. Durch die regelkonforme Entsorgung der Altgeräte werden
Umwelt und die Gesundheit ihrer Mitmenschen vor möglichen negativen Konsequen-
zen geschützt. Materialrecycling hilft, den Verbrauch von Rohsto en zu verringern.
Konformitätserlärung
Hersteller: Chal-Tec GmbH, Wallstraße 16, 10179 Berlin.
Dieses Produkt entspricht den folgenden Europäischen Richtlinien:
2014/35/EU (Niederspannung)
2014/30/EU (EMV)
2011/65/EG (RoHS)
2009/125/EG (ErP)
5
Page 6

Dear Customer,
Congratulations on purchasing this Klarstein eqipment. Please read this manual carefully and take
care of the followring hints on installation and use to avoid technical damages. Any failure caused by
ignoring the mentioned items and cautions mentioned in the operation and installation instructions
are not covered by our warranty and any liability.
Contents
Precaution 6
Safety Instructions 6
Mounting 6
Use and Operation 7
Care and Maintenance 8
Installation and Maintenance of Carbon Filter 8
Troubleshooting 9
Environment Concerns 9
Declaration of Conformity 9
Precaution
• Take care when the cooker hood is operating simultaneously with an open replace or burner that
depend on the air from the environment and are supplied by other than electrical energy, as the
cooker hood removes the air from the environment which a burner or replace need for combus-
tion.
• Provide adequate ventilation in the environment for a safe operation for the cooker hood.
• Follow the local laws applicable for external air evacuation
• Appliance shall only be used with rated voltage and frequency.
• There is a re risk if cleaning is not carried out in accordance with the instruction.
Safety Instructions
• Do not check the status of the lters while the cooker hood is operating.
• Do not touch the light bulbs after appliance use.
• Do not disconnect the appliance with wet hands and without to force the supply cord..
• Flame cooking is prohibited underneath cooker hood.
• Avoid free ame, as it is damaging for the lters and a re hazard.
• Constantly check food frying to avoid that the overheated oil may become a re hazard .
• Disconnect the electrical plug prior to any maintenance.
• Children don’t recognize the risks of electrical appliance. Therefore use or keep the appliance only
under supervision of adults and out of the reach from children.
• If the power cord is damaged, it must be replaced by the manufacturer or a qualied service engineer in order to avoid a harzad.
• Keep electrical appliances out of reach from Children or inrm persons. Do not let them use the
appliances without supervision. Indoor use only.
• When the appliance is not in use and before cleaning, unplug the appliance from the outlet.
Mounting
The cooker hoods should be placed at a distance of
65-75 cm from the cooking surface for best eect (See
Picture).
6
Page 7

Way 1
• To install onto the wall drill 4 holes of Ø 8 mm on a suitable place according with the centre dis-
tance of hole in the back of the cooker hood.
• Insert the wall plugs into the holes.
• Insert the screws into the wall pulgs and tight the screws.
• Put up the cooker hood onto the xed screws.
• Put the one air outlet and extensible pipe onto the cooker hood. (the extensible pipe is optional
not supplied)
Way 2
• Drill 6 holes of 4mm diameter at the bottom of the hanging cupboard.
• Put the air outlet on the cooker hood, then install the cooker hood on the bottom of the cupboard,
tighten the hood with enclosed 6 screws.
• Install the adjusted board on the bottom of the hood in order to keep out the gap between hood
back and cupboard.
Use and Operation
1. Connect the plug into the power.
2. 2Push the switch (1) to turn the lamp
on. Push into O to put
the lamp o .
3. Push the switch (2), to select the speed of the motor in 3 Steps:
I (low) - O (off ) - II (high).
4. The cooker hood will working at low or high speed when pull out
the front panel..
7
Page 8

Important Instructions on Operation
• It is recommended to operate the appliance prior to cooking.
• There shall be adequate ventilation of the room when the cooker hood is used at the same time as
appliances burning gas or other fuels(not applicable to appliances that only discharge the air back
into the room.
• It is recommended to leave the appliance in operation for 15 minutes after cooking is terminated
in order to completely eliminate cooking vapours and odours.
• If the appliance is not used, please turn o .
• Don’t have ame under the cooker hood.
• Don’t use or stop use if the appliance is damaged especially the supply cord and the case.
• If the supply cord is damaged, it must be replaced by the manufacturer, its service agent or simi-
larly quali ed persons in order to avoid a hazard.
• Don’t immerse the appliance in liquid.
• The exhaust air must not be discharge into a ue which is used for exhausting fumes from appli-
ance burning gas or other fuels.
• Regulations concerning the discharge of air have to be ful lled.
Care and Maintenance
It is recommendable to clean the lter at a maximum of 2 months by carrying out the followings:
• Unplug before cleaning, then remove the lters
from the cooker hood and wash them in a solution of water and neutral liquid detergent, leaving
to soak. Rinse thoroughly with warm water and
leave to dry. The lters may also be washed in the
dishwasher.
• The aluminum panels may alter in color after se-
veral washes. This is not cause for customer complaint nor replacement of panels.
• Clean the surface of the cooker hood regularly
using cloth moistened with denatured alcohol of
non abrasive liquid detergent. (Remark: There can
not clear the motor and inside part.)
• Replace lters approximately every 4 months.
• There is a re risk if cleaning is not carried out in
accordance with the instruction.
• Replace the lamp pls see picture on the right.
Installation and Maintenance of Carbon Filter
Carbon lter can be used to trap odors. Normally the activated carbon
lter should be changed at three or six months according to your cooking
habit. Activated carbon lter cannot be washed or recycled. The installation procedure of activated carbon lter is as below:
• Slide the front part of the cooker hood.
• In order to install the activated carbon lter, the Al anti-grease lter
should be detached rst. Press the lock and pull it downward.
• Put the activated carbon lter into the unit and turn it in anti-clockwise
direction. Repeat the same on the other side. Put back to the grease
lter in position.
• Note: When the activated carbon lter installed, the suction power will
be lowered.
8
Page 9

Troubleshooting
Problem Possible cause Solution
The extractor fan ceases
to function.
The kitchen hood feed cable
is not connected to the
network.
Connect feed cable to the network.
There is no electrical current
in the network.
Check that the network has electrical current.
Insu cient suction
power.
Did not set to the right
speed and/or air outlet be-
ing blocked.
If the kitchen hood is set up for recirculation, check
that the charcoal lter is still e ective.
If the kitchen hood is set up for extraction, check
that the ducting and outlets are not blocked.
The kitchen is adequately vented to allow the entry
of fresh air.
Hood has switched o
during operation.
The safety cut-out device
has been tripped.
Turn o the hood and then wait for the device to
reset.
If the hood has been installed below the heights
indicated in the installation instructions, the mo-
tor will cut-out frequently which may damage the
hood.
The lamps do not light
up.
The lamps are burnt out. Change the lamps.
The lamps are loose. Tighten the lamps.
Oil leakage. One-way valve and air ven-
tilation entrance not tightly
sealed.
Seal with glue on the one-way valve.
Leakage from the connection of U-shaped section and
cover.
Seal with soap or paint on U-shaped section.
Hood shakes during
operation.
Leaf is damage. Replace the leaf as a damaged leaf causes shaking.
The body or motor tightly
hung.
Lock the motor tightly or x the body tightly, respectively.
Environment Concerns
According to the European waste regulation 2002/96/EG this symbol on the product
or on its packaging indicates that this product may not be treated as household waste. Instead it should be taken to the appropriate collection point for the recycling of
electrical and electronic equipment. by ensuring this product is disposed of correctly,
you will help prevent potential negative consequences for the environment and human health, which could otherwiese be caused by inappropriate waste handling of
this product. For more detailled information about recycling of this product, please
contact your local council or your household waste disposial service.
Declaration of Conformity
Producer: Chal-Tec GmbH, Wallstraße 16, 10179 Berlin.
This produkt is conform to the followring European Directives:
2014/35/EU (Low voltage)
2014/30/EU (EMV)
2011/65/EG (RoHS)
2009/125/EG (ErP)
9
Page 10

10
Chère cliente, cher client,
Toutes nos félicitations pour l’acquisition de ce nouvel appareil. Veuillez lire attentivement les instructions suivantes de branchement et d’utilisation an d’éviter d’éventuels dommages. Le fabricant
ne saurait être tenu pour responsable des dommages dus au non-respect des consignes de sécurité
et à la mauvaise utilisation de l’appareil.
Sommaire
Wichtige Sicherheitsvorkehrungen 2
Allgemeine Sicherheitshinweise 2
Montage 2
Inbetriebnahme 3
Pege und Wartung 4
Installation und Wartung von Kohleltern 4
Fehlersuche und Fehlerbehebung 5
Hinweise zur Entsorgung 5
Konformitätserklärung 5
Importantes mesures de sécurité
• L‘appareil a été développé pour évacuer vers l‘extérieur l‘air extrait ou pour le recycler avec des
ltres à charbon actif.
• Faites attention lorsque vous utilisez la hotte aspirante au-dessus d‘un foyer de ammes libres
ou d‘un brûleur qui utilisent l‘air ambiant. L‘air aspiré par la hotte pourrait empêcher le feu de
s‘allumer.
• Pour que la hotte aspirante fonctionne correctement, veillez à une ventilation susante.
• Respectez les règlements en vigueur sur l‘évacuation de l‘air.
• Ne branchez l‘appareil que sur des prises fournissant la tension correspondante à celle qui lui est
nécessaire.
• Pour le nettoyage, suivez précisément les indications de ce mode d‘emploi.
Consignes générales de sécurité
• Ne vériez jamais les ltres pendant que la hotte aspirante est allumée.
• Ne touchez jamais les ampoules peu après qu‘elles aient servi.
• Ne débranchez jamais l‘appareil avec les mains mouillées et n‘appuyez pas sur le câble
d‘alimentation.
• Pendant les fritures, faites attention à ce que l‘huile ne surchaue pas et ne s‘enamme pas.
• Débranchez toujours l‘appareil du secteur avant de le nettoyer ou de l‘entretenir.
• Mettez l‘appareil hors de portée des enfants et surveillez-le toujours lorsque des enfants sont
présents.
• L‘appareil est destiné exclusivement à un usage en intérieur.
• Si vous n‘utilisez pas l‘appareil ou que vous le nettoyez, commencez par débrancher la che de la
prise.
Montage
Pour obtenir la meilleure ecacité, la hotte aspirante
doit se trouver 65-75 cm au-dessus de la surface de la
cuisinière (voir illustration de droite).
Page 11

Possibilité 1
• Pour installer la hotte aspirante au mur, percez 4 trous d‘un diamètre de 8 mm dans le mur. Veillez
à ce que les écarts entre les trous correspondent aux trous au dos de la hotte aspirante.
• Placez les chevilles dans les trous.
• Placez les vis dans les chevilles et serrez-les. Veillez à laisser un petit espace entre la tête de la
vis et le mur.
• Placez la hotte aspirante sur les vis serrées.
• Installez la sortie d‘air et le tuyau d‘extraction sur la hotte aspirante (non fourni).
Possibilité 2
• Percez 6 avec les écarts donnés (voir illustration) sur la face inférieure du meuble suspendu.
• Installez la sortie d‘air sur la hotte aspirante. Fixez l‘appareil contre la face inférieure du meuble
suspendu en serrant les 6 vis.
• Installez ensuite le rail de compensation à l‘arrière de l‘unité murale pour compenser l‘écart avec
la hotte aspirante.
Mise en service
1. Branchez la che dans la prise.
2. Appuyez sur l‘interrupteur (1) pour allumer l‘éclairage. Appuyez
sur O pour éteindre l‘éclairage.
3. Appuyez sur l‘interrupteur (2), pour sélectionner l‘une des trois
vitesses du moteur: I (lente) - O (éteint) - II (rapide). Lorsque
vous retirez le cadre avant, le moteur tourne à la vitesse réglée.
11
Page 12

Conseils importants d‘utilisation
• Nous vous recommandons d‘utiliser l‘appareil pendant que vous cuisinez.
• Veillez à ce que la ventilation soit su sante lorsque vous utilisez l‘appareil en même temps que les
cuisinières qui brûlent des gaz ou des liquides (ne convient pas pour les hottes aspirantes rejettent
l‘air aspiré dans la pièce).
• Si vous n‘utilisez pas la hotte aspirante pendant une période prolongée, débranchez la che de la prise.
• N‘utilisez pas la hotte aspirante au-dessus d‘une amme libre.
• N‘utilisez pas l‘appareil s‘il est endommagé. Ceci est valable avant tout pour le câble secteur et le boîtier.
• Si le câble secteur ou la che sont endommagés, faites-les remplacer par le fabricant un service
professionnel agréé ou une personne de quali cation équivalente.
• Ne plongez jamais l’appareil dans l’eau ni dans d’autres liquides.
• L‘air aspiré ne doit pas être rejeté dans les pièces contenant une cuisinière qui fonctionne au gaz
ou brûle un liquide.
• Respectez les règlements concernant l‘évacuation de l‘air.
Entretien et maintenance
Nous vous conseillons de nettoyer le ltre tous les 2 mois au minimum. Voici comment nettoyer le ltre :
• Avant le nettoyage débranchez la che de la prise.
Démontez le ltre de la hotte aspirante en le fai-
sant tremper dans une solution savonneuse avec
un produit nettoyant neutre.
• Rincez le ltre soigneusement à l‘eau claire et
laissez-le sécher. Vous pouvez aussi laver le ltre
au lave-vaisselle.
• Le cadre en aluminium peut déteindre au fur et
à mesure des lavages. Cela ne constitue pas un
motif de réclamation et il n‘est pas non plus nécessaire de changer les cadres.
• Nettoyez régulièrement les surfaces de la hotte
aspirante avec une solution alcoolisée non abra-
sive (remarque : vous ne pouvez pas nettoyer les
pièces intérieures).
• Changez le ltre tous les quatre mois environ.
• Procédez au nettoyage en suivant précisément les
indications pour éviter les incendies.
• Changer les ampoules comme illustré ci-contre à
droite.
Installation et maintenance des fi ltres à charbon
Vous pouvez éliminer les odeurs désagréables à l‘aide des ltres à charbon actif (non fournis). En principe, les ltres à charbon actif doivent être
remplacés tous les trois à six mois en fonction de vos habitudes de cui-
sine. Les ltres à charbon actif ne peuvent être ni lavés ni recyclés. Voici
comment installer les ltres à charbon actif:
• Retirez le panneau avant.
• Avant d‘installer les ltres à charbon actif, retirez le ltre à graisses.
Appuyez sur le verrouillage et tournez-le pour le sortir.
• Installez le ltre à charbon actif et tournez-le en sens antihoraire. Répétez
l‘opération de l‘autre côté. En n, remettez en place le ltre à graisses.
• Remarque : la présence des ltres à charbon actif réduit la puissance
d‘aspiration.
12
Page 13

Identifi cation et résolution des problèmes
Problème Cause possible Solution
Le ventilateur
d'extraction ne tourne
pas.
La che n'est pas branchée. Branchez la che dans une prise.
La prise ne fournit aucune
tension.
Utilisez une autre prise.
Puissance d'aspiration
insatisfaisante.
Vitesse inadaptée ou sortie
d'air bloquée.
Si la hotte renvoie l'air dans la cuisine, contrôlez le
ltre à charbon.
Si la hotte extrait l'air de la cuisine, véri ez que le
ux d'air n'est pas bloqué.
Aérez la cuisine avec su samment d'air frais.
La hotte aspirante
s'arrête toute seule.
L'arrêt de sécurité a été
déclenché.
Eteignez la hotte et attendez que l'appareil se réinitialise.
Si l'appareil a été installé plus bas qu'il n'est
indiqué dans le mode d'emploi, le moteur risque
de s'arrêter souvent, ce qui peut endommager
l'appareil.
L'ampoule ne s'allume
pas.
L'ampoule est brûlée. Remplacez l'ampoule.
L'ampoule est desserrée. Serrez l'ampoule.
Il y a une fuite d'huile. La soupape anti retour et
le tuyau d'échappement ne
sont pas bien scellés.
Scellez la soupape anti retour avec de la colle.
L'huile s'échappe au niveau
de la connexion entre la
pièce en U et le cache.
Scellez la fuite avec du savon ou de la peinture.
La hotte tremble pendant le fonctionnement.
Les pales du ventilateur sont
défectueuses.
Remplacez la pale.
Le boîtier ou le mécanisme
moteur ne sont pas bien
xés.
Fixez le moteur et le boîtier.
Conseils pour le recyclage
Le pictogramme ci-contre apposé sur le produit signi e que la directive européenne
2002/2006/CE (DEEE) s’applique (poubelle à roues barrée d’une croix). Ces produits
ne peuvent être jetés dans les poubelles domestiques courantes. Renseignez-vous
concernant les règles appliquées pour la collecte d’appareils électriques et électro-
niques. Conformez-vous aux réglementations locales et ne jetez pas vos anciens
produits avec les ordures ménagères. Le respect des règles de recyclage des vieux
produits aide à la protection de l’environnement et de la santé de votre entourage
contre les conséquences négatives possibles. Le recyclage des matériaux aide à réduire l’utilisation des matières premières.
Déclaration de conformité
Fabricant : Chal-Tec GmbH, Wallstraße 16, 10179 Berlin.
Ce produit est conforme aux directives européennes suivantes :
2014/35/UE (basse tension)
2014/30/UE (CEM)
2011/65/CE (RoHS)
2009/125/CE (ErP)
13
 Loading...