

Page 1
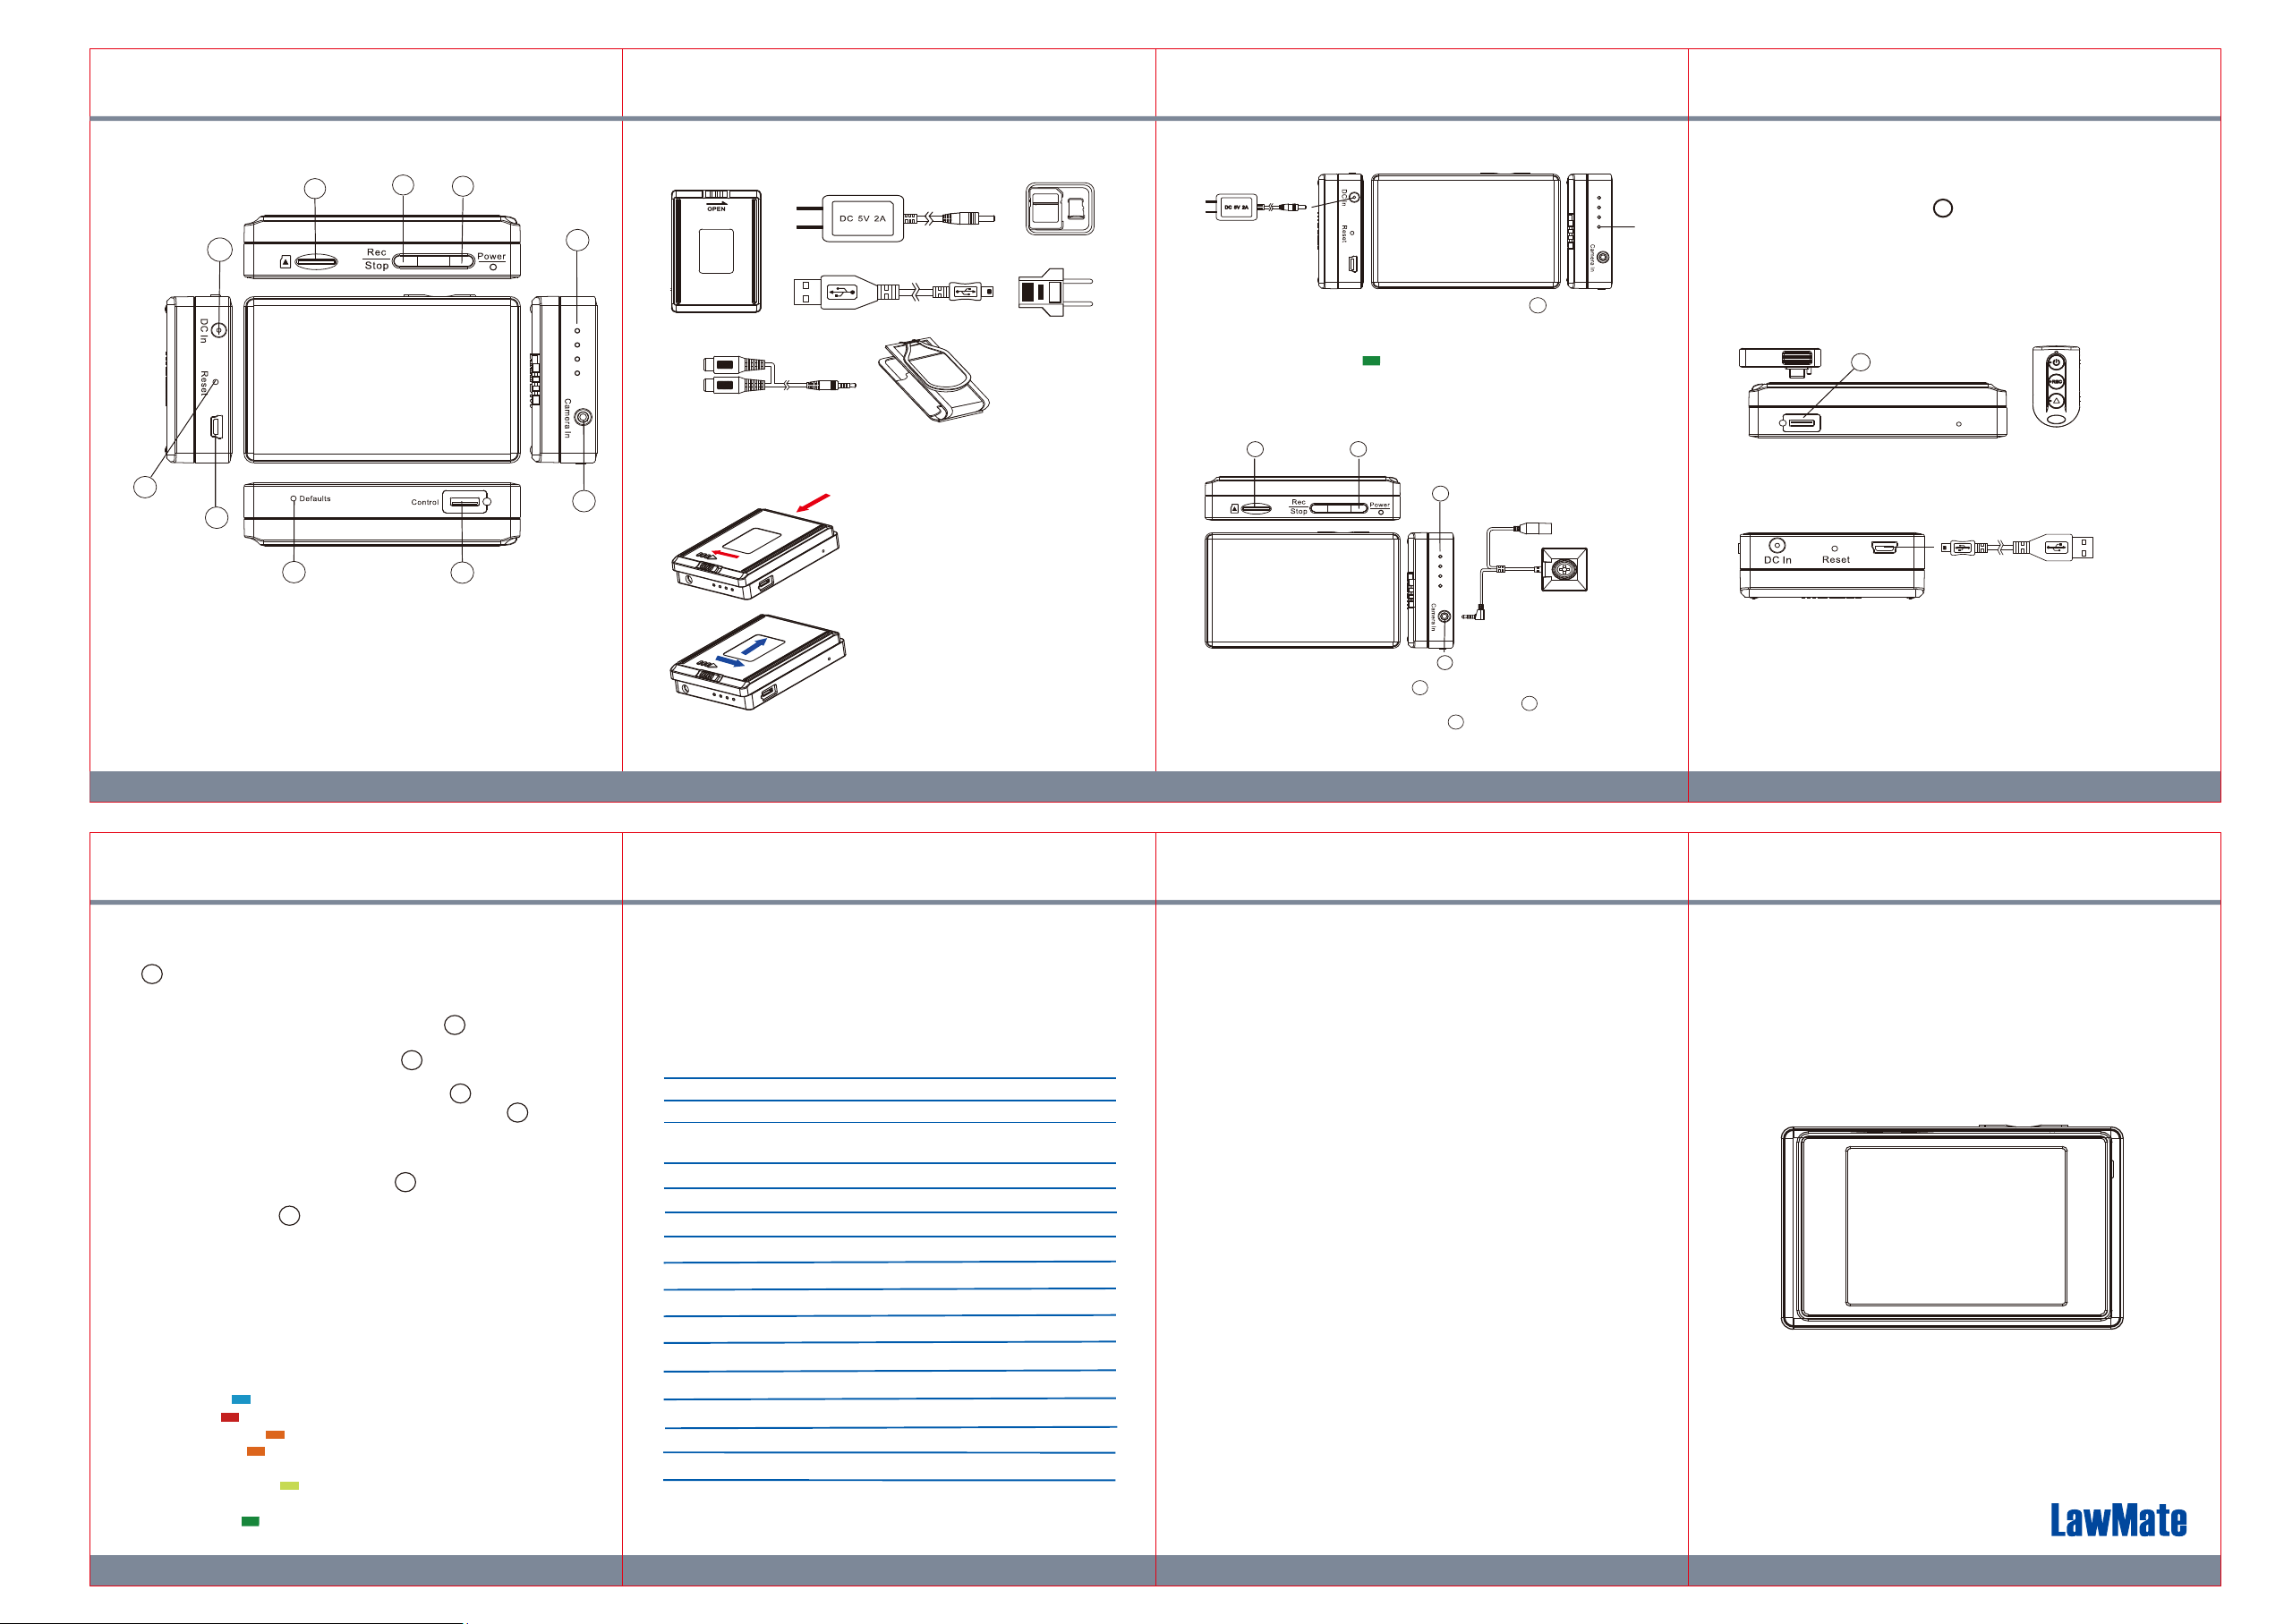
1. Name and Parts
10
2. Package Contents
3
2
1
4
Battery Pack
DC 5V 2A Charger
USB Cable
Lock
Adapter
Memory Card
European Adapter
Head
4. Charge the Battery
4-1. Connect the charger plug to the DC In Jack .
4-2. Plug the power cord of the charger to a power source. The
charging starts automatically.
● Solid green LED - charging.
● Green LED goes off - fully charged.
10
Green
LED
6. Format Memory Card
There are two ways to format the memory card.
6-1 Format the card on computer
6-2 Insert memory card into . Go to PV Cam Viewer App >
Setup P2P connection between device and phone > go to
Program Setting > Tap on Format SD Card.
Note : It is imortant to format the card when using it for the
first time.
3
7. Connect to RF Wireless Controller
6
9
8
7
1. Power On & Off / Wi-Fi Button
2. REC / Stop Button
3. Memory Card Slot
4. LED Indicators
5. Camera In Port
※
Warranty void if serial number label is tampered.
6. Controller Port
7. Default Key
8. USB Port
9. Reset Key
10. DC In Port (Charge)
1 3 2 4
A/V In Cable
Pouch
3. Install and Remove Battery
5
6
1.
2.
To remove the battery, gently unlock it
by switching LOCK switch to the right
LOCK
LOCK
side and push battery in red arrow
pointed direction.
To install the battery, attach the battery
to DVR and gently push the battery in
blue arrow pointed direction. Lastly, do
not forget to slide LOCK swtich to the
left side to ensure it is properly locked.
5. Connect to the Analog Camera
3
1. Insert the memory card into .
2. Plug the analog camera into Camera In Port on the device.
3. Power on the device by pressing for 2 seconds.
1
4
5
3
5
1
For pairing up the controller with DVR, p
PI-RF50 quick guide.
lease refer to
8. Retrieve Files from Memory Card
Connect to
Computer
8-1. Use memory card reader to download video / photo files.
8-2. With device powered on and memory card inserted, connect the
device to computer by USB cable. It will be recognized by computer
as an external drive for users to retrieve the files.
9. Setup IP connection
Please refer to PV Cam Viewer for IP Cam Quick Guide
10. Operation
Power on:
for 2 secs. 40 secs after powered on, the device starts
1
recording automatically. If memory is full or no card in the device,
it powers off itself after few seconds.
Recording: With device powered on, press to start or stop
recording.
Wi-Fi: With device powered on, press to turn on/off Wi-Fi.
After 40 secs, Wi-Fi will be enabled.
Power off: With no ongoing recording, press for 5 seconds.
Reset: When the device functions abnormally, press once.
With camera plugged in, memory card inserted, press
2
1
1
11. Retore Default Settings
11-1 To restore device Wi-Fi password(88888888),
power on the device and press for 4 seconds.
11-2 To restore all factory settings, do one of the following.
A. Long press for 10 seconds.
B. Lauch P2P or IP connection > Go to Program
Setting on the App > Select Load Setup Defaults.
※
When operating in IP connection, device and phone should
be under the same domain (same WiFi Network or Local Area
Network). If not, Load Setup Defaults will fail.
When all LED lights go off with blue LED light staying on, the
settings are restored. Device will restart in 40 secs.
7
7
12. LED Indicators
●
Solid blue - power on
● Solid red - recording on
● Blinking orange - searching for Wi-Fi connection
● Solid orange - device connected to mobile device
via Wi-Fi (P2P connection)
● Solid bright green - device connected to a router
or local network (IP connection)
● Solid green - charging
13. Date and Time Setting
Please refer to the Synchronize the Time steps on the
PV Cam Viewer for IP Cam guide.
PV-500L4i
Pocket Size Blackbox IP DVR
14. Specification
Item Number
Wi-Fi Spec
9
Wi-Fi Protocol
Video Resolution
Frame Rate
Recording Mode
File Format
Storage
Camera Input
Date/Time Table
Power Cunsumption
Power
Battery Life
Battery Charging Time
Recording Time
Dimension
Weight
PV-500L4i
Built-in Wi-Fi Module (IEEE 802.11b/g/n)
RSIP
NTSC 720X480
PAL 720X576
NTSC: 30fps / PAL: 25fps
Standard/Motion Detection
MOV, JPG
SD Card (Supports up to SDHC 32GB)
DC 5V Output at 2.5mm AV Input Jack
YYYY,MM,DD HH,MM,SS
450mA-500mA(Wi-Fi Off)/510mA-560mA(Wi-Fi On)
DC 3.7V
Around 160min(Wi-Fi On) / 180min(Wi-Fi Off) wi
BA-2200: 4 hours (DC 3.7V / 2200 mA LI battery)
1500 min @1920*1080 resolution (16GB card)
84X53X20mm
100g
6
LawMate, innovation never stops
7 5
Quick Guide
®
V1.0
 Loading...