


KJB DVR272WFA, DVR272WF Quick Guide
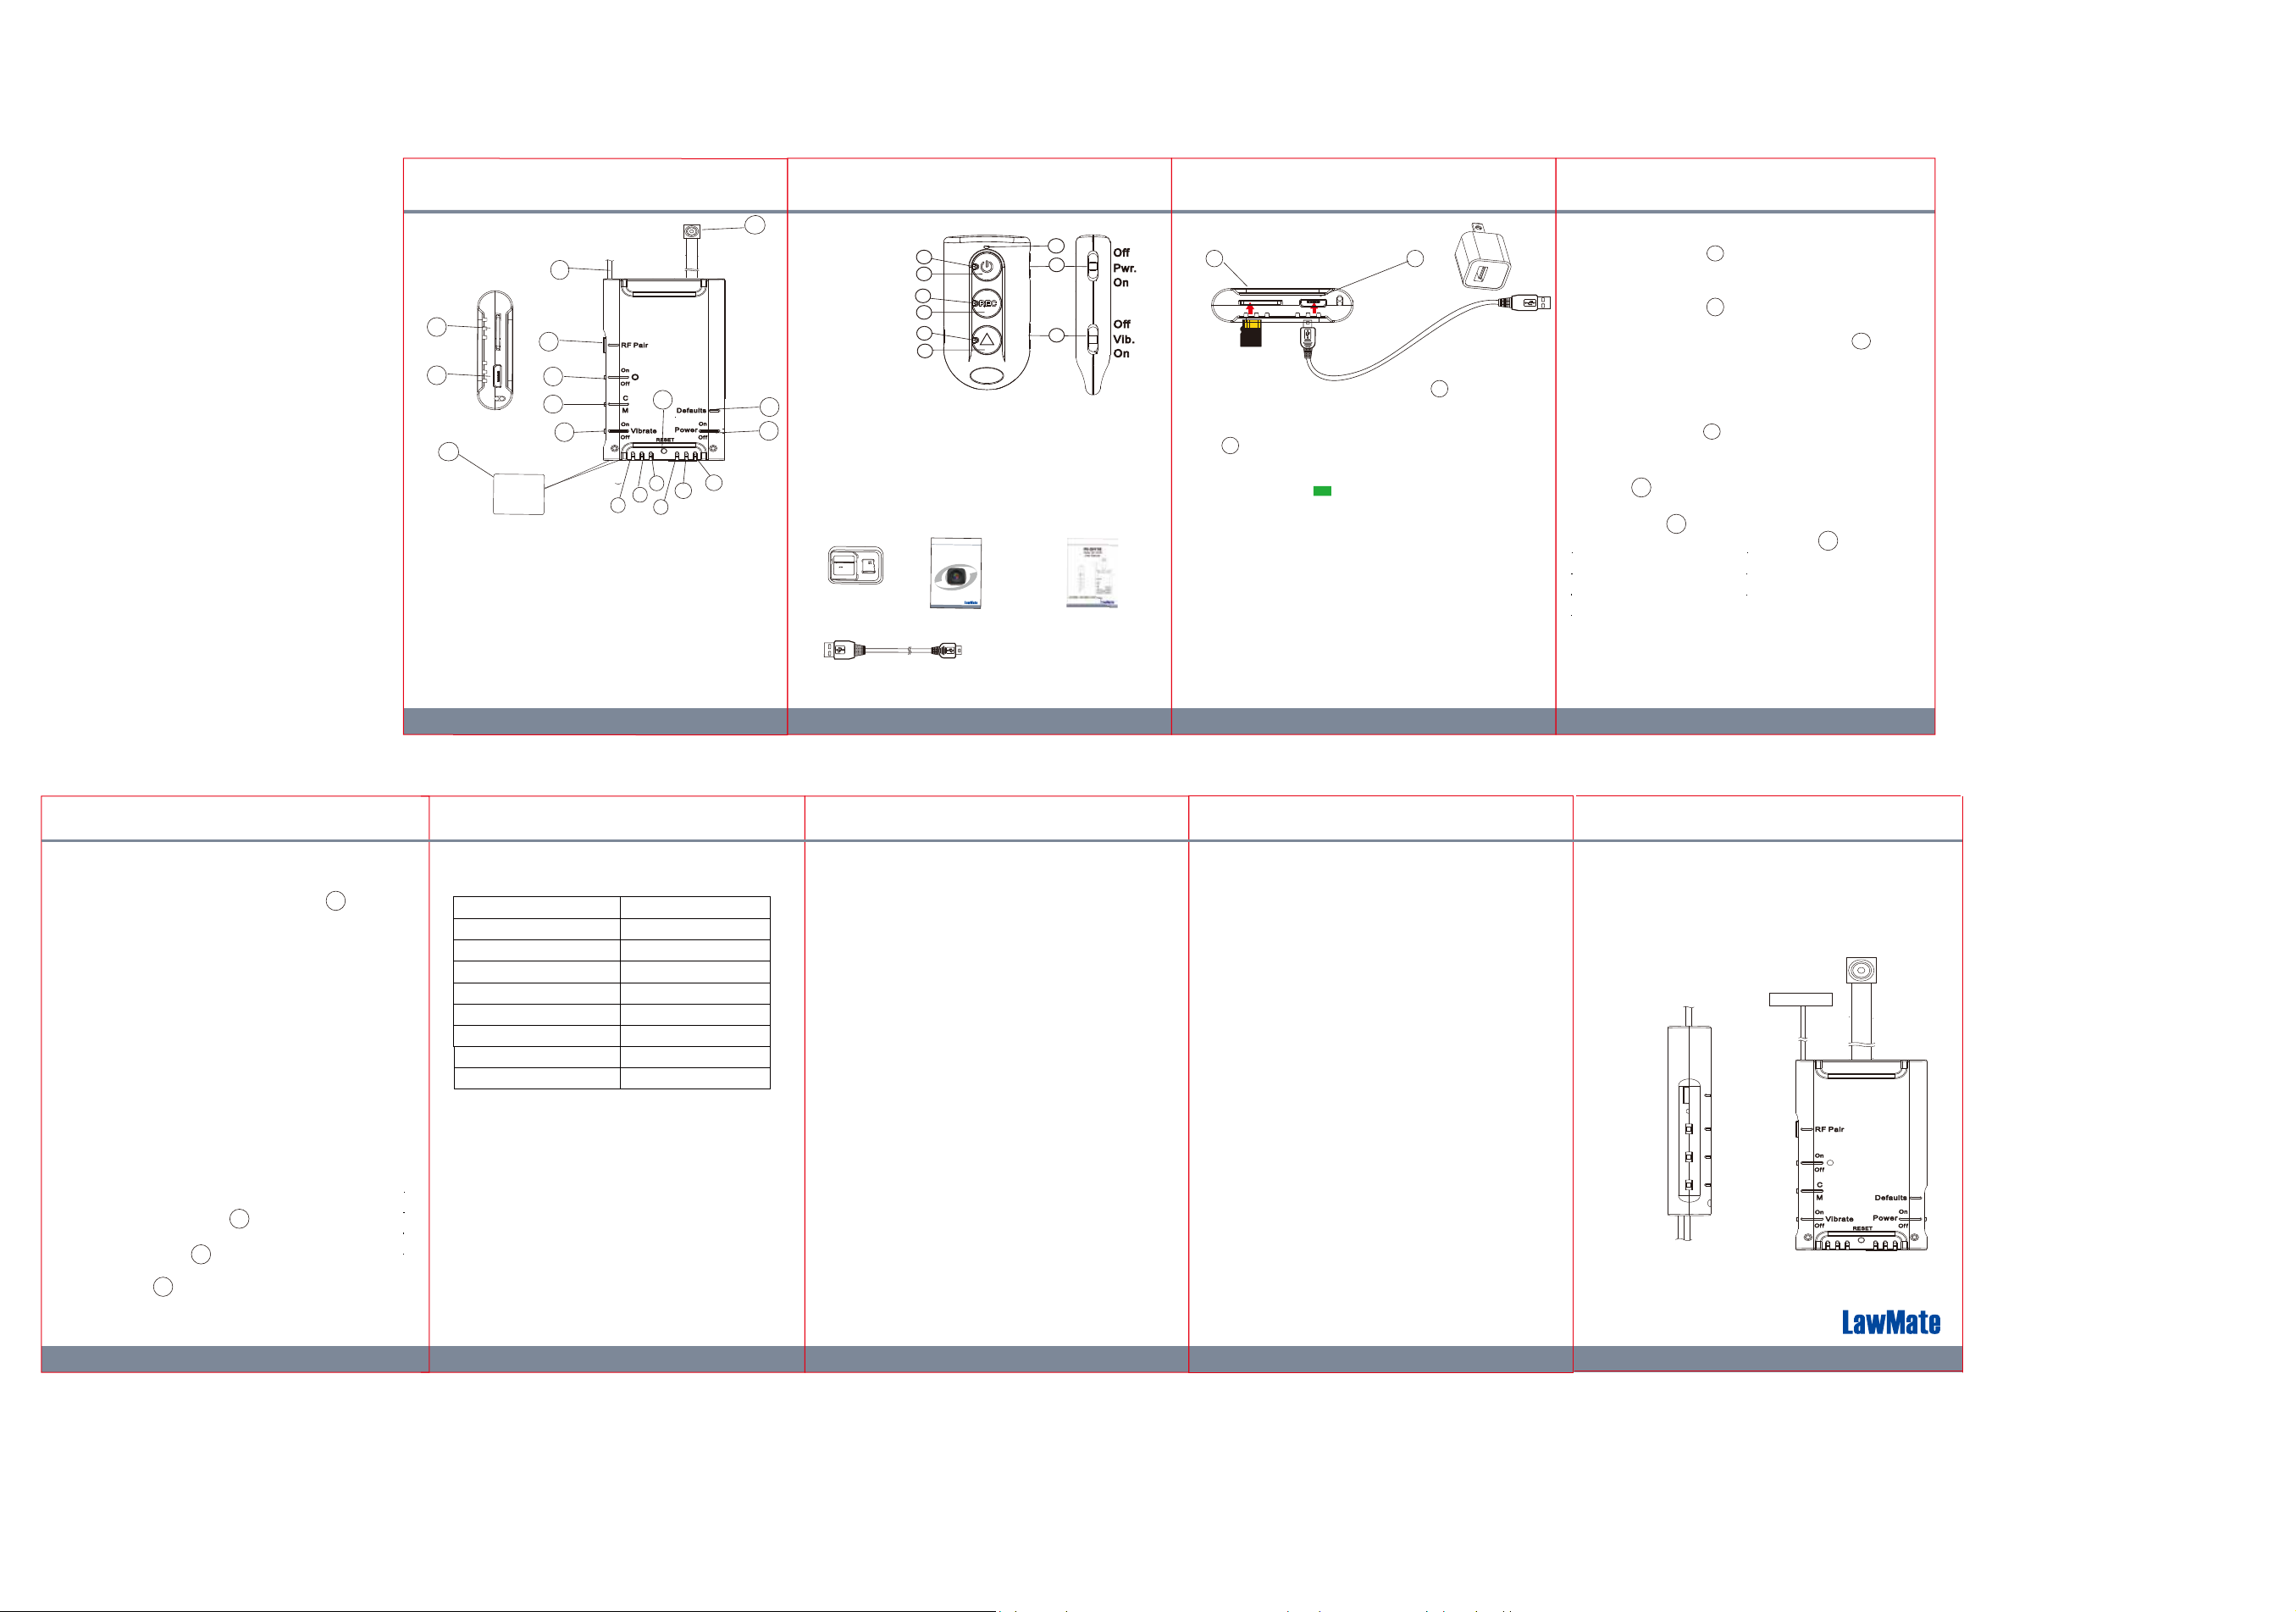
1. Names and parts
* DVR
16
17
15
1. PIR Pairing Button
2. WiFi Switch
3. Continuous Recording/
Motion Detection Recording
4. Vibration Switch
5. Wi-Fi Antenna
6. Default Key
7. Power Switch
8. Camera Lens
9. Power(blue) LED
5
1
2
3
4
14
1
8
18
12
13
11
9
10
10. Rec(red) LED
11. Pairing(blue/red)
LED
12. Wi-Fi(orange) LED
13. Charging(green)
LED
14. IP(light green) LED
15. Battery
16.USB Port
17.Sd Card Slot
18.Reset Key
* Remote Control
6
1.
Remote charge LED (Green)
/ Remote Command sent LED
7
2. DVR Power On LED (Blue)
3. DVR Power On / Off Button
4. DVR Rec LED (Red)
5. DVR
Rec On / Off Button
2. Package content
Lock
4GB
Adapter
Memory Card
USB Cable
2
3
4
5
6
7
6. DVR Wi-Fi LED (Orange)
7. DVR Wi-Fi On / Off Button
8. Remote Power On (down) /
Off (up)
9. Remote Vibration On (down) /
Off (up)
PV-Cam Viewer
for IP Cam
App Store/Play Store
Installation Quick Guide
LawMate, innovation never stops
®
Wi-Fi Quick Guide
2
1
8
9
Device Quick Guide
10. Mini USB port
11. Memory card slot
3. Charge the battery
17
Plug the micro USB end of cable into and plug the
other end into the computer or other USB power source.
After charging is complete, insert he memory card
17
tinto . Then the device will be ready for further
operations.
● Solid green LED - charging.
● Green LED goes off - fully charged.
16
16
4. Format memory card
There are two ways to format the memory card.
4-1 Format the card on computer.
4-2 Insert memory card into the slot. Go to PV Cam Viewer
App>Setup P2P connection between device and phone>
go to Program Setting > tap on Format SD Card.
Then it is done. Note: It is important to format the card
when using it for the first time.
3 4
5. Operation(DVR only)
5-1 Power on: Switch upward to turn on the power.
5-2
Recording: 40 seconds after device on, it will
7
start to record automatically.
5-3 Vibration: Switch upward to turn on, or
downward to turn off.
5-4 Wi-Fi: With device powered on, Switch
4
2
upward to turn on, or downward to turn off.
For more information about WiFi/IP connection
set up, please refer to WiFi/IP quick guide.
Power off: Switch
5-5
7
downward and the previous
recording will be saved automatically.
5-6 Reset: When the device functions abnormally,
press .
18
5-7 Restore default Wi-Fi password and SSID:
Long press for 4 seconds, and release.
5-8 Restore all default settings: Press for 10
6
6
seconds, and release.
6. Vibration Alert
Rec on - 1 long vibration
Snap Shot - 1 long vibration
Wi-Fi on - 2 short vibration
Wi-Fi off - 2 short vibrations
Power Off - 1 short vibrations
7. Pair up the remote with DVR
7-1 Power on the device and long press on DVR
and release the button until you see the blinking
blue& red LED. It indicates that the receiver is
waiting to be paired up.
7-2 Turn on the remote control and enable
alert. Press Rec button on the remote control, with
the remote control vibrates once and both
red LED goes off, the remote is successfully paired
up with the DVR.
1
the vibration
blue &
8. Operation for remote control
For Remote Control:
Power on/off : slide “Pwr” switch downward to power
on; upward to power off.
Turn on/off the vibration :slide “Vib” switch downward
to turn on; upward to turn off.
For DVR:
Turn on/off : Long press on rhe remote at least 3
seconds to turn on and off the DVR.
Recording : Press on the remote once to start or
stop the recording.
Wi-Fi : Press one the remote once to enble or
7
disable Wi-Fi.
3
5
5 6 7
9. LED Indicators
LED Indicators
Solid Blue LED
Blinking Orange LED
Solid Orange LED
Solid Green LED
Solid Bright Green LED
Blinking Red LED
Red LED Blinking 10 Times
Solid Red LED
Device Status
Device On
Searching Wi-Fi
Wi-Fi connected
Device Charging
IP connected
No Memory Card
Low Baery
Recording on
10. Rename the device Wi-Fi SSID
To change the default SSID name, right-click on
Windows desktop. Creat a Notepad *.txt (text) file and
name it as setSSID.txt. Enter your new SSID name on
the first line of the file, save it to the root directory of
memory card, and insert the card back to the device.
Lastly, power on the device. Note: SSID name must be
started with PV and followed by 6 ~ 14 characters of
numbers or alphabets (e.g. PV123abc).
11. Date and time setting
Please refer to the Synchronize the Time steps on the
PV Cam Viewer for IP Cam guide.
12. Download files from DVR
Use a memory card reader to transfer files from
the memory card to the computer.
* Warranty will be void if serial number sticker is tampered.
PV-DY10i
1080p DIY DVR
User Manual
LawMate, innovation never stops
®
V1.0