

KJB DVR269WFA, DVR269WF User Manual
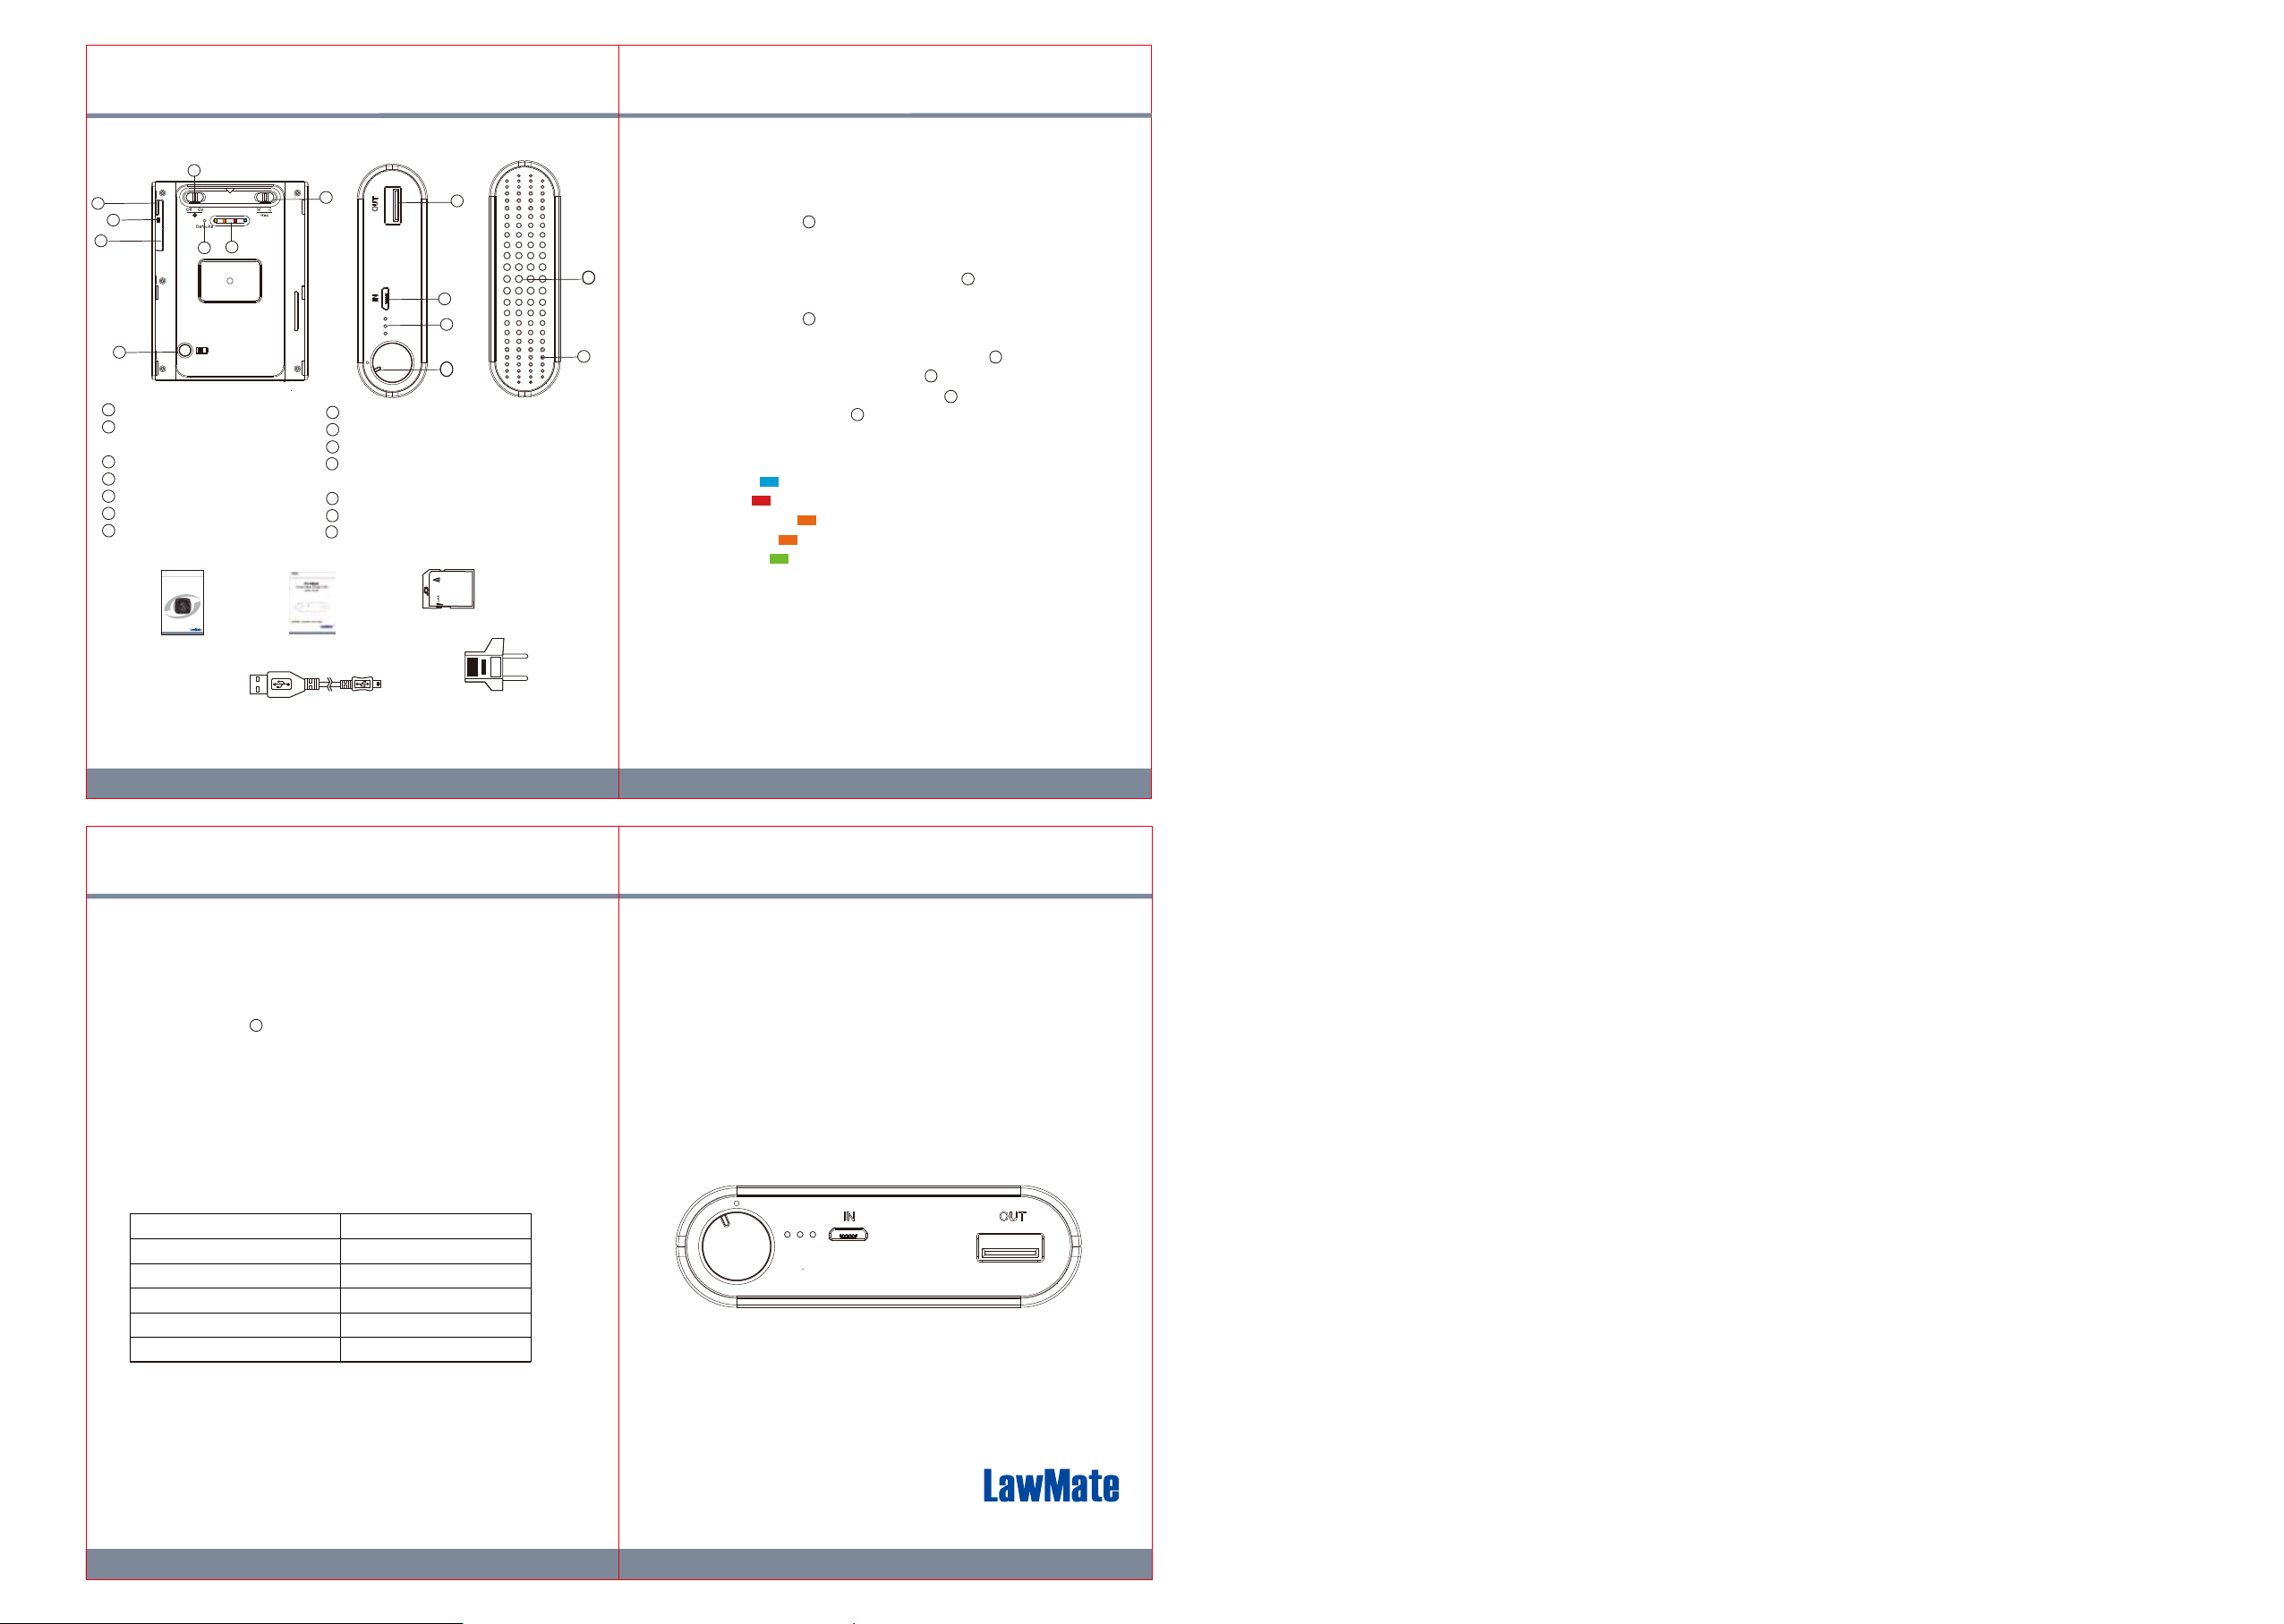
3. Recording Operation1. Names and Parts
1
5
6
7
4
WiFi Switch
1
Continuous Recording/
2
3
14
Motion Detection Switch
LED Indicators
3
Power LED Indicators Button
4
USB Port(Retrieve Video Files)
5
Reset Key
6
Memory Card Slot
7
2. Package Content
PV-Cam Viewer
for IP Cam
App Store/Play Store
Installation Quick Guide
LawMate, innovation never stops
®
IP Cam Quick Guide
Device Quick Guide
2
8
5V Out Port
9
USB Port
10
Power LED Indicators
11
Power Switch
8
9
10
11
(Clockwise: On, Counterclockwise: Off)
12
Lens
13
Microphone
14
Default Button
Memory Card
It is highly recommended to format memory card first before using
it for the first time.
3.1. Power on: Switch to clockwise direction.
11
3.2. Recording: 40 seconds after the device is powered on,
it starts to record automatically.
12
3.3. Wi-Fi: With device powered on, switch to on , Wi-Fi will
1
be turned on in 40 seconds. .
3.4. Power off: Switch to counterclockwise direction,you can stop
11
the recording and turn off the DVR.
13
3.5.
Restore default Wi-Fi password: long press for 4 seconds.
3.6. Restore all default setting : press for 10 seconds.
14
3.7. Change the recording mode: Switch right to Continuous
recording mode; switch left to Motion Detection mode.
2
14
2
4. LED Indicators
● Solid blue LED - power on
● Solid red LED - recording on
● Blinking orange LED - device searching for Wi-Fi connection
● Solid orange LED - device connected to phone (P2P connected)
● Solid green LED - device connected to the router (IP connected)
5. Format Memory Card
Go to the Program Setting on the PV Cam Viewer App to format
the memory card.
USB Cable
No microphones are available for USA market.
*
European Standard
Adapter Head
6. Retrieve Video Files
There are two ways to read the retrieve video files.
6.1. Use memory card reader to retrieve video files.
6.2. With the device powered on and memory card inserted, plug the
USB cable into , and plug the other end into the PC.
The device will be recognized by PC as an external drive for user
to retrieve the files.
5
7. Setting up IP Connection
Please refer to PV-Cam Viewer for IP cam quick guide.
8. Power LED Indicator
2 1
PV-PB20i
Power Bank Design DVR
Quick Guide
LED Indicators Baery Capacity
Three blue LED shining
65~100%
Two blue LED shining 35~ 65%
One blue LED shining 5% ~ 35%
One Blinking blue LED No power
Three flashing blue LED Device charging
Do not remove serial number stickers! Warranty is invalid if the sticker is tampered!
*
3
LawMate, innovation never stops
®
V1.0
V1.0
 Loading...