

Page 1
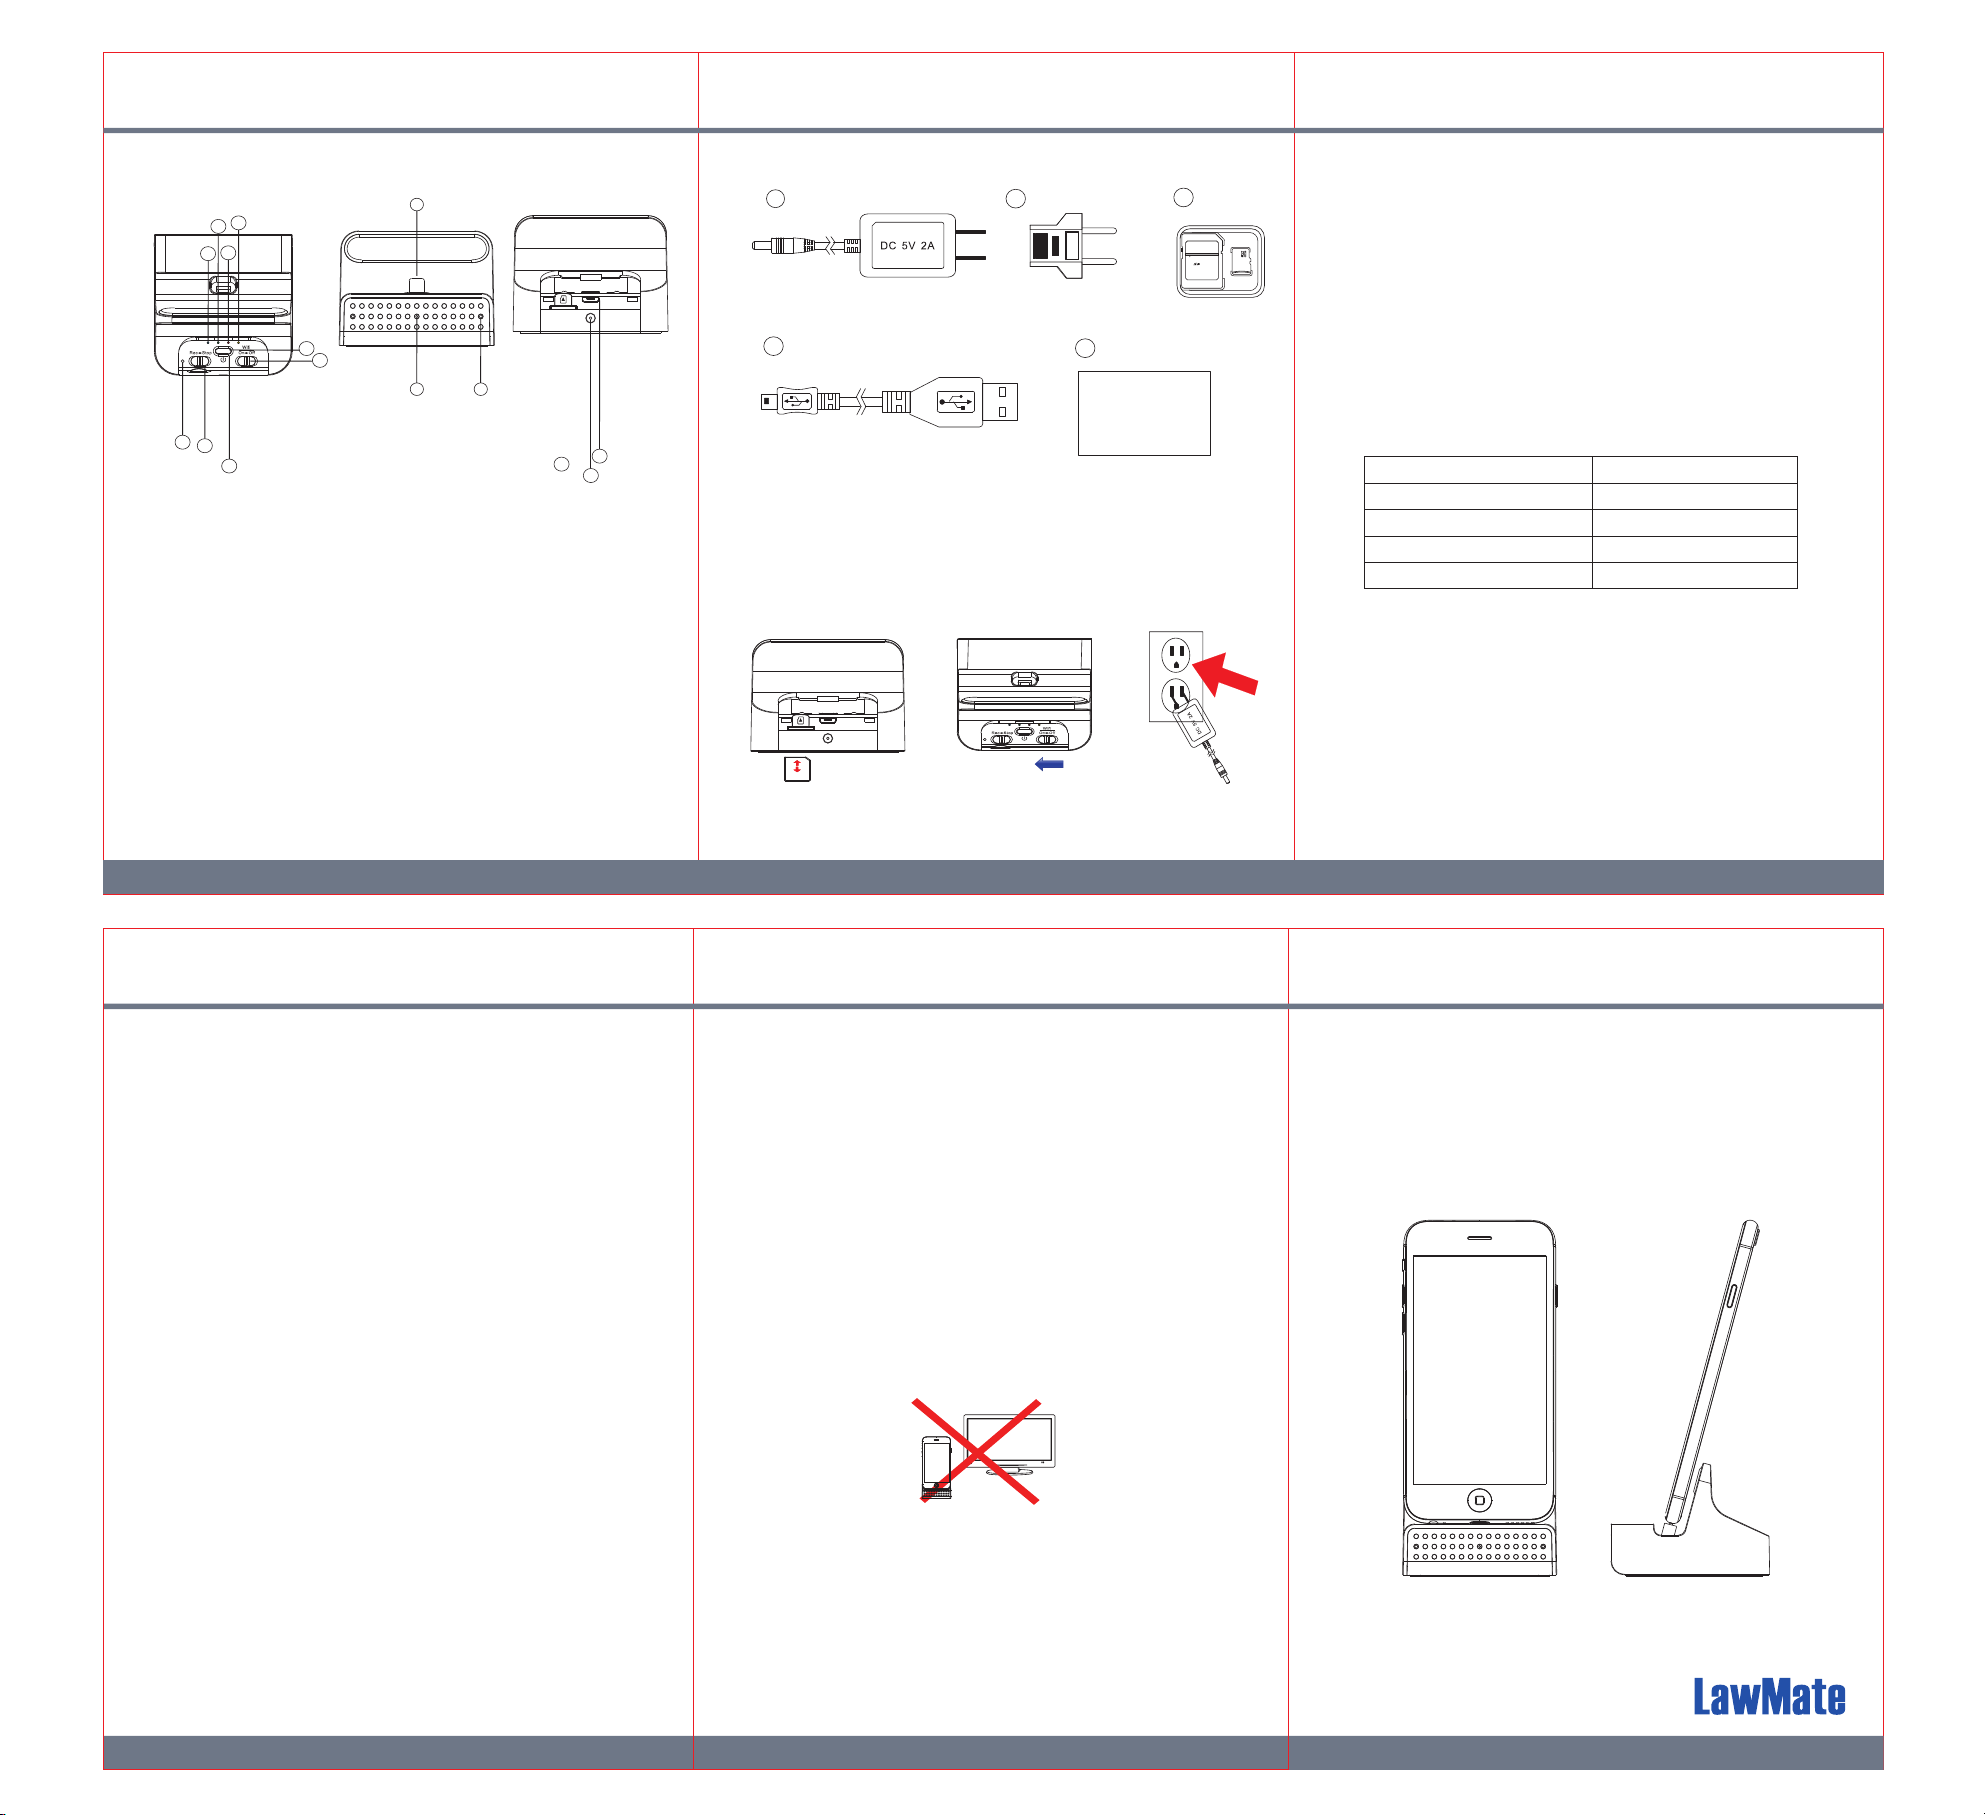
1. Names and Parts
6
4
5
3
15
8
7
13
12
1. Camera Lens
2. Microphone*
3. Power (Blue) LED
4. Record (Red) LED
5. Wi-Fi (Orange) LED
6. Charge (Green) LED
7. Default Button
8. Wi-Fi Switch
9. Memory Card Slot
※No microphones are available for USA market
11
1
2
9
10. USB Port
11. Lightning or USB Jack
12. LED Display Button
13. Rec/Stop Button
14. DC 5V In
15. Power Button
2.
Package Content
a
d
b
DC 5V/2A Power Adapter
Adapter Head
European Standard-
e
c
Lock
4GB
Adapter
Memory Card
3.3 Simply plug the 5V wall adapter power supply into an
electrical outlet. Press on the device and blue LED will
be on. Then the system initialization will take around 40 seconds.
With the presence of the red LED , it indicates that the
15
○
○
4
○
3
recording mode is on. The blinking orange LED suggests that
the unit is ready for P2P connection (for more details about the
P2P connection guide, please refer to the IP Quick Guide).
※ Please note that each time the device is switched to P2P or IP
connection, the system initialization will take around 40 seconds.
Quick Guide
10
14
USB Cable
Quick Guide
3.4 For the LED status indicators
LED Indicators
Device Status
Solid Red LED Recording on
3. Recording Operation
3.1 Insert memory card into slot as shown in illustration 1.
3.2 To turn on Wi-Fi, slide to the left as shown in illustration 2.
8
○
(1) (2) (3)
Blinking orange LED
Solid orange LED
Solid green LED
3.5 To set the password & SSID back to default settings, please press
the default button longer than 4 seconds and less than 10 seconds;
You’ll see the red / orange /green LED turning on and off
at the same time. After 40 seconds, the presence of the flashing
orange LED indicates that the unit is ready to start the P2P
connection again (P2P password: 88888888).
To set all the settings back to factory default, press the default button
longer than 10 seconds; You’ll see the red / orange /green LED
turning on and off at the same time. After 40 seconds, all the
6
○
settings will be back to factory default settings.
○
4
○
5
Searching for P2P
P2P Connected
IP Connected
5
○
○
6
○
4
○
5
1 3 2
5
You,ll see the flashing orange LED which indicates that
○
the unit is back to default setting successfully.
※ Please note that the operation less than 4 seconds will be invalid.
4. Continuous /Motion Detection Recording
4.1. For Continuous recording, please swipe to the left.
4.2. For Motion Detection recording, please swipe to the
right. After 10 sec of system initialization, the unit will be
ready for Motion Detection recording. Once the unit detects
the moving object, it will start the recording and the red LED
4
○
will be on.
4.3. For snapshot function, please refer to the IP Quick
Guide.
4.4. You can also use the PV Cam Viewer to change the
recording mode. For further details, please refer to our
IP Quick Guide, thanks.
13
○
○13
6. Date and time setting (for Windows system)
6.1. From the desktop right-click to open Notepad, create a text
file named settime.txt
6.2. On the first line of the file, enter date and time
informaiton as year.month.day hours.minutes.seconds. For
example, suppose the time is October 16, 2015 15:00.Then
enter 2015.10.16 15:00:00
6.3. Save the file to the root directory of the memory card.
6.4. Insert the memory card into the slot, and power on the device.
The date and time setting is now completed.
Note that when date and time setting is completed.
The settime.txt file should not be visible when you connect
the device to the computer again.
※ Please note that PV-CHG20i does not include A/V out
connection cable.
PV-CHG20i(Droid/iOS)
Smartphone Charging Dock DVR
Quick Guide
5. Retrieving Video Footage
5.1. Video file is stored in the memory card.
5.2. Remove memory card from DVR.
5.3. Insert memory card into a card reader or memory card slot in your PC.
5.4. Computer detects the storage and user may browse
and operate the storage as typical folder directory.
i.e. Rename, copy and paste, delete, duplicate, etc.
※ Please note that vidoe files will be named as V+year+month
+time; e.g. V20150721010101
A/V Out Connection
7. Charging Functionality
7.1 Beyond being a hidden camera, the unit can actually function
as a working smartphone charger. It charges your phone like
a normal docking.
※ Please note that when you try to charge your phone through
the unit, the power your phone receives will be less than when
connecting to its original charger.
5 4
LawMate, innovation never stops
®
V1.0
 Loading...