

KJB DVR259WFA, DVR259WF User Manual
1. Names and Parts
4
5
3
2
1
14
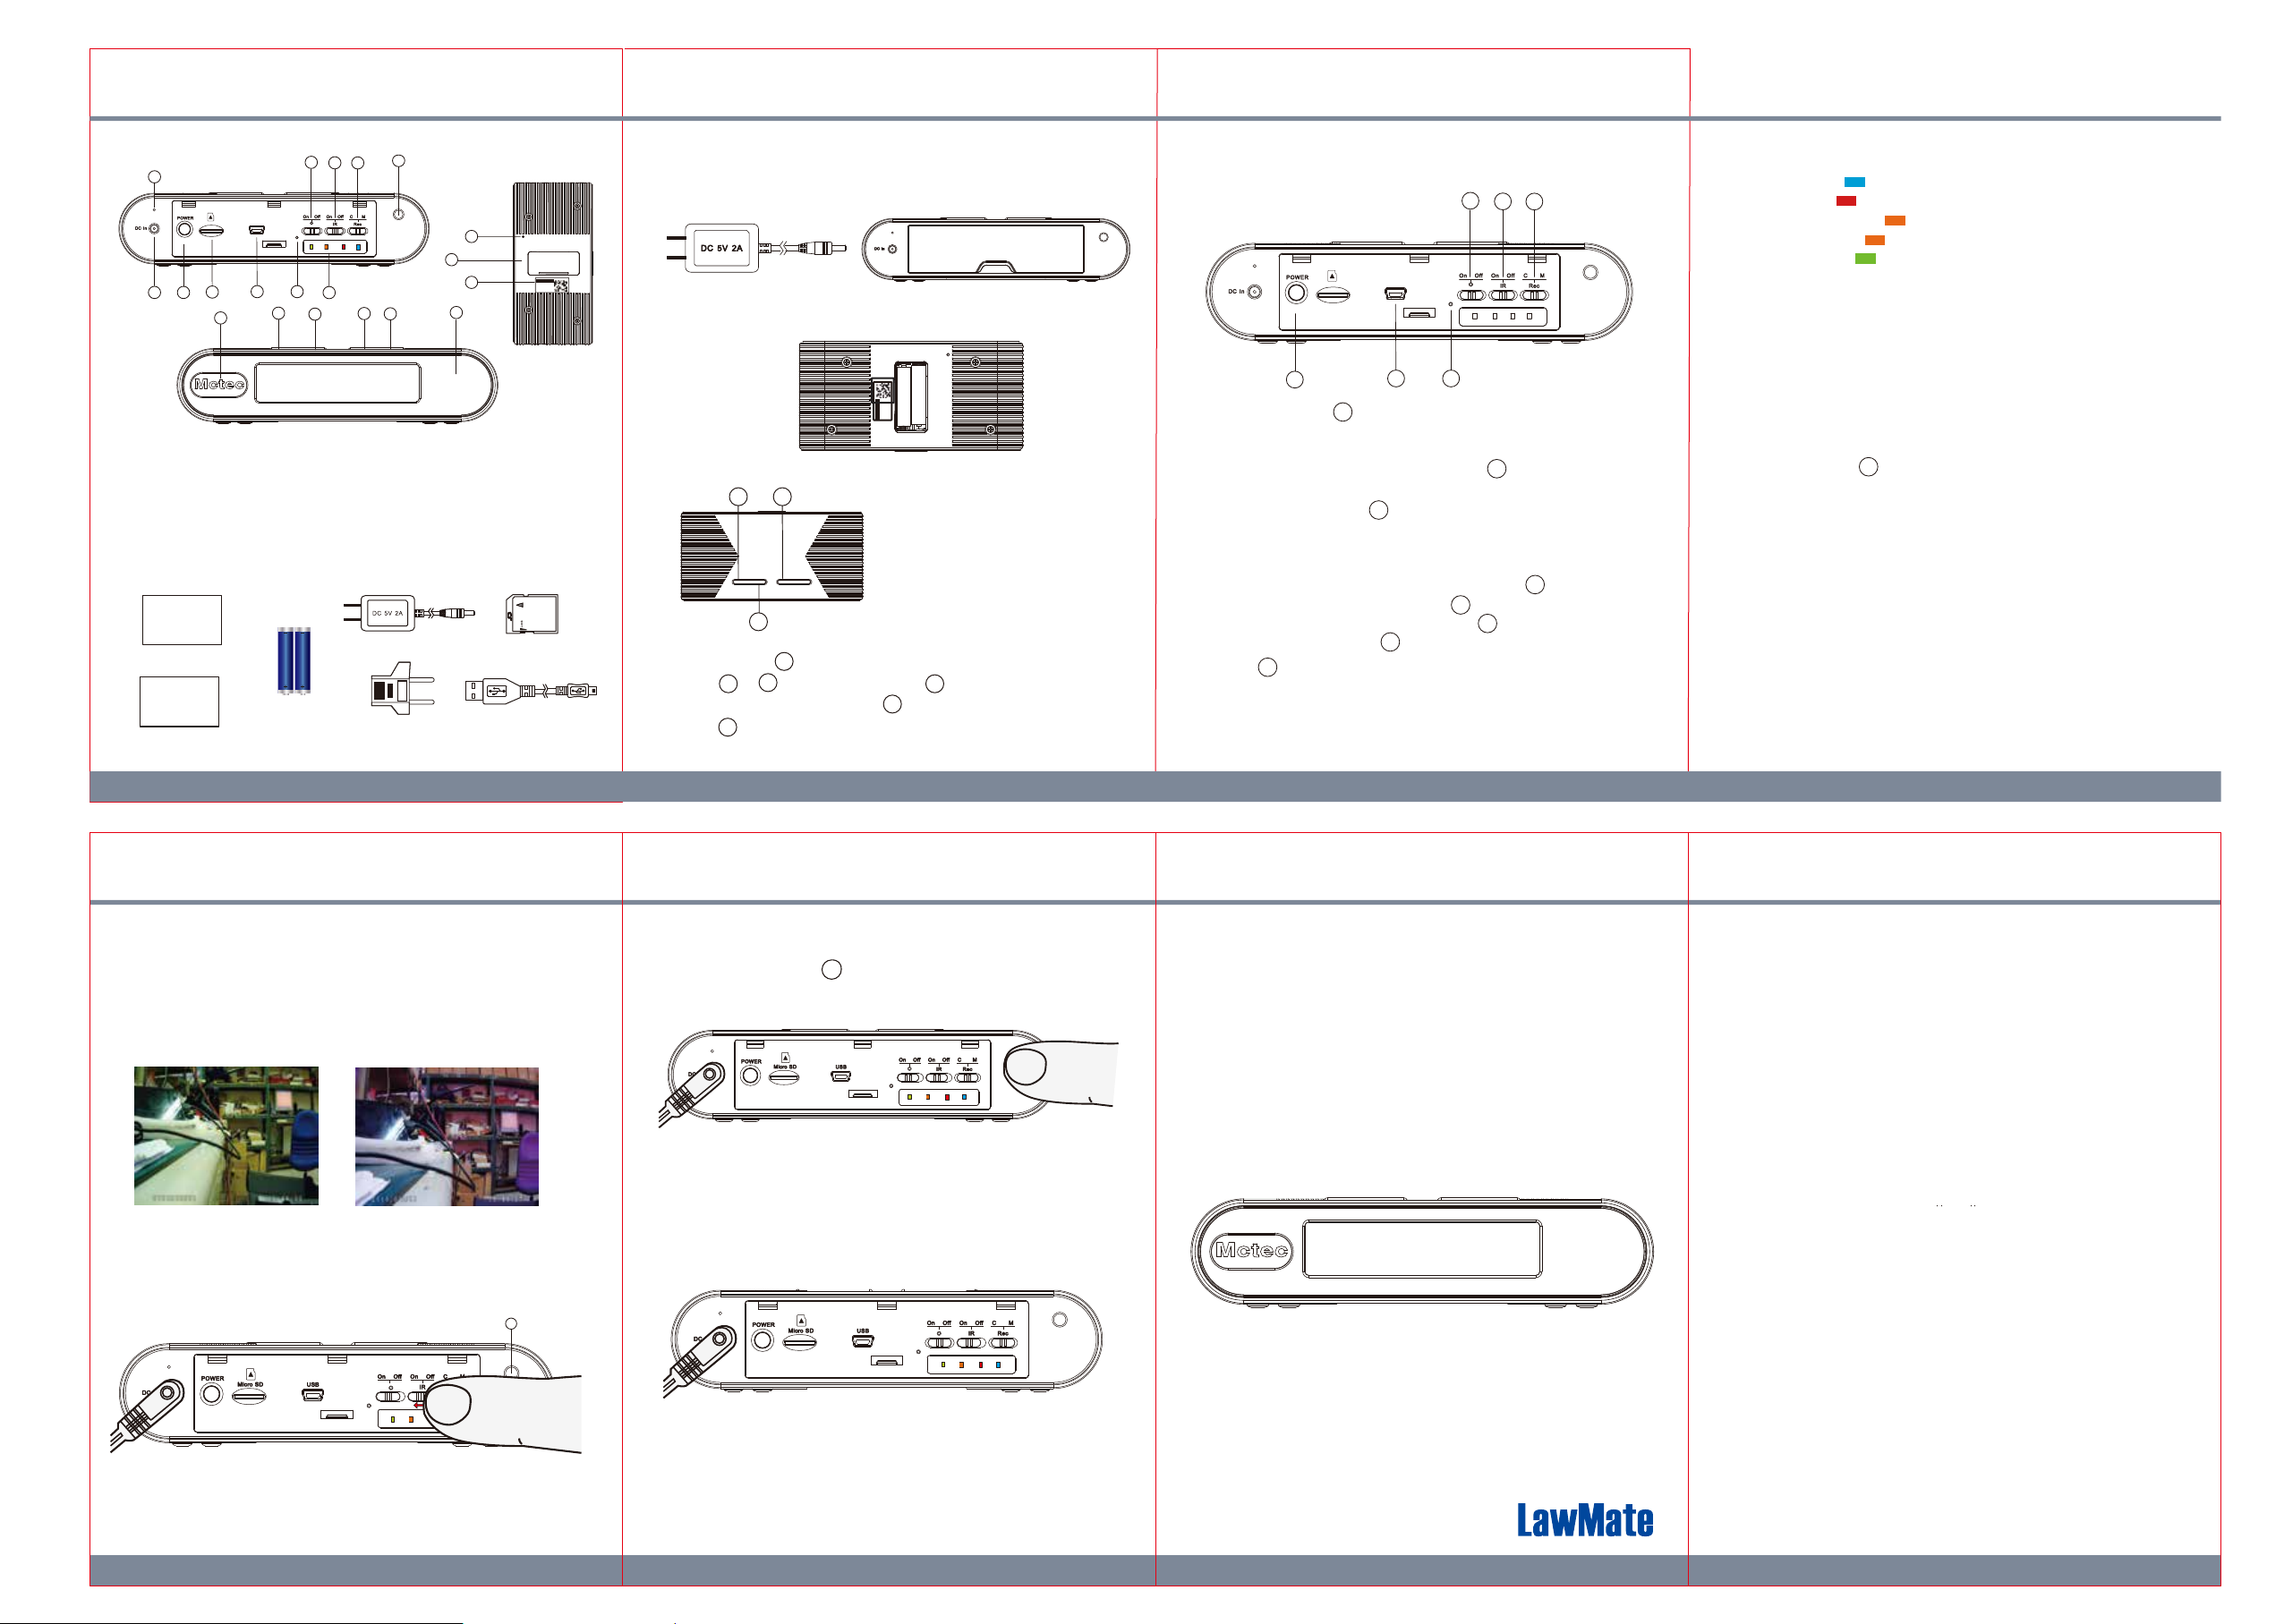
1.DC In
2.Power Button
3.Memory Card Slot
4.Microphone
5.USB Port
6.DVR Default Key
7.LED Indicators
15
8.Wi-Fi On/Off Switch
9.IR Sensor On/Off Switch
10. Continuous Recording/
Montion Detection Switch
11.Photocell
12.DVR QR Code
13.Digital Clock Reset Button
2. Package Content
IP Quick
Guide
IP Quick Guide
User Manual
Device Quick Guide
AAA Battery*2
6
AAA
AAA
8 9 10
7
16
11
13
20
12
18
17
*No Microphones are available for USA market.
19
14.Lens
15.Clock setting : up
16.Clock setting : down
17.Clock setting : set
18.Clock blue LED back light
19. Infrared Illumination
20.AAA battey slot
PV Cam Viewer
ID:P000527
Code:1234
3. Power supply
A. Connect 5V adaptor to DVR is the ONLY way to power the DVR
and run the recording process.
B. Inset 2 pieces AAA batteries into batter slot to power the
digital clock.
PV Cam Viewer
ID:P000048
Code:1234
4. Time Setting for Clock Display
3
1
※The time setting here is for
clock display only. It does not
apply to video files.
2
5V Charger
European Standard
Adapter Head
1 3 2 4
16G Memory Card
USB Cable
4.1. Inser 2 pieces AAA batteries into battery slot.
4.2. Press and hold for three seconds to access time setting mode.
4.3. Press or to set hours and press again to set minutes.
To exit time setting mode, press .
4.4. Press to switch the displaying to 12 or 24 hour format.
1
1
3
2
3
3
5. Operation
It is highly recommended to format SD card first before using it for
the first time.
2
5.1. Power on: Press once.
5
2
5.2. Recording: 40 seconds after the device is powered on, it starts
to record automatically.
5.3. Wi-Fi: With device powered on, switch to on , Wi-Fi will be
turned on in 40 seconds. .
5.4. Power off: Long press for 4 seconds to stop recording and
2
turn off DVR.
5.5. Reset: When the device functions abnormally, please upplug
the DC charger.
5.6. Restore default Wi-Fi password: long press for 4 seconds.
5.7. Restore all default setting : press for 10 seconds.
5.8. Change the recording mode: Switch right to Continuous
recording mode; switch left to Motion Detection mode.
5.9. Switch to activate or turn off the infrared illumination.
9
10
※Do not unplug the 5V charger while recording. This action will
damage the recording files.
9 10
8
6
8
6
6
10
6. LED indicators
● Solid blue LED - power on
● Solid red LED - recording on
● Blinking orange LED - device searching for Wi-Fi connection
● Solid orange LED - device connected to phone (P2P connected)
● Solid green LED - device connected to the router (IP connected)
7. Format memory card
Go to the Progame Setting on the PV Cam Viewer App to formate the
SD card.
8. Retrieve video files
There are two ways to read the retrieve video files.
8.1. Use memory card reader to retrieve video files.
8.2. With the device powered on and memory card inserted, plug the
USB cable into , and plug the other end into the PC.
The device will be recognized by PC as an external drive for user
to retrieve the files.
5
9. Setting up IP connection
Please refer to PV-Cam Viewer for IP cam quick guide.
10. Note
The IR filter could move to the wrong position during the
transportation and it will cause a red recorded image.
In this case please follow the steps below to calibrate
the DVR.
10.1
First, switch on IR function and then power on DVR.
Normal Abnormal
12
10.2
Cover the photocell for 5 - 6 with your finger for
a few seconds. You will hear a click.
11
PV-FM20HDWi
IP-based Digital Clock DVR Quick
Guide
Infrared illumination for night vision
10.3
Remove your finger and you will hear another click
after 5 to 6 seconds later. Then, the calibration process
is completed.
LawMate, innovation never stops
®
6 5
V1.0
 Loading...