

Page 1
V1.1
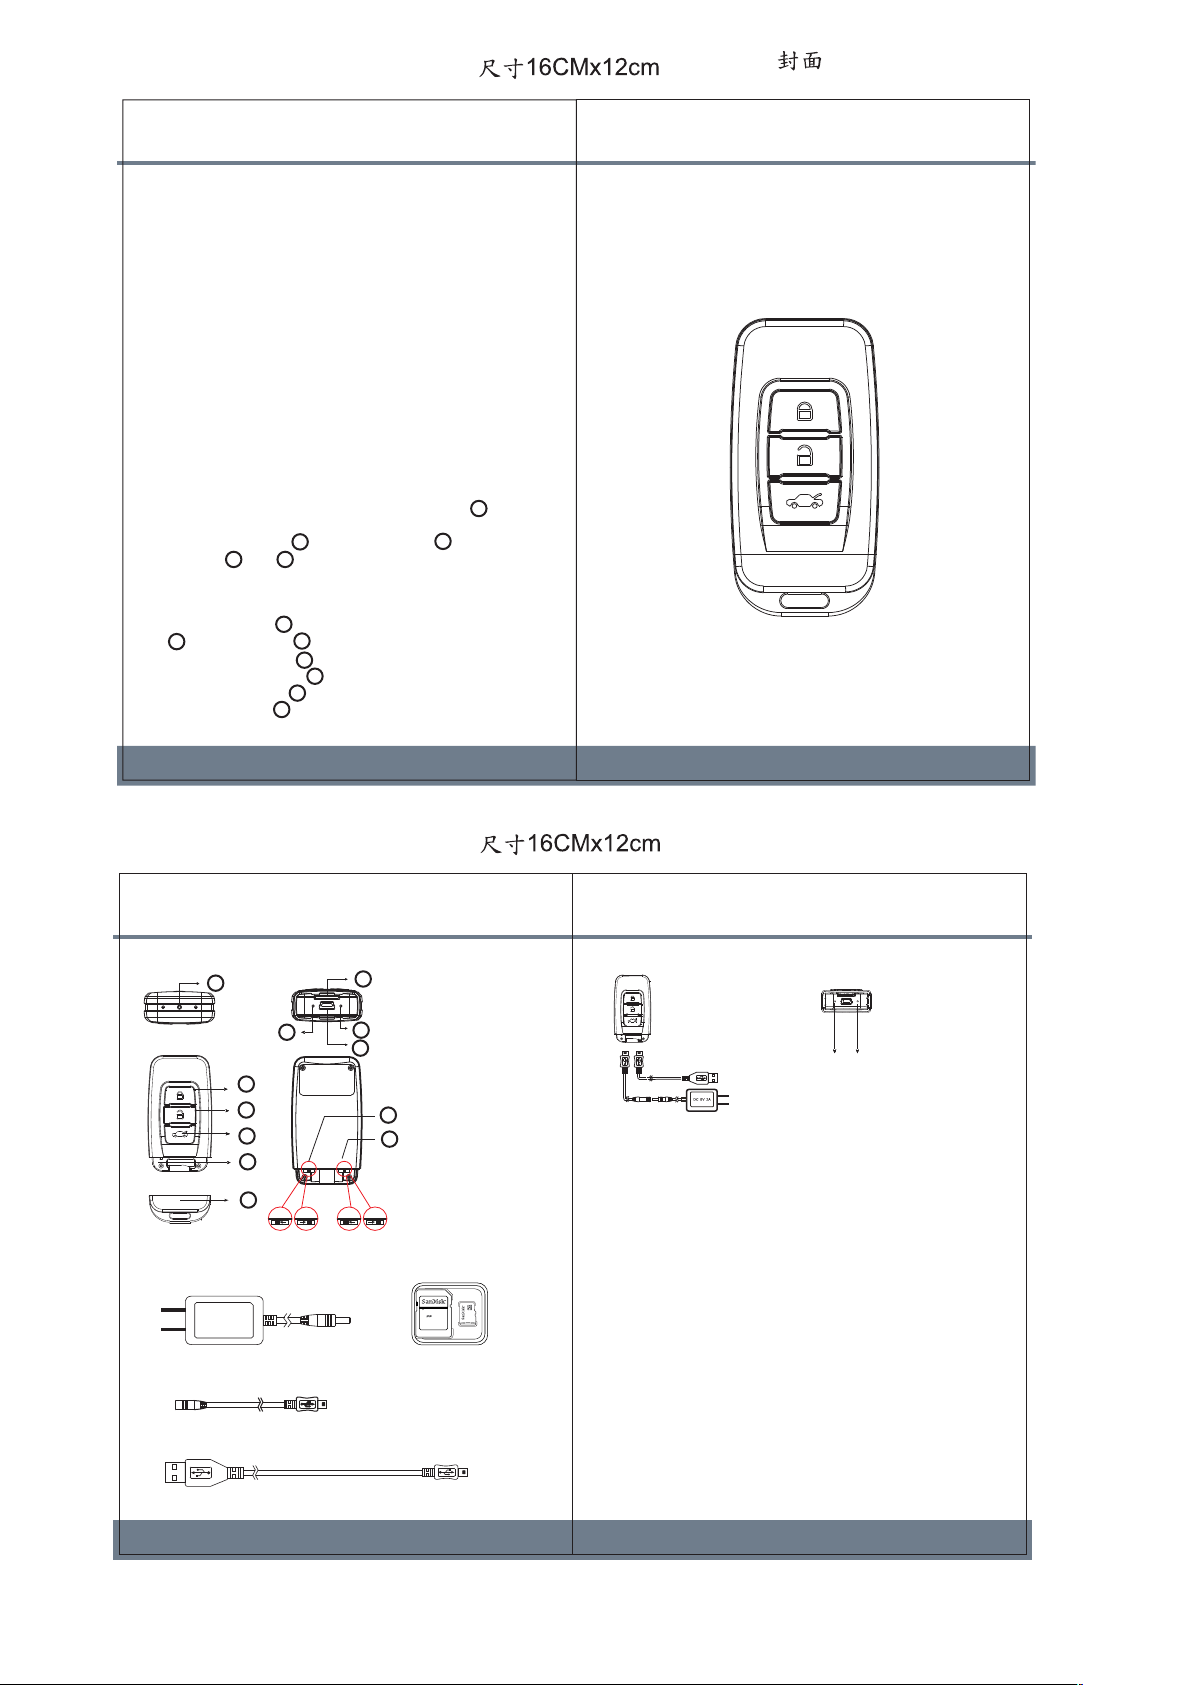
1. Names and parts
VGA
HD
Key Chain 720P DVR Camera
Operation Manual
Law Enforcement Products Manufacturer
LawMate
PV-RC200HD
1. Video and photo files are stored in the memory card.
2. There are two ways to download video/photo files.
2.1 Using memory card reader to download video/photo files.
2.2 With the device powered on and memory card inserted,
connect the device to PC by USB connection. It will be
recognized by PC as an external drive for user to download
the video recordings and photo files.
ON
OFF
1. Right-click on Windows desktop. Choose Notepad to create a
*.txt (text) file. Then double-click the text file.
2. Suppose current time is October 16, 2011 15:00. Enter date and
time information as 2011.10.16 15:00:00 Note that a space must
be present in between date and hour and time is in 24-hour format.
3. Name the file as settime.txt and save it to the root directory of the
memory card.
4. Insert the memory card to the slot then power on the device.
The date and time setting is now completed.
5. Please note when the date and time information is successful
set to the deivce the settime.txt file should not be visible when you
connect the device to the computer again.
3
4
5
6
7
8
9
10
11
12
13
10. Charge LED
11. USB Port
12. Vibration Switch
13. Resolution Switch
2. Package Content
USB cable
DC 5V charger
DC 5V 2A
Power LED(Blue)
Rec/Photo LED(Red)
Charge LED(Green)
When battery is fully charged,
the green LED will turn off.
Connect to PC via USB cable
Connect to the charger
3. Charge the battery
1. Remove memory card from the device, connect to PC by
USB cable then power on the device.
2. PC detects the device as a webcam and installs it automatically,
no driver is needed for installation.(For XP,Vista & Windows 7)
3. Installation completed, webcam is ready for function.
4. Download videos and photos from DVR
5. Using PV-RC200HD as a webcam
6. Date and time setting (for Windows computer)
7. Operation
2. Basic operation
2.1 Power on: Press once and blue LED will illuminate.
2.2 Vibration On/Off, Resolution HD/VGA.
2.3 Record video: Press again and red LED will illuminate.
2.4 Stop recording: Press again and red record LED will turn off.
2.5 Take photos: Press once and red LED will blink.
2.6 Power off: Press once to turn off the device.
The blue indicator will turn off.
1. Format the memory card
1.1 Insert the memory card to the device then press once
to power on the device.
1.2 Press and hold the first, then press the button.
1.3 Release and at the same time. The red and blue LED
will turn off simultaneously with vibration. Please note all LED
should be turned off when memory card format is completed.
※ Please note, memory card needs to be formatted on the device
for the unit to recognize it. Formating memory cards over PC is
highly not recommended and may result in recording failure.
1. Remove the rear covert cap and connect the supplied USB
cable into the device.
2. Plug the USB cable to a PC, the green charge LED at the
rear of the device will illuminate to tell you it’s charging.
3. You can also charge the device by the supplied charger.
Plug the charger to a wall outlet, connect the charger to the
device. The green charge LED will illuminate to tell you it’s
charging and will turn off when the battery is full.
P
Charging cable
3
3
3
5
4
3
4
5
4
5
12
13
4GB
Lock
Adapter
MicroSD card
1
1. 5MP Camera
3. Power on/Record
4. Power off
5. Photo
6. Reset
7. Covert Cap
8. Memory Card Slot
9. Power/Rec/Photo LED
 Loading...