

Page 1
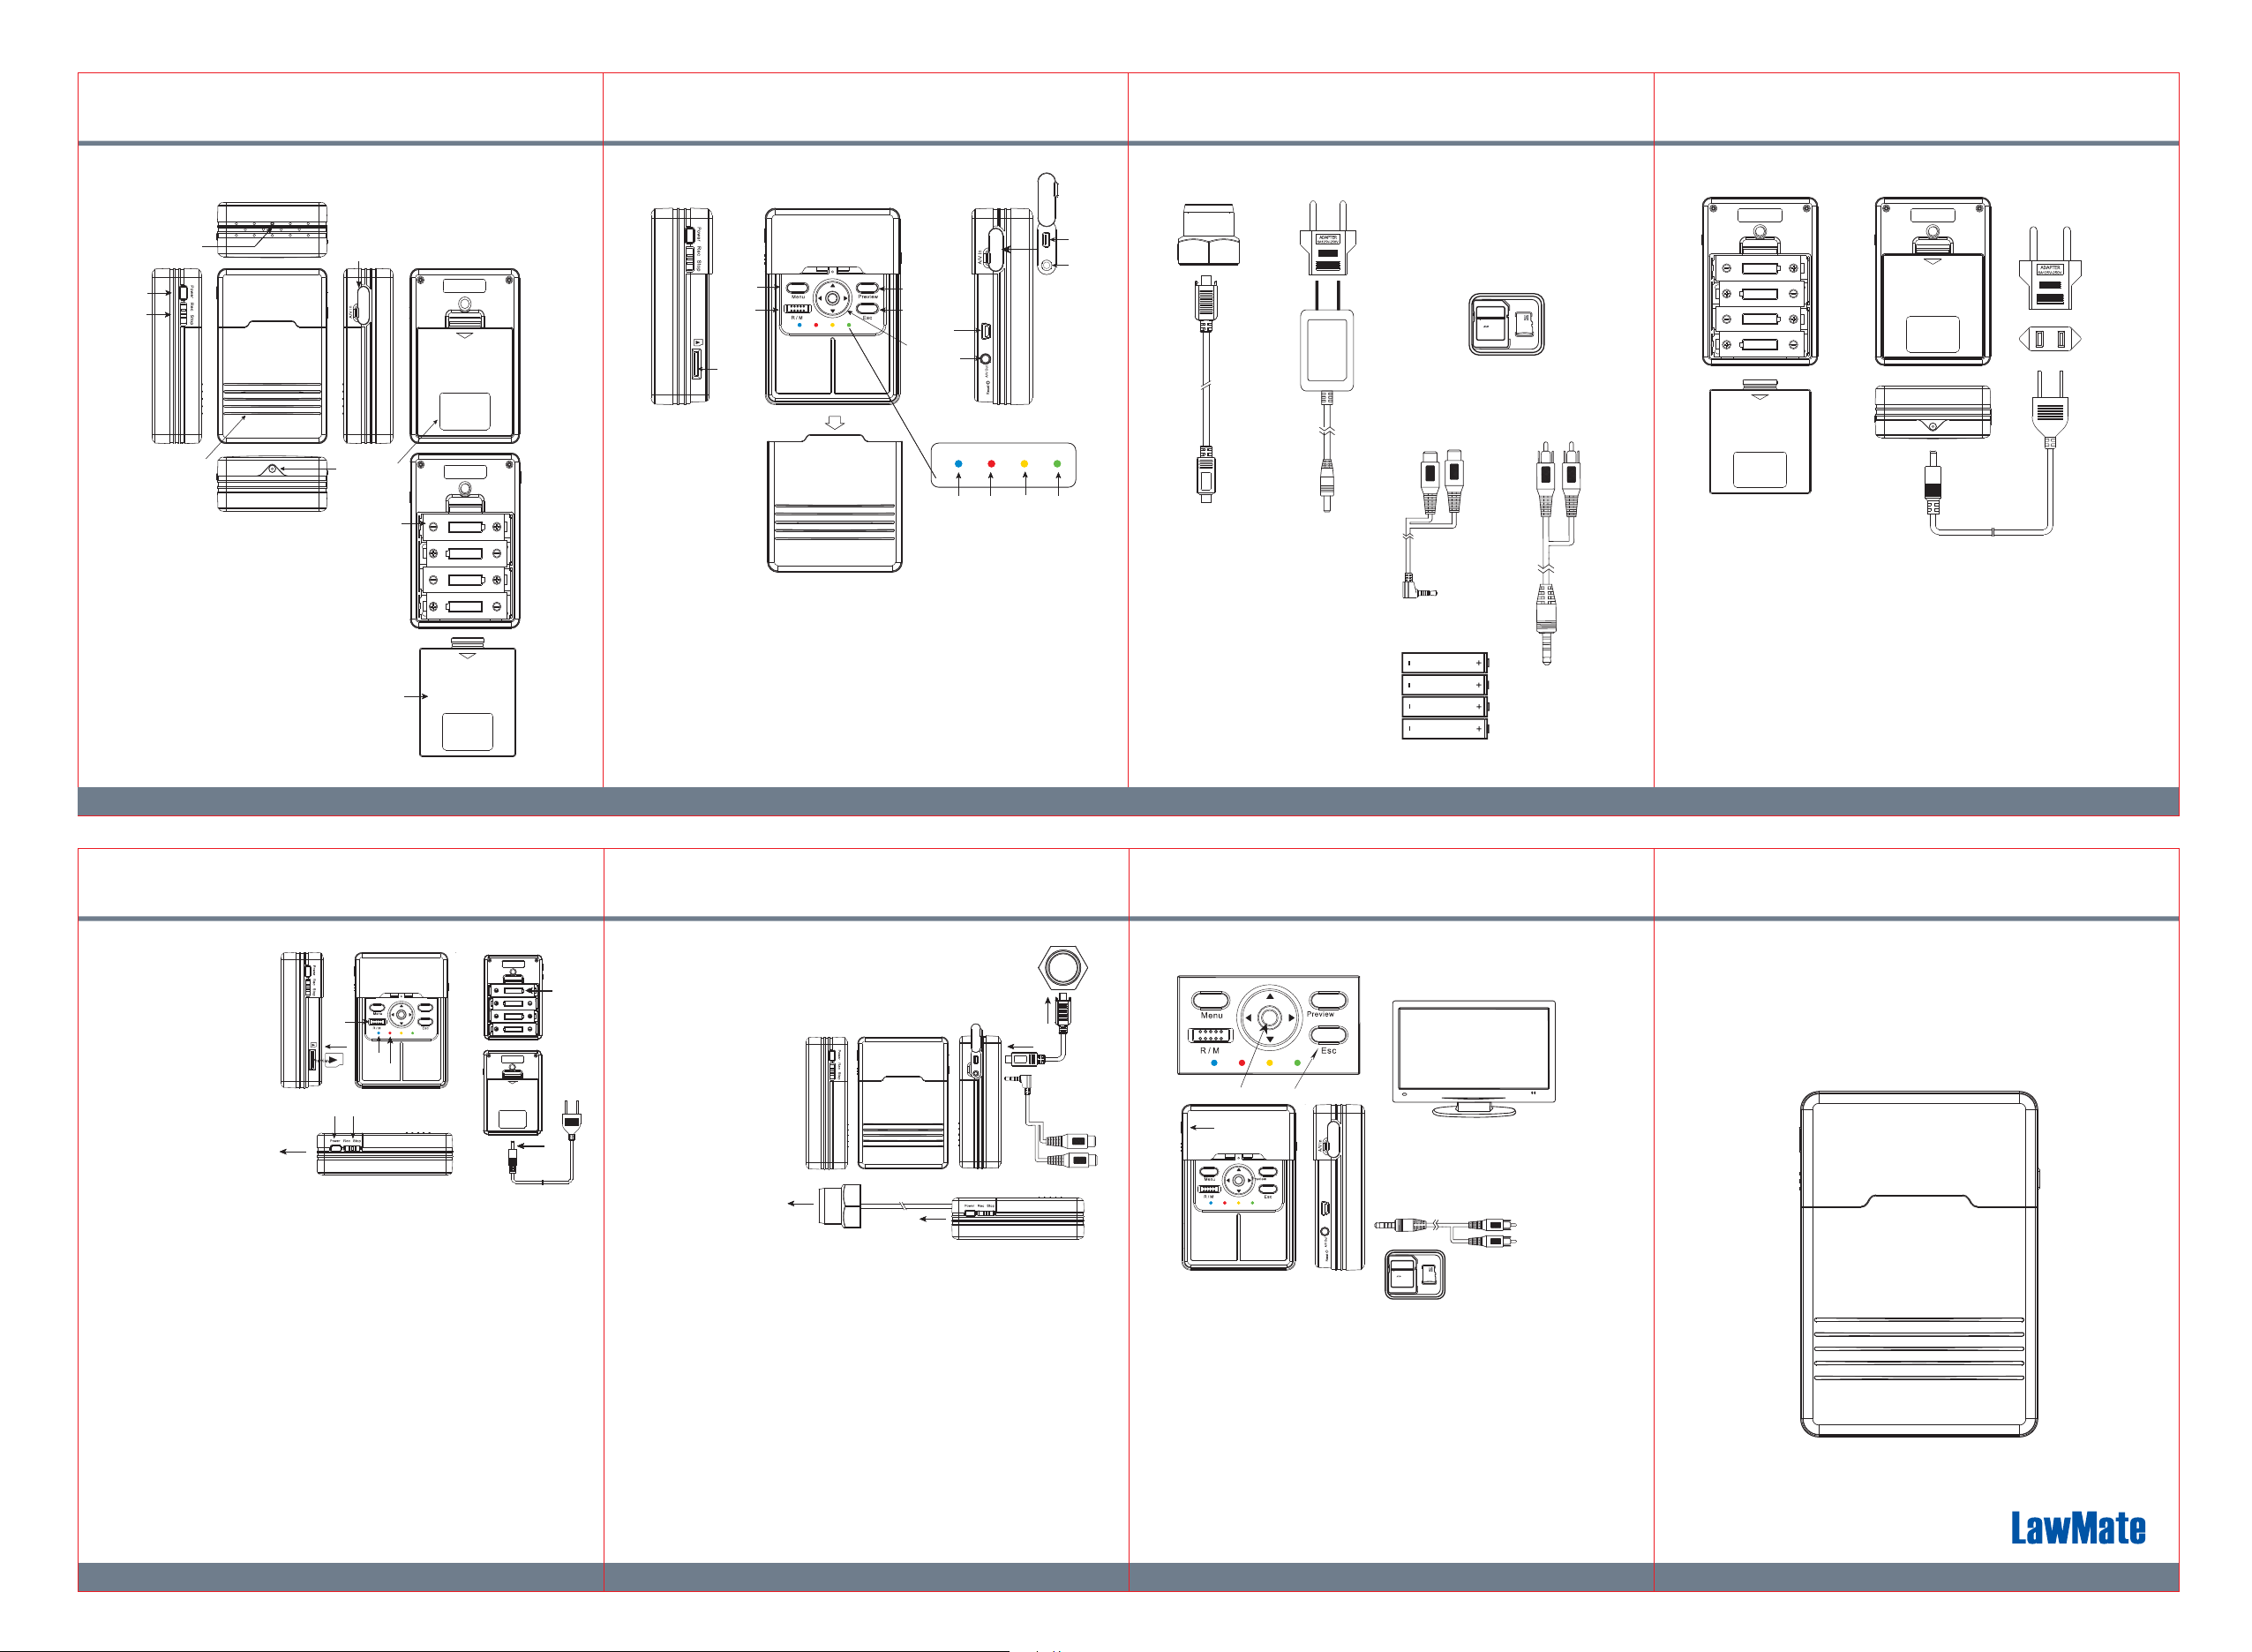
1. Names and Parts
2. Package Content
3. Power Supply
(1)
(8)
(7)
(6)
(1).5MP Camera
(2).A/V In / PIR Sensor Input Port
(3).Battery Cover
(4).Battery Slot
(5).DC 5V In
(6).Controller Cover
(7).Rec/Stop Switch
(8).Power On Switch
(5)
(2)
(3)
(4)
(3)
(15)
(14)
(16)
(9).USB Port
(10).A/V Out
(11).Preview
(12).Esc Button
(13).Navigation Key
(14).Recording Mode Switch
(15).Menu
(11)
(12)
(9)
(13)
(10)
(19) (20) (21) (22)
(16).Memory Card Slot
(17).PIR Sensor Input Port
(18).A/V In
(19).Power LED
(20).Record LED
(21).External Camera Input LED
(22).PIR Input LED
(17)
(18)
(1)
DC 5V 2A
(2)
(1).PIR Sensor
(2).PIR Sensor Cable
(3).Power Plug Adaptor
(4).AC/DC Power Adaptor
(5).Memory Card
(6).A/V In Cable
(7).A/V Out Cable
(8).AA Battery x 4pcs
(4)
(3)
(6)
(5)
Lock
Adapter
(8)
(1)
4GB
(7)
Two ways to power supply the unit,
(2)
(1).Insert 4 pieces AA battery to power the device.
(2).Connect the supplied AC/DC power adaptor to the device.
※Note
With batteries inserted to the unit then connect the AC/DC power adaptor
to the device, the AC/DC power adaptor serves as primary power source
and batteries serves as secondary power source.
1 3 2 4
4.1 Video Recording
(4)
(6)
(9)
(3)
(8)
(5)
(7)
Operation
1).Select the method of power supply.
(1)Battery or(2)Power Adaptor
2).Follow the illustration (3) to insert the memory card.
3).Select the recording mode (4)
R: Continuous recording M: Motion detection
※ It is suggested to select motion detection when the unit is connected to
the AC/DC power adaptor.
4).Press the power on button (5), the blue LED (6) turns on.
5).Place the camera direction (7) then switch to Rec (8)
The red LED (9) turns on.
6).To stop recording, switch to Stop (8)
※Do not remove the batteries or disconnect the power adaptor from unit
during recording. It might damage the recording files.
4.2 Video Recording (with external PIR sensor)
(1)
5. Connect to TV / Video Playback / Retrieving files
PV-BX12
1080p Black Box DVR
(1)
TV
(5)
Video in
(2)
Audio In
(4)
(3)
(4)
(2)
Operation
1).Follow the illustration to connect the PIR sensor (1) to DVR
2).When PIR sensor is connected to the unit, once the sensor is triggered
(by change of temperature), DVR will start recording immediately.
3).The recording time is 5 seconds, if no temperature change is detected,
the system resumes to standby mode.
4).Be sure to aim the PIR sensor (4) and the cam (3) at the direction of
preferred monitoring area.
5).Except the built-in cam, you can also connect the unit to an external camera.
※ When PIR sensor is connected to the unit, all pre-set recording mode will be
disabled and automatically switch to PIR recording mode.
5.1 Connect to TV
Connect the A/V out cable(1) to DVR and TV or monit or then power on DVR(2)
Use the navigation key(4) to edit settings.
5.2 Video Playback
1).
Connect A/V out cable (1) to DVR and TV or monitor and then power on DVR(2)
2).While playing back videos, use navigation key(4) to
Press : play and stop
Right / Left : switch the files
Up / Down : control the volume
3).To escape, press the Esc button(3)
5.3 Retrieving files
Insert the memory card(5) to a card reader and connect to a PC to retrieve files.
6 7 5
(3)
(1)
Lock
4GB
Adapter
(5)
LawMate, innovation never stops
Quick Guide
®
V1.0
 Loading...