

KJB DVR005 User Manual
80x120mm
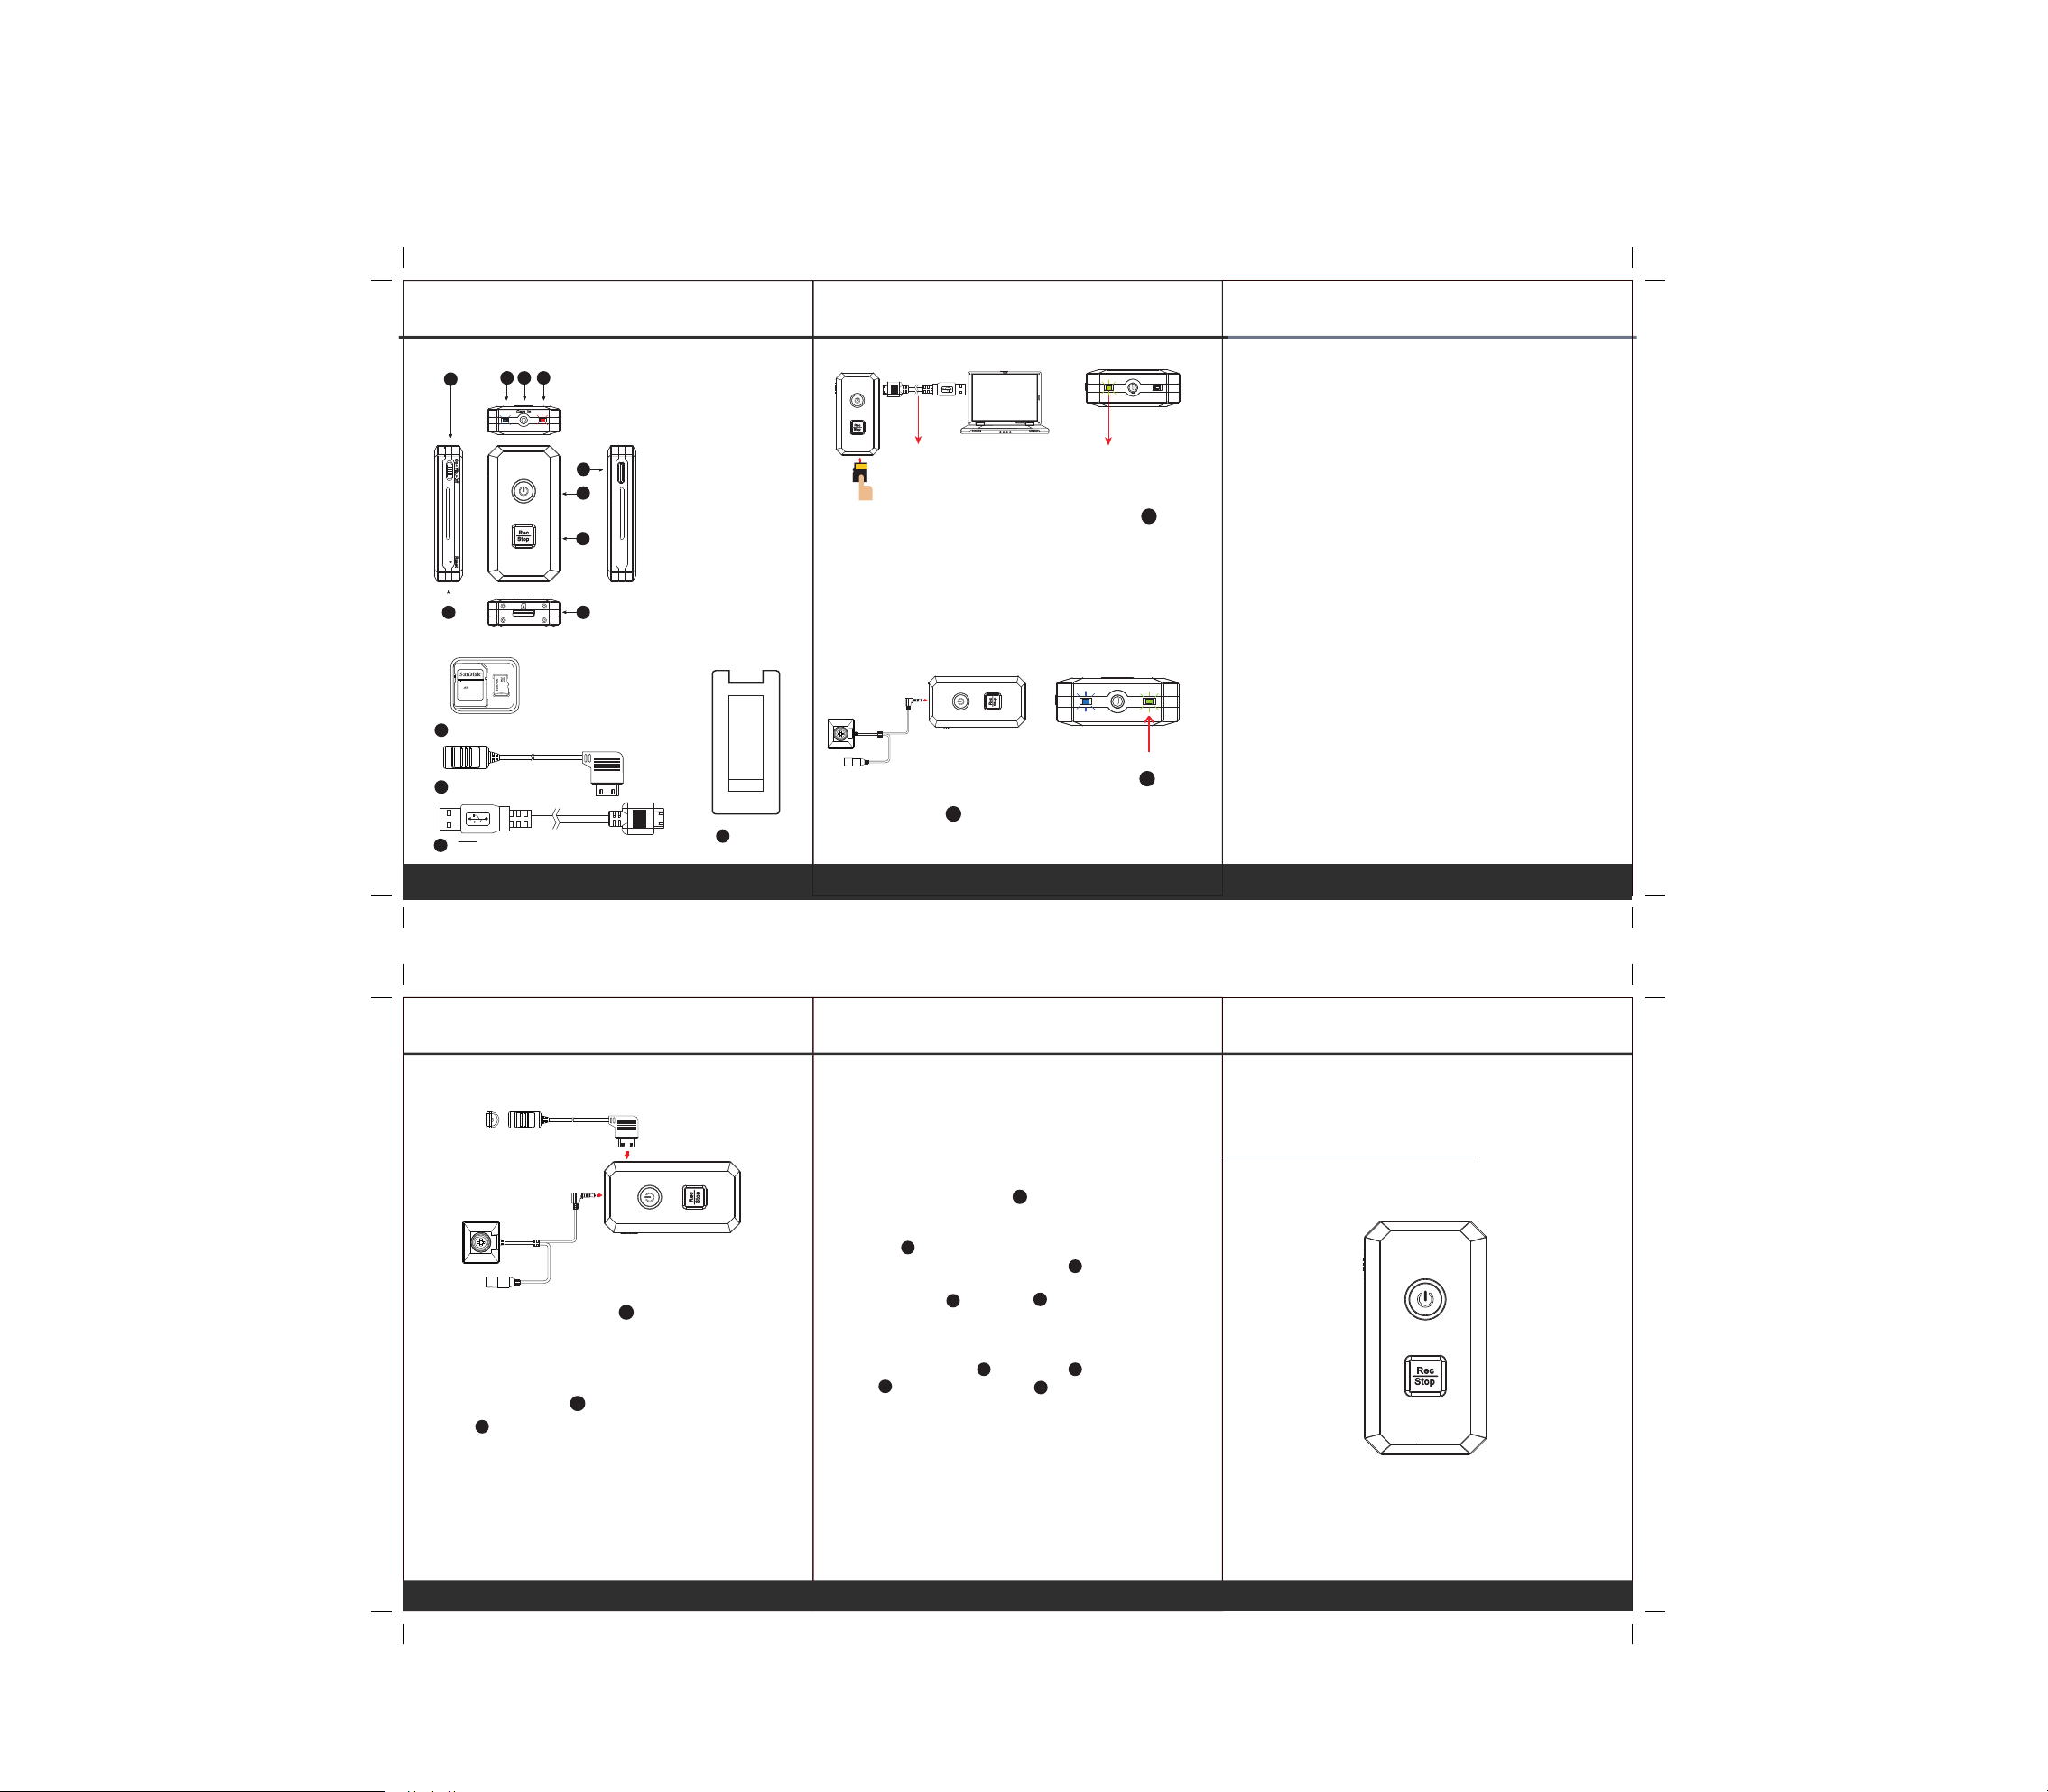
1. Names and Parts
1
9
2 3 4
2. Package Content
Lock
4GB
Adapter
1
Memory Card
2
Cable Controller
3
USB/Charge Cable
3. Charging
1.Vibration Switch
2.Power LED
3.Camera In
5
6
7
8
4.Power/Rec LED
5.Control Port
6.Power ON/OFF
7.REC/STOP
8.Memory Card Slot
9.Reset
With the DVR powered off, connect USB cable to and the
other end of the cable to a computer. When the battery is
fully charged, the device supports 100 minutes continuous
recording. Please note that every video file is approximately
33minutes.(500MB)
USB connection to charge
Charge LED(Green)
When fully charged,
LED will turn off
5
4.Connecting to a Camera
3
4
1. To connect a camera,plug-in camera jack into
on the device.
2. The green LED will illuminate to show the camera is in
Pouch
standby mode.
(1) (2) (3)
4
5. Retrieving Video File
1. With memory card inserted, connect the device to computer
without turning it on by USB cable to establish connection.
2. After the connection is established, turn on DVR.
3. DVR is recognized as a “removable drive.” User may
move/copy files between “removable drive” and computer.
6. Date and time setting (for Windows computer)
1. Right-click on Windows desktop. Choose Notepad
to create a *.txt (text) file. Then double-click the text file.
2. Suppose current time is October 16, 2012 15:00.
Enter date and time information as 2012.10.16 15:00:00
Note that a space must be present in between date
and hour and time is in 24-hour format.
3. Name the file as settime.txt and save it to the
root directory of the memory card.
4. Insert the memory card to the slot then power
on the device. The date and time setting is now completed.
5. Please note when the date and time information
is successful set to the deivce the settime.txt file should
not be visible when you connect the device to the
computer again.
80x120mm
7.Connecting Cable Controller
1. Connect cable controller to .
2. Please be advised, cable controller is for video
recording only. It does not support photo function.
3. To power on the DVR, slide the controller toggle
downward or press on the DVR.
2
LED (red)will turn on.
4. Recording is activated automatically when DVR is on.
5. Sliding the toggle downward and hold for 3 seconds
to turn off recording, DVR will be turned off in the same
time.
5
6
7. Operation
※ Please note, memory card needs to be formatted on the
device for the unit to recognize it. Formating memory
cards over PC is highly not recommended and may
result in recording failure.
1. Sliding the vibration switch to turn vibration mode on.
2. With DVR front side facing toward you and memory card
golden contact area facing upward, insert the memory card
in the slot .
8
3. To power on the DVR gentely press once.
Blue LED turns on.
4. To record, press once. LED will shift from green
7
to red. (Camera must be connected at this moment)
In vibration mode, DVR will vibrate 3 times when recording
starts.
5. To stop record, press again. LED turns to green.
6. Press to turn off DVR. LED turns off.
6
In vibration mode, DVR will vibrate 5 times.
Note:The DVR will turn off automatically in 5 seconds if
memory card is not placed.
(4) (5)
1
6
4
7
4
2
DVR005
Matchbox Size DVR
 Loading...