

Kitsound SLAM 2 User Manual

kitsound.co.uk
Your product and batteries must be recycled or disposed of properly.
Please contact your local recycling centre for more information on proper disposal.
Products showing the ‘Crossed Through’ wheelie bin symbol must be recycled separately from
household waste at the end of their usef ul life. Please DO NOT dispose of this appliance in normal
household waste. Your local appliance retailer may operate a ‘take-back’ scheme when you are
ready to purchase a replacement product, alternatively contact your local government authority
for fur ther help and advice on where to take your appliance for recycling.
Please recycle this packaging responsibly.
All trademarks are acknowledged as the property of their respective owners.
Unless otherwise stated their use does not imply that the trademark owner
is aliated with KitSound or endorses the products herein.
The Bluetooth® word mark and logos are registered trademarks owned by the Bluetooth
SIG, Inc. and any use of such marks by Kondor Ltd. is under lice nse. Other trademarks
and trade names are those of their respective owners.
SLAM 2
®
BLUETOOTH
SPEAKER
JB. 510 8-b / Made in China . © KitSound i s a trademar k of Kondor Lim ited, 2018. Christch urch, Dorse t, BH23 4FL, UK
USER MANUAL
Please read this manual carefully
before use.
Box contents
• KS Slam 2 Bluetooth Speaker
• Micro USB Charge cable
• 3.5 mm to 3.5 mm Aux in cable
• User manual
5 6
IPX5 rating
The Slam 2 is rated IPX5. This means that the Slam 2 is splash resistant, but is not impervious to large
amounts of water. Please make sure that the protective rubber cover is secure. If the Slam 2 has got
damp/wet during use, we recommend drying it o to help prevent any damage from occurring.
Instructions for use
Charging the speaker
Give the speaker a full charge before its rst use.
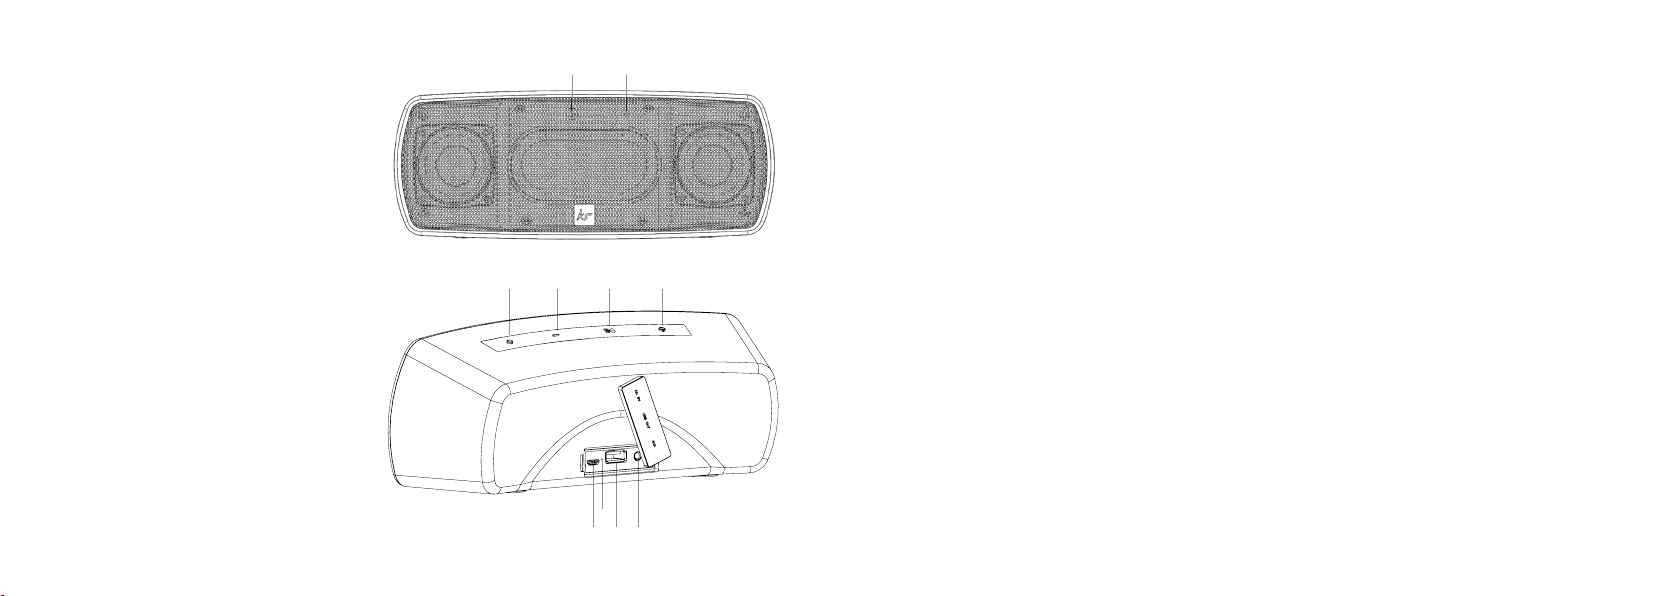
Functions
1. On/O
2. Play/Pause/Call handling
3. Decrease volume/Previous track
4. Increase volume/Next track
13 24
1. Plug the Micro USB charging cable into the Micro USB Charging port (7) and plug into power
2. The Charge indicator LED (8) will be red whilst charging
3. A full charge will take up to 3-4 hours
4. Once fully charged the Charge indicator LED (8) will turn o
Note: Allow up to 4 hours for the rst charge
5. Input indicator LED
6. Microphone
7. Micro USB Charging port
8. Charge indicator LED
9. USB Charging port
10. Aux-in port
8
7 9 10
2 3
 Loading...