

Kite Optics LYNX HD Instruction Manual
INSTRUCTIONS AND WARRANTY
LYNX HD
English (1-3)
Français (4-6)
Nederlands (7-9)
Deutsch (10-12)
Vlamingveld 89 | 8490 Jabbeke | Belgium | T 050 69 23 19 | F 050 69 23 26
www.kiteoptics.com | info@kiteoptics.com
Technical data
Please visit www.kiteoptics.com for all technical data and descriptions of the LYNX HD.
Warranty
LYNX HD – 30 year warranty
Delivery
• Binoculars
• Case
• Carrying strap for binoculars
• Carrying strap for case
• Protective lens caps
• Warranty card
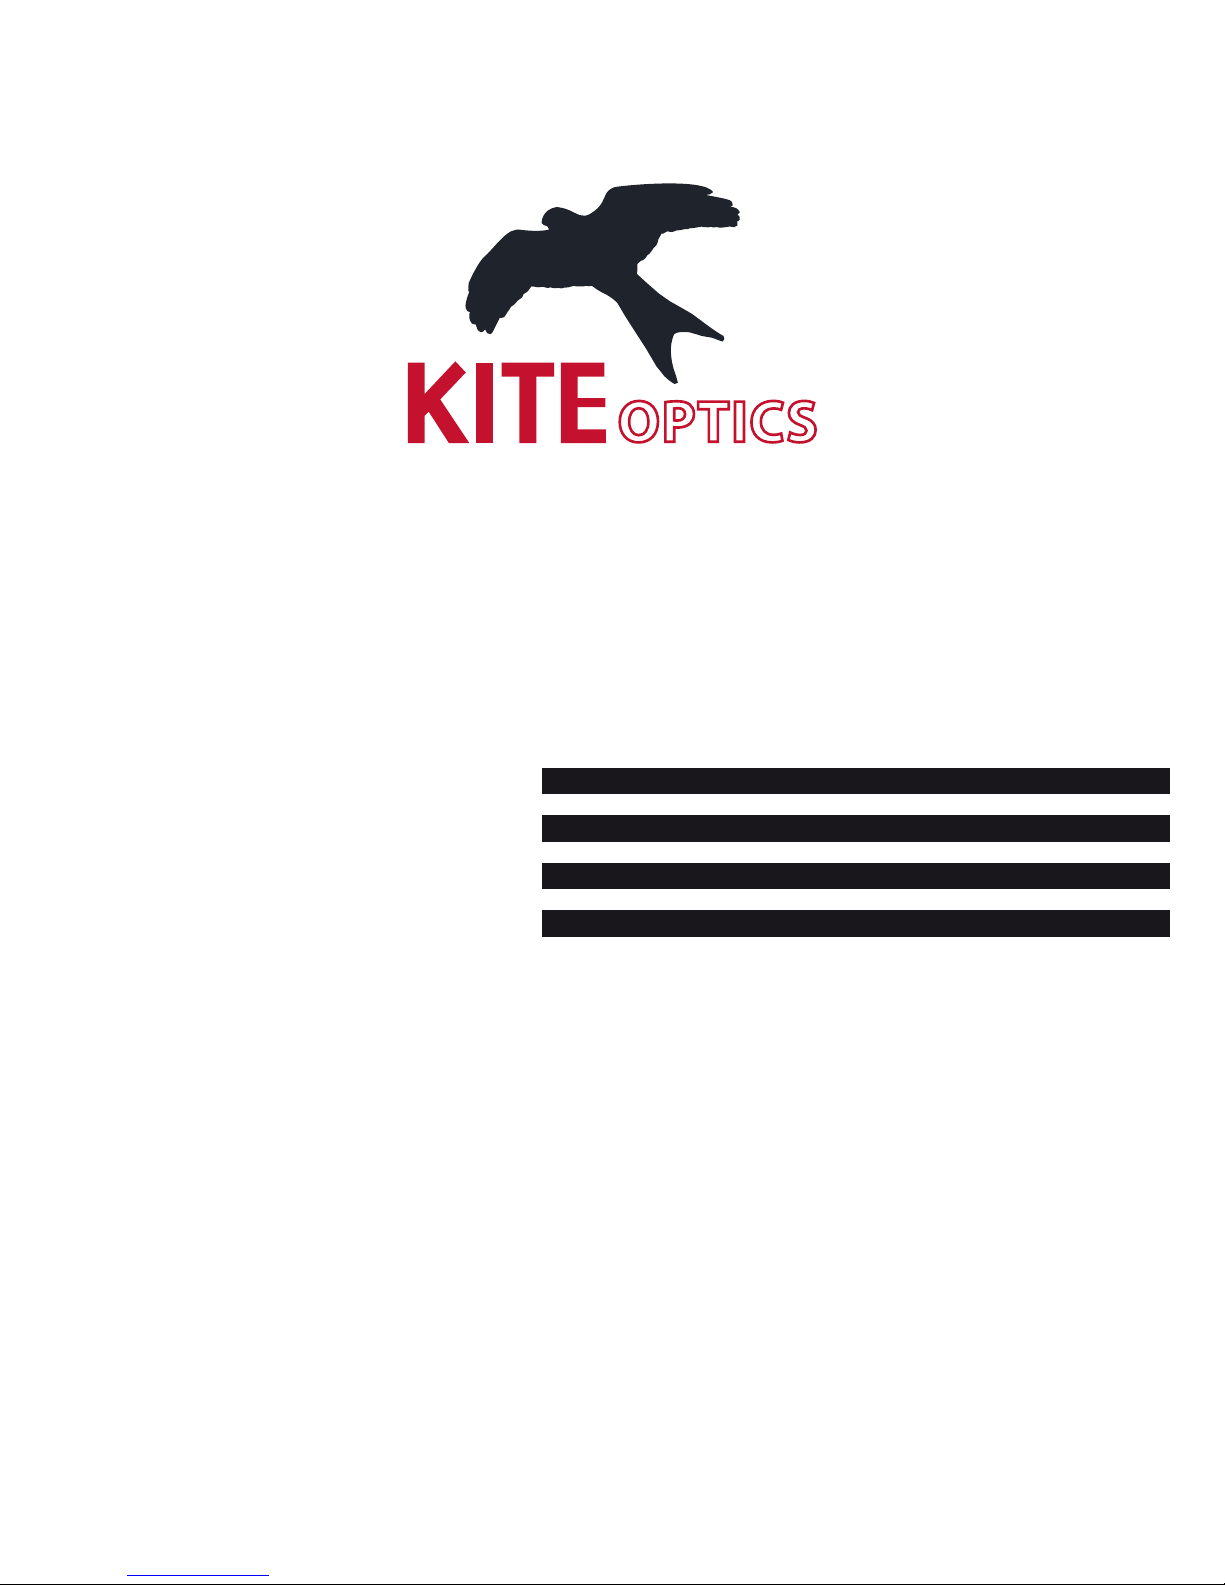
The LYNX HD
1 eyecups – 2 diopter adjustment wheel – 3 eyelets for carrying strap – 4 focusing wheel
5 tripod adaption socket – 6 objective protection caps – 7 ocular protection cap
INSTRUCTIONS AND WARRANTY
LYNX HD
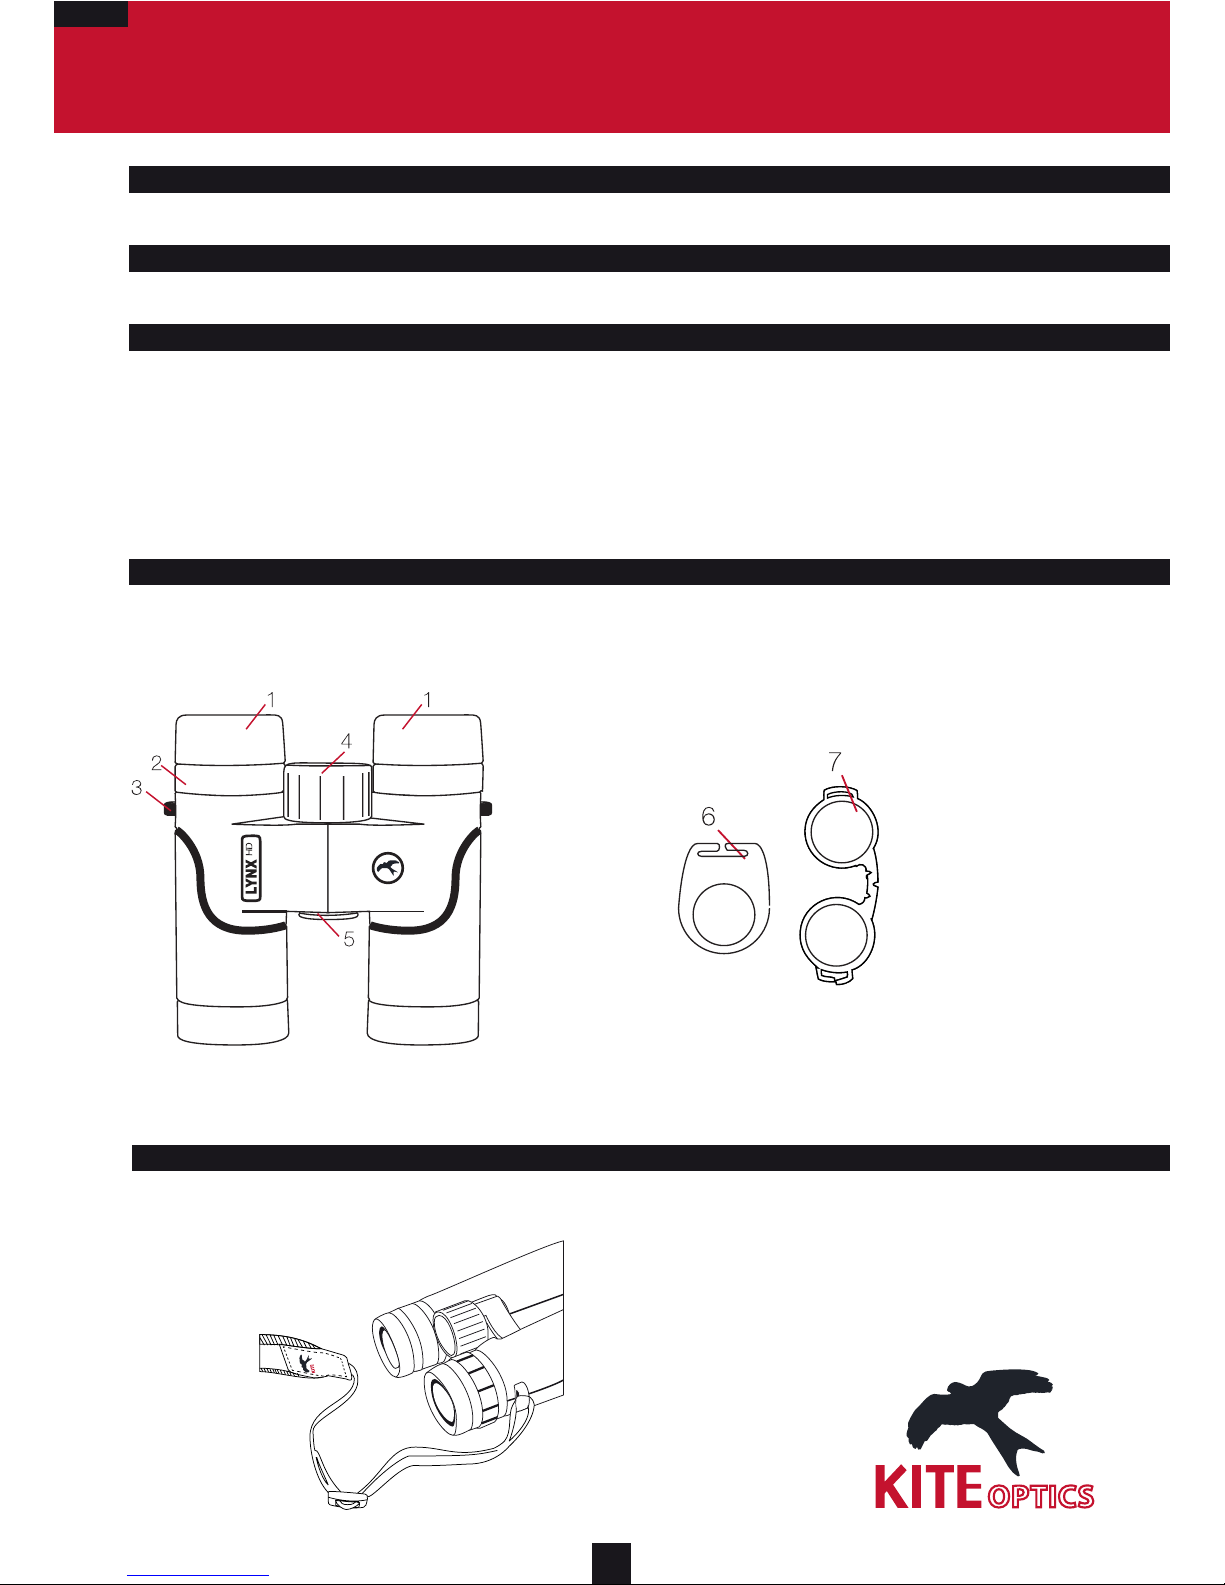
1. Attaching the carrying strap (3)
ENG
1

2. Adjusting the eyecups for use with and without spectacles (1)
Turn the eyecup counterclockwise (down) for observation without spectacles.
Turn the eyecups clockwise (up) for observation with spectacles.
3. Adjustment of interpupillary distance
To see a single round image, turn the two halves of the binoculars until no irritating shadows can be seen.
Attention The LYNX HD eyecups can be removed for easy cleaning or replacing.
Turn the eyecup counterclockwise to remove it.
New eyecups can be obtained with your authorized KITE dealer if you should need a new eyecup.
2

4. Adjustment of focusing (4)
By turning the focusing wheel you can focus any object sharply from closeby to innity.
5. Dioptric compensation (2)
To achieve optimal image quality, the possibly varying visual acuity between the left and right eye
must be corrected.
Use without eyeglasses and equal acuity of both eyes, or with eyeglasses.
Place the diopter adjustment wheel in the middle position.
Use without eyeglasses and varying acuity.
1. Look through the left ocular with your left eye and turn the focusing wheel to focus sharply
on a selected object.
2. Now look at the same object through the right ocular with your right eye and again create a sharp image
of this object by turning the diopter adjustment wheel only.
Now the dioptric correction has been set for your particular visual acuity.
3
 Loading...