

Page 1
Kitchen Center by TCC, LLC
315 West La Cadena,
Riverside, CA 92501
Tel: 888-822-5824
www.TCCkitchencenter.com
User Manual Food Processor
Copyright Kitchen Center by TCC 2007
Page 2
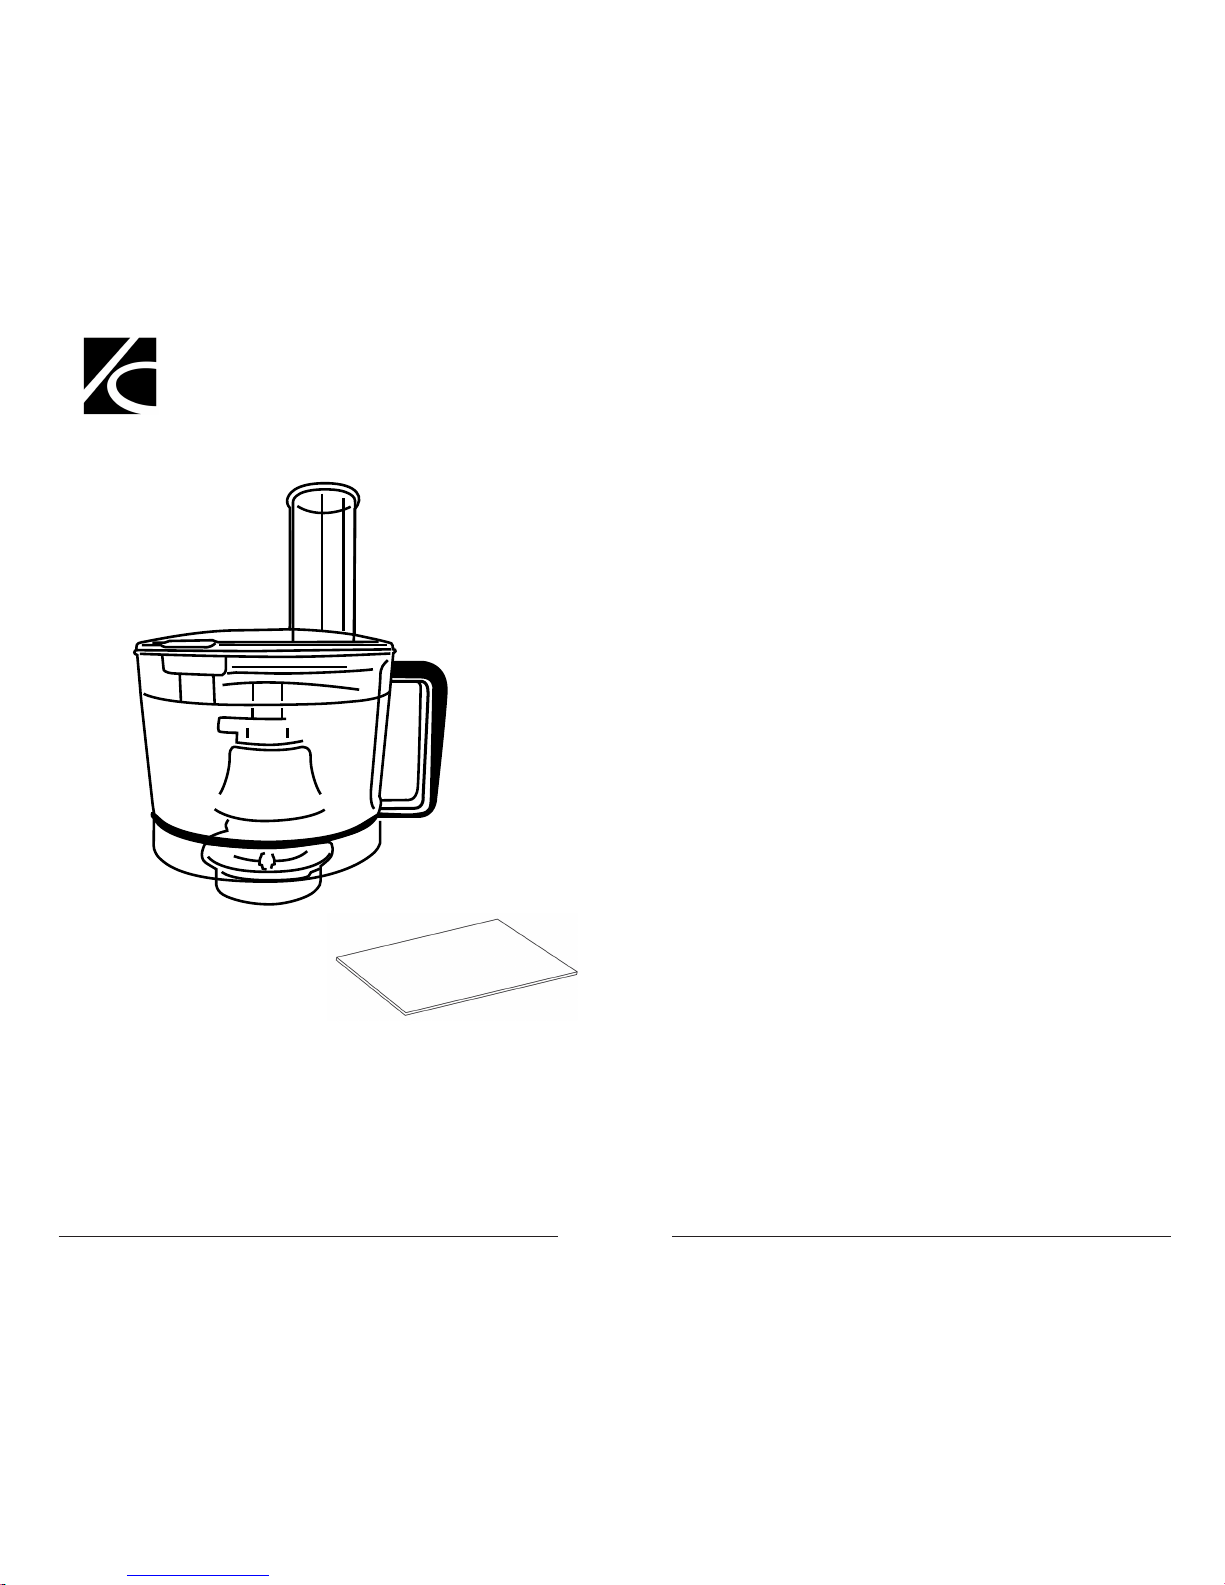
KC-FDPR
Owner's Manual
Food Processor
Congratulations on your purchase of the new Kitchen Center
Food Processor. The Food Processor is a handy "maid-of-all-work"
attachment. Before you try it out, take a few moments to read
this Owner's Manual and familiarize yourself with the easy,
When using electrical appliances, basic safety precautions
should be followed, including the following:
Read all instructions.
Close supervision is necessary when any appliance is
used by or near children.
Be sure the Power Base is turned off before putting on
or taking off the Food Processor.
Check Power Base and Food Processor for presence of
foreign objects before use.
Always use with lid in place.
Do not operate appliance after it has been dropped
or damaged in any manner.
IMPORTANT SAFEGUARDS
SAVE THESE INSTRUCTIONS
Food Processor
Do not remove the lid or place your hands near moving parts
when the appliance is operating
.
Never leave an appliance running un-supervised
Always use the feed tube to push food into the Food Processor
when operating; always turn off the appliance before
removing the lid
·
·
·
·
·
·
·
·
·
·
convenient function of the Food Processor.
The Kitchen Center Food Processor is for household use
only.
Always remove Food Processor from the Power Base
before cleaning, base is not washable - do not immerse in water.
·
·
Flashing light indicates ready to operate. Avoid any contact with
blades or moveable parts.
Do not operate the appliance with a damaged cord or plug or
after the appliance malfunctions, or is dropped or damaged in
any manner. Return appliance to the nearest authorized
service facility for examination, repair or electrical or
mechanical adjustment.
The use of attachments not recommended or sold by the
manufacturer may cause fire, electric shock or injury.
Do not let cord hang over edge of table or counter.
Keep Hands and utensils away from moving blades or
discs while processing food to reduce the risk of severe
injury to persons or damage to the food processor. A scraper
may be used but must be used only when the food processor
is not running.
Blades are sharp. Handle carefully.
To reduce the risk of injury, never place cutting blade or discs
on base without first putting bowl properly in place.
Be certain cover is securely locked in place before operating.
Do not attempt to defeat the cover interlock mechanism.
Do not use Kitchen Center in rain or wet conditions.
If an extension cord is used, the instructions concerning the
proper cord as contained on page 7 should be followed.
Connect Kitchen Center to a grounded-type receptacle
or use an acceptable adaptor. See page 7 for further directions.
·
·
·
·
·
·
·
·
·
·
·
Page 3

HOW TO CLEAN THE FOOD PROCESSOR:
1. The Food Processor should be thoroughly cleaned after using.
HELPFUL TIPS:
1.
When first learning to use your Food Processor it is
better to process for a few seconds, stop and check the
mixture, then process longer if necessary.
2. Before using the Bowl rub a small amount of vegetable
or salad oil around the top inside of the Bowl to help
Refer to your Kitchen Center Owner's Manual for information
regarding the Power Base or any other attachments.
For service, ordering, or if you have any questions about
the Food Processor or operation of the Power Base, contact your
local distributor or:
Kitchen Center by TCC, LLC
315 W La Cadena, Riverside, CA 92501
Tel: 888-822-5824
www.TCCKitchenCenter.com
3. Plan recipes so you process foods in an order that will
allow you to use the Bowl without washing it after
each food is processed.
prevent abrasion.
2. Do not using scouring pad or abrasive cleaners on Food
Processor Bowl, Blades, and Lid.
3. Rinsing the Bowl after you are finished processing should make
4. Be careful when washing the knife blade or the disks. Use a
brush to help make cleaning easier.
ASSEMBLY INSTRUCTIONS:
Disk Operation
1. Properly align the tabs on the Power Post to the Processor
Bowl.
3
.
Locking Ring. Slide the Locking Ring down the Power Post
and screw clockwise to lock in place.
4
.
Post.
.
2.
Place the desired disk on the Power Post. Align the tabs
OPERATING INSTRUCTIONS:
Try chopping some foods such as a zucchini or potato
before you process food to eat. First, cut the ingredients into
1-inch pieces of even size and length.
on the disk and the Power Post. The disk will then fall into
place.
If using the Knife Blade, place food in Processor Bowl.
NEVER EXCEED FILL LEVEL OF BOWL. This is clearly
marked on the side of the Processor Bowl.
Set Lid onto Processor Bowl, push down on it, and turn
clockwise until Lid locks into place.
If using shredding or slicing disk, place food in the feed chute.
Use the Tubes to lower food into the cutting disk. Most food will
feed into the disk under its own weight. Firm pressure may be
required, but never force Tube - this may cause damage to
disk.
Secure the the Power Post to the Processor Bowl with the
Carefully lift and place selected blade in place on the Power
Do not exceed fill level of Bowl. When food is processed, press "off"
to turn off Power Base. WAIT FOR FOOD PROCESSOR TO COME
TO A COMPLETE STOP, THEN REMOVE BOWL LID. BEFORE
POURING OR SCRAPING FOOD FROM BOWL, ALWAYS
CAREFULLY REMOVE KNIFE BLADE.
5. Never immerse Power Post in water; wipe with a clean damp
towel.
5
6
Food Processor Disk
.
ASSEMBLY INSTRUCTIONS:
1. Properly align the tabs on the Power Post with the tabs on the
Processor Bowl.
2
Post; align the tabs and slide the Blade down the Power Post.
It should fit snug on the bottom of the Processor Bowl.
3. Secure the Blade assembly inside Processor Bowl with the
4
5. If needed, align primary and secondary feed tubes on the lid.
6 Food Processor with the
Blade Operation
Locking Ring. Slide the Locking Ring down the Post and
screw clockwise to lock in place.
Knife Blade.
. Carefully lift and place the selected Blade over the Power
. Place lid onto Processor Bowl and screw clockwise.
. You are now ready to operate the
. Place the lid onto Processor Bowl and screw clockwise.
. You are now ready to operate the Food Processor with the
Page 4
SELECTING THE PROPER BLADE/DISK:
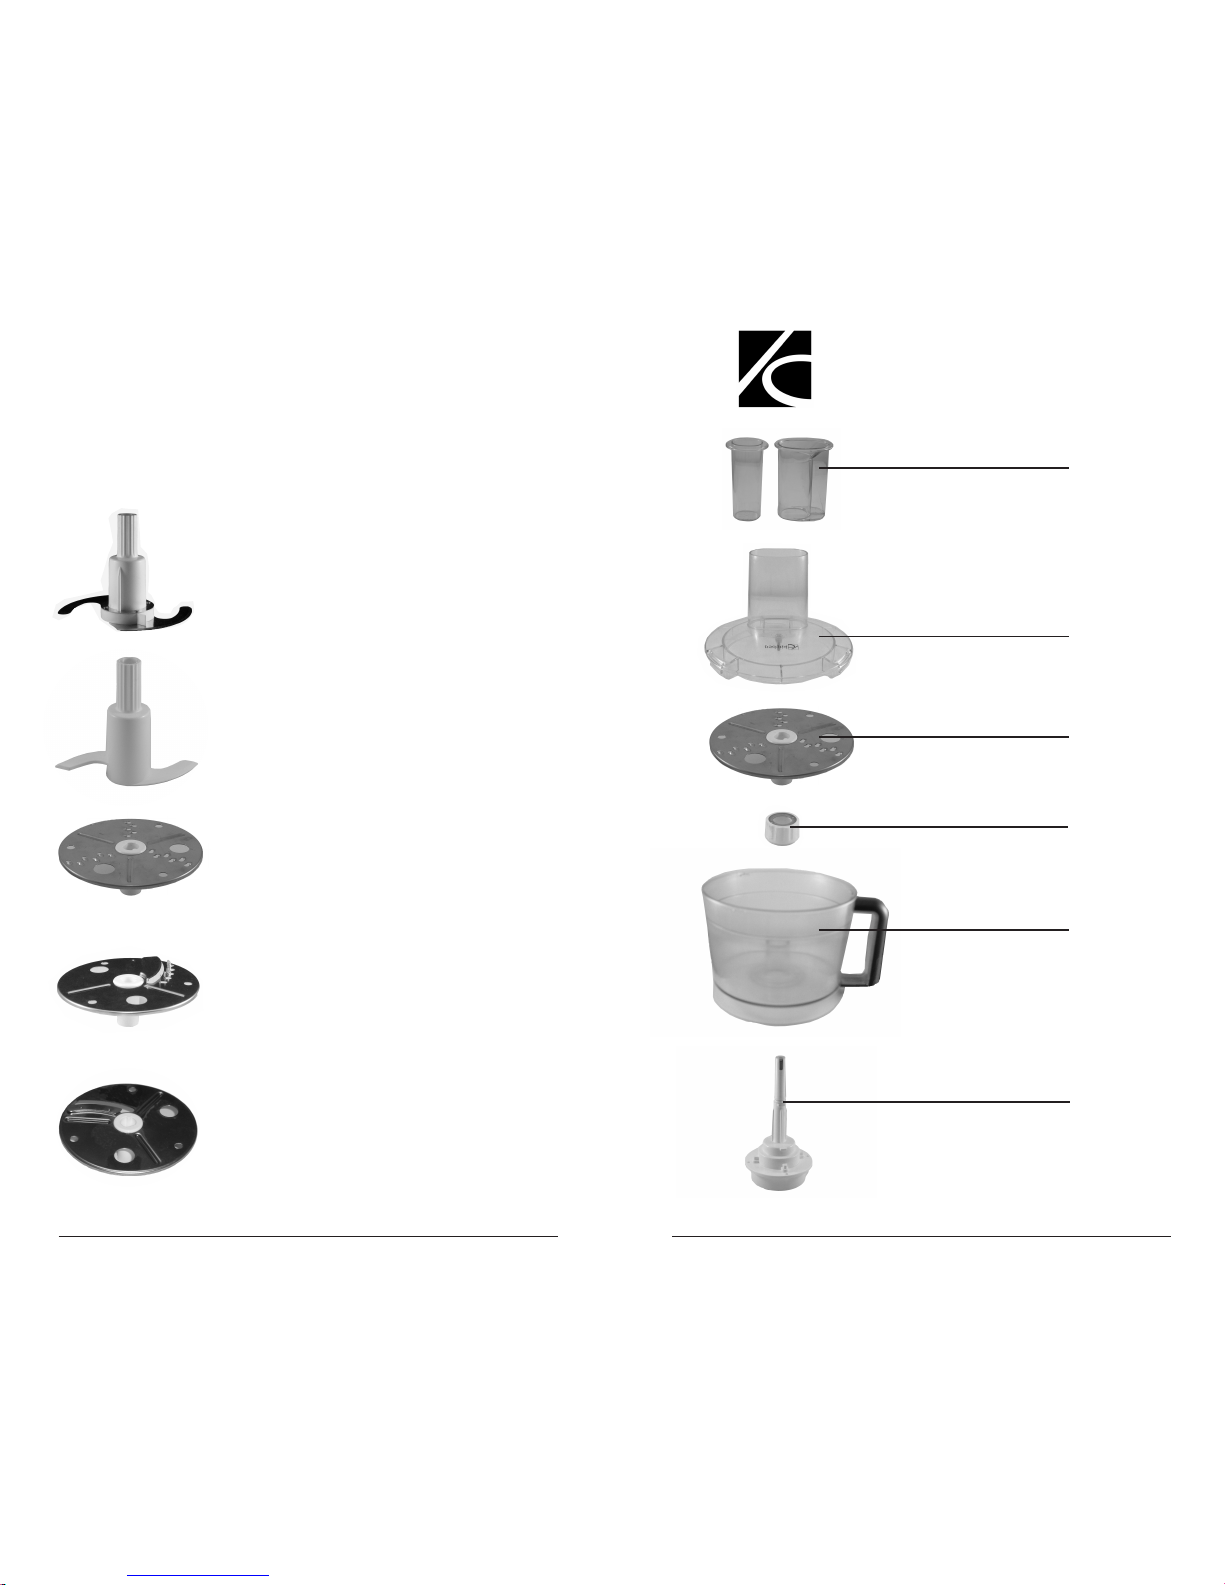
Your Food Processor comes with a Knife Blade, a Dough
Blade, and three disks: shredder, slicer and french fry disks.
You will want to experiment with each to learn which blade or
disk gives the results you want. For example, the shredder disk
produces finely shredded cabbage; the french fry disk produces
a medium shred cabbage; the slicer disk produces a very coarse
cabbage. To get you started in enjoying the many benefits of the
Kitchen Center Food Processor, here are some guidelines:
KC-FDPR
Food Processor
Power Post
Processor Bowl
Locking Ring
Lid
The Knife Blade chops meat and vegetables;
cracker crumbs , purees vegetables
fruits and meats; mixes ingredients
for dips, spreads, sauces, chops nuts, and
makes pate.
The Shredder Disk is used to shred cheese,
fruits and vegetables such as carrots, cabbage,
potatoes, chocolate, and nuts.
The French Fry Disk can be used to cut potatoes,
zucchini, eggplant and other vegetables, to get
julienne strips of ham and cheese for salads.
The Dough Blade is similar to the Knife Blade but
is made of plastic to quickly make bread, bagel, or
pizza dough, even a quick batch of brownies.
Small/Large Feed Tubes
Desired Disk
The Slicing Disk is used to make uniform
slices of meat, fruit, cheese, vegetables.
Page 5
GROUNDING INSTRUCTIONS
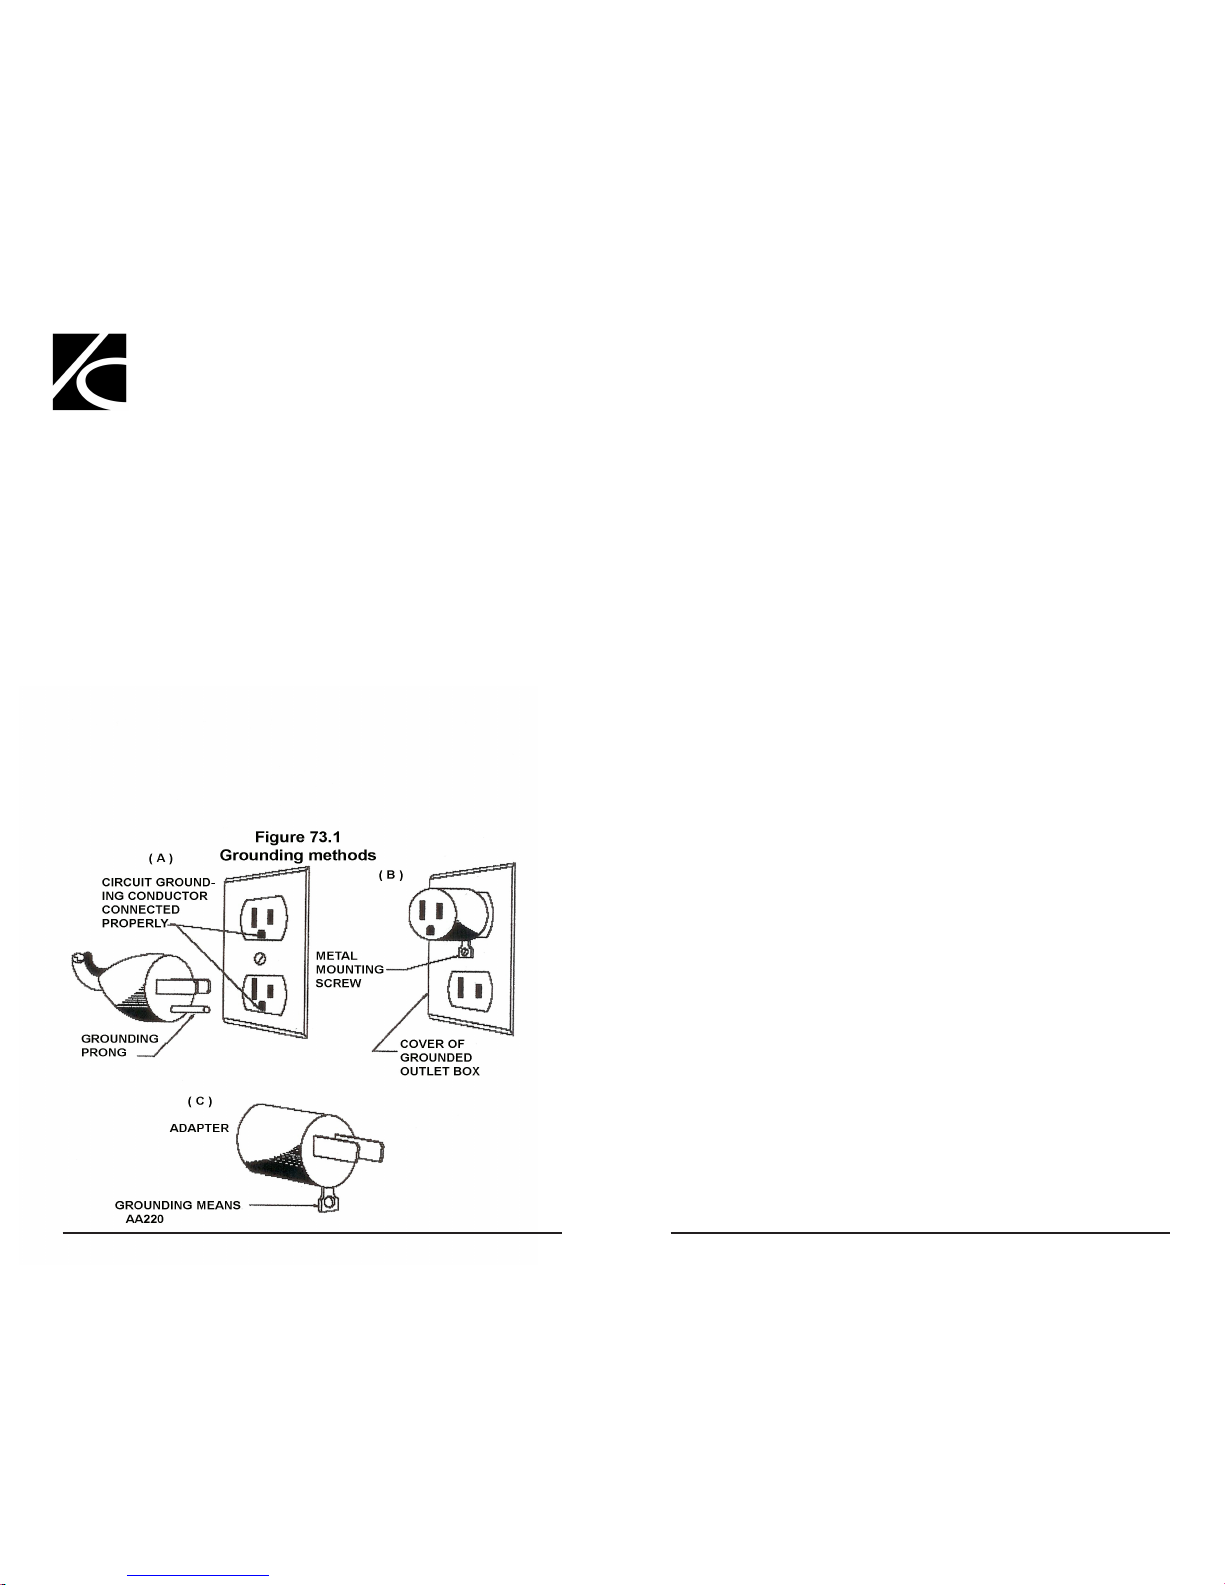
This appliance must be grounded while in use to protect the
operator from electrical shock. The appliance is equipped with
a 3-conductor cord and 3-prong grounding-type receptacle. The
appliance has a plug that looks like sketch A in Figure 73.1. The
adaptor in sketch B. should be used for connecting sketch-A
plugs to two-prong receptacles. The grounding tab, which
extends from the adaptor, must be connected to a permanent
ground such as a properly grounded outlet box as shown in
sketch C using a metal screw.
EXTENSION CORDS
Use only 3-wire extension cords, which have 3-prong ground-type
plugs and 3-pole cord connectors that accept the plug
from the appliance. Use only extension cords, which are intended
for outdoor use. These extension cords are identified by a marking
"suitable for use with outdoor appliances: store indoors while not
in use." Use only extension cords having an electrical rating not
less than the rating of the appliance. Do not use damaged
extension cords. Examine extension cord before using and replace
if damaged. Do not abuse extension cord and do not yank on any
cord to disconnect; keep cord away from heat and sharp edges
 Loading...