

Page 1
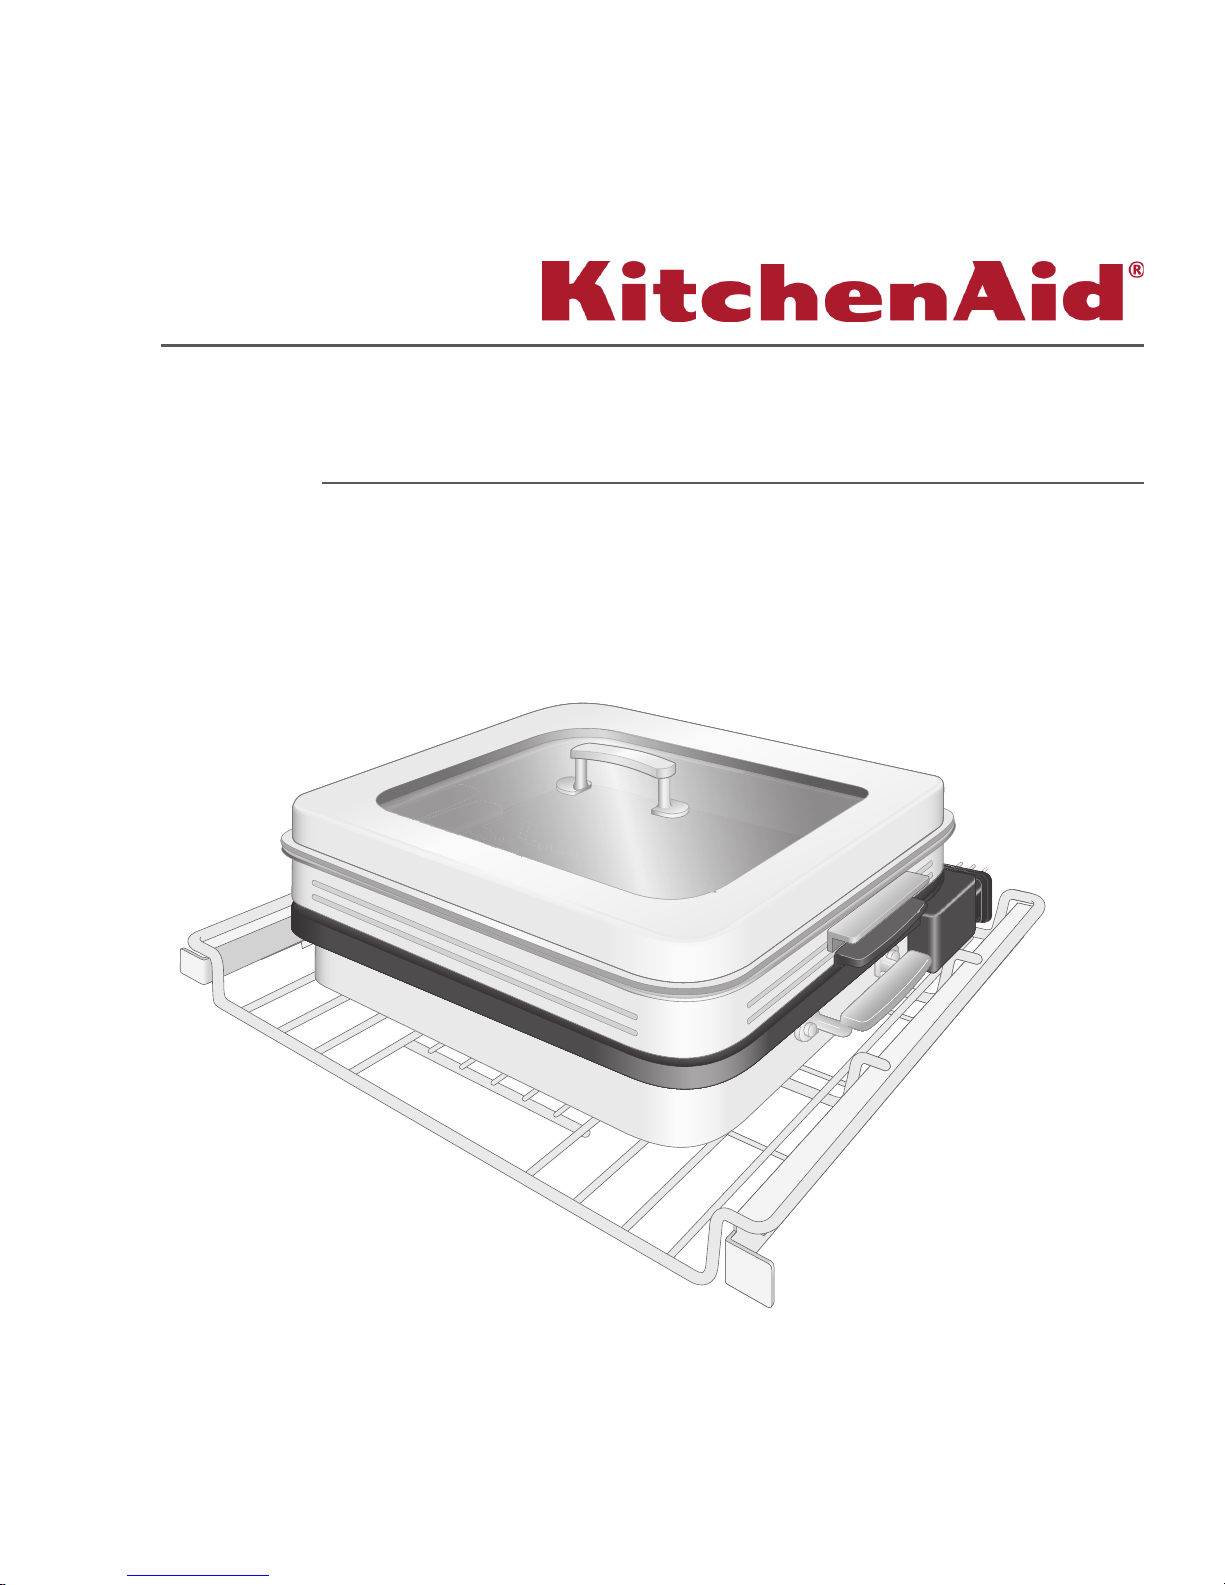
SMART OVEN+ POWERED ATTACHMENTS
USER INSTRUCTIONS
INSTRUCTION D’UTILISATION DES
ACCESSOIRES ÉLECTRIQUES POUR
FOUR INTELLIGENT
Page 2

THANK YOU for purchasing this high-quality product. Register
your built-in oven at register.kitchenaid.com. In Canada, register your
built-in oven at register.kitchenaid.ca.
For future reference, please make a note of your product model and
serial numbers. They can be found on the label located on the bottom
edge of the control panel, right hand side.
Model Number_________________ Serial Number___________________
TABLE OF CONTENTS
3 INSTALLING THE +POWERED ATTACHMENTS
4 Using the +Powered Attachments
6 Storing the +Powered Attachments
8 SMART OVEN+ POWERED BAKING STONE ATTACHMENT
9 Installing the +Baking Stone Attachment
10 Using the +Baking Stone Attachment
13 SMART OVEN+ POWERED GRILL ATTACHMENT
14 Installing the +Grill Attachment
15 Using the +Grill Attachment
18 SMART OVEN+ POWERED STEAMER ATTACHMENT
19 Installing the +Steamer Attachment
20 Using the +Steamer Attachment
22 TROUBLESHOOTING
24 WARRANTY
Page 3
3
INSTALLING THE +POWERED ATTACHMENTS
INSTALLATION
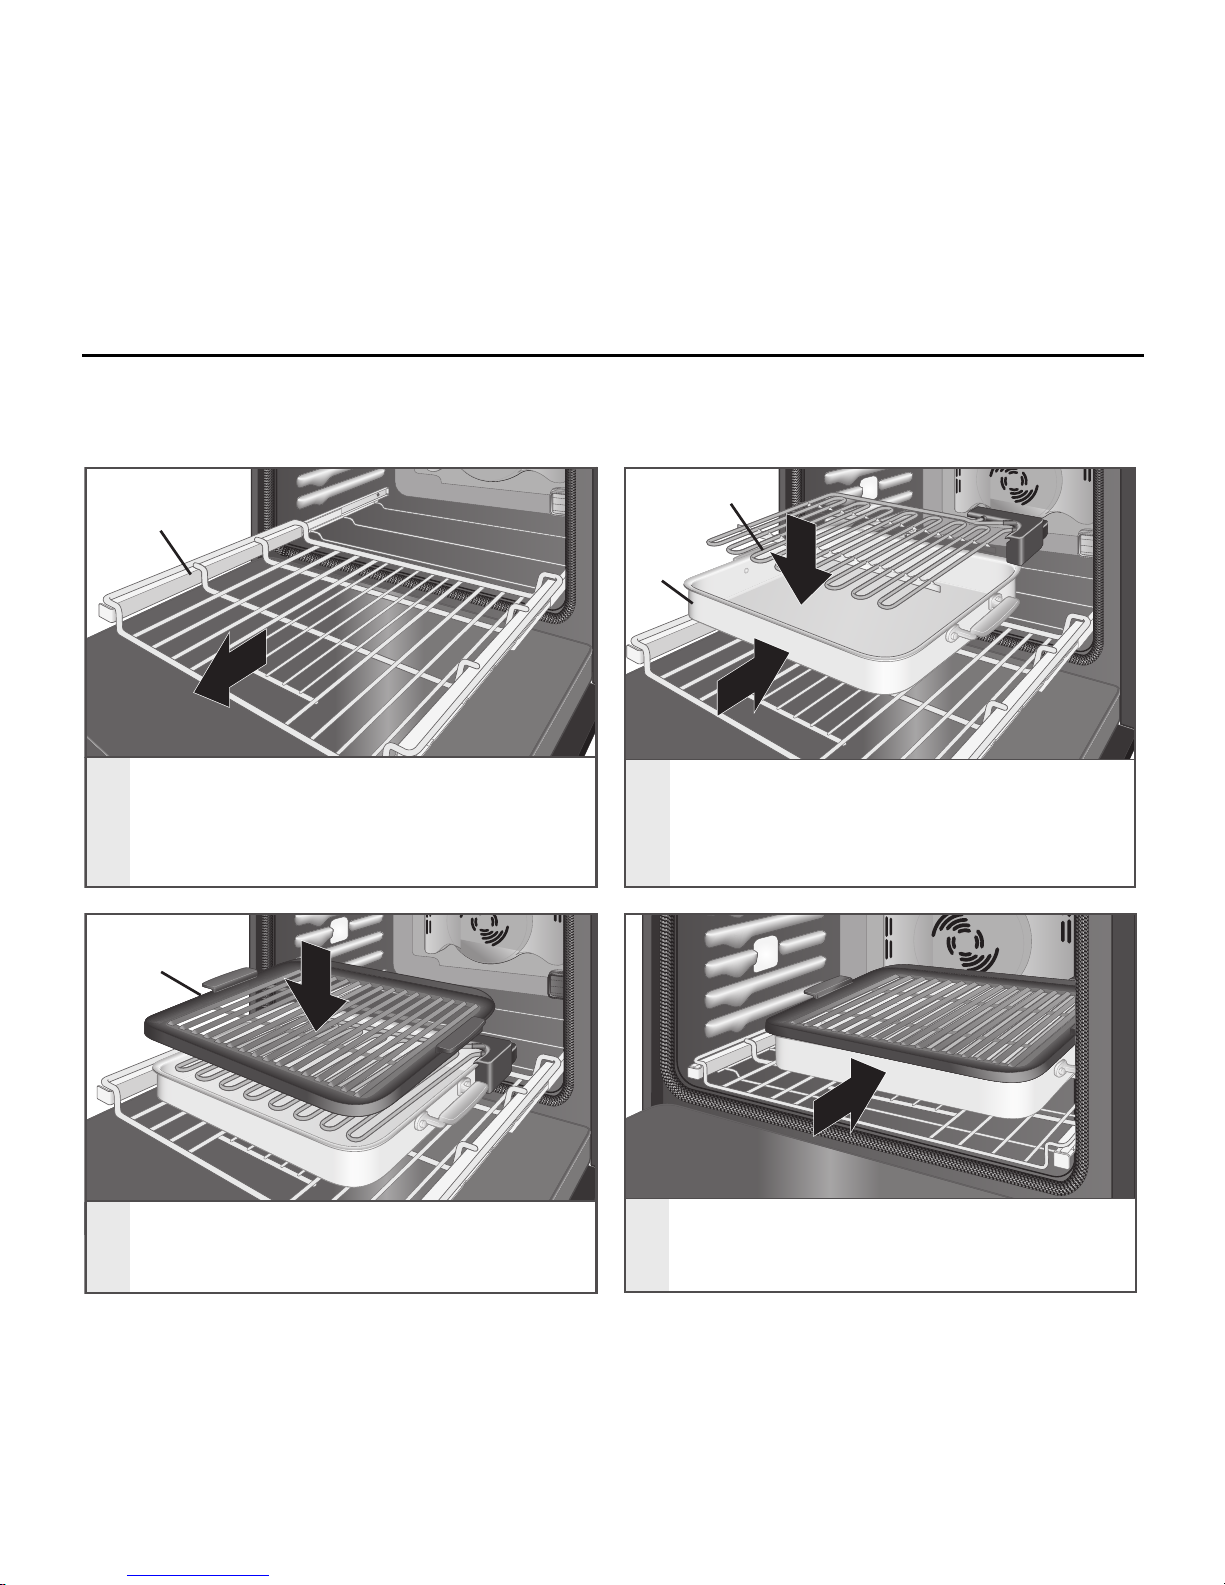
The +Powered Attachments fit on the SatinGlideTM Roll-Out Extension Rack for Smart Oven+
Attachments. They will not rock or wobble when installed correctly. Always fully extend the roll-out rack
before placing the +Powered Attachments. The roll-out rack will lock in place when fully extended.
1
2
1
2
3
4
Insert the roll-out rack into the
lowest rack position. Some force is
required. Extend the rack.
Roll-out rack
Heating
Element
Base
Pan
Place the Base Pan and Heating
Element on the roll-out rack. Push
the Base Pan back and in until the
feet lock into place.
+Grill
Attachment
Place the desired +Powered
Attachment on the Heating Element.
Push the roll-out rack into the oven
fully. A tone will sound and an icon
will appear in the display.
INSTALLING THE +POWERED ATTACHMENTS | 3
Page 4
USING THE +POWERED ATTACHMENTS
HELPFUL TIPS: When moving the +Powered
Attachments, carry only the pieces you will be
using. It is not necessary to carry the whole unit at
once.
GETTING STARTED
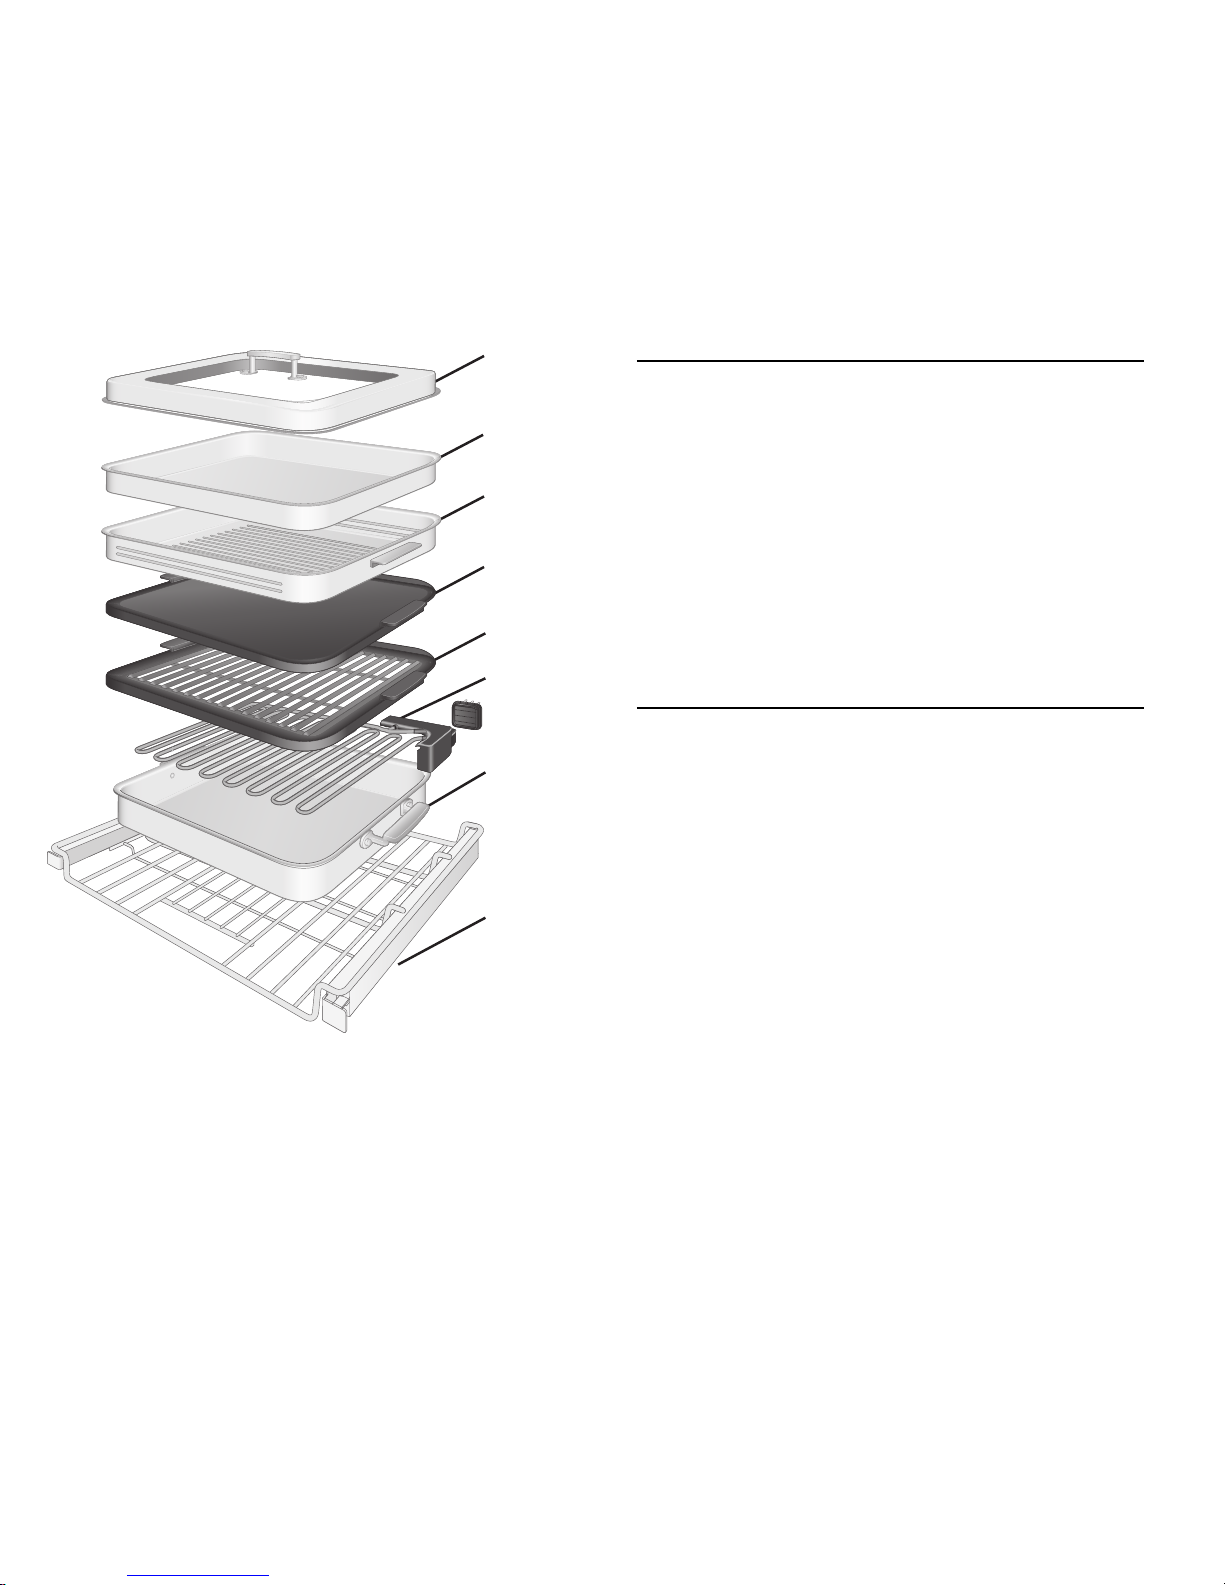
The +Powered Attachments are composed of
several parts. The roll-out rack for powered
attachments and Base Pan positions the
+Powered Attachments in the oven and catches
drips. The Heating Element provides even heat
to the +Powered Attachments. One +Powered
Attachment can be used at a time, but the
+Baking Stone Attachment, +Grill Attachment,
and +Steamer Attachment can be stacked
together for easy storage with the Heating
Element and Base Pan.
TIPS FOR BEST RESULTS
y Always fully extend the roll-out rack to gain
easy access to the +Powered Attachments.
y To avoid damage, do not cook food directly
on the Heating Element.
Steamer
Lid
Perforated
Steamer
Tray
Water
Basin
Pan
+Baking
Stone
Attachment
+Grill
Attachment
Heating
Element
Base Pan
Roll-out rack
for powered
attachments
4 | USING THE +POWERED ATTACHMENTS
Page 5
5
USING THE +POWERED ATTACHMENTS
CLEANING
Wash the Base Pan and +Powered Attachments
after every use. Food spills can react with the
coating and result in permanent stains, foods
sticking to the attachments, or smoking while in
use.
y To avoid damage to the +Powered
Attachments, do not use the oven’s selfcleaning function for the +Powered
Attachments.
y The Base Pan and +Powered Attachments are
dishwasher-safe. The Heating Element is not
dishwasher-safe.
y If hand-washing, use soapy water and a soft
cloth or sponge.
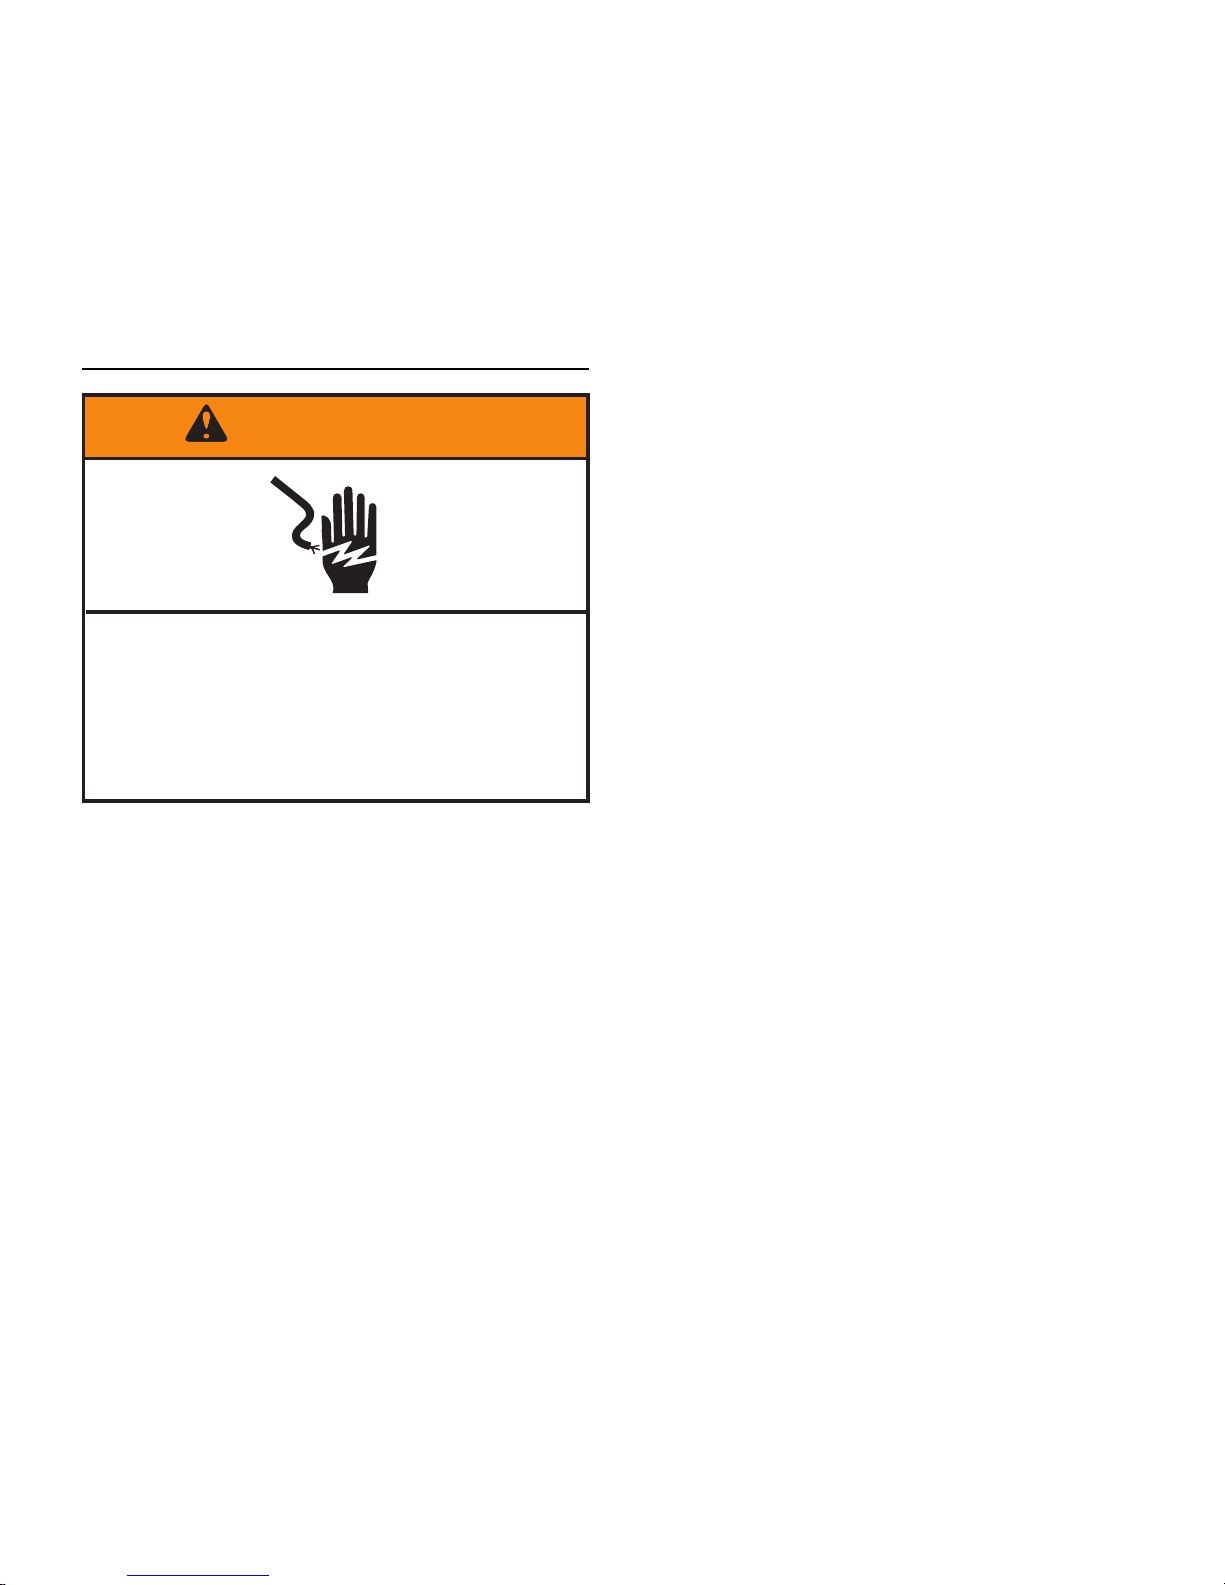
y Do not immerse Heating Element in water.
Electrical Shock Hazard
Do not immerse heating element in water
or place in dishwasher.
Doing so can result in death or electrical
shock.
WARNING
USING THE +POWERED ATTACHMENTS | 5
Page 6
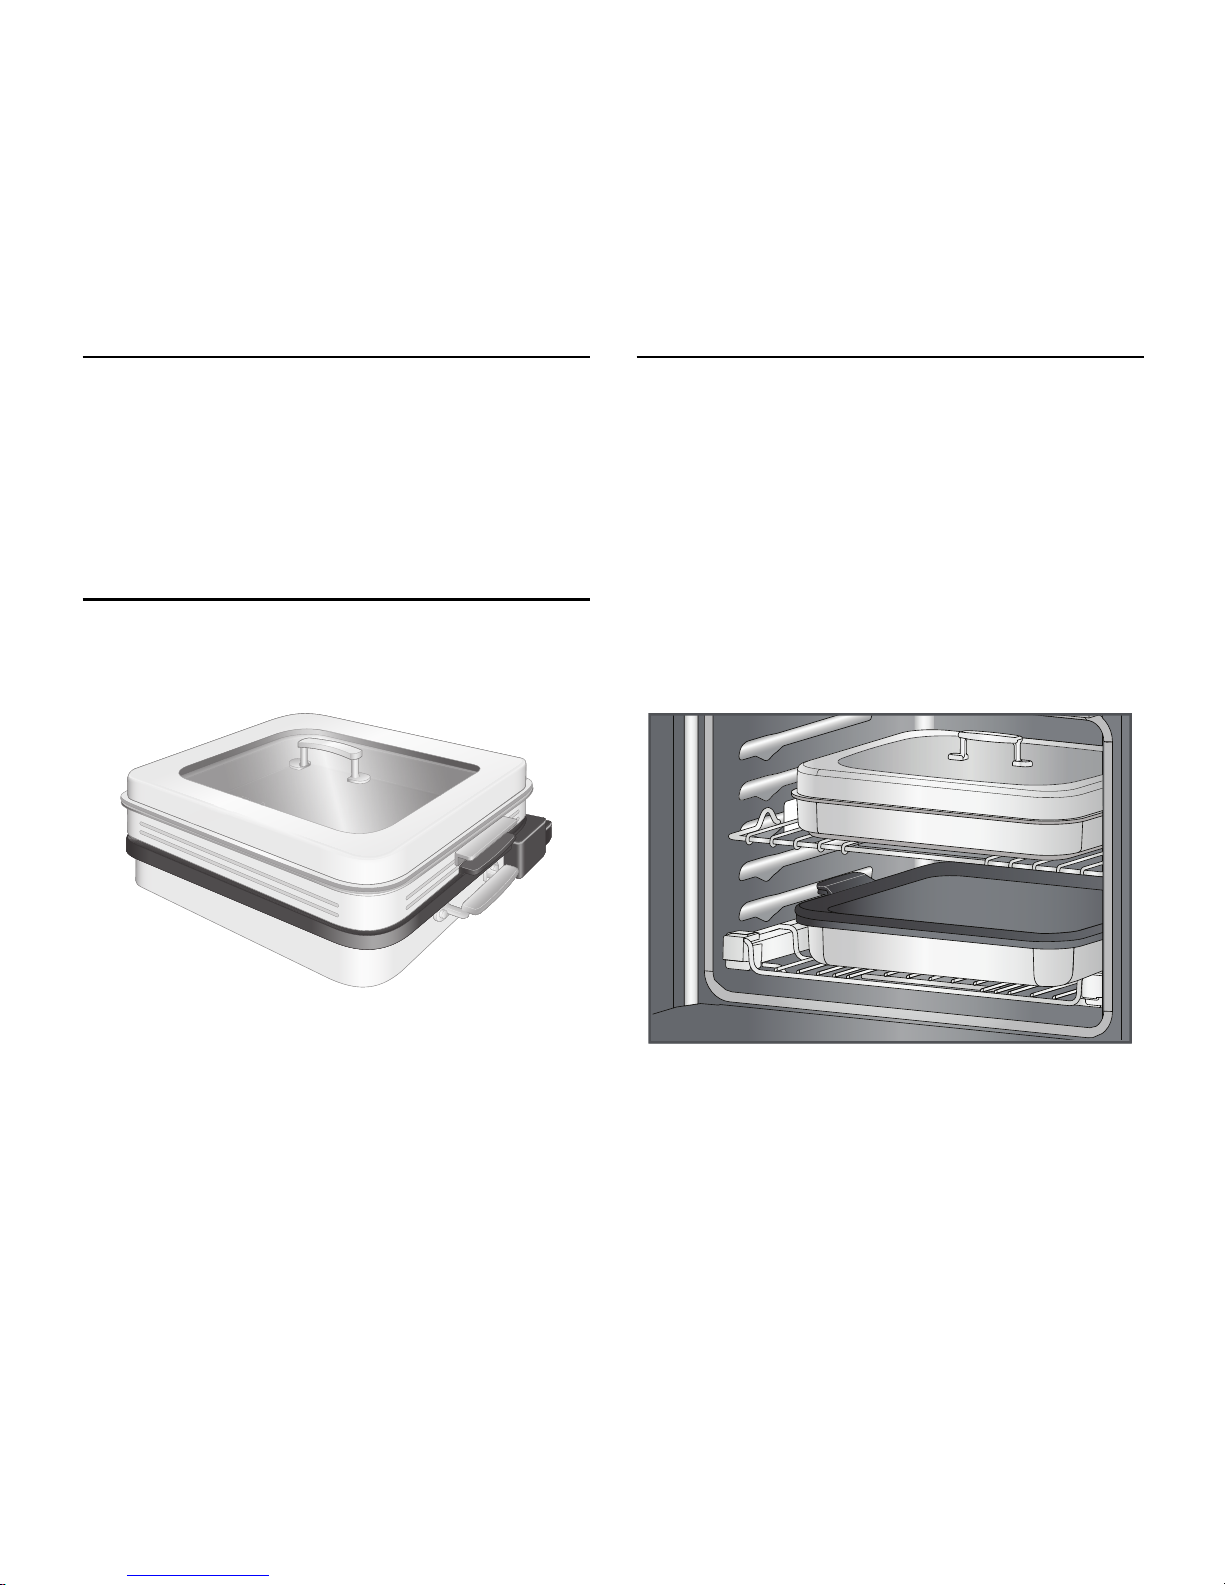
STORING THE +POWERED ATTACHMENTS
GETTING STARTED
The +Powered Attachments are designed for
ease of storage. The +Steamer Attachment,
+Baking Stone Attachment, and +Grill Attachment
conveniently stack together on top of the Heating
Element and the Base Pan. There are many ways
to store the +Powered Attachments, including:
KITCHEN CABINET
The +Powered Attachments can be stored inside
any large enough kitchen cabinet by stacking
them together.
SMART OVEN+
The +Powered Attachments can be stored inside
the Smart Oven+ cavity for ease of access. Place
the +Grill and the +Baking stone attachment
on top of the Heating Element inside the Base
Pan, place the +Powered Attachments on the
roll-out rack for powered attachments, and push
the rack inside the oven. Place the +Steamer
Attachment on a flat rack above the +Baking
Stone Attachment.
IMPORTANT: Remove the +Powered Attachments
from the oven cavity before using non powered
attachment modes or self-cleaning the oven.
6 | STORING THE +POWERED ATTACHMENTS
Page 7

Page 8
SMART OVEN+ POWERED
BAKING STONE ATTACHMENT
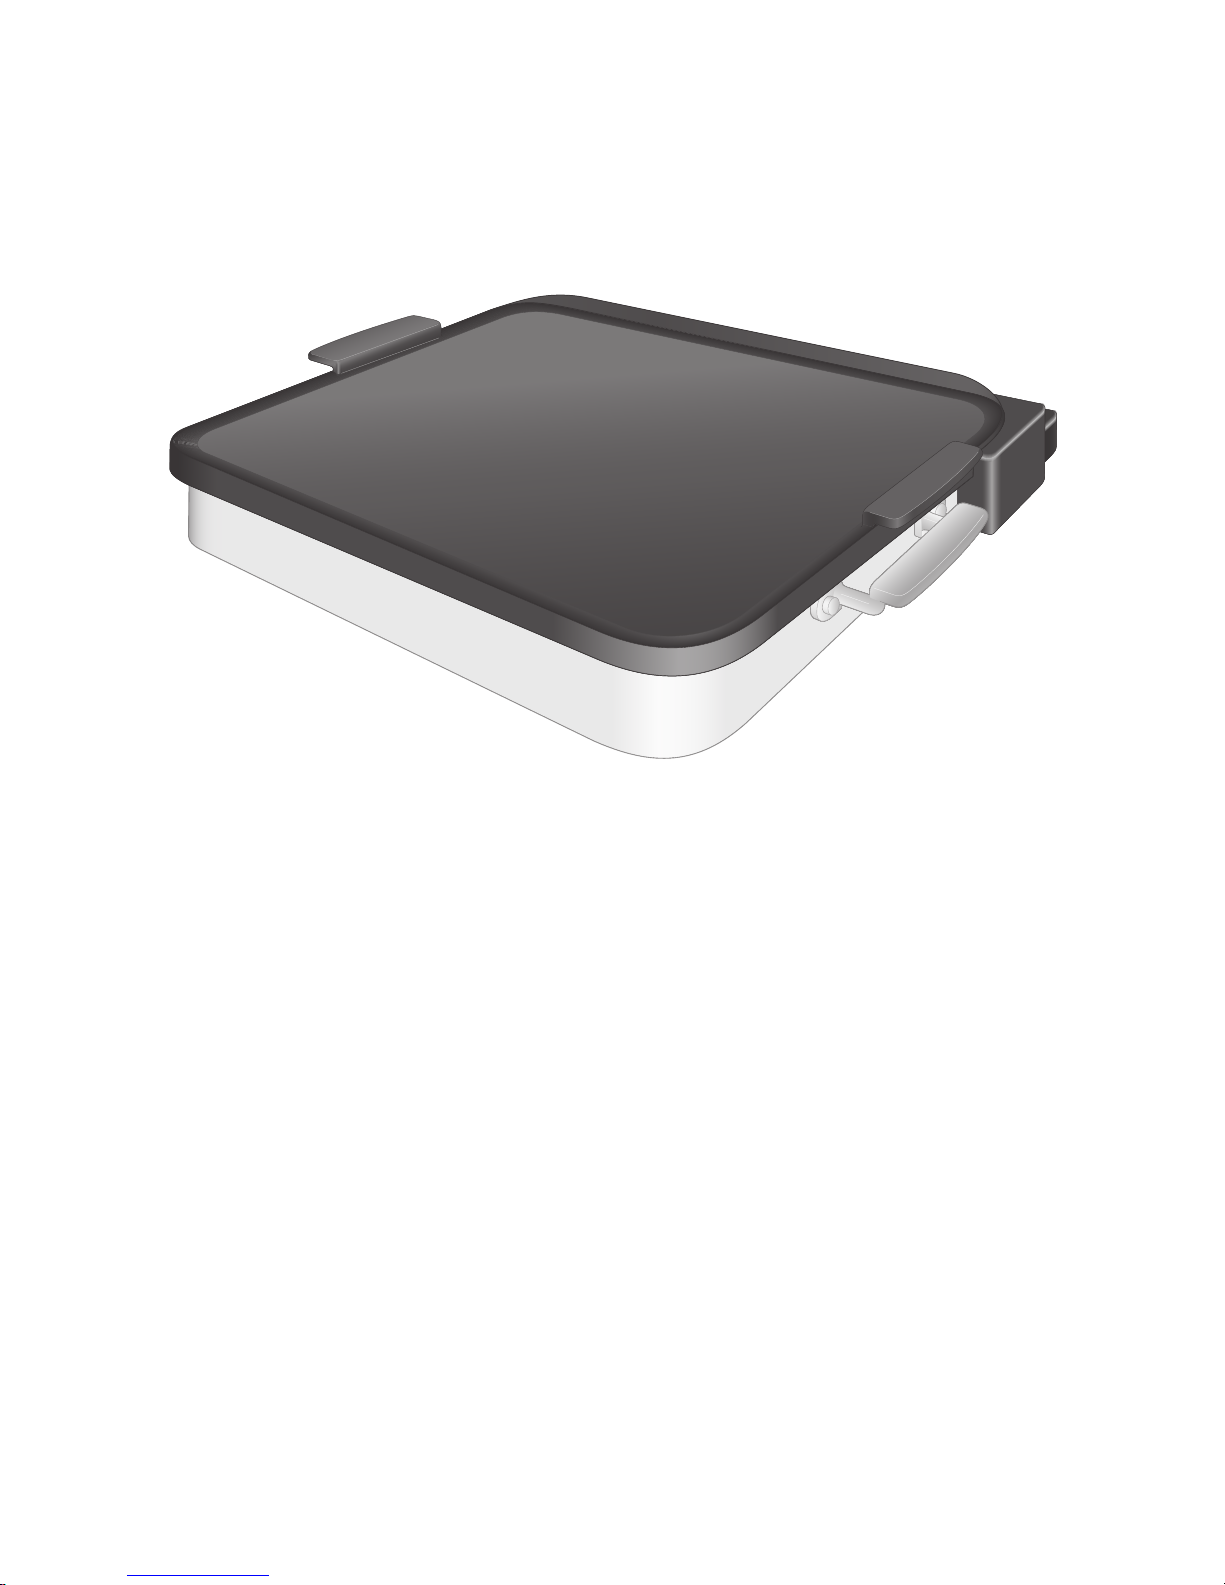
The Smart Oven+ Baking Stone Attachment allows you to expand the possibilities of your baking. It
can crisp a variety of dishes from seared kabobs to crab cakes to breakfast scones, and the stone's
large size empowers you to stone-bake even a 14" (35.6 cm) pizza. Because it's integrated with the
oven, the Smart Oven+ Baking Stone preheats in half the time of a non-integrated stone* and alerts
you when preheating is complete. And you can control the baking stone through the display, or
monitor and control it from a mobile device when remote-enabled.**
* Compared to baking stones of similar size, weight and material.
**Wi-Fi & App required. Features subject to change. For details and privacy statement, visit kitchenaid.com/connect.
8 | SMART OVEN+ POWERED BAKING STONE ATTACHMENT
Page 9
INSTALLING THE +BAKING STONE ATTACHMENT
INSTALLATION
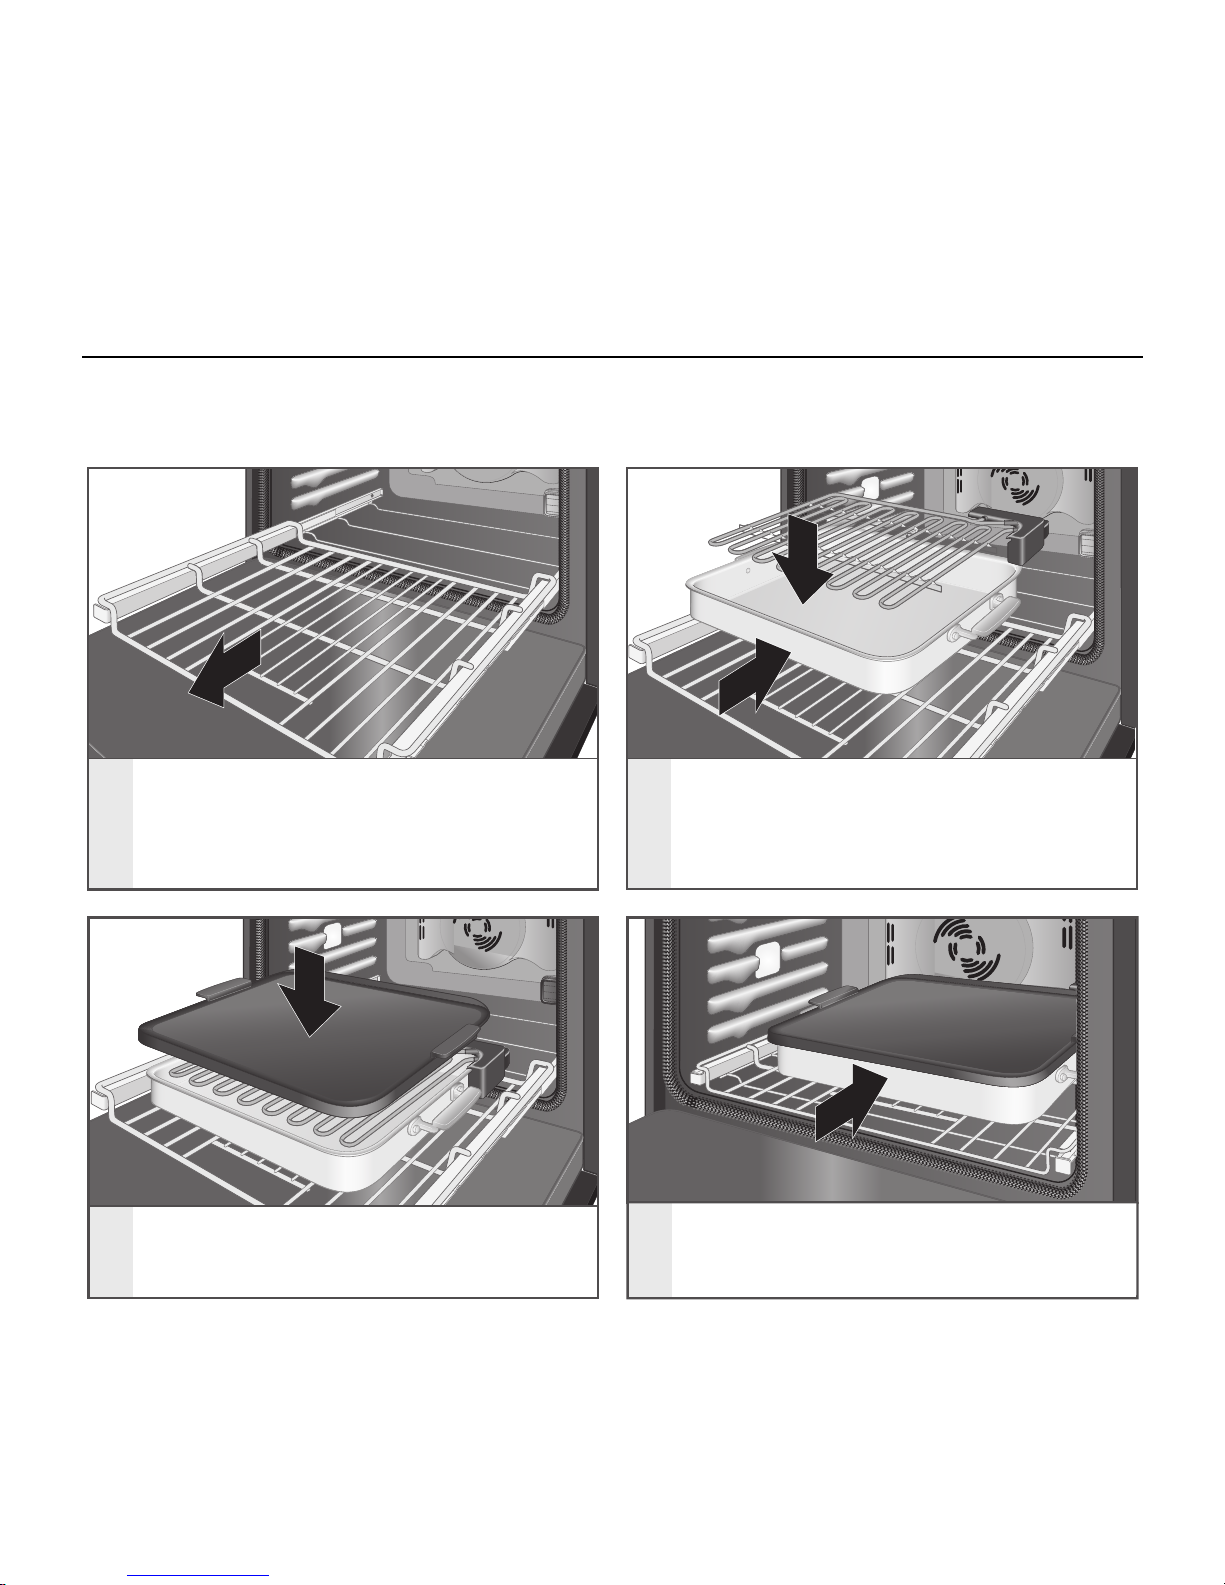
The +Powered Attachments fit on the SatinGlideTM Roll-Out Extension Rack for Smart Oven+
Attachments. They will not rock or wobble when installed correctly. Always fully extend the roll-out rack
before placing the +Powered Attachments. The roll-out rack will lock in place when fully extended.
1
2
1
2
3
4
Insert the roll-out rack into the lowest
rack position. Some force is required.
Extend the rack.
Place the Base Pan and Heating
Element on the roll-out rack. Push
the Base Pan in until the feet lock
into place.
Place the Baking Stone onto the
Heating Element.
Push the roll-out rack into the oven
fully. A tone will sound and an icon
will appear in the display.
INSTALLING THE +BAKING STONE ATTACHMENT | 9
Page 10

USING THE +BAKING STONE ATTACHMENT
GETTING STARTED
Preheat the +Baking Stone Attachment before
placing food. While the length of preheat time
will vary depending on the oven temperature, the
Heating Element will bring the +Baking Stone
Attachment to temperature in under 30 minutes.
The +Baking Stone Attachment is glazed for
easy cleaning, but it can be lined with a sheet of
parchment paper.
TIPS FOR BEST RESULTS
y To transfer multiple items on and off the
+Baking Stone Attachment easily, place
parchment paper on a non-rimmed cookie
sheet and arrange the items on the parchment
in a single layer. When the +Baking Stone
Attachment is preheated, slide the parchment
paper with the items onto the stone and bake
as usual. When done, slide the parchment
paper back onto the sheet.
y Cover the +Baking Stone Attachment with a
sheet of parchment paper for easier cleanup, especially when baking items such as free
form pies, tarts, or fruit turnovers. Baked-on
pie filling can be very difficult to remove from
the +Baking Stone Attachment.
y To gain easy access to the stone, extend the
roll-out rack for powered attachments. Simply
push the +Baking Stone Attachment fully
back into the oven cavity (within 2 minutes) to
continue the cycle.
y Some items, such as bread and rolls, do not
need to be turned. When baking items such
as fresh breaded fish or chicken, turn halfway
through baking.
y Pizza up to 14" (35.6 cm) will fit on the
+Baking Stone Attachment.
y Long, skinny items, such as baguettes, can
be placed diagonally on the +Baking Stone
Attachment to better fit.
10 | USING THE +BAKING STONE ATTACHMENT
Page 11
USING THE +BAKING STONE ATTACHMENT
CLEANING
Wash the +Baking Stone Attachment after every
use. Food spills can react with the coating and
result in permanent stains, foods sticking to the
+Baking Stone Attachment, or smoking while in
use.
y To avoid damage, do not use the oven’s
self-cleaning function for the +Baking Stone
Attachment.
y The +Baking Stone Attachment is
dishwasher-safe.
y If hand washing, use soapy water and a soft
cloth or sponge.
y Baking soda can aid in removing difficult spills.
y Avoid extreme temperature changes.
y Before cleaning, allow the +Baking Stone
Attachment to cool.
y Do not use +Baking Stone Attachment if
damaged or chipped.
y Use a plastic scraper to remove baked-on
foods.
y Do not use under the broiler.
y Avoid bumping or dropping the +Baking
Stone Attachment, which can break.
y Avoid placing any other pan or rack on top of
the +Baking Stone Attachment.
y The +Baking Stone Attachment is metal
utensil safe.
y When placing the +Baking Stone Attachment
on a surface, first cover surface with a sturdy
material to avoid scratches.
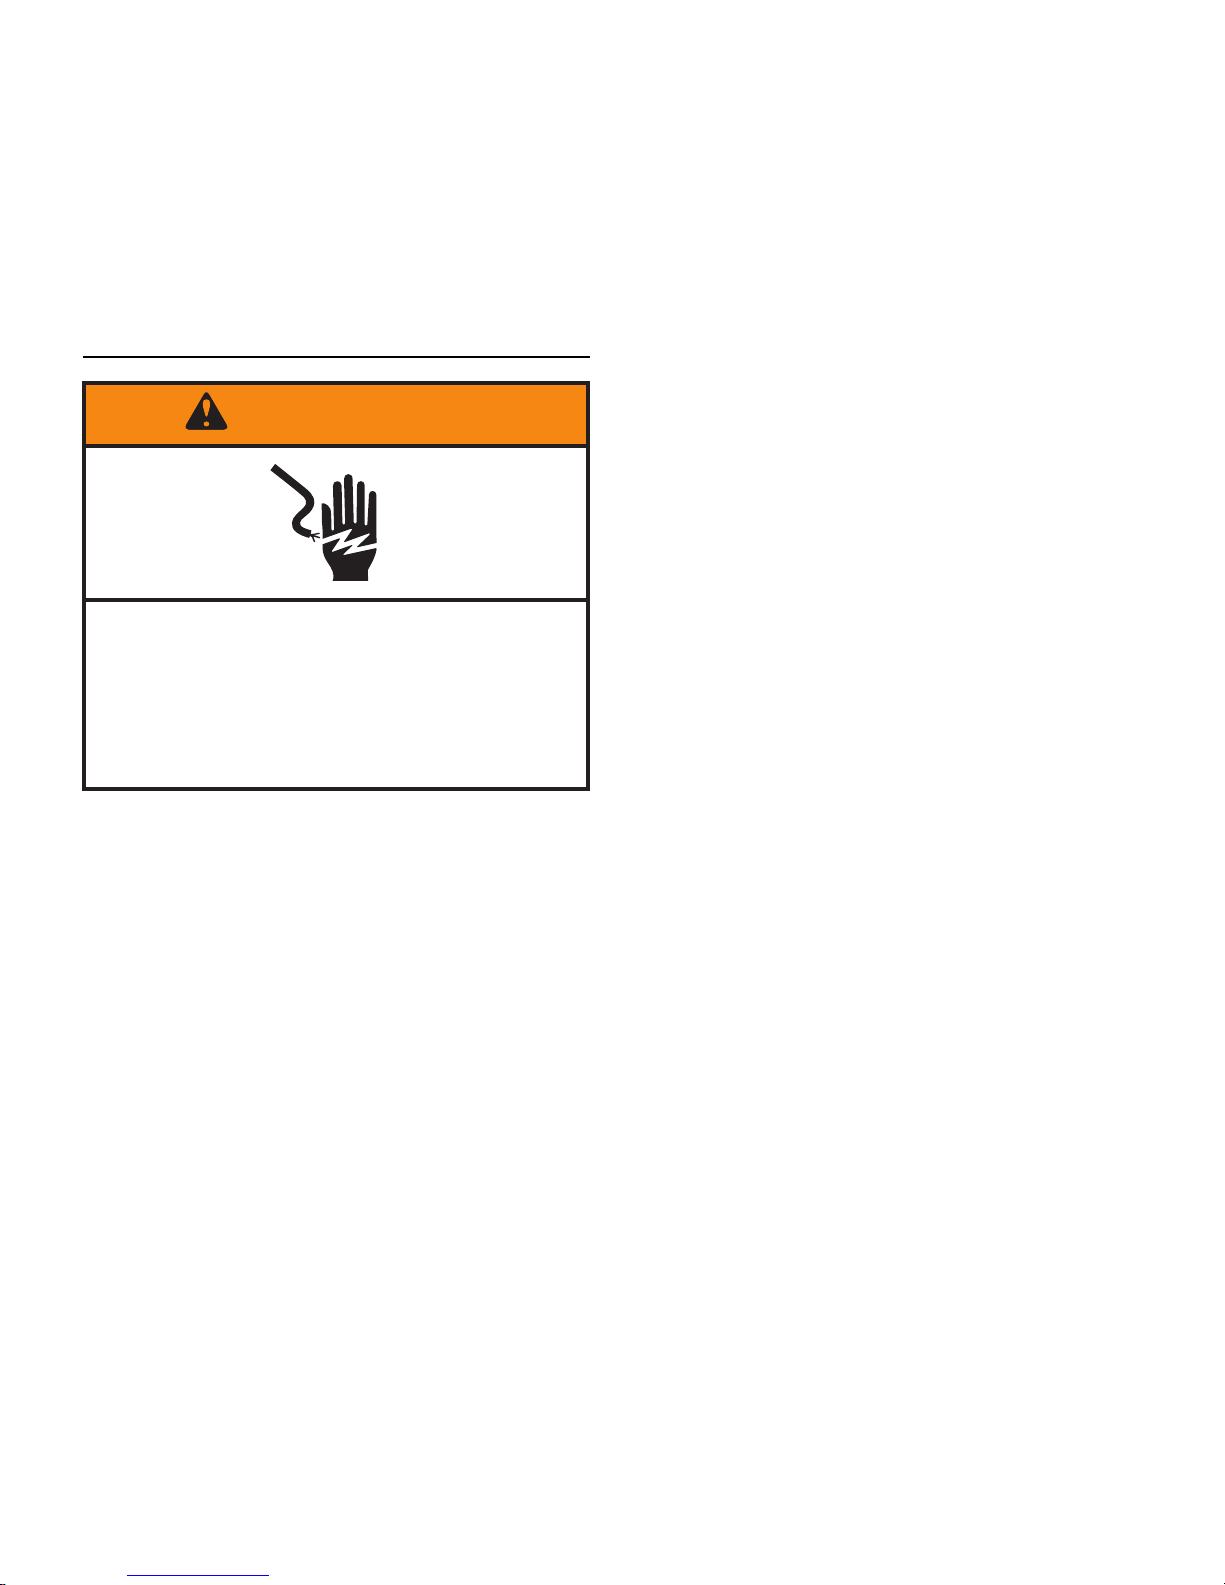
Electrical Shock Hazard
Do not immerse heating element in water
or place in dishwasher.
Doing so can result in death or electrical
shock.
WARNING
USING THE +BAKING STONE ATTACHMENT | 11
Page 12
Page 13
SMART OVEN+ POWERED
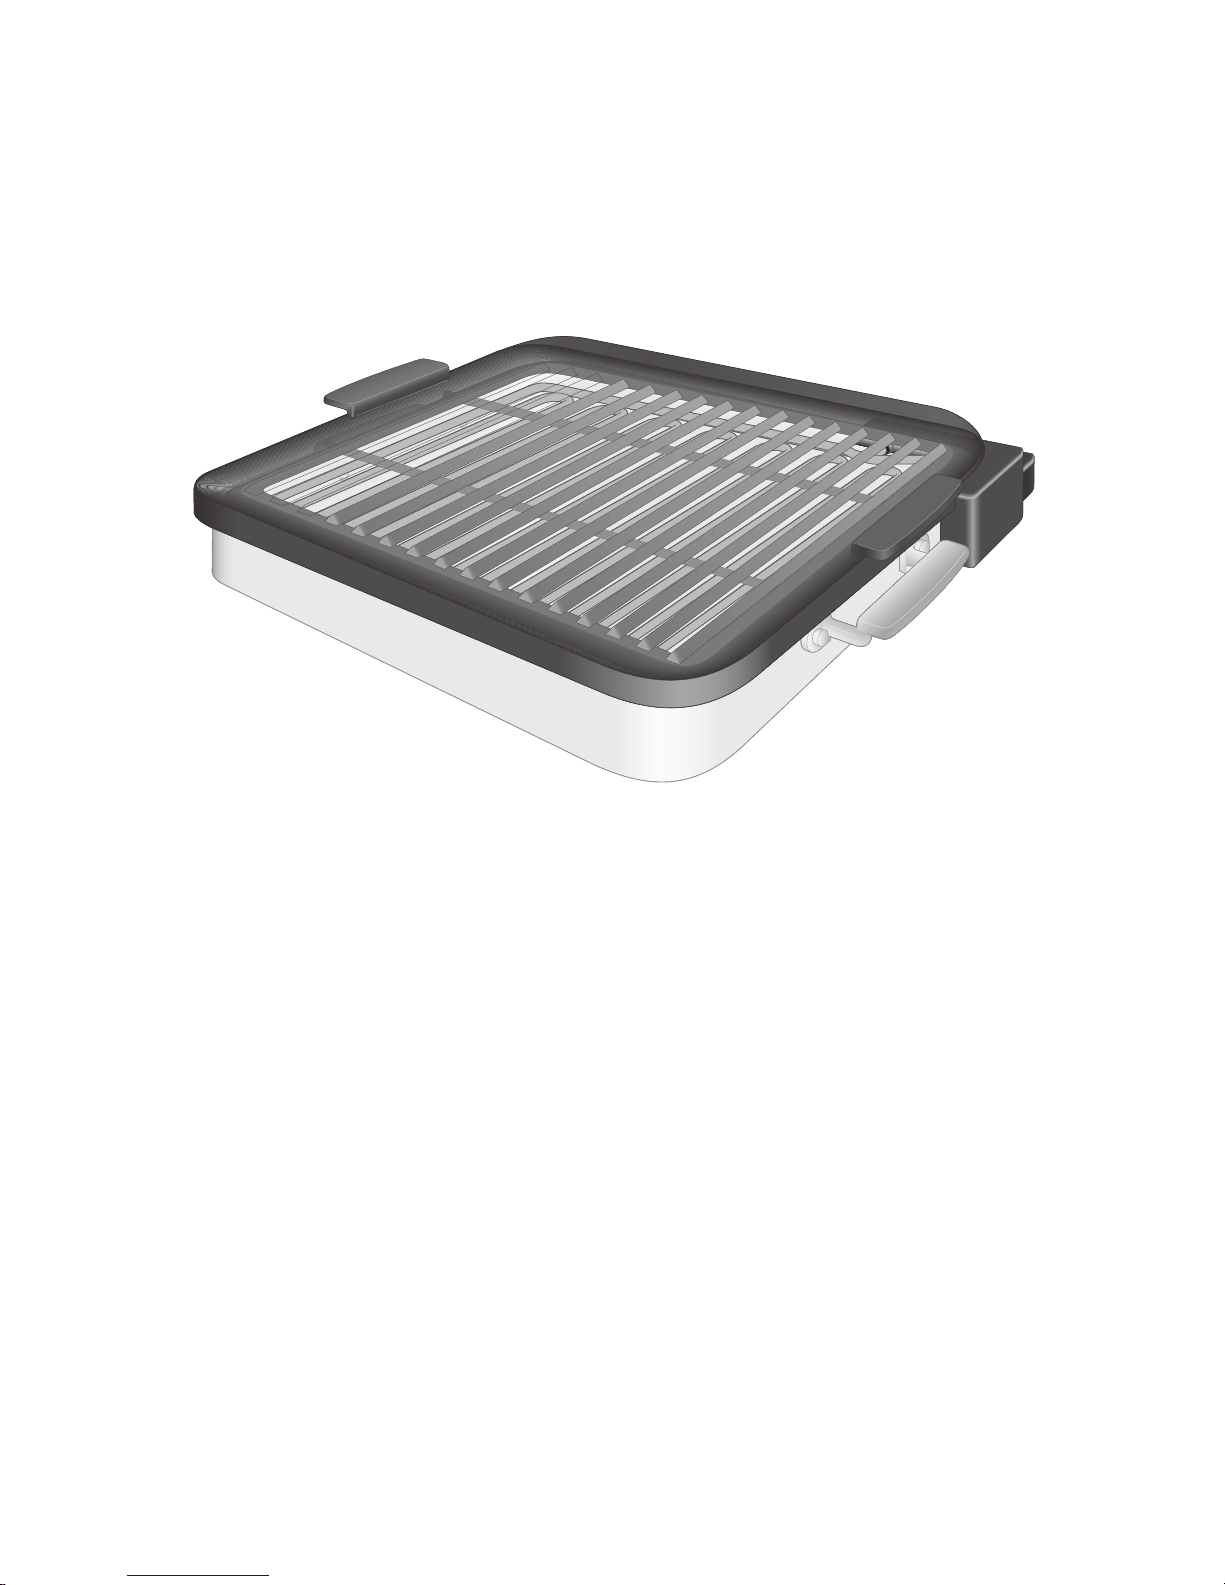
GRILL ATTACHMENT
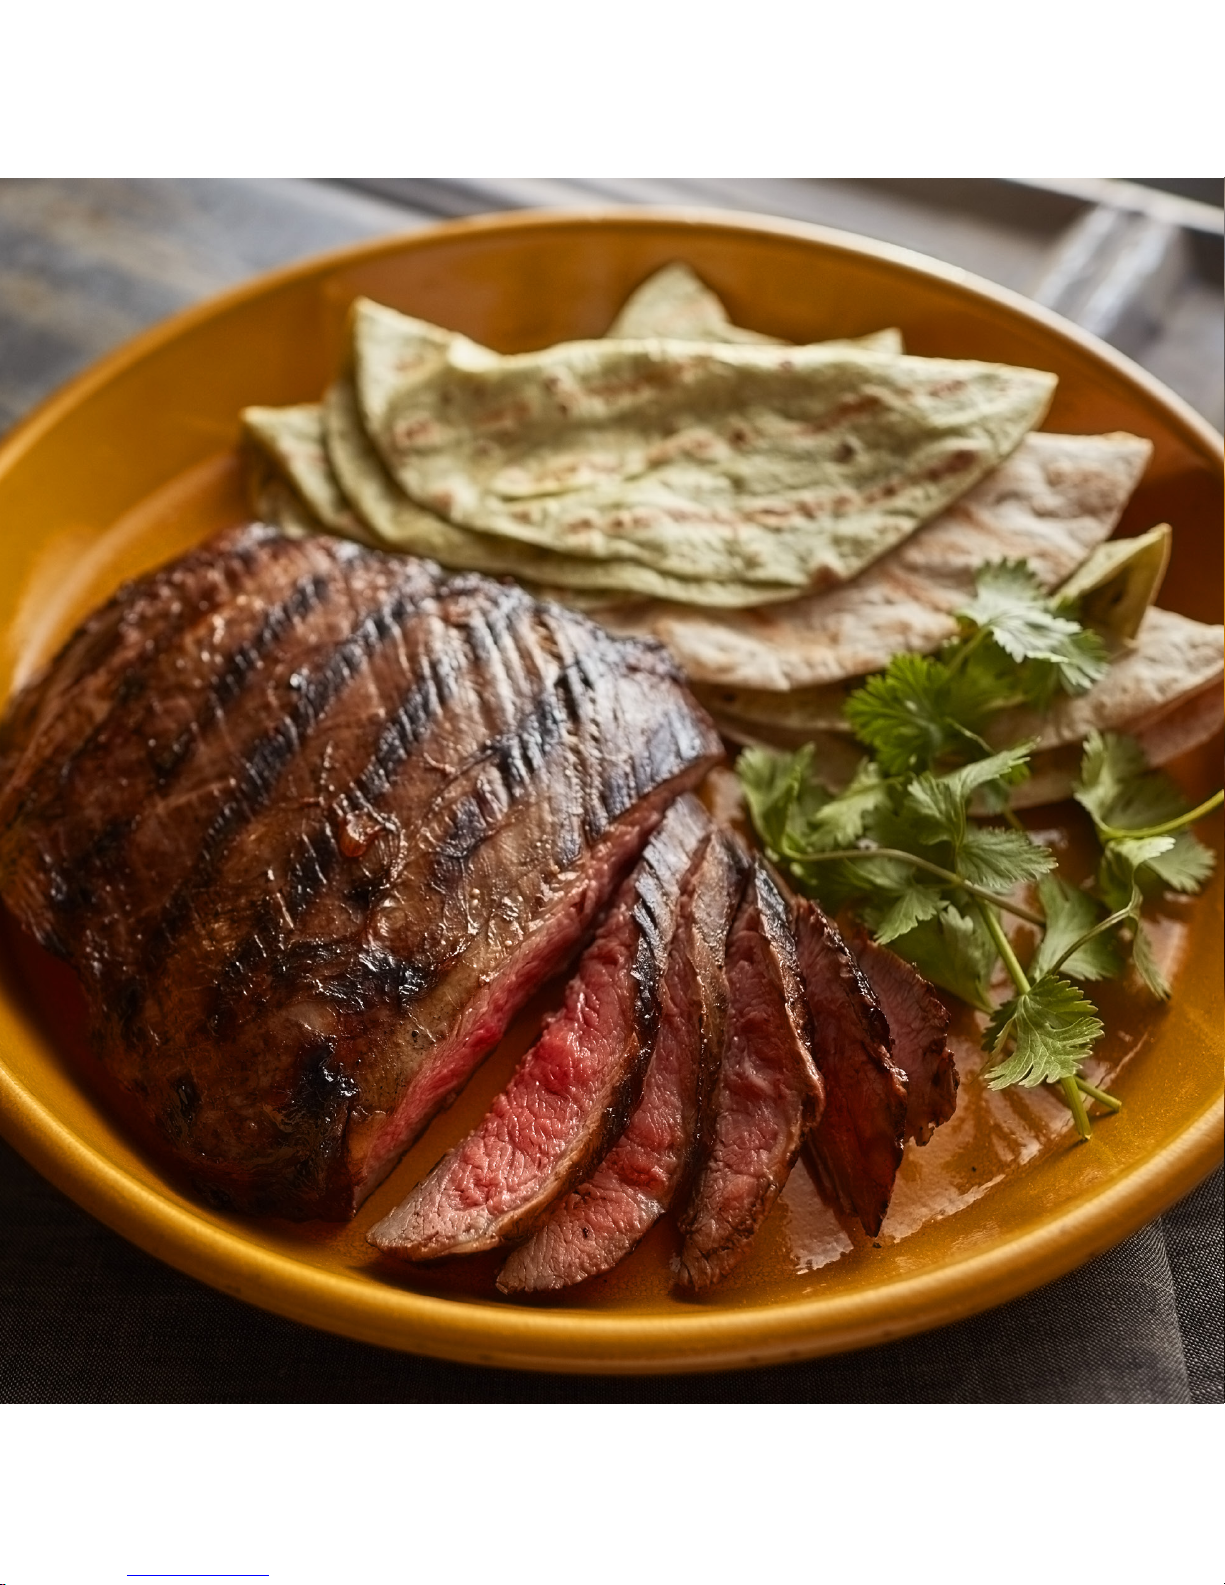
The Smart Oven+ Grill Attachment allows true grilling year-round. Its advanced design minimizes
smoke and eliminates the flare-ups common with outdoor grills. It also heats evenly from edge to
edge, providing consistent results and enabling you to use the entire grilling surface for everything
from steak and burgers to pizza and scallops. And you can control the grilling process through the
display, or monitor and control it from a mobile device when remote-enabled.*
*Wi-Fi & App required. Features subject to change. For details and privacy statement, visit kitchenaid.com/connect.
SMART OVEN+ POWERED GRILL ATTACHMENT | 13
Page 14
INSTALLING THE +GRILL ATTACHMENT
INSTALLATION
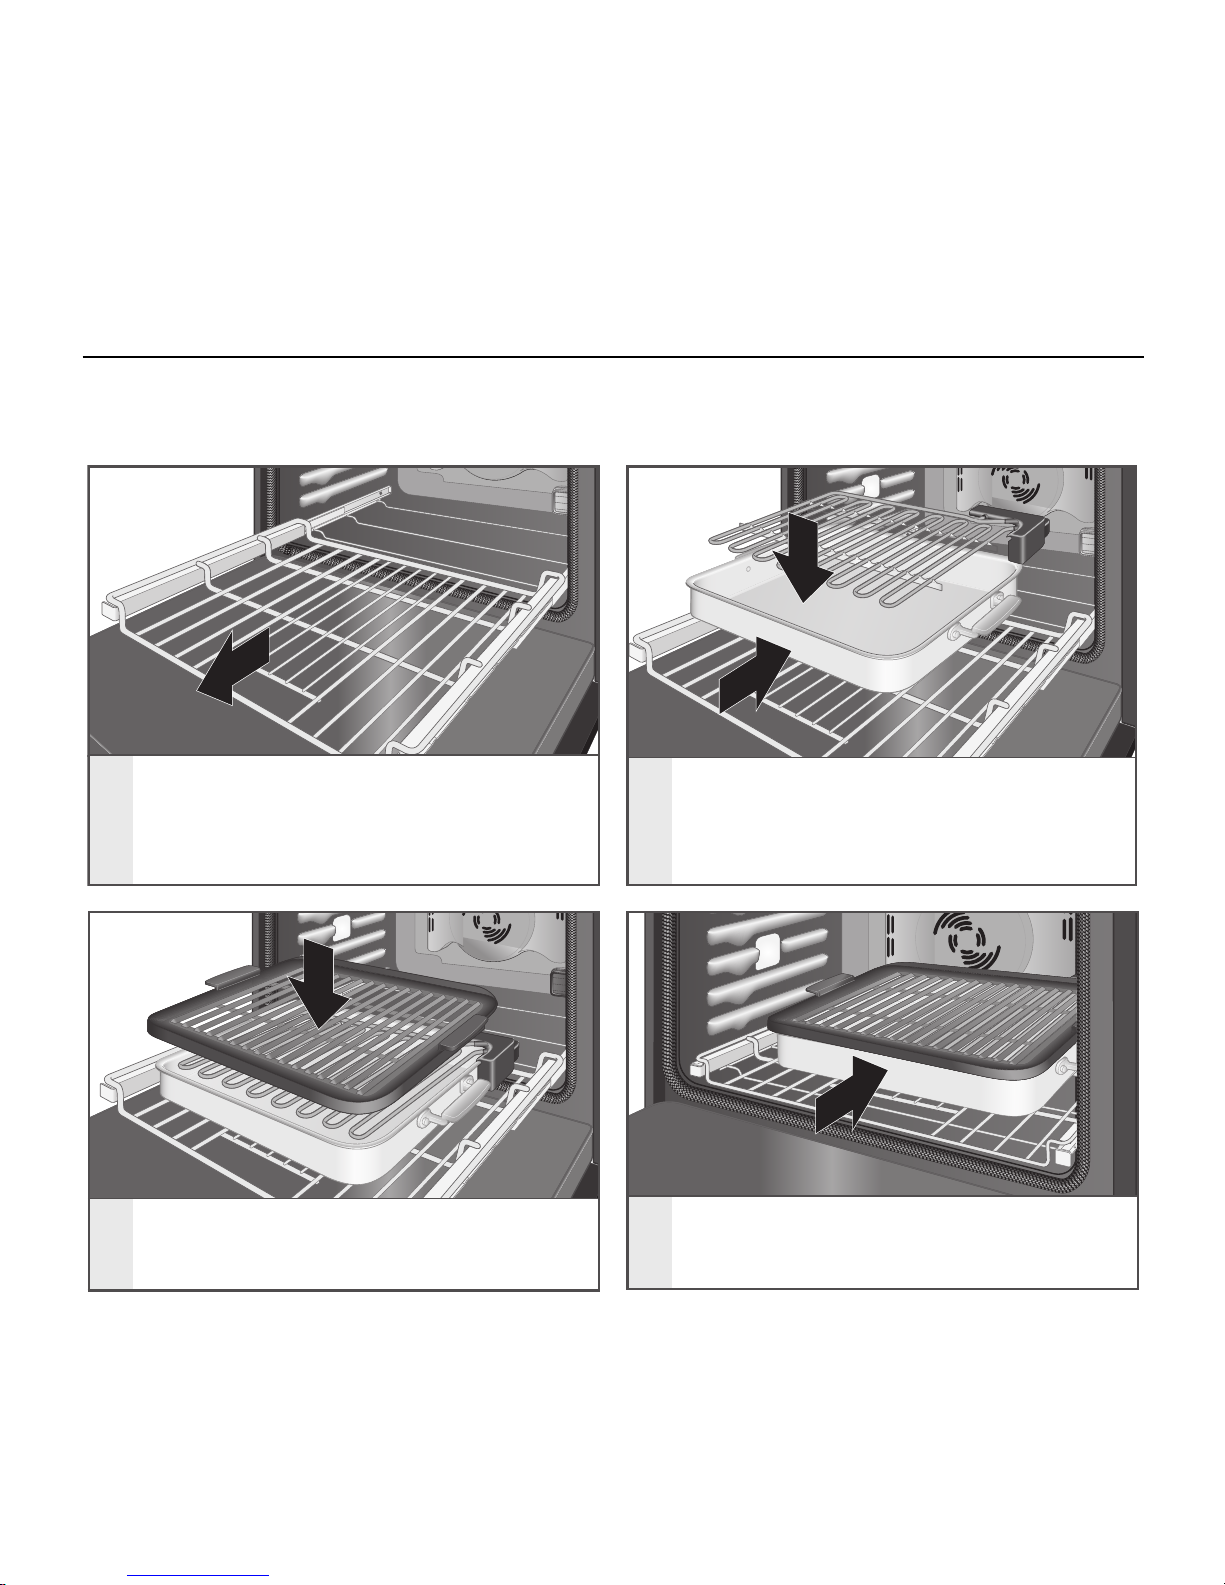
The +Powered Attachments fit on the SatinGlideTM Roll-Out Extension Rack for Smart Oven+
Attachments. They will not rock or wobble when installed correctly. Always fully extend the roll-out rack
before placing the +Powered Attachments. The roll-out rack will lock in place when fully extended.
1
2
1
2
3
4
Insert the roll-out rack into the lowest
rack position. Some force is required.
Extend the rack.
Place the Base Pan and Heating
Element on the roll-out rack. Push
the Base Pan in until the feet lock
into place.
Place the Grill on the Heating
Element.
Push the roll-out rack into the oven
fully. A tone will sound and an icon
will appear in the display.
14 | INSTALLING THE +GRILL ATTACHMENT
Page 15

USING THE +GRILL ATTACHMENT
GETTING STARTED
Preheat the +Grill Attachment per the recipe
instructions before placing food.
The +Grill Attachment has a nonstick coating
for easy cleaning. Metal utensils may scratch or
damage this coating.
The +Grill Attachment has an additional Sear
functionality for creating grill lines. While cooking,
touch the Sear button on the console. The +Grill
Attachment will reach a more intense heat for
5 minutes to sear grill lines into the food.
TIPS FOR BEST RESULTS
Food Notes
Bone-In Chicken
Breast
(Up to 12 oz each)
Start with skin-side down.
Boneless Chicken
Breast
(Up to 8-10 oz
each)
Start with smooth-side down.
Hamburger
Patties
(Up to nine 1/4 lb
[115 g] patties)
80% lean or leaner will
produce best results.
Pizza
(Up to
8" [20.3 cm] in
diameter)
Too many toppings or highly
liquid sauces can make grilled
pizzas soggy. Precooked or raw
toppings that only need to be
warmed should be used.
Fruit
Cook until both sides have grill
marks and fruit is just warmed
to the center. Do not overcook
or fruit will become very soft.
y Add 1 cup (240 mL) of water to the base
pan when grilling to avoid smoke generation
(recommended if broiling greasy/fatty foods
such as burgers, rib eye steaks, etc.).
y When grilling unevenly thick pieces of fish
or meat, position the thickest parts in the
center of the +Grill Attachment for more even
results.
y For best results, do not turn thin fillets of fish.
y Remove excess fat from meats or poultry.
With steaks or chops, slash the edges of fat to
prevent meat from curling.
y Choose items to be grilled that are about the
same size and thickness. Leave 1" (2.5 cm) of
space around each item being grilled.
y Brush sauces or glazes on in the last few
minutes. High-sugar sauces or glazes are more
likely to burn if added too early.
y Season with desired herbs and spices before
grilling, but season with salt after grilling.
y When grilling pizza, cook one side of the crust
until grill marks are the desired darkness.
Remove from the +Grill Attachment and put
toppings on the grilled side. Slide pizza back
onto the +Grill Attachment to finish cooking.
y Opening the door will slow grilling and may
adversely affect the browning.
y Always use an instant-read meat thermometer
to determine doneness.
USING THE +GRILL ATTACHMENT | 15
Page 16
USING THE +GRILL ATTACHMENT
CLEANING
Wash the +Grill Attachment after every use.
Food spills can react with the coating and result
in permanent stains, foods sticking to the +Grill
Attachment, or smoking while in use.
y To avoid damage, do not use the oven’s self-
cleaning function for the +Grill Attachment.
y The +Grill Attachment is dishwasher-safe.
y If hand washing, use soapy water and a soft
cloth or sponge.
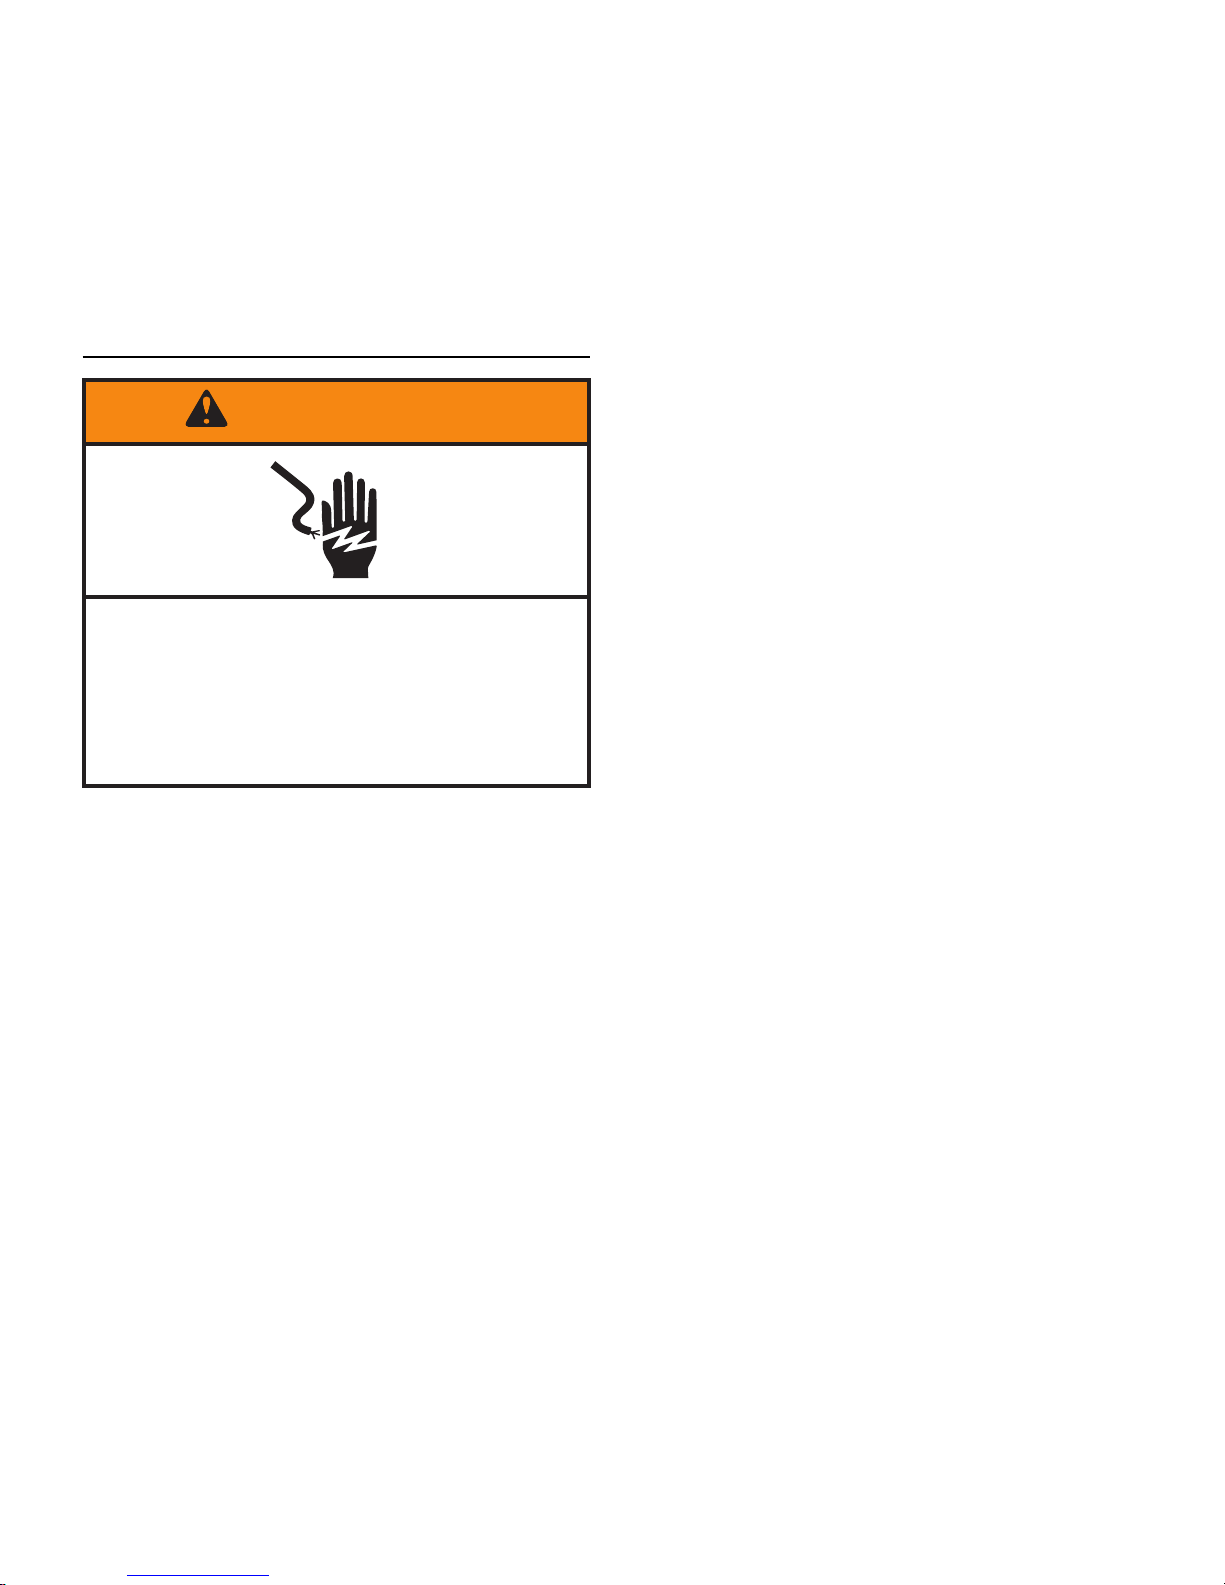
Electrical Shock Hazard
Do not immerse heating element in water
or place in dishwasher.
Doing so can result in death or electrical
shock.
WARNING
16 | USING THE +GRILL ATTACHMENT
Page 17
Page 18
SMART OVEN+ POWERED
STEAMER ATTACHMENT
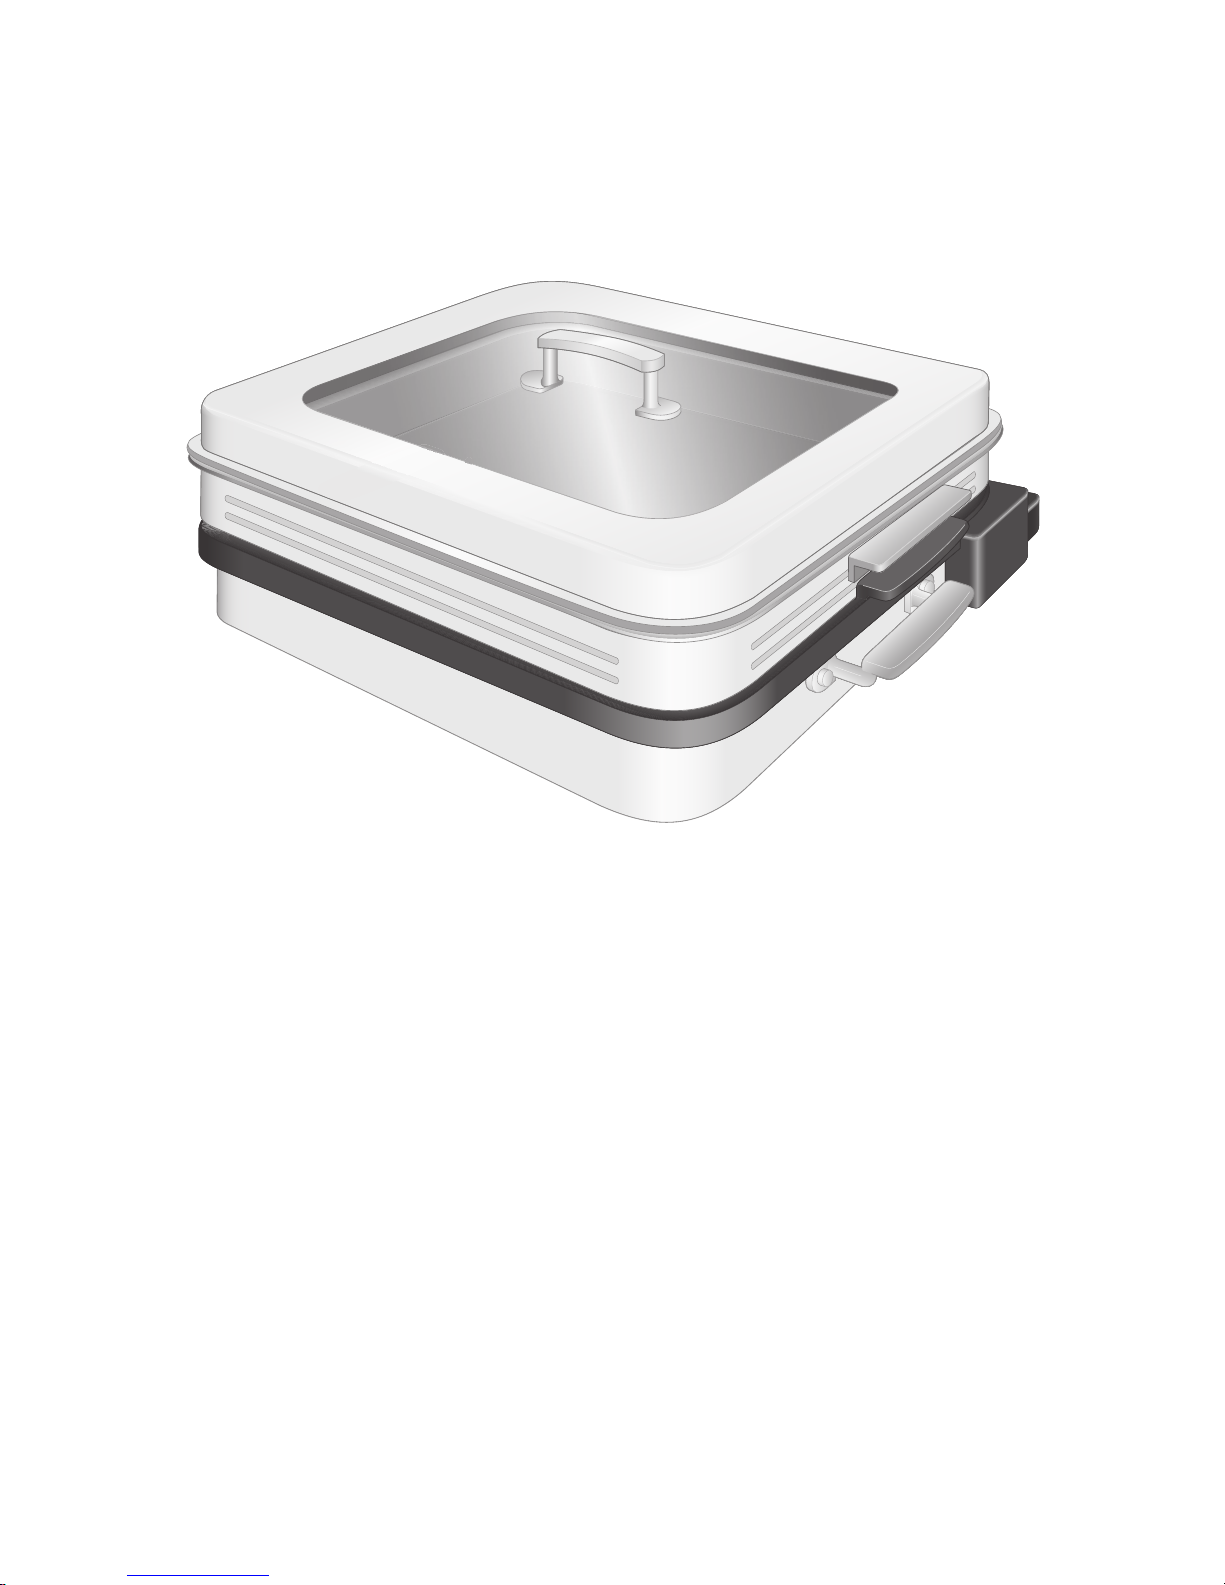
The Smart Oven+ Steamer Attachment keeps foods tender and provides the benefits of steaming.
It has the capacity to dramatically expand the capabilities of steam cooking across a wider range of
foods. It can even prepare a complete dinner for four including meat or fish, potato or pasta, and
vegetable. The attachment can also be used with the Steam Assist mode to create a humid cooking
environment ideal for baked goods, breads and roasts. And you can control the attachment through
the display, or monitor and control it from a mobile device when remote-enabled.*
*Wi-Fi & App required. Features subject to change. For details and privacy statement, visit kitchenaid.com/connect.
18 | SMART OVEN+ POWERED STEAMER ATTACHMENT
Page 19
INSTALLING THE +STEAMER ATTACHMENT
INSTALLATION
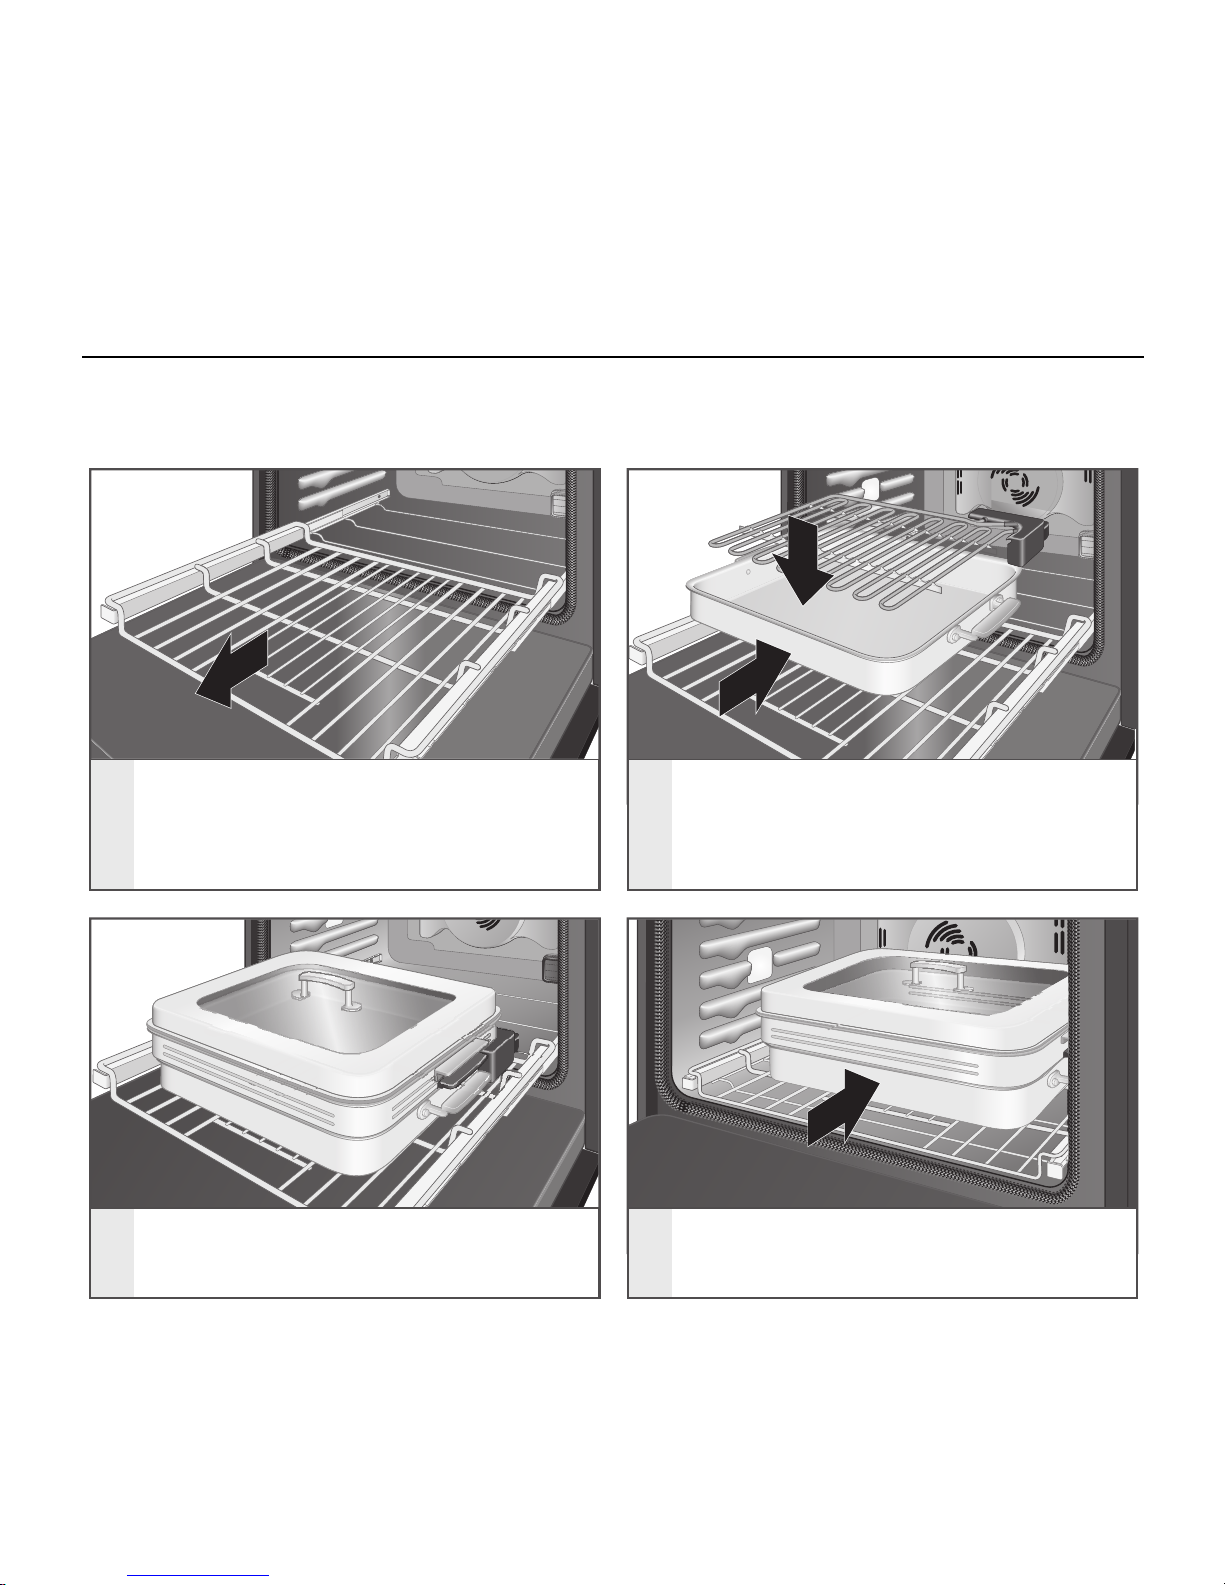
The +Powered Attachments fit on the SatinGlideTM Roll-Out Extension Rack for Smart Oven+
Attachments. They will not rock or wobble when installed correctly. Always fully extend the roll-out rack
before placing the +Powered Attachments. The roll-out rack will lock in place when fully extended.
1
2
1
2
3
4
Insert the roll-out rack into the lowest
rack position. Some force is required.
Extend the rack.
Place the Base Pan and Heating
Element on the roll-out rack. Push
the Base Pan in until the feet lock
into place.
Place the Steamer on the Heating
Element.
Push the roll-out rack into the
oven fully. A tone will sound and
an icon will appear in the display.
INSTALLING THE +STEAMER ATTACHMENT | 19
Page 20
USING THE +STEAMER ATTACHMENT
GETTING STARTED
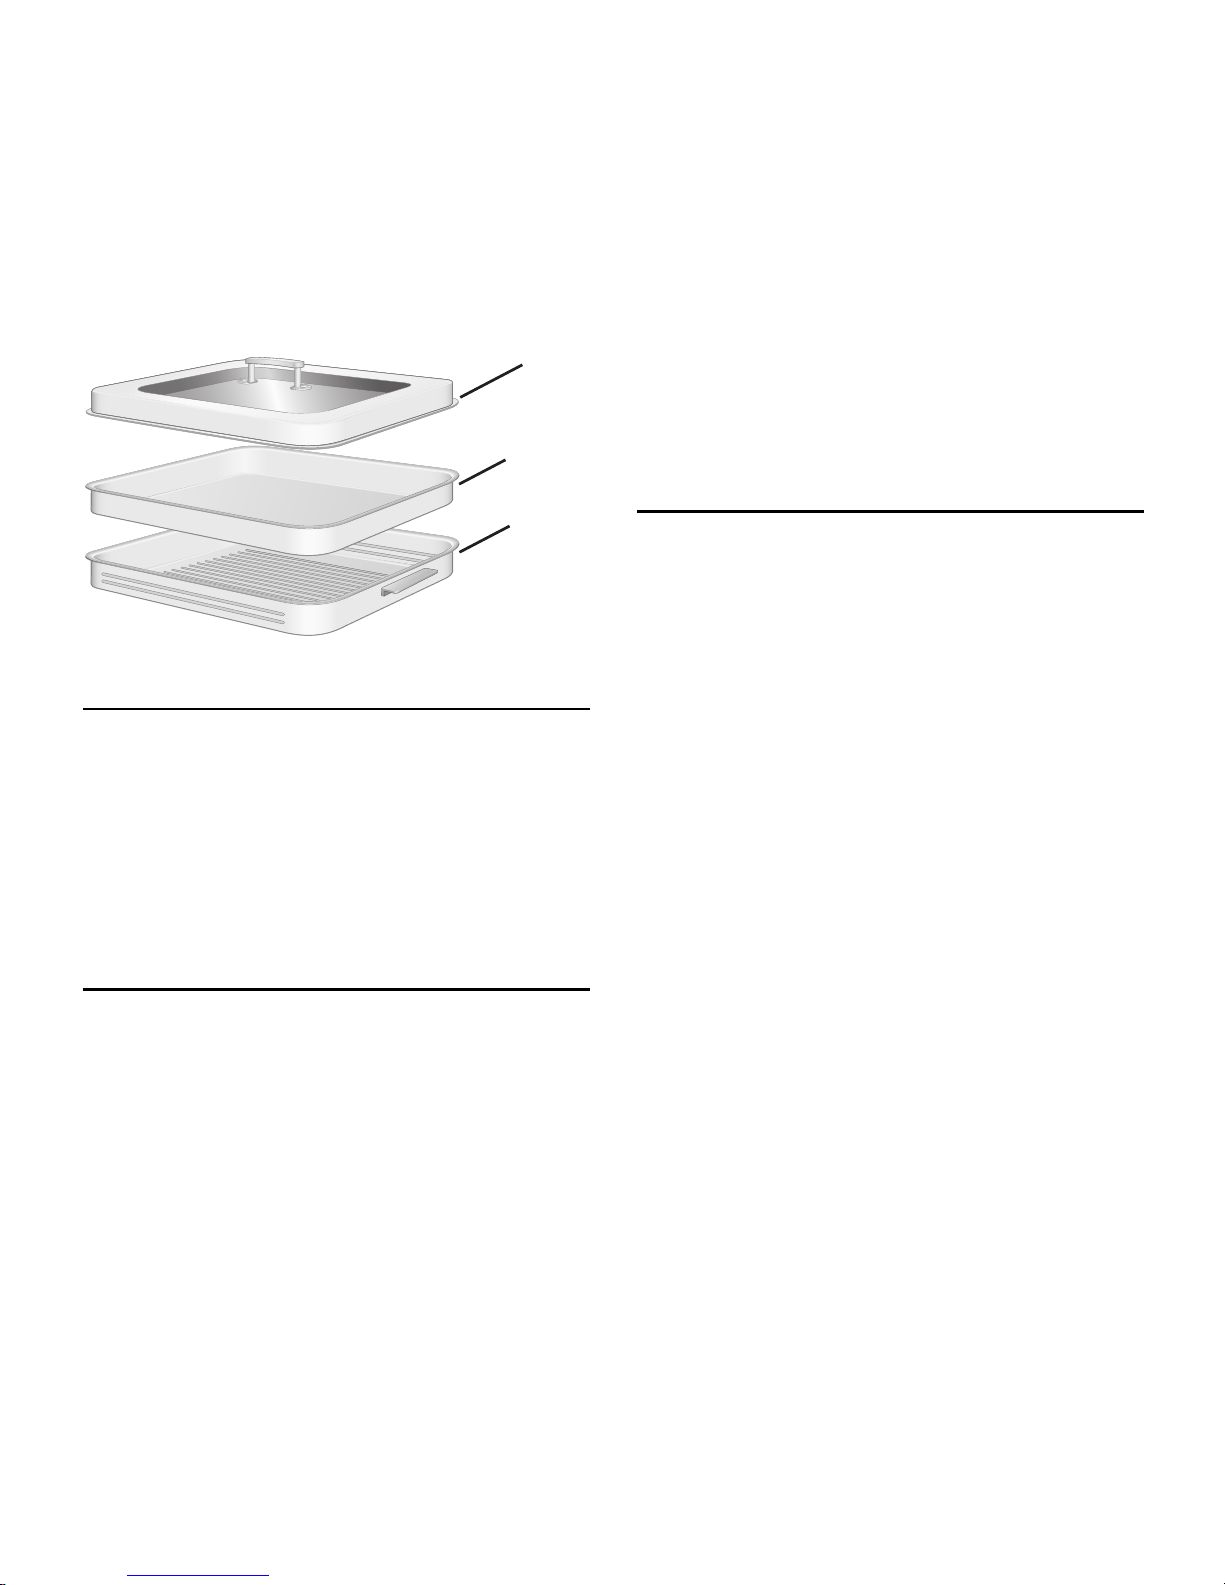
Pour approximately 4 cups (960 mL) of water
into the Steamer Water Basin, and then place the
Perforated Steamer Tray onto the Steamer Water
Basin.
The +Steamer Attachment was designed to hold
6 servings of food. Arrange food in a single layer
on the Perforated Steamer Tray with space around
each piece. Cover with the Steamer Lid.
STEAM ASSIST MODE
The Steam Assist Mode combines the dry heat
of a convection oven with steam to create a
humid environment for cooking, enhancing the
flavor and texture of foods. It is ideal for items
like cheesecake, breads, and a whole chicken or
turkey, as it results in a moist interior and perfectly
browned exterior of the food.
The Steam Assist Mode uses the +Steamer
Attachment. When cooking with the Steam Assist
Mode, do not use the Steamer Lid. This will allow
the steam to escape and fill the oven cavity during
the cooking process.
TIPS FOR BEST RESULTS
y Like-sized pieces will cook more evenly.
y Different types foods, such as fish and
vegetables, may be cooked at the same time
without mixing their flavors.
y For best results, choose foods that cook for
approximately the same length of time.
y Always open the Steamer Lid away from you
to allow steam to escape.
y Opening the oven and removing the Steamer
Lid frequently during steaming will affect the
quality of the food. Check food only when
necessary.
y When using Steam Assist for foods like
cheesecake, place the food in a standard pan
and set it directly in the Perforated Steamer
Tray; set it inside the Steamer Water Basin, but
do not cover with the Steamer Lid.
y When using Steam Assist for items, like bread
or poultry, place the food in a regular pan,
according to baking instructions, and place
it on the standard rack above the +Steamer
Attachment.
Steamer
Lid
Steamer
W
ater
Basin
Perforated
Steamer
Tray
20 | USING THE +STEAMER ATTACHMENT
Page 21
USING THE +STEAMER ATTACHMENT
CLEANING
Wash the Steamer Lid, Perforated Steamer Tray,
and Steamer Water Basin after every use. Food
spills can react with the material and result in
permanent stains, foods sticking to the Perforated
Steamer Tray, or smoking while in use.
y To avoid damage, do not use the oven’s
self-cleaning function for the +Steamer
Attachment.
y The +Steamer Attachment is dishwasher-safe.
y If hand washing, use soapy water and a soft
cloth or sponge.
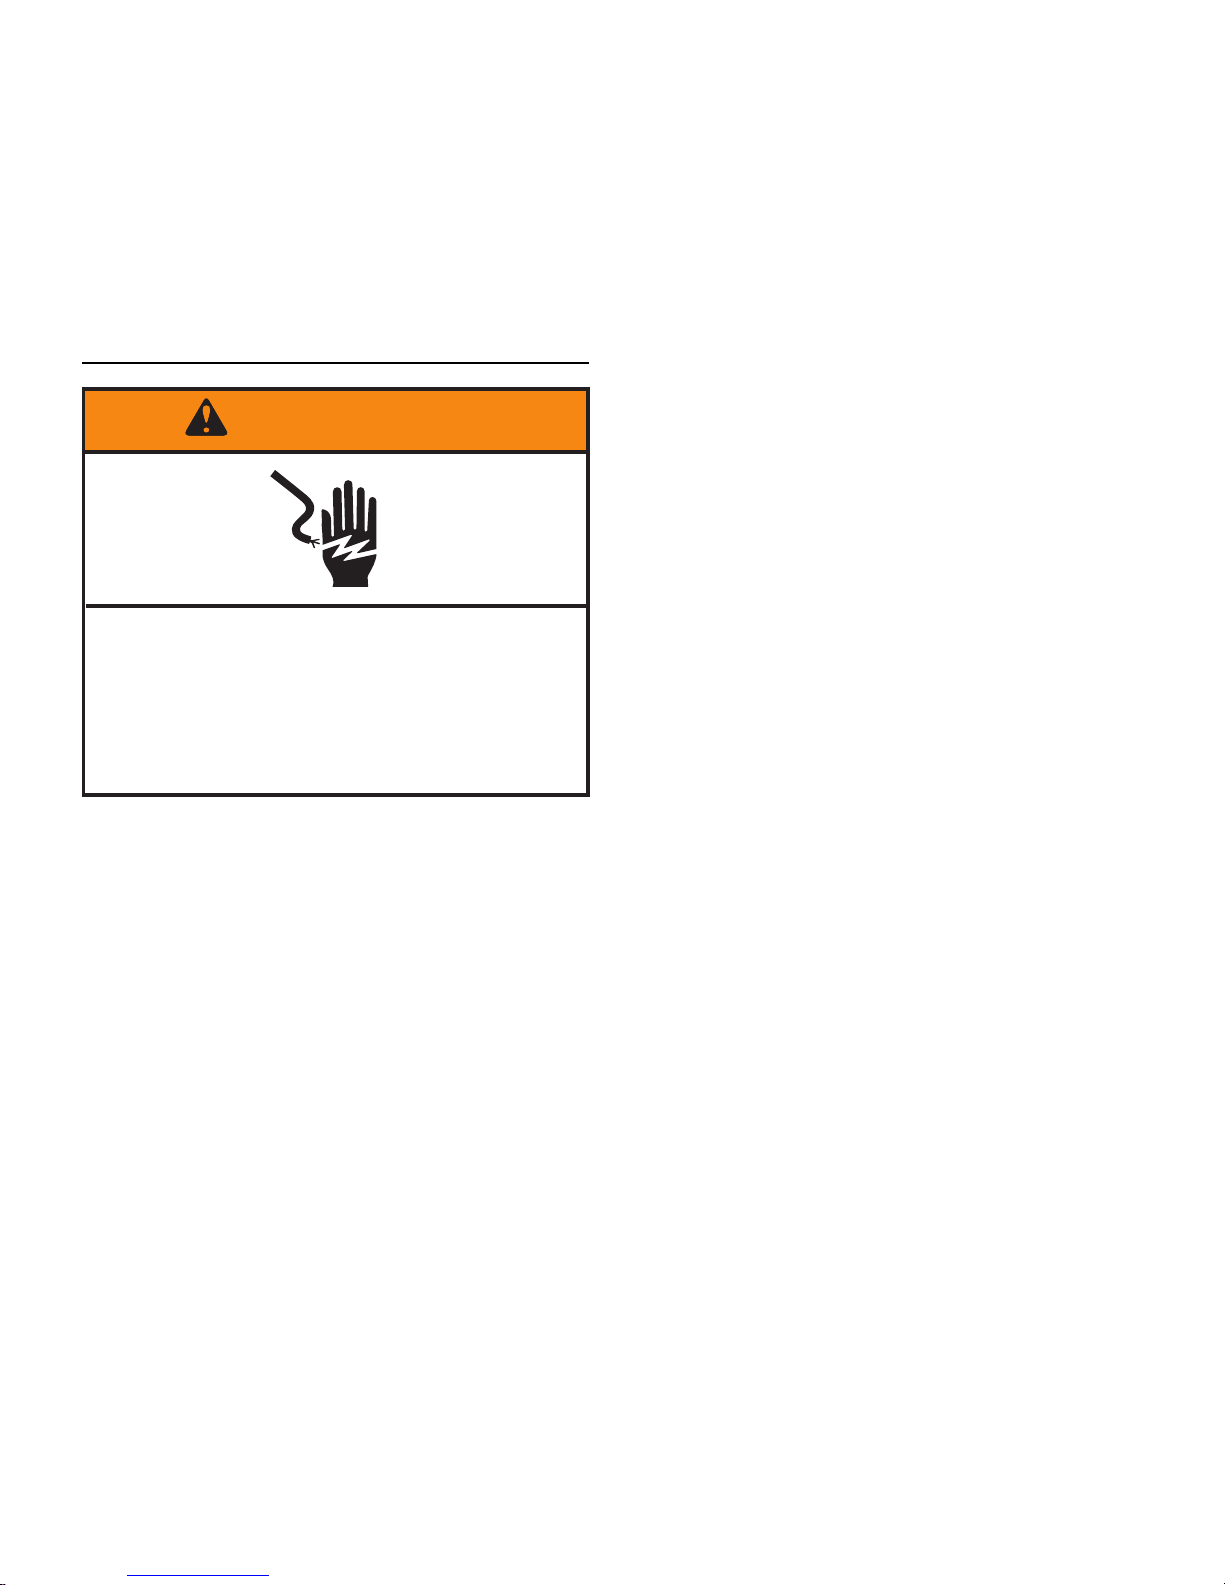
Electrical Shock Hazard
Do not immerse heating element in water
or place in dishwasher.
Doing so can result in death or electrical
shock.
WARNING
USING THE +STEAMER ATTACHMENT | 21
Page 22

TROUBLESHOOTING
First try the solutions suggested here. If you need further assistance or more recommendations that
may help you avoid a service call, visit http://producthelp.kitchenaid.com. In Canada, visit
http://www.kitchenaid.ca.
Contact us by mail with any questions or concerns at the address below:
In the U.S.A.:
KitchenAid Brand Home Appliances
Customer eXperience Center
553 Benson Road
Benton Harbor, MI 49022-2692
In Canada:
KitchenAid Brand Home Appliances
Customer eXperience Centre
200 - 6750 Century Ave.
Mississauga, Ontario L5N 0B7
Please include a daytime phone number in your correspondence.
GENERAL
1. Plug doesn’t line up – Check that
SatinGlideTM Roll-Out Extension Rack for
Smart Oven+ Attachments is properly
installed and lined up. If it is, make sure the
Base Pan is properly placed. Base Pan “feet”
should fit neatly on the 3rd and 10th spaces
(from the left) on the rack. Once placed,
gently slide the Base Pan back until it locks
into place on the rack.
2. No tone for connection – There is
approximately a 2-second delay before the
tone sounds. If you do not hear a tone, pull
the Base Pan with heating element out fully
and fully reinsert it. Wait for a tone.
3. Attachment not in right spot on the
roll-out rack for powered attachments
– Check that the roll-out rack for powered
attachments is positioned correctly. Make
sure the correct attachment is being used.
The Base Pan “feet” should fit neatly on the
rack, in the 3rd and 10th spaces (from the
left) on the rack.
4. +Powered Attachment disconnects
while cooking – Should the +Powered
Attachment disconnect, a tone (different
from the connection tone) will sound and
the icon will disappear from the display.
Open the oven and extend the roll-out rack
for powered attachments to disconnect the
Base Pan and +Powered Attachment from
the plug. Once removed, push the roll-out
rack for powered attachments back in to
reconnect the +Powered Attachment to the
plug. Make sure the connection tone sounds
and the icon reappears in the display. This
can be done with any attachment that is
in use (+Grill Attachment, +Baking Stone
Attachment, +Steamer Attachment, etc.).
Note that only the +Grill Attachment secures
to the Base Pan.
22 | TROUBLESHOOTING
Page 23

TROUBLESHOOTING
GENERAL
5. Oven is smoking – Should you notice smoke
during a cooking cycle, it is time to self clean
the oven. Once the current cooking cycle is
over and the +Powered Attachments have
cooled down, remove them, along with the
roll-out rack for powered attachments and
begin a Self-Cleaning cycle.
NOTE: Steam during a cycle is normal, and
will dissipate quickly with very little odor.
6. +Grill Attachment is smoking – Once cool,
remove the +Powered Attachment, +Grill
Attachment, and Base Pan from oven. The
Base Pan and all +Powered Attachments are
dish washer safe. Clean +Grill Attachment
and/or Base Pan by hand washing or place in
dishwasher.
7. Smoke/steam from oven changes the
User Interface (UI) (false touch) – If steam
from the oven affects the UI, simply hit the
Back button once to return to the preheat/
cooking timer. If steam completely canceled
out of cooking mode, use the UI to return to
previous cooking setting.
TROUBLESHOOTING | 23
Page 24

WARRANTY
KITCHENAID® +POWERED ATTACHMENTS WARRANTY FOR THE 50 UNITED STATES,
THE DISTRICT OF COLUMBIA, PUERTO RICO, AND CANADA
This warranty extends to the purchaser and any succeeding owner of the +Powered Attachments
operated in the 50 United States, the District of Columbia, Puerto Rico, and Canada.
Length of Warranty: One Year Full Warranty from date of purchase.
KitchenAid Will Pay
for Your Choice of:
Hassle-Free Replacement of your +Powered Attachments. See the next
page for details on how to arrange for service, or call the Customer
eXperience Center toll-free at 1-800-541-6390.
OR
The replacement parts and repair labor costs to correct defects in materials
and workmanship. Service must be provided by an Authorized KitchenAid
Service Center.
KitchenAid Will Not
Pay for:
A. Repairs when your +Powered Attachments is used in other than
normal single family home use.
B. Damage resulting from accident, alteration, misuse, or abuse.
C. Any shipping or handling costs to deliver your +Powered Attachments
to an Authorized Service Center.
D. Replacement parts or repair labor costs for +Powered Attachments
operated outside the 50 United States, District of Columbia, Puerto
Rico, and Canada.
DISCLAIMER OF IMPLIED WARRANTIES; LIMITATION OF REMEDIES
IMPLIED WARRANTIES, INCLUDING TO THE EXTENT APPLICABLE WARRANTIES OF
MERCHANTABILITY OR FITNESS FOR A PARTICULAR PURPOSE, ARE EXCLUDED TO THE EXTENT
LEGALLY PERMISSIBLE. ANY IMPLIED WARRANTIES THAT MAY BE IMPOSED BY LAW ARE LIMITED
TO ONE YEAR, OR THE SHORTEST PERIOD ALLOWED BY LAW. SOME STATES AND PROVINCES
DO NOT ALLOW LIMITATIONS OR EXCLUSIONS ON HOW LONG AN IMPLIED WARRANTY OF
MERCHANTABILITY OR FITNESS LASTS, SO THE ABOVE LIMITATIONS OR EXCLUSIONS MAY NOT
APPLY TO YOU.
IF THIS PRODUCT FAILS TO WORK AS WARRANTED, CUSTOMER’S SOLE AND EXCLUSIVE
REMEDY SHALL BE REPAIR OR REPLACEMENT ACCORDING TO THE TERMS OF THIS LIMITED
WARRANTY. KITCHENAID AND KITCHENAID CANADA DO NOT ASSUME ANY RESPONSIBILITY
FOR INCIDENTAL OR CONSEQUENTIAL DAMAGES. This warranty gives you specific legal rights
and you may also have other rights which vary from state to state or province to province.
24 | WARRANTY
Page 25

WARRANTY
HASSLE-FREE REPLACEMENT WARRANTY – 50 UNITED STATES,
DISTRICT OF COLUMBIA, AND PUERTO RICO
We’re so confident the quality of our products
meets the exacting standards of KitchenAid that, if
your +Powered Attachments should fail within the
first year of ownership, KitchenAid will arrange to
deliver an identical or comparable replacement to
your door free of charge and arrange to have your
original +Powered Attachments returned to us. Your
replacement unit will also be covered by our one
year limited warranty. If your +Powered Attachments
should fail within the first year of ownership, simply
call our toll-free Customer eXperience Center at
1-800-541-6390 Monday through Friday. Please
have your original sales receipt available when you
call. Proof of purchase will be required to initiate the
claim. Give the consultant your complete shipping
address (no P.O. Box numbers, please).
When you receive your replacement +Powered
Attachments, use the carton, packing materials,
and prepaid shipping label to pack up your original
+Powered Attachments and send it back to
KitchenAid.
HASSLE-FREE REPLACEMENT WARRANTY – CANADA
We’re so confident the quality of our products
meets the exacting standards of KitchenAid
that, if your +Powered Attachments should fail
within the first year of ownership, KitchenAid will
arrange to deliver an identical or comparable
replacement to your door free of charge
and arrange to have your original +Powered
Attachments returned to us. Your replacement
unit will also be covered by our one year limited
warranty. If your +Powered Attachments should
fail within the first year of ownership, simply
call our toll-free Customer eXperience Center
at 1-800-807-6777 Monday through Friday.
Please have your original sales receipt available
when you call. Proof of purchase will be required
to initiate the claim. Give the consultant your
complete shipping address.
When you receive your replacement +Powered
Attachments, use the carton, packing materials,
and prepaid shipping label to pack up your
original +Powered Attachments and send it back
to KitchenAid.
WARRANTY | 25
Page 26

WARRANTY
ARRANGING FOR SERVICE AFTER THE WARRANTY EXPIRES,
OR ORDERING ACCESSORIES AND REPLACEMENT PARTS
In the United States and Puerto Rico:
For service information, or to order accessories
or replacement parts, call toll-free at
1-800-541-6390 or write to:
Customer eXperience Center,
KitchenAid Small Appliances,
P.O. Box 218, St. Joseph, MI 49085-0218
Outside the United States and Puerto Rico:
Consult your local KitchenAid dealer or the store
where you purchased the +Powered Attachments
for information on how to obtain service.
For service information in Canada:
Call toll-free 1-800-807-6777.
26 | WARRANTY
Page 27

MERCI d’avoir acheté ce produit de grande qualité. Enregistrer votre four
encastré au register.kitchenaid.com. Au Canada, enregistrer votre four
encastré sur register.kitchenaid.ca.
Pour référence ultérieure, consignez par écrit les numéros de modèle et
de série de votre produit. Ces numéros se trouvent sur l’étiquette située
sur le bord inférieur du tableau de commande, côté droit.
Numéro de modèle______________ Numéro de série___________________
TABLE DES MATIÈRES
28 INSTALLATION DES ACCESSOIRES ÉLECTRIQUES
29 Utilisation des accessoires électriques
31 Rangement des accessoires électriques
33 PIERRE DE CUISSON ÉLECTRIQUE POUR FOUR INTELLIGENT
34 Installation de la pierre de cuisson
35 Utilisation de la pierre de cuisson
38 GRIL ÉLECTRIQUE POUR FOUR INTELLIGENT
39 Installation du gril
40 Utilisation du gril
43 CUISEUR-VAPEUR ÉLECTRIQUE POUR FOUR INTELLIGENT
44 Installation du cuiseur-vapeur
45 Utilisation du cuiseur-vapeur
47 DÉPANNAGE
49 GARANTIE
Page 28
28
INSTALLATION DES ACCESSOIRES ÉLECTRIQUES
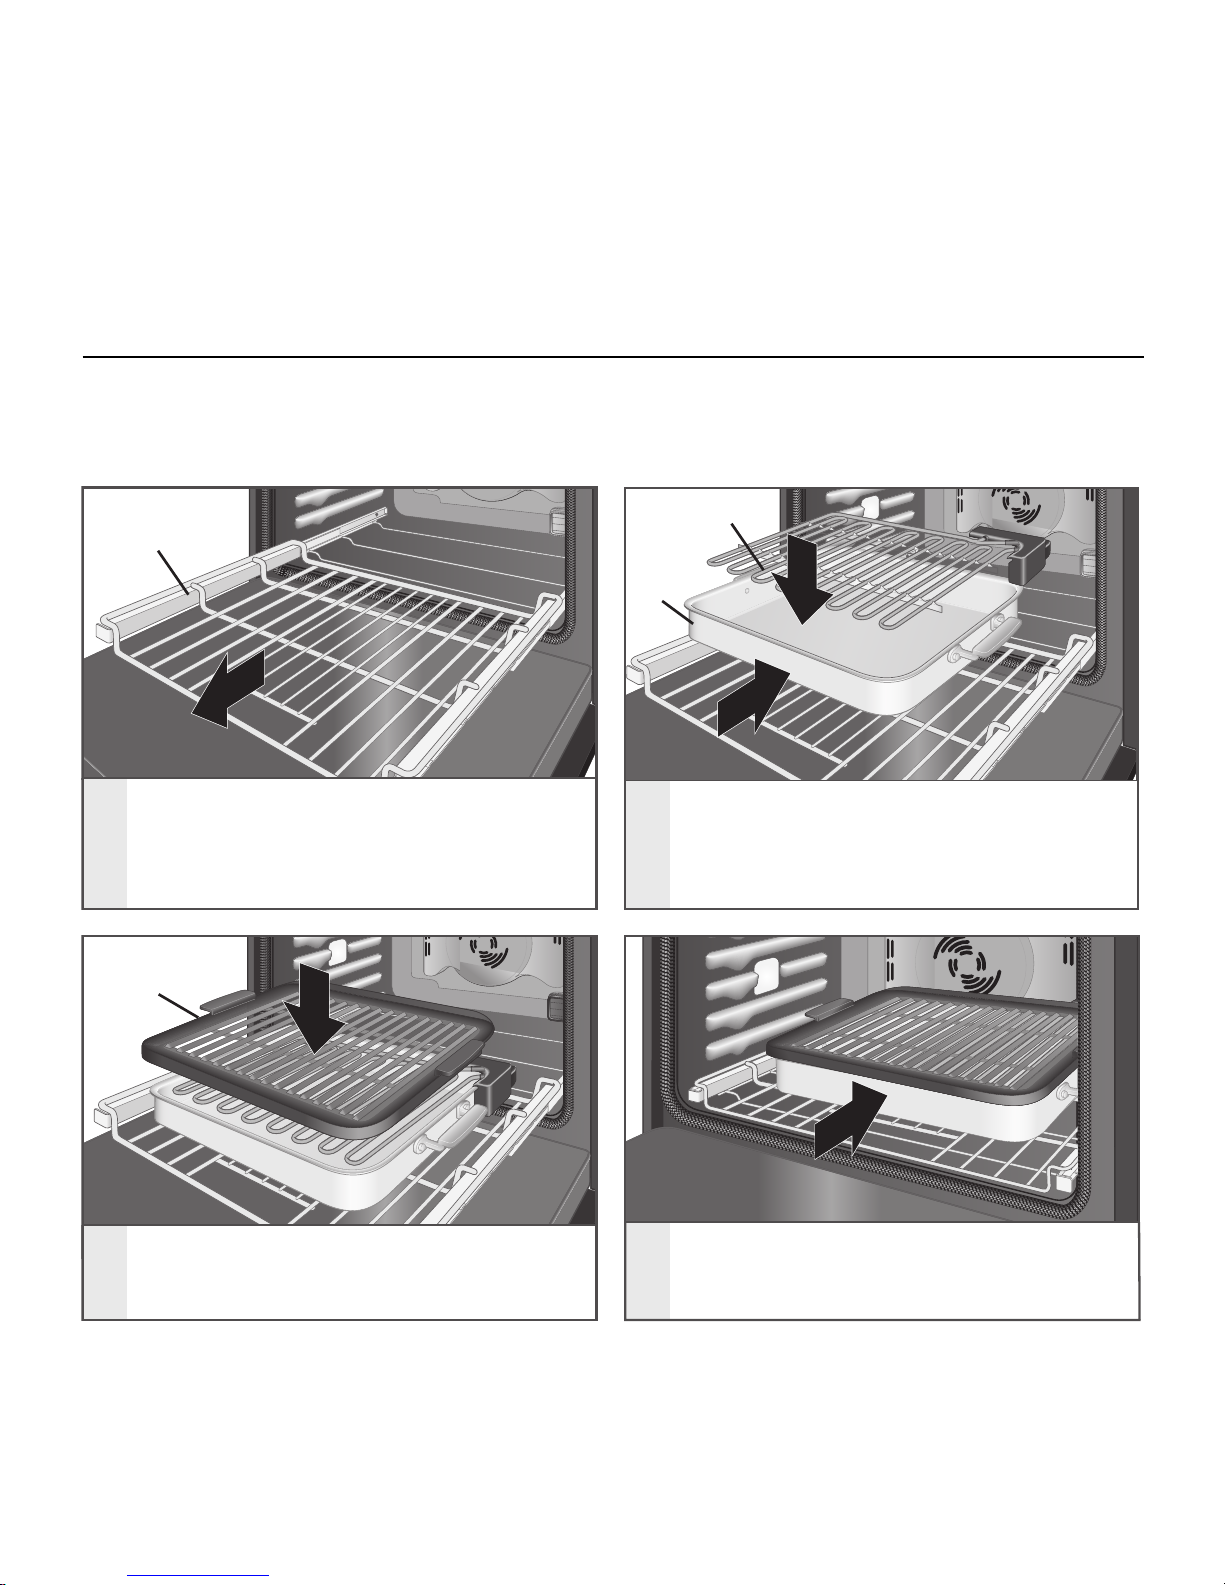
INSTALLATION
Les accessoires électriques peuvent être placés sur la grille coulissante SatinGlideTM conçue pour
four intelligent. Ils ne se balanceront et n’oscilleront pas s’ils sont bien installés. Toujours déployer
complètement la grille coulissante avant d’y placer un accessoire électrique. La grille coulissante se
verrouille en place lorsqu’elle est entièrement déployée.
1
2
1
2
3
4
Placer la grille coulissante à la position
la plus basse. Il faudra appliquer une
certaine force. Tirer sur la grille.
Grille
coulissante
Élément
chauffant
Plateau
inférieur
Placer le plateau inférieur sur l’élément
chauffant de la grille coulissante.
Repousser le plateau inférieur vers
l’intérieur jusqu’à ce que les pieds
se verrouillent en place.
Gril
Placer l’accessoire électrique
souhaité sur l’élément chauffant.
| INSTALLATION DES ACCESSOIRES ÉLECTRIQUES
Replacer complètement la grille
coulissante dans le four. Un signal
sonore se fait entendre et une icône
apparaît sur l’afficheur.
Page 29
UTILISATION DES ACCESSOIRES ÉLECTRIQUES
CONSEILS UTILES : Lors du transport des
accessoires électriques, ne transporter que
ceux qui seront utilisés. Il n’est pas nécessaire
de transporter tous les accessoires à la fois.
MISE EN PLACE
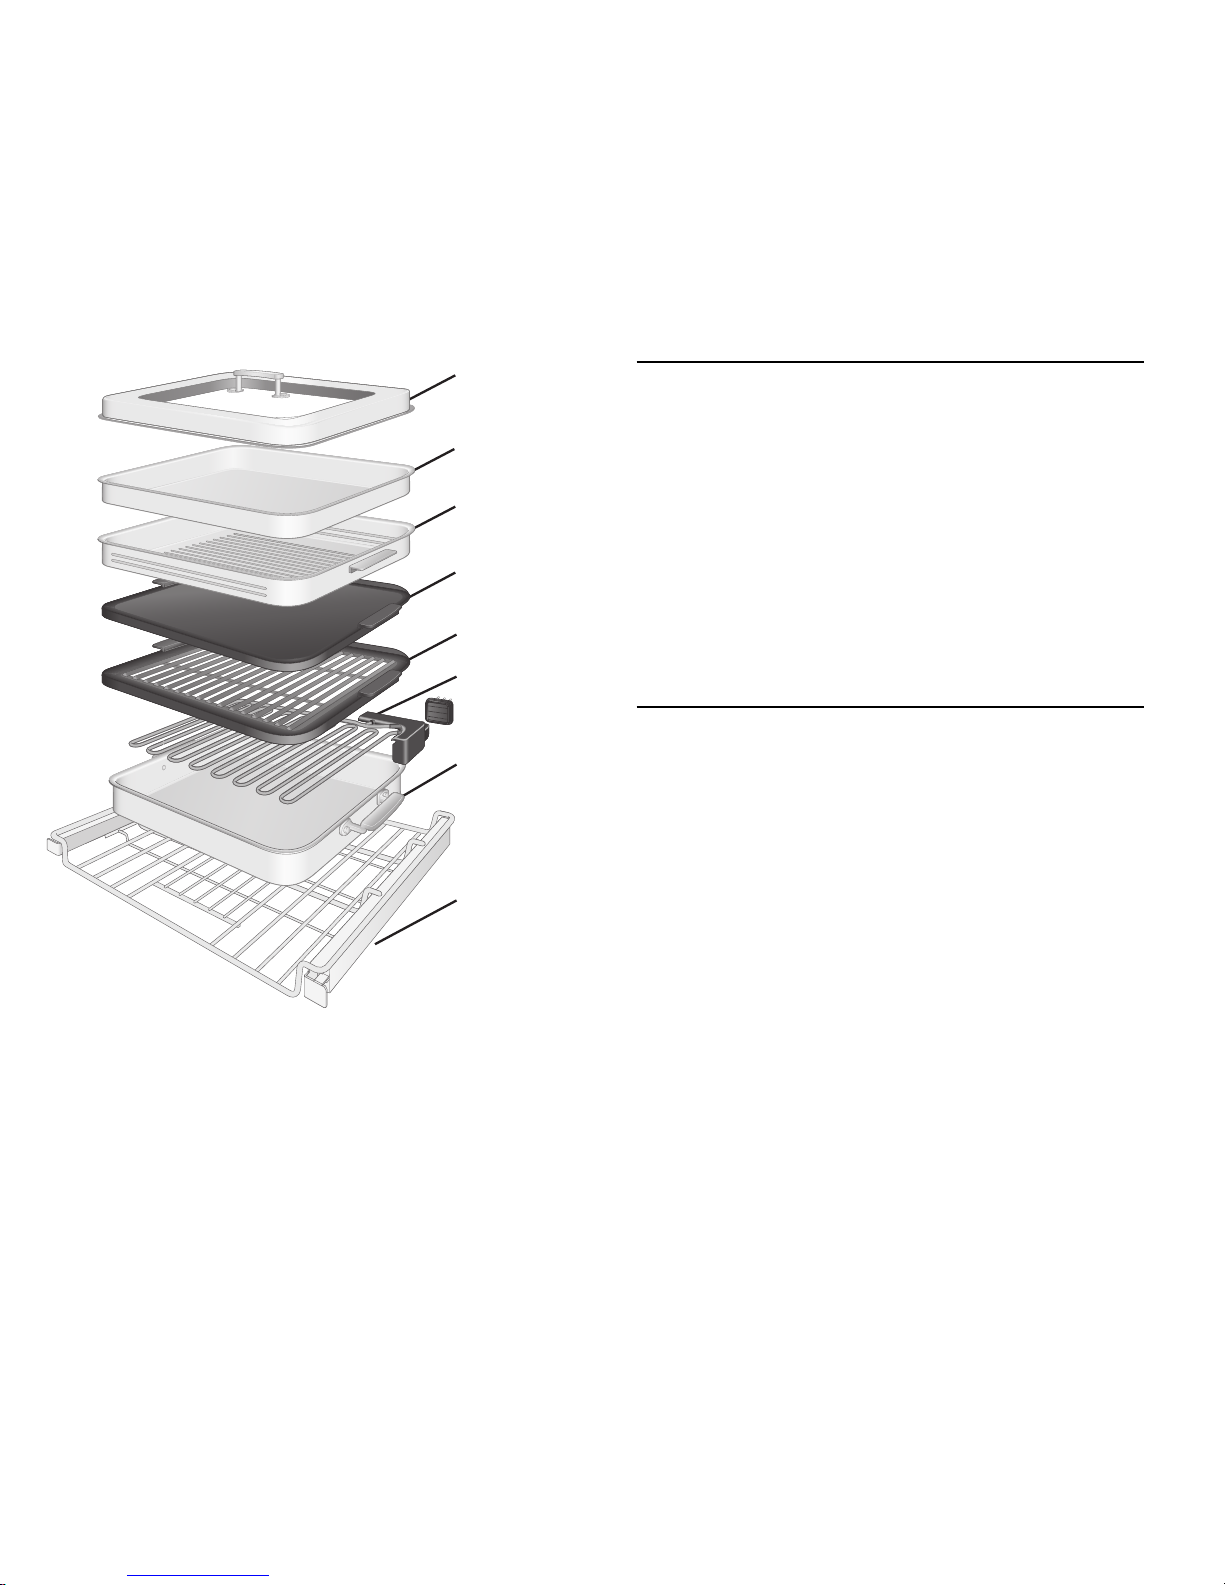
Les accessoires électriques sont composés
de plusieurs pièces. La grille coulissante pour
accessoires électriques et le plateau inférieur placent
les accessoires électriques dans le four et ramassent
les gouttes. L’élément chauffant fournit une chaleur
égale pour les accessoires électriques. Un seul
accessoire électrique peut être utilisé en tout temps,
mais la pierre de cuisson, le gril et le cuiseur-vapeur
peuvent être empilés pour en faciliter le rangement
avec l’élément chauffant et le plateau inférieur.
CONSEILS POUR OBTENIR DE
BONS RÉSULTATS
y Toujours déployer complètement la grille
coulissante pour facilement accéder aux
accessoires électriques.
y Afin d’éviter les dommages, ne pas cuire
d’aliments directement sur l’élément
chauffant.
Couvercle du
cuiseur-vapeur
Plateau
perforé du
cuiseur-vapeur
Plateau du
bac à eau
+Pierre
de cuisson
+Gril
Élément
chauffant
Plateau
inférieur
Grille coulissante
pour accessoires
électriques
UTILISATION DES ACCESSOIRES ÉLECTRIQUES | 29
Page 30
30
UTILISATION DES ACCESSOIRES ÉLECTRIQUES
NETTOYAGE
Laver le plateau inférieur et les accessoires
électriques après leur utilisation. Les renversements
d’aliments peuvent réagir avec le revêtement
et causer des taches permanentes, rester collés
aux accessoires ou produire de la fumée.
y Pour éviter d’endommager les accessoires
électriques, ne pas utiliser la fonction
d’autonettoyage du four pour les
accessoires électriques.
y Le plateau inférieur et les accessoires
électriques peuvent être lavés au lavevaisselle. L’élément chauffant n’est pas
lavable au lave-vaisselle.
y Pour le nettoyage à la main, utiliser de l’eau
savonneuse et un chiffon doux ou une éponge.
y Ne pas plonger l’élément chauffant dans l’eau.
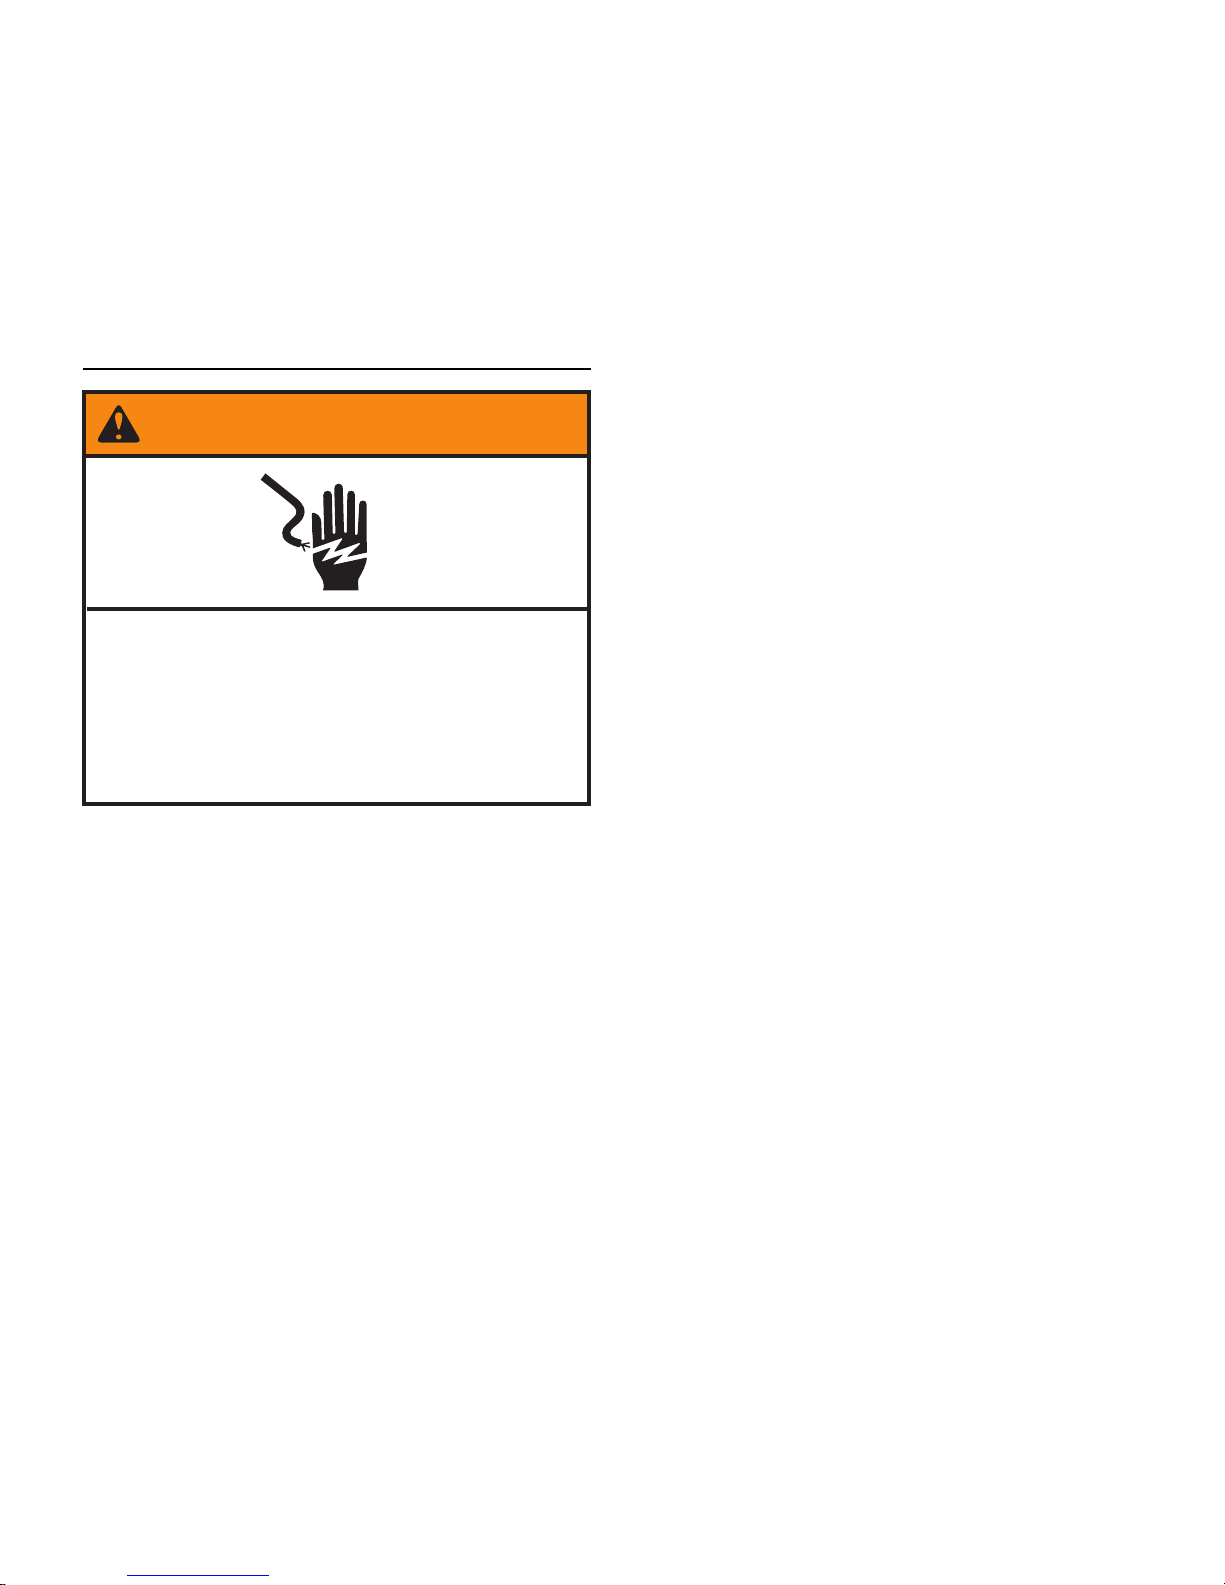
Risque de choc électrique
Ne pas plonger l’élément chauffant dans
l’eau ou le placer au lave-vaisselle.
Le non-respect de cette instruction peut
causer un décès ou une choc électrique.
AVERTISSEMENT
| UTILISATION DES ACCESSOIRES ÉLECTRIQUES
Page 31
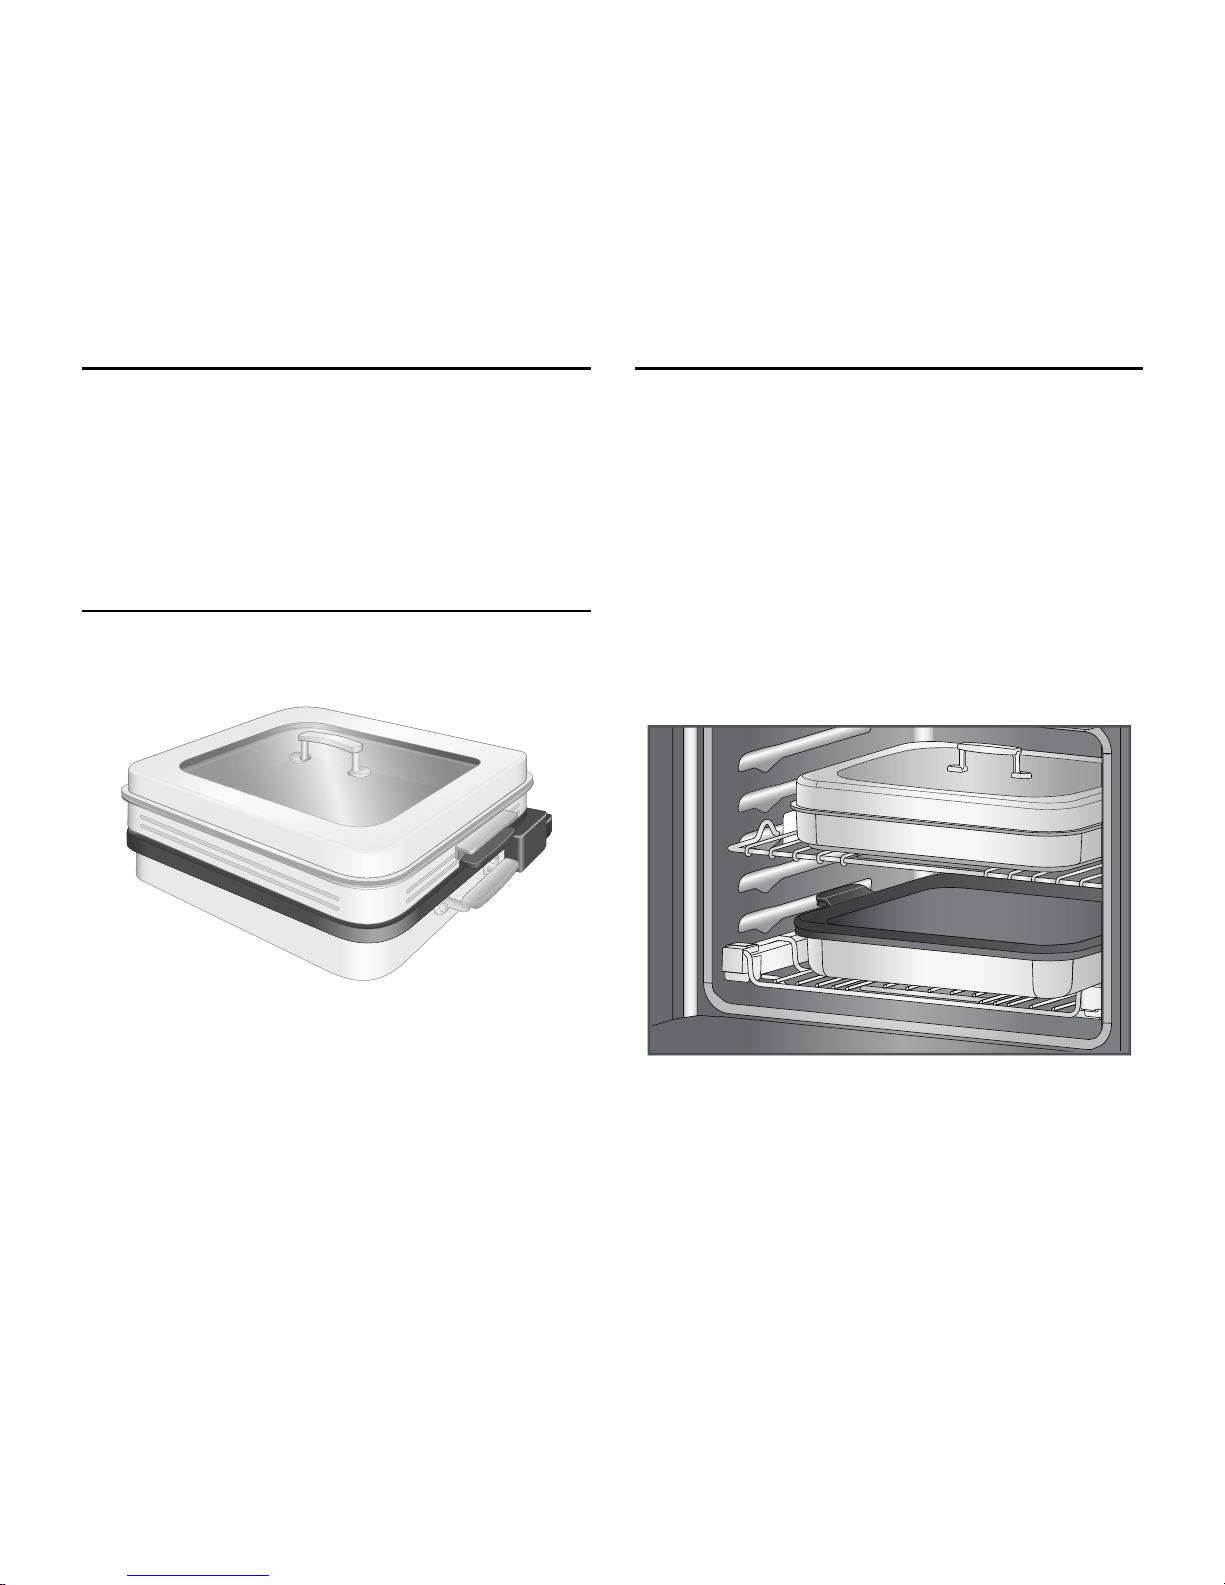
RANGEMENT DES ACCESSOIRES ÉLECTRIQUES
MISE EN PLACE
Les accessoires électriques sont conçus pour
être faciles à ranger. Le cuiseur-vapeur, la pierre
de cuisson et le gril s’empilent facilement sur
l’élément chauffant et le plateau inférieur.
Il y a plusieurs façons de ranger les accessoires
électriques :
ARMOIRE DE CUISINE
Les accessoires électriques peuvent être empilés
dans une armoire de cuisine suffisamment grande.
FOUR INTELLIGENT
Les accessoires électriques peuvent être rangés
dans le four intelligent pour un accès facile.
Placer le gril et la pierre de cuisson sur l’élément
chauffant, à l’intérieur du plateau inférieur, placer
les accessoires électriques sur la grille coulissante
pour accessoires électriques et pousser la grille
dans le four. Placer le cuiseur-vapeur sur une grille
plate, au-dessus de la pierre de cuisson.
IMPORTANT : Retirer les accessoires électriques
du four avant d’utiliser un mode de cuisson sans
accessoire électrique ou de lancer
l’autonettoyage.
RANGEMENT DES ACCESSOIRES ÉLECTRIQUES | 31
Page 32

Page 33
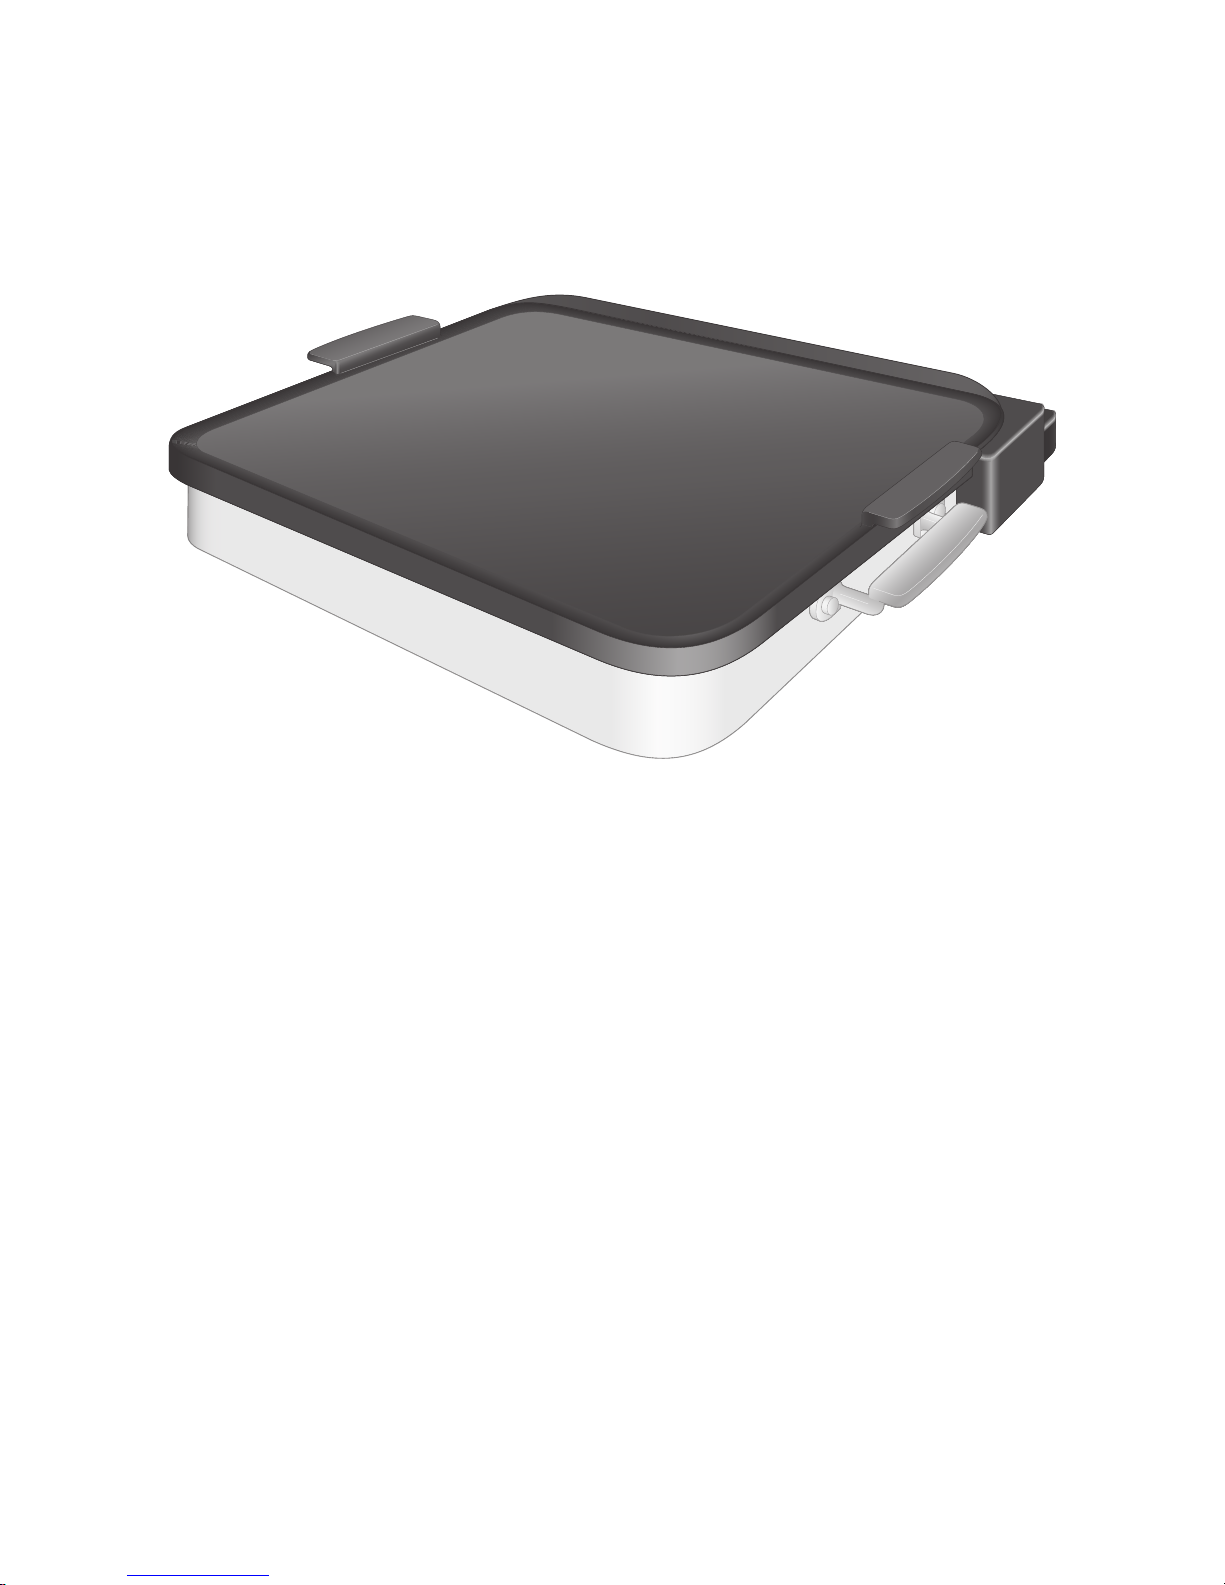
PIERRE DE CUISSON ÉLECTRIQUE
POUR FOUR INTELLIGENT
La pierre de cuisson électrique pour four intelligent offre de nouvelles façons d’utiliser le four.
Elle permet de rendre plusieurs plats croustillants, des chiches-kebabs grillés aux croquettes de
crabe en passant par les scones du déjeuner. Sa grande taille permet même de cuire une pizza de
14 po (35,6 cm). Parce qu’elle est intégrée au four, la pierre de cuisson pour four intelligent prend
moitié du temps à préchauffer qu’une pierre non intégrée* et vous indique lorsque le préchauffage
est terminé. La pierre de cuisson peut être commandée à partir de l’écran ou surveillée et
commandée à partir d’un appareil mobile lorsque la commande à distance est activée.**
* Comparée à une pierre de cuisson fabriquée dans le même matériau, de taille et poids similaires.
** Connexion Wi-Fi et application requises. Caractéristiques sujettes à changement. Pour obtenir les détails
etlapolitique en matière de vie privée, visiter le kitchenaid.com/connect.
PIERRE DE CUISSON ÉLECTRIQUE POUR FOUR INTELLIGENT | 33
Page 34
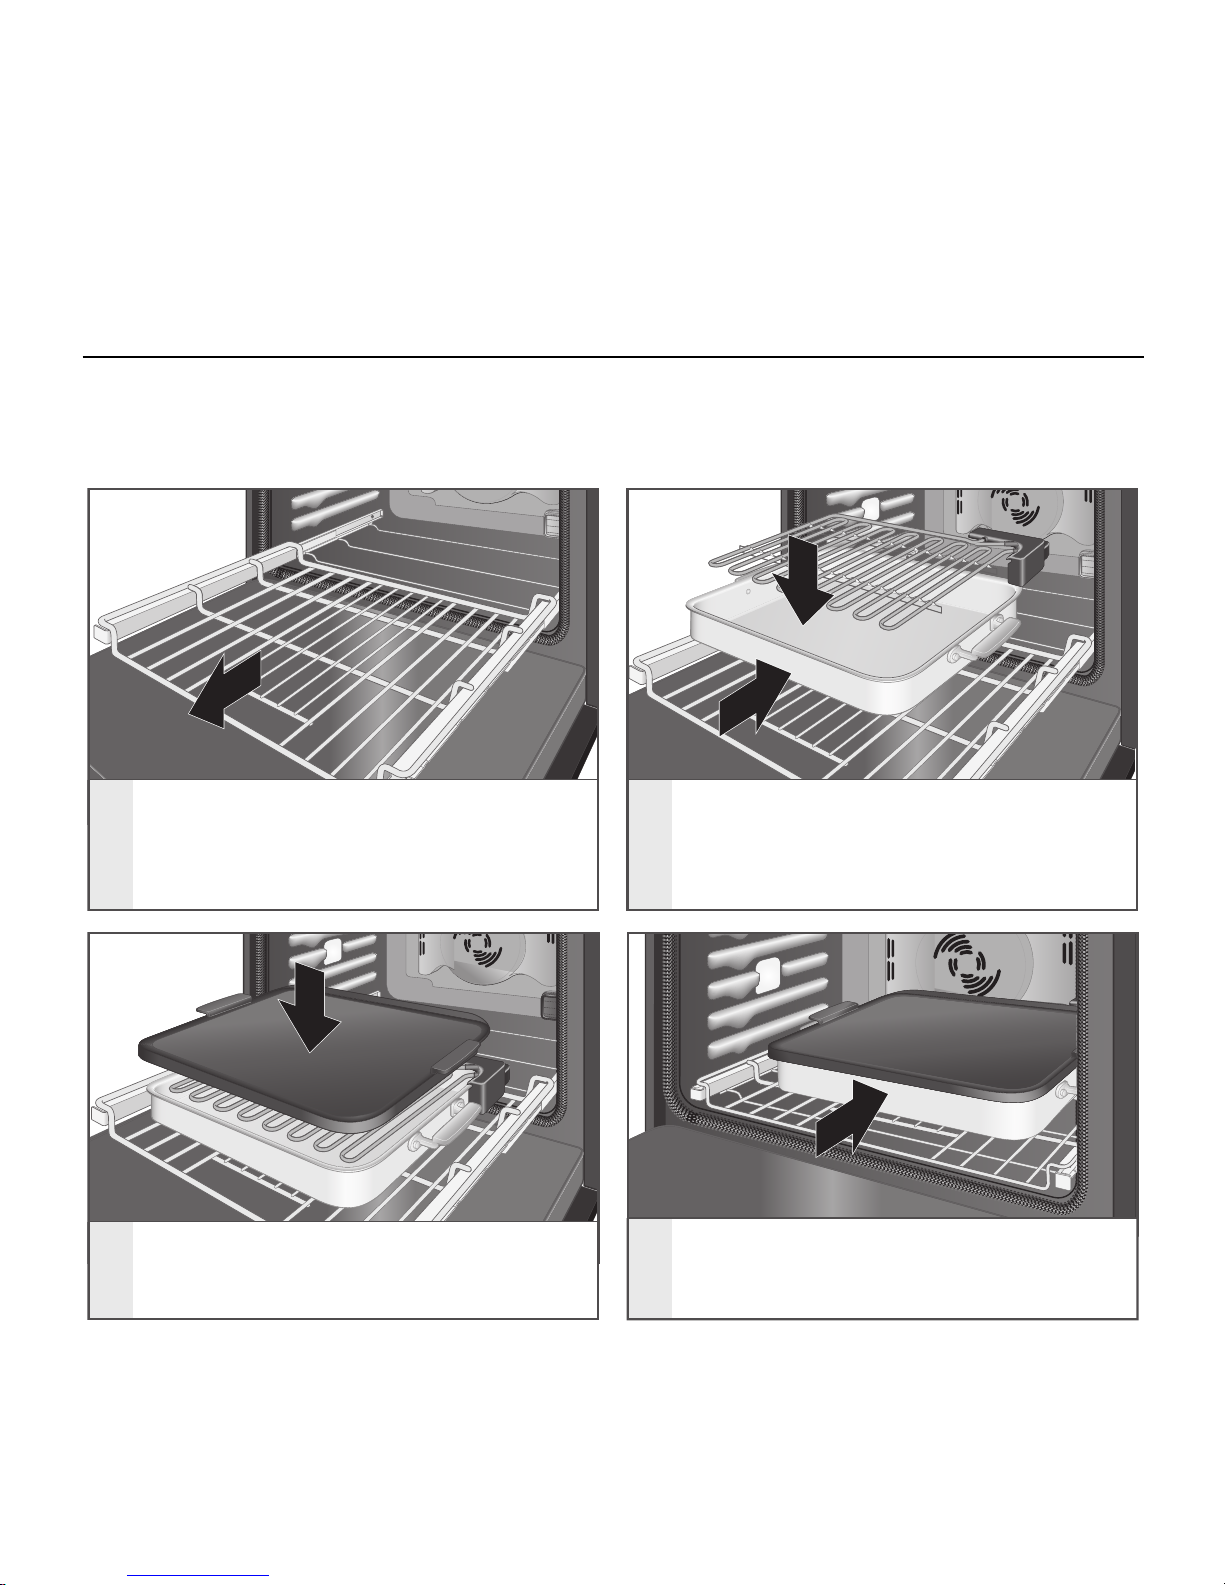
INSTALLATION DE LA PIERRE DE CUISSON
INSTALLATION
Les accessoires électriques peuvent être placés sur la grille coulissante SatinGlideTM conçue pour
four intelligent. Ils ne se balanceront et n’oscilleront pas s’ils sont bien installés. Toujours déployer
complètement la grille coulissante avant d’y placer un accessoire électrique. La grille coulissante se
verrouille en place lorsqu’elle est entièrement déployée.
1
2
1
2
3
4
Placer la grille coulissante à la position
la plus basse. Il faudra appliquer une
certaine force. Tirer sur la grille
Placer le plateau inférieur sur l’élément
chauffant de la grille coulissante.
Pousser le plateau inférieur vers
l’intérieur jusqu’à ce que les pieds
se verrouillent en place.
Placer la pierre de cuisson sur
l’élément chauffant.
Replacer complètement la grille
coulissante dans le four. Un signal
sonore se fait entendre et une icône
apparaît sur l’afficheur.
34 | INSTALLATION DE LA PIERRE DE CUISSON
Page 35

UTILISATION DE LA PIERRE DE CUISSON
MISE EN PLACE
Préchauffer la pierre de cuisson avant d’y placer
des aliments. Même si la durée du préchauffage
peut varier en fonction de la température du
four, l’élément chauffant ne prendra pas plus
de 30 minutes pour chauffer la pierre de cuisson.
La pierre de cuisson est lissée pour la rendre facile
à nettoyer, mais on peut y ajouter une feuille de
papier sulfuré.
CONSEILS POUR OBTENIR DE
BONS RÉSULTATS
y Pour placer plusieurs aliments sur la pierre de
cuisson et les enlever, placer le papier sulfuré
sur une tôle à biscuits sans rebord et placer
les aliments sur le papier en une seule couche.
Une fois la pierre de cuisson préchauffée, glisser
le papier sulfuré et les aliments sur la pierre
et les faire cuire normalement. Une fois prêts,
replacer le papier parchemin sur la tôle à biscuit.
y Couvrir la pierre de cuisson de papier sulfuré
pour en faciliter le nettoyage après la cuisson
d’une tarte de forme irrégulière, de tartelettes
ou de chaussons aux fruits. La garniture de
tarte peut être très difficile à nettoyer de la
pierre de cuisson.
y Pour facilement accéder à la pierre, tirer sur la
grille coulissante pour accessoires électriques.
Repousser simplement la pierre de cuisson
dans le four (dans les 2 minutes) pour
continuer la cuisson.
y Certains aliments, comme le pain et les petits
pains n’ont pas besoin d’être retournés.
Pour la cuisson d’aliments comme le poisson
ou le poulet frais panné, retourner à moitié
de la cuisson.
y Une pizza d’une taille maximum de 14 po
(35,6 cm) peut être placée sur la pierre de cuisson.
y Les aliments longs et minces comme les
baguettes peuvent être placés en diagonale
sur la pierre de cuisson pour qu’ils rentrent
bien dans le four.
UTILISATION DE LA PIERRE DE CUISSON | 35
Page 36
UTILISATION DE LA PIERRE DE CUISSON
NETTOYAGE
Laver la pierre de cuisson après chaque utilisation.
Les renversements d’aliments peuvent réagir avec
le revêtement et causer des taches permanentes,
rester collés à la pierre de cuisson ou produire
de la fumée.
y Pour éviter les dommages, ne pas utiliser
la fonction d’autonettoyage du four pour
la pierre de cuisson.
y La pierre de cuisson peut être lavée au lave-
vaisselle.
y Pour le nettoyage à la main, utiliser de l’eau
savonneuse et un chiffon doux ou une éponge.
y Le bicarbonate de soude peut aider à nettoyer
les taches tenaces.
y Éviter les variations de température extrêmes.
y Avant de procéder au nettoyage, laisser la
pierre de cuisson refroidir.
y Ne pas utiliser la pierre de cuisson si elle est
endommagée ou écaillée.
y Utiliser une spatule en plastique pour enlever
les aliments collés.
y Ne pas placer sous le gril.
y Éviter de cogner ou d’échapper la pierre de
cuisson ; elle pourrait se briser.
y Éviter de placer une casserole ou une grille
sur le dessus de la pierre de cuisson.
y La pierre de cuisson est sécuritaire pour les
ustensiles en métal.
y Au moment de déposer la pierre de cuisson
sur une surface quelconque, recouvrir cette
dernière d’un matériau résistant pour éviter
les égratignures.
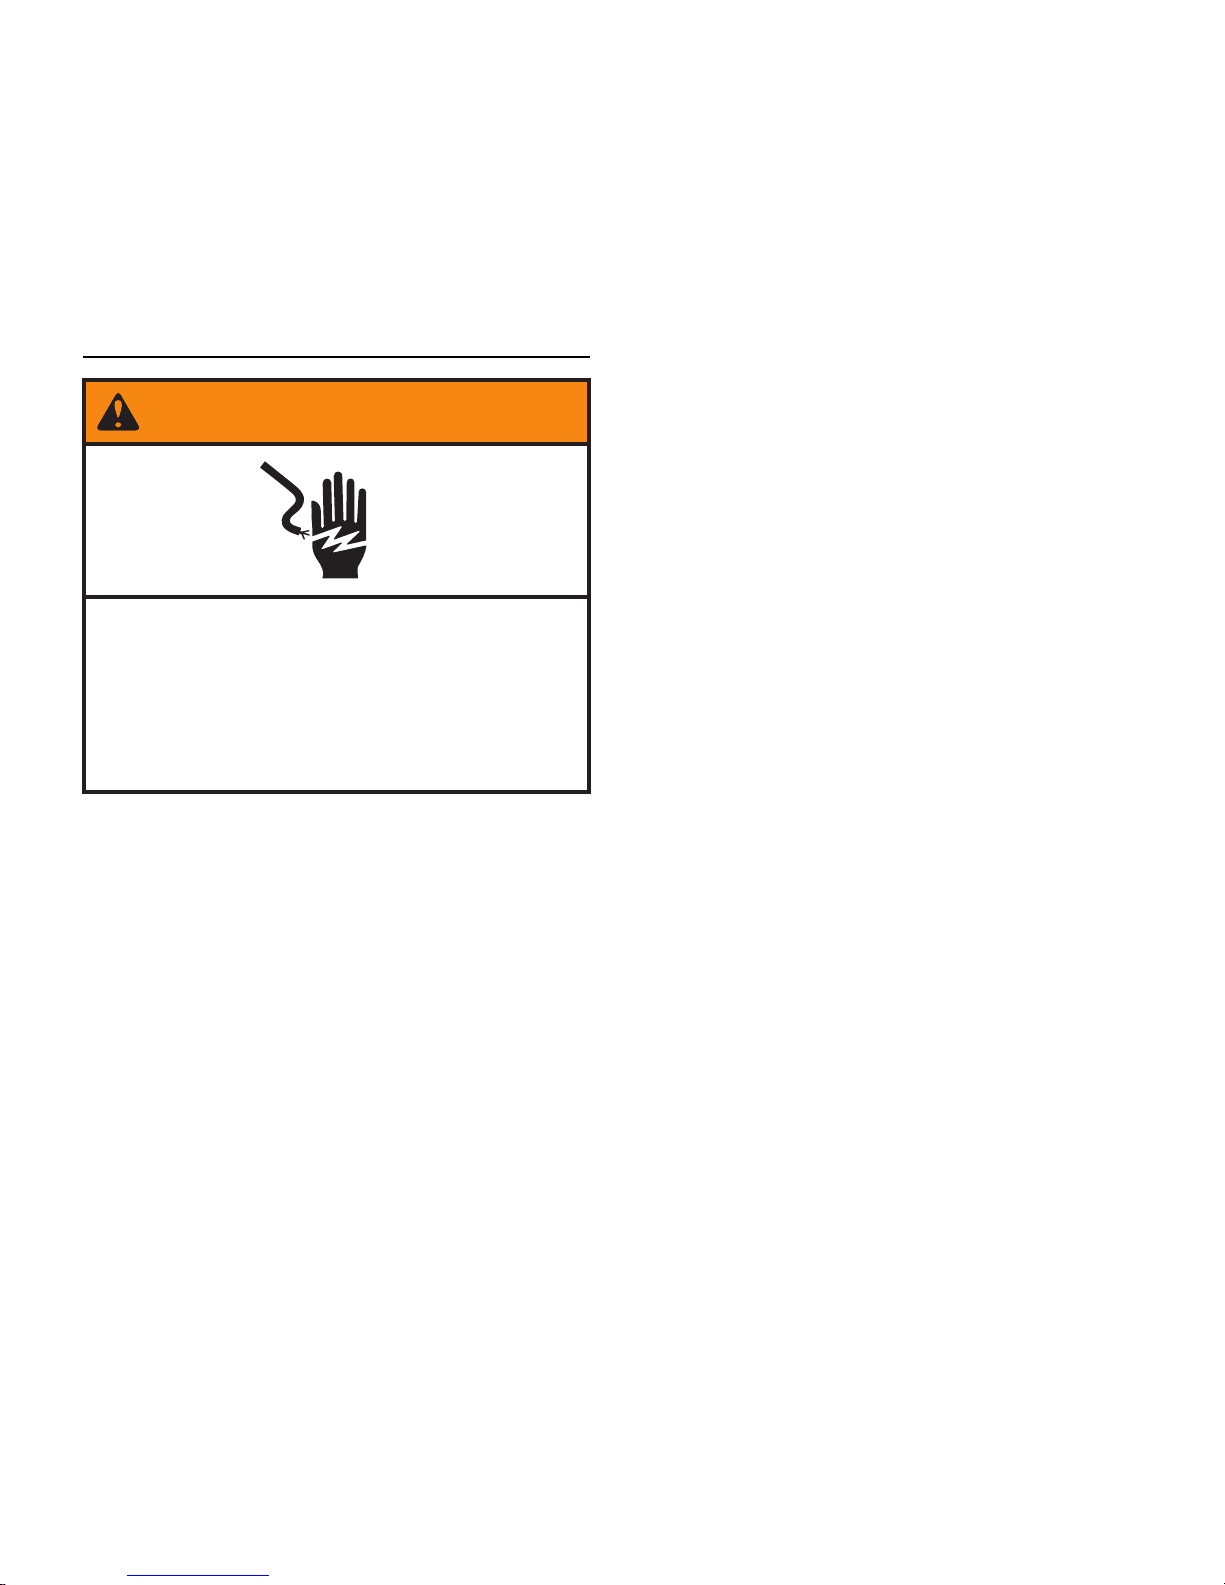
Risque de choc électrique
Ne pas plonger l’élément chauffant dans
l’eau ou le placer au lave-vaisselle.
Le non-respect de cette instruction peut
causer un décès ou une choc électrique.
AVERTISSEMENT
36 | UTILISATION DE LA PIERRE DE CUISSON
Page 37
Page 38
GRIL ÉLECTRIQUE POUR
FOUR INTELLIGENT
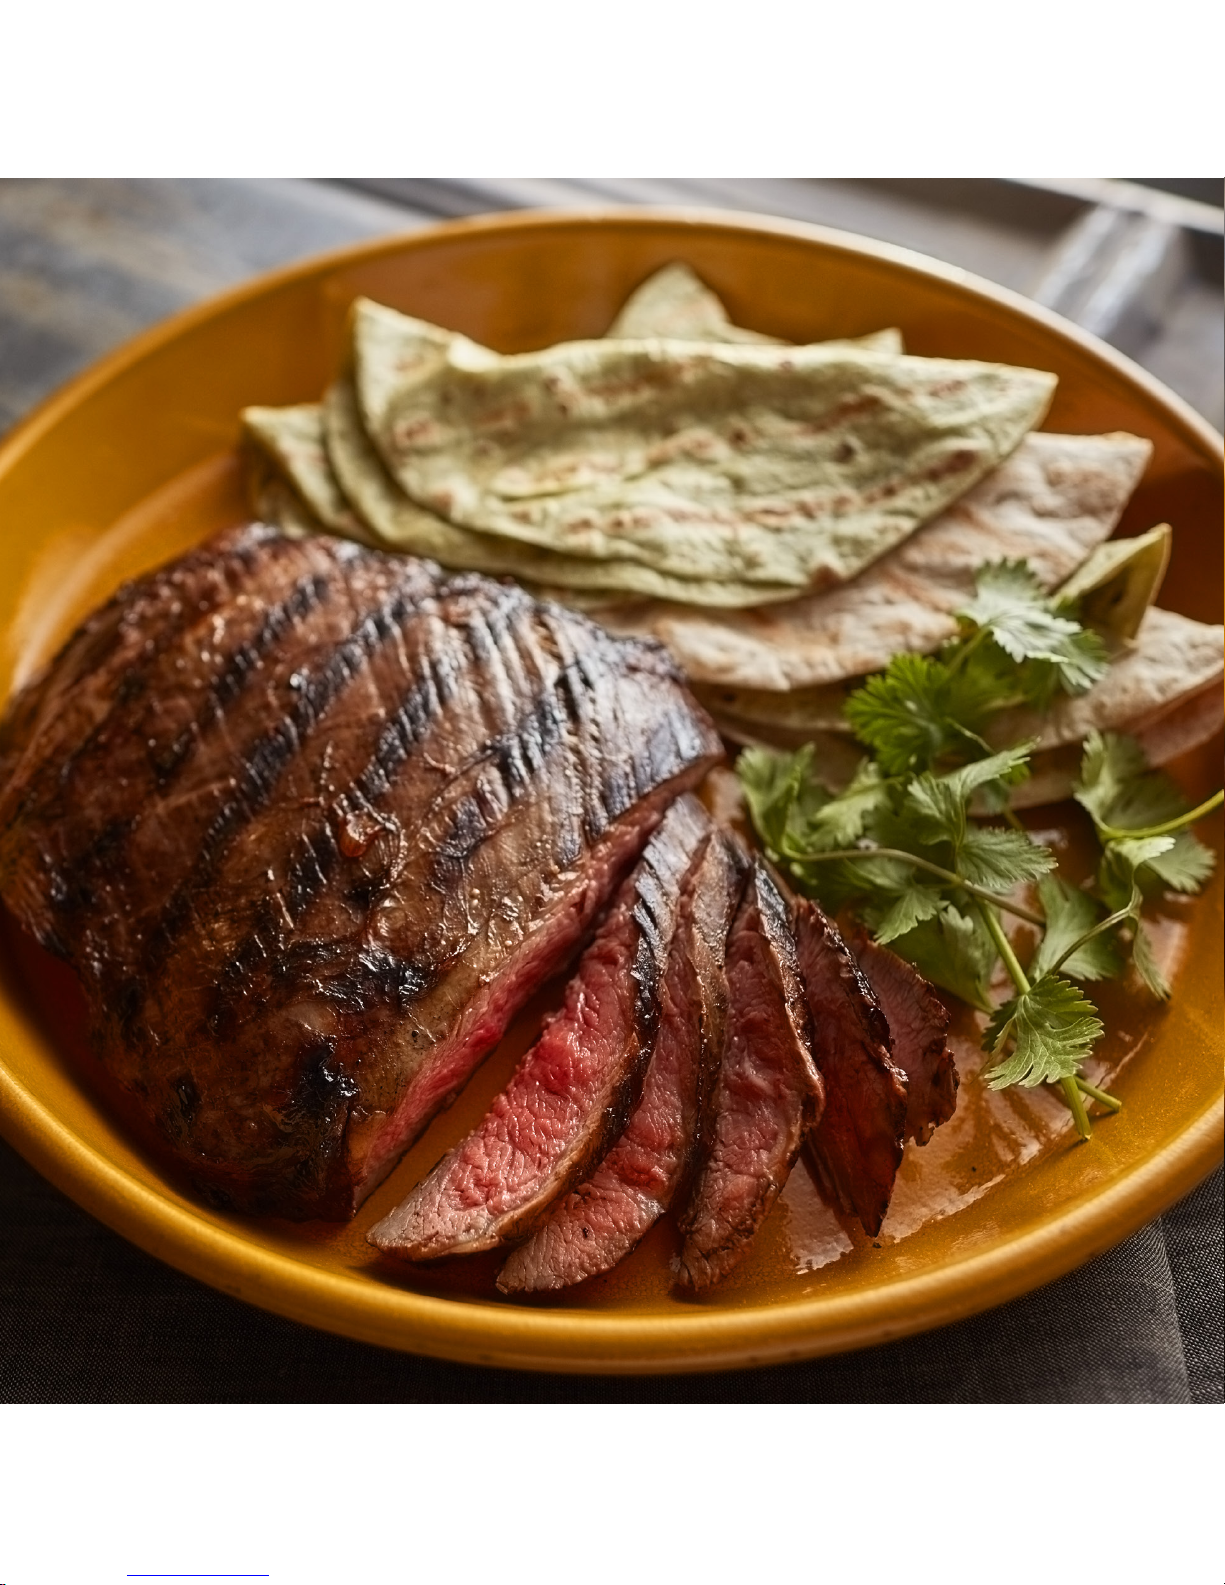
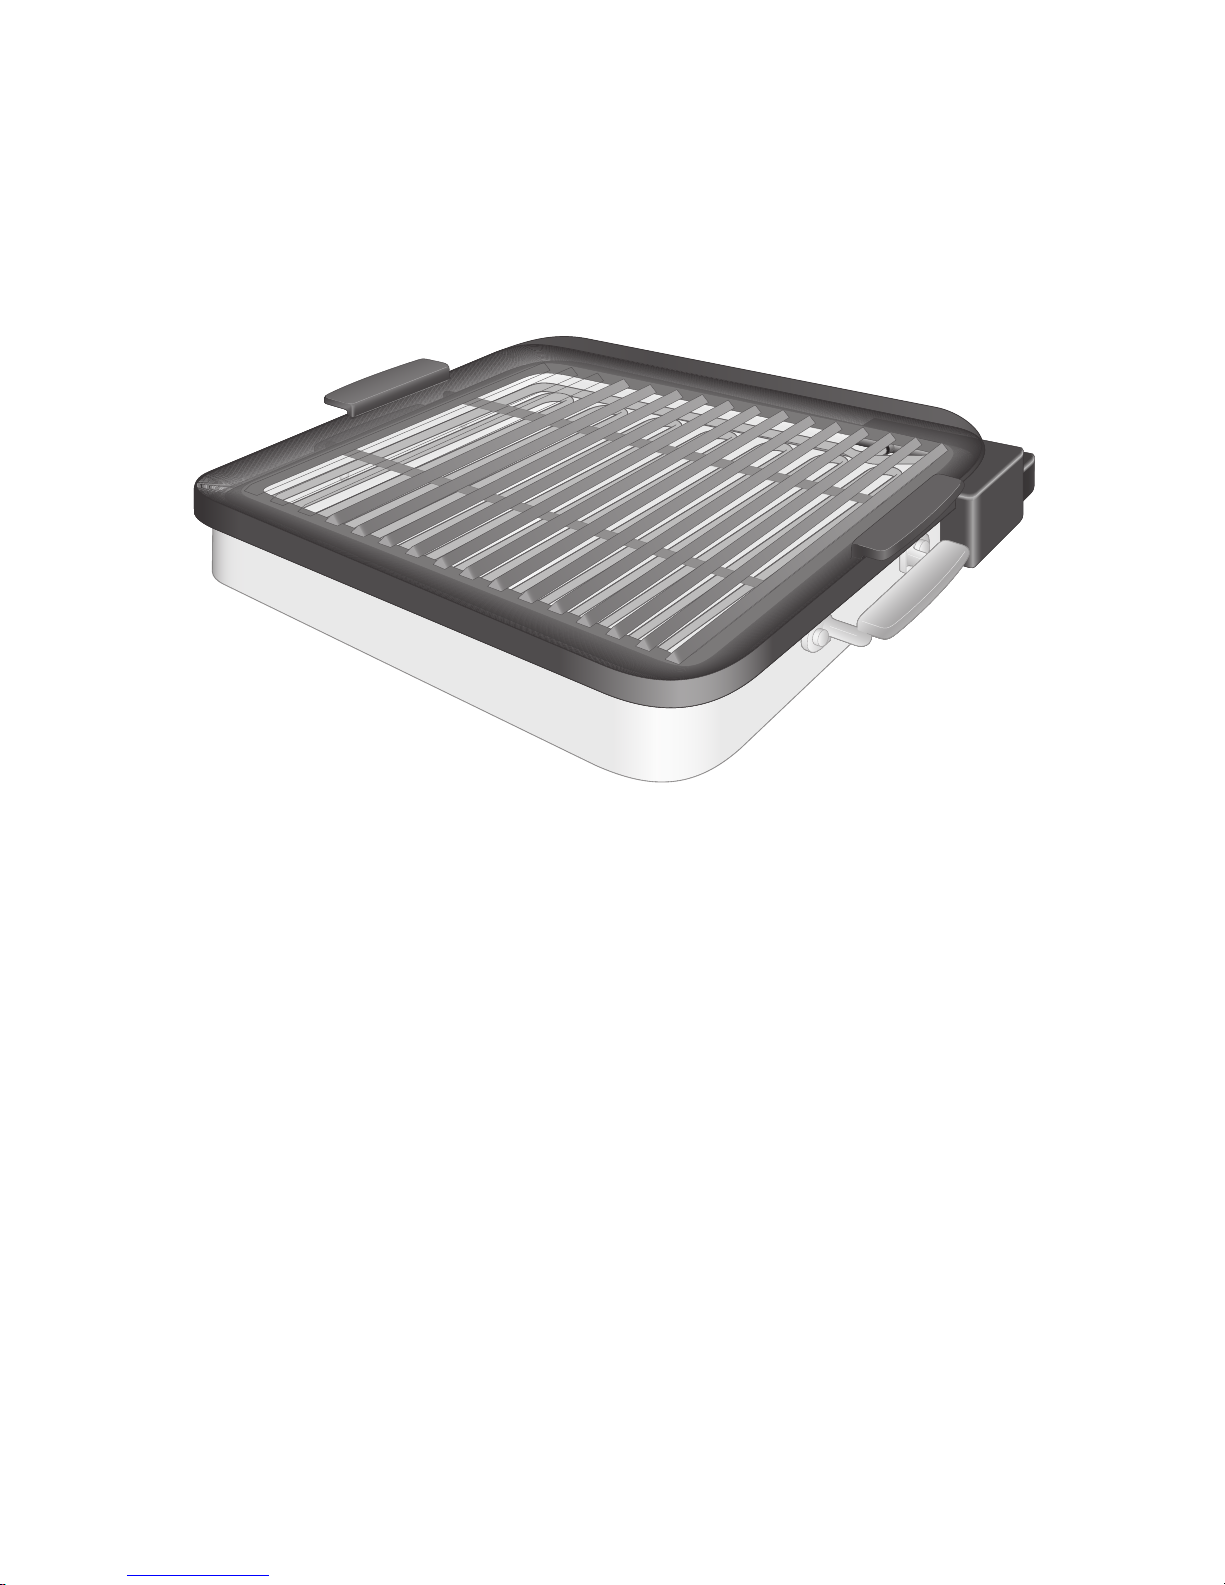
Le gril pour four intelligent permet de griller des aliments toute l’année. Sa conception de pointe
réduit la production de fumée et élimine les flambées si communes avec les barbecues extérieurs.
Il chauffe aussi de façon égale d’un bout à l’autre pour offrir des résultats égaux et permettre
d’utiliser toute la surface de cuisson. Il permet de préparer du bifteck des hamburgers, de la pizza
ou des pétoncles. Le gril peut être commandé à partir de l’écran ou surveillé et commandé à partir
d’un appareil mobile lorsque la commande à distance est activée.*
* Connexion Wi-Fi et application requises. Caractéristiques sujettes à changement. Pour obtenir les détails
etlapolitique en matière de vie privée, visiter le kitchenaid.com/connect.
38 | GRIL ÉLECTRIQUE POUR FOUR INTELLIGENT
Page 39
INSTALLATION DU GRIL
INSTALLATION
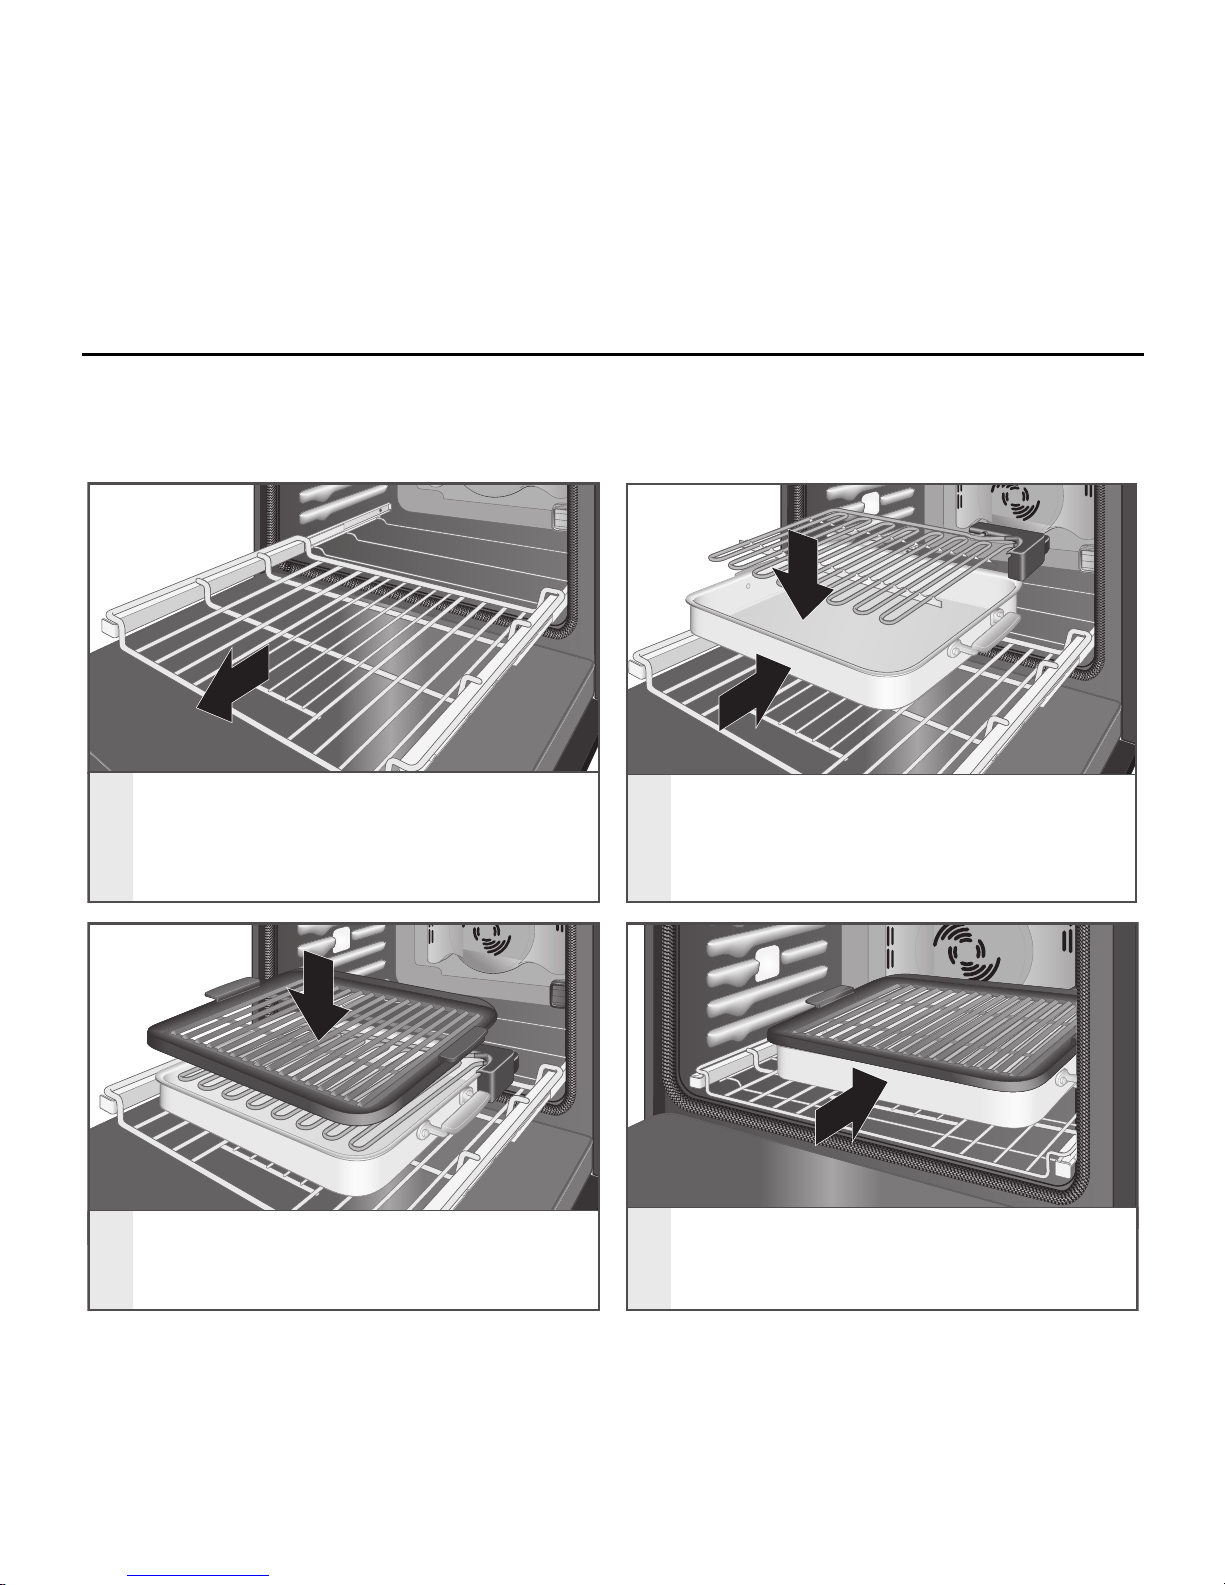
Les accessoires électriques peuvent être placés sur la grille coulissante SatinGlideTM conçue pour
four intelligent. Ils ne se balanceront et n’oscilleront pas s’ils sont bien installés. Toujours déployer
complètement la grille coulissante avant d’y placer un accessoire électrique. La grille coulissante se
verrouille en place lorsqu’elle est entièrement déployée.
1
2
1
2
3
4
Placer la grille coulissante à la position
la plus basse. Il faudra appliquer une
certaine force. Tirer sur la grille
Placer le plateau inférieur sur l’élément
chauffant de la grille coulissante.
Pousser le plateau inférieur vers
l’intérieur jusqu’à ce que les pieds
se verrouillent en place.
Placer le gril sur l’élément chauffant.
Replacer complètement la grille
coulissante dans le four. Un signal
sonore se fait entendre et une icône
apparaît sur l’afficheur.
INSTALLATION DU GRIL | 39
Page 40

UTILISATION DU GRIL
MISE EN PLACE
Préchauffer le gril selon les instructions de
la recette avant d’y placer des aliments.
Le gril possède une surface antiadhésive facile
à nettoyer. Les ustensiles en métal peuvent rayer
ou endommager la surface.
Le gril peut aussi servir à faire saisir et créer des
marques de gril. Pendant la cuisson, appuyer sur le
bouton Sear (saisir) situé sur les commandes. Le gril
atteindra une chaleur plus élevée pendant 5 minutes
pour créer des lignes de gril sur les aliments.
CONSEILS POUR OBTENIR DE
BONS RÉSULTATS
Aliment Notes
Poitrine de
poulet avec os
(jusqu’à 12 oz chacune)
Mettre le côté peau vers
le bas en premier.
Poitrine de
poulet sans os
(jusqu’à 8 à 10 oz
chacune)
Mettre le côté lisse vers
le bas en premier.
Galettes de
viande hachée
(galette jusqu’à 1/4 lb
[115 g] chacune)
Une viande maigre à
80 % ou plus donnera
les meilleurs résultats.
Pizza
(jusqu’à 8 po
[20,3 cm] de
diamètre)
Trop de garnitures ou de
sauce peuvent rendre la pizza
détrempée. Des garnitures
précuites ou crues qui n’ont
besoin que d’être réchauffées
devraient être utilisées.
Fruit
Cuire jusqu’à ce que les deux
côtés aient des marques de
gril et que les fruits au centre
soient chauds. Ne pas trop
cuire pour ne pas rendre
les fruits trop mous.
y Ajouter 1 tasse (240 ml) d’eau dans le plateau
inférieur lors de l’utilisation du gril pour
éviter la production de fumée (recommandé
pour la cuisson d’aliments gras comme les
hamburgers, le bifteck de faux-filet, etc.).
y Lors de la cuisson de pièce de poisson ou de
viande d’épaisseurs inégales, placer la partie
la plus épaisse au centre du gril pour obtenir
un résultat plus uniforme.
y Pour obtenir les meilleurs résultats, ne pas
retourner les filets de poisson minces.
y Enlever l’excès de gras de la viande et du
poulet. Pour la cuisson de biftecks et de
côtelettes, couper les rebords de gras pour
éviter que la viande ne se courbe.
y Faire griller des aliments qui ont
approximativement la même taille et épaisseur.
Laisser 1 po (2,5 cm) entre chaque aliment
grillé.
y N’ajouter les marinades liquides que pendant
les quelques dernières minutes. Les marinades
liquides ont tendance à brûler si elles sont
ajoutées trop tôt.
y Assaisonner d’herbe et de marinades sèches
avant la cuisson, mais ne saler qu’une fois la
cuisson terminée.
y Pour la cuisson d’une pizza, griller d’abord la
croûte jusqu’à ce que les marques de gril soient
de la couleur souhaitée. Retirer la croûte du
gril et ajouter les garnitures sur le côté grillé.
Replacer la pizza sur le gril pour terminer la
cuisson.
y Ouvrir la porte peut ralentir la cuisson et nuire
au rôtissage.
y Toujours utiliser un thermomètre à viande à
lecture instantanée pour déterminer la cuisson.
40 | UTILISATION DU GRIL
Page 41
UTILISATION DU GRIL
NETTOYAGE
Laver le gril après chaque utilisation.
Les renversements d’aliments peuvent réagir avec
le revêtement et causer des taches permanentes,
rester collés sur le gril ou produire de la fumée.
y Pour éviter les dommages, ne pas utiliser la
fonction d’autonettoyage du four pour le gril.
y Le gril peut être lavé au lave-vaisselle.
y Pour le nettoyage à la main, utiliser de
l’eau savonneuse et un chiffon doux ou une
éponge.
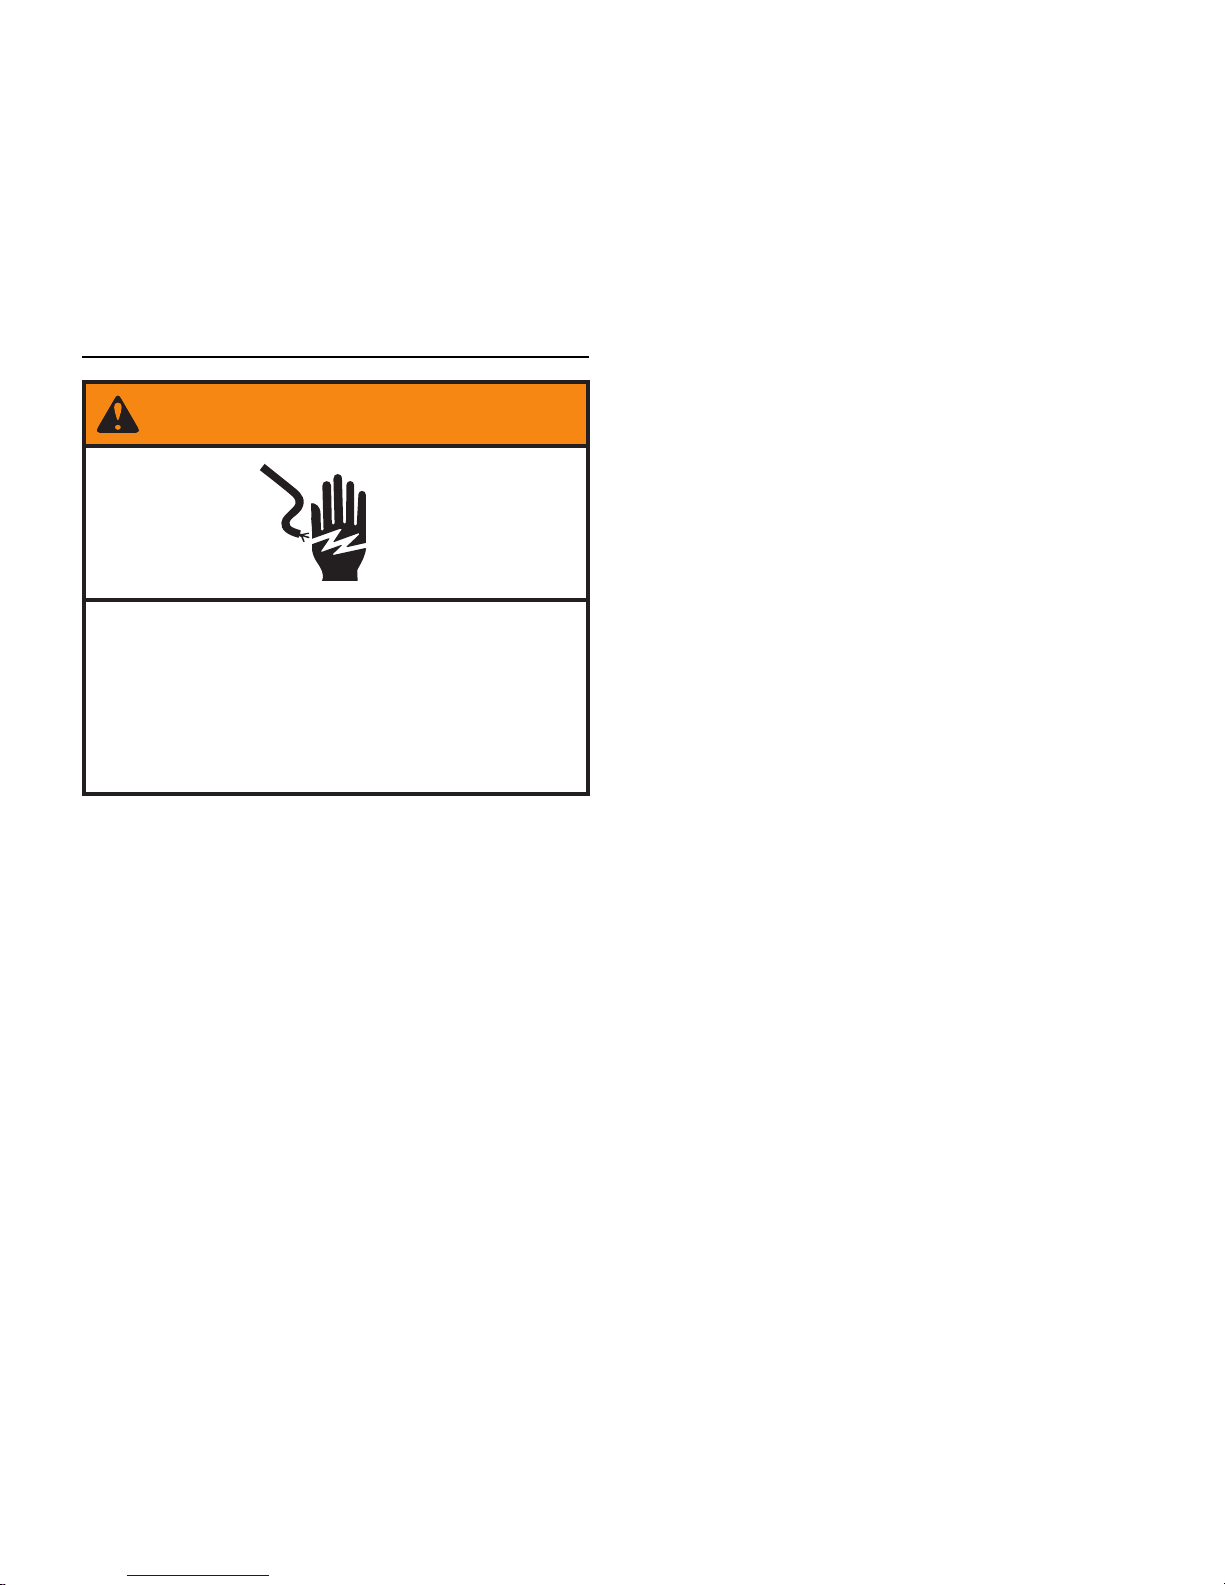
Risque de choc électrique
Ne pas plonger l’élément chauffant dans
l’eau ou le placer au lave-vaisselle.
Le non-respect de cette instruction peut
causer un décès ou une choc électrique.
AVERTISSEMENT
UTILISATION DU GRIL | 41
Page 42
Page 43
CUISEUR-VAPEUR ÉLECTRIQUE
POUR FOUR INTELLIGENT
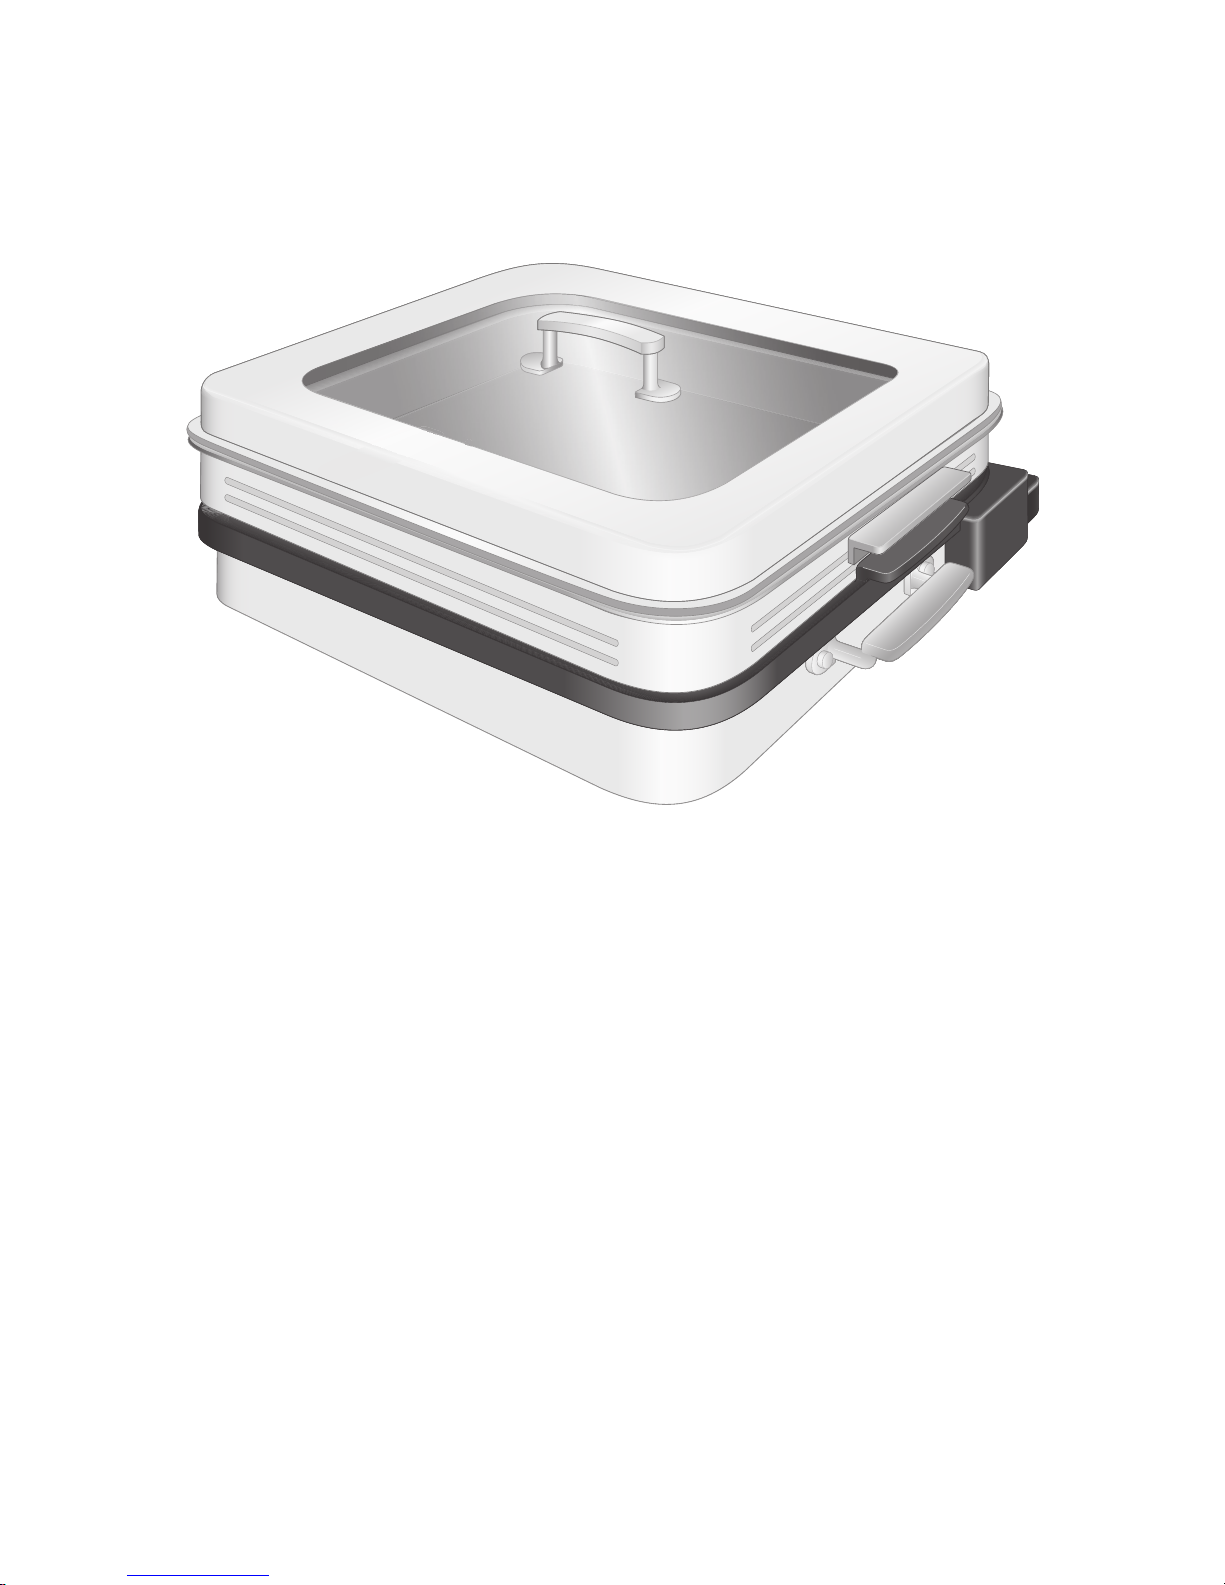
Le cuiseur-vapeur électrique pour four intelligent garde les aliments tendres et offre les avantages
de la cuisson à la vapeur. Il permet de cuire à la vapeur une grande variété d’aliments. Il permet
même de préparer un repas complet pour quatre qui comprend de la viande ou du poisson, des
pommes de terre ou des pâtes et des légumes. Cet accessoire peut aussi être utilisé avec le mode
injection de vapeur pour créer un environnement de cuisson humide parfait pour les pâtisseries,
pains et rôtis. Le cuiseur-vapeur peut être commandé à partir de l’écran ou surveillé et commandé
à partir d’un appareil mobile lorsque la commande à distance est activée.*
* Connexion Wi-Fi et application requises. Caractéristiques sujettes à changement. Pour obtenir les détails
etlapolitique en matière de vie privée, visiter le kitchenaid.com/connect.
CUISEUR-VAPEUR ÉLECTRIQUE POUR FOUR INTELLIGENT | 43
Page 44
INSTALLATION DU CUISEUR-VAPEUR
INSTALLATION
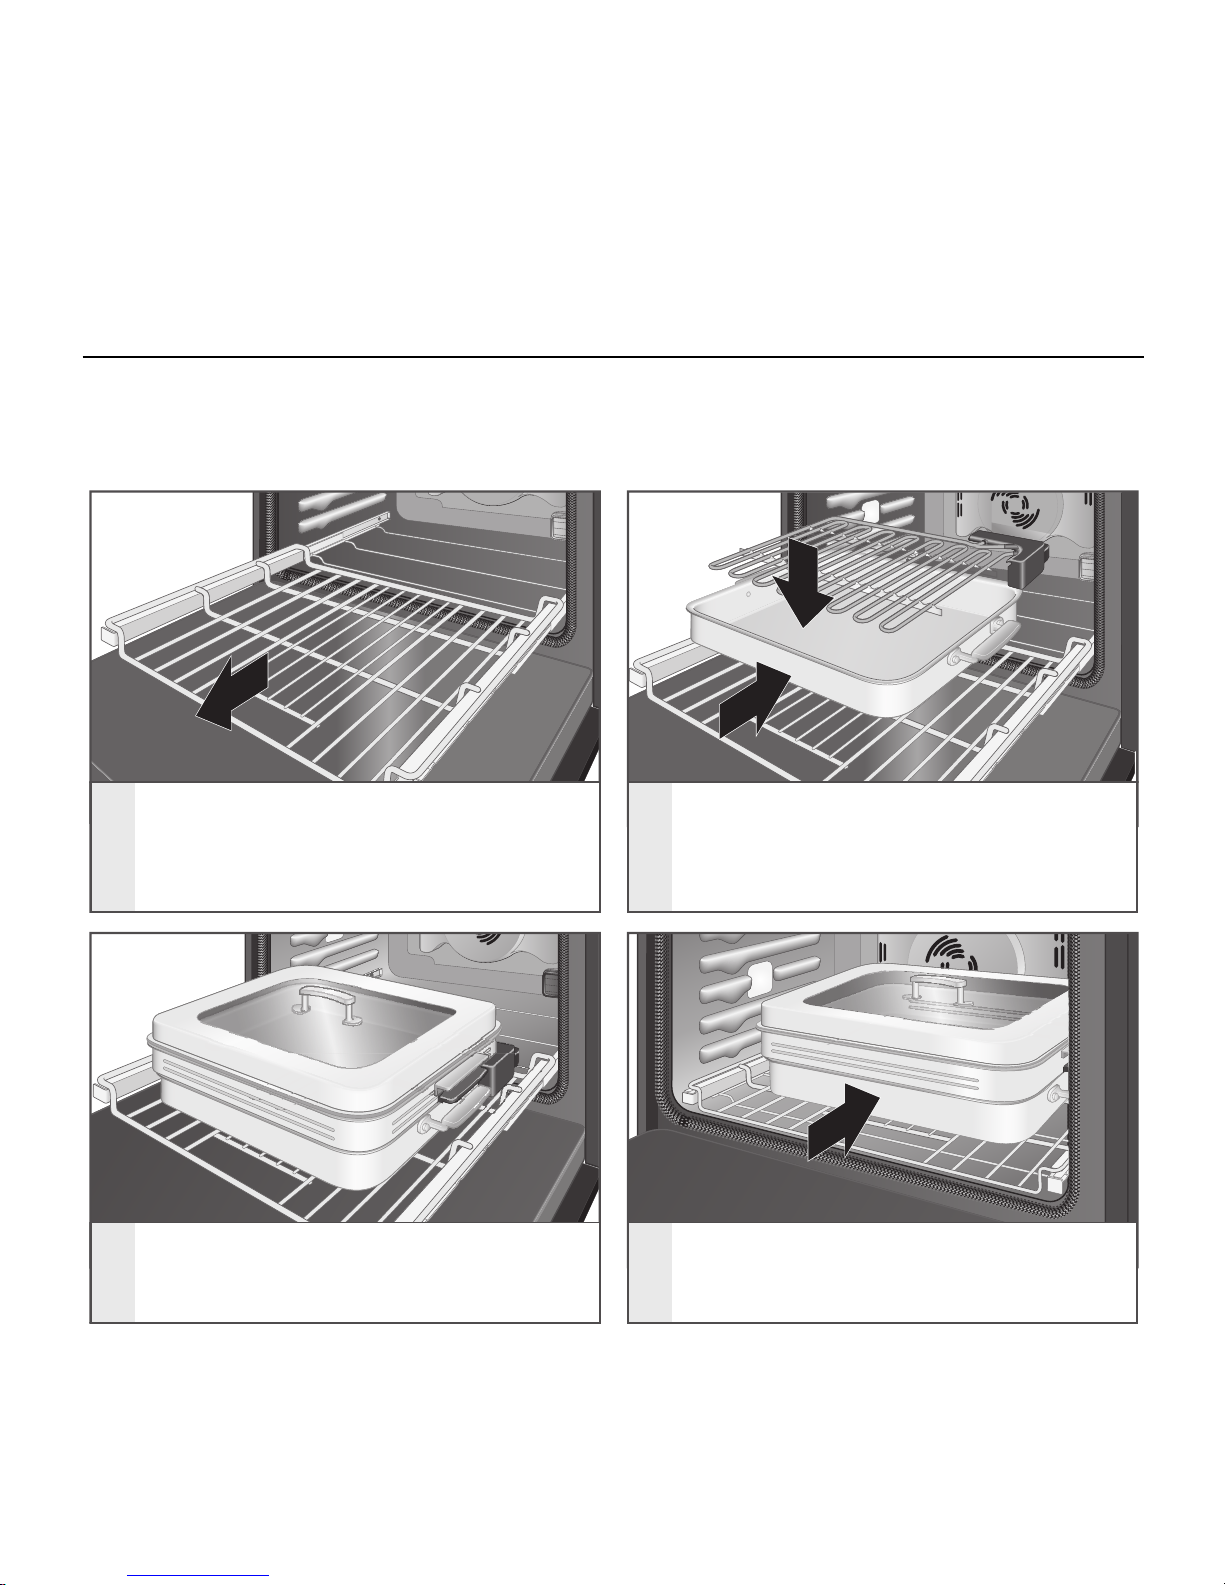
Les accessoires électriques peuvent être placés sur la grille coulissante SatinGlideTM conçue pour
four intelligent. Ils ne se balanceront et n’oscilleront pas s’ils sont bien installés. Toujours déployer
complètement la grille coulissante avant d’y placer un accessoire électrique. La grille coulissante se
verrouille en place lorsqu’elle est entièrement déployée.
1
2
1
2
3
4
Placer la grille coulissante à la position
la plus basse. Il faudra appliquer une
certaine force. Tirer sur la grille.
Placer le plateau inférieur sur l’élément
chauffant de la grille coulissante.
Pousser le plateau inférieur vers
l’intérieur jusqu’à ce que les pieds
se verrouillent en place.
Placer le cuiseur-vapeur sur
l’élément chauffant.
Replacer complètement la grille
coulissante dans le four. Un signal
sonore se fait entendre et une icône
apparaît sur l’afficheur.
44 | INSTALLATION DU CUISEUR-VAPEUR
Page 45
UTILISATION DU CUISEUR-VAPEUR
MISE EN PLACE
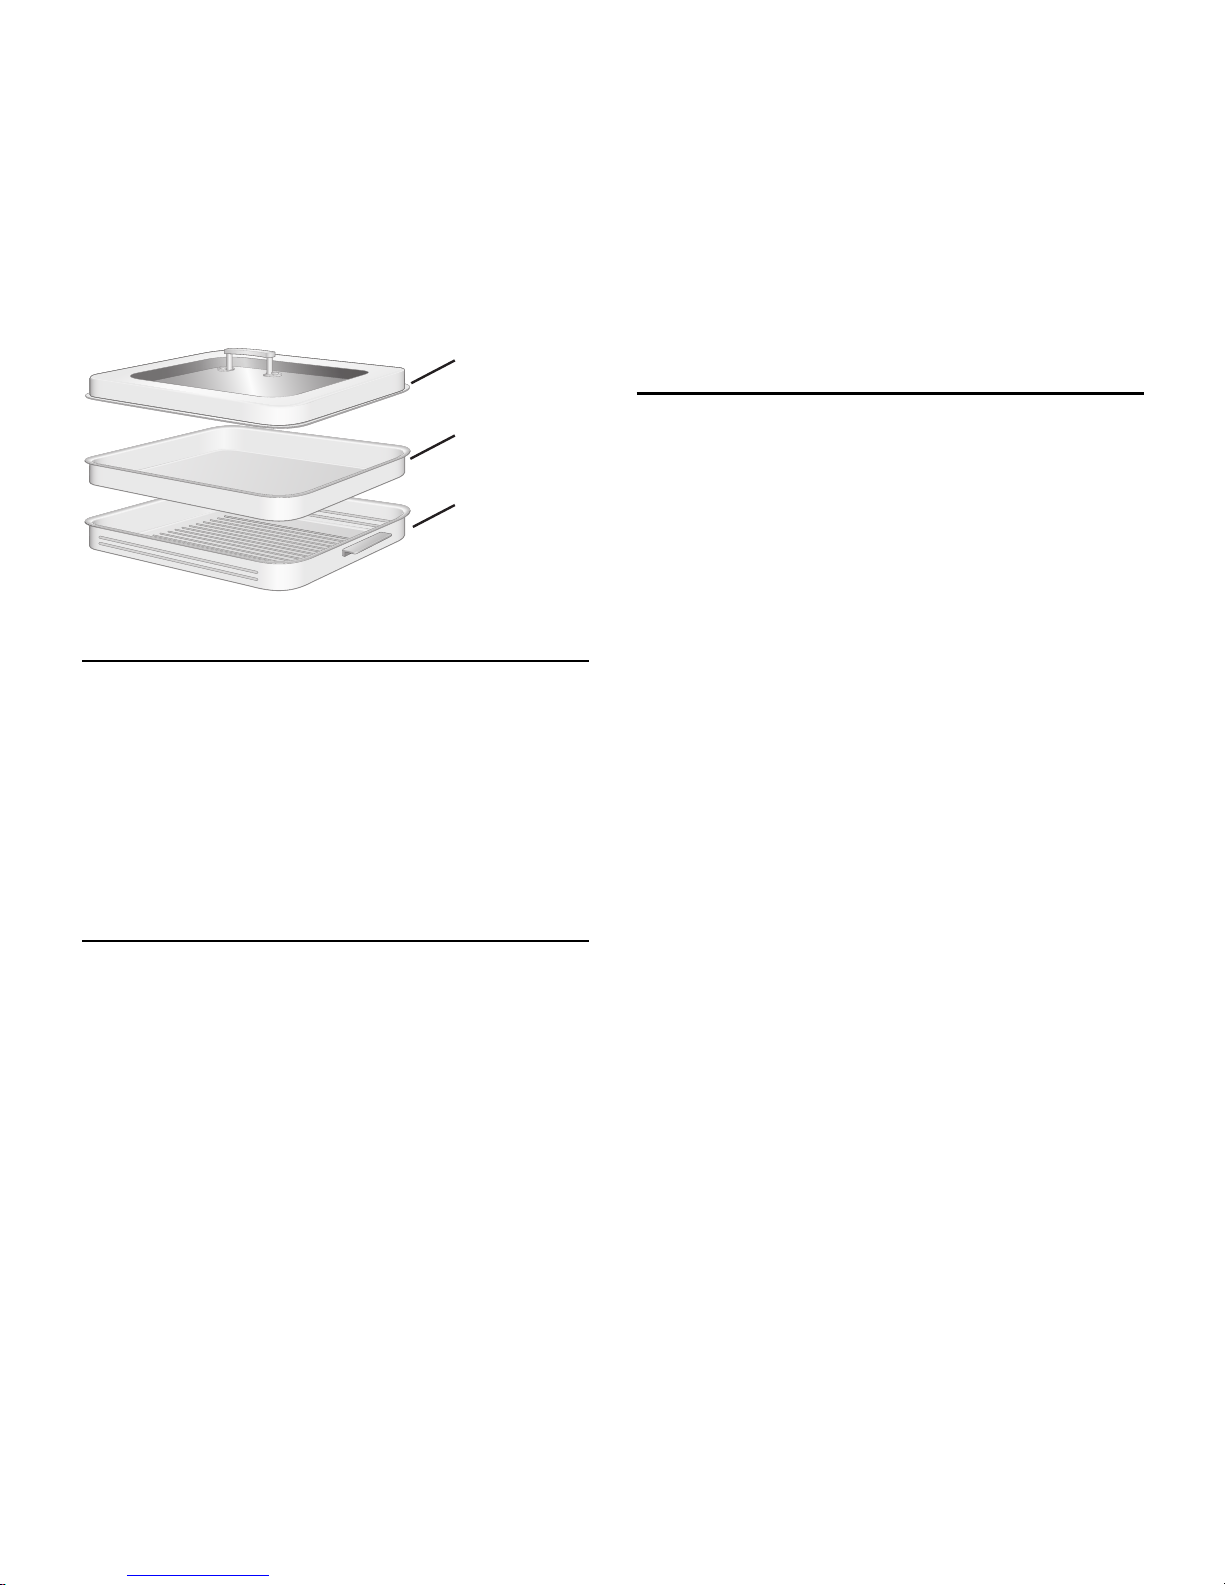
Verser environ 4 tasses (960 ml) d’eau dans le bac
à eau du cuiseur-vapeur, puis placer le plateau
perforé du cuiseur-vapeur sur le bac.
Le cuiseur-vapeur est conçu pour contenir 6 portions
d’aliments. Placer les aliments en une seule couche
sur le plateau perforé du cuiseur-vapeur en laissant
de l’espace entre chaque aliment. Couvrir à l’aide
du couvercle du cuiseur-vapeur.
MODE INJECTION DE VAPEUR
Le mode injection de vapeur combine la chaleur
sèche d’une cuisson par convection et la vapeur
pour créer un environnement de cuisson humide,
ce qui améliore le parfum et la texture des aliments.
Ce mode est parfait pour les aliments comme le
gâteau au fromage, le pain et les dindes ou poulets
entiers puisqu’il permet de garder l’intérieur
humide et de faire rôtir l’extérieur des aliments.
Le mode injection de vapeur utilise le cuiseurvapeur. Lors de la cuisson avec le mode injection
de vapeur, ne pas utiliser le couvercle du cuiseurvapeur. Ceci permettra à la vapeur de s’échapper
et de remplir le four pendant la cuisson.
CONSEILS POUR OBTENIR DE
BONS RÉSULTATS
y Des pièces de taille semblable cuiront de
façon plus uniforme.
y Différents aliments, comme du poisson
et des légumes, peuvent être préparés
en même temps sans mélanger les parfums.
y Pour obtenir les meilleurs résultats, choisir
des aliments qui ont besoin de cuir environ
le même temps.
y Toujours ouvrir le couvercle du cuiseur-vapeur
pour permettre à la vapeur de s’échapper.
y Ouvrir le four et retirer fréquemment le
couvercle du cuiseur-vapeur pendant la
cuisson affectera la qualité des aliments.
Ne vérifier les aliments que lorsque c’est
nécessaire.
y Lorsque le mode injection de vapeur est
utilisé pour des aliments comme un gâteau au
fromage, placer l’aliment dans un plat normal
directement sur le plateau perforé du cuiseurvapeur, dans le bac à eau du cuiseur-vapeur, mais
ne pas utiliser le couvercle du cuiseur-vapeur.
y Lorsque le mode injection de vapeur est utilisé
avec des aliments comme du pain ou de la
volaille, placer l’aliment dans un plat normal
(comme l’indiquent les instructions de cuisson)
directement sur une grille ordinaire au-dessus
du cuiseur-vapeur.
Couvercle du
cuiseur-vapeu
r
Bac à eau du
cuiseur-vapeu
r
Plateau
perforé du
cuiseur-vapeur
UTILISATION DU CUISEUR-VAPEUR | 45
Page 46
UTILISATION DU CUISEUR-VAPEUR
NETTOYAGE
Laver le couvercle, le plateau perforé et le bac
à eau du cuiseur-vapeur après chaque utilisation.
Les renversements d’aliments peuvent réagir avec
le matériau et causer des taches permanentes,
rester collés sur le plateau perforé du cuiseurvapeur ou produire de la fumée.
y Pour éviter les dommages, ne pas utiliser
la fonction d’autonettoyage du four pour
le cuiseur-vapeur.
y Le cuiseur-vapeur peut être lavé au lave-vaisselle.
y Pour le nettoyage à la main, utiliser de l’eau
savonneuse et un chiffon doux ou une éponge.
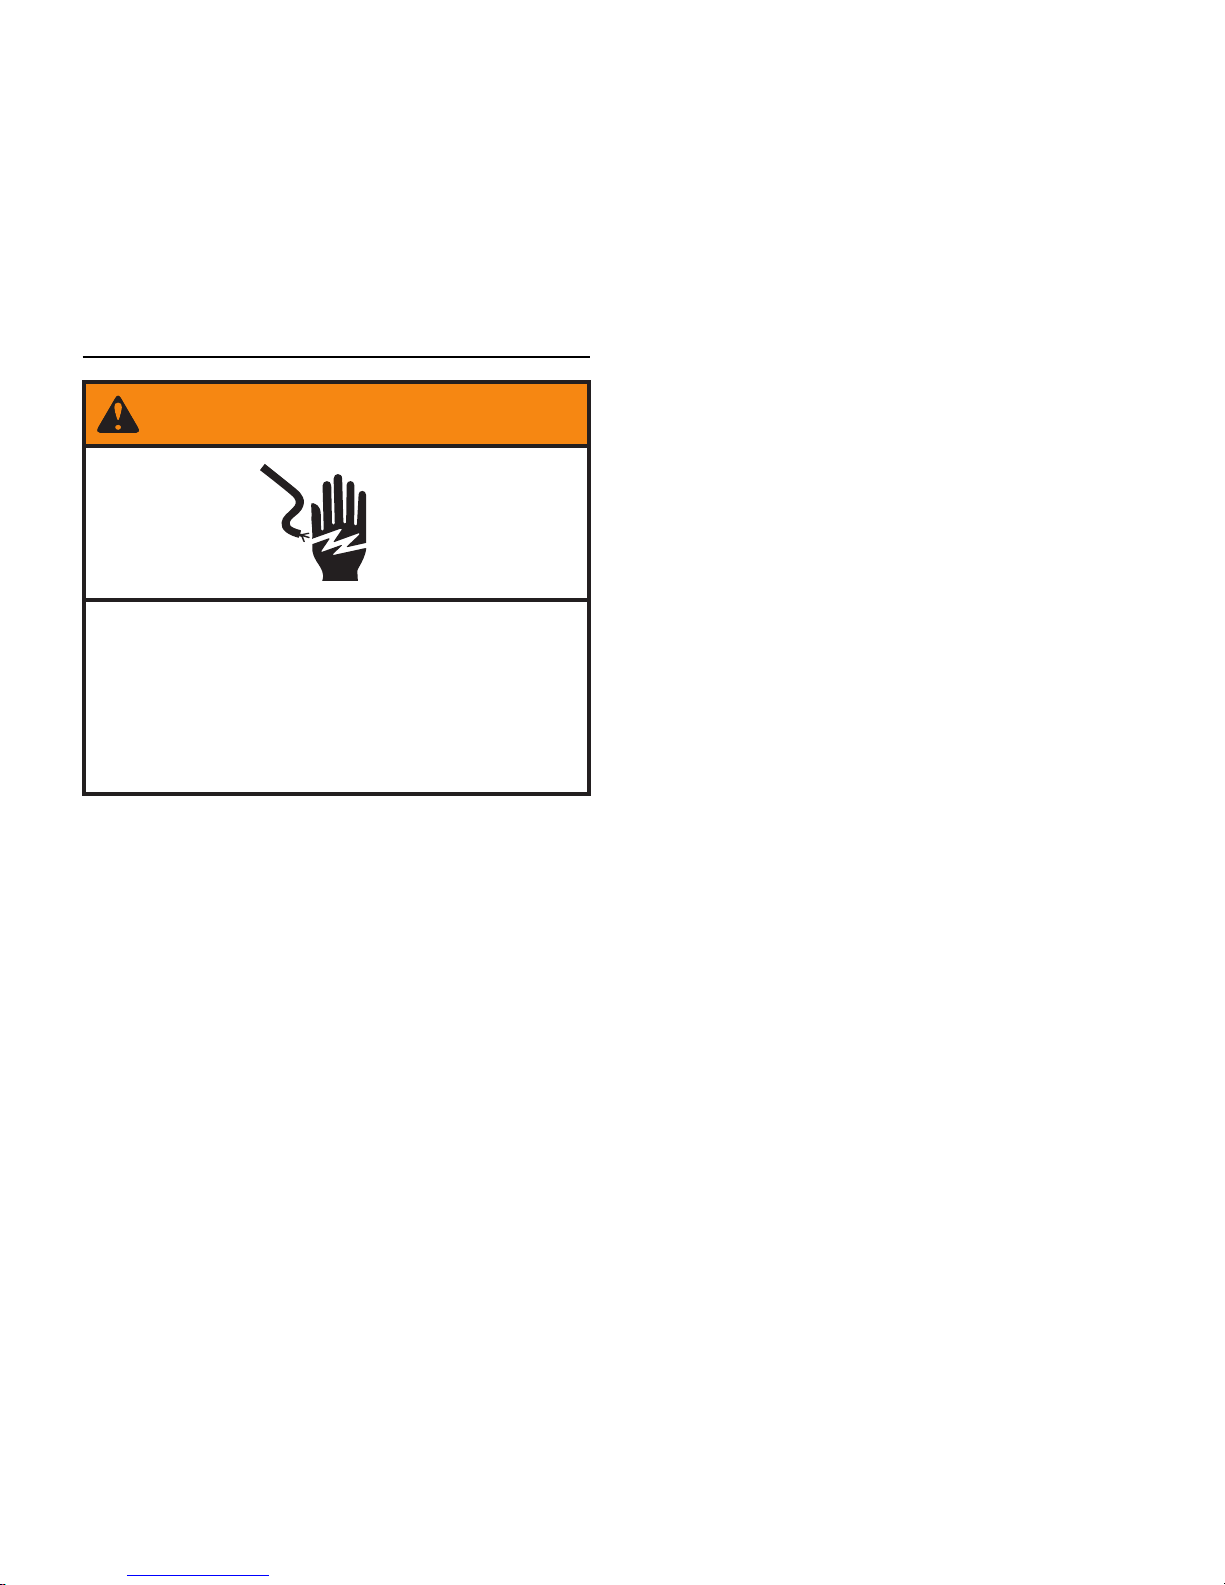
Risque de choc électrique
Ne pas plonger l’élément chauffant dans
l’eau ou le placer au lave-vaisselle.
Le non-respect de cette instruction peut
causer un décès ou une choc électrique.
AVERTISSEMENT
46 | UTILISATION DU CUISEUR-VAPEUR
Page 47

DÉPANNAGE
Essayez d’abord les solutions suggérées ici. Pour obtenir de l’aide ou des recommandations
supplémentaires pour éviter un appel de service, visiter le http://producthelp.kitchenaid.com.
Au Canada, visiter le http://www.kitchenaid.ca.
Il est possible d’adresser ses commentaires ou questions par courrier à l’adresse ci-dessous :
Aux États-Unis :
KitchenAid Brand Home Appliances
Customer eXperience Center
553 Benson Road
Benton Harbor, MI 49022-2692
Au Canada :
KitchenAid Brand Home Appliances
Customer eXperience Centre
200 – 6750 Century Ave.
Mississauga, Ontario L5N 0B7
Veuillez indiquer dans votre correspondance un numéro de téléphone où l’on peut vous joindre dans la journée.
INFORMATIONS GÉNÉRALES
1. La prise ne s’allume pas – Vérifier la grille
coulissante SatinGlideTM pour s’assurer que
l’accessoire pour four intelligent est bien
placé et aligné. Si c’est le cas, s’assurer que
le plateau inférieur est bien placé. Les pieds
du plateau inférieur devraient s’asseoir sur les
3e et 10e espaces (à partir de la gauche) de la
grille. Une fois en place, glisser doucement de
nouveau le plateau inférieur à sa place jusqu’à
ce qu’il se verrouille en place sur la grille.
2. Aucune tonalité de connexion – Il y a un
retard d’environ 2 secondes avant la tonalité.
Si la tonalité ne se fait pas entendre, tirer
complètement sur le plateau inférieur
avec l’élément chauffant et le replacer
correctement. Attendre la tonalité.
3. L’accessoire n’est pas à la bonne place
sur la grille coulissante pour accessoires
électriques – Vérifier que la grille coulissante
pour accessoires électriques est bien placée.
S’assurer que le bon accessoire est utilisé.
Les pieds du plateau inférieur devraient bien
s’asseoir sur les 3e et 10e espaces (à partir de
la gauche) de la grille.
4. L’accessoire électrique se débranche
pendant la cuisson – Une tonalité (différente
de celle de connexion) se fait entendre si
l’accessoire électrique se débranche et l’icône
ne sera plus affichée à l’écran. Ouvrir le
four et tirer sur la grille coulissante pour
accessoires électriques pour débrancher le
plateau inférieur et l’accessoire électrique de
la prise. Ensuite, repousser la grille coulissante
et l’accessoire électrique pour rebrancher
l’accessoire à la prise. S’assurer que la tonalité
de connexion se fait entendre et que l’icône
s’affiche de nouveau à l’écran. Cette opération
peut être effectuée avec l’accessoire utilisé
(gril, pierre de cuisson, cuiseur-vapeur, etc.).
À noter que seul le gril se fixe de façon
sécuritaire au plateau inférieur.
DÉPANNAGE | 47
Page 48

DÉPANNAGE
INFORMATIONS GÉNÉRALES
5. Le four produit de la fumée – Il est temps
d’effectuer un autonettoyage si le four
commence à produire de la fumée pendant
la cuisson. Une fois la cuisson terminée et les
accessoires électriques refroidis, retirer les
accessoires et la grille coulissante, puis lancer
un programme d’autonettoyage.
REMARQUE : La production de vapeur
pendant une cuisson ordinaire est normale,
elle se dissipera rapidement et n’occasionnera
que très peu d’odeur.
6. Le grill produit de la fumée – Une fois refroidi,
retirer l’accessoire électrique, le gril et le
plateau inférieur du four. Le plateau inférieur
et l’accessoire électrique peuvent être lavés
au lave-vaisselle. Nettoyer le gril ou le plateau
inférieur à la main ou au lave-vaisselle.
7. De la fumée/vapeur s’échappant du four
modifie l’interface utilisateur (IU) – Si de
la vapeur s’échappant du four affecte l’IU,
simplement appuyer une fois sur le bouton
de retour pour revenir à la minuterie
de préchauffage/cuisson. Si la vapeur a
entièrement annulé un mode de cuisson,
utiliser l’IU pour revenir aux réglages de
cuisson précédents.
48 | DÉPANNAGE
Page 49
GARANTIE
GARANTIE DES ACCESSOIRES ÉLECTRIQUES KITCHENAID® POUR LES 50 ÉTATS
DES ÉTATS-UNIS LE DISTRICT FÉDÉRAL DE COLUMBIA, PORTO RICO ET LE CANADA
La présente garantie couvre l’acheteur et les propriétaires suivants des accessoires électriques lorsqu’ils
sont utilisés dans les 50 États des États-Unis, le district fédéral de Columbia, à Porto Rico et au Canada.
Durée de la garantie :
Garantie complète d’un an à compter de la date d’achat.
KitchenAid prendra
en charge les éléments
suivants à votre choix :
Remplacement sans difficulté des accessoires électriques. Voir la page
suivante pour plus de détails concernant la procédure à suivre pour un
dépannage, ou appeler le numéro sans frais 1 800 541-6390 du Centre
eXpérience à la clientèle.
OU
Les frais de pièces de rechange et de main-d’œuvre pour corriger les vices de
matériaux et de fabrication. L’intervention de dépannage doit être effectuée
par un centre de dépannage KitchenAid agréé.
KitchenAid ne paiera
pas pour :
A. Les réparations lorsque les accessoires électriques sont utilisés hors du
cadre d’un usage unifamilial normal.
B.
Les dommages causés par : accident, altération, mauvaise utilisation ou abus.
C. Tout frais d’expédition ou de manutention pour livrer les accessoires
électriques dans un centre de réparation autorisé.
D. Les pièces de rechange ou frais de main-d’œuvre pour les accessoires
électriques lorsqu’ils sont utilisés à l’extérieur des 50 États des États-Unis,
du district fédéral de Columbia, de Porto Rico et du Canada.
CLAUSE D’EXONÉRATION DE RESPONSABILITÉ AU TITRE DES GARANTIES IMPLICITES;
LIMITATION DES RECOURS
LES GARANTIES IMPLICITES, Y COMPRIS DANS LA MESURE APPLICABLE LES GARANTIES DE QUALITÉ
MARCHANDE OU D’APTITUDE À UN USAGE PARTICULIER, SONT EXCLUES DANS LA MESURE AUTORISÉE PAR LA LOI. TOUTE GARANTIE IMPLICITE POUVANT ÊTRE IMPOSÉE PAR LA LOI EST LIMITÉE
À UN AN OU À LA PLUS COURTE PÉRIODE AUTORISÉE PAR LA LOI. CERTAINES JURIDICTIONS NE
PERMETTENT PAS LA LIMITATION DE LA DURÉE DE VALIDITÉ DES GARANTIES IMPLICITES DE QUALITÉ
MARCHANDE OU D’APTITUDE À UN USAGE PARTICULIER; PAR CONSÉQUENT, LES LIMITATIONS OU
EXCLUSIONS STIPULÉES DANS LES PRÉSENTES PEUVENT NE PAS ÊTRE APPLICABLES.
SI CE PRODUIT NE FONCTIONNE PAS COMME GARANTI, LE SEUL ET UNIQUE RECOURS DU
CLIENT CONSISTE À EN OBTENIR LA RÉPARATION OU LE REMPLACEMENT CONFORMÉMENT AUX
TERMES DE LA PRÉSENTE GARANTIE LIMITÉE. KITCHENAID ET KITCHENAID CANADA DÉCLINENT
TOUTE RESPONSABILITÉ AU TITRE DES DOMMAGES FORTUITS OU INDIRECTS. Cette garantie vous
confère des droits juridiques spécifiques et vous pouvez également jouir d’autres droits qui peuvent
varier d’un État à l’autre ou d’une province à l’autre.
K
I
T
C
H
E
N
A
I
D
Q
U
A
L
I
T
É
GARANTIE DE
REMPLACEMENT
SANS DIFFICUL
TÉ
GARANTIE | 49
Page 50

GARANTIE
GARANTIE DE REMPLACEMENT SANS DIFFICULTÉ POUR LES 50 ÉTATS DES
ÉTATS-UNIS, LE DISTRICT DE COLUMBIA ET PORTO RICO
Nous sommes tellement certains que la qualité de
nos produits satisfait aux normes exigeantes de
KitchenAid que si les accessoires électriques cessent
de fonctionner au cours de la première année suivant
leur acquisition, KitchenAid livrera gratuitement
à votre porte des accessoires électriques de
remplacement identiques ou comparables et prendra
les dispositions nécessaires pour que les accessoires
électriques d’origine nous soient retournés. Les
accessoires électriques de remplacement seront
également couverts par notre garantie limitée
d’un an. Si vos accessoires électriques cessent de
fonctionner durant la première année suivant leur
acquisition, il vous suffit d’appeler notre Centre
d’eXpérience à la clientèle au 1 800 541-6390, du
lundi au vendredi. Veuillez avoir l’original de votre
reçu de vente à portée de main au moment de votre
appel. Une preuve d’achat est indispensable pour
que votre réclamation puisse être traitée. Il vous
faudra fournir votre adresse de livraison complète au
représentant (aucune boîte postale).
Après avoir reçu les accessoires électriques
de rechange, utiliser le carton, les matériaux
d’emballage et l’étiquette d’expédition prépayée
pour emballer les accessoires électriques d’origine et
les renvoyer à KitchenAid.
GARANTIE DE REMPLACEMENT SANS DIFFICULTÉ POUR LE CANADA
Nous sommes tellement certains que la qualité
de nos produits satisfait aux normes exigeantes
de KitchenAid que si les accessoires électriques
cessent de fonctionner au cours de la première
année suivant leur acquisition, KitchenAid livrera
gratuitement à votre porte des accessoires
électriques de remplacement identiques
ou comparables et prendra les dispositions
nécessaires pour que les accessoires électriques
d’origine nous soient retournés. Les accessoires
électriques de remplacement seront également
couverts par notre garantie limitée d’un an. Si vos
accessoires électriques cessent de fonctionner
durant la première année suivant leur acquisition,
il vous suffit d’appeler notre Centre d’eXpérience
à la clientèle au 1 800 807-6777, du lundi au
vendredi. Veuillez avoir l’original de votre reçu
de vente à portée de main au moment de votre
appel. Une preuve d’achat est indispensable pour
que votre réclamation puisse être traitée. Il vous
faudra fournir votre adresse de livraison complète
au représentant.
Après avoir reçu les accessoires électriques
de rechange, utiliser le carton, les matériaux
d’emballage et l’étiquette d’expédition prépayée
pour emballer les accessoires électriques d’origine
et les renvoyer à KitchenAid.
50 | GARANTIE
Page 51

GARANTIE
OBTENIR UN DÉPANNAGE UNE FOIS LA GARANTIE EXPIRÉE OU COMMANDER
DES ACCESSOIRES ET DES PIÈCES DE RECHANGE
Aux États-Unis et à Porto Rico :
Pour des informations sur le service de dépannage
ou pour commander des accessoires ou des pièces
de rechange, composer le numéro sans frais
1 800 541-6390 ou écrire à :
Customer eXperience Center,
KitchenAid Small Appliances,
P.O. Box 218, St. Joseph, MI 49085-0218
En dehors des États-Unis et de Porto Rico :
Consulter le revendeur KitchenAid local ou
le détaillant auprès duquel les accessoires
électriques ont été achetés pour savoir
comment obtenir un dépannage.
Pour des informations concernant toute
intervention de dépannage au Canada :
Composer sans frais le 1 800 807-6777.
GARANTIE | 51
Page 52

W11095988B
®
/™ ©2018 KitchenAid. All rights reserved. Used under license in Canada.
Tous droits réservés. Utilisé sous licence au Canada.
07/18
 Loading...