

KitchenAid KUDX23HB0 Owner’s Manual
ruse and Care Guide
KltchenAld"
FOR THE WAY IT'S MADE."
A Note to You .................. 2
Understanding
DishwasherSafety ............ 3
KnowingYour
Dishwasher'sFeatures ...... 5
Operating Your
Dishwasher....................... 7
Loading Your
Dishwasher..................... 15
Cadng forYour
Dishwasher..................... 18
Changklg FrontPanels... 21
SolvingCommon
DishwashingProblems.... 24
Troubleshooting.............. 28
IfYou Need Assistance
orSelvice ....................... 30
Index ............................. 31
Warranty ........................ 32
1-800-422-1230
Call our Consumer Assistance Center
withquestionsor comments.
KITCHENAID" Undercounter Dishwasher
Model: KUDX23HB
Note to You
Thankyou for buying a KitchenAid®appliance!
KitchenAid appliances have everything you would expect of a superior appliance,
plusthe distinct style and thoughtful details which contributeto the overall look of
your home and your enjoyment of it. To ensure that you enjoy many years of
trouble-free operation, we developed this Use and Care guide. It contains valuable
information concerning how to operate and maintain your new appliance properly
and safely. Please read it carefully.
Also, please complete and mail the enclosed Product Registration Card.
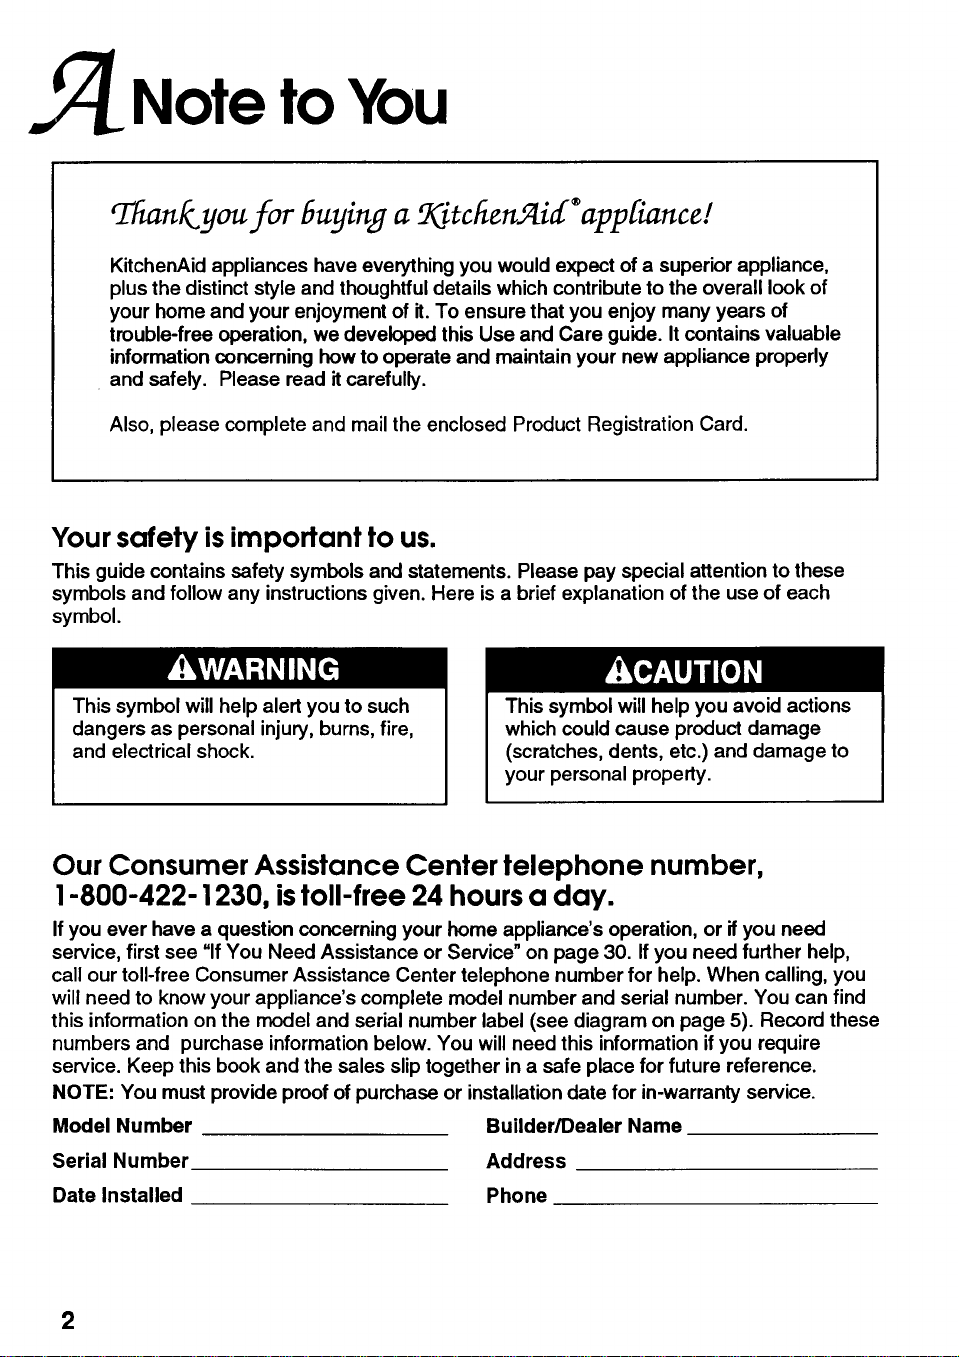
Your safety is important to us.
This guide contains safety symbols and statements. Please pay special attention to these
symbols and follow any instructions given. Here is a brief explanation of the use of each
symbol.
This symbol will help alert you to such
dangers as personal injury, burns, fire,
and electrical shock.
This symbol will help you avoid actions
which could cause product damage
(scratches, dents, etc.) and damage to
your personal property.
Our Consumer Assistance Center telephone number,
1-800-422-1230, istoll-free 24 hours a day.
If you ever have a question concerning your home appliance's operation, or if you need
service, first see "If You Need Assistance or Service" on page 30. Ifyou need further help,
call our toll-free Consumer Assistance Center telephone number for help. When calling, you
will need to know your appliance's complete model number and serial number. You can find
this information on the model and serial number label (see diagram on page 5). Record these
numbers and purchase information below. You willneed this information if you require
service. Keep this book and the sales slip together in a safe place for future reference.
NOTE: You must provide proof of purchase or installationdate for in-warranty service.
Model Number Builder/Dealer Name
Serial Number Address
Date Installed Phone
2

nderstanding Dishwasher
Safety
IMPORTANTSAFETYINSTRUCTIONS
To reduce the riskof fire, electrical shock, or injury when using
your dishwasher, follow basic precautions includingthe following:
• Read all instructionsbefore using the
dishwasher.
• Use your dishwasher only for the uses
described in this manual.
• DISHWASHER MUST BE ELECTRI-
CALLY GROUNDED. Read the Installa-
tion Instructions for details.
• When discarding an old dishwasher,
always remove the door to prevent
accidental entrapment or suffocation.
• Use ONLY detergents and rinse agents
recommended for use in a dishwasher.
• Store dishwasher detergent in a cool, dry
place WHERE CHILDREN CAN'T
REACH IT.
When loading items to be washed:
-Load sharp items and knives with the
handles up to reduce risk of cut-type
injuries.
-Locate sharp items and knives so that
they are not likelyto damage the door
seal.
• DO NOT let children play in or on the
dishwasher.
• DO NOT wash plastic items unless
marked "dishwasher safe" orthe
equivalent. If not marked, check
manufacturer's recommendations.
• DO NOT reach intothe area below the
bottom rack until the heating element
has cooled for at least 20 minutes.
• DO NOT use your dishwasher unless
all enclosure panels are properly in
place.
• DO NOT siton, stand on, or abuse the
dishwasher door or dishracks.
• DO NOT tamper with controls.
• Ifhot water has not been used recently
(usually two weeks or longer), hydro-
gen gases may build up in the water
heater and the hot water pipes.
HYDROGEN GAS IS EXPLOSIVE. To
prevent injury or damage, before using
your dishwasher, turn on all hot water
faucets and allow water to runfor
several minutes. This will allow gases
to escape.
Do not smoke or use any open flame
near the faucet while it is open.
• DO NOT store or use gasoline or other
flammable vapors and liquids in the
vicinityof this or any other appliance.
The fumes can create a fire hazard or
explosion.
• Disconnect electrical power to the
dishwasher before attempting
to service.
-SAVE THESEINSTRUCTIONS-
3
+"Understanding Dishwasher Safely
Help us help you
Please:
• Have your dishwasher installed by a
qualified installer.
• Install where dishwasher is protected from
the elements. Protect against possible
rupture of fill valve by freezing. Such
ruptures are not covered by the warranty.
See winter storage information on
page 19.
• Install and level dishwasher on a floor that
will hold the weight, and in an area suitable
for itssize and use.
• Properly connect dishwasher to electricity,
water, and drain.*
• Remove all shipping plugs from hoses and
connectors (such as the cap on the drain
outlet) before installing.*
• Remove all hang tags and temporary
labels.
• Make sure dishwasher is not used by
anyone unable to operate itproperly.
• Properly maintain dishwasher.
See page 18.
* See Installation Instructions for complete
information.
4
_ owing YourDishwasher's
Features
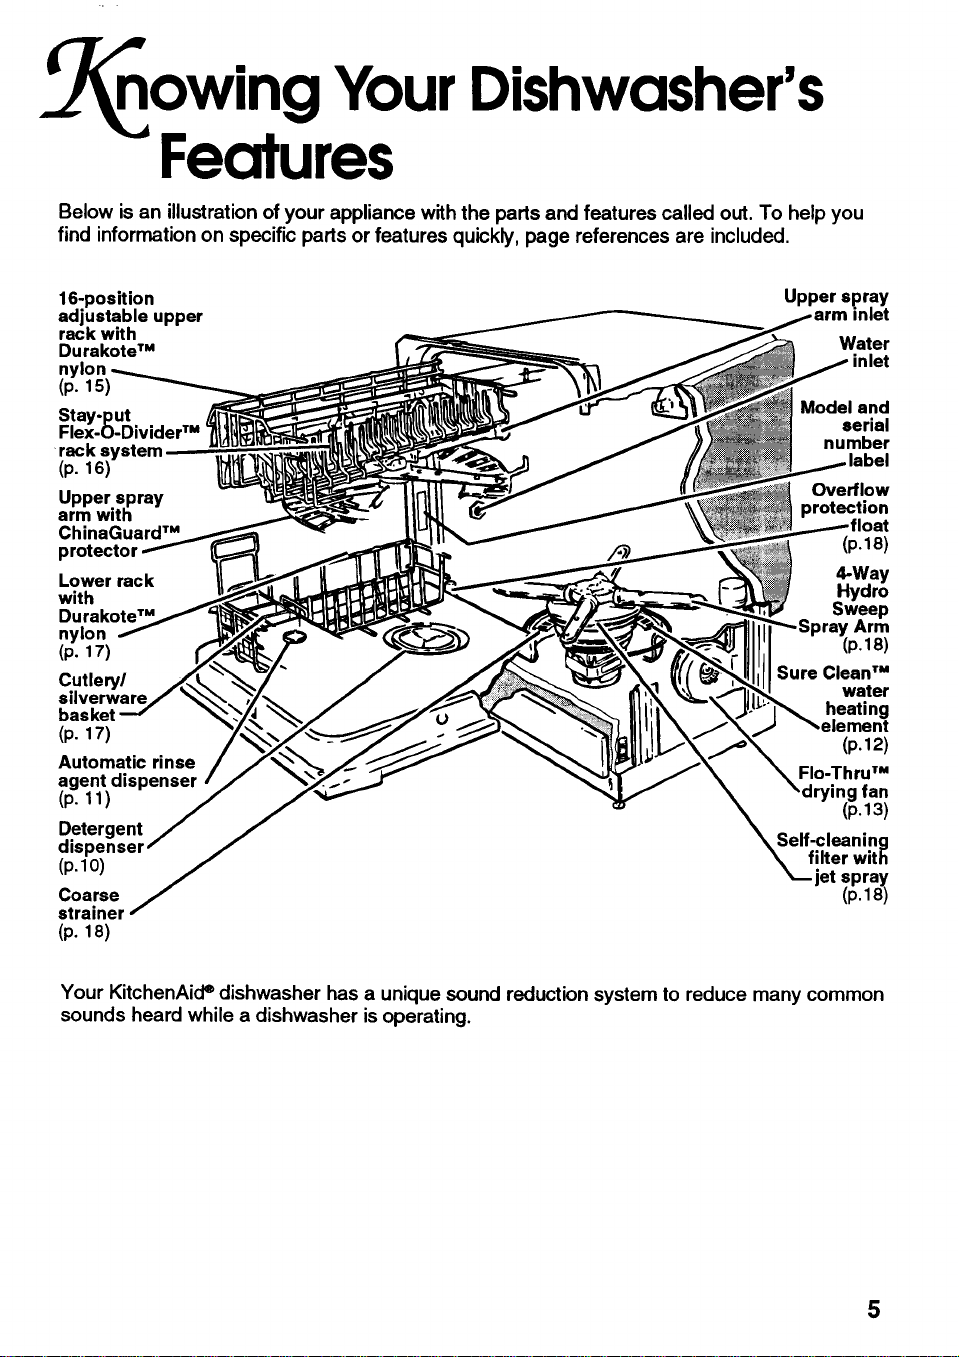
Below is an illustration of your appliance with the parts and features called out. To help you
find information on specific parts or features quickly, page references are included,
16-position Upper spray
adjustable upper inlet
rack with
DurakoteTM Water
nylon inlet
(p. 15)
Stay-put Model end
Flex.O.DividerTM serial
rack number
(p. 16) label
Upper spray Overflow
arm with protection
ChinaGuardTM (p.18)
Lower rack 4-Way
with Hydro
nylon Arm
(p. 17) (p.18)
Cutlery/ Sure Clean TM
silverware water
basket heating
(p. 17)
Automatic rinse
agent dispenser
(p. 11)
Detergent
dis
(p,lO)
Coarse
strainer
(p. 18)
Sweep
FIo-Thru TM
ying fan
Self-cleaning
filter with
jet spray
(p.12)
(p.13)
(p,18)
Your KitchenAidedishwasher has a unique sound reduction system to reduce many common
sounds heard while a dishwasher is operating.
5
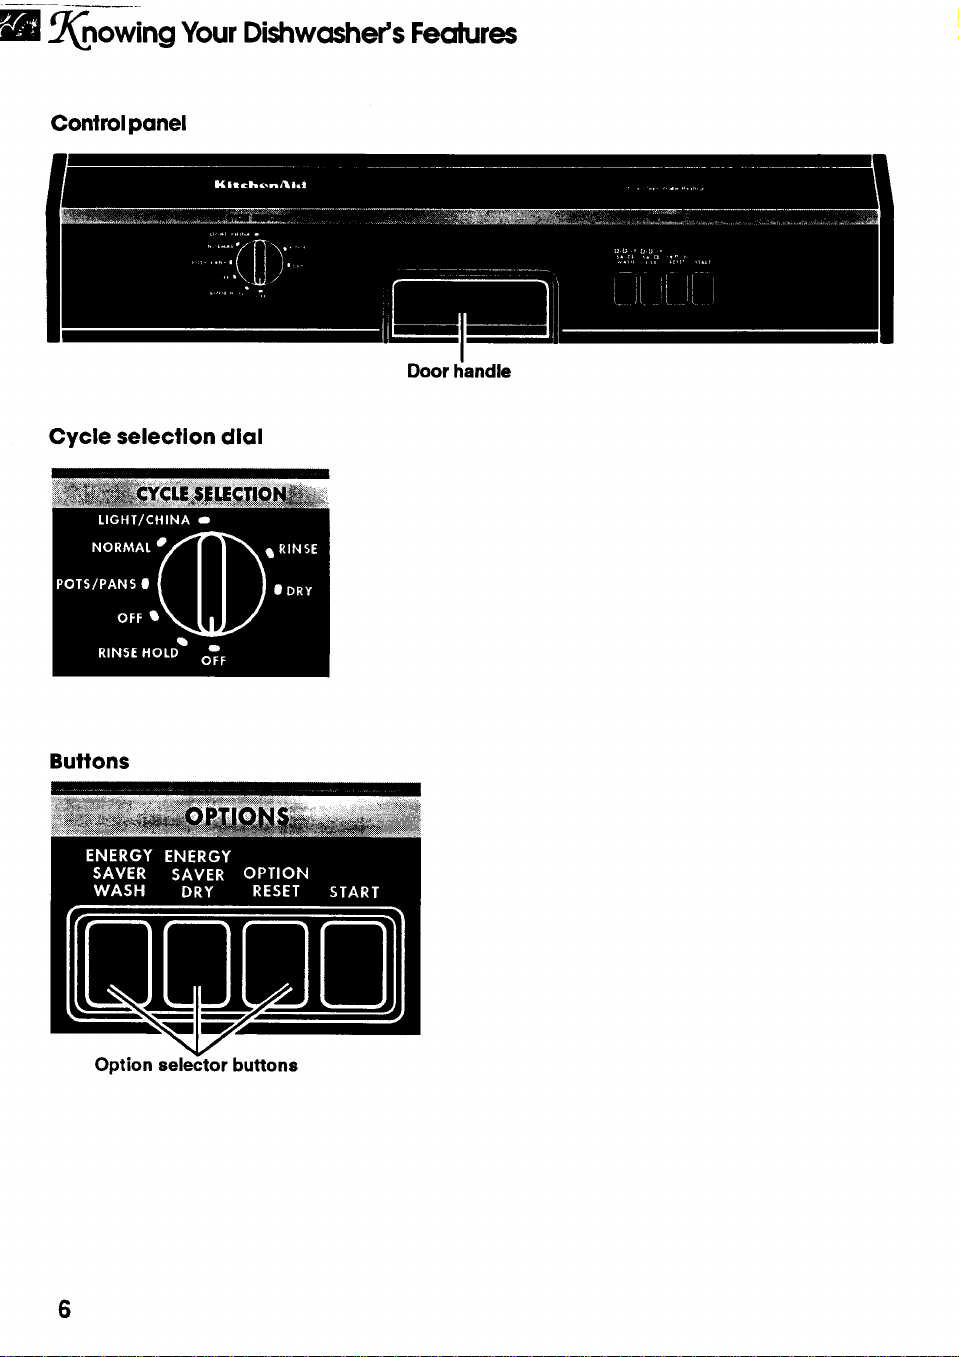
_owing Your Dishwasher's Features
Control panel
Door handle
Cycle selectlon dlal
Buttons
Option selector buttons
6
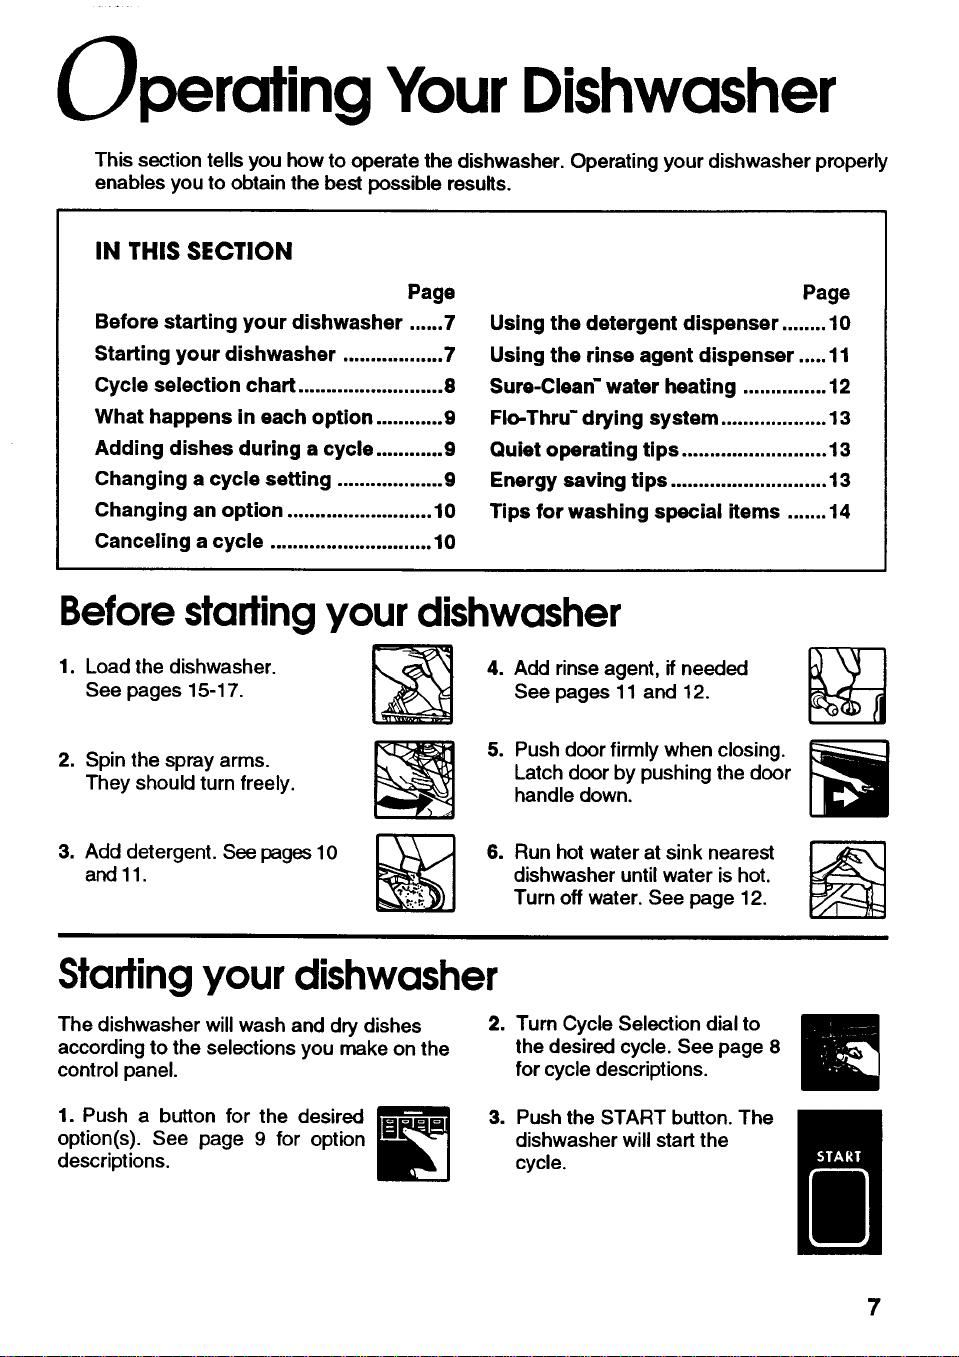
( perating YourDishwasher
This section tells you how to operate the dishwasher. Operating your dishwasher properly
enables you to obtain the best possible results.
IN THIS SECTION
Page
Before starting your dishwasher ...... 7
Starting your dishwasher .................. 7
Cycle selection chart .......................... 8
What happens in each option ............ 9
Adding dishes during a cycle ............ 9
Changing a cycle setting ................... 9
Changing an option .......................... 10
Canceling a cycle ............................. 10
Using the detergent dispenser ........ 10
Using the rinse agent dispenser ..... 11
Sure-Clean" water heating ............... 12
FIo-Thru" drying system ................... 13
Quiet operating tips .......................... 13
Energy saving tips ............................ 13
Tips for washing special items ....... 14
Before starting your dishwasher
1. Load the dishwasher. _,,_ _ 4. Add rinse agent, if needed
See pages 15-17. I_ See pages 11 and 12.
2. Spin the spray arms.
They should turn freely.
3. Add detergent. See pages 10
and 11.
5. Push door firmly when closing.
Latch door by pushing the door
handle down.
6. Run hot water at sink nearest
dishwasher until water is hot.
Turn off water. See page 12.
Page
Starting your dishwasher
The dishwasher will wash and dry dishes
according to the selections you make on the
control panel.
1. Push a button for the desired
option(s). See page 9 for option
descriptions.
2. Turn Cycle Selection dial to
the desired cycle. See page 8
for cycle descriptions.
3. Push the START button. The
dishwasher will start the
cycle.
7
perafing YourDishwasher
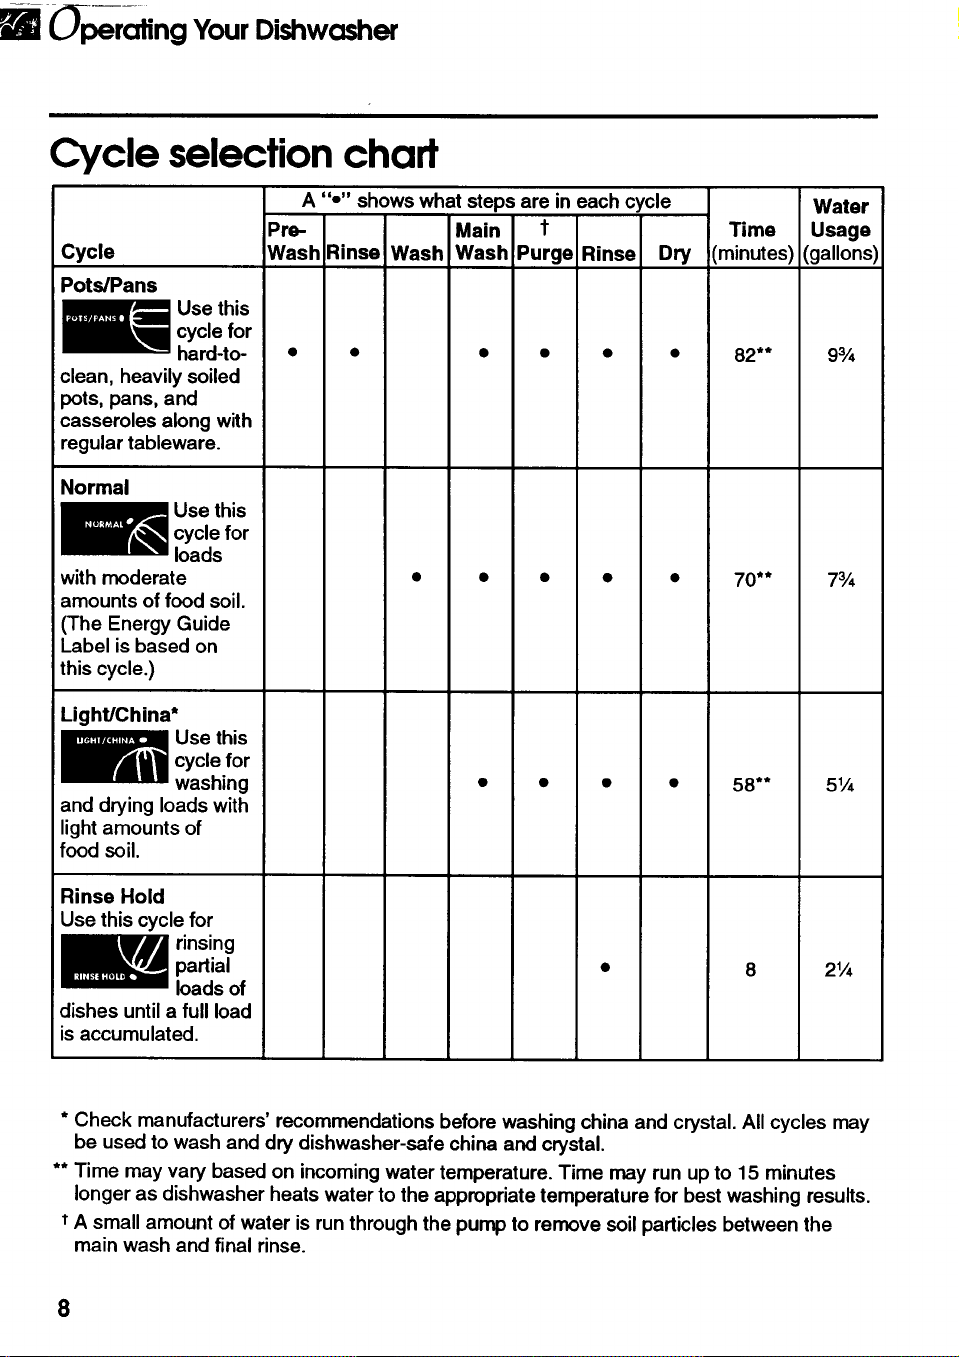
Cycle selection chaff
A "o" shows what steps are in each cycle Water
Pro- Main t Time Usage
Cycle
Pots/Pans
Use this
cycle for
hard-to-
i clean, heavily soiled
pots, pans, and
casseroles along with
regular tableware.
Normal
Use this
1
lwith moderate
Iamounts of food soil.
(The Energy Guide
Label is based on
this cycle.)
cycle for
loads
Wash Rinse Wash Wash Purge Rinse Dry (minutes) (gallons)
• • • • • • 82** 9¾
• • 70** 7¾
Light/China*
Use this
cycle for
washing
and drying loads with
light amounts of
food soil.
Rinse Hold
Use this cycle for
rinsing
partial
loads of
dishes untila full load
isaccumulated.
* Check manufacturers' recommendations before washing china and crystal. All cycles may
be used to wash and dry dishwasher-safe china and crystal.
** Time may vary based on incoming water temperature. Time may run up to 15 minutes
longer as dishwasher heats water to the appropriate temperature for best washing results.
t A small amount of water isrun through the pump to remove soil particles between the
main wash and final rinse.
58** 5¼
2¼
(_)perating YourDishwasher
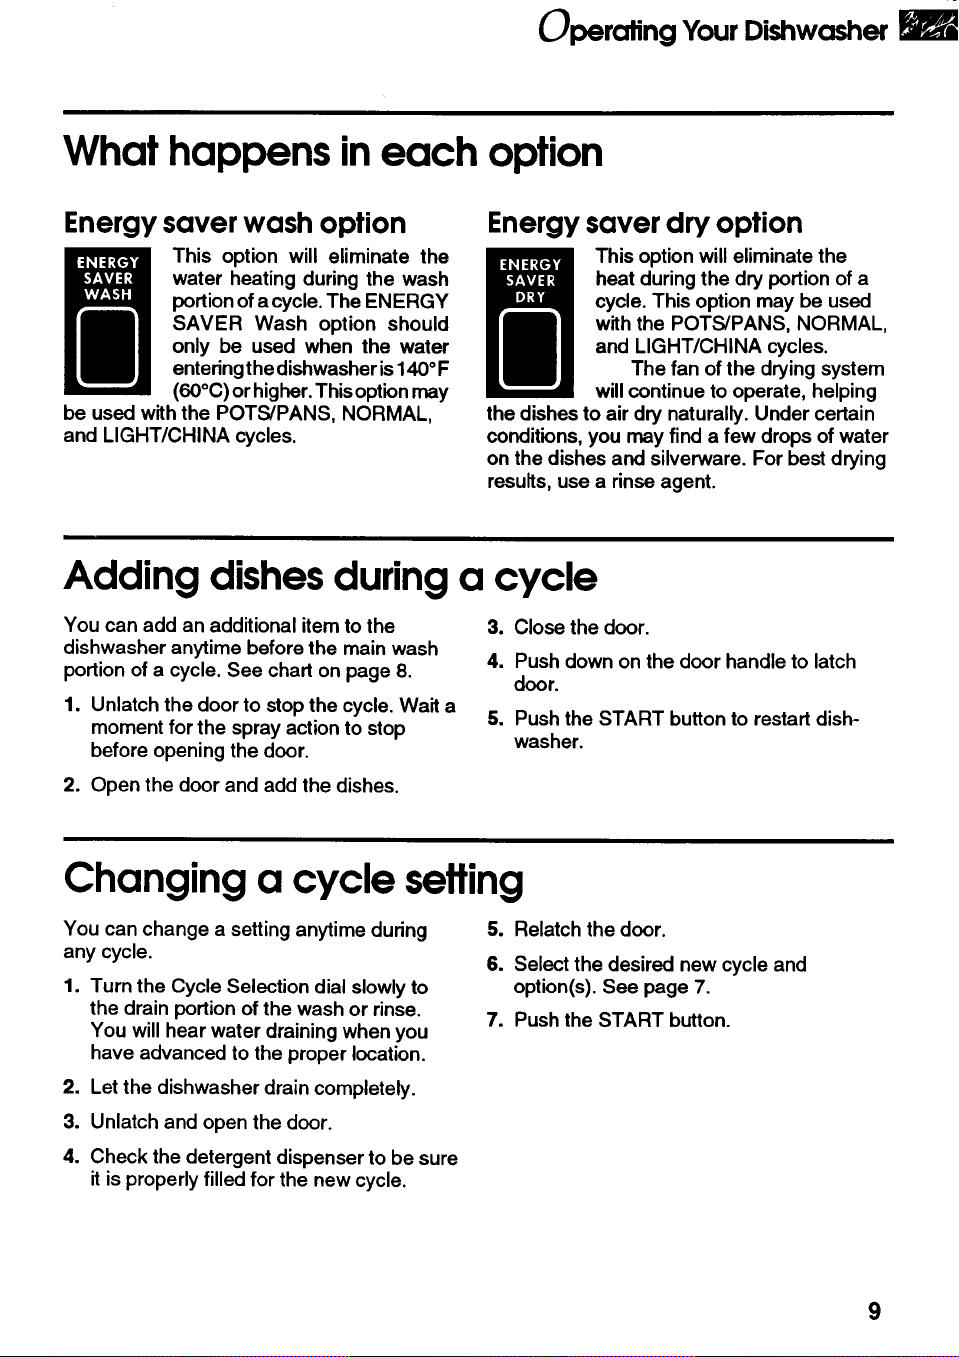
What happens in each option
Energy saver wash option
This option will eliminate the
water heating during the wash
portionofa cycle. The ENERGY
SAVER Wash option should
only be used when the water
enteringthe dishwasheris140°F
(60°C) or higher.This optionmay
be used with the POTS/PANS, NORMAL,
and LIGHT/CHINA cycles.
Energy saver dry option
I his option will eliminate the
the dishes to air dry naturally. Under certain
conditions, you may find a few drops of water
on the dishes and silverware. For best drying
results, use a rinse agent.
Adding dishes during a cycle
You can add an additional item to the
dishwasher anytime before the main wash
portion of a cycle. See chart on page 8.
1. Unlatch the door to stop the cycle. Wait a
moment for the spray action to stop
before opening the door.
2. Open the door and add the dishes.
3. Close the door.
4. Push down on the door handle to latch
door.
5. Push the START button to restart dish-
washer.
heat during the dry portion of a
cycle. This option may be used
with the POTS/PANS, NORMAL,
and LIGHT/CHINA cycles.
The fan of the drying system
willcontinue to operate, helping
Changing a cycle setting
You can change a setting anytime during
any cycle.
1. Turn the Cycle Selection dial slowly to
the drain portion of the wash or rinse.
You will hear water draining when you
have advanced to the proper location.
2. Let the dishwasher drain completely.
3. Unlatch and open the door.
4. Check the detergent dispenser to be sure
it is properly filled for the new cycle.
5. Relatch the door.
6. Select the desired new cycle and
7. Push the START button.
option(s). See page 7.
9

(_perating YourDishwasher
Changing an option
You can change an option anytime during a
cycle. To change the selected option(s):
1. Push the OPTION RESET button.
2. Push an Option Selector button for each
desired option.
Canceling a cycle
You can cancel a cycle anytime during the
cycle.
.
Turn the Cycle Selection dial slowly to
the drain portion of the wash or rinse.
You will hear water draining when you
have advanced to the proper location.
2. Let the dishwasher drain completely.
3. Unlatch the door.
4. Advance the Cycle Selection dial to the
OFF position.
The cycle is now canceled.
Usingthe detergent dispenser
What type of detergent to use
• For best results use powdered automatic
dishwasher detergent. Other detergents
are too mild and much too sudsy to work in
the dishwasher.
• Follow manufacturer's directions when
using concentrated dishwasher detergent.
• Do not add detergent until you are ready
to wash.
• Store detergent tightly closed ina cool, dry
place. Fresh automatic dishwasher
detergent is necessary for best washing
results.
NOTE: Different brands of dishwasher
detergent have different amounts of phospho-
rus for softening water. If water is hard and
phosphorus content is low (6.0% or less), you
may need to:
• Use more detergent.
OR
• Use a brand witha higher phosphorus
content (8.7%).
10
See phosphorus
content on
package labels
 Loading...