

STAND MIXER USE AND CARE GUIDE
GUIDE TO EXPERT RESULTS
台式搅拌机使用和保养指南
专业效果指南
s
t
r
a
p
g
n
i
v
o
m
e
r
f
o
g
n
i
t
r
e
s
n
i
e
r
o
f
e
b
g
u
l
p
n
U
:
N
10
O
I
T
U
A
8
C
6
4
2
1
O
KitchenAid
Joseph, Michigan USA
St.
®
W10190231B
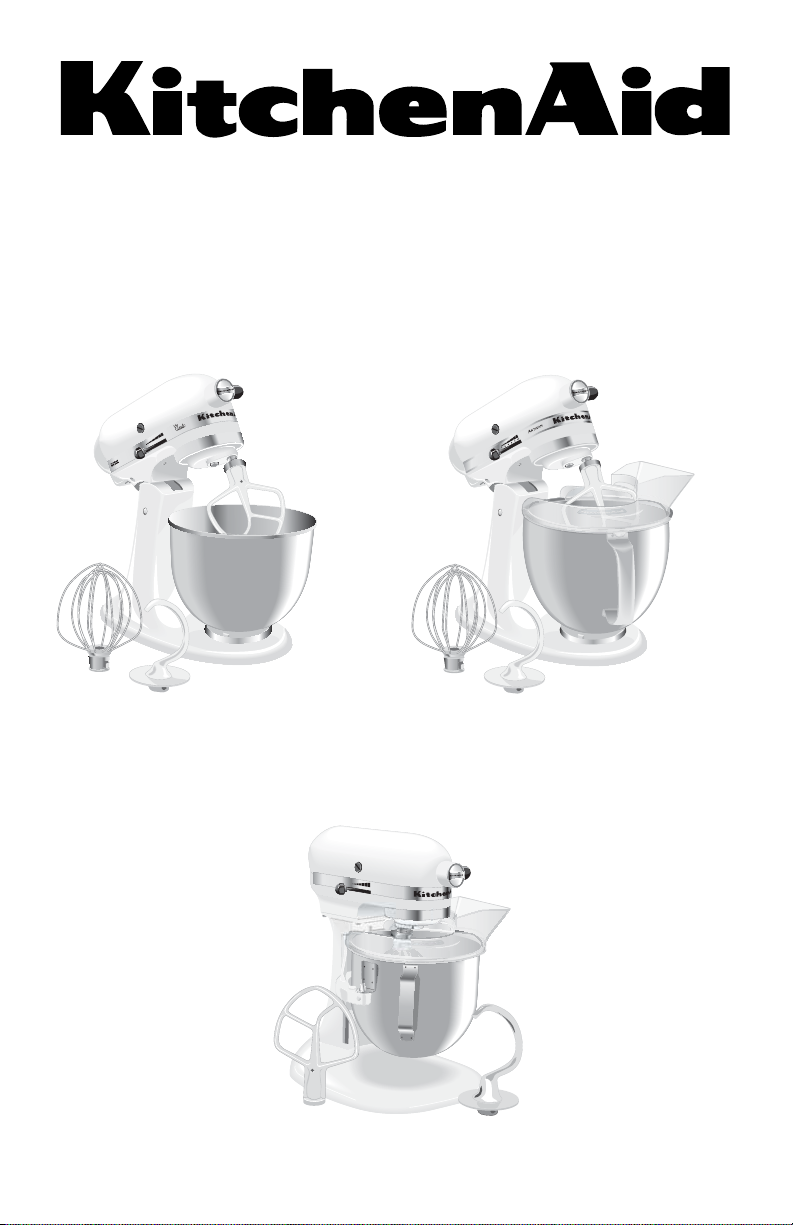
Model K45SS
型号 K45SS
Kitc
henAid
St. Joseph, Mic
higan,
Model KSM150
型号 KSM150
USA
0 1 2 4 6 8 10
Heavy Duty
Model K5SS
型号 K5SS

Table of Contents
Stand Mixer Safety ..........................................................................................................4
Important Safeguards ..................................................................................................... 4
Electrical Requirements ...................................................................................................5
K45SS Tilt-Head Stand Mixer Features .............................................................................6
KSM150 Tilt-Head Stand Mixer Features .........................................................................7
Assembling Your Tilt-Head Stand Mixer ...........................................................................8
English
K5SS Bowl-Lift Stand Mixer Features ............................................................................... 9
Assembling Your Bowl-Lift Stand Mixer .........................................................................10
Assembling Your Pouring Shield .................................................................................... 11
Using Your KitchenAid
Beater to Bowl Clearance .............................................................................................. 12
Care and Cleaning ........................................................................................................13
Planetary Mixing Action ................................................................................................ 13
Stand Mixer Use ...........................................................................................................13
Speed Control Guide - 10 Speed Mixers ........................................................................ 14
Mixing Tips ................................................................................................................... 15
Mixing and Kneading Yeast Dough ...............................................................................16
Egg Whites ................................................................................................................... 17
Whipped Cream............................................................................................................17
Accessories - General Instructions .................................................................................18
When You Need Service ................................................................................................19
KitchenAid
®
Household Stand Mixer Warranty ..............................................................20
Service Centers .............................................................................................................. 20
®
Flat Beater, Wire Whip and Dough Hook .................................12
2

目录
台式搅拌机安全注意事项....................................................................................................... 22
重要安全措施........................................................................................................................... 22
电压要求................................................................................................................................... 23
K45SS
倾斜头台式搅拌机的结构 ............................................................................................ 24
KSM150 倾斜头台式搅拌机的结构......................................................................................... 25
组装倾斜头台式搅拌机........................................................................................................... 26
K5SS 升降式台式搅拌机的结构 .............................................................................................. 27
组装升降式台式搅拌机........................................................................................................... 28
组装导流罩............................................................................................................................... 29
使用 KitchenAid® 平搅器、打蛋器和面团钩 .......................................................................... 30
搅拌器与桶的间距................................................................................................................... 30
保养和清洁............................................................................................................................... 31
行星式搅拌动作....................................................................................................................... 31
台式搅拌机的用法................................................................................................................... 31
速度控制指南 - 10 速搅拌机 .................................................................................................. 32
搅拌提示................................................................................................................................... 33
搅拌和揉搓发酵面团............................................................................................................... 34
蛋白........................................................................................................................................... 35
发泡鲜奶油............................................................................................................................... 35
附件 - 一般说明 ....................................................................................................................... 36
当您需要服务时....................................................................................................................... 37
KitchenAid
服务中心................................................................................................................................... 38
®
家用台式搅拌机保修证 ...................................................................................... 38
Chinese/中文
33

Stand Mixer Safety
Your safety and the safety of others are very important.
We have provided many important safety messages in this manual and on your
appliance. Always read and obey all safety messages.
This is the safety alert symbol.
This symbol alerts you to potential hazards that can kill or hurt you
English
All safety messages will tell you what the potential hazard is, tell you how to
reduce the chance of injury, and tell you what can happen if the instructions are
not followed.
and others.
All safety messages will follow the safety alert symbol and either
the word “DANGER” or “WARNING.” These words mean:
You can be killed or seriously
DANGER
injured if you don’t immediately
follow instructions.
You can be killed or seriously injured
if you don’t follow instructions.
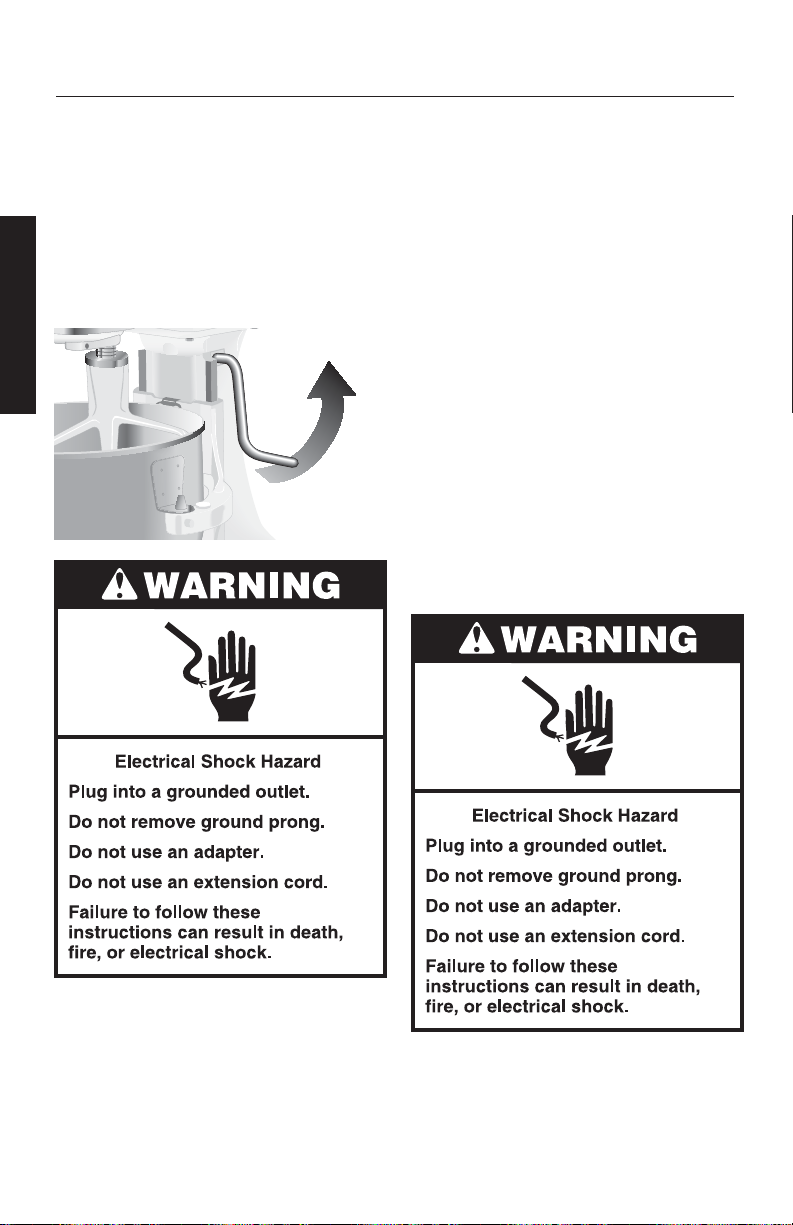
IMPORTANT SAFEGUARDS
When using electrical appliances, basic
safety precautions should always be
followed including the following:
1. Read all instructions.
2. To avoid risk of electrical shock, do
not put Stand Mixer in water or other
liquid.
3. The appliance is not intended for use
by young children or infirm persons
without supervision.
4. Unplug Stand Mixer from outlet when
not in use, before putting on or
taking off parts and before cleaning.
5. Avoid contacting moving parts.
Keep hands, hair, clothing, as well
as spatulas and other utensils away
from beater during operation to
reduce the risk of injury to persons
and/or damage to the Stand Mixer.
SAVE THESE INSTRUCTIONS
6. Do not operate Stand Mixer with
a damaged cord or plug or after
the Stand Mixer malfunctions, or
is dropped or damaged in any
manner. Return appliance to the
nearest Authorized Service Center
for examination, repair or electrical or
mechanical adjustment.
7. The use of accessories not
recommended or sold by KitchenAid
may cause fire, electrical shock or injury.
8. Do not use the Stand Mixer outdoors.
9. Do not let the cord hang over edge
of table or counter.
10. Remove flat beater, wire whip or dough
hook from Stand Mixer before washing.
11. This product is designed for
household use only.
4
Electrical Requirements
Your Stand Mixer operates on a regular
220-240 volt A.C., 50/60 hertz house
current. The wattage rating for your
Stand Mixer is printed on the trim band.
This wattage is determined by using the
accessories which draws the greatest
power. Other recommended accessories
may draw significantly less power.
Do not use an extension cord. If the
power supply cord is too short, have a
qualified electrician or serviceman install
an outlet near the appliance.
English
5
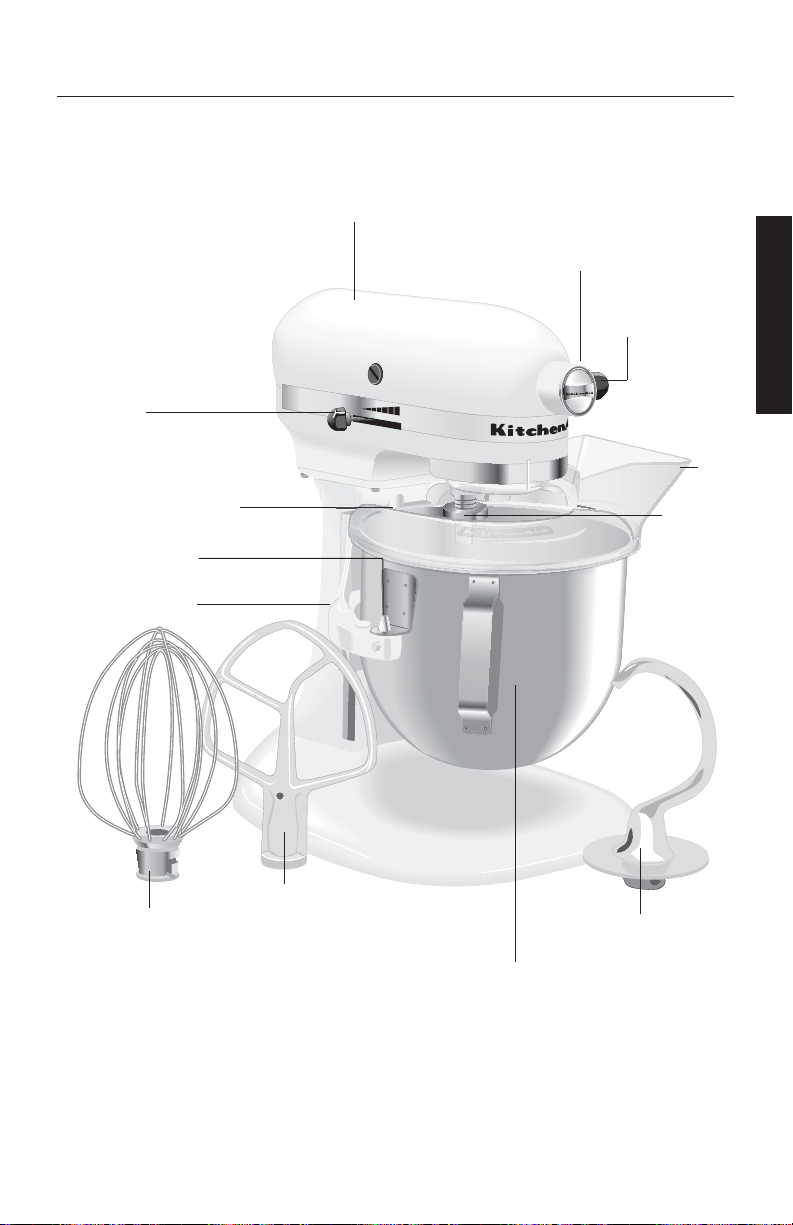
K45SS Tilt-Head Stand Mixer Features
Accessory Hub
English
Speed
Control
Lever
Beater Height
Adjustment
Screw
Motor Head
O
KitchenAid
St. Joseph, Michigan USA
Accessory Knob
s
t
r
a
p
g
n
i
v
o
m
e
r
f
o
g
n
i
t
r
e
s
n
i
e
r
o
f
e
b
g
u
l
p
n
U
:
N
10
O
I
T
U
A
8
C
6
4
2
1
Motor Head
Locking Lever
(not shown)
Beater Shaft
Flat Beater
Wire Whip
4.25 L
(4.5 qt)
Stainless
Steel
Bowl
Bowl Clamping Plate
Dough Hook
6
KSM150 Tilt-Head Stand Mixer Features
Accessory Hub
Speed
Control
Lever
Beater Height
Adjustment
Screw
Motor Head
Accessory Knob
Motor Head
Locking Lever
(not shown)
Beater Shaft
Flat Beater
English
Pouring
Shield
Wire Whip
4.8 L
(5 qt)
Stainless
Steel Bowl
Bowl Clamping Plate
Dough Hook
7
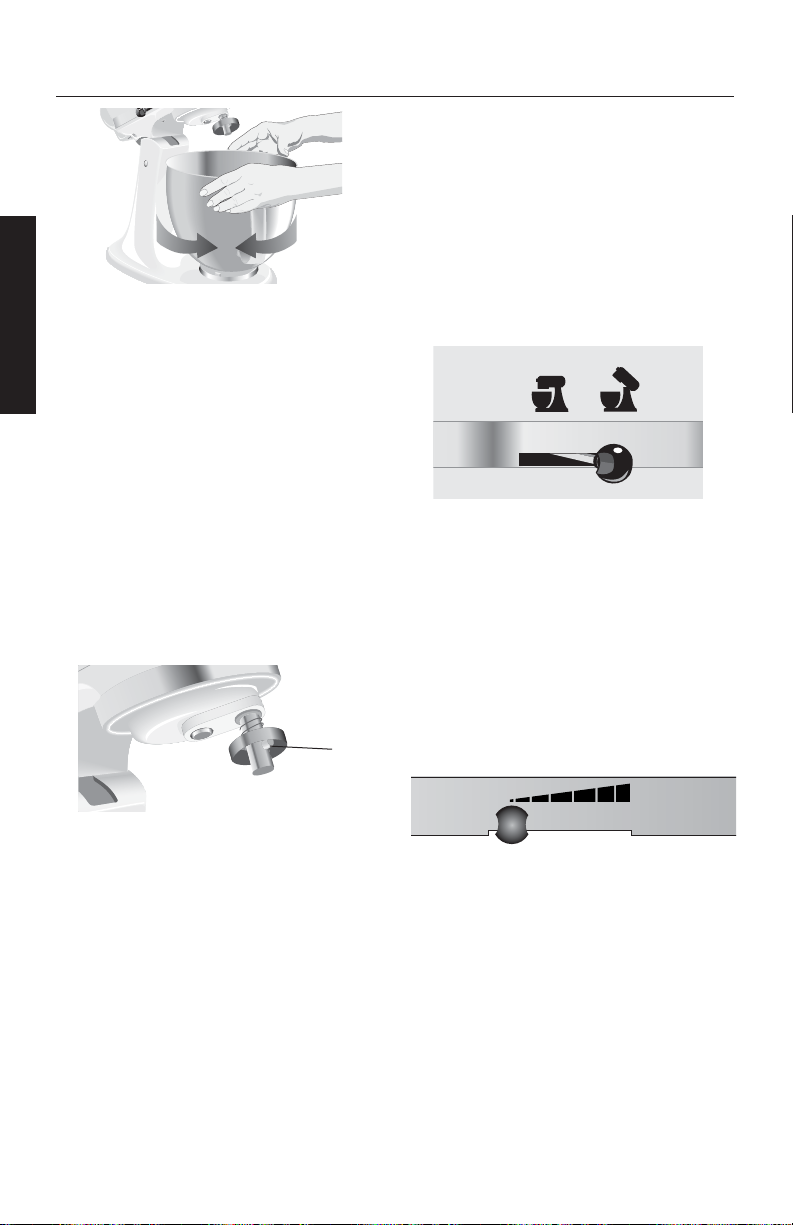
Assembling Your Tilt-Head Stand Mixer
English
To Attach Bowl
1. Turn speed control to “O.”
2. Unplug Stand Mixer or disconnect
power.
3. Hold the locking lever in the UNLOCK
position and tilt motor head back.
4. Place bowl on bowl clamping plate.
5. Turn bowl gently in clockwise
direction.
To Remove Bowl
1. Turn speed control to “O.”
2. Unplug Stand Mixer or
disconnect power.
3. Hold the locking lever in the UNLOCK
position and tilt motor head back.
4. Turn bowl counterclockwise.
Pin
To Remove Flat Beater,
Wire Whip, or Dough Hook
1. Turn speed control to “O.”
2. Unplug Stand Mixer or disconnect
power.
3. Hold the locking lever in the UNLOCK
position and raise motor head.
4. Press beater upward as far as possible
and turn left.
5. Pull beater from beater shaft.
To Lock Motor Head
1. Make sure motor head is completely
down.
2. Place locking lever in LOCK position.
3. Before mixing, test lock by attempting
to raise head.
To Unlock Motor Head
1. Place lever in UNLOCK position.
NOTE: Motor head should always be
kept in LOCK position when using the
Stand Mixer.
To Attach Flat Beater,
Wire Whip, or Dough Hook
1. Turn speed control to “O.”
2. Unplug Stand Mixer or disconnect
power.
3. Hold the locking lever in the UNLOCK
position and raise motor head.
4. Slip beater onto beater shaft and press
upward as far as possible.
5. Turn beater to right, hooking beater
over pin on shaft.
21
O
4
10
6
8
To Operate Speed Control
Plug Stand Mixer in proper electrical
outlet. Speed control lever should always
be set on lowest speed for starting, then
gradually moved to desired higher speed
to avoid splashing ingredients out of bowl.
See “Speed Control Guide” section.
8
K5SS Bowl-Lift Stand Mixer Features
Motor Head
Accessory Hub
Accessory
Knob
English
Speed Control
Knob
Spring Latch, Bowl
Pin and Bowl Height
Adjustment Screw
(not shown)
Locating Pins
Bowl Support
Wire Whip
Kitc
henAid
St. Joseph,
Michigan,
Flat Beater
USA
0 1 2 4 6 8 10
Heavy Duty
Handle
(not shown)
Pouring
Shield
Beater
Shaft
Dough Hook
Bowl Lift
4.8 L (5 qt)
Stainless Steel Bowl
9
Assembling Your Bowl-Lift Mixer
To Attach Bowl
1. Turn speed control to “O.”
2. Unplug Stand Mixer or disconnect
power.
3. Place bowl-lift handle in down
position.
4. Fit bowl supports over locating pins.
5. Press down on back of bowl until
English
bowl pin snaps into spring latch.
6. Raise bowl before mixing.
Raise
To Lower Bowl
1. Rotate handle back and down.
To Remove Bowl
1. Turn speed control to “O.”
2. Unplug Stand Mixer or disconnect
power.
3. Place bowl-lift handle in down
position.
4. Remove flat beater, wire whip, or
dough hook.
5. Grasp bowl handle and lift straight up
and off locating pins.
To Attach Flat Beater,
Wire Whip, or Dough Hook
1. Turn speed control to “O.”
2. Unplug Stand Mixer or disconnect
power.
3. Lower bowl by rotating bowl-lift
handle downward.
4. Slip flat beater on beater shaft.
5. Turn beater to left, hooking beater
over the pin on shaft.
7. Plug into proper electrical outlet.
To Raise Bowl
1. Rotate handle to straight-up position.
2. Bowl must always be in raised, locked
position when mixing.
6. Plug into proper electrical outlet.
10
Assembling Your Bowl-Lift Mixer
Pin
To Remove Flat Beater,
Wire Whip, or Dough Hook
1. Turn speed control to “O.”
2. Unplug Stand Mixer or disconnect
power.
3. Lower bowl by rotating bowl-lift
handle downward.
4. Press beater upward and turn right.
5. Pull beater from beater shaft.
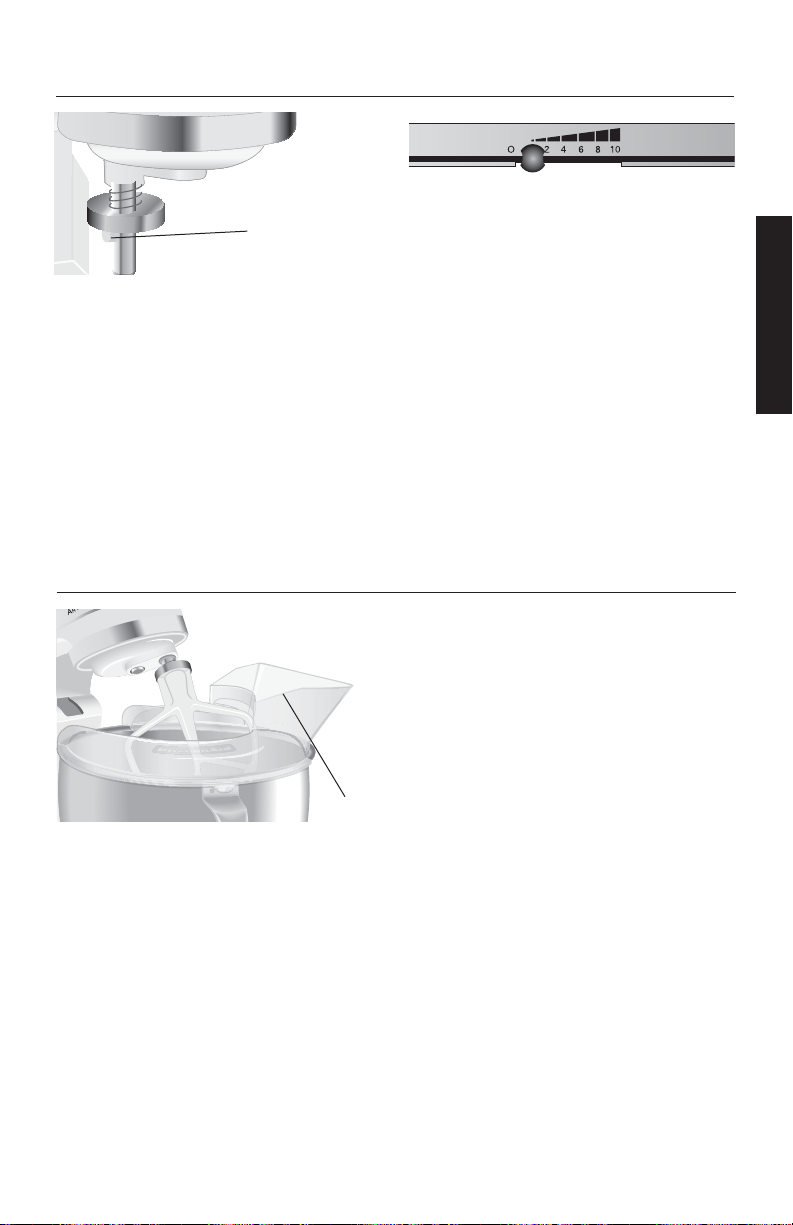
Assembling Your Pouring Shield*
Pouring Chute
To Attach Pouring Shield
1. Turn speed control to “O.”
2. Unplug Stand Mixer or disconnect power.
3. Attach flat beater, dough hook, or wire
whip and bowl (depending on your
model, see “Assembling Your Tilt-Head
Stand Mixer” or “Assembling Your BowlLift Mixer”).
4. From the front of the Stand Mixer, slide
the pouring shield over the bowl until the
shield is centered. The bottom rim of the
shield should fit within the bowl.
Stand Mixer Speed Control
To reduce the potential for splash-out,
always begin mixing using Speed 1 (STIR
speed), then gradually move to higher
speeds as needed. See “Speed Control
Guide.”
Auto-Reset Motor Protection
If the Stand Mixer stops due to overload,
slide the speed control lever to “O.”
After a few minutes, the Stand Mixer will
automatically reset. Slide the speed control
lever to the desired speed and continue
mixing.
If the Stand Mixer does not restart, see
“When You Need Service.”
To Remove Pouring Shield
1. Turn speed control to “O.”
2. Unplug Stand Mixer or disconnect power.
3. Lift the front of the pour shield clear of
the bowl rim and pull forward.
4. Remove accessory and bowl.
To Use Pouring Shield
1. For best results, rotate the shield so the
motor head covers the “u” shaped gap
in the shield. The pouring chute will be
just to the right of the accessory hub
as you face the Stand Mixer.
2. Pour the ingredients into the bowl
through the pouring chute.
* If Pouring Shield is included.
English
11
Using Your KitchenAid® Flat Beater,
Wire Whip and Dough Hook
Flat Beater for normal to heavy mixtures:
cakes biscuits creamed frostings
quick breads candies meat loaf
cookies mashed potatoes pie pastry
Wire Whip for mixtures that need air incorporated:
English
eggs sponge cakes egg whites
angel food cakes heavy cream mayonnaise
boiled frostings some candies
Dough Hook for mixing and kneading yeast doughs:
breads coffee cakes rolls
buns pizza dough
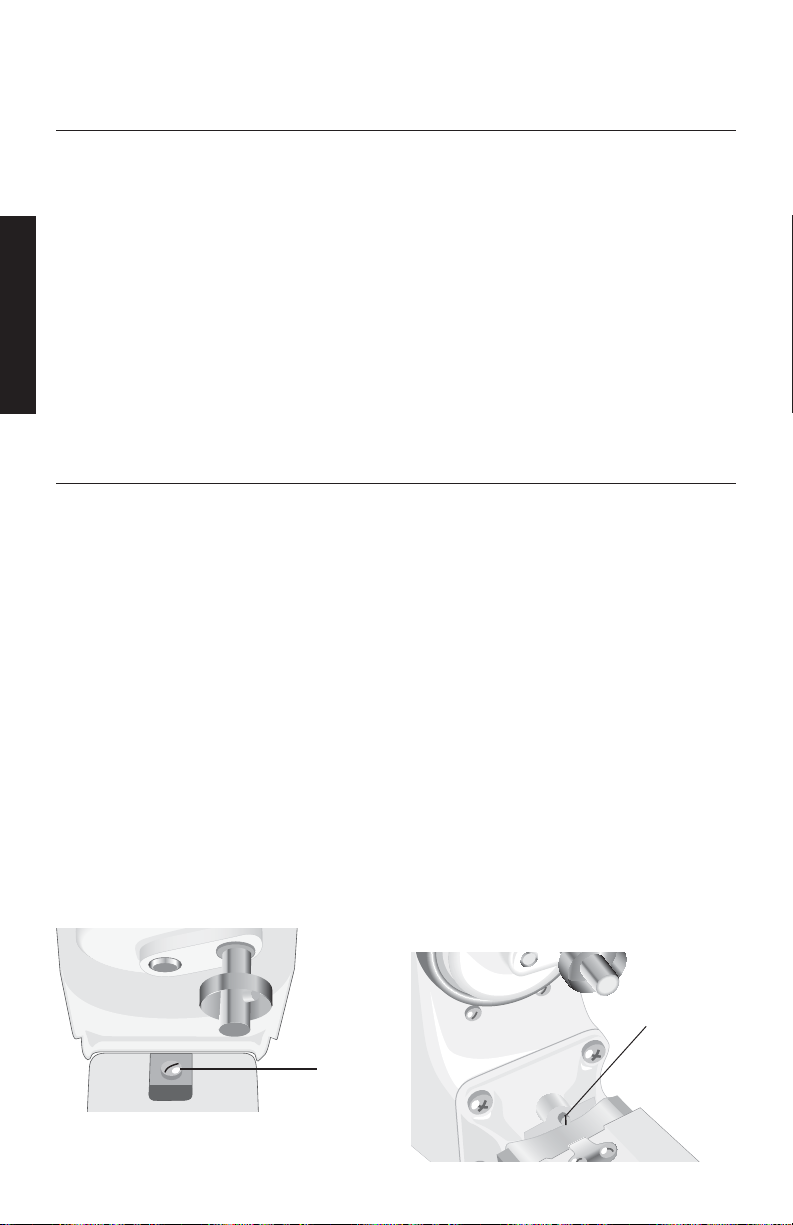
Beater to Bowl Clearance
Your Stand Mixer is adjusted at the factory so the flat beater just clears the bottom of
the bowl. If, for any reason, the flat beater hits the bottom of the bowl or is too far
away from the bowl, you can correct clearance easily.
Tilt Head Stand Mixers:
1. Turn speed control to “O.”
2. Unplug Stand Mixer.
3. Lift motor head.
4. Turn screw (A) SLIGHTLY counterclockwise (left) to raise flat beater or
clockwise (right) to lower flat beater.
5. Make adjustment with flat beater, so it
just clears surface of bowl. If you over
adjust the screw, the bowl lock lever
may not lock into place.
NOTE: When properly adjusted, the flat
beater will not strike on the bottom or
side of the bowl. If the flat beater or the
wire whip is so close that it strikes the
bottom of the bowl, coating may wear off
the beater or wires on whip may wear.
A
Bowl-Lift Stand Mixers:
1. Turn speed control to “O.”
2. Unplug Stand Mixer.
3. Place bowl-lift handle in down
position.
4. Attach flat beater.
5. Turn screw (B) SLIGHTLY counterclockwise (left) to raise flat beater or
clockwise (right) to lower flat beater.
6. Place bowl-lift handle in up position to
check clearance.
7. Repeat steps 5 and 6 if necessary.
NOTE: When properly adjusted, the flat
beater will not strike on the bottom or
side of the bowl. If the flat beater or the
wire whip is so close that it strikes the
bottom of the bowl, coating may wear off
the beater or wires on whip may wear.
B
12
 Loading...