

Manual de Usuario
Batidora
KSM15 Series
KSM150PS Series
KSM175PS Series
KSM180RP Series
KSM180RC Series
KSM185PS Series
W11256121A.indd 1 14/06/2018 15:29:21
W11256121A.indd 2 14/06/2018 15:29:21

ENGLISH
TABLE OF CONTENTS
PARTS AND FEATURES �����������������������������������������������������������������������������������������4
Parts and accessories ��������������������������������������������������������������������������������������4
STAND MIXER SAFETY ����������������������������������������������������������������������������������������� 5
Important safeguards �������������������������������������������������������������������������������������5
Electrical requirements �����������������������������������������������������������������������������������8
Electrical equipment waste disposal ��������������������������������������������������������������8
USING THE STAND MIXER ����������������������������������������������������������������������������������� 9
Speed control guide ���������������������������������������������������������������������������������������9
Accessory guide �������������������������������������������������������������������������������������������10
Attaching/removing the bowl�����������������������������������������������������������������������10
Lifting/lowering the motor head ������������������������������������������������������������������11
Attaching/removing the flat beater, Flex Edge beater*,
wire whip, or dough hook ����������������������������������������������������������������������������11
Beater to bowl clearance ������������������������������������������������������������������������������ 13
Placing/removing the pouring shield* ����������������������������������������������������������13
Using the pouring shield* ����������������������������������������������������������������������������� 14
Operating the speed control ������������������������������������������������������������������������15
Optional attachments ����������������������������������������������������������������������������������� 15
TIPS FOR GREAT RESULTS ���������������������������������������������������������������������������������17
Egg whites ���������������������������������������������������������������������������������������������������� 17
Whipped cream ��������������������������������������������������������������������������������������������17
Mixing tips ���������������������������������������������������������������������������������������������������� 18
CARE AND CLEANING ��������������������������������������������������������������������������������������� 19
TROUBLESHOOTING ������������������������������������������������������������������������������������������ 20
*Included with select models only� Also available as an optional accessory�
| 3
W11256121A.indd 3 14/06/2018 15:29:21
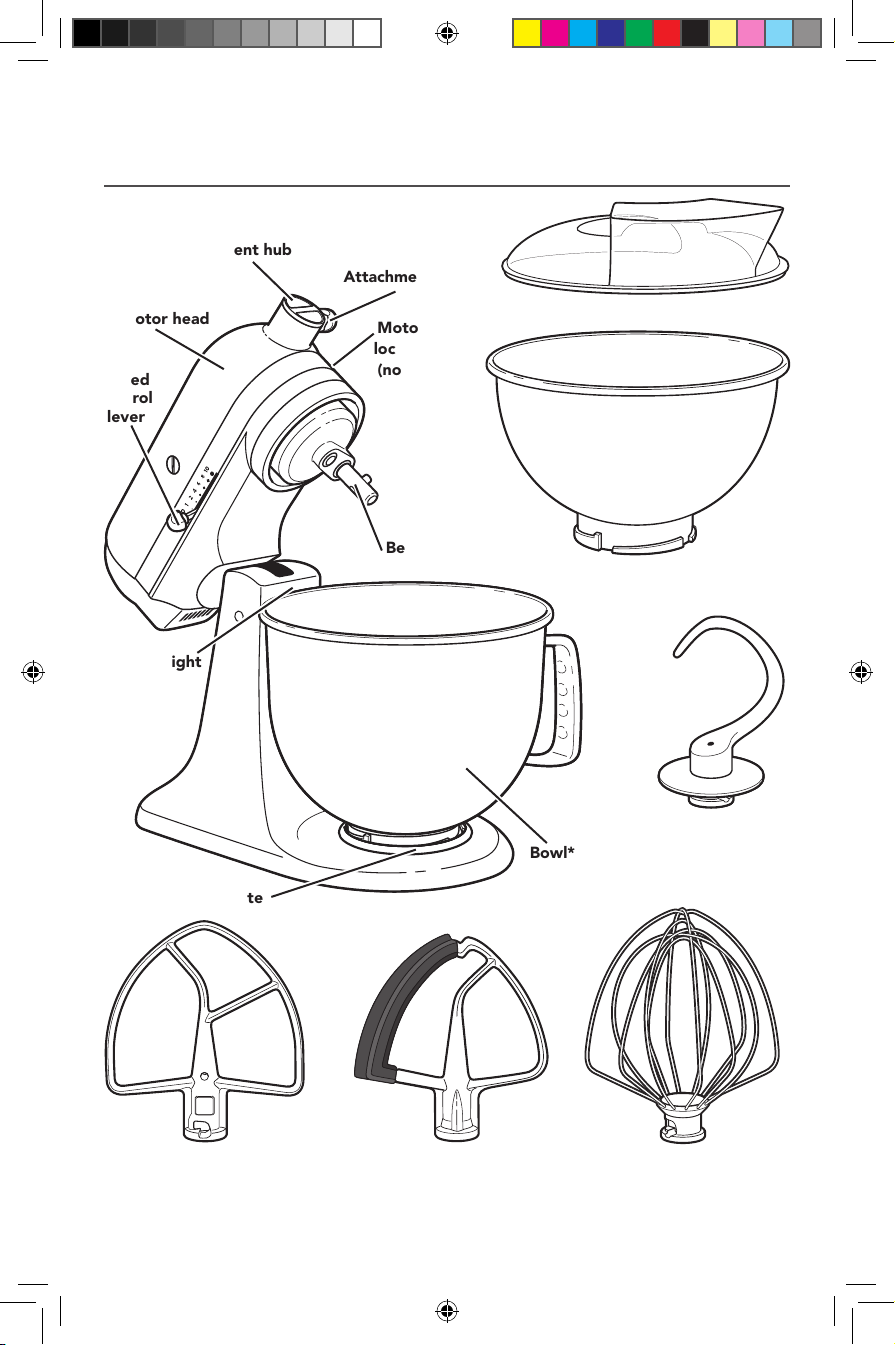
PARTS AND FEATURES
PARTS AND ACCESSORIES
Attachment hub
Attachment knob
Motor head
Speed
control
lever
Beater height
adjustment
screw
(not shown)
Motor head
locking lever
(not shown)
Beater shaft
Pouring shield*
2.8 L stainless steel bowl*
Dough hook
Bowl**
Bowl clamping plate
Flat beater
Flex Edge beater*
Wire whip
*Included with select models only� Also available as an optional accessory�
**The bowl design and material depend on the Stand Mixer model�
4 | PARTS AND FEATURES
W11256121A.indd 4 14/06/2018 15:29:22
ENGLISH
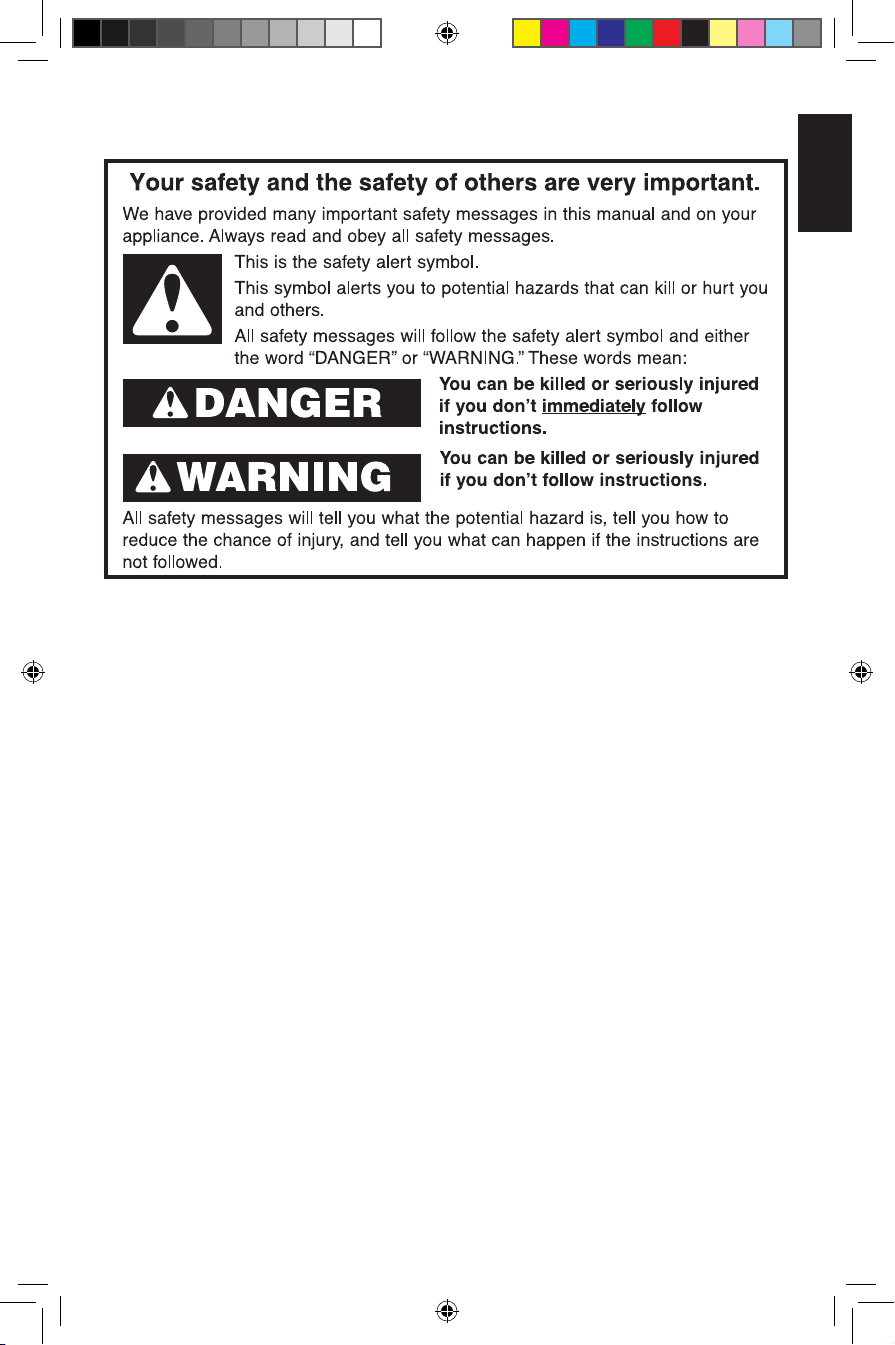
STAND MIXER SAFETY
IMPORTANT SAFEGUARDS
When using electrical appliances, basic safety
precautions should always be followed, including
the following:
1. Read all instructions. Misuse of appliance may result
in personal injury.
2. This appliance is not intended for use by persons,
including children, with reduced physical, sensory,
or mental capabilities, or lack of experience and
knowledge, unless they have been given supervision
or instructions concerning use of the appliance in a
safe way and understand the hazards involved.
STAND MIXER SAFETY | 5
W11256121A.indd 5 14/06/2018 15:29:23

STAND MIXER SAFETY
3. Children should be supervised to ensure that they do
not play with the appliance.
4. If the supply cord is damaged, it must be replaced
by the manufacturer, its service agent, or similarly
qualied persons in order to avoid a hazard.
5. To protect against risk of electrical shock, do not put
appliance in water or other liquid.
6. Never leave the appliance unattended while it is in
operation.
7. Unplug from outlet when not in use, before putting on
or taking off parts, and before cleaning.
8. Avoid contacting moving parts. Keep hands, hair, and
clothing, as well as spatulas and other utensils away
from accessories during operation to reduce the risk of
injury to persons and/or damage to the appliance.
9. Do not operate any appliance with a damaged cord
or plug or after the appliance malfunctions or has
been damaged in any manner. Return appliance
to the nearest Authorised Service Centre for
examination, repair, or adjustment.
6 | STAND MIXER SAFETY
W11256121A.indd 6 14/06/2018 15:29:23
ENGLISH
STAND MIXER SAFETY
10. Do not let the cord hang over edge of table or counter.
11. The use of attachments not recommended or sold
by KitchenAid may cause re, electric shock, or injury.
12. Do not use the Stand Mixer outdoors.
13. Remove at beater, wire whip, or dough hook from
Stand Mixer before washing.
14. To avoid product damage, do not use the Stand
Mixer bowls in areas of high heat such as an oven,
microwave, or on a stovetop.
15. Refer to the “Care and Cleaning” section for
instructions on cleaning the surfaces in contact with
food.
16. This appliance is intended to be used in household
and similar applications such as:
- staff kitchen areas in shops, ofces or other working
environments;
- farmhouses;
- by clients in hotels, motels and other residential
type environments;
- bed and breakfast type environments.
SAVE THESE INSTRUCTIONS
STAND MIXER SAFETY | 7
W11256121A.indd 7 14/06/2018 15:29:23
STAND MIXER SAFETY
ELECTRICAL REQUIREMENTS
Voltage: 220-240 V~
Frequency: 50-60 Hz
Wattage: 300 W
NOTE: To reduce the risk of electrical
shock, this plug will fit in an outlet only
one way� If the plug does not fit in the
outlet, contact a qualified electrician� Do
not modify the plug in any way�
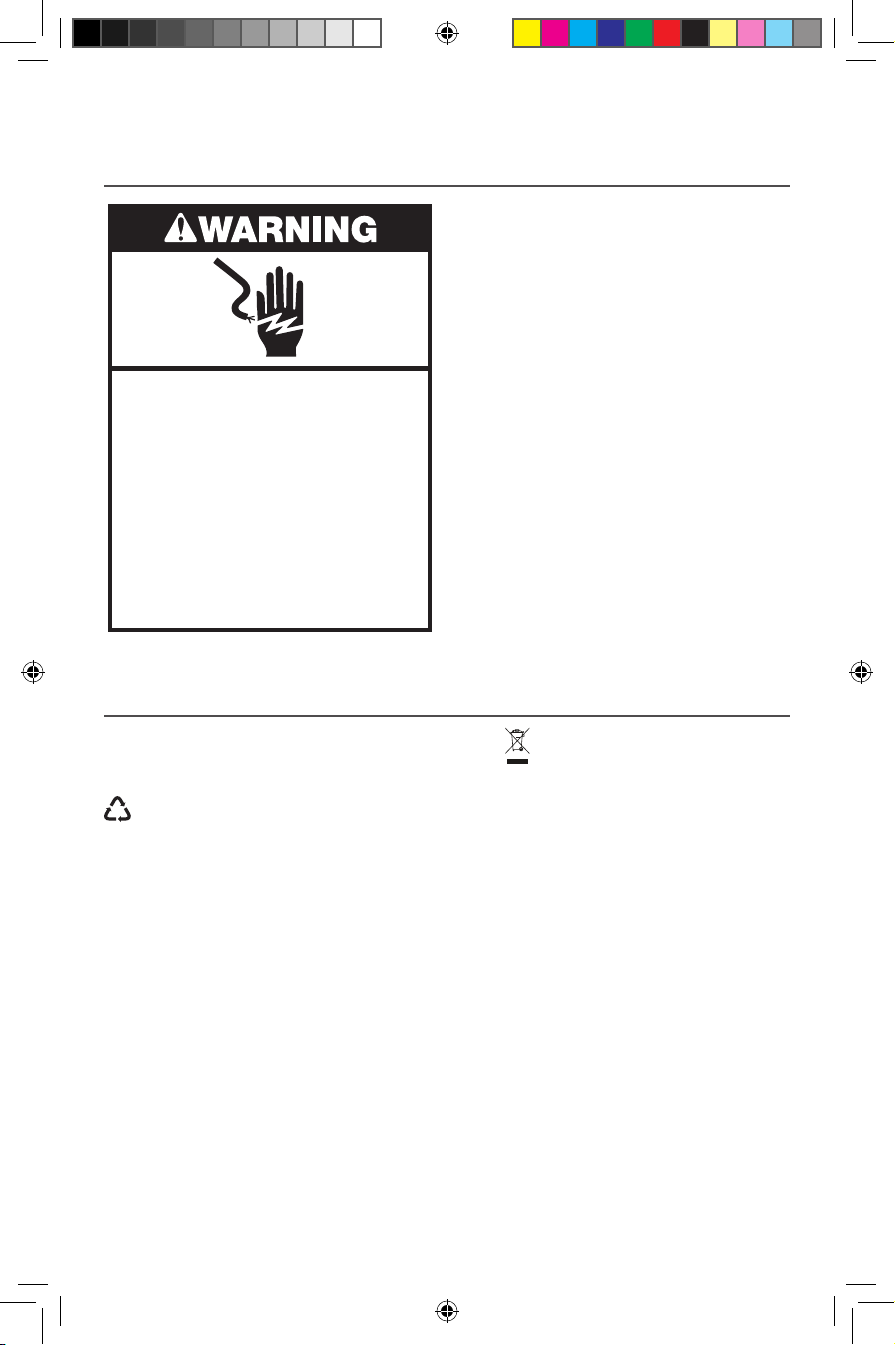
Electrical Shock Hazard
Plug into an earthed outlet.
Do not remove earth prong.
Do not use an adapter.
Do not use an extension cord.
Failure to follow these
instructions can result in
death, fire, or electrical shock.
ELECTRICAL EQUIPMENT WASTE DISPOSAL
A short power supply cord is supplied to
reduce the risk resulting from becoming
entangled in or tripping over a longer
cord�
If an extension cord is used:
• The marked electrical rating of the cord
set or extension cord should be at least
as great as the electrical rating of the
appliance�
• The cord should be arranged so that it
will not drape over the countertop or
tabletop where it can be pulled on by
children or tripped over unintentionally�
Disposal of packing material
The packing material is 100% recyclable
and is marked with the recycle symbol
� The various parts of the packing
must therefore be disposed of
responsibly and in full compliance
with local authority regulations
- The symbol on the product or
documentation indicates that it may not
be treated like normal household waste,
but must be disposed of in accordance
with current local legislation and
regulations for this type of waste�
governing waste disposal�
Scrapping the product
- By ensuring this product is disposed
of correctly, you will help prevent
potential negative consequences for
the environment and human health,
which could otherwise be caused by
inappropriate waste handling of this
product�
8 | STAND MIXER SAFETY
W11256121A.indd 8 14/06/2018 15:29:23

ENGLISH
USING THE STAND MIXER
SPEED CONTROL GUIDE
SPEED ACTION ATTACHMENT DESCRIPTION
STIR
1
SLOW
2
MIXING
For slow stirring, combining, mashing,
starting all mixing procedures. Use to add
flour and dry ingredients to batter, and to add
liquids to dry ingredients. Do not use Speed
1 to mix or knead yeast doughs.
For slow mixing, mashing, faster stirring. Use
to mix and knead yeast doughs, heavy batters
and candies, start mashing potatoes or other
vegetables, cut shortening into flour, and mix
thin or splashy batters.
4
6
8
10
MIXING,
BEATING
BEATING,
CREAMING
FAST BEATING,
WHIPPING
FAST
WHIPPING
For mixing semi-heavy batters, such
as cookies. Use to combine sugar and
shortening and to add sugar to egg whites
for meringues. Medium speed for cake mixes.
For medium-fast beating (creaming)
or whipping. Use to finish mixing cake,
doughnut, and other batters. High
speed for cake mixes.
For whipping cream, egg whites, and
boiled frostings.
For whipping small amounts of cream,
egg whites, or for final whipping of
mashed potatoes.
NOTE: The speed control lever can be set between the speeds listed in the above chart
to obtain speeds 3, 5, 7, and 9 if a finer adjustment is required� Do not exceed Speed 2
when preparing yeast doughs as this may cause damage to the Stand Mixer�
USING THE STAND MIXER | 9
W11256121A.indd 9 14/06/2018 15:29:24
USING THE STAND MIXER
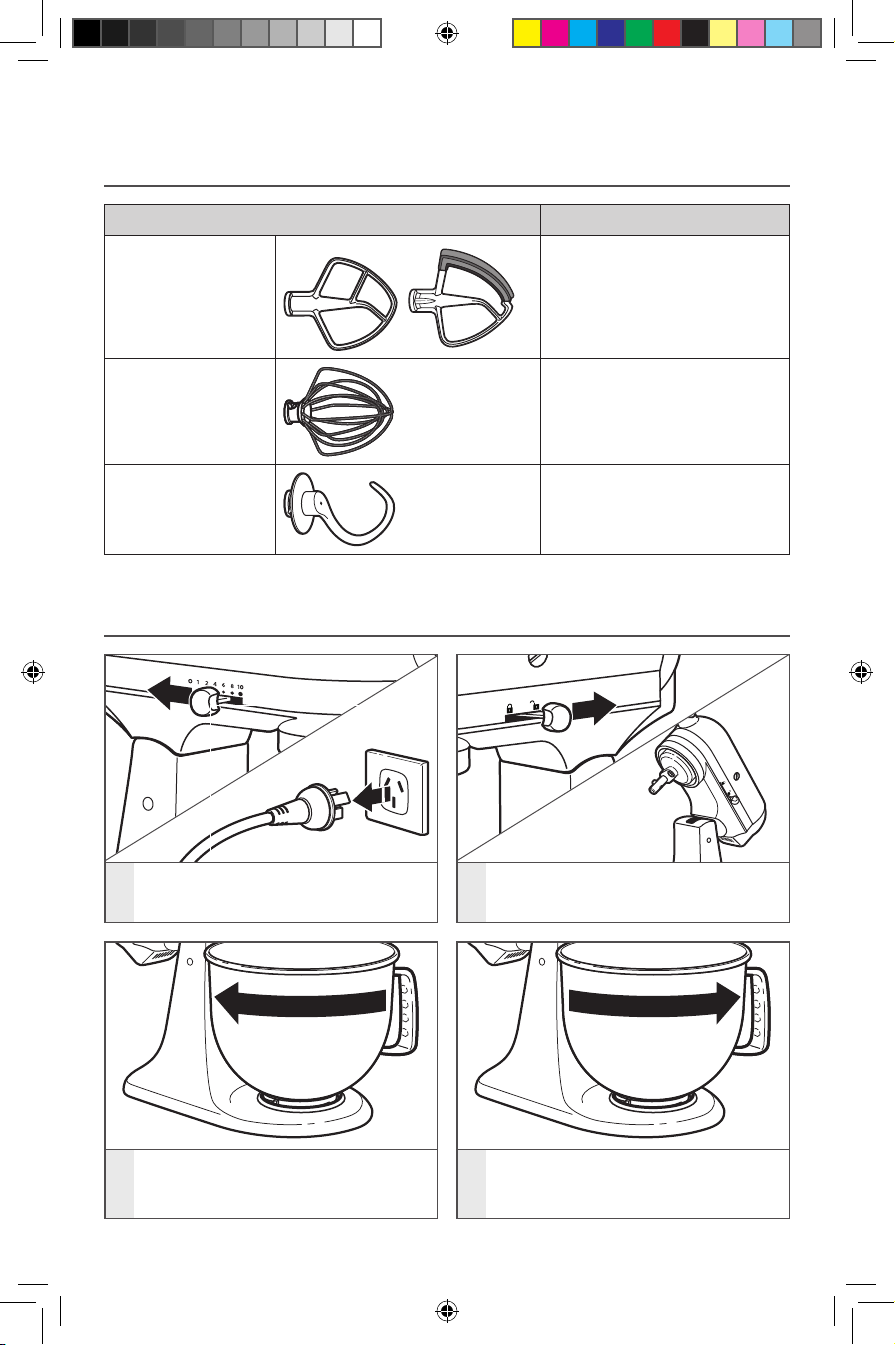
ACCESSORY GUIDE
ACCESSORY USES
Flat beater and
Flex Edge beater*
for normal to heavy
mixtures:
Wire whip for
mixtures that need
air incorporated:
Cakes, creamed frostings,
candies, cookies, pie pastry,
biscuits, meat loaf,
mashed potatoes
Eggs, egg whites, heavy cream,
boiled frostings, sponge cakes,
mayonnaise, some candies
Dough hook for mixing
and kneading yeast
doughs:
Breads, rolls, pizza dough, buns
*Included with select models only� Also available as an optional accessory�
ATTACHING/REMOVING THE BOWL
To attach bowl: Turn speed control
1
to “0”� Unplug Stand Mixer�
Hold the locking lever in the unlock
2
position and tilt motor head back�
Place bowl on bowl clamping
plate� Turn bowl gently in
3
clockwise direction�
10 | USING THE STAND MIXER
W11256121A.indd 10 14/06/2018 15:29:25
To remove bowl: Repeat steps 1
and 2� Turn bowl gently
4
counterclockwise�
ENGLISH
USING THE STAND MIXER
LIFTING/LOWERING THE MOTOR HEAD
To lift motor head: Push the locking
lever to the unlock position and lift
the head� Once lifted, the lever will
1
automatically go back in the lock
position to keep the head lifted�
NOTE: Motor head should always be in the lock position when using the Stand Mixer�
To lower motor head: Push the
locking lever to unlock and gently
bring the head down� The locking
lever will automatically go back in
2
the lock position when the head is
down� Before mixing, test lock by
attempting to raise motor head�
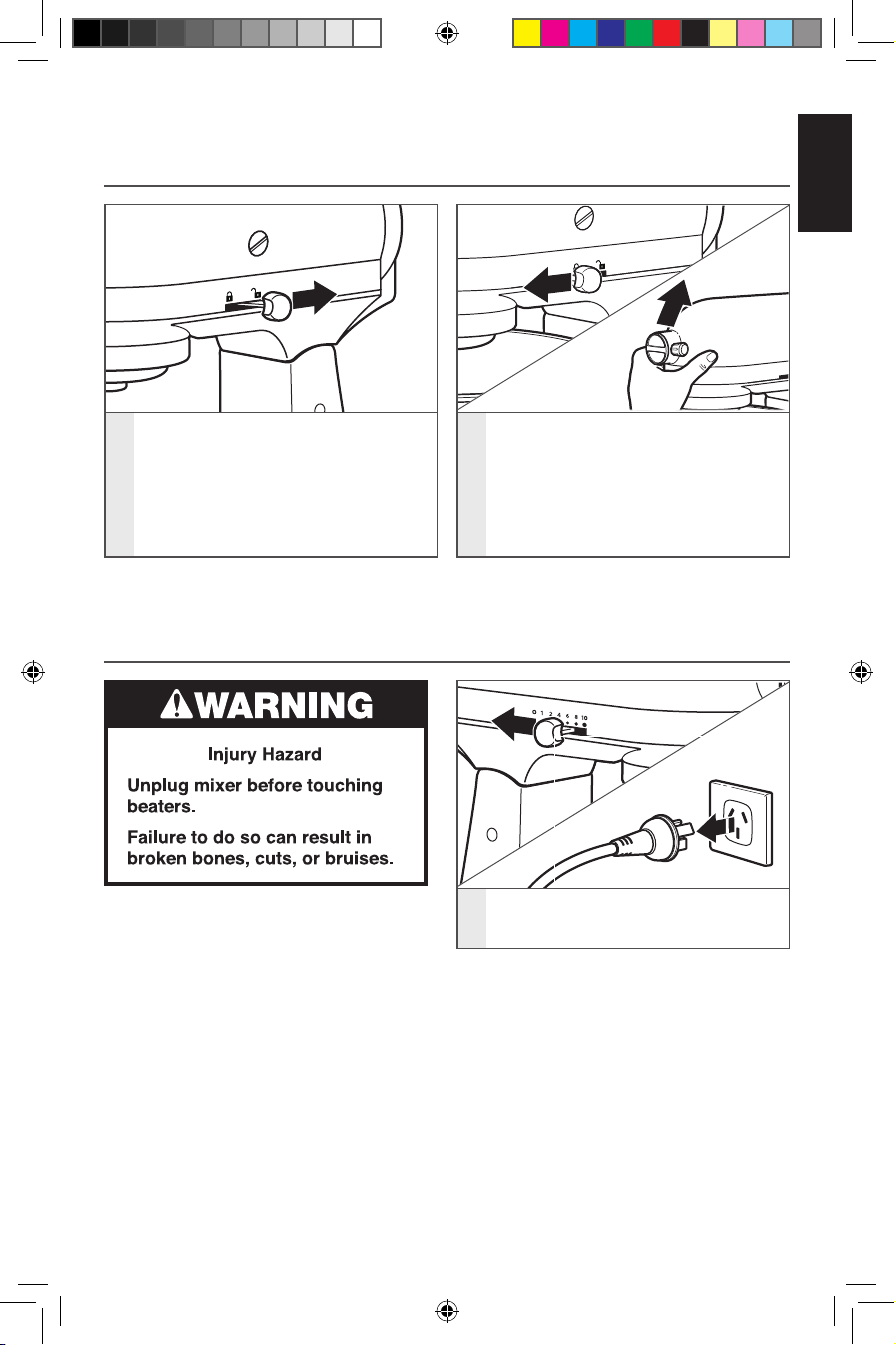
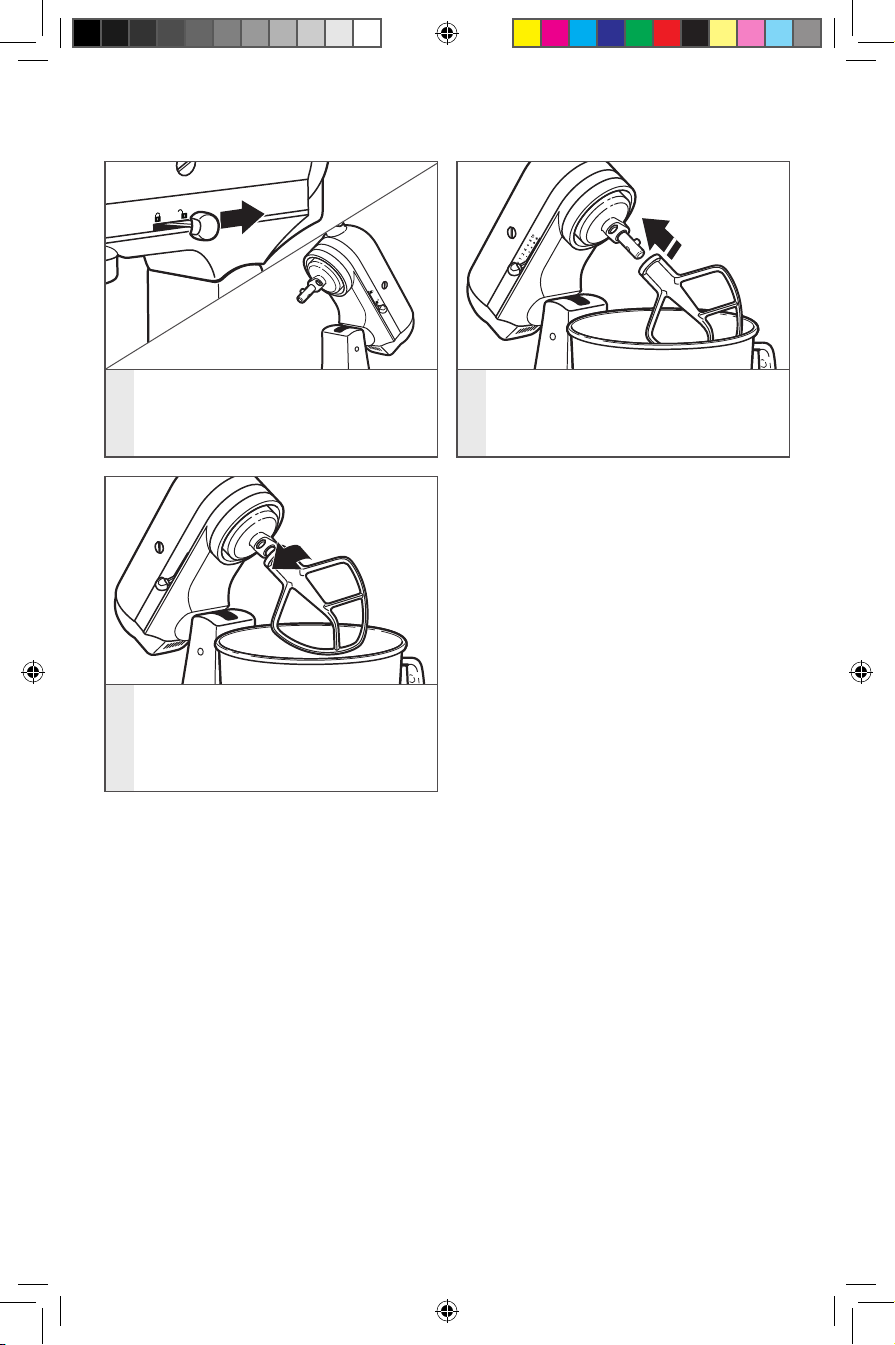
ATTACHING/REMOVING THE FLAT BEATER, FLEX EDGE BEATER*, WIRE WHIP, OR DOUGH HOOK
To attach accessory: Turn speed
1
control to “0”� Unplug Stand Mixer�
*Included with select models only� Also available as an optional accessory�
USING THE STAND MIXER | 11
W11256121A.indd 11 14/06/2018 15:29:25
USING THE STAND MIXER
Hold the locking lever in the unlock
2
position and tilt motor head back�
To remove accessory: Repeat steps 1
and 2� Press accessory upward
as far as possible and turn to the
4
left� Then pull accessory from the
beater shaft�
Slip accessory onto beater shaft and
press upward as far as possible� Then,
3
turn accessory to the right, hooking
accessory over the pin on the shaft�
12 | USING THE STAND MIXER
W11256121A.indd 12 14/06/2018 15:29:26
ENGLISH
USING THE STAND MIXER
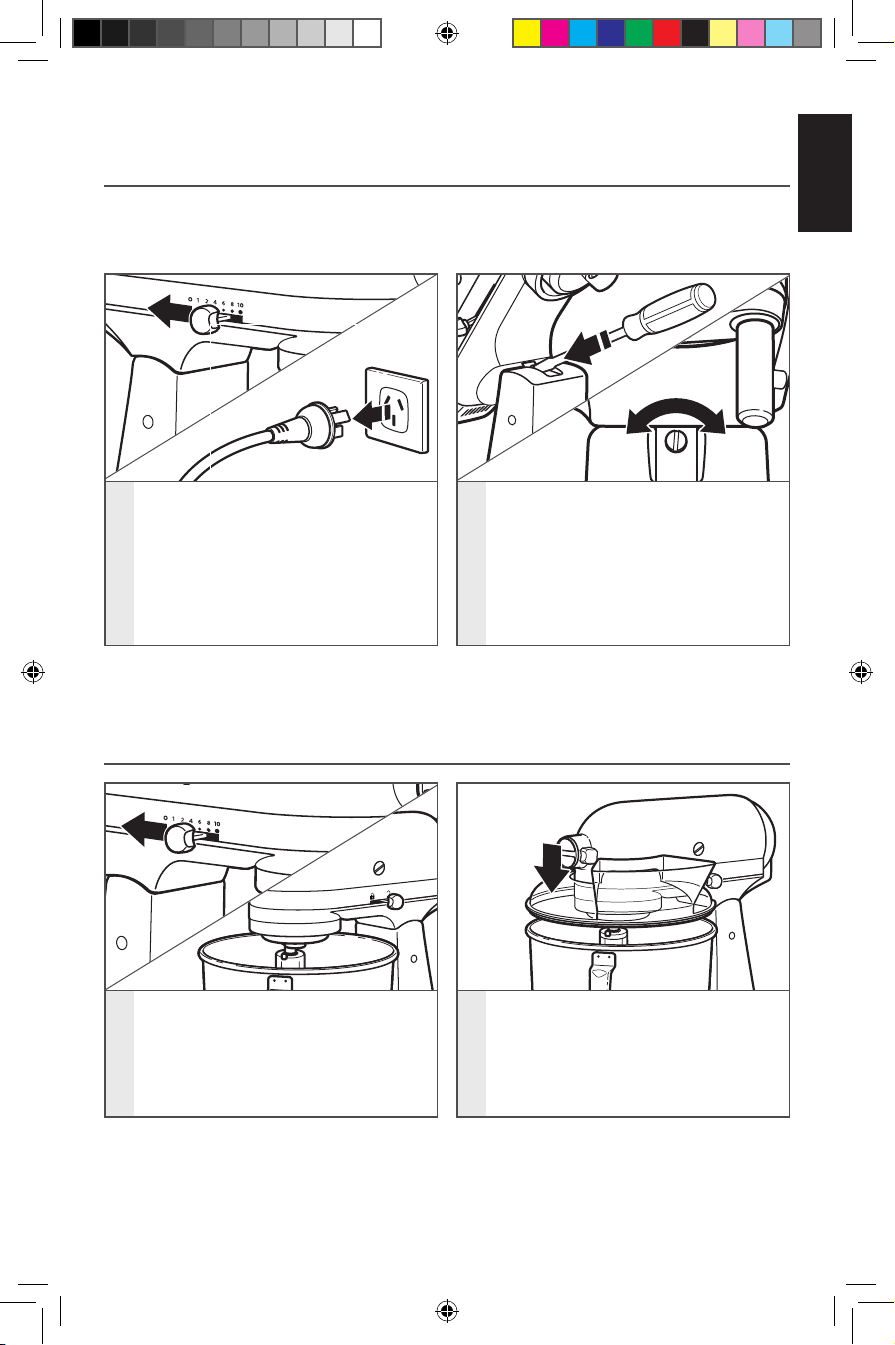
BEATER TO BOWL CLEARANCE
Your Stand Mixer is adjusted at the factory so the flat beater just clears the bottom of the
bowl� If for any reason the flat beater hits the bottom of the bowl or is too far away from
the bowl, you can correct the clearance easily�
Lift motor head� Turn screw slightly
counterclockwise (left) to raise flat
Turn speed control to “0”� Unplug
1
Stand Mixer�
NOTE: When properly adjusted, the flat beater will not strike on the bottom or side
of the bowl� If the flat beater or the wire whip is so close that it strikes the bottom
of the bowl, coating may wear off the beater or wires on whip may wear�
beater or clockwise (right) to lower
flat beater� Make adjustment with
2
flat beater, so it just clears surface
of bowl� If you overadjust the screw,
the bowl lock lever may not lock
into place�
PLACING/REMOVING THE POURING SHIELD*
To place pouring shield: Turn speed
control to “0”� Unplug Stand Mixer�
Attach your chosen accessory� See
1
the “Attaching/removing the flat
beater, Flex Edge beater, wire whip,
or dough hook” section�
*Included with select models only� Also available as an optional accessory�
W11256121A.indd 13 14/06/2018 15:29:26
From the front of the Stand Mixer,
slide the pouring shield over the
bowl until the shield is centred� The
2
bottom rim of the shield should fit
within the bowl�
USING THE STAND MIXER | 13
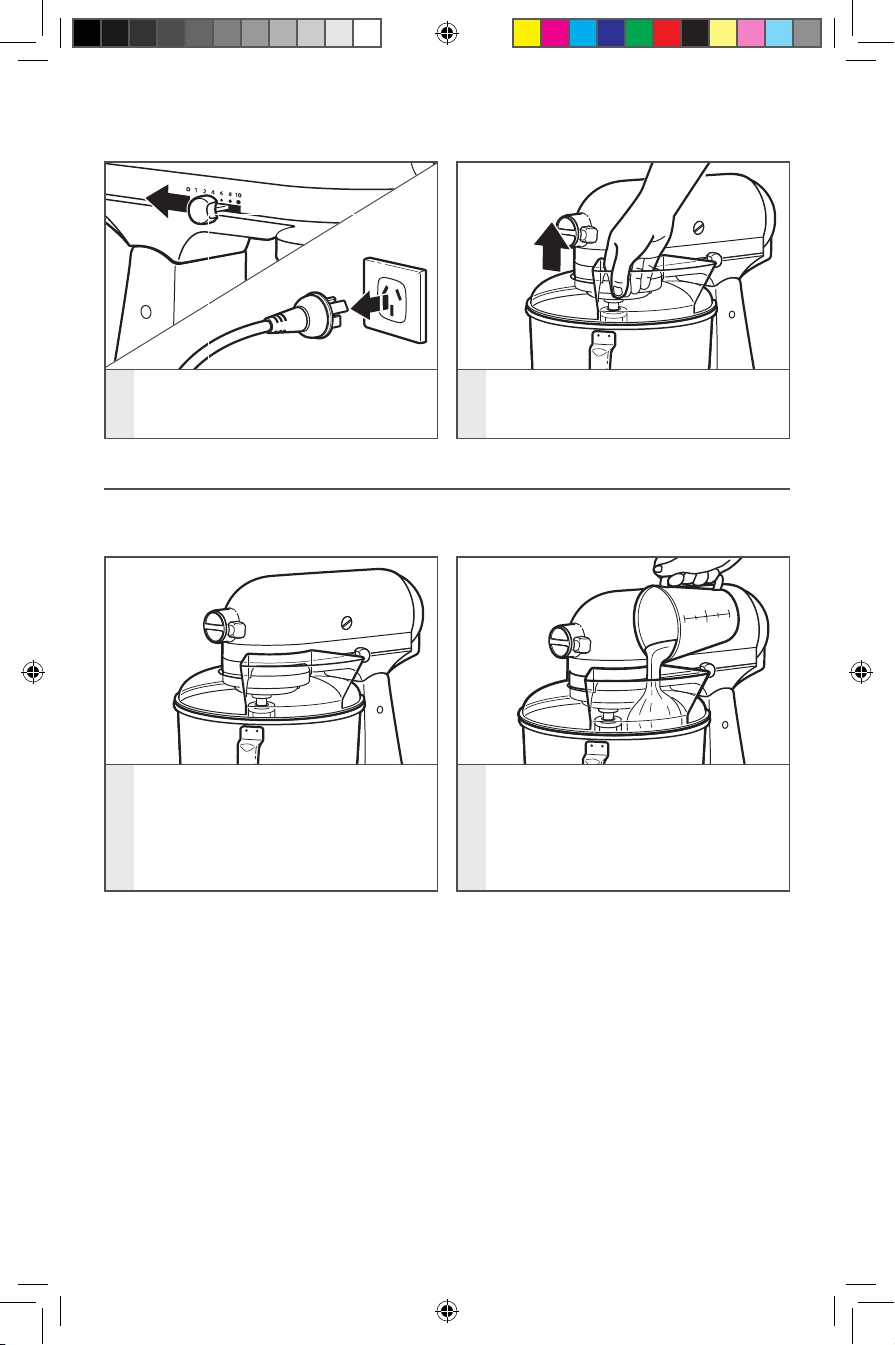
USING THE STAND MIXER
To remove pouring shield:
Turn speed control to “0”�
3
Unplug Stand Mixer�
Lift the front of the pouring shield
clear of the bowl rim and pull forward�
4
Remove attachment and bowl�
USING THE POURING SHIELD*
Use the pouring shield to avoid having ingredients splashing out of the bowl when
mixing, as well as to easily pour ingredients into the bowl while mixing�
For best results, rotate the shield
so the motor head covers the
U-shaped gap in the shield� The
1
pouring chute will be just to the
right of the attachment hub as
you face the Stand Mixer�
Pour the ingredients into the bowl
2
through the pouring chute�
*Included with select models only� Also available as an optional accessory�
14 | USING THE STAND MIXER
W11256121A.indd 14 14/06/2018 15:29:26
 Loading...