

KitchenAid KRAB 6010 Instructions For Use Manual

KRAB 6010
Instructions for use
501971102025_GB:Layout 1 14-01-2008 16:27 Pagina 1

501971102025_GB:Layout 1 14-01-2008 16:27 Pagina 2

Before using the appliance 4
Safeguarding the environment 4
Precautions and general recommendations 5
Foreword 6
Use 6
Routine maintenance 13
Installation guidelines 16
Installation 18
Alarms 22
Technical specifications 22
Standard features 22
Dimensions of equipment 23
Dimensions of packaging 23
Electrical diagram 24
501971102025_GB:Layout 1 14-01-2008 16:27 Pagina 3

• Your new appliance is designed exclusively for
domestic use.
To get the best out of your appliance, please
read these instructions carefully. Inside you
will find out how best to use your appliance
and useful tips on keeping food.
Please keep this booklet for future reference.
1. After unpacking the appliance, make sure that it
is not damaged and that the door closes
properly. Any damage must be reported to the
dealer within 24 hours of delivery of the
appliance.
2. Allow the appliance to stand for at least least
two hours after installation before switching the
appliance on, this is to ensure that the cooling
circuit has time to reach full efficiency.
3. Make sure that the installation and electrical
connection are carried out by a qualified
engineer according to the manufacturer’s
instructions and the local legislation in force.
4. Clean the inside of the appliance before using it.
Before using the appliance
1. Packing
The packing material is 100% recyclable and is
labelled with the recycling symbol. Please dispose of
all packing responsibly and carefully. Keep the
packaging material (plastic bags, polystyrene parts,
etc.) out of the reach of children as it is potentially
hazardous.
2. Scrapping/Disposal
The appliance is manufactured using recyclable
material.
This appliance is marked in conformity with
European Directive 2002/96/EC, Waste Electrical
and Electronic Equipment (WEEE). Ensuring correct
disposal of the appliance helps to prevent any
adverse consequences for health and the
environment.
The symbol on the product, or on the
documents accompanying this appliance indicates
that this product should not be disposed of as
household waste. Please dispose of this appliance at
an Electrical & Electronic Equipment Collection
point as in accordance with local environmental
regulations for waste disposal.
When the appliance is to be scrapped, make it
unusable by cutting the power cable and removing
the doors and shelves so that children cannot be
trapped inside easily.
Dispose of the appliance responsibly by taking it to
an authorised diaposal point. Do not leave it
unattended even for a few days as it is a potential
source of danger for children. For details of your
local collection point please contact your local
authority.
Information:
This appliance does not use CFC. The refrigerant
system contains either R404a, refer to the rating
plate inside the appliance.
Appliances with Isobutane (R600a): isobutane is a
natural gas without environmental impact, but is
flammable. Therefore, make sure the refrigerant
circuit pipes are not damaged.
Declaration of conformity
• This appliance is intended for storing food and is
manufactured in conformity with European
regulation (EC) No. 1935/2004.
• This product has been designed, manufactured
and marketed in compliance with:
- the safety objectives of Low Voltage Directive
2006/95/EC (replacing 73/23/EEC and
subsequent amendments);
- the protection requirements of Directive "EMC"
89/336/EEC amended by Directive 93/68/EEC.
• Electrical safety of the appliance can only be
guaranteed if it is correctly connected to an
approved earthing system.
Safeguarding the environment
4
501971102025_GB:Layout 1 14-01-2008 16:27 Pagina 4

• During installation, ensure the power cable is
not damaged.
• Make sure the appliance is not near a heat
source.
• To guarantee adequate ventilation, leave a space
on both sides and above the appliance following
the installation instructions.
• Keep the appliance ventilation openings free.
• Power cable modification or replacement must
only be carried out by qualified personnel.
• Make sure the voltage specified on the rating
plate corresponds to that of your home.
• The appliance must be handled and installed by
two or more persons.
• Be careful not to damage the floors (e.g.
parquet) when moving the appliance.
• Do not use single/multi adapters or extension
cords.
• Install the appliance in a dry and well-ventilated
place. The appliance is designed for use in area
where the temperature comes within the
following ranges, according to the climatic
classification given on the rating plate. The
appliance may not work properly if it is left for
along period at a temperature above or below
the specified range.
Climatic Class Amb. T (°C) Amb. T (°F)
SN from 10 to 32 from 50 to 90
N from 16 to 32 from 61 to 90
ST from 16 to 38 from 61 to 100
T from 16 to 43 from 61 to 110
• Do not store or use petrol, flammable liquids or
gas in the vicinity of this or other electrical
appliances. In fact, the fumes can cause fires or
explosions.
• Do not use mechanical, electric or chemical
means other than those recommended by the
Manufacturer to speed up the defrost process.
• Do not damage the appliance refrigerant circuit
pipes.
• Do not use or place electrical appliances inside
the product if they are not of the type expressly
authorised by the Manufacturer.
• This appliance should not be used by children or
people with limited physical or mental abilities
and with no experience or knowledge of its use,
unless they are supervised by someone in charge
of their safety or who has taught them how to
use the appliance. Children should not play with
the appliance.
• Do not swallow the contents (non-toxic) of the
ice packs (in some models).
• Before any maintenance or cleaning, unplug the
plug from the power socket or switch off the
electrical power.
• The Manufacturer declines any liability if
the above advice and precautions are not
respected.
Precautions and general recommendations
5
501971102025_GB:Layout 1 14-01-2008 16:27 Pagina 5
A Blast chiller is a professionally designed household equipment for blast chilling and shock freezing food
and fast chilling beverages.
Food that is blast chilled with the blast chiller after cooking maintains its original texture flavour and aroma
for 5-7 days. Shock-frozen foods do not collapse and maintain its original texture and taste once thawed.
Foreword
IMPORTANT NOTICE TO USERS
• These Use and Maintenance instructions are part of the product and provide all the instructions that
are needed for the correct installation, use and maintenance of this equipment.
• Users and installers should read these instructions carefully and always refer to them. These
instructions must be kept in a known, easily accessible location.
• Store these instructions carefully and give them to any future owner of the equipment.
• If you notice any problems with the equipment (for example if the power cable is damaged or if the
control panel is not working) do not use the blast chiller and notify your dealer immediately.
• This equipment must be used exclusively by competent adults; DO NOT allow children or disabled
adults to use the equipment without correct supervision!
• This equipment has been designed exclusively for its intended use, i.e. blast chilling and shock freezing
food. Any other use is considered inappropriate and potentially dangerous.
• In the case of a power supply interruption during the blast chilling or shock freezing cycle, the
equipment will extend the remaining cycle by 30 minutes when it restarts.
• Caution! Do not obstruct the blast chiller’s top and front air vents, otherwise the equipment may
overheat and suffer damage.
BEFORE YOU USE THE BLAST CHILLER...
The following instructions will help you make the best use of use the
blast chiller.
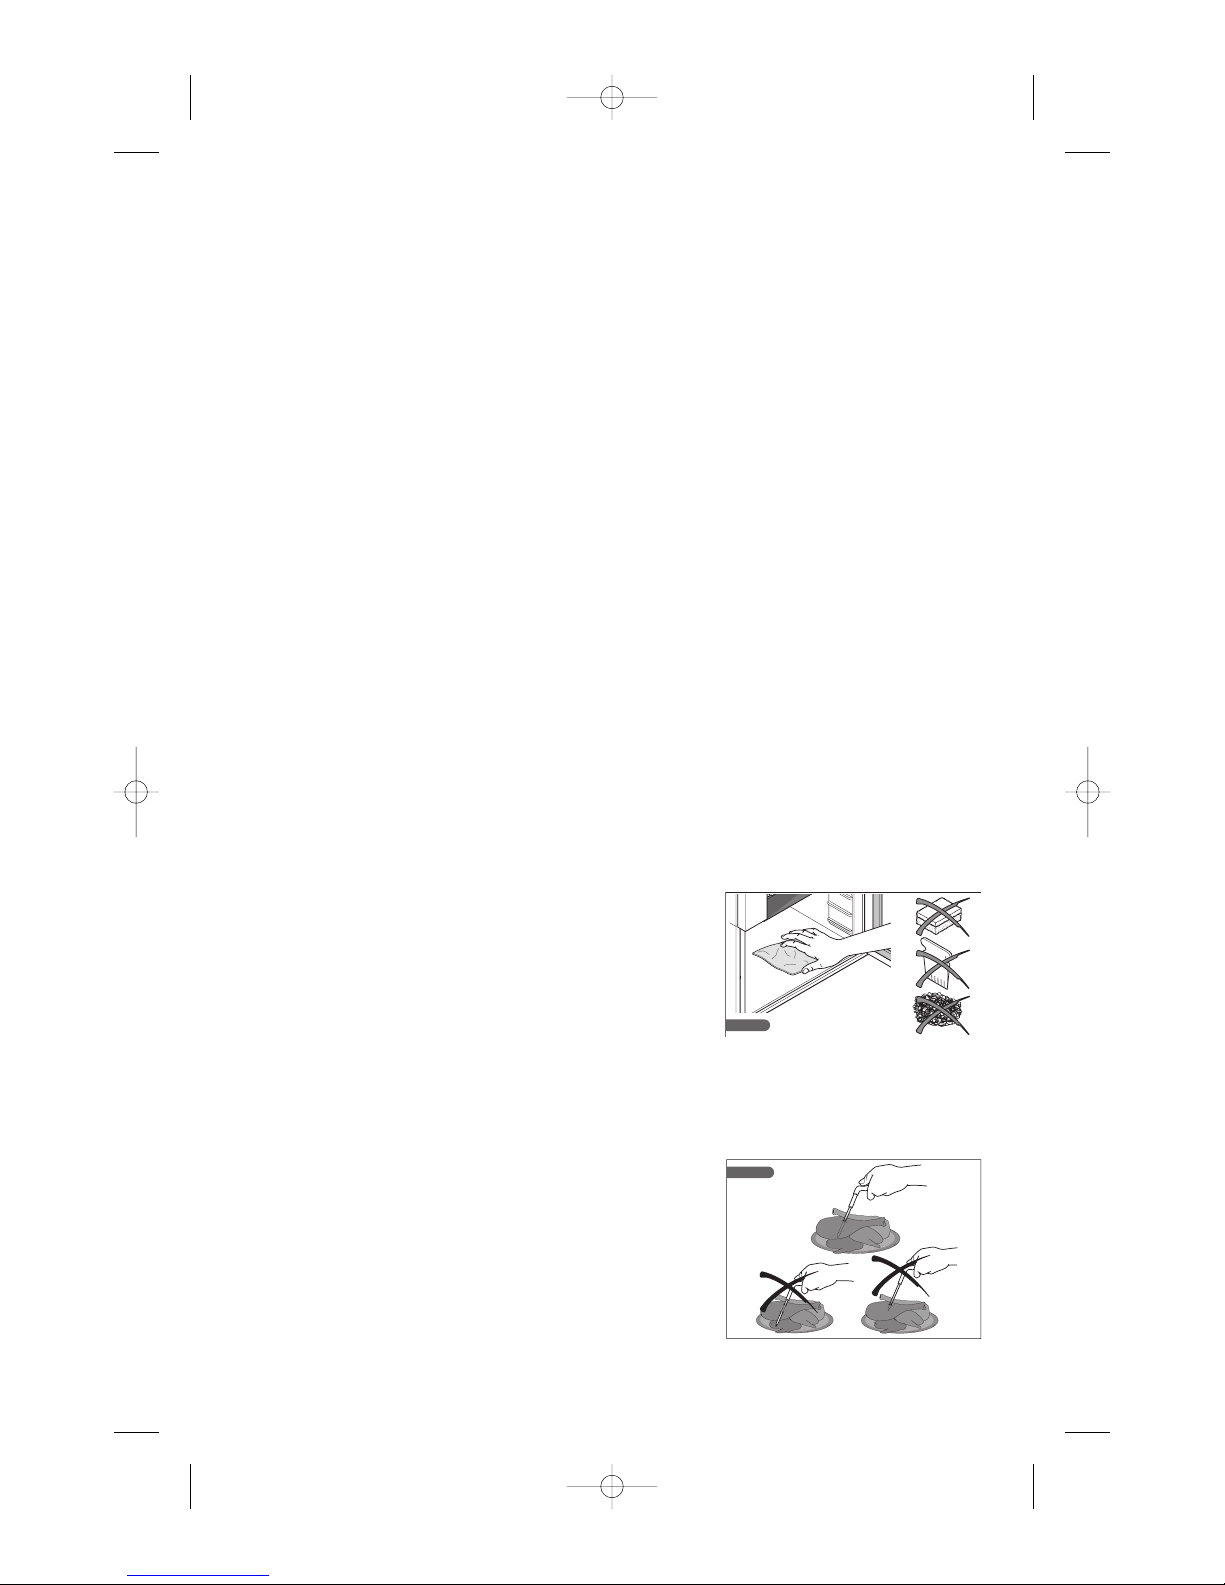
Preliminary cleaning of the chamber
Before you start the equipment clean the inside of the chamber with
a soft cloth and neutral detergent.
Do not use stainless steel scouring pads, scrapers or abrasive or acid
substances which could permanently damage the stainless steel
surface (fig. 1.2.1).
Rinse thoroughly after cleaning.
Available operating modes
Core probe controlled cycle
The core probe is attached to the door of the equipment. It is used
to measure the temperature at the centre, or core of the food to be
blast chilled or shock frozen. When the core probe detects that the
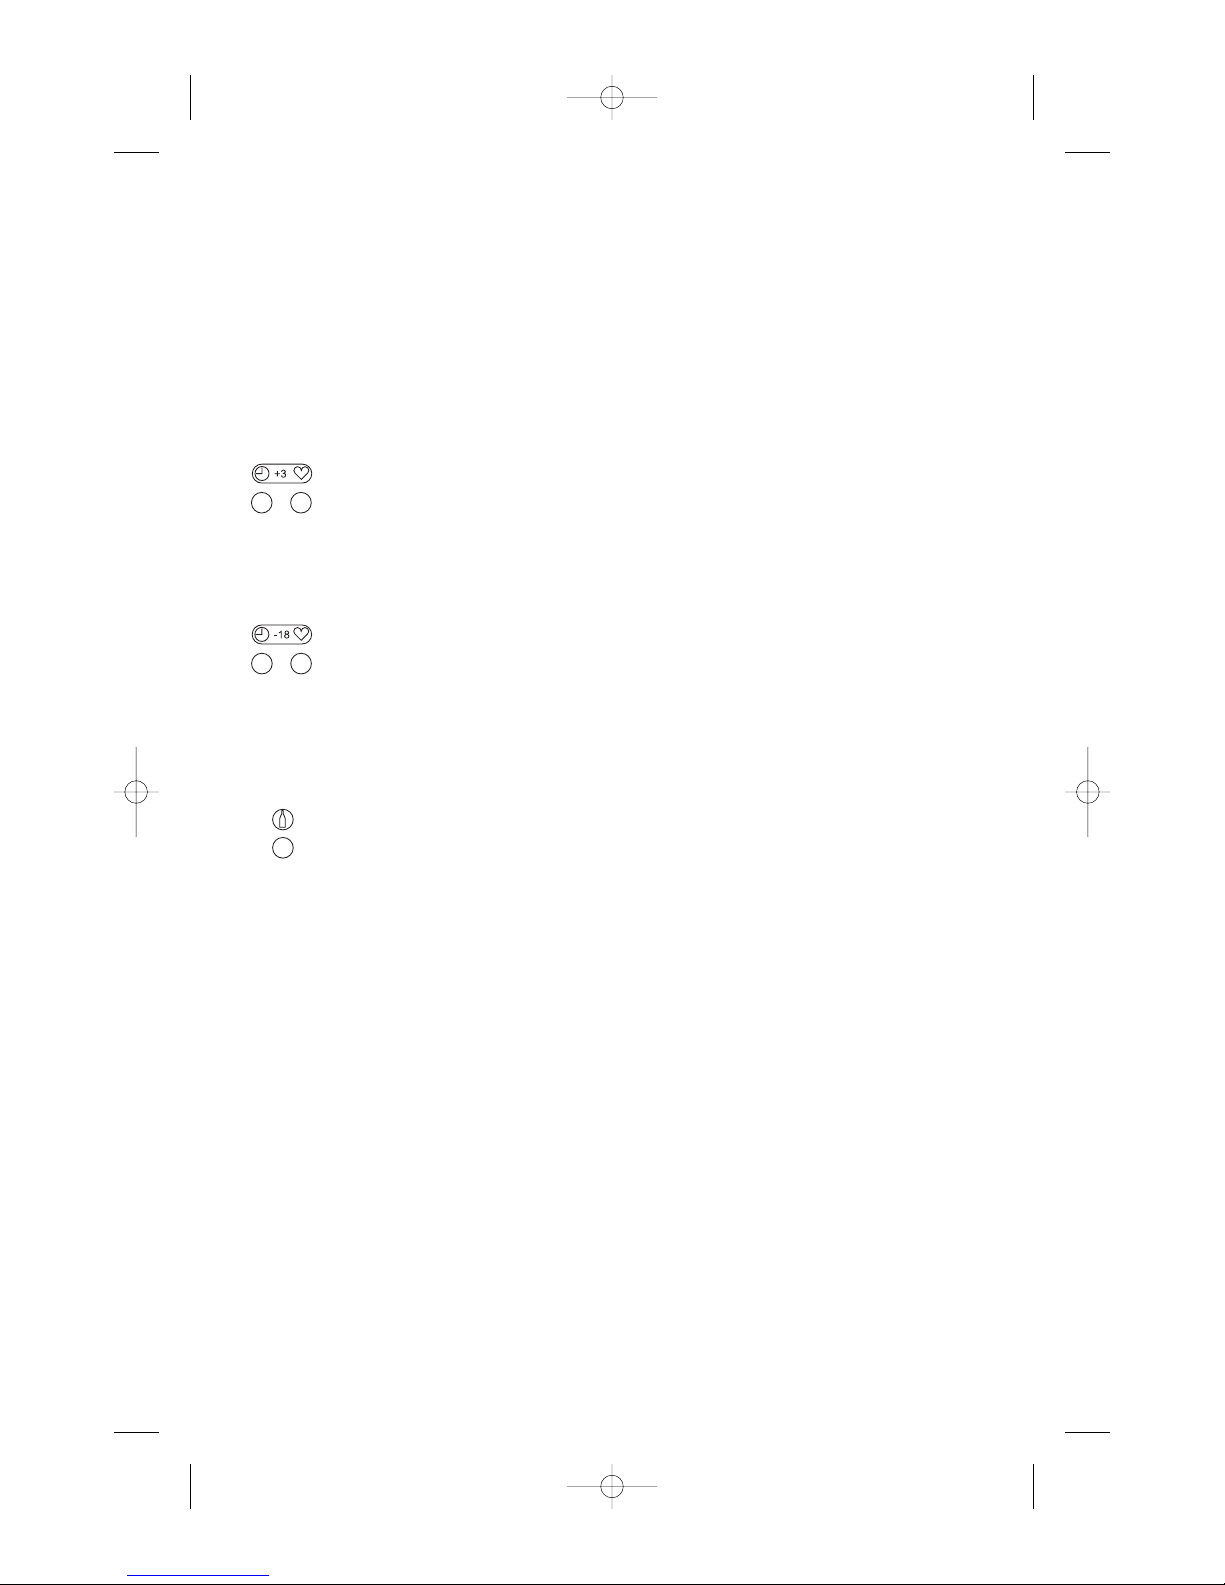
temperature at the core of the food product has reached +3°C
(during the blast chilling cycle) or -18°C (during the shock freezing
cycle) it stops the cycle automatically.
The core probe must be inserted into the food to be blast chilled or
shock frozen before the cycle is started.
Caution! Insert the core probe deep into the centre of the food
product, making sure it does not come out (fig. 1.2.2). Handle with
care as it is sharp. At the end of the blast chilling/shock freezing cycle
clean with a soft cloth and lukewarm water, and then replace in the
bracket.
Caution! If you are blast chilling or shock freezing products of
different sizes, insert the core probe into the thickest product.
Use
6
1.2.1
OK!
1.2.2
501971102025_GB:Layout 1 14-01-2008 16:27 Pagina 6
7
Timer-controlled cycle
The blast chilling and shock freezing cycles can also be carried out in timer-controlled mode. The pre-set
duration of the blast chilling cycle is 1:30 (hours:minutes) and that of the shock freezing cycle is 4:00
(hours:minutes). At the end of the pre-set cycle the equipment stops automatically.
Caution! The core probe cannot be used in conjunction with the timer-controlled mode.
Caution! The pre-set duration of the cycle can be adjusted by the user according to the type of food to
be blast chilled or shock frozen.
Functions
Blast chilling
The blast chilling cycle rapidly reduces the temperature of food products to +3°C at the core (with air
temperature inside the chamber between 0°C and 2°C) within a maximum of 1:30 (hours:minutes). The
blast chilling cycle can be operated in the timer or core probe mode.
Shock freezing
The shock freezing cycle rapidly reduces the temperature of food products to -18°C at the core (with air
temperature inside the chamber between -35°C and -40°C). This cycle has to be completed as rapidly as
possible, within a maximum of 4:00 (hours:minutes). The shock freezing cycle can be operated in the
timer or core probe mode.
Fast chilling cycle for beverages
This cycle is used to chill beverages in bottles or cans. You can select one of 3 pre-set chilling cycles (5-1015 minutes) by pressing the cycle button repeatedly.
Holding mode
“Holding mode” starts automatically at the end of the blast chilling, shock freezing or fast chilling cycles.
When the equipment is in holding mode the temperature display flashes and a brief signal is emitted.
At the end of the blast chilling cycle the temperature inside the chamber is maintained at a steady +2°C.
At the end of the shock freezing cycle the temperature inside the chamber is maintained at a steady -20°C.
At the end of the beverage fast chilling cycle the temperature inside the chamber is maintained at a steady
+ 10°C.
Caution! “Holding mode” lasts indefinitely and can only be interrupted by the operator.
It is advisable that you DO NOT use the equipment as a normal “holding cabinet” and that you DO NOT
open and close the door too often when the equipment is in the holding mode.
“Holding mode” is considered a temporary phase between the blast chilling and/or the shock freezing
cycles and refrigerated conservation in a normal refrigerator or freezer.
Use
501971102025_GB:Layout 1 14-01-2008 16:27 Pagina 7
8
Air temperature gauge
The air temperature gauge (which is not accessible or visible, and cannot be adjusted by the operator)
continuously monitors the temperature of the air inside the chamber.
This is in order to:
• perform safety checks
• keep air temperature inside the chamber constant during “holding mode” after the blast chilling, shock
freezing or beverage fast chilling cycles.
Containers and lids
It is recommended that you use trays and containers that are as shallow as possible, and not deeper than
65 mm. Do not cover the trays and containers with lids or cling film: the bigger the surface of the food
product exposed to the cold air, the shorter the blast chilling cycle.
Caution! Make sure that the containers are suitable for low temperatures (-40°C).
Loading the equipment
Make sure that the foods to be blast chilled and/or shock frozen do not overlap and are not thicker than
5-8 cm. Do not overload the equipment. The maximum load per cycle is indicated by the manufacturer:
Blast chilling: 7 kg
Shock freezing: 4 kg
Check that there is enough space between the trays, so as to allow enough air to pass through.
The maximum weight that can be supported by each grille is 5 kg.
Food temperatures
Caution! Do not leave cooked food too long at room temperature before blast chilling or shock freezing
it. Food at room temperature undergoes the following harmful changes:
- it loses moisture
- it loses its original quality (colour, fragrance, flavour, etc...)
- it is more subject to bacterial contamination
It is for these reasons that we recommend that the blast chilling and/or shock freezing cycle start as soon
as the food has been prepared and/or cooked. Food should undergo the blast chilling and/or shock
freezing cycle whilst at a high temperature (70°C or more).
Caution! If you are placing very hot containers (above 100°C) into the blast chiller, you should pre-chill
the empty chamber (i.e. with nothing inside). Also remember that hot containers should not be placed
directly onto the bottom of the chamber, but on the wire shelves provided instead.
Use
501971102025_GB:Layout 1 14-01-2008 16:28 Pagina 8
9
Use
1.3.1
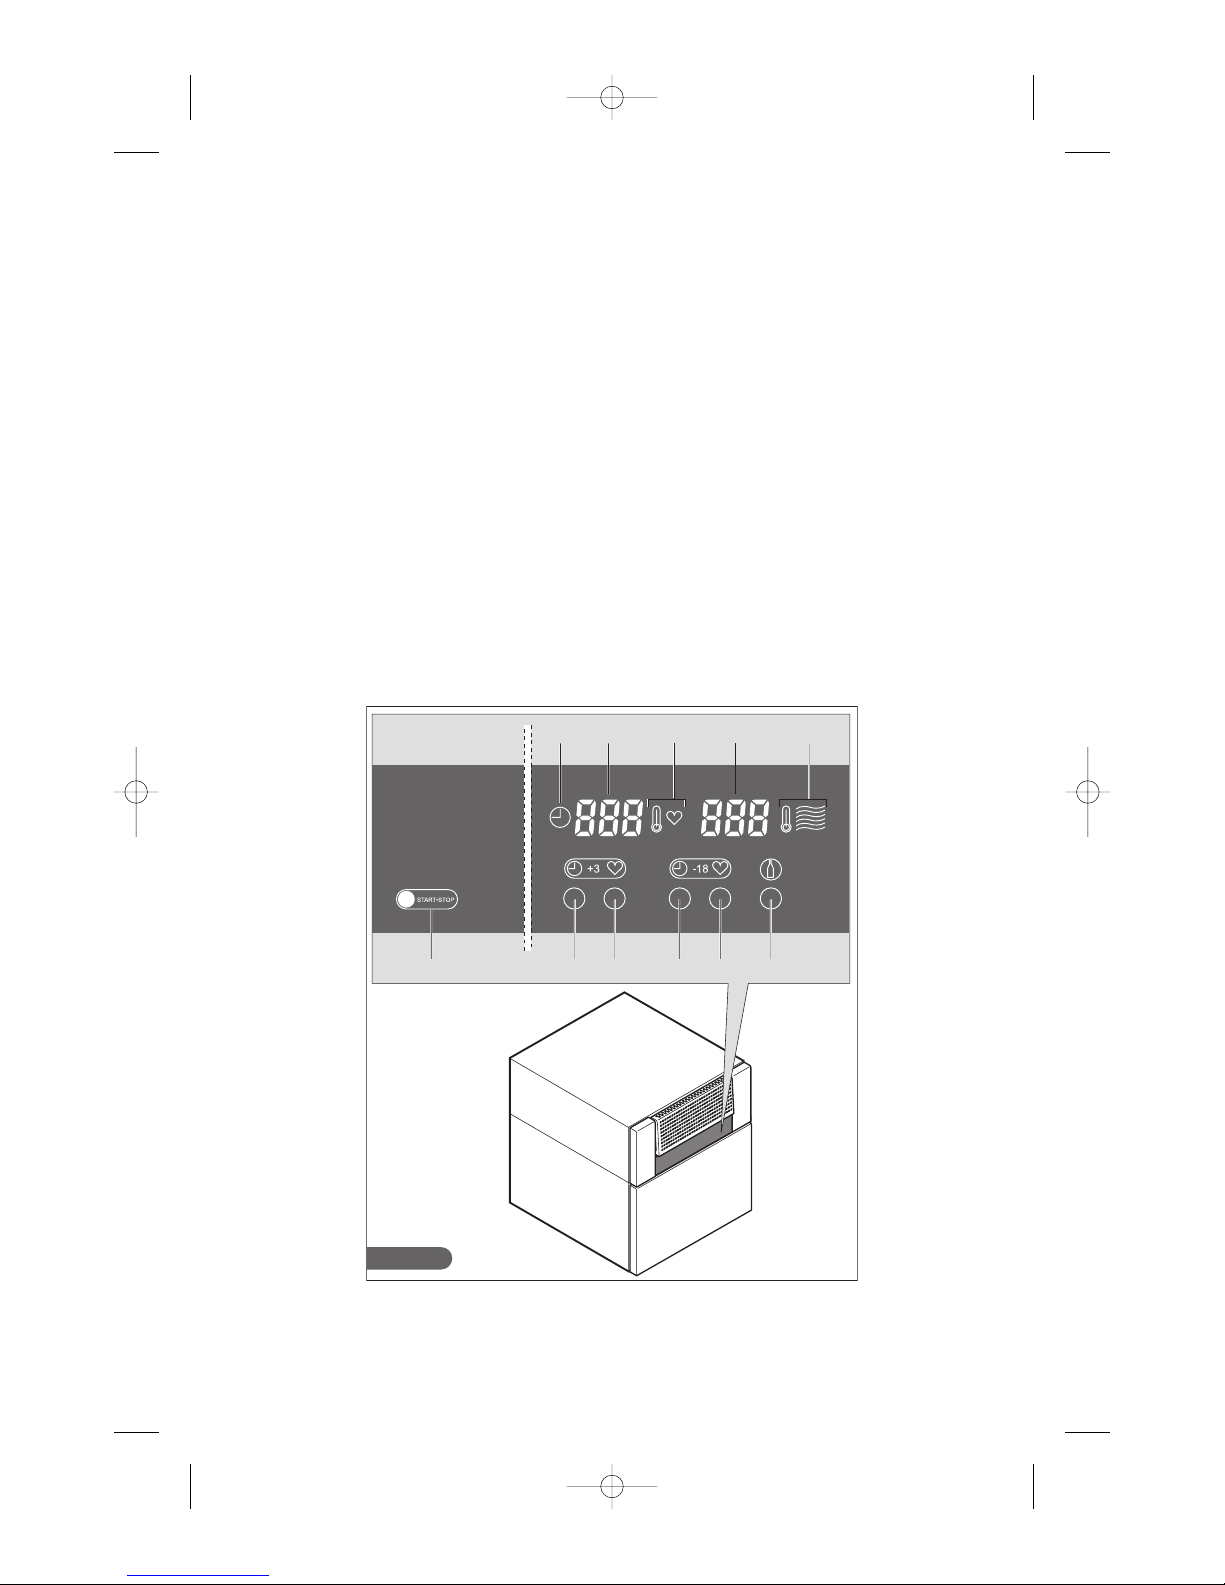
B1 B2 C1 C2 D
E
A
F H G L
CONTROL PANEL
A: START/STOP starts/stops the selected cycle
B1: selects the timer-controlled blast chilling cycle with a pre-set duration of 1:30 (hours:minutes). Press
repeatedly to set the duration of the cycle to 0:30 (hours:minutes) or to 1:00 (hours:minutes).
B2: selects the temperature-controlled blast chilling cycle (i.e. controlled by the core probe).
C1: selects the timer-controlled shock freezing cycle with a pre-set duration of 4:00 (hours:minutes).
Press repeatedly to set the duration of the cycle to 1, 2 or 3 hours.
C2: selects the temperature-controlled shock freezing cycle (i.e. controlled by the core probe).
D: selects the “BEVERAGE CHILLING CYCLE”. Press repeatedly to set the duration of the cycle to
5,10 or 15 minutes. The cycle duration appears on the display (H).
E: This symbol indicates the timer-controlled mode (with duration set by the user)
F: This display shows the set duration of the timer-controlled cycle or the actual temperature
measured by the core probe in temperature-controlled mode.
H: This display shows the air temperature inside the chamber.
G: This symbol refers to the “core probe” mode.
L: This symbol refers to the “air temperature gauge” mode.
501971102025_GB:Layout 1 14-01-2008 16:28 Pagina 9
 Loading...