

Page 1
MODEL
KPFD200
FROZEN DESSERT
MAKER
Table of Contents ...............................3
Frozen Dessert Maker Safety...............4
Important Safeguards.........................5
Proof of Purchase & Registration.........6
Electrical Requirements.......................7
Introduction
Section Contents
P RO L INE™S ERIES
INTRODUCTION
1
Page 2
2
Few things have the power to delight like fresh ice cream and
other frozen desserts. And for your family and guests, that
power is now at your fingertips. The KitchenAid™
PRO LINE™ Series Frozen Dessert Maker is an unequaled
blend of convenience and quality that will produce expert
results in about 30 minutes, whether you’re making gourmet
ice cream for your family or premium margaritas for a dinner
party. It’s so easy and versatile, you’ll find yourself donning a
chef’s hat and experimenting with new recipes and ingredients
– and creating one sensational taste after another.
Professional results begin with a commercial quality design. The housing and freezing cylinder are
stainless steel for the ultimate in durability, good looks, and sanitary clean-up. The rugged refrigeration
system will stand up to years of heavy use. And the dispenser is not only a great way to fill ice cream
cones for the kids, it makes pouring frozen drinks effortless.
This commercial-style design also provides expert control: the PRO LINE™ Series Frozen Dessert Maker is
the only home freezer that lets you control the amount of air mixed into your dessert. Ice cream for the
kids can be whipped to a lighter consistency, while the gourmet treats destined for your freezer can
embody an indulgent richness that surpasses anything you’ll scoop from a store-bought package.
The KitchenAid™ PRO LINE™ Series: commercial quality for the discriminating home chef. From the
company distinguished by its legendary craftsmanship.
Page 3

TABLE OF CONTENTS
INTRODUCTION
3
CARE AND CLEANING
Cleaning the Frozen Dessert Maker........................................42
Clean the Freezing Cylinder & Vent ..................................42
Remove the Dispenser Assembly & Mixing Blade............43
Dry the Mixing Blade & Freezing Cylinder ........................44
Clean the Housing & Drip Tray..........................................44
Disassemble & Clean the Dispenser Assembly..................44
Assemble the Dispenser Assembly....................................45
Attach the Mixing Blade & Dispenser Assembly
............47
Storing the Frozen Dessert Maker
................................48
Removing the Funnel Lid ................................................49
Troubleshooting ........................................................................50
WARRANTY AND SERVICE INFORMATION
Warranty for the 50 United States & District of Columbia ....54
Warranty for Puerto Rico..........................................................55
Arranging for Hassle-Free Replacement ................................55
Ordering Accessories & Replacement Parts ............................56
Arranging for Service After the Warranty Expires ..................56
Arranging for Service Outside the 50 United States
& Puerto Rico ........................................................................57
INTRODUCTION
Introduction ........................................................................2
Frozen Dessert Maker Safety
..............................................4
Important Safeguards ..............................................................5
Proof of Purchase & Product Registration ..............................6
Electrical Requirements ..........................................................7
FEATURES AND OPERATION
Frozen Dessert Maker Features ................................................10
An Introduction To The Frozen Dessert Maker ......................12
Preparing the Frozen Dessert Maker for Use
Placement & Setup..........................................................13
Food-Safe Lubrication ....................................................13
Before First Use of the Frozen Dessert Maker ................13
Operating the Frozen Dessert Maker........................................14
Frozen Dessert Maker Operating Tips ....................................17
All About Overrun in Frozen Desserts ....................................19
A Glossary of Luscious Frozen Desserts..................................20
Tips for Great Ice Cream ........................................................22
Recipes ........................................................................................23
Page 4
4
FROZEN DESSERT MAKER SAFETY
Your safety and the safety of others are very important.
We have provided many important safety messages in this manual and on your appliance. Always read
and obey all safety messages.
This is the safety alert symbol.
This symbol alerts you to potential hazards that can kill or hurt you and others.
All safety messages will follow the safety alert symbol and either the word “DANGER” or
“WARNING.”These words mean:
You can be killed or seriously injured if you don’t immediatel
y
follow instructions.
You can be killed or seriously injured if you don’t follow
instructions.
All safety messages will tell you what the potential hazard is, tell you how to reduce the chance of injury,
and tell you what can happen if the instructions are not followed.
DANGER
WARNING
Page 5

INTRODUCTION
5
When using electrical appliances, basic safety precautions
should always be followed, including the following:
1. Read all instructions.
2. Close supervision is necessary when any appliance is used by
or near children.
3. To protect against electrical shock, do not immerse cord,
plugs, or the Frozen Dessert Maker in water or other liquids.
4. Be certain unit is “off” before inserting or removing plug
from wall outlet.
5. Unplug the Frozen Dessert Maker from the outlet when not
in use and before disassembling.
6. Avoid contact with moving parts.
IMPORTANT SAFEGUARDS
SAVE THESE INSTRUCTIONS
7. Do not operate any appliance with a damaged cord or plug,
or after the appliance malfunctions or has been damaged in
any manner. Return appliance to the nearest authorized
service facility for examination, repair, or adjustment.
8. The use of accessory attachments not recommended by the
appliance manufacturer may cause injuries.
9. Do not place on or near a hot gas or electric burner, or in a
heated oven.
10. Do not use outdoors.
11. Do not let the cord touch hot surfaces, or hang over the
edge of table or counter.
12. Do not use the appliance for other than intended use.
13. This product is designed for household use only.
Page 6

6
Always keep a copy of the sales receipt showing the date of
purchase of your Frozen Dessert Maker. Proof of purchase will
assure you of in-warranty service.
Before you use your Frozen Dessert Maker, please fill out and
mail your product registration card packed with the unit. This
card will enable us to contact you in the unlikely event of a
product safety notification and assist us in complying with the
provisions of the Consumer Product Safety Act. This card does
not verify your warranty.
PROOF OF PURCHASE
& PRODUCT REGISTRATION
Please complete the following for your personal records:
Model: KPFD200
Serial Number ___________________________________________
Date Purchased__________________________________________
Store Name _____________________________________________
Page 7
7
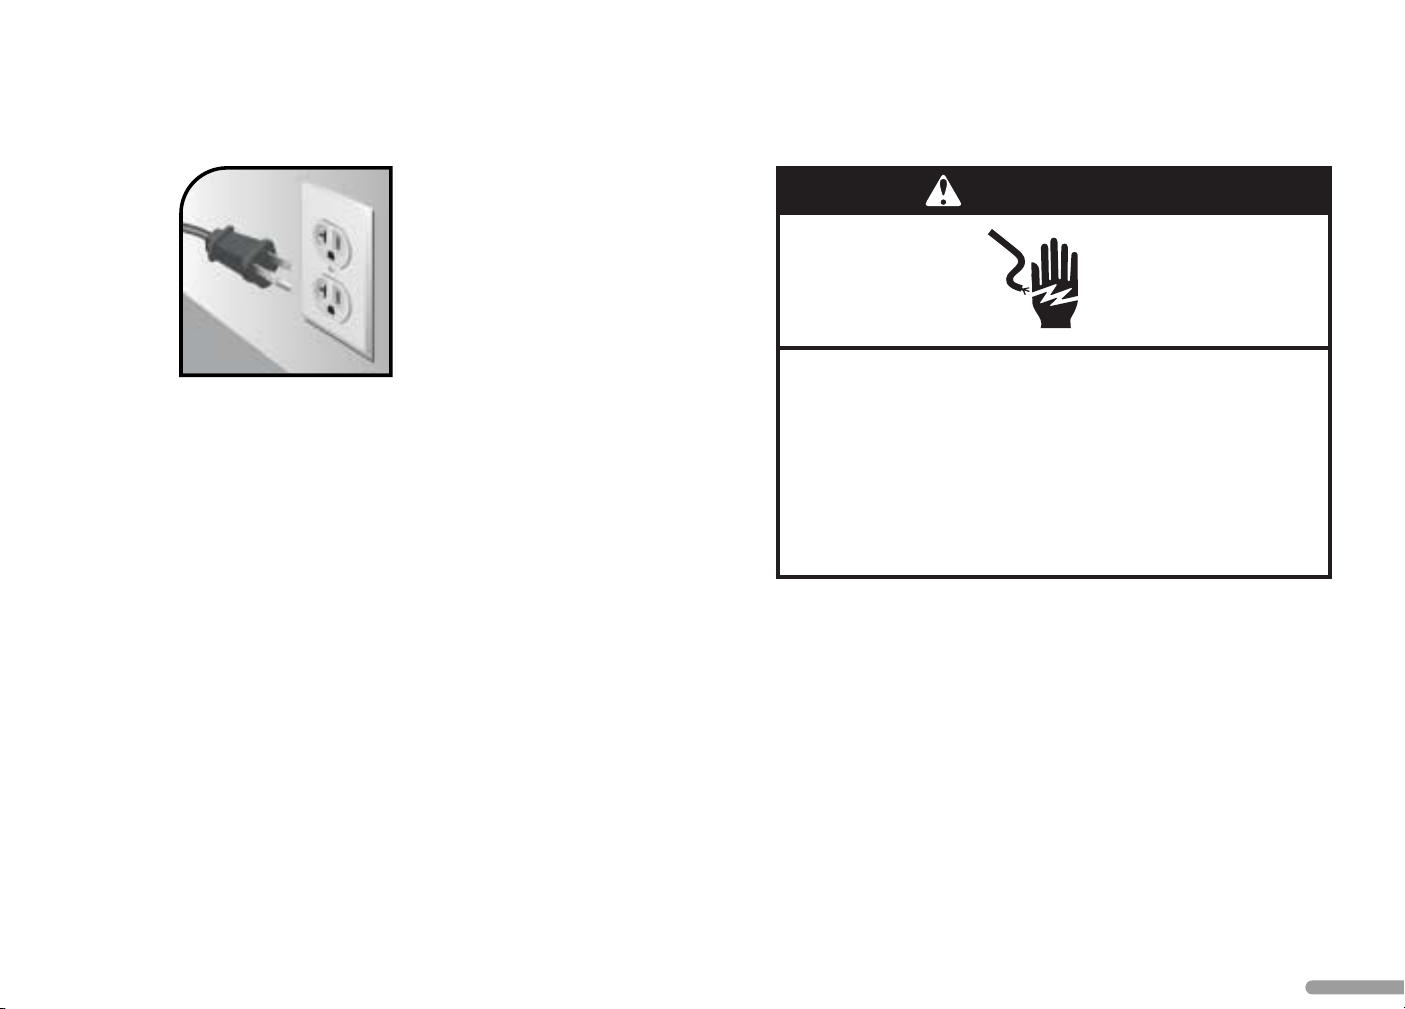
Volts: 120 V.A.C. only.
Hertz: 60 Hz
NOTE: Your Frozen Dessert Maker has
a 3 prong grounded plug. To reduce
the risk of electrical shock, this plug
will fit in an outlet only one way. If the
plug does not fit in the outlet, contact
a qualified electrician. Do not modify the plug in any way.
Do not use an extension cord. If the power supply cord is too
short, have a qualified electrician or serviceman install an outlet
near the appliance.
ELECTRICAL REQUIREMENTS
INTRODUCTION
WARNING
Electrical Shock Hazard
Plug into a grounded 3 prong outlet.
Do not remove ground prong.
Do not use an adapter.
Do not use an extension cord.
Failure to follow these instructions can result in death,
fire, or electrical shock.
Page 8

Page 9
FEATURES AND OPERATION
9
FEATURES
AND
OPERATION
P RO L INE™S ERIES
Frozen Dessert Maker Features..........10
Introduction to the
Frozen Dessert Maker .......................12
Placement & Setup ...........................13
Food-Safe Lubrication.......................13
Before First Use ................................13
Operating the Dessert Maker ............14
Operating Tips..................................17
Overrun in Frozen Desserts ...............19
Glossary of Frozen Desserts...............20
Tips for Great Ice Cream ...................22
Recipes.............................................23
Features and Operation
Section Contents
Page 10
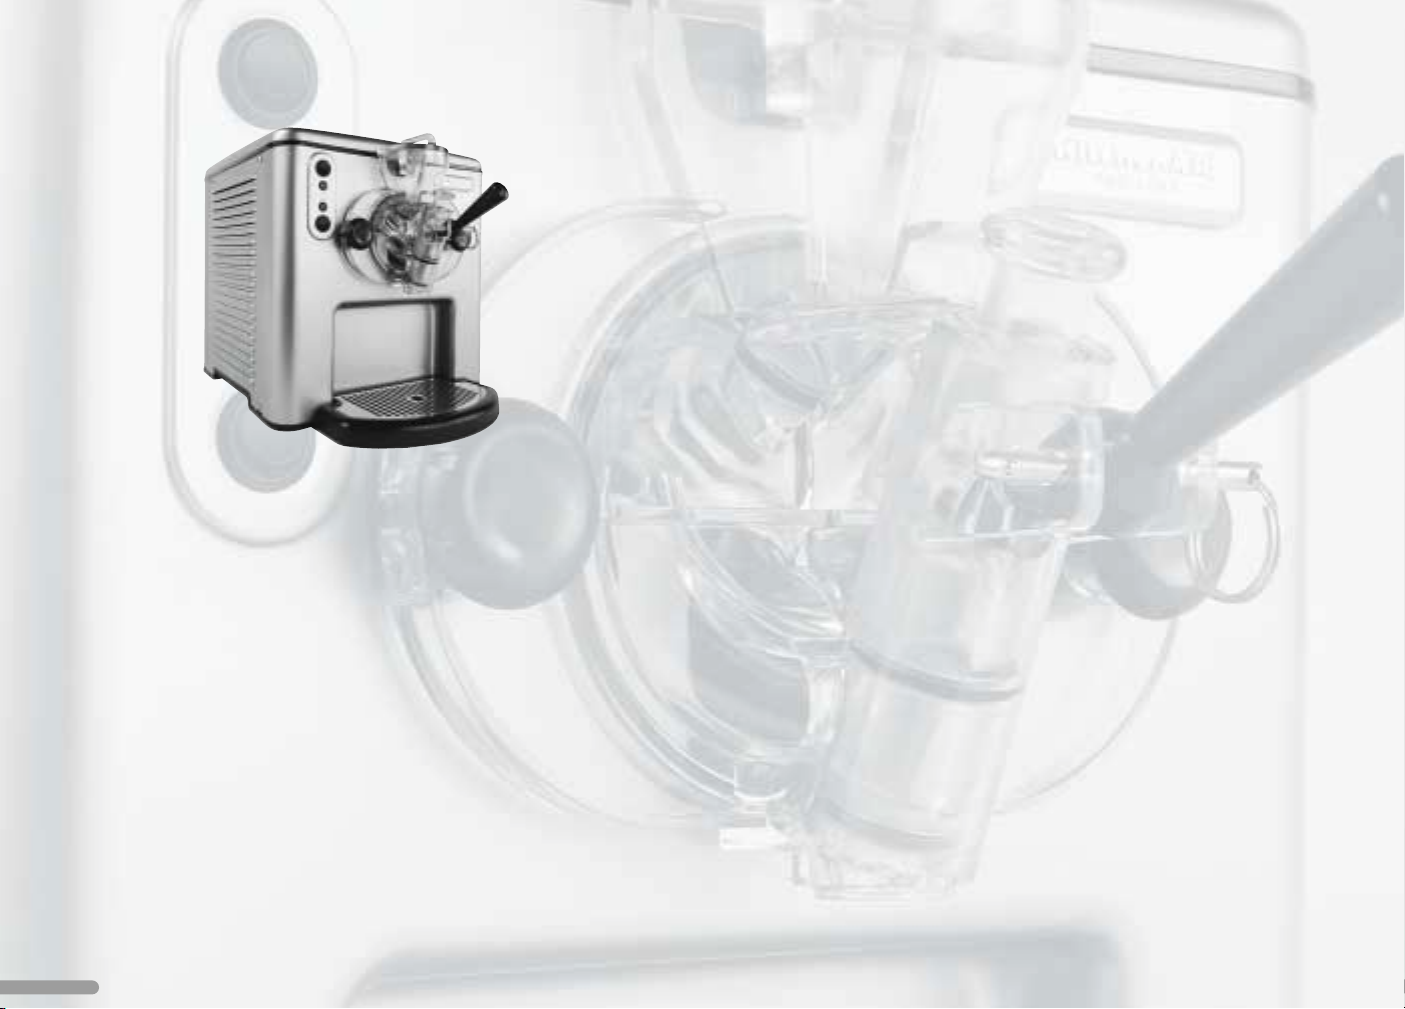
MODEL KPFD200
FROZEN DESSERT MAKER
FEATURES
Stainless Steel Housing
Brushed stainless steel housing is durable and easy to clean.
Ingredient Funnel
Funnel makes adding ingredients to the frozen
dessert maker easy.
Funnel Lid
Funnel lid doubles as a convenient food pusher and
functions as an interlock: the frozen dessert maker
will not operate unless the lid is in place.
Dispensing Lever
When the freezing cycle is complete, just pull down
the lever to dispense frozen drinks and desserts.
Dispensing Cylinder and Piston
Desserts are dispensed from the frozen dessert
maker through the dispensing cylinder. The piston
inside the cylinder acts as a valve.
10
Model KPFD200
Frozen Dessert Maker
Page 11
FEATURES AND OPERATION
11
Mix and Freeze Switches
Mix starts the mixing blade and freeze turns on the
freezing system. Indicator lights show which
functions are active. To prevent ingredients from
freezing solid, the freezing system will not activate
unless the mixing blade is started.
Dispenser Assembly Attachment Knobs
Unscrew the two easy-to-grasp knobs to remove
the dispenser assembly for cleaning.
Stainless Steel Freezing Cylinder
Desserts are mixed and frozen in the freezing
cylinder. The half-gallon capacity cylinder is stainless
steel for lasting performance and easy cleanup.
Mixing Blade
High-performance mixing blade is dishwasher-safe
for easy cleanup.
Drip Tray
Drip tray catches spills and is dishwasher-safe. Tray
features a removable stainless steel drip plate.
Vent Cap
Cap on top of the frozen dessert maker prevents
debris from falling into the freezing cylinder vent.
Cleaning Brush
Use the small end of the brush to clean the
freezing cylinder vent; use the large end to clean
the dispensing cylinder.
Automatic Overload Protection
If a dessert becomes too stiff to churn, the mixing blade and
freezing system will automatically shut off to prevent damage to
the frozen dessert maker.
Page 12
When making frozen desserts, two distinct types of freezers are
used. The continuous process freezer is what you’ll see dispensing
soft-serve ice cream and slushes in commercial establishments. It
freezes the dessert on a continuous basis and dispenses it on
demand. Additional ingredients can be added as needed without
interrupting production. As you might imagine, the demands of
the continuous freezing process make these machines complex
and very expensive.
The second – and more traditional – way to make frozen
desserts is with a batch freezer. In the batch freezing process,
ingredients are added, frozen to the desired consistency, and
removed all at once.
Your PRO LINE™ Series Frozen Dessert Maker is a premium quality,
batch-process freezer. When a freezing cycle is complete, just pull
down the handle on the professional-style dispensing head to
serve delicious frozen drinks, ice cream, and other desserts. Once
you’ve emptied the dessert maker, simply add more ingredients to
start another batch.
To obtain the best results from your frozen dessert maker, read this
use and care guide carefully. Many of the tips and suggestions will
prove invaluable for making the finest desserts possible.
12
AN INTRODUCTION TO THE PRO LINE™ SERIES
FROZEN DESSERT MAKER
Page 13
FEATURES AND OPERATION
13
Placement and Setup
• For the best performance, the dessert maker should be placed on
a level surface, out of direct sunlight. Position the dessert maker so
the back and sides of the unit are at least 2-inches from any
adjacent wall; this permits the freezing system to work effectively.
• For easier cleaning, the freezing cylinder vent on top of the
dessert maker should be accessible and clear of any
overhanging cabinets. To prevent debris from entering the
freezing cylinder, place the vent cap into the vent.
• To provide a surface for the drip tray, position the front of the
dessert maker several inches from the edge of the countertop
or table.
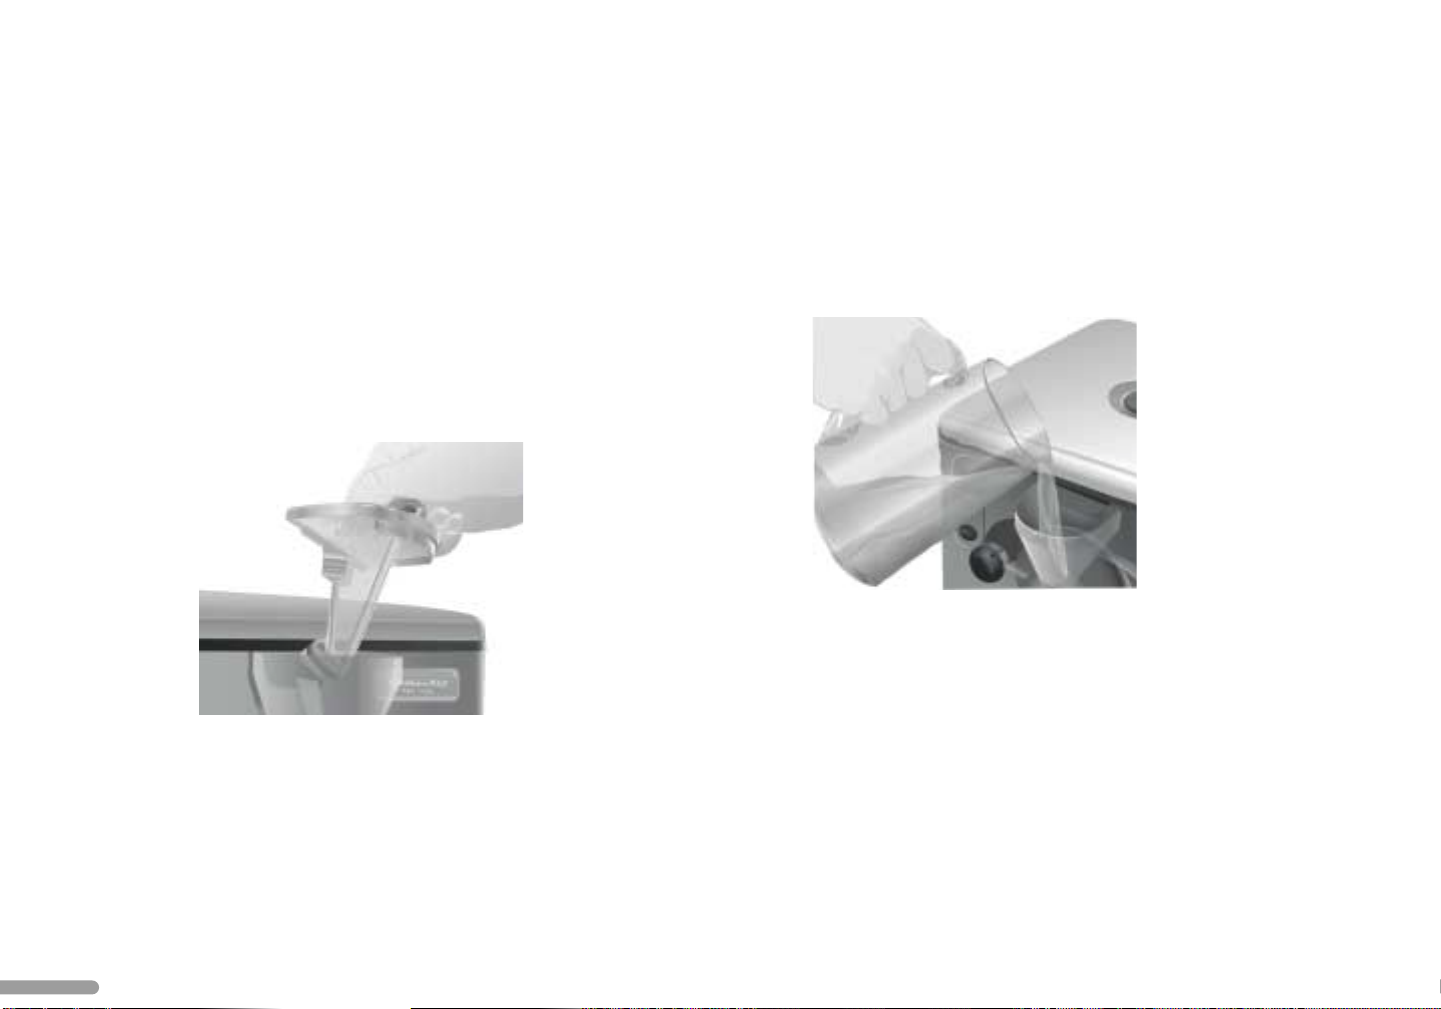
Food-Safe Lubrication
From the factory, the O-rings on the funnel lid and dispensing
piston are lubricated with a food-safe gel. The gel will not affect
the flavor or quality of your desserts. Before use, excess gel can be
wiped from the funnel lid with a paper towel.
Before First Use of the Frozen Dessert Maker
Immediately before using the dessert maker for the first time – or
after any long period of non-use – rinse the freezing cylinder,
mixing blade, and dispenser assembly with clean, warm water.
1. Place the drip tray on the countertop underneath the
dispenser assembly.
2. Make sure the dispensing lever is in the closed (up) position –
when the lever is moved upward, you’ll feel it “snap” into the
fully closed position.
3. Remove the funnel lid. Pour about 1 quart of warm water into
the funnel. This will fill the freezing cylinder about halfway as
seen through the dispenser faceplate. Replace the funnel lid.
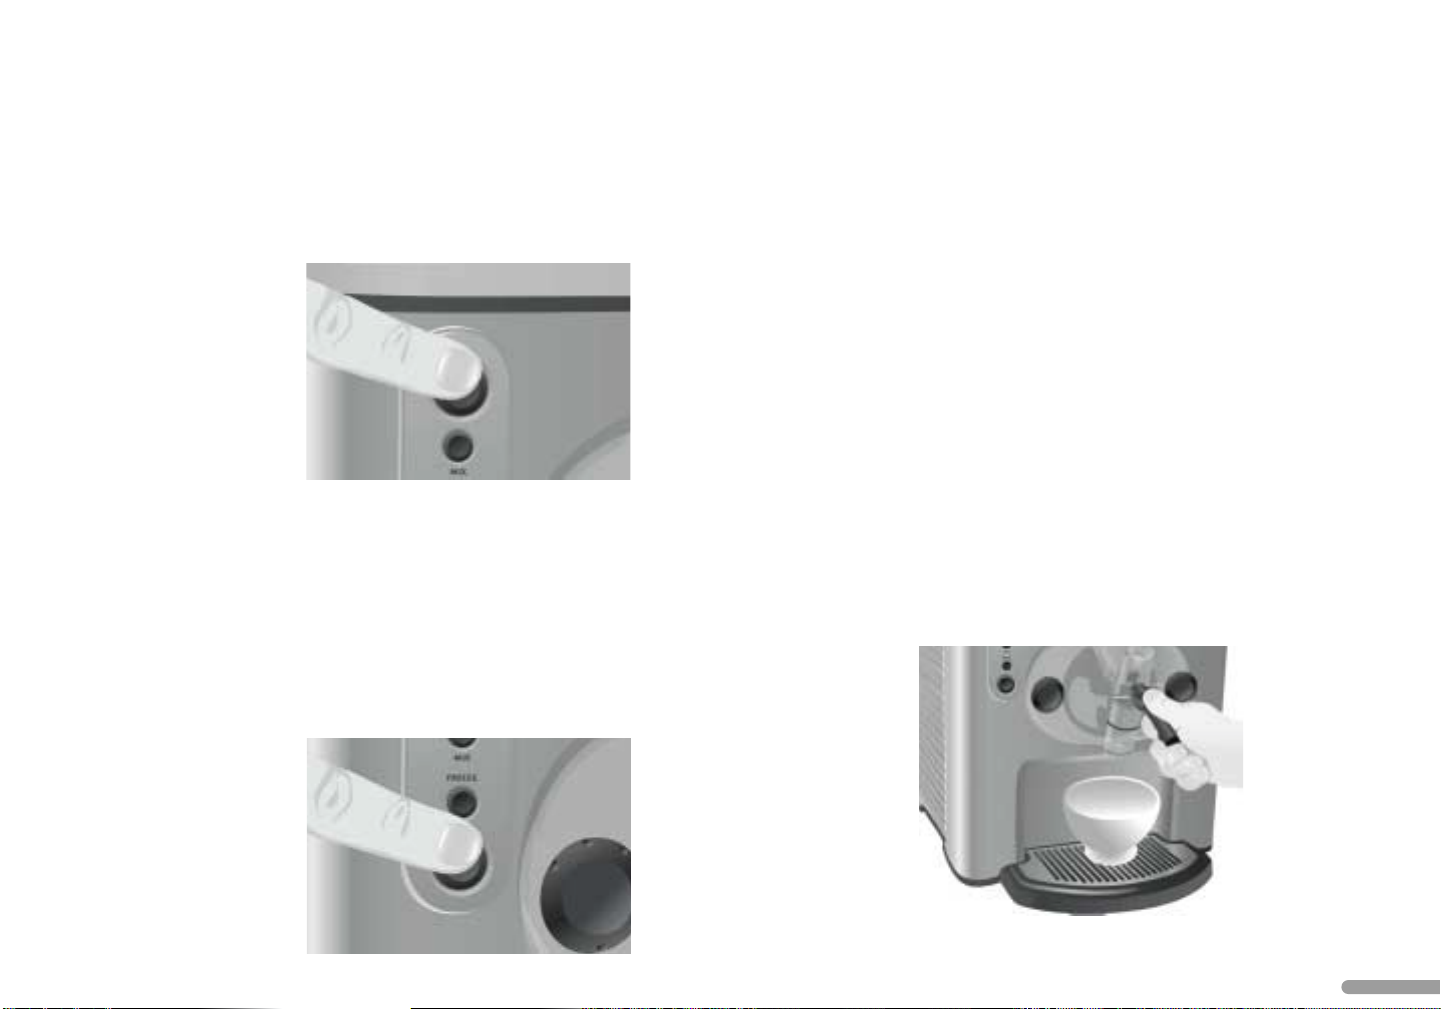
4. Tu rn on the mixing blade by rocking the Mix Switch upward.
After about 30 seconds, dispense the cleaning water into an
appropriate container by pulling the dispensing lever down.
5. Turn off the mixing blade by rocking the Mix Switch downward.
Move the dispensing lever to the closed (up) position.
6. The dessert maker is now ready for use. If no dessert is to be
prepared at this time, the dispenser assembly should be
removed and the freezing cylinder wiped dry. See “Remove
the Dispenser Assembly and Mixing Blade” on page 43 for
instructions.
PREPARING THE PRO LINE
™
SERIES
FROZEN DESSERT MAKER FOR USE
WARNING
Excessive Weight Hazard
Use two or more people to move and install frozen
dessert maker.
Failure to do so can result in back or other injury.
Page 14
14
1. Place the drip tray on the countertop underneath the dispenser
assembly.
2. Make sure the dispensing lever is in the closed (up) position –
when the lever is moved upward, you’ll feel it “snap” into the
fully closed position.
3. Remove the funnel lid. (If the lid proves difficult to remove,
see page 49.)
4. Pour the recipe ingredients into the ingredient funnel. If the
recipe includes solid foods – like fruit, nuts, or candy – add them
before the liquid ingredients. The funnel lid can be used as a
convenient food pusher. Solid food must be less than 1-inch in
diameter to pass through the ingredient funnel.
NOTE: Most ingredients expand when frozen. Filling the dessert
maker with a large quantity of recipe mix may cause dessert to
back up through the freezing cylinder vent during operation. This
is normal and will not harm the dessert maker. Reduce the
amount of mix used to prevent this from occurring. If you are
using a commercial soft-serve ice cream mix, use only 1 quart of
mix per batch – greater quantities will not freeze adequately. One
quart of commercial mix will make 2 quarts of ice cream.
During operation, some dessert may accumulate in the ingredient
funnel. This is normal. If the funnel lid is not positioned securely,
however, ingredients may fill and overflow the funnel.
OPERATING THE PRO LINE
™
SERIES
FROZEN DESSERT MAKER
Page 15
15
FEATURES AND
OPERATION
5. Replace the funnel lid and turn on the mixing blade by rocking
the Mix Switch upward. The mixing indicator light will glow
when the mixing blade is rotating.
NOTE: The funnel lid serves as an electrical interlock: the mixing
blade will not rotate unless the lid is in place. Do not remove the
funnel lid during freezing – removing and replacing the lid will
extend the freezing time.
6. Turn on the freezing system by rocking the Freeze Switch
upward. The freeze indicator light will glow when the freezing
system is operating.
NOTE: Unless the Mix Switch is on, the freezing system will not
operate – even if the Freeze Switch is turned on. This prevents
ingredients from freezing solid.
7. As the ingredients begin to harden, check the consistency every
few minutes through the dispenser faceplate. The dessert can be
sampled by pulling the dispensing lever down momentarily. Do
not let the dessert become too firm – it will not dispense
properly. (Hard ice cream or other firm desserts can be prepared
by placing the dispensed dessert in a freezer for 2 or more hours.)
8. When the dessert is ready, turn off the freezing system by
rocking the Freeze Switch downward. Keep the Mix Switch on.
Place a cup, cone, glass, or other container under the
dispensing spout and pull the lever down to dispense the
dessert. For best results, all the dessert should be dispensed
within several minutes.
Continued…
Page 16

16
NOTE: Dessert will not dispense properly unless the mixing blade
is rotating. If the dessert has become too firm to dispense
completely, turn off the mixing blade by rocking the Mix Switch
downward, let the dessert thaw for a few minutes, then turn on
the mixing blade and dispense. Moving the dispensing lever up
and down several times may also help dispense a firm dessert.
You can also remove the dispenser assembly and use a soft
(non-metallic) spatula to remove any remaining dessert from the
freezing cylinder and mixing blade.
9. After dispensing the dessert, turn off the mixing blade by
rocking the Mix Switch downward.
10. Repeat steps 1–9 to prepare additional batches of a dessert.
When the dessert maker is being used continuously, it does
not need to be cleaned between batches. Before preparing a
different recipe, however, rinse the dessert maker by adding a
quart of warm water to the freezing cylinder, turning on the
mixing blade for 30 seconds, and dispensing the water into a
container. Repeat until the dispensed water runs clear.
Automatic Overload Protection
A dessert that becomes extremely stiff will cause the dessert
maker to automatically shut off to prevent damage. If this occurs,
turn off the Mix and Freeze Switches, wait 5 minutes for the
dessert to thaw, then turn the Mix Switch back on. If the mixing
blade rotates, dispense the dessert; if not, turn off the Mix Switch
and allow the dessert to thaw several more minutes before
repeating the procedure. You can also remove the dispenser
assembly and use a soft (non-metallic) spatula to remove firm
dessert from the freezing cylinder and mixing blade.
OPERATING THE PRO LINE
™
SERIES
FROZEN DESSERT MAKER
Page 17

17
FEATURES AND
OPERATION
PRO LINE™SERIES FROZEN DESSERT MAKER
OPERATING TIPS
Always dispense your dessert before it becomes too firm to dispense easily. If a firmer
consistency is desired, transfer the dessert to an airtight container and store in a freezer
for 2 or more hours.
2
If a dessert becomes too firm to dispense, turn off the mixing blade and freezing system, let
the dessert thaw for several minutes, then turn on the mixing blade and dispense. Moving
the dispensing lever up and down several times may also help dispense a firm dessert.
3
When preparing a dessert, keep the funnel lid in place. Removing and replacing the lid will
cause the freezing system to restart and slow the freezing process.
4
Whenever possible, chill the dessert ingredients before adding them to the frozen
dessert maker. This will shorten the freezing time and minimize ice crystal formation in
dairy-desserts for a smoother texture.
5
Continued…
For the best results, always finish one batch before starting another.
1
Page 18

18
When the dessert maker is being used continuously, it does not need to be cleaned between
batches. Before preparing a different recipe, however, rinse the dessert maker by adding a quart
of warm water to the freezing cylinder, turning on the mixing blade for 30 seconds, and
dispensing the water into a container. Repeat until the dispensed water runs clear.
8
If the funnel lid proves difficult to remove after storage, see page 49.
9
PRO LINE™SERIES FROZEN DESSERT MAKER
OPERATING TIPS
Any solid food added to the dessert maker – like fruit, nuts, cookies, or candy – will be
reduced to small pieces within a few seconds by the action of the mixing blade. If you
prefer larger pieces in your frozen dessert, fold them into the dessert after dispensing.
6
Process time for a frozen dessert depends on the temperature and quantity of ingredients,
ambient air temperature, and specific recipe. Mixtures which contain fruit, alcohol, or extra
sugar will usually take longer to freeze. When using a commercial soft-serve ice cream mix,
use only 1 quart of mix per batch – greater quantities will not freeze adequately. When frozen,
1 quart of commercial mix will fill the freezing cylinder and produce 2 quarts of soft-serve.
7
Page 19

FEATURES AND OPERATION
19
The PRO LINE™ Series Frozen Dessert Maker is the only home
freezer that lets you control the amount of air that is mixed into a
dessert. Professional ice cream makers call this “overrun,” which
refers to how much the ingredients expand (overrun) as a result of
air being whipped into the mixture. One quart of liquid ice cream
mix that freezes into 1
1
⁄2 quarts of ice cream is said to have a 50%
overrun; one quart of mix that freezes into 2 quarts of ice cream
has a 100% overrun…which means that half the ice cream is
nothing but air!
The best gourmet ice creams typically have low overruns – on the
order of 20% to 30%. This gives them a very dense texture and
flavor. Many packaged and soft-serve ice creams are produced
with 40% to 90% overruns for a lighter texture and fewer calories
per serving. Significant overrun is possible only with ingredients
that trap air when whipped; this includes the dairy-based desserts
and excludes most of the simple water-ices, like sorbet, granita,
and margaritas.
To control the overrun of your ice cream and other dairy desserts,
simply vary the amount of mixture you start with. If you fill the
freezing cylinder nearly to the top, little air is present during
mixing and you’ll produce a very low overrun dessert (but be
careful: recipes high in milk fat – like those used for gourmet
ice cream – may develop grainy flecks of butterfat when frozen at
very low overruns). If you only fill the cylinder halfway, you’ll
produce a dessert with a nearly 100% overrun. Vary the amount
of ingredients between these two extremes to produce
intermediate levels of overrun.
Experimenting with overrun is both fun and practical. Ice cream
for the kids can be whipped to a lighter consistency, while the
gourmet treats destined for your freezer can embody a sinfully
indulgent richness.
THE AIR IN THERE:
ALL ABOUT OVERRUN IN YOUR FROZEN DESSERTS
Page 20

Ice Cream
At its simplest, everyone’s favorite dessert is a combination of
cream, sugar, and pureed fruit or flavoring that’s whipped into a
foam and frozen. According to FDA standards, real ice cream
must contain at least 10% milk fat by weight. Gourmet ice creams
are usually 14% to 18% milk fat and are produced with very low
(20% to 30%) overruns.
There are two major varieties of ice cream: French (or custard) ice
cream contains eggs, while Philadelphia ice cream (also called
American, New York, or plain) does not. French ice creams can be
somewhat richer and smoother than their Philadelphia
counterparts, although the rich custard base tends to mute the
intensity of flavors.
Did you ever wonder how ice cream, kept at 0º F in a freezer, is
still soft enough to be scooped? The answer is simple, yet
surprising: the sugar or sweeteners added to ice cream depress
the freezing point of water, so at least 25% of the water in ice
cream remains liquid at freezer temperatures. This helps explain
why temperature stability is so important when storing ice cream:
any increase in temperature, even if it’s far below 32º F, will cause
some small ice crystals to melt. If the temperature then drops, the
water will refreeze on existing crystals, making them larger. A few
large “heat shocks,” or many smaller temperature fluctuations,
will turn the finest ice cream into a gritty, icy mess.
Ice Milk
According to the FDA, ice milk is simply “ice cream” which
contains less than 10% milk fat. On store shelves, you’ll find ice
milk labeled as reduced fat, light, or low-fat ice cream. With it’s
lower fat content, ice milk usually doesn’t have the smoothness of
ice cream, but it can feature a lightness and intensity of flavor
that’s difficult to duplicate.
Frozen Yogurt
Substitute yogurt for the cream in ice cream recipes, and you’ll
have a creamy alternative to traditional ice cream that is about
2% milk fat.
Gelato
Known for its bright, intense flavors, gelato is a deliciously creamy
dessert that’s a favorite in Italy. Usually made from whole milk,
sugar, eggs, and flavoring, it’s produced with very low overruns
(20% to 30%), yielding a dense, somewhat soft dessert that is
only 5% to 6% milk fat. When you think of gelato, think of
gourmet ice cream on a diet.
Water Ices
Water ices are non-dairy blends of water, sugar, and flavorings.
Sorbet, granita, and slushes (frozen drinks) are water ices.
20
A GLOSSARY OF LUSCIOUS
FROZEN DESSERTS
Page 21

FEATURES AND OPERATION
21
Sorbet
Sorbet is a deliciously smooth, creamy water ice that consists of
sugar, water, and flavoring. Delightfully refreshing, it’s the perfect
dish to cleanse the palate after the rich main course of a meal.
Most commonly made with fresh fruit juice or fruit purée, sorbet
can also be flavored with wine, liquors, tea, or herbs.
Granita
Granita is a blend of sugar, water, and a flavored liquid, such as
fruit juice, coffee, or even melted chocolate. It’s distinguished from
sorbet by a lower sugar content and a coarse, snow-like texture.
Sherbet
A water ice similar to sorbet, sherbet includes additional
ingredients like milk, egg whites, or gelatin. In the United States,
sherbets are typically made with milk and contain approximately
2% milk fat.
Page 22

TIPS FOR GREAT ICE CREAM
22
Any solid food added to the dessert maker – like fruit, nuts, cookies, or candy – will be
reduced to small pieces within a few seconds by the action of the mixing blade. If you
prefer larger pieces in your ice cream, fold them into the dessert after dispensing.
3
When transferring ice cream to your freezer to harden, do it quickly – and place the
container in the coldest spot available. Rapid chilling minimizes the formation of ice
crystals and preserves the texture of the ice cream.
2
The body and texture of ice cream can be improved by aging the ingredients. Store the ice
cream mix for 4 to 12 hours in your refrigerator prior to making the dessert. Cooling the mix
will also shorten the freezing time and minimize ice crystal formation for a smoother texture.
1
A little bit of salt in ice cream recipes enhances flavor and sweetness. Add about
1
⁄8 teaspoon of salt to every 4 cups of mixture.
4
When using half-and-half or milk in an ice cream recipe, briefly heat them to 175º F
(just below scalding) before adding them to the ingredient mix. This will make the ice cream
substantially smoother. Be sure to cool and age the mix (see Tip 1) before making the dessert.
5
If ice cream made with powdered milk, evaporated milk, or condensed milk has a grainy or
gritty texture, reduce the amount of these ingredients. All milk concentrates contain high
levels of lactose (milk sugar), which has a tendency to form large ice crystals.
6
Page 23

FROZEN
DESSERT MAKER
RECIPES
P RO L INE™S ERIES
FEATURES AND OPERATION
23
French Vanilla Ice Cream...................24
Mexican Chocolate Ice Cream ...........25
Mango Buttermilk Ice Cream ............26
Mocha Fudge Ice Cream...................27
Butter Pecan Ice Cream.....................28
Green Tea Ice Cream.........................29
Triple Berry Frozen Yogurt .................30
Peach Granola Frozen Yogurt ............31
Mango Orange Frozen Yogurt ..........32
Melon Sorbet ...................................33
Pineapple Ginger Sorbet ...................34
Strawberry Basil Sorbet.....................35
Frozen Lime Margarita......................36
Malted Mocha Freeze .......................37
Cranberry-Lime Cooler ......................38
Raspberry Coffee Freeze....................39
Page 24

24
21⁄2 cups half-and-half
4 egg yolks
1 cup sugar
1
1
⁄2 cups whipping cream
1 tablespoon vanilla
1
⁄8 teaspoon salt
In medium saucepan over medium heat, heat half-and-half until very hot but not boiling,
stirring often. Set aside.
Place egg yolks and sugar in mixer bowl. Attach bowl and flat beater to mixer. Turn to
Speed 2; mix until light and lemon color. Continuing on Speed 2, gradually add
half-and-half; mix until blended. Return half-and-half mixture to medium saucepan; cook
over medium-low heat until slightly thickened and mixture coats a metal spoon, stirring
constantly. Do not boil. Transfer half-and-half mixture to medium bowl. Add whipping
cream, vanilla, and salt; mix well. Cover; refrigerate at least 4 hours to overnight.
Pour ice cream mixture into dessert maker; turn on Mix and Freeze Switches. Freeze about
20 minutes. When desired consistency is reached, serve immediately or dispense into
chilled container, cover, and freeze.
Yield: 13 servings (1⁄2 cup per serving).
Per Serving: About 230 cal, 2 g pro, 19 g carb, 16 g total fat, 9 g sat fat,
120 mg chol, 55 mg sod.
VARIATION: GINGERED PEACH ICE CREAM
To finished French Vanilla Ice Cream, fold in 2 cups chopped, peeled fresh or canned
peaches and 2 tablespoons finely chopped crystallized ginger.
Yield: 16 servings (1⁄2 cup per serving).
Per Serving: About 210 cal, 2 g pro, 20 g carb, 13 g total fat, 8 g sat fat,
95 mg chol, 45 mg sod.
FRENCH VANILLA ICE CREAM
Page 25

In small saucepan over very low heat, melt chocolate; set aside. In medium saucepan over
medium heat, heat half-and-half until very hot but not boiling, stirring often; set aside.
Place egg yolks, sugar, cinnamon, and salt in mixer bowl. Attach bowl and flat beater to
mixer. Turn to Speed 2; mix until light and lemon color. Continuing on Speed 2, gradually
add chocolate and half-and-half; mix until blended. Return chocolate mixture to medium
saucepan; cook over medium-low heat until slightly thickened and mixture coats a metal
spoon, stirring constantly. Do not boil. Transfer chocolate mixture to medium bowl. Add
whipping cream and vanilla; mix well. Cover; refrigerate at least 4 hours to overnight.
Pour ice cream mixture into dessert maker; turn on Mix and Freeze Switches. Freeze about
20 minutes. When desired consistency is reached, serve immediately or dispense into
chilled container, cover, and freeze.
Yield: 14 servings (1⁄2 cup per serving).
Per Serving: About 260 cal, 3 g pro, 20 g carb, 19 g total fat, 11 g sat fat,
115 mg chol, 50 mg sod.
MEXICAN CHOCOLATE ICE CREAM
25
FEATURES AND OPERATION
3 squares (1 oz. each)
unsweetened chocolate
2
1
⁄2 cups half-and-half
4 egg yolks
1 cup sugar
3
⁄4 teaspoon cinnamon
1
⁄8 teaspoon salt
1
2
⁄3 cups whipping cream
1 tablespoon vanilla
Page 26

26
13⁄4 cups half-and-half
1 cup sugar
1
⁄8 teaspoon salt
1
⁄8 teaspoon nutmeg, if desired
1
3
⁄4 cups buttermilk
1 teaspoon vanilla
cups (2 medium) diced
ripe mangoes
In medium saucepan, combine half-and-half, sugar, salt, and nutmeg, if desired. Heat
over medium-low heat until very hot but not boiling, stirring constantly. Transfer
half-and-half mixture to medium bowl; stir in buttermilk and vanilla. Cover; refrigerate
at least 4 hours to overnight.
Add mangoes to dessert maker. Pour ice cream mixture into dessert maker; turn on Mix
and Freeze Switches. Freeze about 20 minutes. When desired consistency is reached, serve
immediately or dispense into chilled container, cover, and freeze.
Yield: 14 servings (1⁄2 cup per serving).
Per Serving: About 120 cal, 2 g pro, 21 g carb, 4 g total fat, 2.5 g sat fat,
10 mg chol, 65 mg sod.
MANGO BUTTERMILK ICE CREAM
2–21⁄2
Page 27

27
FEATURES AND OPERATION
4 cups milk
1can (14 oz.) sweetened
condensed milk
1 package (3.9 oz.) instant
chocolate fudge pudding
and pie filling mix
1–2 tablespoons instant coffee
granules
1 teaspoon vanilla
1
⁄8 teaspoon salt
In medium bowl, mix all ingredients with wire whisk until well blended.
Pour ice cream mixture into dessert maker; turn on Mix and Freeze Switches. Freeze 30 to
35 minutes. When desired consistency is reached, serve immediately or dispense into
chilled container, cover, and freeze.
Yield: 12 servings (1⁄2 cup per serving).
Per Serving: About 220 cal, 6 g pro, 37 g carb, 6 g total fat, 3.5 g sat fat,
20 mg chol, 250 mg sod.
MOCHA FUDGE ICE CREAM
Page 28

28
3 cups half-and-half
1
⁄4 cup packed brown sugar
3 tablespoons butter
1
⁄8 teaspoon salt
1
1
⁄2 cups whipping cream
1 package (3.4 oz.) instant
vanilla pudding and
pie filling mix
1
⁄2 cup chopped pecans
In medium saucepan, combine half-and-half, brown sugar, butter, and salt. Heat over
medium-low heat until very hot but not boiling, stirring constantly. Transfer half-and-half
mixture to medium bowl; stir in whipping cream. Cover; refrigerate at least 4 hours
to overnight.
Gradually add pudding mix; whisking until well blended. Add pecans to dessert maker.
Pour ice cream mixture into dessert maker; turn on Mix and Freeze Switches. Freeze about
20 minutes. When desired consistency is reached, serve immediately or dispense into
chilled container, cover, and freeze.
Yield: 14 servings (1⁄2 cup per serving).
Per Serving: About 240 cal, 2 g pro, 15 g carb, 20 g total fat, 11 g sat fat,
60 mg chol, 150 mg sod.
BUTTER PECAN ICE CREAM
Page 29

29
FEATURES AND OPERATION
1 cup boiling water
1
⁄4 cup loose green tea leaves
(10 to 12 tea bags, opened)
3 cups half-and-half
3
⁄4 cup sugar
1 teaspoon vanilla
1
⁄8 teaspoon salt
1 envelope unflavored gelatin
1
⁄4 cup cold water
1
1
⁄2 cups whipping cream
In small bowl, pour boiling water over tea. Cover; steep 30 minutes. Meanwhile, in medium
saucepan, combine half-and-half and sugar. Heat over medium-low heat until very hot but
not boiling, stirring constantly. Transfer half-and-half mixture to medium bowl; stir in vanilla,
salt, and tea mixture. Cover; refrigerate at least 4 hours to overnight.
Pour tea mixture through fine mesh strainer or cheesecloth. If needed, repeat until leaves are
removed. In small bowl, combine gelatin and cold water; let stand 1 minute. Add gelatin
mixture and whipping cream to tea mixture; mix well. Pour ice cream mixture into dessert
maker; turn on Mix and Freeze Switches. Freeze 15 to 20 minutes. When desired consistency
is reached, serve immediately or dispense into chilled container, cover, and freeze.
Yield: 14 servings (1⁄2 cup per serving).
Per Serving: About 200 cal, 2 g pro, 15 g carb, 14 g total fat, 9 g sat fat,
55 mg chol, 50 mg sod.
GREEN TEA ICE CREAM
Page 30

30
3 cups vanilla yogurt
3
⁄4 cup sugar
1
⁄2 cup milk
1
⁄8 teaspoon salt
1 cup blueberries
1 cup raspberries
1 cup blackberries
In large bowl, combine yogurt, sugar, milk, and salt; mix well. Set aside.
Add blueberries, raspberries, and blackberries to dessert maker. Pour yogurt mixture into
dessert maker; turn on Mix and Freeze Switches. Freeze about 20 minutes. When desired
consistency is reached, serve immediately or dispense into chilled container, cover, and freeze.
Yield: 16 servings (1⁄2 cup per serving).
Per Serving: About 100 cal, 3 g pro, 19 g carb, 1.5 g total fat, 1 g sat fat,
5 mg chol, 50 mg sod.
TRIPLE BERRY FROZEN YOGURT
Page 31

31
FEATURES AND OPERATION
3
⁄4 cup sugar
1
⁄3 cup milk
1
⁄8 teaspoon salt
24 ounces peach yogurt
1 cup granola
1
1
⁄3 cups diced, peeled peaches
In small saucepan over medium heat, heat sugar, milk, and salt until very hot but not boiling,
stirring constantly. Transfer sugar mixture to medium bowl; cool. Stir in yogurt; set aside.
Add granola and peaches to dessert maker. Pour yogurt mixture into dessert maker; turn
on Mix and Freeze Switches. Freeze 25 to 30 minutes. When desired consistency is reached,
serve immediately or dispense into chilled container, cover, and freeze.
Yield: 10 servings (1⁄2 cup per serving).
Per Serving: About 200 cal, 6 g pro, 35 g carb, 4.5 g total fat, 2 g sat fat,
5 mg chol, 110 mg sod.
PEACH GRANOLA FROZEN YOGURT
Page 32

32
2 cups (2 medium)
diced ripe mangoes
1 can (11 oz.) mandarin
oranges, drained
3
⁄4 cup sugar
1 teaspoon lemon juice
1 container (32 oz.)
vanilla yogurt
1
⁄3 cup milk
1
⁄8 teaspoon salt
1
⁄8 teaspoon ground nutmeg,
if desired
In food processor, position multipurpose blade in work bowl. Add mangoes, oranges,
sugar, and lemon juice. Process until sugar dissolves and fruit is pureed, 30 to 45 seconds.
In large bowl, combine fruit mixture, yogurt, milk, salt, and nutmeg, if desired. Pour yogurt
mixture into dessert maker; turn on Mix and Freeze Switches. Freeze 20 to 25 minutes.
When desired consistency is reached, serve immediately or dispense into chilled container,
cover, and freeze.
Yield: 16 servings (1⁄2 cup per serving).
Per Serving: About 120 cal, 3 g pro, 22 g carb, 2 g total fat, 1 g sat fat,
5 mg chol, 60 mg sod.
MANGO ORANGE FROZEN YOGURT
Page 33

33
FEATURES AND OPERATION
5 cups (about 2 lbs.) diced
cantaloupe or
honeydew melon
1
1
⁄4 cups sugar
1 tablespoon lime or
lemon juice
1 teaspoon grated lime or
lemon peel
1
⁄8 teaspoon salt
2
⁄3 cup ice water
1
⁄2 cup cold limeade, lemonade
or water
In food processor, position multipurpose blade in work bowl. Add all ingredients; process
until sugar dissolves and melon is pureed, about 45 seconds.
Pour sorbet mixture into dessert maker; turn on Mix and Freeze Switches. Freeze 25 to 35
minutes. When desired consistency is reached, serve immediately or dispense into chilled
container, cover, and freeze.
Yield: 14 servings (1⁄2 cup per serving).
Per Serving: About 100 cal, 1 g pro, 24 g carb, 0 g total fat, 0 g sat fat,
0 mg chol, 25 mg sod.
MELON SORBET
Page 34

34
21⁄2 cups (about 1 medium)
diced pineapple
1
3
⁄4 cups sugar
1
3
⁄4 cups ice water or pineapple
juice and ice water to equal
1
3
⁄4 cups
2 tablespoons fresh lemon juice
teaspoon ground ginger
1
⁄8 teaspoon salt
In food processor, position multipurpose blade in work bowl. Add all ingredients; process
until sugar dissolves and pineapple is pureed, about 45 seconds.
Pour sorbet mixture into dessert maker; turn on Mix and Freeze Switches. Freeze about
35 minutes. When desired consistency is reached, serve immediately or dispense into
chilled container, cover, and freeze.
Yield: 12 servings (1⁄2 cup per serving).
Per Serving: About 130 cal, 0 g pro, 33 g carb, 0 g total fat, 0 g sat fat,
0 mg chol, 25 mg sod.
PINEAPPLE GINGER SORBET
1
⁄2–3⁄4
Page 35

35
FEATURES AND OPERATION
1
⁄4 cup hot water
1
⁄4 cup light corn syrup
1
1
⁄2 pounds strawberries, hulled
and stemmed
1
1
⁄4 cups sugar
2 tablespoons fresh lemon juice
1
⁄8 teaspoon salt
1
1
⁄4 cups ice water, divided
1
⁄3 cup coarsely chopped
fresh basil*
* Some basil will remain in the
dessert maker after sorbet is
dispensed, but the basil flavor
is dispersed in the sorbet.
In small bowl, combine hot water and corn syrup; cool. In food processor, position
multipurpose blade in work bowl. Add strawberries, sugar, lemon juice, salt, and syrup
mixture; process until sugar dissolves and strawberries are pureed, adding as much ice
water as needed to puree mixture.
In large bowl, combine strawberry puree, remaining ice water, and basil. Pour sorbet
mixture into dessert maker; turn on Mix and Freeze Switches. Freeze 25 to 35 minutes.
When desired consistency is reached, serve immediately or dispense into chilled container,
cover, and freeze.
Yield: 12 servings (1⁄2 cup per serving).
Per Serving: About 120 cal, 0 g pro, 30 g carb, 0 g total fat, 0 g sat fat,
0 mg chol, 35 mg sod.
STRAWBERRY BASIL SORBET
Page 36

36
1 can (12 oz.) frozen limeade
concentrate, partially thawed
3
⁄4 cup tequila*
1
⁄3 cup orange-flavored liqueur*
1
1
⁄2 cups water
Lime slices, if desired
* For non-alcoholic option,
substitute
3
⁄4 cup water for
tequila and
1
⁄3 cup orange
juice for liqueur.
Pour limeade, tequila, liqueur, and water into dessert maker; turn on Mix and Freeze Switches.
Freeze 10 to 15 minutes. When desired consistency is reached, dispense immediately into
glasses with salt-lined rims or serving pitcher. Garnish with lime slices, if desired.
Yield: 4 servings (1 cup per serving).
Per Serving: About 330 cal, 0 g pro, 51 g carb, 0 g total fat, 0 g sat fat,
0 mg chol, 0 mg sod.
FROZEN LIME MARGARITA
Page 37

37
FEATURES AND OPERATION
2 cups milk
1
⁄2 cup chocolate syrup
3 tablespoons malt powder
2 tablespoons instant
coffee granules
1
1
⁄2 cups water*
1
⁄2 cup coffee-flavored liqueur*
Whipped Cream, if desired
Mini, semi-sweet chocolate
chips, if desired
* For non-alcoholic option, omit
liqueur, and add 2 cups water
instead of 1
1
⁄2 cups.
In large bowl, combine milk, chocolate, malt, coffee, water, and liqueur. Pour drink mixture
into dessert maker; turn on Mix and Freeze Switches. Freeze 8 to 12 minutes. When desired
consistency is reached, dispense immediately into glasses or serving pitcher. Garnish with
whipped cream and chocolate chips, if desired.
Yield: 4 servings (1 cup per serving).
Per Serving: About 340 cal, 7 g pro, 55 g carb, 4 g total fat, 2.5 g sat fat,
15 mg chol, 160 mg sod.
MALTED MOCHA FREEZE
Page 38

38
1
⁄4 cup fresh lime juice
1
⁄2 cup powdered sugar
2 teaspoons grated lime peel,
if desired
3
⁄4 cup (from 12 oz.-can) frozen
cranberry juice concentrate,
partially thawed
2
1
⁄4 cups water*
3
⁄4 cup vodka*
Lime slices, if desired
* For non-alcoholic option, omit
vodka, and add 3 cups water
instead of 2
1
⁄4 cups.
In medium bowl, combine lime juice and powdered sugar; mix until sugar dissolves. Pour
sugar mixture, lime peel, cranberry concentrate, water, and vodka into dessert maker; turn
on Mix and Freeze Switches. Freeze 10 to 15 minutes. When desired consistency is reached,
dispense immediately into glasses or serving pitcher. Garnish with lime slices, if desired.
Yield: 4 servings (1 cup per serving).
Per Serving: About 250 cal, 1 g pro, 37 g carb, 0 g total fat, 0 g sat fat,
0 mg chol, 30 mg sod.
CRANBERRY-LIME COOLER
Page 39

39
FEATURES AND OPERATION
1
⁄2 cup water
1
⁄3 cup sugar
2
3
⁄4 cups milk
3-4 tablespoons raspberry
drink syrup*
3-4 tablespoons instant coffee
granules, dissolved in
1
⁄2 cup water
Fresh raspberries, if desired
* If desired, substitute vanilla,
hazelnut, or caramel drink
syrup for raspberry syrup.
In small saucepan, combine 1⁄2 cup water and sugar. Heat over medium heat 1 to 2
minutes, or until sugar is dissolved. Chill in refrigerator 10 minutes. Pour sugar mixture,
milk, raspberry syrup, and coffee mixture into dessert maker; turn on Mix and Freeze
Switches. Freeze 8 to 12 minutes. When desired consistency is reached, dispense
immediately into glasses or serving pitcher. Garnish with fresh raspberries, if desired.
Yield: 6 servings (1 cup per serving).
Per Serving: About 130 cal, 4 g pro, 24 g carb, 2.5 g total fat, 1.5 g sat fat,
10 mg chol, 60 mg sod.
RASPBERRY COFFEE FREEZE
Page 40

Page 41

CARE AND CLEANING
CARE
AND
CLEANING
Clean the Freezing Cylinder...............42
Remove the Dispenser Assembly .......43
Dry the Freezing Cylinder...................44
Clean the Housing & Drip Tray .............44
Disassemble the Dispenser Assembly...44
Assemble the Dispenser Assembly .....45
Attach the Mixing Blade
& Dispenser Assembly.......................47
Storing the Dessert Maker ................48
Removing the Funnel Lid ..................49
Troubleshooting................................50
Care and Cleaning
Section Contents
P RO L INE™S ERIES
41
Page 42

• Clean the frozen dessert maker thoroughly after every use.
• After cleaning, wipe the dessert maker housing with a quality
stainless steel cleaner to preserve the finish and prevent
corrosion. Do not apply stainless steel cleaner to the freezing
cylinder or dispenser assembly parts.
Clean the Freezing Cylinder and Vent
1. Make certain the dispensing lever is in the closed (up) position.
2. Pour a quart of warm water with one or two drops of soap into
the ingredient funnel, replace the lid, and turn on the mixing
blade. Do not turn on the freezing system. After 30 seconds,
dispense the soapy water into a container and turn off the
mixing blade.
CLEANING THE FROZEN
DESSERT MAKER
42
Page 43

43
3. Remove the vent cap from the top of the frozen dessert maker.
Wet the small end of the provided cleaning brush in soapy water
and insert the brush into the freezing cylinder vent, then remove.
Repeat several times.
4. Make certain the dispensing lever is in the closed (up) position,
then pour a cup of clean rinse water into the freezing cylinder
vent. Replace the vent cap.
5. Pour a quart of clean rinse water into the ingredient funnel,
replace the lid, and turn on the mixing blade. Do not turn on
the freezing system. After 30 seconds, dispense the water into
a container and turn off the mixing blade. Repeat this step
once more.
Remove the Dispenser Assembly and Mixing Blade
1. Make certain the mixing blade and freezing system are turned off.
2. Remove the dispenser assembly by turning the dispenser
assembly attachment knobs counter-clockwise until the assembly
is free. Be sure to hold the assembly as the last knob is removed.
3. Grasp the mixing blade and remove it from the freezing cylinder.
CARE AND CLEANING
Continued…
Page 44

44
Dry the Mixing Blade and Freezing Cylinder
1. Wipe the freezing cylinder with a clean damp sponge, then dry it
thoroughly with a clean cloth.
2. The mixing blade can be wiped dry or placed in the top rack of a
dishwasher for more thorough cleaning.
Clean the Housing and Drip Tray
1. Wipe the exterior of the frozen dessert maker with a warm,
sudsy cloth; then wipe the dessert maker clean with a damp
cloth and dry with a soft cloth. Do not use abrasive cleansers
or scouring pads – they can scratch the stainless steel surfaces.
2. Wash the drip tray and drip plate in warm soapy water, then
rinse with clean water and dry. The tray and plate can also be
washed in the top rack of the dishwasher.
3. Wipe the dessert maker housing with a quality stainless steel
cleaner to preserve the finish and prevent corrosion. Do not
apply stainless steel cleaner to the freezing cylinder or dispenser
assembly parts.
CLEANING THE FROZEN
DESSERT MAKER
Disassemble and Clean the Dispenser Assembly
1. Remove the large O-ring from the back of the dispenser assembly.
2. Remove the funnel lid, then lay the dispenser assembly flat
side down.
3. Move the dispensing lever to halfway between the top and
bottom positions.
Page 45

6. Wash the dispenser assembly parts in warm soapy water – do
not use abrasive cleansers or scouring pads. Use the large end of
the provided cleaning brush to clean the interior of the
dispensing cylinder. Rinse the parts with clean water and let dry
thoroughly. The dispenser assembly parts can also be washed in
the top rack of a dishwasher.
Assemble the Dispenser Assembly
1. Apply a light coating of vegetable oil to the O-rings on the
dispensing piston. This will lubricate the piston and make sliding
it into the dispensing cylinder easier.
4. Remove the dispensing lever clevis pin by pulling on the attached
ring, and lift the dispensing lever from the assembly.
5. Grasp the bottom of the dispensing cylinder and the top of
the dispensing piston, and pull the piston from the cylinder.
Continued…
45
Lubricate O-rings
with Vegetable Oil
CARE AND CLEANING
Page 46

4. Insert the clevis pin through the faceplate tabs and lever. The
lever may have to be moved slightly so the pin can be aligned
with the holes in the lever.
2. Align the cutout in the piston with the slot on the dispensing
cylinder, and insert the piston into the cylinder. Position the
piston so that the cutout is directly beneath the center of the
cylinder slot.
3. Place the round end of the dispensing lever through the slot on
the cylinder and into the piston cutout. The dispensing lever
should be positioned so that it angles upwards, towards the
ingredient funnel. Placing the dispensing lever upside-down will
prevent the dispenser from opening fully.
46
CLEANING THE FROZEN
DESSERT MAKER
Cutout
Slot
Correct Lever Position
Incorrect Lever Position
Page 47

47
CARE AND CLEANING
Attach the Mixing Blade and Dispenser Assembly
1. Insert the mixing blade into the freezing cylinder. Make certain
the end with the square keyhole is inserted into the freezing
cylinder first.
2. When the mixing blade is fully inserted into the cylinder, rotate
the blade until you feel the motor shaft at the back of the
freezing cylinder slip into the mixing blade keyhole.
5. Apply a light coating of vegetable oil to the O-ring on the bottom
of the funnel lid. This will lubricate the funnel lid and make it easy
to remove. Then place the lid into the ingredient funnel.
6. Fit the large O-ring onto the back of the dispenser assembly.
Lubricate O-ring
with Vegetable Oil
Continued…
Page 48

Storing the Frozen Dessert Maker
When storing the dessert maker between uses:
• Make certain the housing, freezing cylinder, and dispenser
assembly parts are dry.
• Be sure the O-ring on the funnel lid is lubricated with vegetable
oil; this will make the funnel lid easy to remove. See step 5 on
page 47.
• Wipe the dessert maker housing with a quality stainless steel
cleaner to preserve the finish and prevent corrosion. Do not
apply stainless steel cleaner to the freezing cylinder or dispenser
assembly parts.
3. Position the dispenser assembly on the housing, making sure the
tip of the mixing blade shaft fits into the hole on the back of the
dispenser assembly. Thread the attachment knobs onto the
attachment bolts, and turn them clockwise until snug.
48
CLEANING THE FROZEN
DESSERT MAKER
Page 49

49
CARE AND CLEANING
Removing the Funnel Lid
If not properly lubricated after use, the funnel lid may prove difficult
to remove from the funnel. If this happens:
1. Make certain the mixing blade and freezing system are turned off.
2. Remove the dispenser assembly from the dessert maker by
turning the dispenser assembly attachment knobs
counter-clockwise until the assembly is free. Be sure to hold the
assembly as the last knob is removed.
3. Turn the dispenser assembly so the flat side faces upwards. Using
a thumb, press the funnel lid ingredient pusher where it fits into
the dispenser assembly. The funnel lid should pop out easily.
4. Position the dispenser assembly on the housing, making sure the
tip of the mixing blade shaft fits into the hole on the back of the
dispenser assembly. Thread the attachment knobs onto the
attachment bolts, and turn them clockwise until snug.
Once the funnel is wetted with dessert ingredients, the funnel lid
can be inserted and removed easily. To make removing the funnel lid
easier after cleaning and storing the dessert maker, apply a light
coating of vegetable oil to the O-ring on the pusher (see step 5 on
page 47).
Page 50

• If the mixing blade shuts off while a dessert is being made:
If a dessert becomes too stiff to mix, the frozen dessert maker
will automatically shut off. If the Mix Switch is left on, the
mixing blade will automatically re-start when the dessert has
thawed. Although no immediate harm will result from leaving
the Mix Switch on in this circumstance, repeated automatic
on/off cycling will shorten the life of some components. If the
dessert maker has automatically shut off, it is recommended
that the Mix and Freeze Switches be turned off. Wait 5 minutes
for the dessert to thaw, then turn the Mix Switch back on. If the
mixing blade rotates, dispense the dessert; if not, turn off the
Mix Switch and allow the dessert to thaw several more minutes
before repeating the procedure. When the mixing blade is
rotating, moving the dispensing lever up and down several
times may help dispense a firm dessert.
• If the dispenser drips during use:
Make sure the dispensing lever is in the fully closed (up)
position. When the lever is moved upward, you’ll feel it “snap”
into the fully closed position.
After dispensing a dessert, a small amount may cling to the
mouth of the dispensing cylinder and bottom of the
dispensing piston; this dessert will eventually melt and drip.
This is normal.
• If the indicator light remains dark and the mixing blade
fails to turn when the Mix Switch is turned on:
– Make sure the funnel lid is securely positioned on the funnel.
The funnel lid serves as an electrical interlock: the frozen
dessert maker will not operate unless the lid is in place.
– Make sure the frozen dessert maker is plugged into a
grounded 3 prong outlet. If it is, unplug the frozen dessert
maker, then plug it back into the same outlet again. Turn on
the mixing blade by rocking the Mix Switch upward. If the
mixing blade still does not rotate, check the fuse or circuit
breaker on the electrical circuit the frozen dessert maker is
connected to and make certain the circuit is closed.
• If a dessert does not dispense well:
– Make sure the Mix Switch is turned on and the mixing blade
is rotating.
– If a dessert has become too firm to dispense easily, shut off
the Mix and Freeze Switches, wait a few minutes for the
dessert to thaw, then turn the Mix Switch back on and
dispense the dessert.
– Check the dispensing lever. When the dispenser is fully closed,
the lever should angle upwards. If the lever is almost
horizontal in the closed position, the dispenser will not open
fully. See step 3 on page 46 for proper dispenser assembly.
TROUBLESHOOTING
50
Page 51

51
• If a dessert never freezes adequately:
Use less dessert mix. You can also try reducing the alcohol or
sugar in the recipe. When using a commercial soft-serve ice
cream mix, use only 1 quart of mix per batch. Greater quantities
will not freeze adequately.
If the problem cannot be fixed with the steps above, see the
KitchenAid Warranty and Service section on page 53.*
*Do not return the frozen dessert maker to the retailer, as they do not provide service.
• If condensation forms around the dispenser assembly:
The freezing system will cause condensation to form around the
dispenser assembly in humid environments. This is normal.
• If a dessert backs up through the freezing cylinder vent:
Most ingredients expand when frozen. Filling the dessert maker
with a large quantity of ingredient mix may cause dessert to
back up through the freezing cylinder vent during operation.
This is normal and will not harm the dessert maker. Reduce the
amount of mix used to prevent this from occurring.
• If a dessert backs up into the ingredient funnel:
During operation, some dessert may accumulate in the
ingredient funnel. This is normal. If the funnel lid is not
positioned securely, however, ingredients may fill and overflow
the funnel. Make sure the lid is placed tightly on the funnel.
CARE AND CLEANING
Page 52

Page 53

WARRANTY AND SERVICE INFORMATION
Warranty for the U.S. .......................54
Warranty for Puerto Rico ..................55
Arranging for
Hassle-Free Replacement ..................55
Ordering Accessories
& Replacement Parts.........................56
Arranging for Service
After the Warranty Expires................56
Arranging for Service Outside
the U.S. & Puerto Rico......................57
Warranty Information
Section Contents
WARRANTY
AND SERVICE
INFORMATION
P RO L INE™S ERIES
53
Page 54

54
FROZEN DESSERT MAKER WARRANTY
FOR THE 50 UNITED STATES
AND DISTRICT OF COLUMBIA
This warranty extends to the purchaser and any succeeding owner for PRO LINE™ Series Frozen Dessert
Makers operated in the 50 United States and District of Columbia.
KITCHENAID DOES NOT ASSUME ANY RESPONSIBILITY FOR INCIDENTAL OR CONSEQUENTIAL
DAMAGES. Some states do not allow the exclusion or limitation of incidental or consequential damages,
so this exclusion may not apply to you. This warranty gives you specific legal rights and you may also have
other rights which vary from state to state.
KitchenAid Will Pay For
Your Choice of:
Hassle-Free
Replacement of
your Frozen Dessert
Maker. See “Arranging
for Hassle-Free
Replacement” for details, or call the
KitchenAid Customer Satisfaction
Center toll-free at 1-800-541-6390.
OR
The replacement parts and repair labor
costs to correct defects in materials
and workmanship. Service must be
provided by an Authorized KitchenAid
Service Center. See the KitchenAid™
PRO LINE™ Series Frozen Dessert
Maker Warranty for Puerto Rico for
details on how to arrange for service.
KitchenAid Will
Not Pay For:
A. Repairs when the Frozen
Dessert Maker is used in
other than normal single
family home use.
B. Damage resulting from
accident, alteration,
misuse or abuse.
C. Any shipping or handling
costs to deliver your Frozen
Dessert Maker to an
Authorized Service Center.
D. Replacement parts or
repair labor costs for Frozen
Dessert Makers operated
outside the 50 United States
and District of Columbia.
Length of
Warranty:
Two Year Full
Warranty for
Household Use,
from date of
purchase.
Page 55

55
WARRANTY AND SERVICE INFORMATION
FROZEN DESSERT MAKER
WARRANTY FOR PUERTO RICO
A limited two year warranty extends to the purchaser and any
succeeding owner for PRO LINE™ Series Frozen Dessert Makers
operated in Puerto Rico. During the warranty period, all service must
be handled by an Authorized KitchenAid Service Center.
IF YOU RESIDE IN THE 50 UNITED STATES and your KitchenAid™
PRO LINE™ Series Frozen Dessert Maker should fail within the first two
years of ownership, simply call our toll-free Customer Satisfaction
Center at 1-800-541-6390 Monday through Friday, 8 a.m. to 8 p.m.
(Eastern Time), or Saturday, 10 a.m. to 5 p.m. Give the consultant
your complete shipping address. (No P.O. Box Numbers, please.)
KitchenAid will arrange to deliver an identical or comparable
replacement to your door free of charge and arrange to have your
“failed” Frozen Dessert Maker returned to us. Your replacement unit
will also be covered by our two year full warranty.
Please bring the Frozen Dessert Maker, or ship it prepaid and insured,
to the nearest Authorized Service Center. Call toll-free 1-800-541-6390
Monday through Friday, 8 a.m. to 8 p.m. (Eastern Time), or Saturday,
10 a.m. to 5 p.m. to learn the location of a Service Center near you.
Your repaired Frozen Dessert Maker will be returned to you prepaid
and insured.
When you receive your replacement PRO LINE™ Series Frozen Dessert
Maker, use the carton and packing materials to pack-up your “failed”
Frozen Dessert Maker. In the carton, include your name and address
on a sheet of paper along with a copy of the proof of purchase
(register receipt, credit card charge slip, etc.).
ARRANGING FOR
HASSLE-FREE REPLACEMENT
Page 56

56
56
ORDERING ACCESSORIES AND
REPLACEMENT PA RTS
To order accessories or replacement parts for your Frozen Dessert
Maker, call toll-free 1-800-541-6390 Monday through Friday, 8 a.m.
to 8 p.m. (Eastern Time), or Saturday, 10 a.m. to 5 p.m., or write to:
ARRANGING FOR SERVICE AFTER
THE WARRANTY EXPIRES
For service information, call toll-free 1-800-541-6390 Monday
through Friday, 8 a.m. to 8 p.m. (Eastern Time), or Saturday,
10 a.m. to 5 p.m., or write to:
Customer Satisfaction Center, KitchenAid Portable Appliances,
P. O. Box 218, St. Joseph, MI 49085-0218.
Customer Satisfaction Center, KitchenAid Portable Appliances,
P. O. Box 218, St. Joseph, MI 49085-0218.
WARNING
Electrical Shock Hazard
Unplug before servicing.
Failure to do so can result in
death or electrical shock.
Page 57

57
ARRANGING FOR SERVICE OUTSIDE
THE 50 UNITED STATES
AND PUERTO RICO
Consult your local KitchenAid dealer or the store where you
purchased your PRO LINE™ Series Frozen Dessert Maker for
information on how to obtain service.
WARRANTY AND SERVICE INFORMATION
Page 58

 Loading...