

ODEL
PRO LINE _®SERIES
MAKER
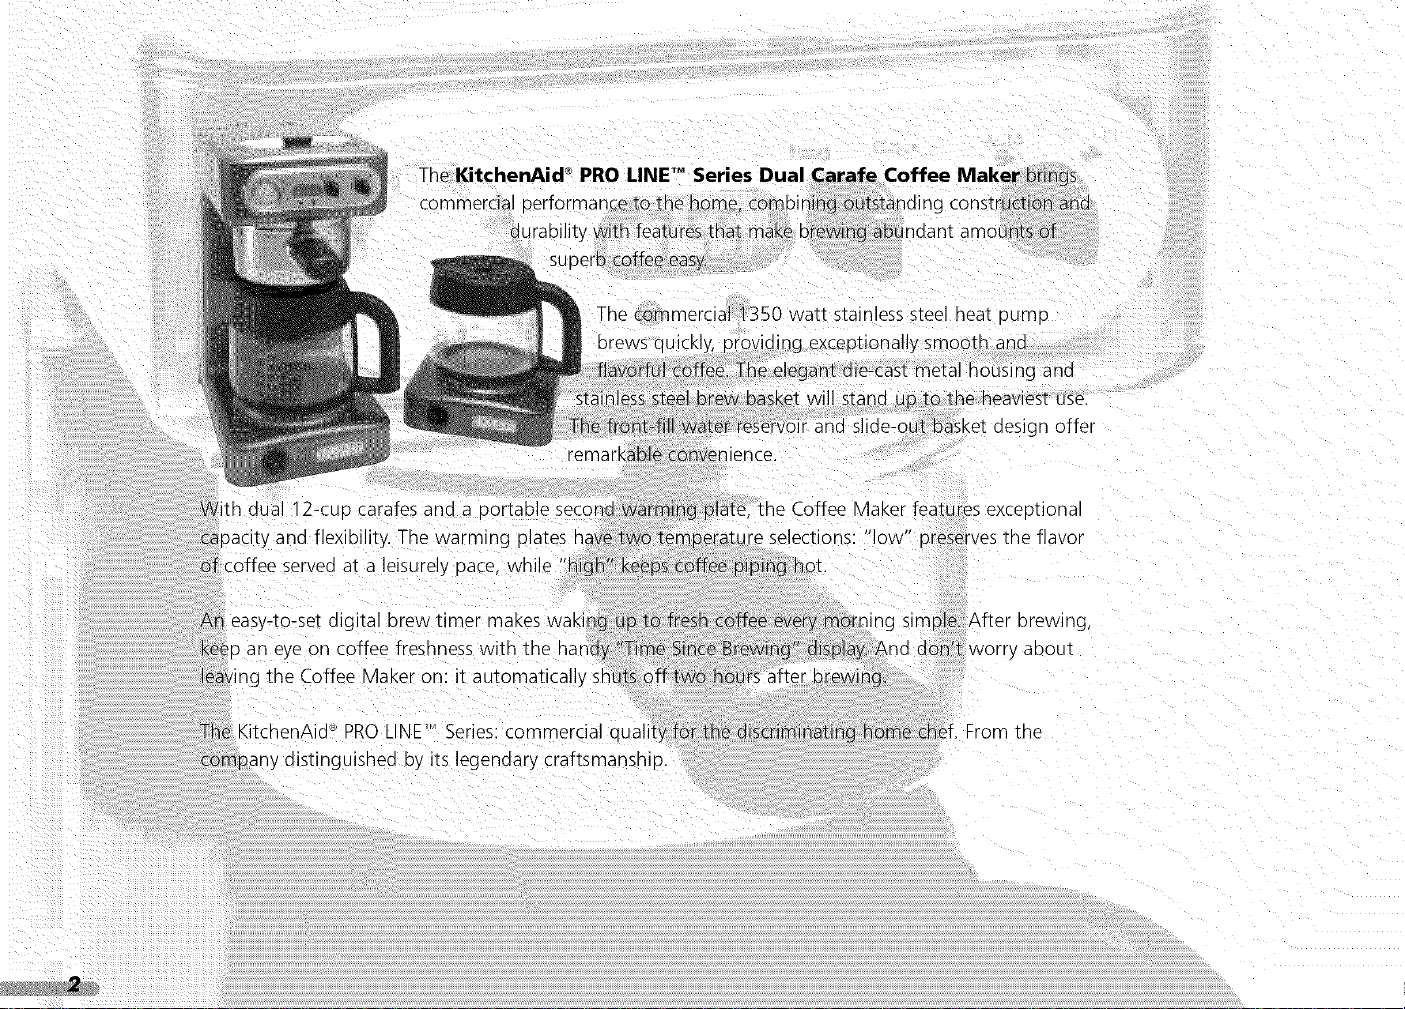
The commerdal_350 wat_ stainless steel heat OUmD
orews quickl'
me heaviestuse.
gn offer
ana
n oual 12-CUDcarafes ana a oortable secor
uacity and flexibility. The warming
__rveoat a leisurel
i eas}-to-set o gital brew timer maKes waking
_n eye on coffee freshness with the handy
the Coffee Vlaker on: it automatically sh
The <itchenAid _ PROLINE'MSeries: commercial quail
COmpanydistinguished by its egendary craftsmanshio.
plate, the Coffee ,, .MaKerfeatures exceptiona
re selections: low D-eservesthe flavor
ing simple. After brewing
worr) aDOUI
me
BLE - CQN FEN F
HTt{O©UCT OH
Introduction .................................................................... 2
Coffee Maker Safety .......................................................... 4
Important Safeguards ...................................................... 5
Proof of Purchase & Product Registration ............................ 6
Electrical Requirements .................................................... 7
Coffee Maker Features .......................................................... 10
Preparing the Coffee Maker For Use
Pre-Use Cleaning ............................................................ 13
Installing the Water Filter ................................................ 13
Setting the Time-of-Day Clock ........................................ 14
Brewing Coffee ...................................................................... 16
Using the Warming Plates
Adjusting the Temperatu re .............................................. 19
Turning Off the Warming Plates ...................................... 19
Automatic Shutoff Feature .............................................. 19
Programming the Automatic Brew Timer .............................. 20
Adjusting Message Tone Volume ............................................ 22
Resetting the Water Filter Icon .............................................. 23
Coffee Brewing Suggestions: Advice for Great Taste .............. 24
CAF2_EA_%,CI,,_IAIsSNG
Cleaning the Coffee Maker ................................................ 28
Descaling ............................................................................ 29
Storing the Coffee Maker .................................................. 30
Cleaning the Optional Gold Tone Permanent Filter .............. 30
Troubleshooting and Error Codes ...................................... 31
WA:_/'<ANTY x_} SEPN CE b_FO/(MA[ O_,S
Warranty for the 50 United States & District of Columbia .... 34
Warranty for Puerto Rico .................................................... 35
Arranging for Hassle-Free Replacement .............................. 35
Ordering Accessories and Replacement Parts ...................... 36
Arranging for Service After the Warranty Expires ................ 36
Arranging for Service Outside the 50 United States
& Puerto Rico ...................................................................... 37
2
©
o
Z
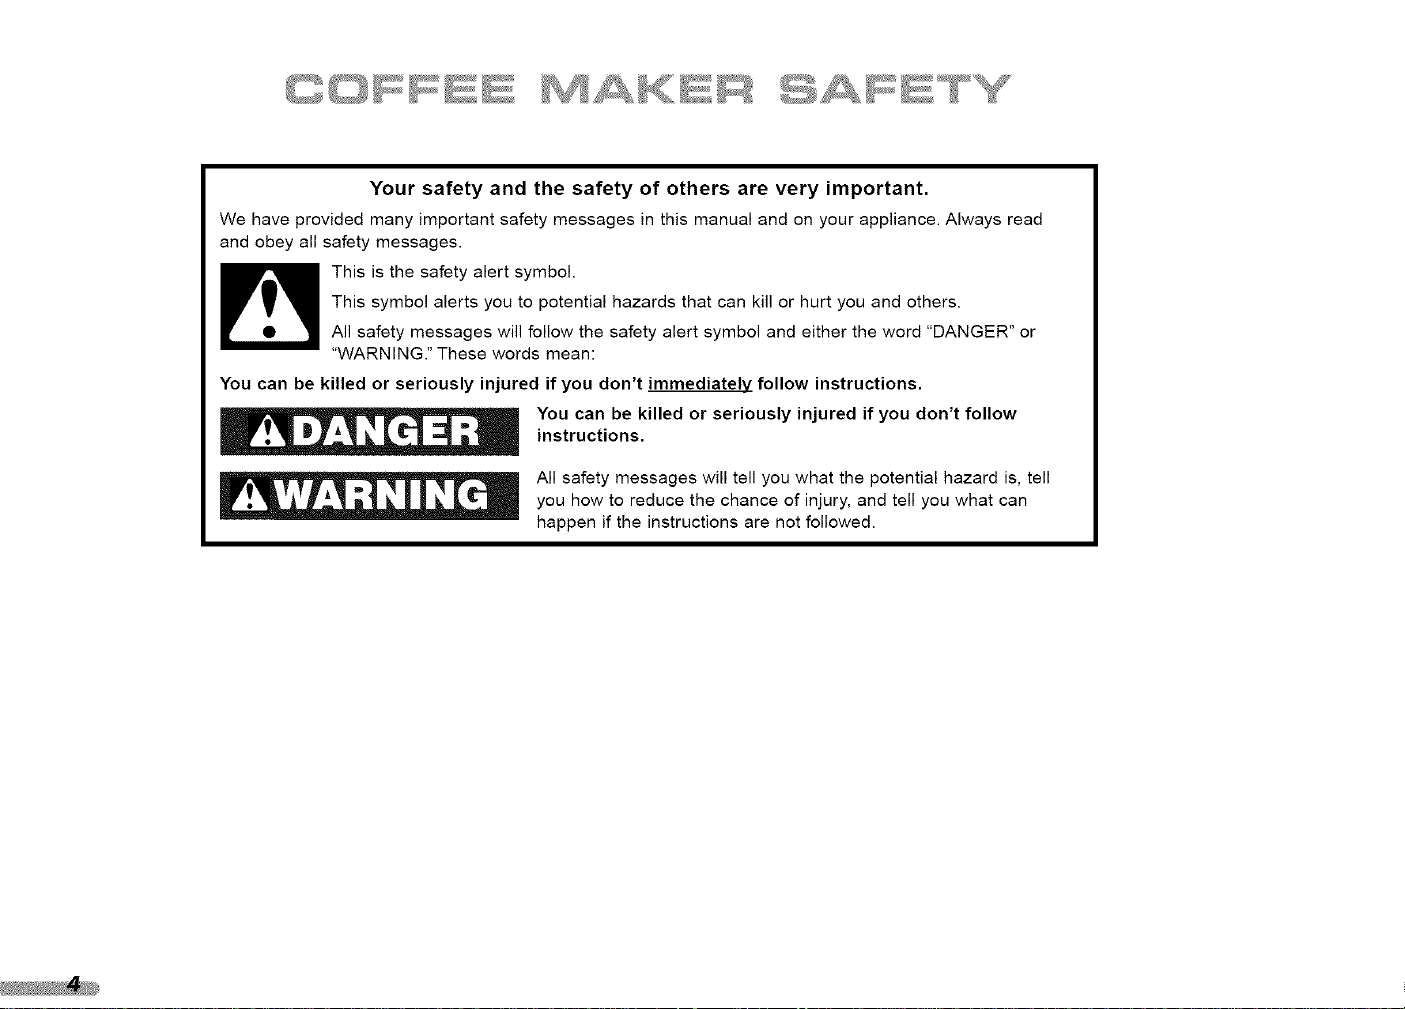
Your safety and the safety of others are very important.
We have provided many important safety messages in this manual and an your appliance. Always read
and obey all safety messages.
This is the safety alert symbol.
This symbol alerts you to potential hazards that can kill or hurt you and others.
All safety messages will follow the safety alert symbol and either the word "DANGER" or
"WARNING." These words mean:
You can be killed or seriously injured if you don't immediately follow instructions.
You can be killed or seriously injured if you don't follow
instructions.
All safety messages will tell you what the potential hazard is, tell
you how to reduce the chance of injury, and tell you what can
happen if the instructions are not followed.
When using electrical appliances, basic safety precautions
should always be followed, including the following:
} Readall instructions.
2 Do not touch hot surfaces. Usehandles or knobs.
To protect against electrical shock, do not immerse cord,
plugs, or Coffee Maker in water or other liquid.
Closesupervision is necessarywhen any appliance is used by
or near children.
Unplug Coffee Maker from outlet before cleaning. Allow to
cool before putting on or taking off parts, and before
cleaning the appliance.
_: Do not operate any appliance with a damaged cord or plug,
or after the appliance malfunctions or has been damaged in
any manne[ Return appliance to the nearest authorized
servicefacility for examination, repair, or adjustment.
}" The use of accessoriesnot recommended by the appliance
manufacturer may result in fire, shock or injury to persons.
..............................s s sU,,,,*_,,,,_,3_}}!i! '_*_,,,,_,; ....................
;_: Do not useoutdoors.
,! Do not let cord hang over edge of table or counter, or touch
hot surfaces.
Do not place on or near a hot gas or electric burner, or in a
heated oven.
Do not useappliance for other than its intended use.
}
, Do not use appliance without lid properly placed on container.
The container is designed for use with this appliance. It must
never be used on a range top.
Do not set a hot container on awet or cold surface.
: Do not use a cracked container or a container having a loose
or weakened handle.
: Do not clean container with cleaners, steel wool pads, or
other abrasive material.
' This product has been UL Listedfor household and
commercial use.
2
©
o
Z
Alwayskeepacopyofthesalesreceiptshowingthedateof
purchaseofyourCoffee Maker. Proof of purchase will assureyou
of in-warranty service.
Before you use your Coffee Maker, please fill out and mail your
product registration card packed with the unit. This card will
enable us to contact you in the unlikely event of a product
safety notification and assist us in complying with the provisions
of the Consumer Product Safety Act. This card does not verify
your warranty.
Pleasecomplete the following for your personal records:
Model: KPCMIO0
Serial Number
Date Purchased
Store Name
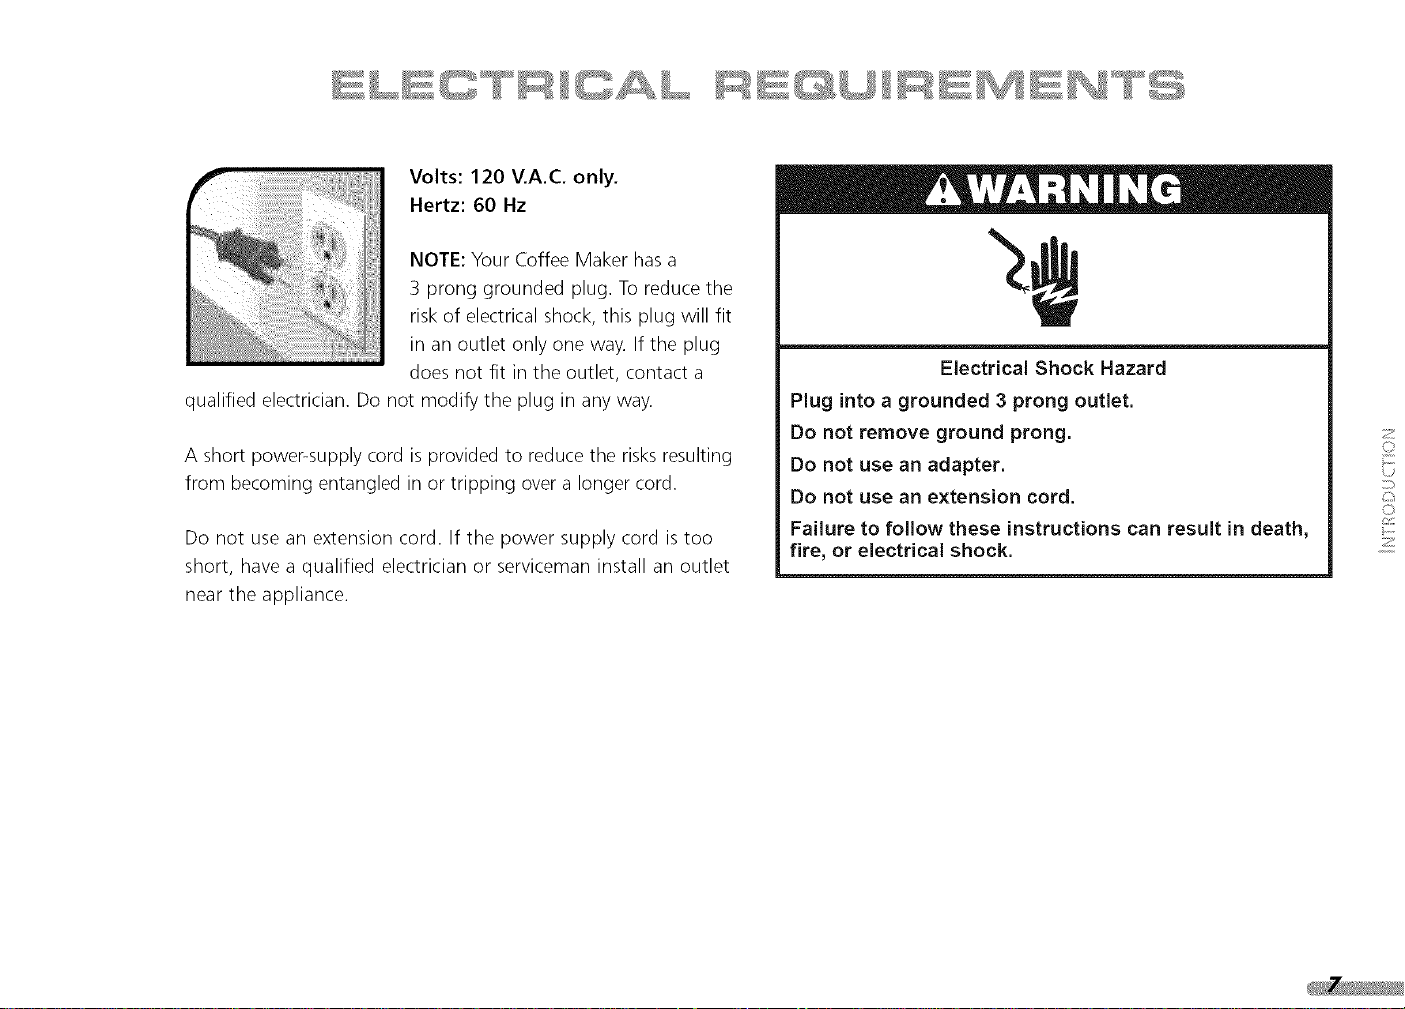
Volts:120V.A.C.only.
Hertz:60Hz
NOTE:YourCoffeeMakerhasa
3pronggroundedplug.Toreducethe
riskofelectricalshock,thisplugwillfit
inanoutletonlyoneway.Iftheplug
doesnotfit intheoutlet,contacta
qualifiedelectrician.Donotmodifythepluginanyway.
Ashortpower-supplycordisprovidedto reducetherisksresulting
frombecomingentangledinortrippingoveralongercord.
Donotuseanextensioncord.Ifthepowersupplycordistoo
short,haveaqualifiedelectricianorservicemaninstallanoutlet
neartheappliance.
ElectricalShockHazard
Pluginto a grounded 3 prong outlet.
Do not remove ground prong.
Do not use an adapter.
Do not use an extension cord.
Failure to follow these instructions can result in death,
fire, or electrical shock.
2
o
o
Z

PRO LINE TM®SERIES
ON
9
P_,,/}£_iiii}_ii <:::_G::!','_,_'I OC}
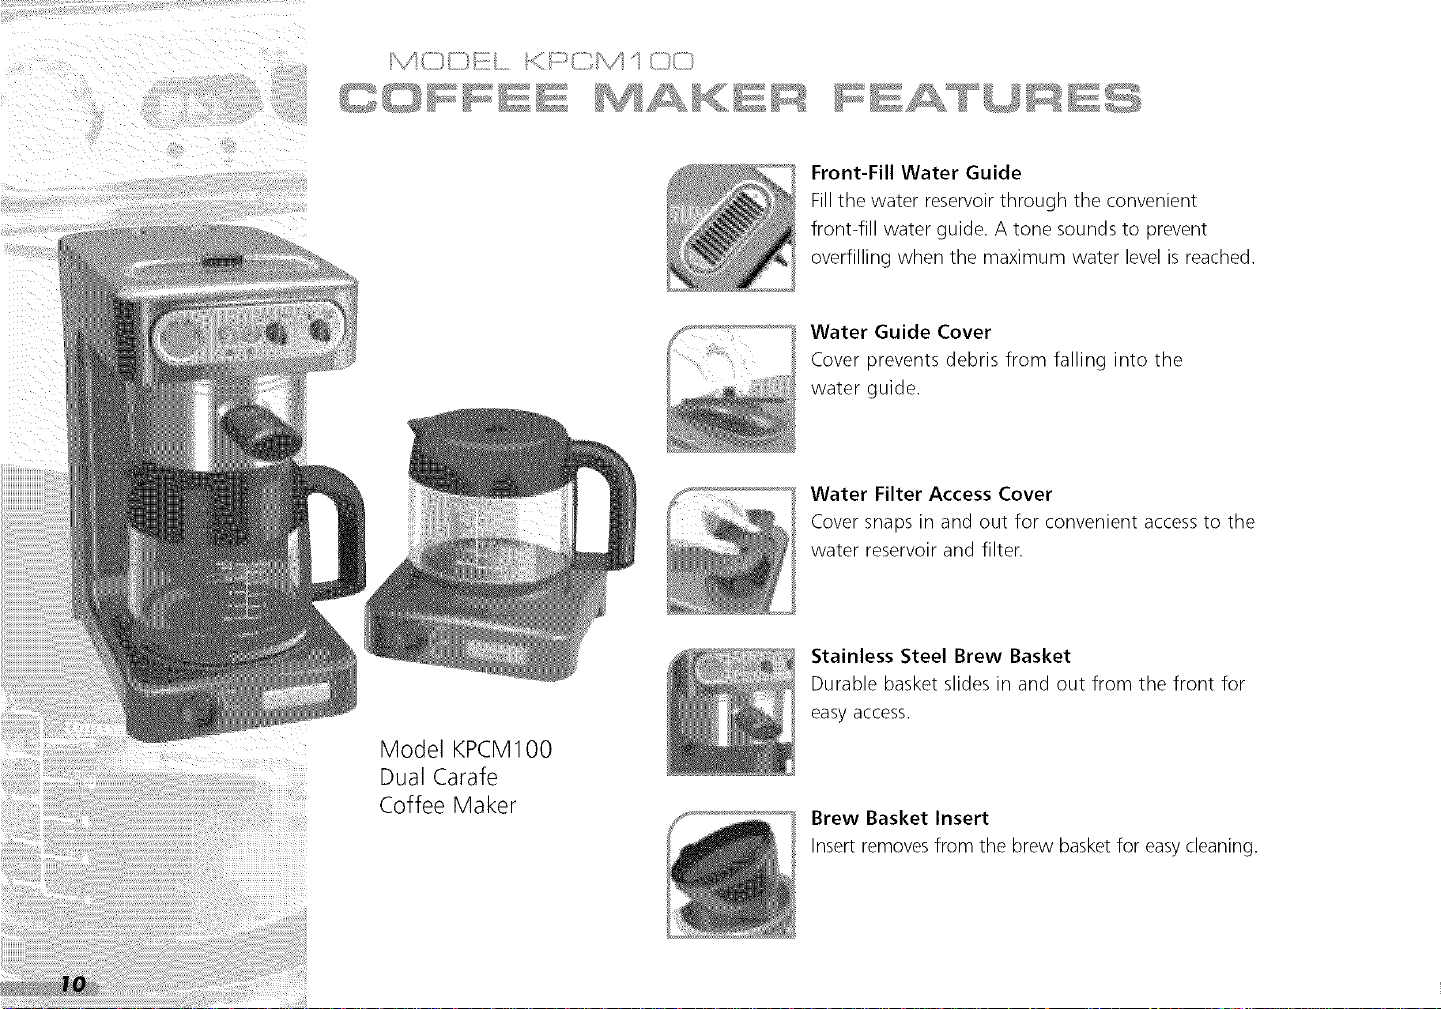
Front-Fill Water Guide
Fillthe water reservoirthrough the convenient
front-fill water guide. A tone sounds to prevent
overfilling when the maximum water level is reached.
Water Guide Cover
Cover prevents debris from falling into the
water guide.
Water Filter Access Cover
Cover snaps in and out for convenient access to the
water reservoir and filter.
Model KPCM100
Dual Carafe
Coffee Maker
Stainless Steel Brew Basket
Durable basket slides in and out from the front for
easy access.
Brew Basket Insert
Insert removesfrom the brew basketfor easycleaning.
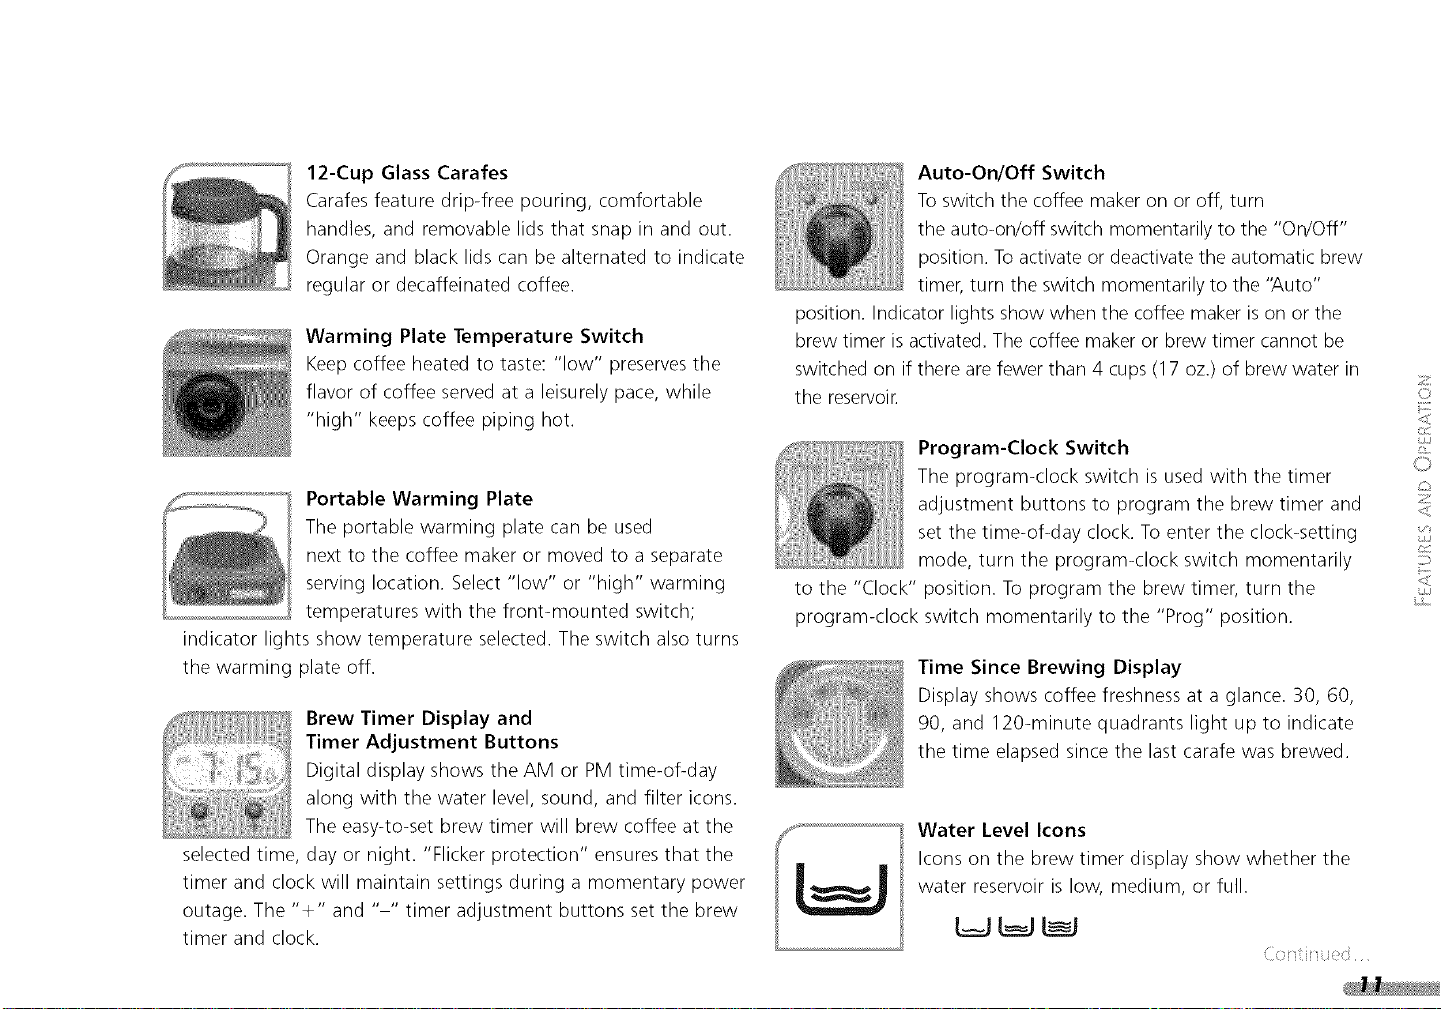
12-Cup Glass Carafes
Carafesfeature drip-free pouring, comfortable
handles, and removable lids that snap in and out.
Orange and black lids can be alternated to indicate
regular or decaffeinated coffee.
Warming Plate Temperature Switch
Keep coffee heated to taste: "low" preserves the
flavor of coffee served at a leisurely pace, while
"high" keeps coffee piping hot.
Portable Warming Plate
The portable warming plate can be used
next to the coffee maker or moved to a separate
serving location. Select "low" or "high" warming
temperatures with the front-mounted switch;
indicator lights show temperature selected. The switch also turns
the warming plate off.
Brew Timer Display and
Timer Adjustment Buttons
Digital display shows the AM or PM time-of-day
along with the water level, sound, and filter icons.
The easy-to-set brew timer will brew coffee at the
selected time, day or night. "Flicker protection" ensures that the
timer and clock will maintain settings during a momentary power
outage. The "+" and .... timer adjustment buttons set the brew
timer and clock.
Auto-On/Off Switch
To switch the coffee maker on or off, turn
the auto-on/off switch momentarily to the "On/Off"
position. To activate or deactivate the automatic brew
timer, turn the switch momentarily to the 'Auto"
position. Indicator lights show when the coffee maker is on or the
brew timer is activated. The coffee maker or brew timer cannot be
switched on if there are fewer than 4 cups (17 oz.) of brew water in
the reservoir.
Program-Clock Switch
The program-clock switch is used with the timer
adjustment buttons to program the brew timer and
set the time-of-day clock. To enter the clock-setting
mode, turn the program-clock switch momentarily
to the "Clock" position. To program the brew timer, turn the
program-clock switch momentarily to the "Prog" position.
Time Since Brewing Display
Display shows coffee freshness at a glance. 30, 60,
90, and 120-minute quadrants light up to indicate
the time elapsed since the last carafe was brewed.
Water Level Icons
Icons on the brew timer display show whether the
water reservoir is low, medium, or full.
z
©
<
11
©
z
<
<
C/J
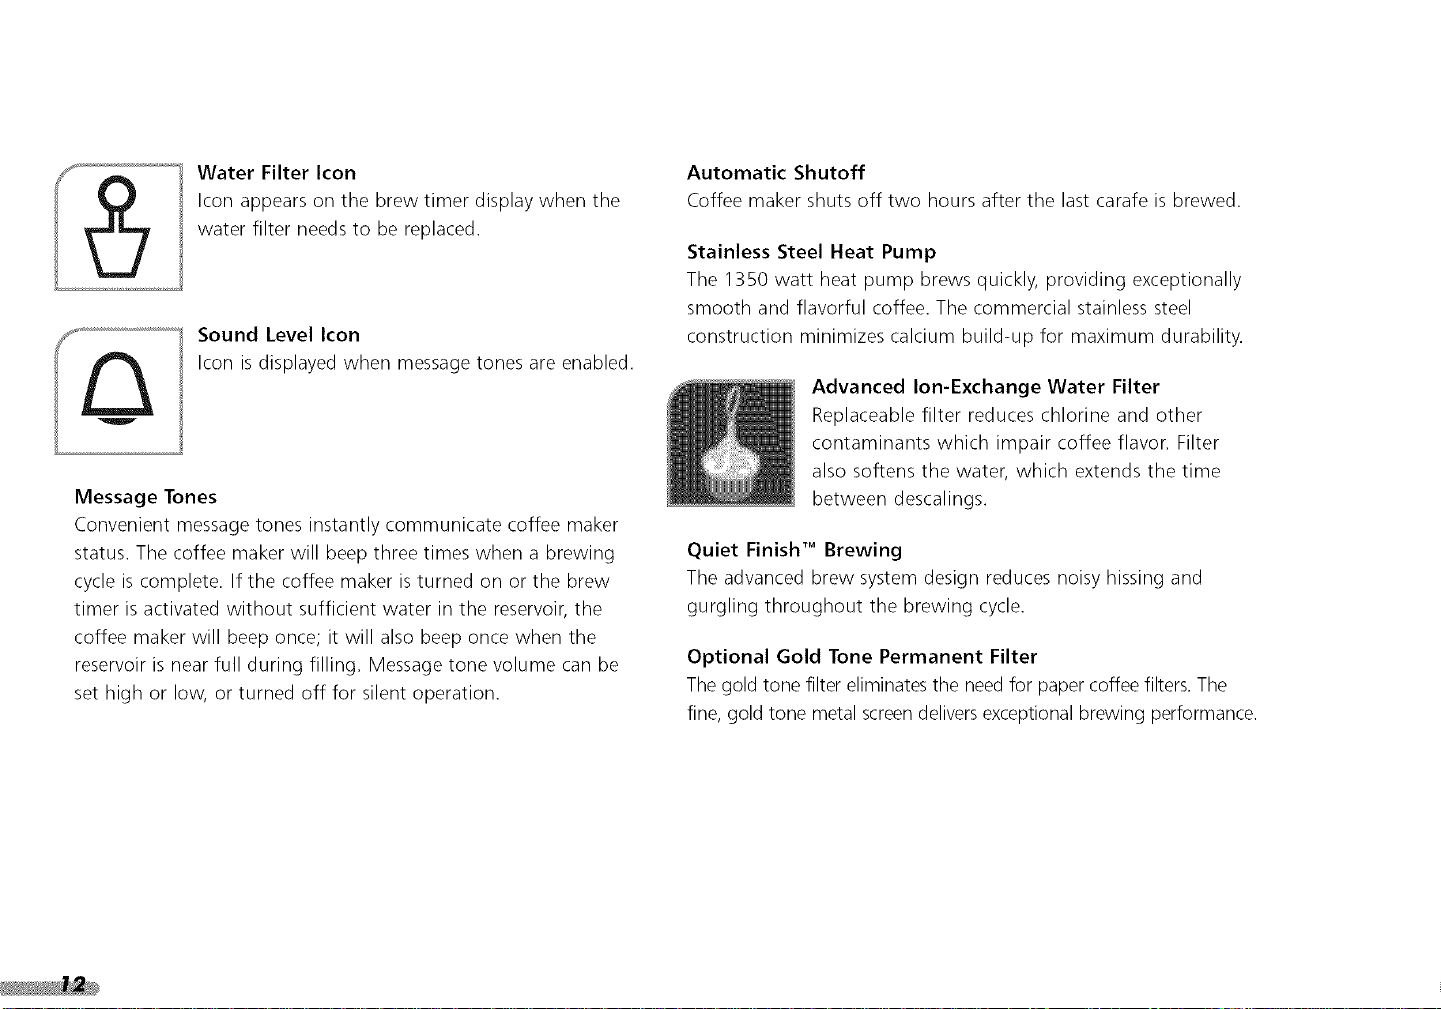
Water Filter Icon
Icon appears on the brew timer display when the
water filter needs to be replaced.
Sound Level Icon
Icon is displayed when message tones are enabled.
Message Tones
Convenient message tones instantly communicate coffee maker
status. The coffee maker will beep three times when a brewing
cycle is complete. If the coffee maker is turned on or the brew
timer is activated without sufficient water in the reservoir, the
coffee maker will beep once; it will also beep once when the
reservoir is near full during filling. Message tone volume can be
set high or low, or turned off for silent operation.
Automatic Shutoff
Coffee maker shuts off two hours after the last carafe is brewed.
Stainless Steel Heat Pump
The 1350 watt heat pump brews quickly, providing exceptionally
smooth and flavorful coffee. The commercial stainless steel
construction minimizes calcium build-up for maximum durability.
Advanced Ion-Exchange Water Filter
Replaceable filter reduces chlorine and other
contaminants which impair coffee flavor. Filter
also softens the water, which extends the time
between descalings.
Quiet Finish TM Brewing
The advanced brew system design reduces noisy hissing and
gurgling throughout the brewing cycle.
Optional Gold Tone Permanent Filter
Thegold tone filter eliminates the needfor paper coffee filters. The
fine, gold tone metal screendeliversexceptional brewing performance.

Pre-Use Cleaning
Wash the filter basket, basket insert, carafes, and carafe lids in
hot, soapy water, then rinse with clean water and dry. Do not use
abrasive cleansers or scouring pads. These parts may also be
washed in the top rack of the dishwasher.
The water filter is for use only with municipally treated tap water
or well water that is regularly tested for contaminants.
To Install the Filter:
I Remove the cartridge from its packaging.
Installing the Water Filter
Since most tap water ischlorinated and contains some level of
calcium, the use of a PROLINE" SeriesWater Filter is
recommended. The advanced ion-exchange water filter reduces
chlorine and other contaminants which impair coffee flavor. The filter
also softens the water, which extends the time between descalings.
The PRO LINE Series Water Filter will filter approximately 25
the end of its life, the water filter icon will appear on the
gallons of water (60 full carafes). When a filter has reached
brew timer display.
Use of the water filter is optional: the coffee maker will operate
normally without it. If a water filter is not used, the filter icon will
still appear on the brew timer display as a reminder to descale the
coffee maker. To reset the icon after it appears, see page 23.
£ Placethe filter cartridge in a separate container filled with
fresh, cool water; the cartridge should remain submerged in
the water for 10 minutes.
Remove the water filter accesscover from the coffee maker.
0
i,s ....
2
©
<
L
z
<
t£S
<
s£S

Placethe filter cartridge in the circular well at the bottom of
the water reservoir. Push the cartridge slightly to make sure it
fits snugly.
Replace the water filter accesscover and run the coffee maker
through a complete brewing cycle without coffee. Use a full
carafe of clean, cool water.
Electrical Shock Hazard
Plug into a grounded 3 prong outlet.
Do not remove ground prong.
Do not use an adapter.
Do not use an extension cord.
Failure to follow these instructions can result in death,
fire, or electrical shock.
Setting the Time-Of-Day Clock
When the coffee maker is first plugged in or when power is
restored after an interruption, the brew timer display
automatically enters the clock-setting mode. The hour digits on
the display will flash until a time is set.

ToEnterClock-SettingMode
Ifthedigitsonthebrewtimerdisplayarenotflashing,enterthe
clock-settingmodebyturningtheProgram-ClockSwitchclockwise
tothe"Clock"position,thenreleasing.Thehourdigitswillbegin
toflash.
2
©
ToSetTheClock
Pressthe.... TimerAdjustmentButtontodecreasethehouror
the"÷" TimerAdjustmentButtonto increasethehour.Ifa
TimerAdjustmentButtonispressedandheld,thehourdigits
willscroll.TheAMandPMiconswillchangewhenthehour
digitsrollpast"12".Makecertainthehoursetiscorrectwith
regardtoAMorPM.
_ Oncethehourisset,turntheProgram-ClockSwitchclockwise
tothe"Clock"position,thenrelease.Theminutedigitswill
begintoflash.
Pressthe"-" or"÷" TimerAdjustmentButtonstoadjustthe
minutes.IfaTimerAdjustmentButtonispressedandheld,the
minutedigitswillscroll.
Oncetheminutesareset,turntheProgram-ClockSwitch
clockwisetothe"Clock"position,thenrelease.Theminute
digitswillstopflashingandthebrewtimerdisplaywillexitthe
clock-settingmode.
L
0
z
<
C/J

Before brewing coffee for the first time, run the coffee maker
through a complete brewing cycle without coffee. Use a full
carafe of clean, cool waten This rinses the water reservoir, heat
pump, and showerhead. This first brew cycle will yield slightly less
water than the amount added, since the brew system retains a
small amount of waten
Fill a carafe with enough fresh, cool water to make the desired
amount of coffee. A graduated scale on the side of the carafe
helps measure the amount of water required. The right side
of the scale ("coffee") is an accurate measurement of carafe
volume in 4K ounce cups. The left side of the scale ("water")
indicates the amount of water needed to produce a given
number of cups. (Brewing always produces lesscoffee than the
volume of water added, since coffee grounds retain waten)
NOTE: Use at least 4 cups (17 oz.) of water to brew coffee.
The coffee maker will not operate with less.
_<Removethe water guide coverand pour the water into the guide.
L_J _ The water level icons on the brew timer
display will indicate whether the water reservoir is low, medium,
or near full.

_lf messagetonesareenabled,thecoffeemakerwillbeep
oncewhenthewaterreservoirisnearfull.
Afterfillingthereservoir,placethecarafeonthecoffeemaker
warmingplate.
Grasp the brew basket handle and remove the brew basket
from the front of the coffee maker.
2
©
Make certain the plastic brew basket insert is placed in the brew
basket. Insert a 10-12 cup flat-bottom paper filter or the optional
gold tone permanent filter into the brew basket. Using the
included scoop, fill the filter with one rounded scoop of ground
coffee for each cup desired. Add more coffee for a stronger
brew, lessfor a weaker brew. Use a medium grind appropriate
for automatic drip coffee makers: too fine a grind will produce
bitterness and may causewater to overflow the brew basket.
f Slide the brew basket into the coffee maker as far as possible.
:." To begin brewing, turn the Auto-On/Off Switch clockwise to
the "On/Off" position, then release. The on/off indicator light
will illuminate when the coffee maker ison. Do not remove the
carafe from the coffee maker until brewing is complete.
©
z
<
L/J

NOTE:Thecoffeemakercannotbeswitchedoniftherearefewer
than4cups(17oz.)ofbrewwaterinthereservoir.
J_ Ifmessagetonesareenabled,thecoffeemakerwill:
+_beep once if there are fewer than 4 cups (17 oz.) of brew
water in the reservoir
+_beep three times when brewing is complete
S When brewing is finished, the 30, 60, 90, and 120-minute
segments on the time since brewing displaywill light up to indicate
the time elapsedsincethe completion of the brewing cycle.At the
end of two hours, the coffee maker will shut off automatically. To
shut off the coffee maker manually,turn the Auto-On/Off Switch
clockwise to the "On/Off" position, then release.
Repeat steps 1 7 to brew additional carafes of coffee. Always
turn off the coffee maker and allow it to cool for five minutes
before starting the next carafe.

Adjusting Warming
Plate Temperature
The warming plates can hold coffee at a choice of two serving
temperatures. Turn the Temperature Switch clockwise to the "Low"
position to preserve the flavor of coffee served at a leisurely pace.
Turn the Temperature Switch counter-clockwise to the "High"
position to keep coffee piping hot. Indicator lights on the portable
warming plate will show the current temperature selected.
Turning Off the
Warming Plates
The coffee maker warming plate is on whenever the on/off indicator
light is illuminated. To shut off the coffee maker,turn the Auto-
On/Off Switch clockwise to the "On/Off" position, then release.
The portable warming plate ison whenever a temperature indicator
light is illuminated. The portable warming plate can be shut off by
turning the Temperature Switch clockwise to the "Off" position.
2
©
The Automatic
Shutoff Feature
The coffee maker warming plate will remain on for 2 hours after
the last carafe is brewed, then automatically shut off.
NOTE: The portable warming plate has no automatic shutoff
feature - it will remain on until the Temperature Switch is turned
to the "Off" position.
L
0
z
<
C/J

PR@@RA t
AUS@ A[S ...... ..........
The KitchenAid PROLINE" Series Coffee Maker can be
programmed to brew coffee at a preset time, making it easyto
wake up to fresh coffee every morning. To set the automatic brew
timer, perform the following steps:
Enter the brew timer program mode by turning the
Program-Clock Switch counter<lockwise to the "Prog" position,
then releasing. The brew timer display background color will
change from blue to red and the hour digits will begin to flash.
The red background indicates program mode is active.
•
Once the hour is set, turn the Program-Clock Switch
counter<lockwise to the "Prog" position, then release. The
minute digits will begin to flash.
d Pressthe .... or "+" Timer Adjustment Buttons to adjust the
minutes• If a Timer Adjustment Button is pressed and held, the
minute digits will scroll.
2 Pressthe "-" Timer Adjustment Button to decrease the hour or
the "+" Timer Adjustment Button to increase the hour. If a
Timer Adjustment Button is pressed and held, the hour digits
will scroll. The AM and PM icons will change when the hour
digits roll past "12". Make certain the hour set is correct in
regard to AM or PM.
Once the minutes are set, turn the Program-Clock Switch
clockwise to the "Prog" position, then release•The brew timer
will exit the program mode and the brew timer display
background color will return to blue.

_: Fillthecoffeemakerwithcoffeeandfreshwater,then
activatetheautomaticbrewtimerbyturningthe
Auto-On/OffSwitchcounter<lockwisetothe"Auto"position,
thenreleasing.Whenthebrewtimerisactive,theauto
indicatorlightwillbeilluminated.
i.' When brewing starts at the programmed time, the on/off
indicator light will illuminate and the auto indicator light will
go out.
_ If message tones are enabled, the coffee maker will beep
three times when brewing is complete.
NOTE: The automatic brew timer must be activated each time you
want the coffee maker to brew at the programmed time.
2
©
O
z
<
NOTE:Thebrewtimerwillnotactivateiftherearefewerthan4
cups(17oz.)ofbrewwaterinthereservoin
_ Ifmessagetonesareenabled,thecoffeemakerwillbeepon
every attempt to activate the brew timer without sufficient water
in the reservoir.
If automatic brewing needs to be cancelled, deactivate the brew
timer by turning the Auto-On/Off Switch counter<lockwise to the
"Auto" position, then releasing. When deactivated, the auto
indicator light will go out.
L/J

i ® _l¸' _,÷, ' '
A @U /NG
, Jf ......
Message tones instantly communicate coffee maker status. Tone
volume can be set high or low, or turned off for silent operation.
When first used, the coffee maker automatically defaults to high
volume tones.
The sound level icon will be visible on the brew timer display
when message tones are enabled:
High-Volume Icon
Low-Volume Icon
With message tones enabled, the coffee maker will produce 3
one-second tones when the brewing cycle is complete, and a
single one-second tone when:
+,you attempt to turn on the coffee maker or activate the brew
timer without sufficient water in the reservoir
,, the water reservoir nears the maximum level during filling
+,the water filter icon is reset
To Adjust the Message Tone Volume
Pressand hold the .... and "÷" Timer Adjustment Buttons
simultaneously for about 5 seconds to enable, disable, or
change the volume of the message tones.
As the Timer Adjustment Buttons are pressed:
,, If the high-volume sound level icon isvisible, it will disappear.
The message tones are now disabled.
,, If the message tones are disabled (no sound level icon is
visible), the low-volume sound level icon will appear. The
coffee maker will now produce low-volume tones.
+,If the low-volume sound level icon is visible, it will change to
the high-volume icon. The coffee maker will now produce
high-volume tones.
If the Timer Adjustment Buttons are held down continuously, the
message tones will alternate between disabled, low volume, and
high volume.

ThePROLINE"SeriesWaterFilterwillfilterapproximately25
gallonsofwater(60fullcarafes)•Whenafilterhasreachedthe
endofitslife,thewaterfiltericonwillappearonthebrewtimer
display•Thecoffeemakerwillkeeptrackoftheremainingfilterlife
evenwhenunplugged.
Tomaintainthebestperformance,thecoffeemakershouldbe
descaledwheneverthewaterfiltericonappears•Ifawaterfilteris
notused,thecoffeemakerwillstilldisplaythewaterfiltericonas
areminderto descale.Fordescalinginstructions,seepage29.
To Reset the Water Filter Icon
After the water filter has been replaced (see "Installing the Water
Filter" on page 13), press and hold the "+" Timer Adjustment
Button until the water filter icon disappears• Doing this resetsthe
function that tracks how much coffee has been brewed• The
water filter icon will re-appear when the new filter has reached
the end of its life.
0
i,s ....
2
©
L
z
<
%,)
C/J

EE
The flavor of coffee depends on a variety of
factors, including the quality, freshness, and
roast of the beans, the fineness and
consistency of the grind, the ratio of coffee
to brew water, the cleanlinessof the brewing
equipment, and the brew water purity.
Fresh Coffee Beans
Great coffee can only come from fresh coffee
beans, properly roasted. Many experts
recommend buying beans roasted no darker than a
medium roast, the color of which appears as an
even chocolate brown. This roast preserves the natural sugars
and flavor of the bean, and sets the stage for an excellent cup of
coffee. A medium roast is the darkest a bean can be roasted
without oils developing on the surface.
Darkly roasted beans which appear dark brown or
nearly black look great, but the extra roasting will
overwhelm the more delicate coffee flavors and
caramelize any sugars. A heavy "roasted" coffee
flavor, often bitter and sharp, will predominate
with a dark roast.
To preserve the freshness of coffee beans:
Keep beans in an opaque, air-tight container and
store them in a cool, dry place. Refrigeration is not
recommended, as condensation tends to form on
the beans whenever the container is opened. Freezing
can help preserve beans stored for an extended period, but it will
also impair the flavon

The Right Grind
Freshly ground coffee loses flavor and aroma quickly - within
minutes. The best cup of coffee will always come from coffee
beans that are ground just before brewing.
If you prefer substantially weaker-than-average coffee, it's best to
brew using a normal amount of ground coffee and then dilute
the result with hot water. Doing this will maximize flavor and
minimize bitterness.
A proper grind is critical for good coffee, and that means using a
quality burr grinder like the PROLINE" SeriesBurr Coffee Mill or
the KitchenAid_'Model A-9" Coffee Mill. A good burr grinder will
produce an extremely consistent grind with little frictional heating,
and preservethe full flavor of your coffee.
Be sure to grind your coffee to the correct size- use a medium
grind level appropriate for automatic drip coffee makers. Feelfree
to experiment with slightly finer or coarser grinds, but don't
overdo it: too fine a grind will result in very bitter coffee, and too
coarse a grind will produce weak flavor. If the correct grind is
used, adding more coffee simply makes a brew stronger without
making it excessivelybitter.
The Proper Amount of Ground Coffee
For standard drip-process coffee, a good starting point isto use
1 ounce of coffee for every 4 cups of brew water as measured
with the carafe (a carafe "cup" is about 4_/_ounces). Finer grinds
usually require less coffee, but using too fine a grind will produce
bitterness and may cause water to overflow the brew basket.
Brew Water Purity
The PRO LINE11 Series water filter that comes with your coffee
maker is one of the most effective in the industry at removing
off-tastes and contaminants from your brew water. It also
softens the water and extends the time between coffee maker
descalings. For great tasting coffee, be sure to use the filter-
and replace it promptly when the water filter icon appears on
the brew timer display.
Where local water quality is extremely poor, you may wish to use
bottled, purified water with your coffee maker. Do not use distilled
water or mineral water - they can damage the coffee maker.
If the coffee maker hasn't been used in awhile, run it through a
complete brewing cycle without coffee. Use a full carafe of
clean, cool water. This rinses the water reservoir, heat pump,
and showerhead, and eliminates any stale water within the unit.
2
©
L
0
z
:/4

EE
Coffee Maker Cleanliness
Coffee oils build up quickly within the brew basket and carafe.
Over time, these oils will go stale and taint the flavor of freshly
brewed coffee. Daily cleaning of the brew basket, brew basket
insert, and carafes is strongly recommended for the
best-tasting coffee.
Warming Plate Temperature
If you intend to keep coffee on the warming plate for an
extended period, usethe "low" temperature setting. This will help
preserve coffee flavor. If the coffee won't be consumed
immediately, store it in a thermal carafe. Of course, the best idea
isalways to brew fresh!
Pre-Heating the Warming Plate
When using the portable warming plate, keep freshly brewed
coffee up to temperature by turning on the plate a few minutes
before your coffee is finished brewing.
/::?_,Ii;;ii_\/i_'iiii;!]ii fn<_i_i;)_ (i;Ti;7:::'_{)_ii:/:k]....

®
PRO LINE TM
SERIES
27

Cleaning the Coffee Maker
Unplug the coffee maker and portable warming plate.
Remove the brew basket insert from the brew basket.
Wash the brew basket, brew basket insert, carafe, and carafe lid
in hot, soapy water and rinse with hot water. Do not use
abrasive cleansers or scouring pads. These parts can also be
washed in the upper rack of the dishwasher.
A Wipe the coffee maker housing and portable warming plate with
a clean damp cloth, and dry with a soft cloth. Do not use
abrasive cleansers or scouring pads.

Descaling
Calcium deposits ("scale") from water will build up in the coffee
maker heat pump over time and impair brewing efficiency and
coffee quality. With normal use, scale should be removed every
three months or whenever the water filter icon appears on the brew
timer display. Local water conditions, use of the coffee maker more
than once a day, or use without a water filter may require more
frequent descaling.
The following conditions indicate an immediate need for descaling:
_ the presence of loud sounds during brewing
_ a brewing time greater than 10 minutes for 12 cups of coffee
_ the appearance of "El" or "E2" on the brew timer display
Descaling Steps
Before descaling, always remove the water filter (see "Installing
the Water Filter" on page 13) and make certain the brew basket
contains no coffee or coffee filters.
Run the coffee maker through a complete brewing cycle using
the descaling solution. If the coffee maker has not been descaled
for an extended period, run it through a second brewing cycle
using fresh descaling solution.
Rinsethe coffee maker by running it through two brewing cycles
using fresh, cool water.
Wash the brew basket, brew basket insert, carafe, and carafe lid
in hot, soapy water and rinse with hot water. These parts can
also be washed in the upper rack of the dishwasher.
2
Z
J
2
_J
Mixing The Descaling Solution
The coffee maker can be descaled using a packaged descaling agent
or vinegar.
_ When using a descaling agent, follow the directions on the
package for the recommended amounts of descaling agent and
water to use.
_ When using vinegar, mix a solution of 6 cups vinegar and
6 cups water.
Reinstall the water filter and reset the water filter icon if
necessary (seepage 23).
Error Codes During Descaling
If "El" or "E2" error codes appear during descaling, unplug the
coffee maker for 30 seconds to reset the display, then plug it back
in and continue. If error codes continue to appear after cleaning,
seethe KitchenAid warranty and service section on page 34.

CAR ......
Storing the Coffee Maker
Since the coffee maker retains a small amount of water after
brewing, never use it in environments where the temperature drops
below freezing (32 °F or 0°C).
If the coffee maker will not be used for a prolonged period, or if it
will be stored at temperatures below freezing, empty all water from
the unit. To empty, unplug the coffee maker, then remove the water
guide cover, the water filter accesscover, the water filter, and the
brew basket. Hold the coffee maker over a sink, and repeatedly turn
it upside down until all the water drains from the unit. Wipe the
coffee maker dry, and store.
When the coffee maker is taken out of storage, run it through a
complete brewing cycle without coffee. Use a full carafe of clean, cool
waten This rinsesthe water reservoir,heat pump, and showerhead.
Cleaning the Optional
Gold Tone Permanent Filter
After several uses, clean the filter with a soft brush or sponge. Avoid
using abrasive cleansers or steel wool pads. The filter can also be
washed in the top rack of a dishwashen

_Ifthe brewtimer displayisnot illuminated:
_ If it requires more than 10 minutes to brew 12 cups of coffee:
Checktoseeifthecoffeemakerispluggedin.Ifit is,unplug
thecoffeemaker,thenplugit backinagain.Ifthebrewtimer
displayremainsdark,checkthefuseorcircuitbreakeronthe
electricalcircuitthecoffeemakerisconnectedtoandmake
certainthecircuitisclosed.
_If "El" or"E2"appearson the brewtimer display:
Thecoffeemakerneedsto bedescaled.Unplugthecoffee
makerfor30secondstoresetthedisplay,thenplugit backin
again.See"Descaling"onpage29.If errorcodescontinueto
appearaftercleaning,seetheKitchenAidwarrantyandservice
sectiononpage34.
_If "E3"appearsonthe brewtimerdisplay:
A button or switch isjammed. Unplug the coffee maker, press
or turn each switch and button several times, then plug the
coffee maker back in. (If the coffee maker has been stored or
used in a cool environment, warm the unit to normal room
temperature before doing this.) If "E3" appears again on the
display, repeat this procedure.
The coffee maker needs to be descaled. See "Descaling" on
page 29.
_ If the coffee maker makes loud sounds during brewing:
The coffee maker needs to be descaled. See "Descaling" on
page 29.
If the problem cannot be fixed with the steps above, see the
KitchenAid Warranty and service section on the following page.*
*Do not return the coffee makerto the retailer.Retailersdo not provide service.
2
Z
<
J


PRO LI N E _ S E RI E s
ON
33

This warranty extends to the purchaser and any succeeding owner for PROLINE" Series Coffee Makers
operated in the 50 United States and District of Columbia.
Length of KitchenAid Will Pay For KitchenAid Will
Warranty: Your Choice of: Not Pay For:
Two Year Full
Warranty for
Household Use,
from date of
purchase.
Replacement" for details, or call
the KitchenAid Customer Satisfaction
Center toll-free at 1-800-541-6390.
OR
The replacement parts and repair
labor costs to correct defects in
materials and workmanship. Service
must be provided by an Authorized
KitchenAid ServiceCenter. See the
KitchenAid _ PROLINE" SeriesCoffee
Maker Warranty for Puerto Ricofor
details on how to arrange for service.
KITCFIENAID DOES NOT ASSUME ANY RESPONSIBILITYFOR INCIDENTAL OR CONSEQUENTIAL
DAMAGES. Somestatesdo not allow the exclusionor limitation of incidental or consequential damages,
so this exclusionmay not apply to you. This warranty givesyou specific legal rights and you may alsohave
other rights which vary from state to state.
Hassle-Free
Replacement of
your Coffee Maker.
See "Arranging
for Hassle-Free
A. Repairswhen the Coffee
Maker isused in other than
normal singlefamily home use.
B. Damage resulting from
accident, alteration,
misuse or abuse.
C. Any shipping or handling
costs to deliver your Coffee
Maker to an Authorized
Service Center.
D. Replacement parts or
repair labor costs for Coffee
Makers operated outside the
50 United States and District
of Columbia.

Alimitedtwoyearwarrantyextendstothepurchaserandany
succeedingownerforPROLINE,i SeriesCoffee Makers operated in
Puerto Rico. During the warranty period, all service must be handled
by an Authorized KitchenAid Service Center.
Pleasebring the Coffee Maker, or ship it prepaid and insured, to the
nearest Authorized ServiceCenter. Call toll-free 1-800-541-6390
Monday through Friday,8 a.m. to 8 p.m. (EasternTime), or Saturday,
10 a.m. to 5 p.m. to learn the location of a ServiceCenter near you.
Your repaired Coffee Maker will be returned to you prepaid and insured.
©
IF YOU RESIDE IN THE 50 UNITED STATESand your KitchenAid _
PROLINE" SeriesCoffee Maker should fail within two years of
ownership, simply call our toll-free Customer Satisfaction Center at
1-800-541-6390 Monday through Friday,8 a.m. to 8 p.m. (Eastern
Time), or Saturday, 10 a.m. to 5 p.m. Give the consultant your
complete shipping address. (No RO. Box Numbers, please.)
KitchenAid will arrange to deliver an identical or comparable
replacement to your door free of charge and arrange to have your
"failed" Coffee Maker returned to us. Your replacement unit will also
be covered by our two year full warranty.
When you receive your replacement PROLINE" Series Coffee Maker,
use the carton and packing materials to pack-up your "failed" Coffee
Maker. In the carton, include your name and address on a sheet of
paper along with a copy of the proof of purchase (register receipt,
credit card charge slip, etc.).
>
L
<
z
<

To order accessories or replacement parts for your Coffee Maker, call
toll-free 1-800-541-6390 Monday through Friday,8 a.m. to 8 p.m.
(Eastern Time), or Saturday, 10 a.m. to 5 p.m., or write to:
..........,....... _ ";_Y ........Y<, ,•...::?_?:_,
Customer Satisfaction Center, KitchenAid Portable Appliances,
RO. Box 218, St. Joseph, MI 49085-0218.
i"'_ I L.! 1
%
For service information, call tollAree 1-800-541-6390 Monday
through Friday, 8 a.m. to 8 p.m. (Eastern Time), or Saturday,
sl0 a.m. to 5 p.m., or write to:
Electrical Shock Hazard
Unplug before servicing.
Failure to do so can result in
death or electrical shock.
Customer Satisfaction Center, KitchenAid Portable Appliances,
RO. Box 218, St. Joseph, MI 49085-0218.

/\ _1_i:z:;)_ [\ ¢z:] i _ ¢7 _
Consult your local KitchenAid dealer or the store where you
purchased your PROLINE" Series Coffee Maker for information on
how to obtain service.
. \i t
z
©
Z
\9
o
z
L!L
 Loading...