

KitchenAid KHWS160VWH4, KHWS160VWH5 Installation Guide
I itchen kid*
HOME APPLIANCES
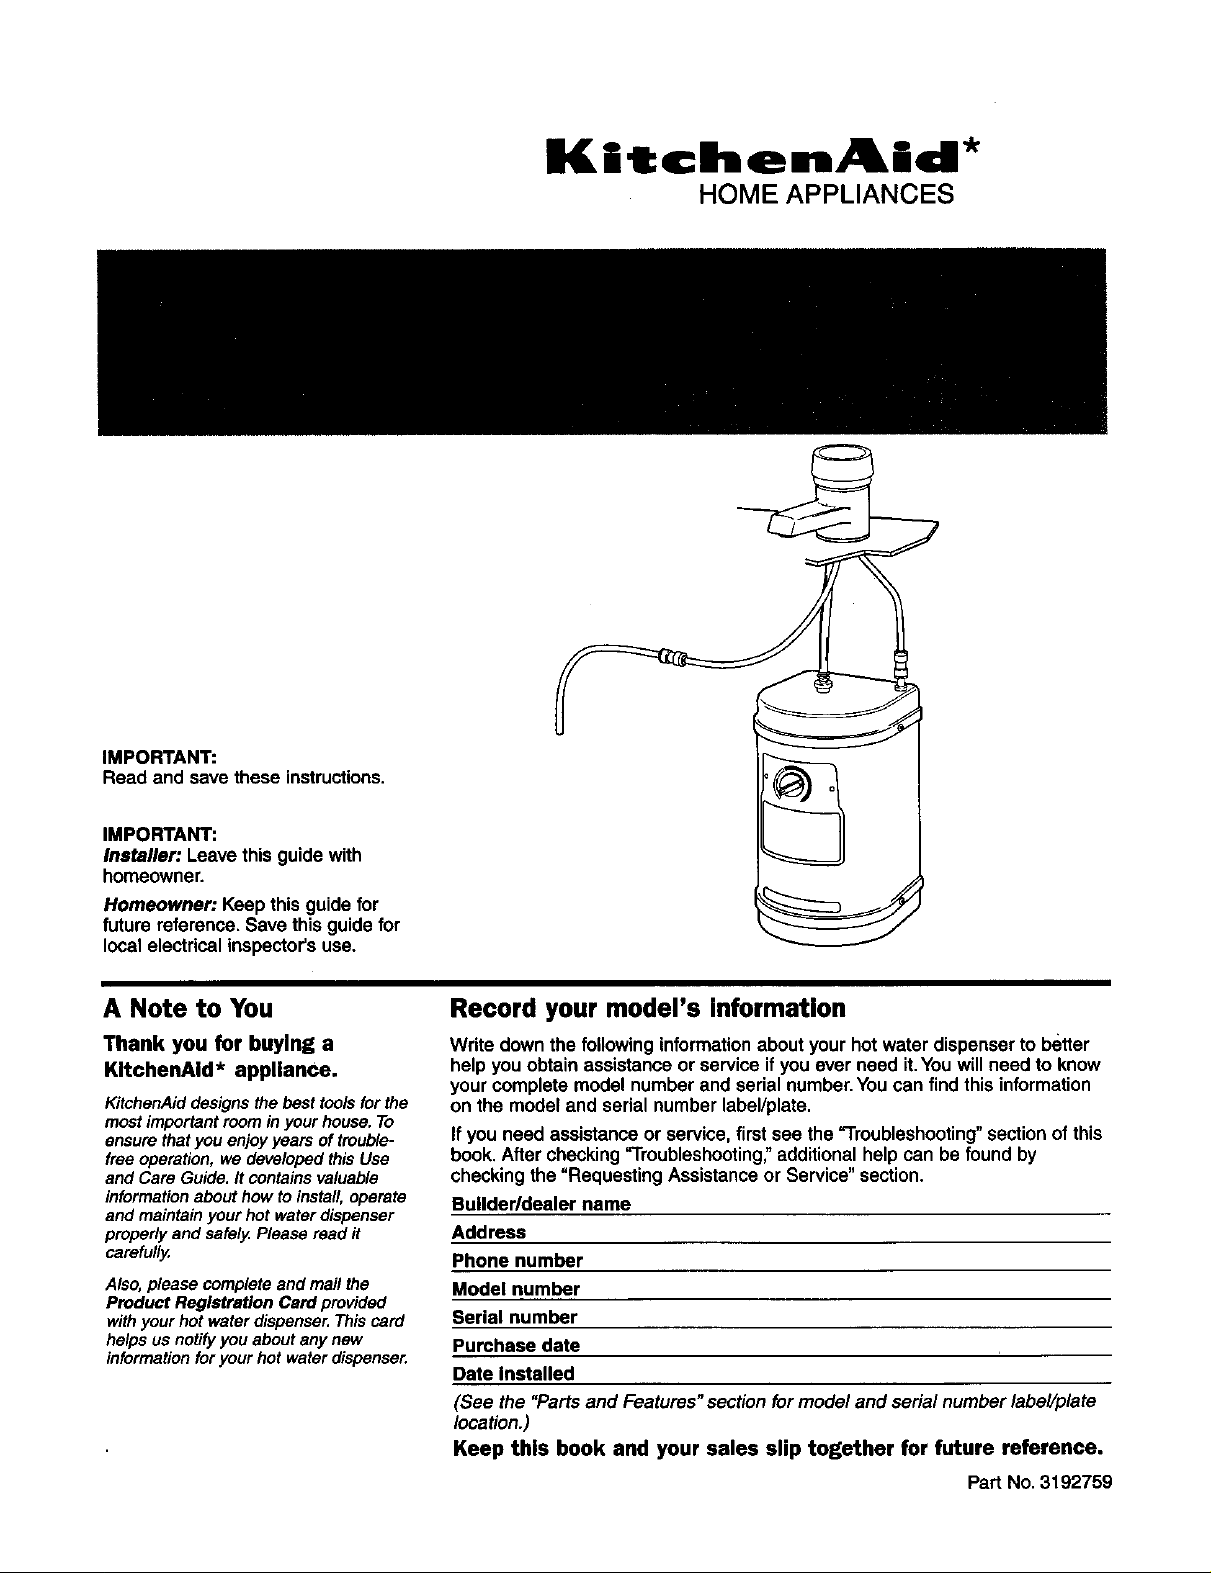
IMPORTANT:
Read and save these instructions.
IMPORTANT:
Installer: Leavethisguidewith
homeowner.
Homeowner: Keep this guide for
futurereference.Save this guide for
localelectricalinspector'suse.
A Note to You
Thank you for buying a
KltchenAid* appliance.
KitchenAiddesigns the best tools for the
most importantroom inyour house. To
ensure thatyou enjoyyears of trouble-
free operation, we developedthis Use
and Care Guide. It containsvaluable
informationabout how to install,operate
and maintainyour hot waterdispenser
properlyand safely Please read it
carefully.
Also,please complete and mail the
Product Registration Card provided
withyour hot waterdispenser.This card
helps us notifyyou aboutany new
informationforyour hot waterdispenser.
Record your model's information
Write down the followinginformationaboutyourhot waterdispenser to better
helpyouobtainassistanceorserviceifyou ever needit.Youwillneed to know
yourcomplete model numberandserial number.Youcan find this information
on the model and serialnumberlabel/plate.
If you need assistance or service,firstsee the "Troubleshooting" sectionof this
book. After checking"Troubleshooting," additionalhelpcan be found by
checkingthe "Requesting Assistanceor Service"section.
Builder/dealer name
Address
Phone number
Model number
Serial number
Purchase date
Date Installed
(See the "Parts and Features"sectionformodeland serialnumberlabel/plate
location.)
Keep this book and your sales slip together for future reference,
Part No. 3192759
ANotetoyou............ Cover
Hot Water Dispenser Safety .... 2
Parts and Features ........... 3
How yourhotwater
dispenserworks .............. 3
Before You Start ............. 4
Tools and materials needed ...... 5
Parts supplied................ 5
Electrical requirements ......... 5
Water supply requirements ...... 5
installation Instructions ......... 6
Using Your Hot Water
Dispenser ................. 10
Beforeusingthe firsttime ...... 10
Temperaturecontrol .......... 10
Dispensinghot water ......... 10
Hot water dispenser uses ...... 10
Caring For Your Hot
Water Dispenser ............ 11
Energy-savingtips and .........
preparation for periods ......
of nonuse .................. 11
Cleaning the spout screen...... 11
Troubleshooting ............. 12
Requesting Assistance
or Service ................. 13
Warranty .................. 15
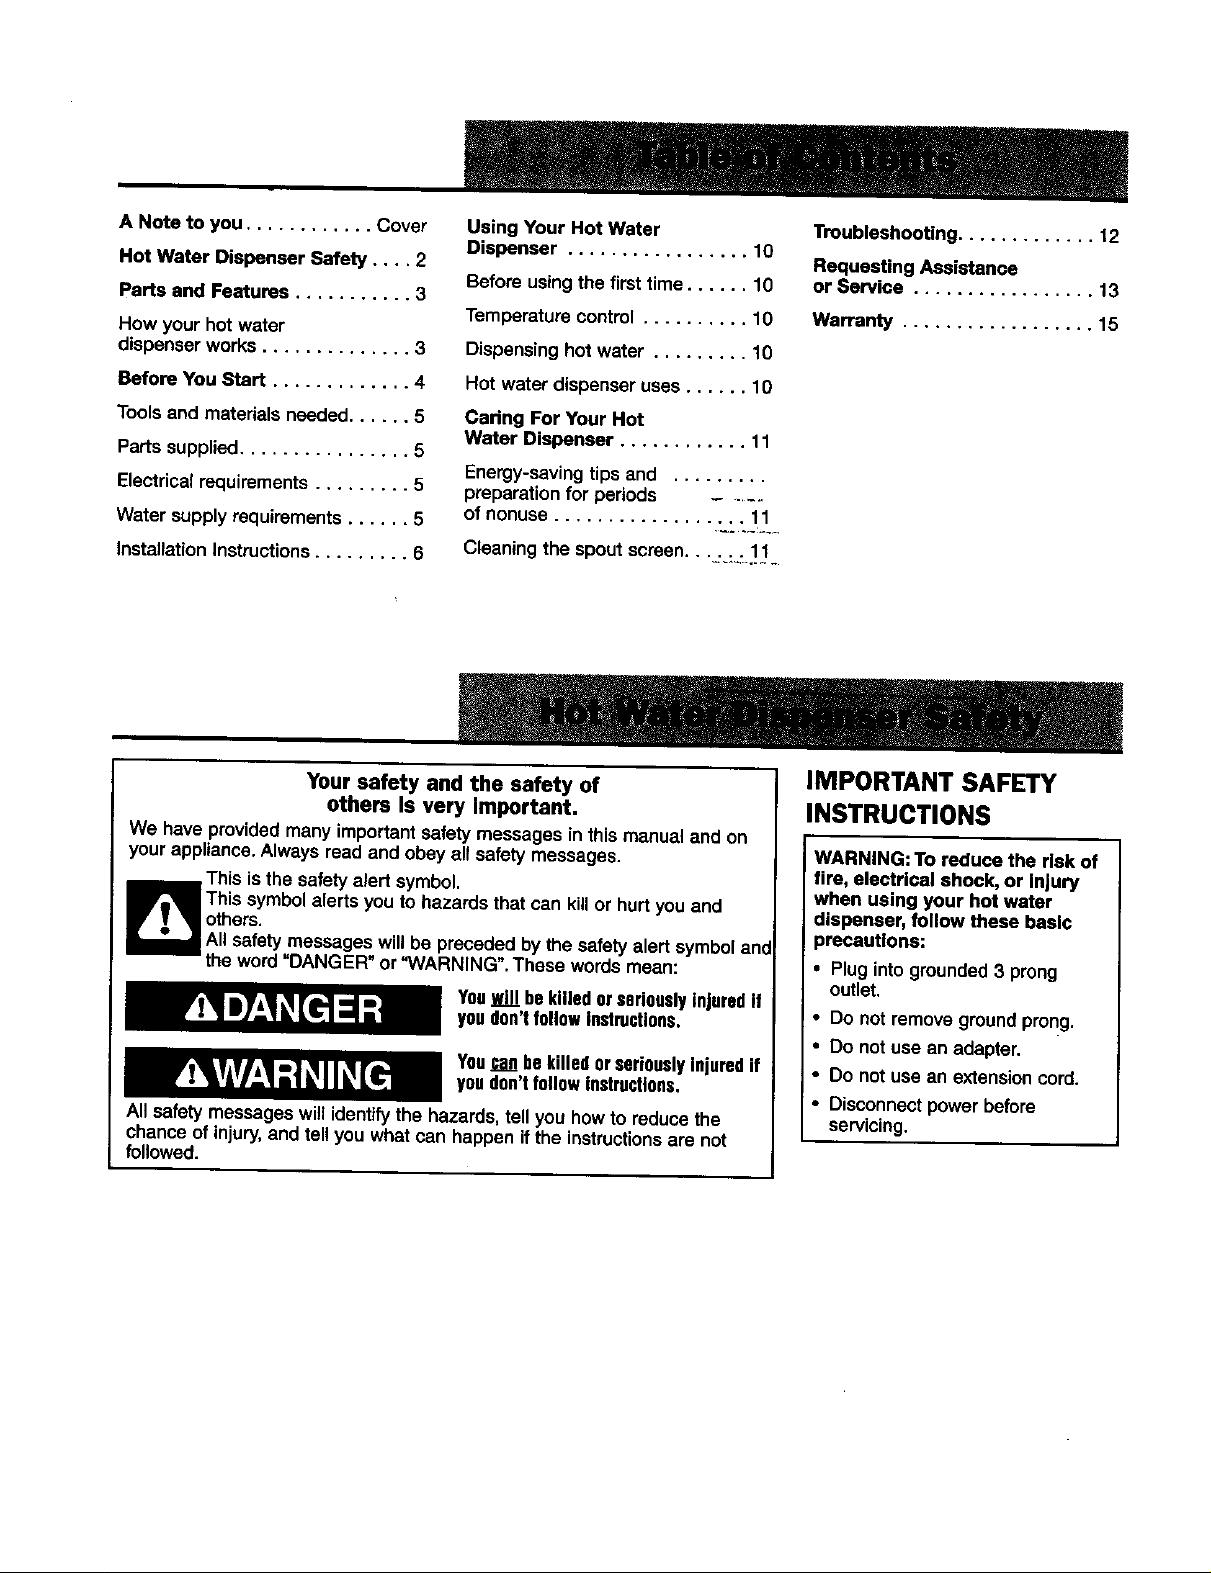
Your safety and the safety of
others Is very Important.
We have providedmanyimportantsafety messages inthismanualand on
yourappliance.Alwaysreadandobey all safety messages.
This is the safety alert symbol.
This symbolalerts you to hazardsthat can killor hurt you and
messages willbe preceded by the safetyalert symboland
the word "DANGER" or"WARNING". These words mean:
You_ be killedorseriouslyinjuredIf
youdon'tfollowInstructions.
You.r,oobekilledorseriouslyInjuredif
youdon'tfollowinstructions,
Allsafetymessageswill identify the hazards,tell you how to reduce the
chance of injury,and tell you what can happen if the instructions are not
followed.
IMPORTANT SAFETY
INSTRUCTIONS
WARNING: To reduce the risk of
fire, electrical shock, or Injury
when using your hot water
dispenser, follow these basic
)recautlons:
• Plug intogrounded 3 prong
outlet,
• Do not removegroundprong.
• Do not use an adapter.
• Do not use an extensioncord.
• Disconnectpower before
servicing.
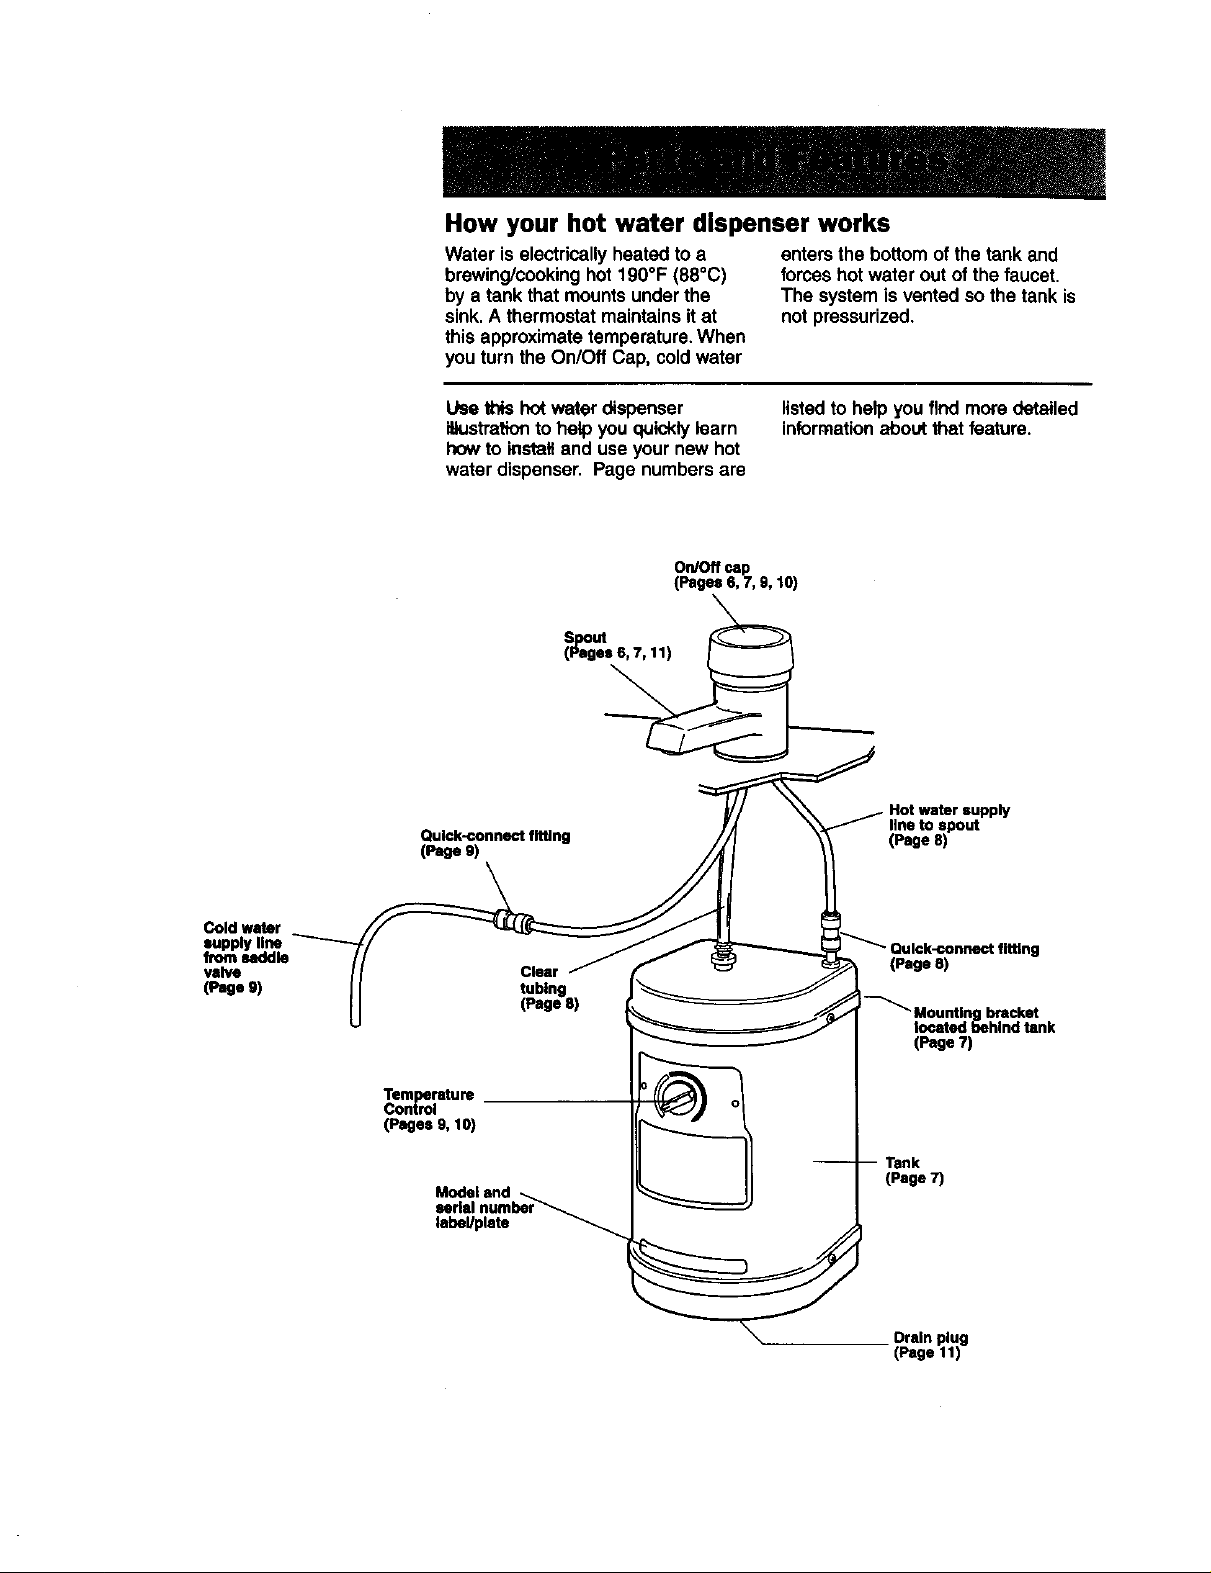
How your hot water dispenser works
Water iselectricallyheatedto a
brewing/cooking hot190°F (88°C)
by a tank that mountsunderthe
sink.A thermostatmaintainsitat
this approximatetemperature.When
you turnthe On/Off Cap,coldwater
entersthe bottom of thetank and
forceshotwater out of the faucet.
The systemis ventedsothe tank is
not pressurized,
Coldwater
supply fine
fromsaddle
valve
(Page9)
Usethishotwaterdispenser
illustrationto help you quicklylearn
howto installand use your new hot
water dispenser. Page numbersare
On/Off cap
(Pages 6, 7, 9, 10)
Quick-conneutfitting
(Page9)
Clear
tubing
(Page 8)
listed tohelp you findmoredetailed
informationaboutthat feature.
line to spout
(Page 8)
(Page 8)
[_ Mounting bracket
located behind tank
(Page 7)
Tern rature
Con_l
(Pages 9, 10)
Model end
label/plata
(Page 7)
Drain plug
(Page 11)
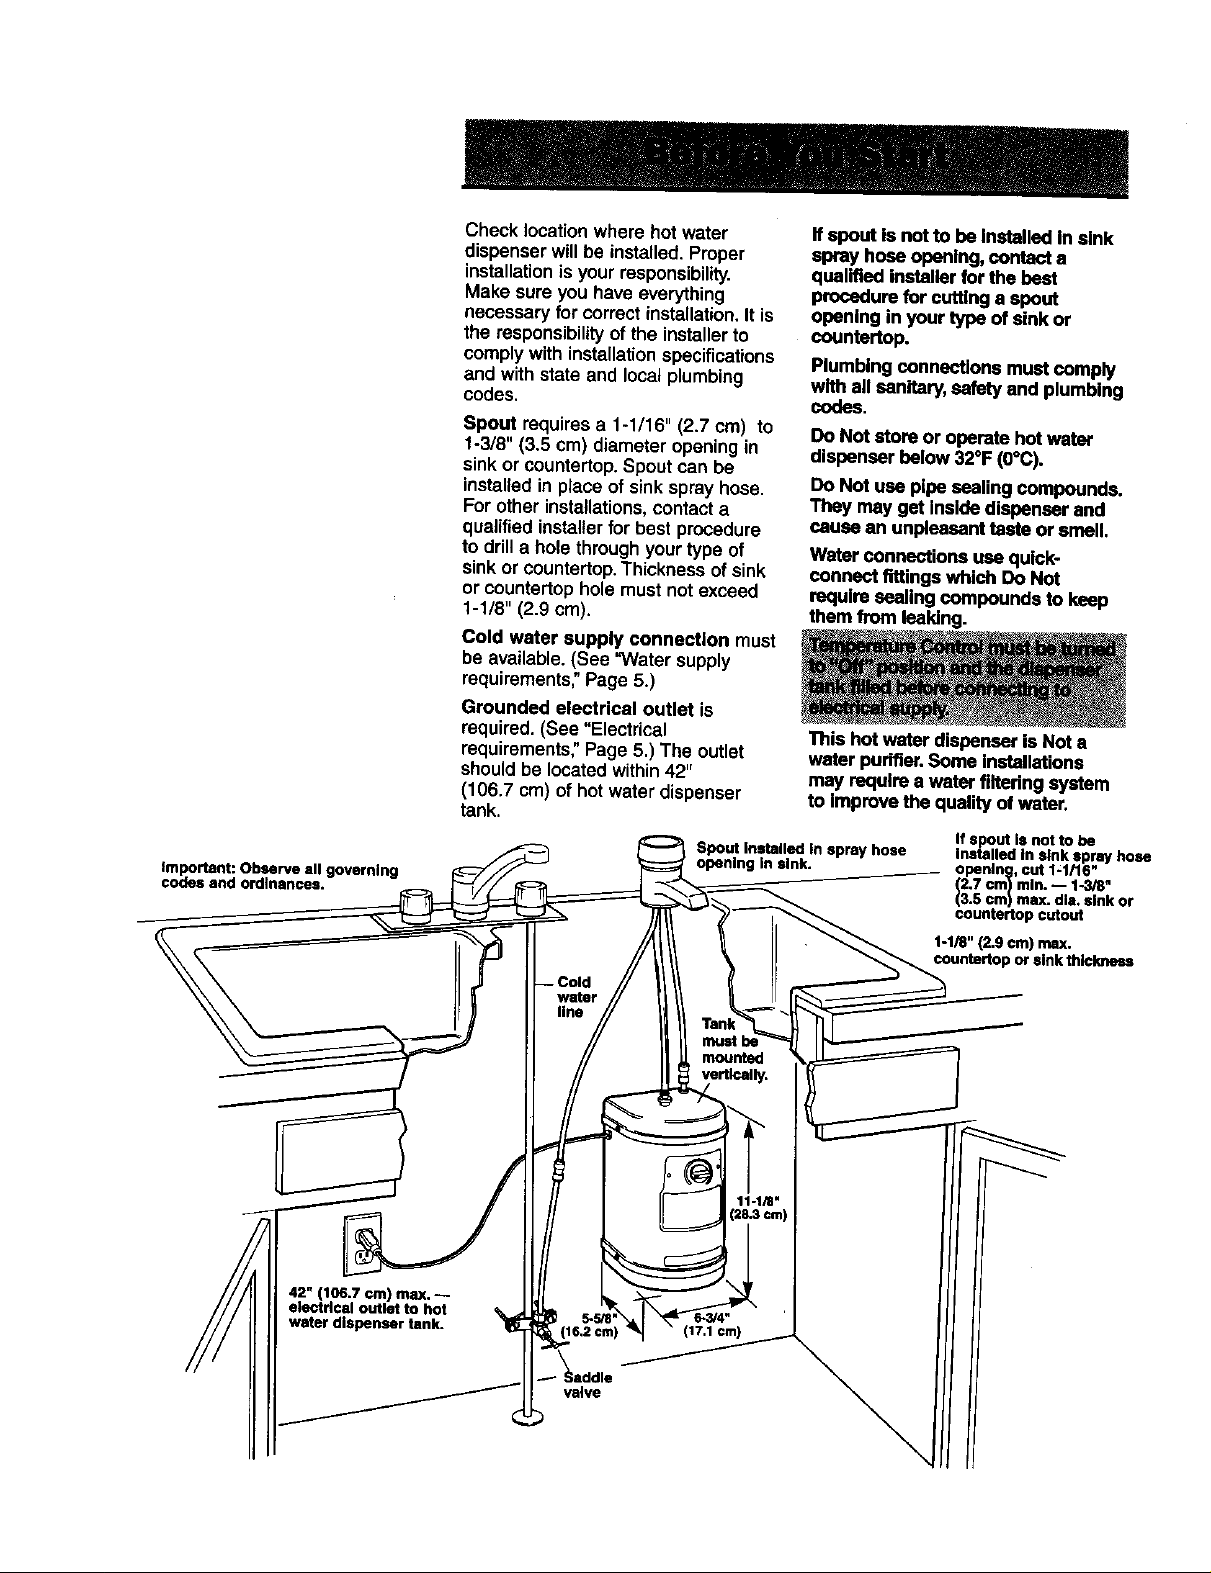
codesandordinances.
Check locationwhere hot water
dispenserwill be installed.Proper
installationisyourresponsibility.
Make sure you have everything
necessaryfor correctinstallation.It is
the responsibilityof the installerto
complywithinstallationspecifications
and withstate and local plumbing
codes.
Spout requiresa 1-1/16" (2.7 cm) to
1-3/8" (3.5 cm) diameteropeningin
sinkor countertop.Spoutcan be
installedin placeof sink sprayhose.
For other installations,contacta
qualifiedinstallerfor best procedure
to drill a holethroughyour type of
sinkor countertop.Thicknessofsink
or countertophole must not exceed
1-1/8" (2.9 cm).
Cold water supply connection must
be available.(See "Water supply
requirements,"Page 5.)
Grounded electrical outlet is
required.(See"Electrical
requirements,"Page 5.) The outlet
shouldbe locatedwithin42"
(106.7 cm) of hot waterdispenser
tank.
Spout Installed In spray hose
opening In sink.
Ifspout is not to be Installed In sink
spray hose opening,contact a
qualified installerforthe best
procedure for cutting a spout
opening in your type of sink or
countertop.
Plumbing connections mustcomply
with all sanitary,safetyand plumbing
codes.
Do Not store or operate hot water
dispenserbelow 32°F (O°C).
Do Not usa pipesealingcompounds.
They may get inside dispenser and
cause an unpleasanttasteorsmell.
Water connections use quick-
connect fittingswhich Do Not
require seanngcompounds to keep
them from leaking.
This hot water dispenser is Not a
water purifier.Some Installations
may requirea water filtering system
to Improvethe qualityof water.
If spout Is not to be
Installed In sink spray hose
openlnn_,cut 14/16"
(2.7 cmj mln. -- 1-3/8
(3.5 cm) max. dis. sink or
countertap cutout
1-1R" (2.9 cm) max.
countertop or sink thickness
valve
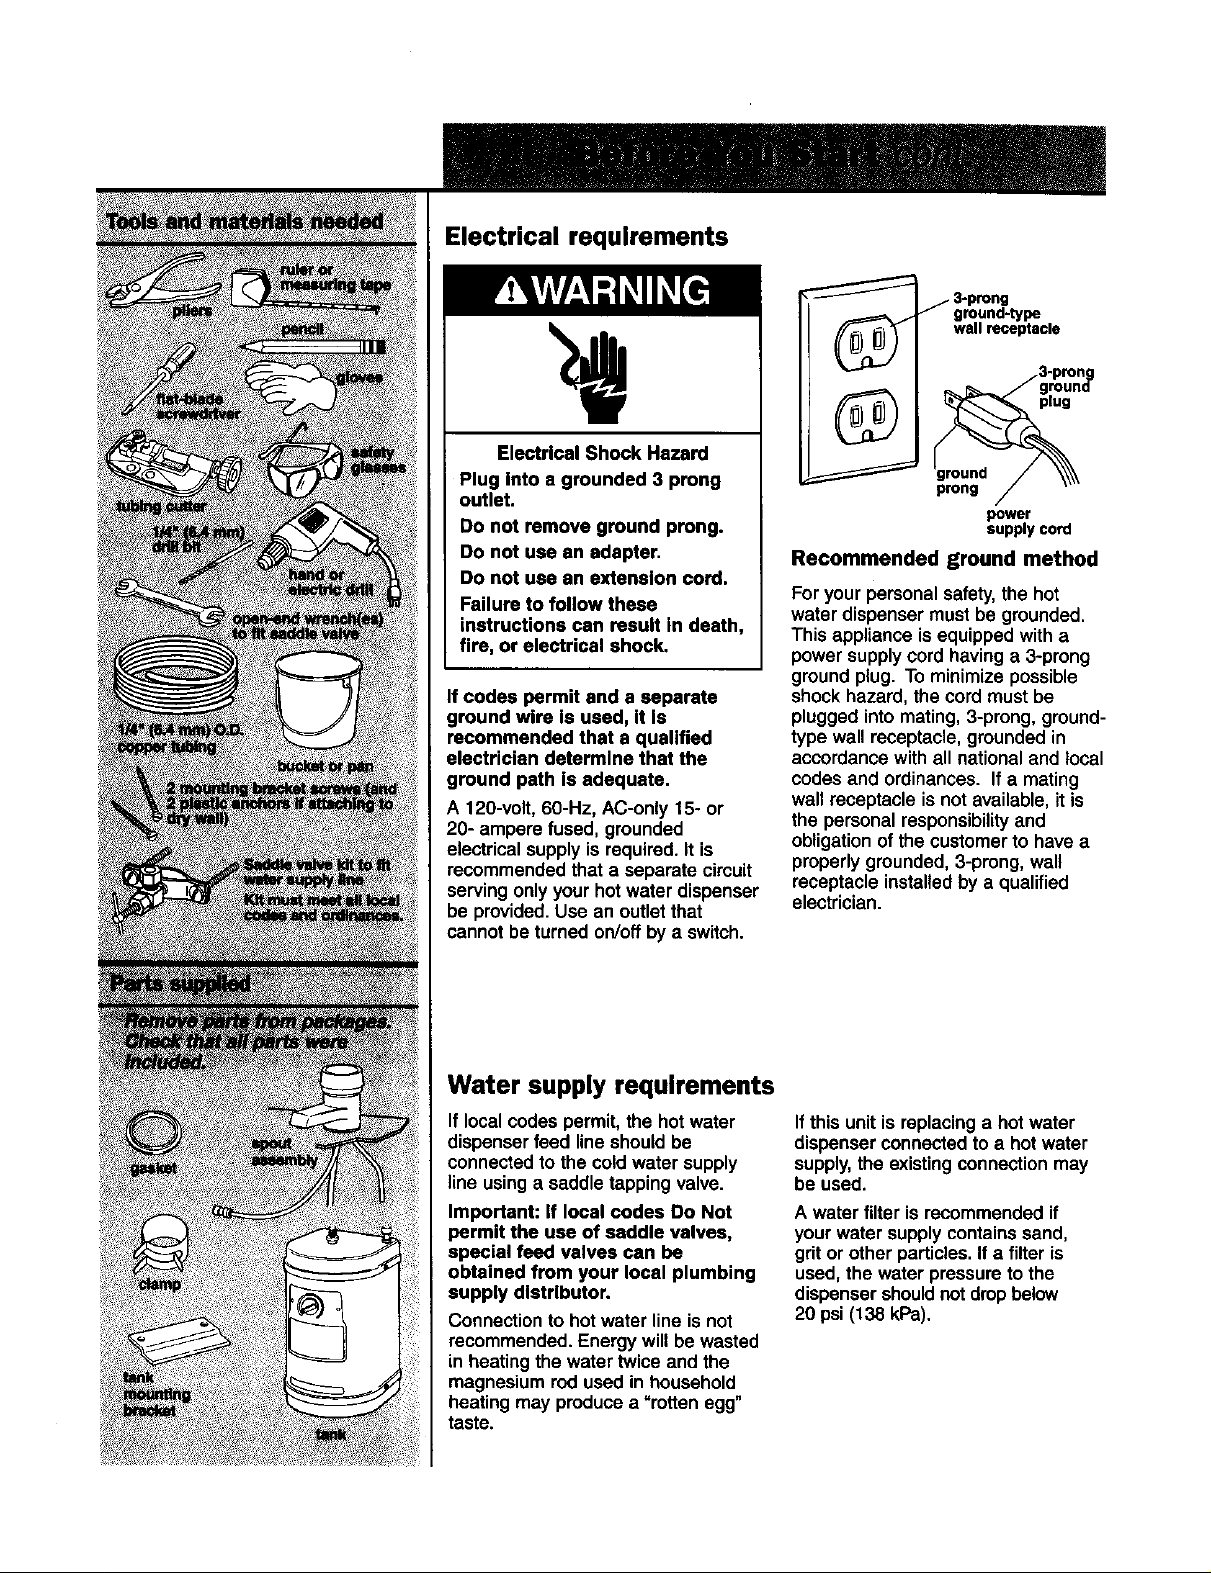
Electrical requirements
Electrical Shock Hazard
Plug Into a grounded 3 prong
outlet.
Do not remove ground prong.
Do not use an adapter.
Do not use an extension cord.
Failure to follow these
instructions can result in death,
fire, or electrical shock.
If codes permit and a separate
ground wire Is used, It Is
recommended that a qualified
electrician determine that the
ground path is adequate.
A 120-volt,60-Hz, AC-only 15- or
20- ampere fused, grounded
electrical supply is required. It is
recommended that a separate circuit
serving only your hot water dispenser
be provided. Use an outlet that
cannotbe turned on/offby a switch.
3-prong
ground-type
wall receptacle
prong
power
supplycord
Recommended ground method
Foryour personal safety,the hot
waterdispensermustbe grounded.
Thisappliance is equippedwitha
powersupplycord havinga 3-prong
groundplug. To minimizepossible
shock hazard,the cordmustbe
plugged intomating,3-prong,ground-
type wall receptacle,groundedin
accordancewith all nationaland local
codes and ordinances. If a mating
wall receptacleis not available,it is
the personal responsibilityand
obligationofthe customerto have a
properlygrounded,3-prong,wall
receptacleinstalledby a qualified
electrician.
Water supply requirements
If localcodes permit,the hotwater
dispenserfeed line should be
connectedto thecold water supply
line usinga saddle tappingvalve.
Important: If local codes Do Not
permit the use of saddle valves,
special feed valves can be
obtained from your local plumbing
supply distributor.
Connectionto hot water line is not
recommended. Energywillbe wasted
in heatingthe watertwice and the
magnesiumrodusedinhousehold
heatingmay producea"rotten egg"
taste.
If this unitis replacinga hot water
dispenser connected toa hotwater
supply,the existingconnectionmay
be used.
A water filteris recommendedif
yourwater supplycontainssand,
gritor other particles.If a filter is
used,the water pressuretothe
dispensershouldnotdropbelow
20 psi(138 kPa).
 Loading...