

KITCHENAID KHMF 9010/I User Manual

KHMF 9010/I
Instructions for use


Product description and symbols 4
Gas burner functions 4
Practical advice on how to use the burners 5
Injectors table 5
Induction zone functions 6
Positioning the pan supports and Wok support 7
Sizes and installation measurements (mm) 8
Precautions and general recommendations 9
Safeguarding the environment 10
Installation 11
Gas connection 12
Electrical connection 12
Securing the hob into cabinetry 13
Adaption to different kinds of gas 13
Replacing the injectors 14
Regulating the minimum level of the taps 14
General cleaning 15
Troubleshooting guide 16
After Sales Service 17
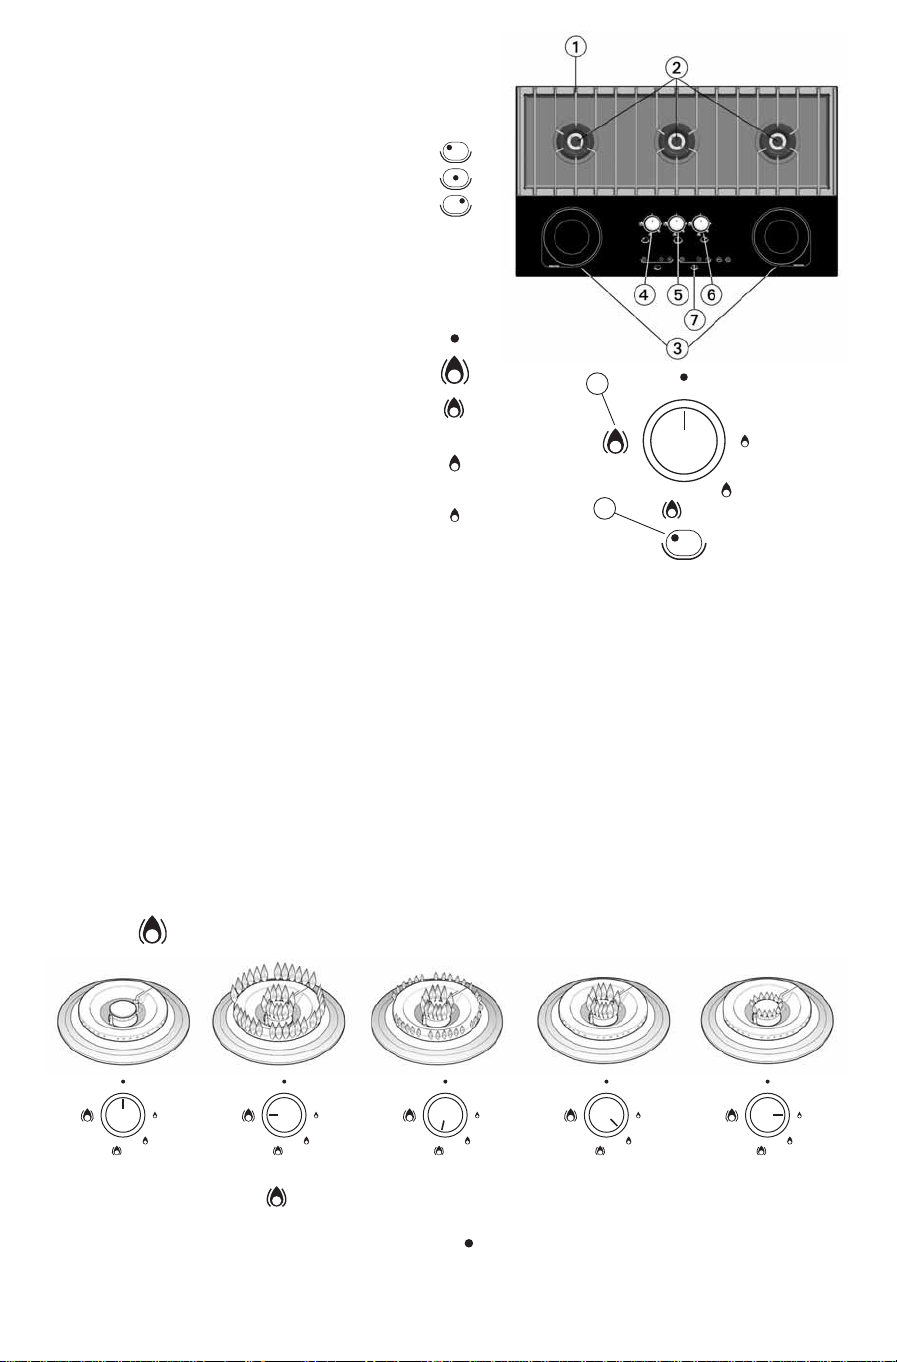
1. Removable pan supports
2. Professional double crown Wok burners
3. 145 mm diameter induction zone
4. Left gas burner control knob
5. Central gas burner control knob
6. Right gas burner control knob
7. Display and touch control panel for the induction zones
Gas burner control knob symbols
A. Burner position indicator
B. Flame regulation symbols
- Off
- Maximum external and internal crown flame
- Minimum external crown flame.
Maximum internal crown flame.
- External crown flame off.
Maximum internal crown flame.
- External crown flame off.
Minimum internal crown flame.
Product description and symbols
B
A
This hob is fitted with three professional gas
double crown wok burners, which means that the
gas burners are extremely flexible. Flexible enough
to allow cooking at extremely high temperatures
whilst also allowing cooking over a very low heat
thanks to the central crown.
Even when the induction part is not on, the
gas burners will work anyway.
Turning the gas burners on
- Push in the corresponding control knob to turn
on one of the burners and rotate it anticlockwise until the indicator on the control
knob is lined up with the maximum flame
symbol .
- Press the control knob against the control panel
to turn on the relevant burner. Once the burner
is lit, keep the control knob pushed in for about
5 seconds to allow the safety thermocouple
fitted to each gas burner to heat up. Then
release the control knob. The thermocouple is
a safety device that will shut off the gas supply
should the flame accidentally go out ( a gust of
air, momentary lack of gas supply, liquid spillage,
etc).
- The control knob should not be pushed in
for more than about 15 seconds. If the gas
burner has not ignited within this time,
return the control knob to the off position,
wait at least a minute before trying again.
Gas burner functions
4
Important: If you just want to use the internal crown burner, turn the control knob until the
indicator is lined up with , then press the control knob into the control panel. The external
crown burner automatically switches off. When you wish to turn the gas burner off, just turn
the control knob until the indicator points to the .
Read these instructions to get the best out of your
burners:
- Use pans with a diameter the same as the burner
(see pan diameter table to the side).
- Only use flat bottom pots and pans.
- Use the right amount of water for cooking food
and use the lid.
Important: using the pan supports incorrectly will
scratch the hob top: avoid placing them upside
down or dragging them across the hob.
You should never use:
- Cast iron or steatite stone grills, terracotta pots
or pans.
- Convectors such as metal netting or other.
- The use of two burners simultaneously with just
one container such as a fish kettle.
Failure comply with these recommendations
could lead to your glass ceramic hob being
damaged, or broken and/or the safety of your
equipment being compromised.
Burner Pan diameter
both crowns from 24 to 26 cm
only the internal crown from 8 to 14 cm
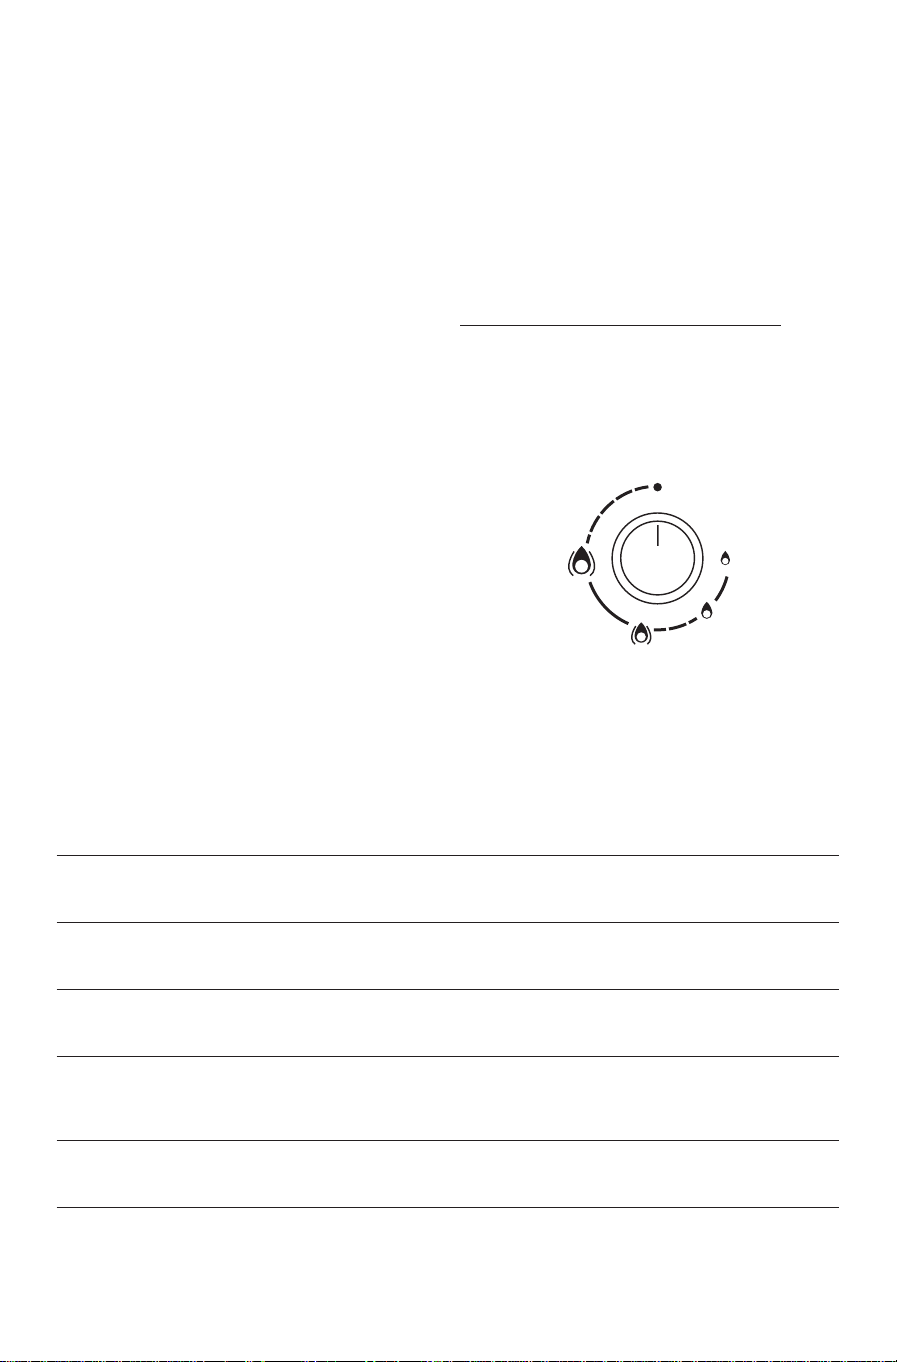
IMPORTANT
To get the most out of your burner as well as
its flexibility, use it in the positions shown in
the flame regulation symbols indicated in the
diagrams above. The button positions
corresponding with the continuous sections in
the diagram to the right shows maximum
functioning areas and make the most of the
burner ’s capacity.
Practical advice on how to use the burners
Category II2E+3+
Type of gas used Type of Injector Injector Injector Nominal heat Nominal Reduced heat Gas pressure (mbar)
burner marking distance distance flow kW consumption flow kW min. nom. max
(X) mm (Y) mm
NATURAL GAS Dual crown 140 + 34 7,5 - 4,20 400 l/h 1,70
(Methane) 17 20 25
G20 Internal crown 34 - open 0,50 48 l/h 0,25
GAS Dual crown 86 + 13 11 - 3,78 275 g/h 2,65
LIQUID PETROLEUM 20 28-30 35
(Butane) G30 Internal crown 13 - open 0,45 33 g/h 0,25
GAS Dual crown 86 + 13 11 - 3,78 270 g/h 2,65
LIQUID PETROLEUM 25 37 45
(Propane) G31 Internal crown 13 - open 0,45 32 g/h 0,25
Type of gas used Configuration Heat flow Total consumption Required air (m3)
model nominal kW nominal for the combustion of 1 m3of gas
G20 20 mbar 3 burners 12,60 1200 l/h 9,52
G30 28-30 mbar 3 burners 11,34 825 g/h 30,94
G31 37 mbar 3 burners 11,34 810 g/h 23,80
Electrical: 230 V - 50 Hz -
3,6 kW Type PLMTF
Injectors table
5
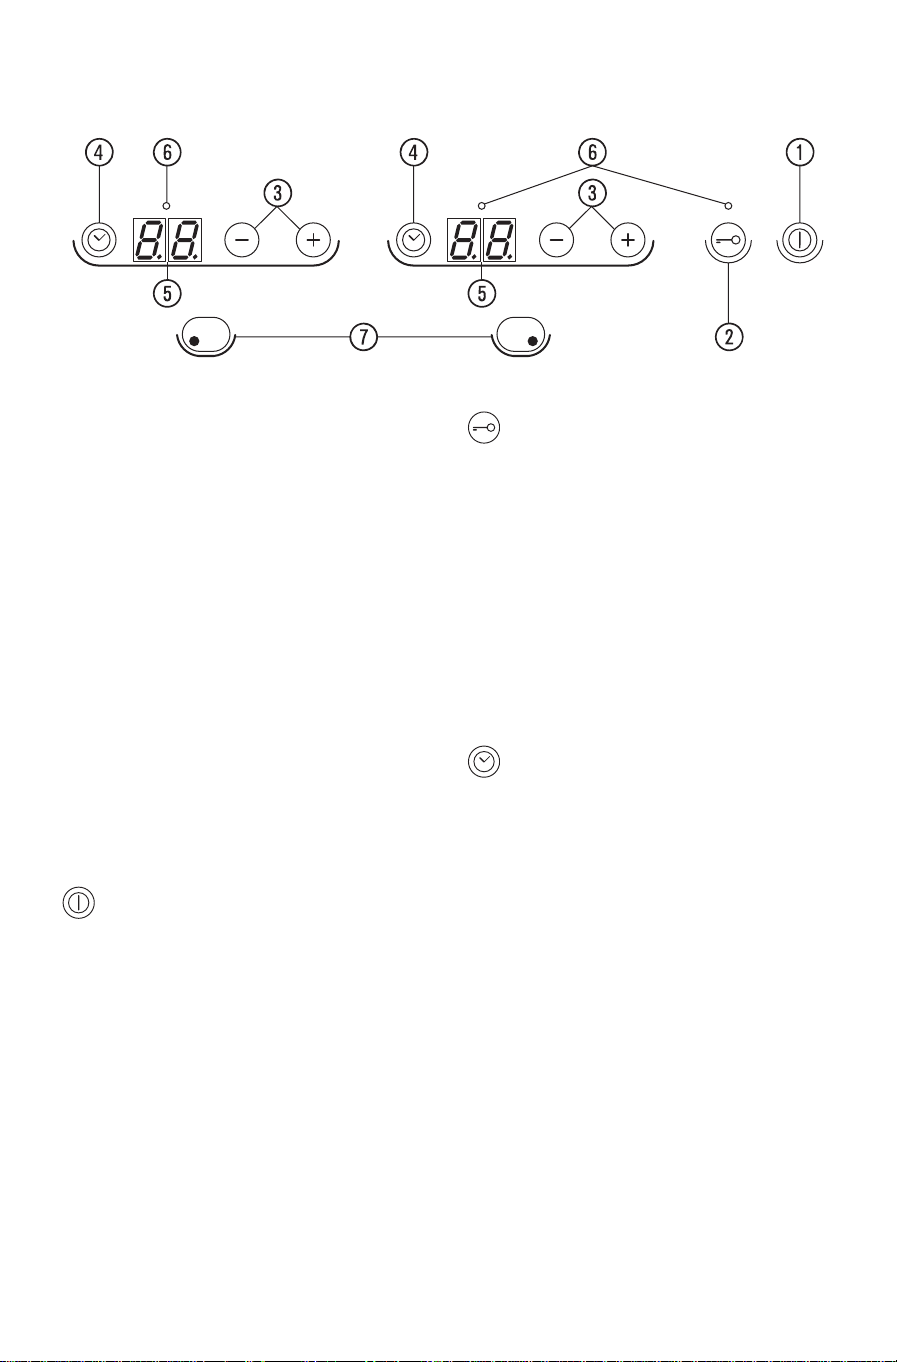
This hob is fitted with 2 induction zones that allow
you to boil water very quickly, as well as control
the temperature with extreme precision, giving you
a vast range of cooking options. The induction
zone control panel has the following functions.
1. On/off touch pad control
2. Child safety lock
3. Zone selection/ power level adjustment
4. Timer switch
5. LED display
6. LED indicator
7. Induction zone indicator symbol
IMPORTANT
Use pans made of a material suitable for
induction cooking. See the chapter on
“Precautions and general recommendations”
on page 9.
To use the induction zones on your hob press
button (1) for 2 seconds. The two displays (5) will
show the number 0. If the induction zone is not
selected within 10 seconds the zone will
automatically switch itself off for safety purposes.
Select the zone you wish to use by pressing one of
the buttons (3). If you press the + button, the
zone selected will automatically switch on with the
power set at 5. If, however you press the - button
the zone is automatically switched on with the
power level set at 10. The power level can then be
adjusted up or down from 1 to 10 using the
buttons (3) as required. Pressing the + and buttons simultaneously turns off the induction
zone.
The child safety option can be turned on by
pressing the button (2) until the illuminated point
above the button with the key symbol (2) comes
on. This option blocks all the buttons with the
exception of the on/off button (1). The option will
stay on even after the cooktop has been turned off
and on again and can be disabled by pressing the
button (2) again until the light above the button
disappears.
Should there be a power cut or a failure in the
distribution network, the option will turn off.
The timer switch option can be used both as a
timer and to programme how long each zone will
stay on for. In order to programme a zone using
the timer option, just select the zone using the +/buttons (3) and the power level required. Activate
the timer option by pressing the button with the
clock symbol (4) located to the side of each display.
LED (6) showing the selected zone will flash above
the selected zone’s display. The display will show
00. Set the required cooking time (1 min to 99
mins) within 10 seconds using the +/- buttons (3).
After 10 seconds the timer option start
automatically and the red control light (6) will stay
on, whilst the display will show the power setting.
Alternatively if the 10 seconds have not elapsed
start the timer by pressing the clock symbol button
(4) again. Once you have programmed the timer,
you can change the power level selected using the
+/- buttons (3). Pressing the clock symbol button
will show the time remaining.
Induction zone functions
6
 Loading...