

Page 1
Kitche JLid ° PROLINEDryer
TiPS FOR BEST PERFORMANCE OF ELECTRIC DRYER
See installationinstructionsformore detailed information,
Not fordirect wire installations.
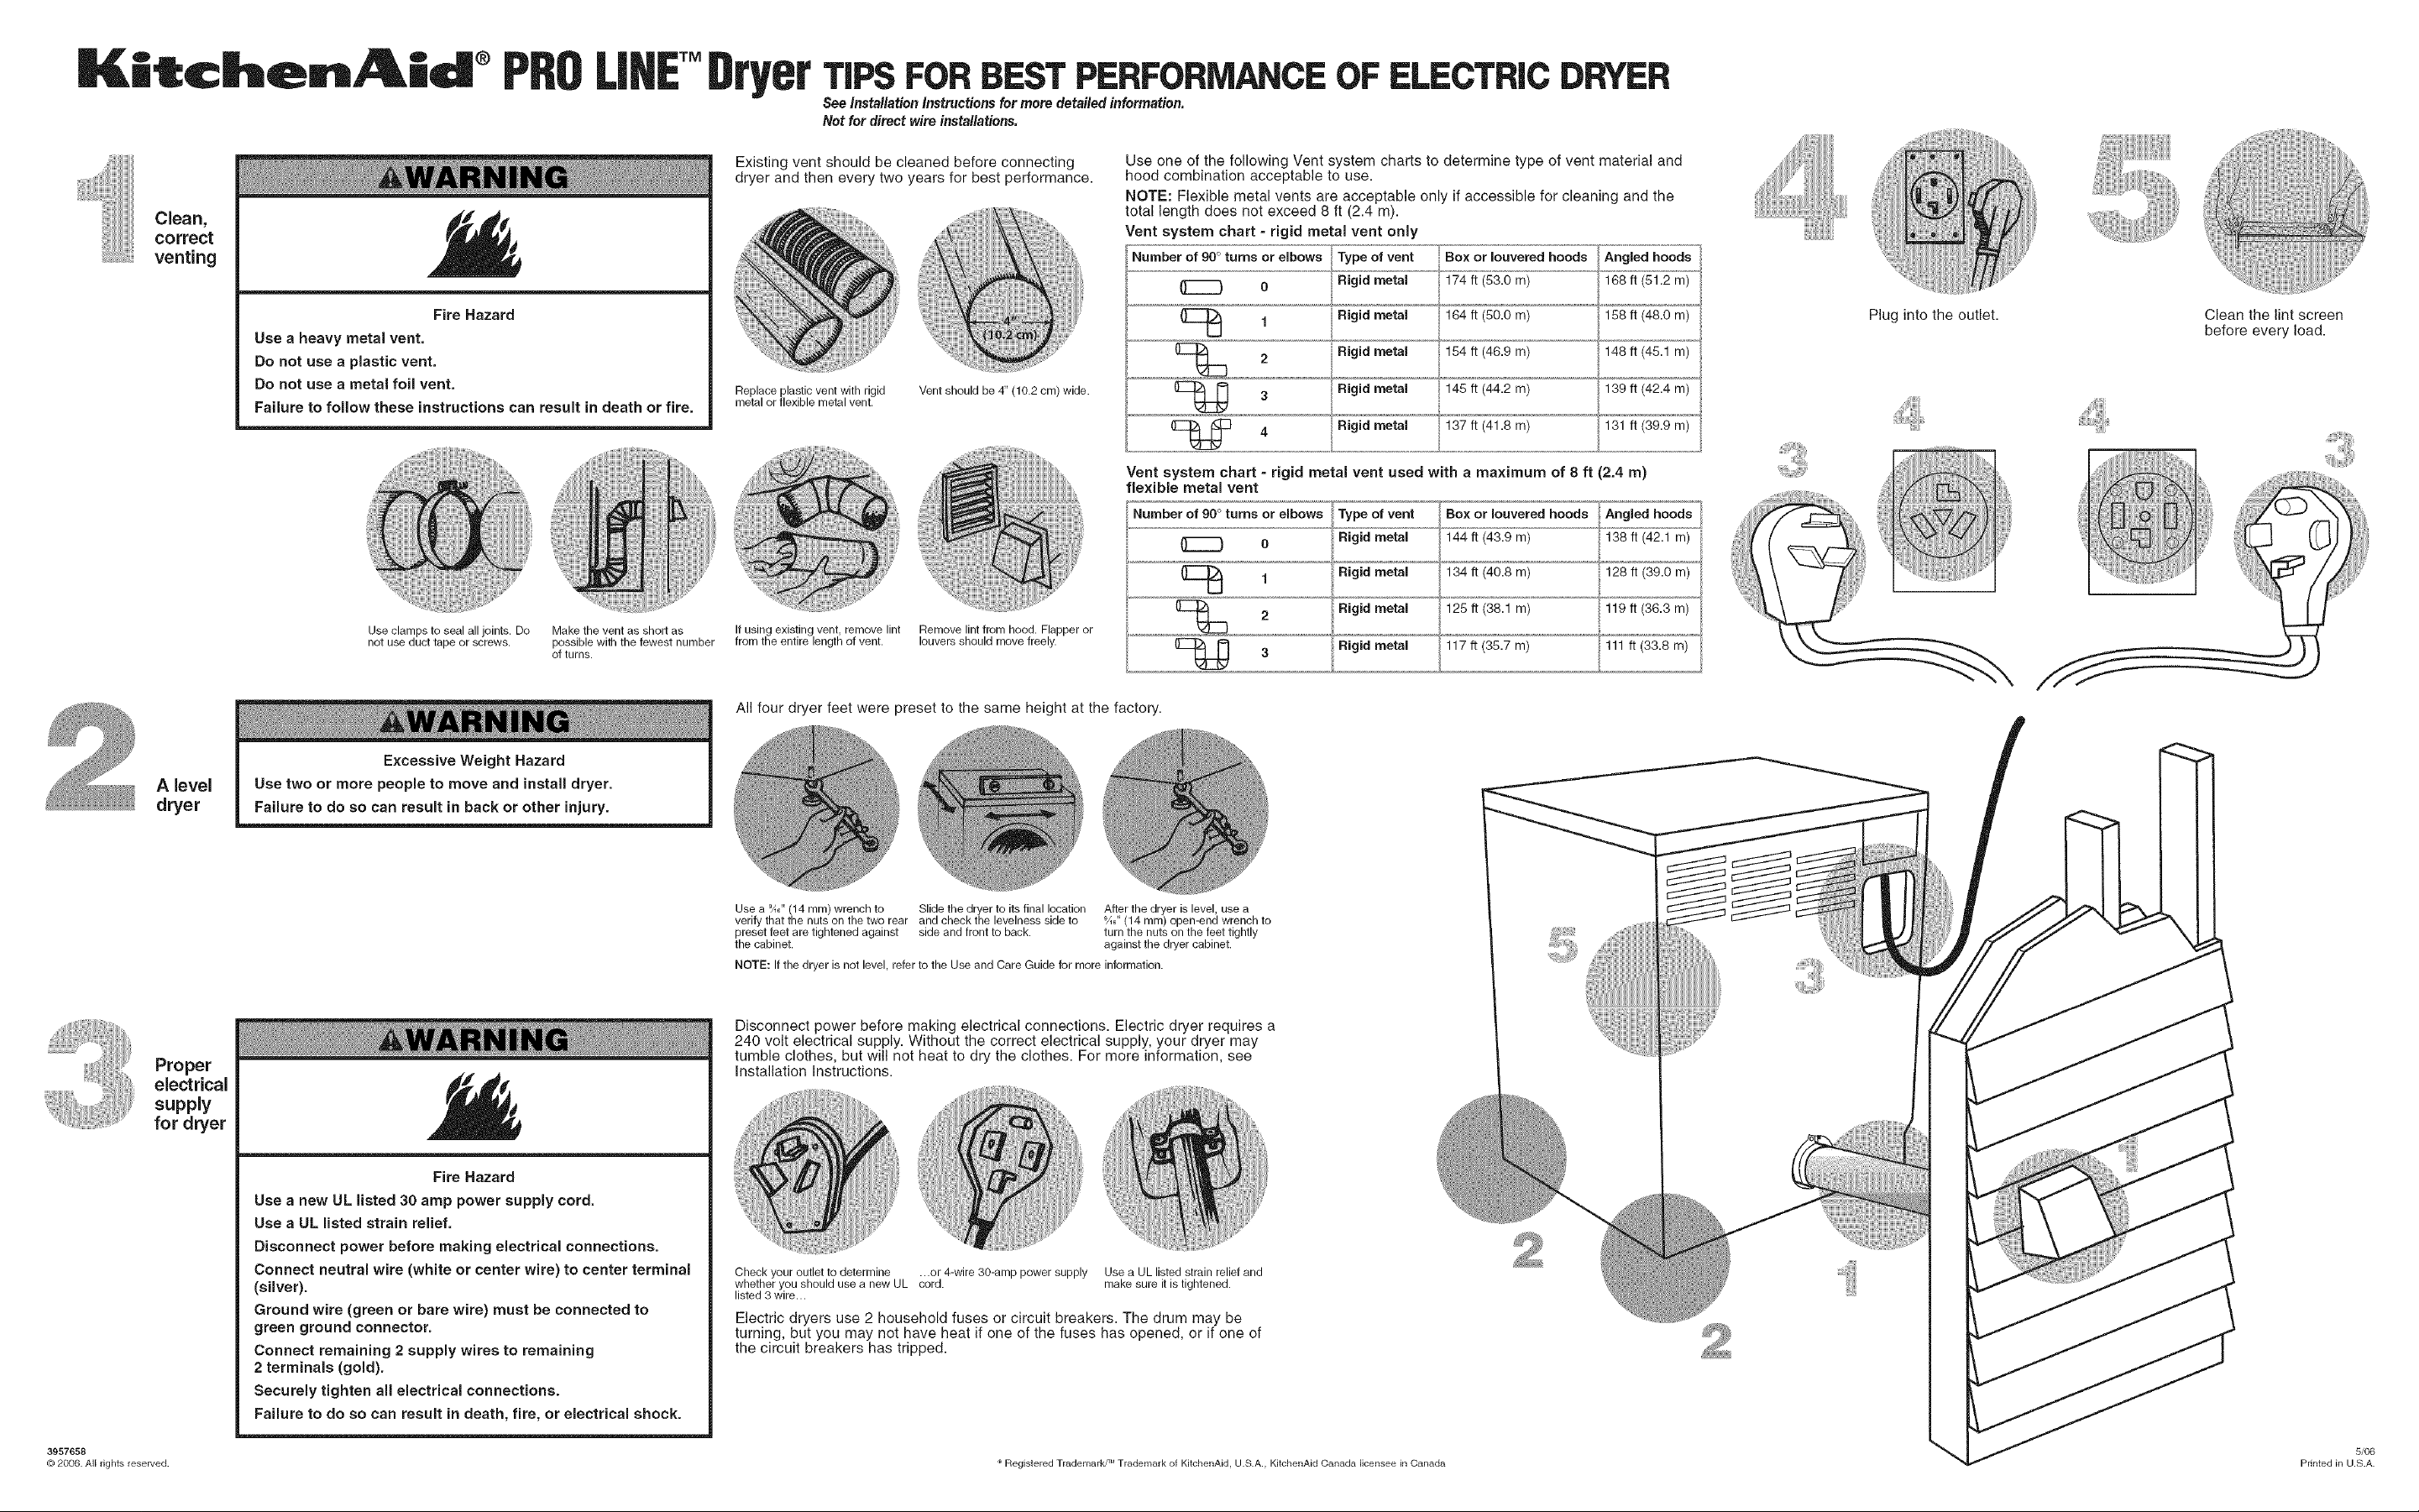
Clean,
correct
venting
Fire Hazard
Use a heavy metal vent.
Do not use a plastic vent.
Do not use a metal foil vent.
Failure to follow these instructions can result in death or fire.
Use clamps to seal all joints. Do Make the vent as short as
not use duct tape or screws, possible with the fewest number
of turns.
Existing vent should be cleaned before connecting
dryer and then every two years for best performance.
Replace plastic vent with rigid
metal or flexible metal vent.
If using existing vent remove lint Remove lint from hood. Flapper or
from the entire length of vent. louvers should move freely.
Vent should be 4" (10.2 cm) wide.
Use one of the following Vent system charts to determine type of vent material and
hood combination acceptable to use.
NOTE: Flexible metal vents are acceptable only if accessible for cleaning and the
total length does not exceed 8 ft (2.4 m).
Vent system chart =rigid metal vent only
Numberof 90° turns or elbows ,_Typeofvent
0
Rigid metal
Rigid metal
2 Rigid metal 184ft (46.9m)
Box or Iouvered hoods
174 ft (53.0 m)
164 ft (50.0 m)
._,
Angled hoods
168 ft (81.2 m)
158 ft (48.0 m)
148 ft (48.1 m)
139 ft (42.4 m)
(E_ 3 metal 145ft (44.2m)
131 ft (39.9 m)
Vent system chart - rigid metal vent used with a maximum of 8 ft (2.4 m)
flexible metal vent
Number of90° turns or elbows
o
Type of vent
Rigid metal
Rigid metal
Rigid metal
Rigid metal
Box or Iouvered hoods Ang ed hoods
134ft (40.8 m) 128ft (39.0 m)
125ft (38.1 m) 119ft (36.3 m)
117ft (35.7 m) 111ft (33.8 m)
Plug into the outlet.
Clean the lint screen
before every load.
A level
dryer
Proper
electrical
supply
for dryer
Fire Hazard
Use a new UL listed 30 amp power supply cord.
Use a UL listed strain relief,
Disconnect power before making electrical connections.
Connect neutral wire (white or center wire) to center terminal
(silver).
Ground wire (green or bare wire) must be connected to
green ground connector.
Connect remaining 2 supply wires to remaining
2 terminals (gold).
Securely tighten all electrical connections.
Failure to do so can result in death, fire, or electrical shock.
All four dryer feet were preset to the same height at the factory.
verify that the nuts on the two rear and check the levelness side to _A_"(14 ram) open-end wrench to
preset feet are tightened against side and front to back. turn the nuts on the feet tightly
the cabinet, against the dryer cabinet.
NOTE: If the dryer is not level, refer to the Use and Care Guide for more information.
After the dryer is level, use aUse a gA_"(14 ram) wrench to Slide the dryer to its final location
Disconnect power before making electrical connections. Electric dryer requires a
240 volt electrical supply. Without the correct electrical supply, your dryer may
tumble clothes, but will not heat to dry the clothes. For more information, see
Installation Instructions.
Check your outlet to determine ...or 4-wire 30-amp power supply Use a UL listed strain relief and
whether you should use a new UL cord. make sure it is tightened.
listed 3 wire...
Electric dryers use 2 household fuses or circuit breakers. The drum may be
turning, but you may not have heat if one of the fuses has opened, or if one of
the circuit breakers has tripped.
I
3957656
Cd,p2006. All rights reserved.
® Registered TrademarkF Trademark of KitchenAid, U.S.A., KitchenAid Canada licensee in Canada
M
Printed in U.S.A.
5/06
 Loading...