

KitchenAid KGRS807SSS, KGRS807SBL, KGRS807SBT, KGRS807XSP, KGSS907XSP Owner's Manual
...
GAS RANGE
ARCHITECT® SERIES II
Use & Care Guide
For questions about features, operation/performance, parts, accessories or service, call: 1-800-422-1230
In Canada, call for assistance, installation and service, call: 1-800-807-6777
or visit our website at www.kitchenaid.com
or visit our website at www.KitchenAid.ca
CUISINIÈRE À GAZ
ARCHITECT® SÉRIE II
Guide d’utilisation et d’entretien
Au Canada, pour assistance, installation ou service composez le 1-800-807-6777
ou visitez notre site web à : www.KitchenAid.ca
Table of Contents/Table des matières.............................................................................2
Models/Modèles KGRS807 KGSK901 KGSS907
W10246109B

TABLE OF CONTENTS
TABLE DES MATIÈRES
RANGE SAFETY .............................................................................3
The Anti-Tip Bracket ....................................................................4
PARTS AND FEATURES................................................................5
COOKTOP USE ..............................................................................7
Cooktop Controls.........................................................................7
TripleTier
Sealed Surface Burners ...............................................................9
Cookware ...................................................................................10
Home Canning ...........................................................................11
GLASS TOUCH-ACTIVATED
ELECTRONIC OVEN CONTROL.................................................11
Electronic Control Pads .............................................................12
Oven Displays ............................................................................12
Start............................................................................................12
Control Lock...............................................................................12
Off...............................................................................................12
Clock/Timer Display ...................................................................12
Timer...........................................................................................12
OPTIONS.......................................................................................12
Options Selection Pad ...............................................................12
Fahrenheit and Celsius - Option 1.............................................12
Tones - Options 2, 3, 4 ..............................................................13
Dehydrate - Option 5 .................................................................13
Oven Temperature Calibration - Option 6 .................................13
Sabbath Mode - Option 7..........................................................13
OVEN USE.....................................................................................14
Aluminum Foil.............................................................................14
Bakeware....................................................................................14
Meat Thermometer.....................................................................15
Temperature Probe ....................................................................15
Oven Vent...................................................................................15
Positioning Racks and Bakeware ..............................................16
Bake............................................................................................16
Broil ............................................................................................16
Convection Cooking...................................................................17
EasyConvect
Convection Bake........................................................................18
Convection Roast.......................................................................18
Convection Broil.........................................................................19
Proofing Bread ...........................................................................20
Timed/Delay Cooking.................................................................20
Warming Drawer ........................................................................20
RANGE CARE ...............................................................................21
Self-Cleaning Cycle....................................................................21
General Cleaning........................................................................22
Oven Light(s) ..............................................................................23
Oven Door ..................................................................................23
Storage Drawer ..........................................................................24
Warming Drawer ........................................................................24
TROUBLESHOOTING ..................................................................25
ASSISTANCE OR SERVICE.........................................................26
In the U.S.A. ...............................................................................27
In Canada ...................................................................................27
WARRANTY ..................................................................................28
®
Flame Burner with InstaWok™ Grate.........................9
™
Conversion.........................................................18
SÉCURITÉ DE LA CUISINIÈRE ...................................................29
Bride antibasculement ...............................................................30
PIÈCES ET CARACTÉRISTIQUES ..............................................31
UTILISATION DE LA TABLE DE CUISSON................................33
Commandes de la table de cuisson ..........................................33
Brûleur TripleTier
Brûleurs de surface scellés ........................................................36
Ustensiles de cuisson ................................................................37
Préparation de conserves à la maison.......................................37
COMMANDE ÉLECTRONIQUE TACTILE DU FOUR.................38
Touches de commande électroniques ......................................38
Afficheurs du four .......................................................................38
Mise en marche..........................................................................39
Verrouillage des commandes.....................................................39
Arrêt ............................................................................................39
Affichage horloge/minuterie .......................................................39
Minuterie.....................................................................................39
OPTIONS .......................................................................................39
Touche de sélection des options...............................................39
Fahrenheit et Celsius - Option 1 ................................................39
Signaux sonores - Options 2, 3, 4 .............................................39
Déshydrater - Option 5...............................................................40
Calibrage de la température du four - Option 6 ........................40
Mode Sabbat - Option 7 ............................................................40
UTILISATION DU FOUR...............................................................41
Papier d’aluminium.....................................................................41
Ustensiles de cuisson au four....................................................42
Thermomètre à viande ...............................................................42
Sonde thermométrique ..............................................................42
Évent du four ..............................................................................43
Positionnement des grilles et des ustensiles de cuisson.........43
Cuisson au four ..........................................................................43
Cuisson au gril............................................................................44
Cuisson par convection .............................................................45
Conversion EasyConvect
Cuisson au four par convection.................................................46
Rôtissage par convection ..........................................................46
Cuisson au gril par convection...................................................47
Levée du pain.............................................................................47
Cuisson minutée/différée ...........................................................48
Tiroir-réchaud.............................................................................48
ENTRETIEN DE LA CUISINIÈRE.................................................49
Programme d'autonettoyage .....................................................49
Nettoyage général ......................................................................50
Lampe(s) du four ........................................................................52
Porte du four...............................................................................52
Tiroir de remisage.......................................................................52
Tiroir-réchaud.............................................................................52
DÉPANNAGE.................................................................................53
ASSISTANCE OU SERVICE.........................................................55
Au Canada..................................................................................55
GARANTIE.....................................................................................55
®
avec grille InstaWok™ ................................35
™
.........................................................45
2
RANGE SAFETY
Your safety and the safety of others are very important.
We have provided many important safety messages in this manual and on your appliance. Always read and obey all safety
messages.
This is the safety alert symbol.
This symbol alerts you to potential hazards that can kill or hurt you and others.
All safety messages will follow the safety alert symbol and either the word “DANGER” or “WARNING.”
These words mean:
You can be killed or seriously injured if you don't immediately
DANGER
WARNING
All safety messages will tell you what the potential hazard is, tell you how to reduce the chance of injury, and tell you what can
happen if the instructions are not followed.
WARNING: If the information in this manual is not followed exactly, a fire or explosion
may result causing property damage, personal injury or death.
follow instructions.
can be killed or seriously injured if you don't
You
instructions.
follow
– Do not store or use gasoline or other flammable vapors and liquids in the vicinity of this
or any other appliance.
– WHAT TO DO IF YOU SMELL GAS:
Do not try to light any appliance.
•
Do not touch any electrical switch.
•
Do not use any phone in your building.
•
Immediately call your gas supplier from a neighbor's phone. Follow the gas supplier's
•
instructions.
If you cannot reach your gas supplier, call the fire department.
•
– Installation and service must be performed by a qualified installer, service agency or
the gas supplier.
WARNING: Gas leaks cannot always be detected by smell.
Gas suppliers recommend that you use a gas detector approved by UL or CSA.
For more information, contact your gas supplier.
If a gas leak is detected, follow the “What to do if you smell gas” instructions.
State of California Proposition 65 Warnings:
WARNING: This product contains a chemical known to the State of California to cause cancer.
WARNING: This product contains a chemical known to the State of California to cause birth defects or other reproductive harm.
3
The Anti-Tip Bracket
The range will not tip during normal use. However, the range can tip if you apply too much force or weight to the open door without the
anti-tip bracket fastened down properly.
WARNING
Tip Over Hazard
A child or adult can tip the range and be killed.
Connect anti-tip bracket to rear range foot.
Reconnect the anti-tip bracket, if the range is moved.
See the installation instructions for details.
Failure to follow these instructions can result in death or serious burns to children and adults.
Anti-Tip Bracket
Range Foot
Making sure the anti-tip bracket is installed:
• Slide range forward.
• Look for the anti-tip bracket securely attached to floor.
• Slide range back so rear range foot is under anti-tip bracket.
IMPORTANT SAFETY INSTRUCTIONS
WARNING:
persons, or damage when using the range, follow basic
precautions, including the following:
■
WARNING:
RANGE, THE RANGE MUST BE SECURED BY PROPERLY
INSTALLED ANTI-TIP DEVICES. TO CHECK IF THE DEVICES
ARE INSTALLED PROPERLY, SLIDE RANGE FORWARD, LOOK
FOR ANTI-TIP BRACKET SECURELY ATTACHED TO FLOOR,
AND SLIDE RANGE BACK SO REAR RANGE FOOT IS UNDER
ANTI-TIP BRACKET.
■
WARNING:
heat or warm the room. Doing so may result in carbon monoxide
poisoning and overheating of the oven.
■
WARNING:
oven bottom or cover an entire rack with materials such as
aluminum foil. Doing so blocks air flow through the oven and may
cause carbon monoxide poisoning. Aluminum foil linings may also
trap heat, causing a fire hazard.
■
CAUTION:
above a range or on the backguard of a range – children climbing
on the range to reach items could be seriously injured.
■
Proper Installation – The range, when installed, must be electrically
grounded in accordance with local codes or, in the absence of
local codes, with the National Electrical Code, ANSI/NFPA 70. In
Canada, the range must be electrically grounded in accordance
with Canadian Electrical Code. Be sure the range is properly
installed and grounded by a qualified technician.
To reduce the risk of fire, electrical shock, injury to
TO REDUCE THE RISK OF TIPPING OF THE
NEVER use this appliance as a space heater to
NEVER cover any slots, holes or passages in the
Do not store items of interest to children in cabinets
■
This range is equipped with a three-prong grounding
plug for your protection against shock hazard and
should be plugged directly into a properly grounded
receptacle. Do not cut or remove the grounding
prong from this plug.
■
Disconnect power before servicing.
■
Injuries may result from the misuse of appliance
doors or drawers such as stepping, leaning, or
sitting on the doors or drawers.
■
Maintenance – Keep range area clear and free from
combustible materials, gasoline, and other
flammable vapors and liquids.
■
Storage in or on the Range – Flammable materials
should not be stored in an oven or near surface
units.
■
Top burner flame size should be adjusted so it does
not extend beyond the edge of the cooking utensil.
For self-cleaning ranges –
■
Before Self-Cleaning the Oven – Remove broiler pan
and other utensils. Wipe off all excessive spillage
before initiating the cleaning cycle.
SAVE THESE INSTRUCTIONS
4
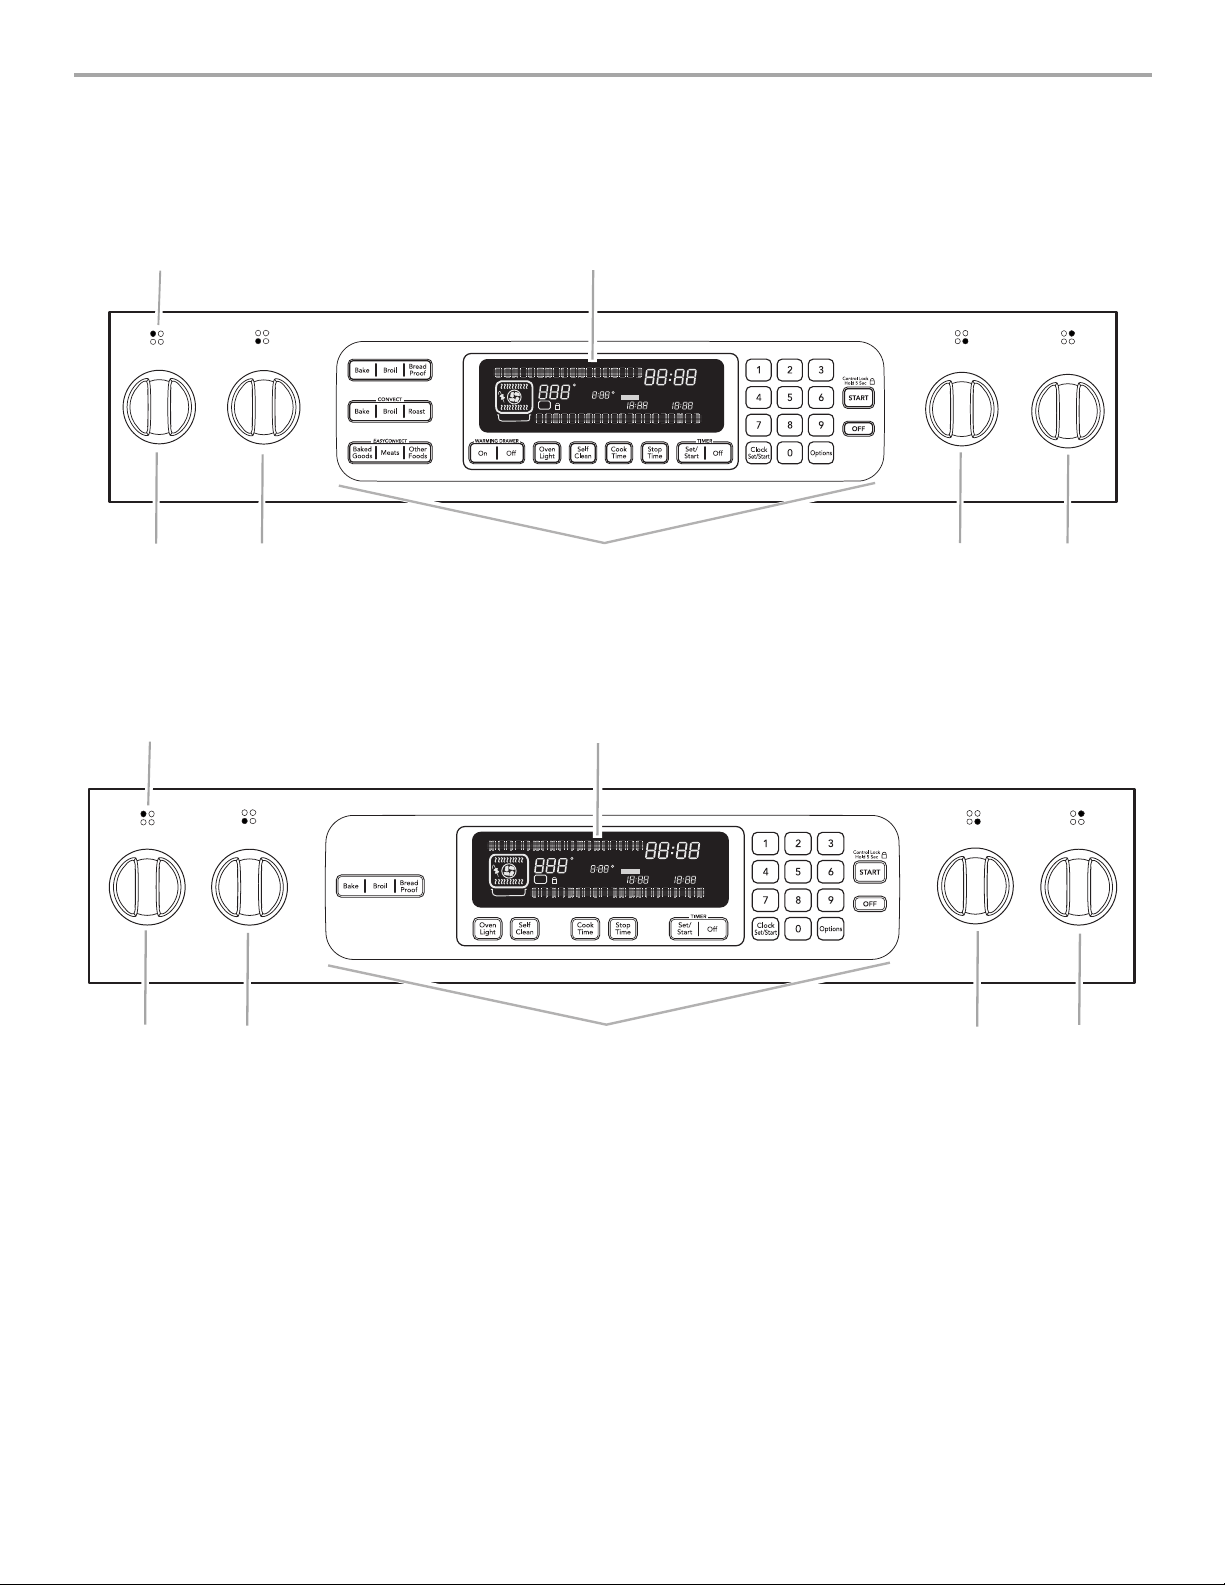
PARTS AND FEATURES
This manual covers several different models. The range you have purchased may have some or all of the items listed. The locations and
appearances of the features shown here may not match those of your model.
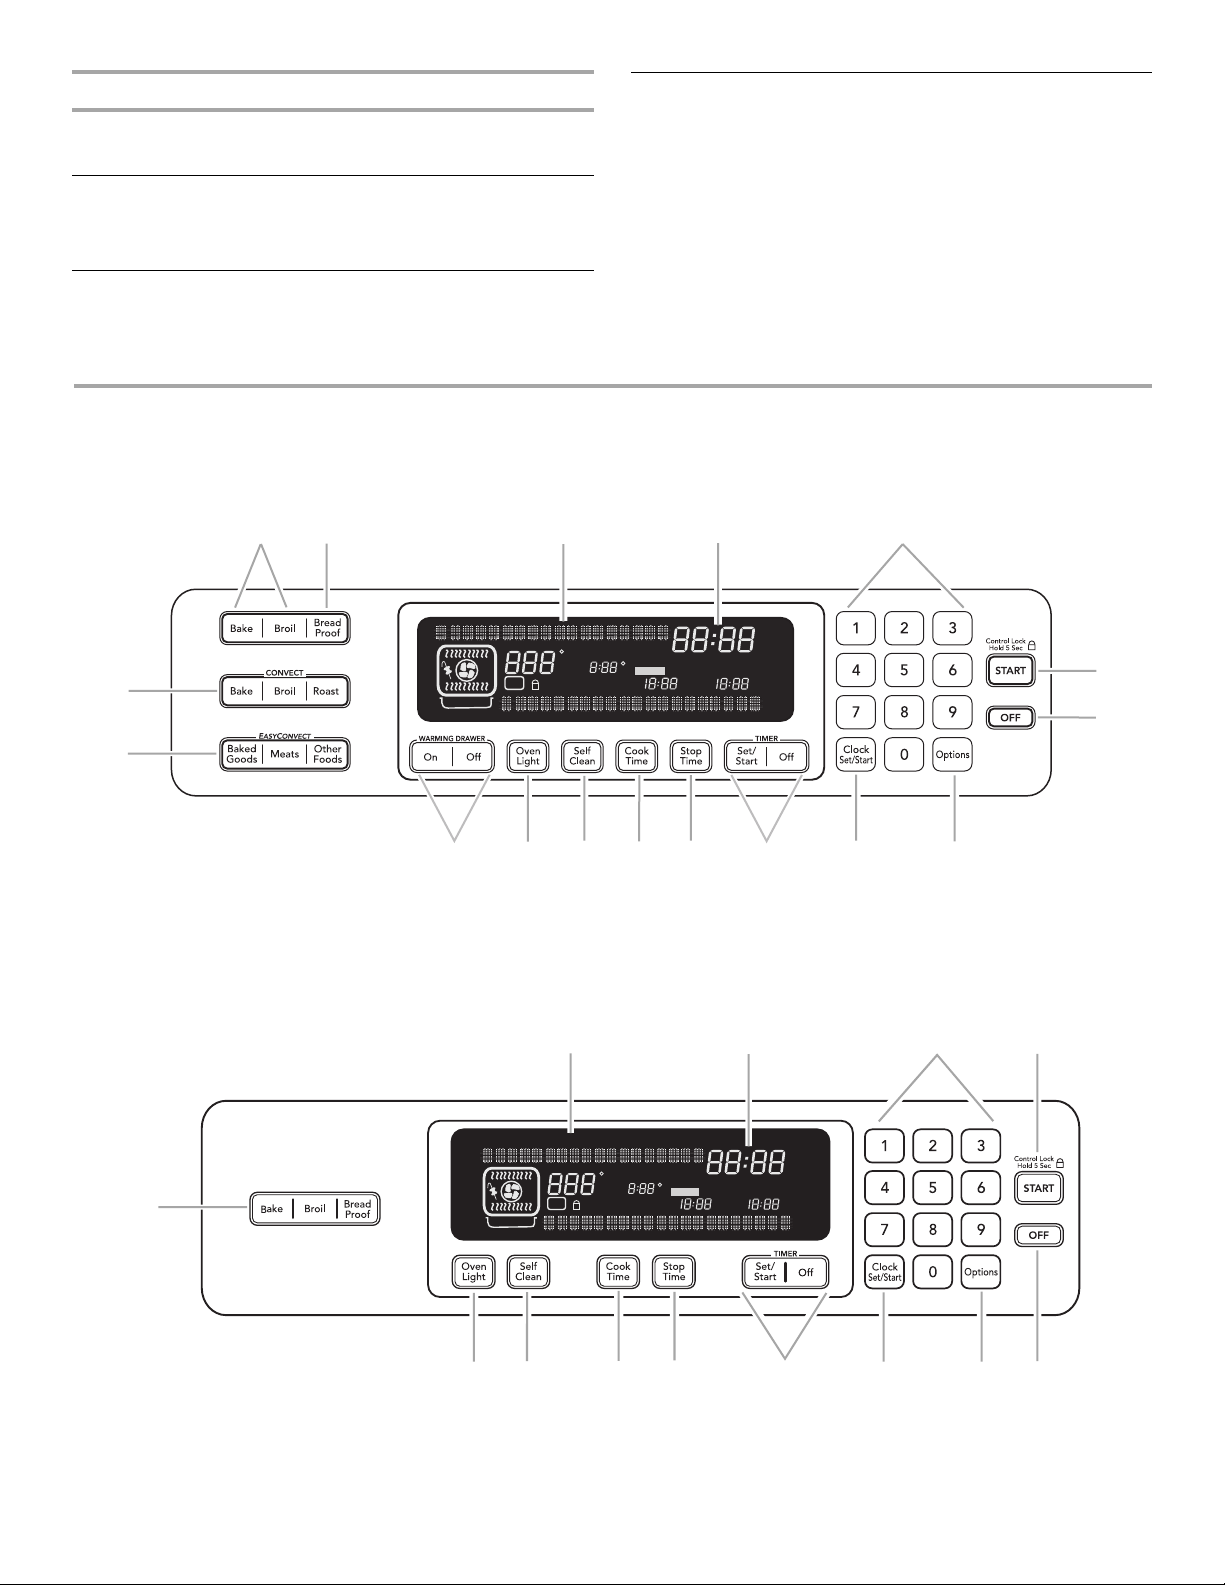
Glass Touch-Activated Electronic Oven Control Panel with TripleTier® Burner (Models KGRS807 and KGSS907)
A
C
A. Surface burner locator
B. Oven display
C. Left rear control knob (6000 Btu/h)
D
MED LOW HI
D. Left front dual valve TripleTier® flame burner
knob (15,000 Btu/h)
E. Electronic oven control
B
CLEAN
TIME
PROBE
TEMP
HR MIN
DELAY
MIN HR SEC MIN
START
TIME
STOP
TIME
F
C
CONTROL
ON
COOK TIME
LOCKED
E
F. Right front control knob (6000 Btu/h)
G. Right rear control knob (12,500 Btu/h)
Glass Touch-Activated Electronic Oven Control Panel with Standard Burners (Model KGSK901)
A
B
F
G
C
D
A. Surface burner locator
B. Oven display
C. Left rear control knob (6000 Btu/h)
CLEAN
TIME
PROBE
TEMP
MED LOW HI
F
C
CONTROL
ON
COOK TIME
LOCKED
HR MIN
DELAY
MIN HR SEC MIN
START
TIME
STOP
TIME
E
D. Left front control knob (14,000 Btu/h)
E. Electronic oven control
F
G
F. Right front control knob (6000 Btu/h)
G. Right rear control knob (12,500 Btu/h)
5
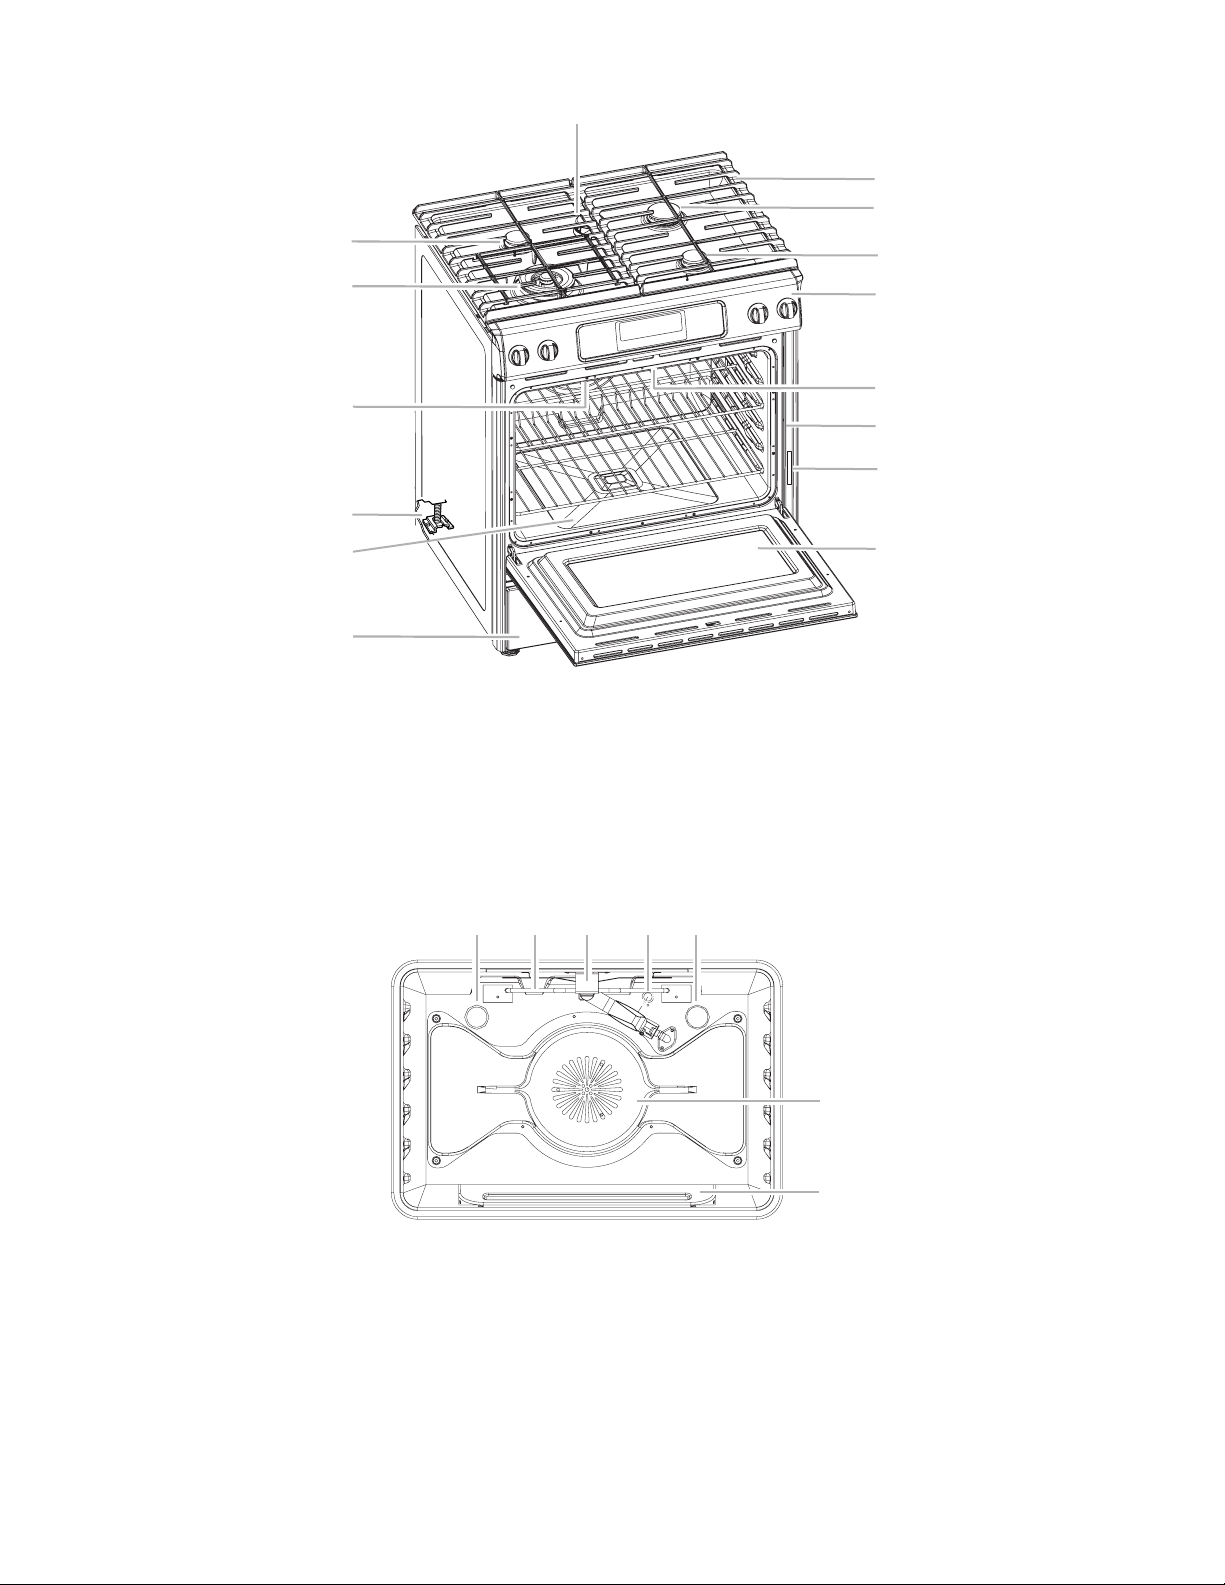
Range
E
F
G
H
I
A. Warming drawer (on some
models) or storage drawer (on
some models)
B. Bake burner and cover (not
shown)
C. Anti-tip bracket
D. Broil burner with electric broil
element (not shown)
F
E
D
C
B
A
E. Left front surface burner (dual
valve TripleTier
InstaWok™ Grate on some
models)
F. Left rear surface burner
G. Oven vent
H. Standard grate
I. Right rear surface burner
®
flame burner with
J. Right front surface burner
K. Control panel
L. Automatic oven light switch/
self-clean latch
M. Door gasket
N. Model and serial number plate
O. Oven door window
J
K
L
M
N
O
Parts and Features not shown
(on some models)
Broiler pan and grid
Temperature probe
Oven Interior
ABC AD
A. Oven lights
B. Broil burner
C. Broil element
D. Oven cavity sensor
E. T.H.E.™ convection fan and element (not visible)
(on some models)
F. Bake burner (not visible)
6
COOKTOP USE
Cooktop Controls
WARNING
Fire Hazard
Do not let the burner flame extend beyond the edge of
the pan.
Turn off all controls when not cooking.
Failure to follow these instructions can result in death
or fire.
IMPORTANT: Your cooktop is factory-set for use with Natural
gas. If you wish to use LP Gas, an LP Gas Conversion Kit is
included with your new range. Models with the TripleTier
Burner will include a TripleTier® Burner LP Gas Conversion Kit
and a kit for standard ranges. See “Installation Instructions” for
details on making this conversion.
Electric igniters automatically light the surface burners when
control knobs are turned to LITE.
Before setting a control knob, place filled cookware on the grate.
Do not operate a burner while using empty cookware or without
any cookware on the grate.
NOTE: Visually check that the burner has lit. If the burner does
not ignite, listen for the clicking sound. If you do not hear the
igniter click, turn the burner off. Check for a tripped circuit
breaker or blown fuse.
Check that the control knob is pressed completely down on the
valve shaft. If the spark igniter still does not operate, call a trained
repair specialist.
Proper grounding and polarity are necessary for correct operation
of the electric ignition system. If the wall receptacle does not
provide correct polarity, the igniters will become grounded and
occasionally click, even after the burner has ignited. Contact a
trained repair specialist to check the wall receptacle to see
whether it is wired with the correct polarity.
®
Flame
TripleTier® Burner with High Power Settings and Low
Simmer Settings (on some models)
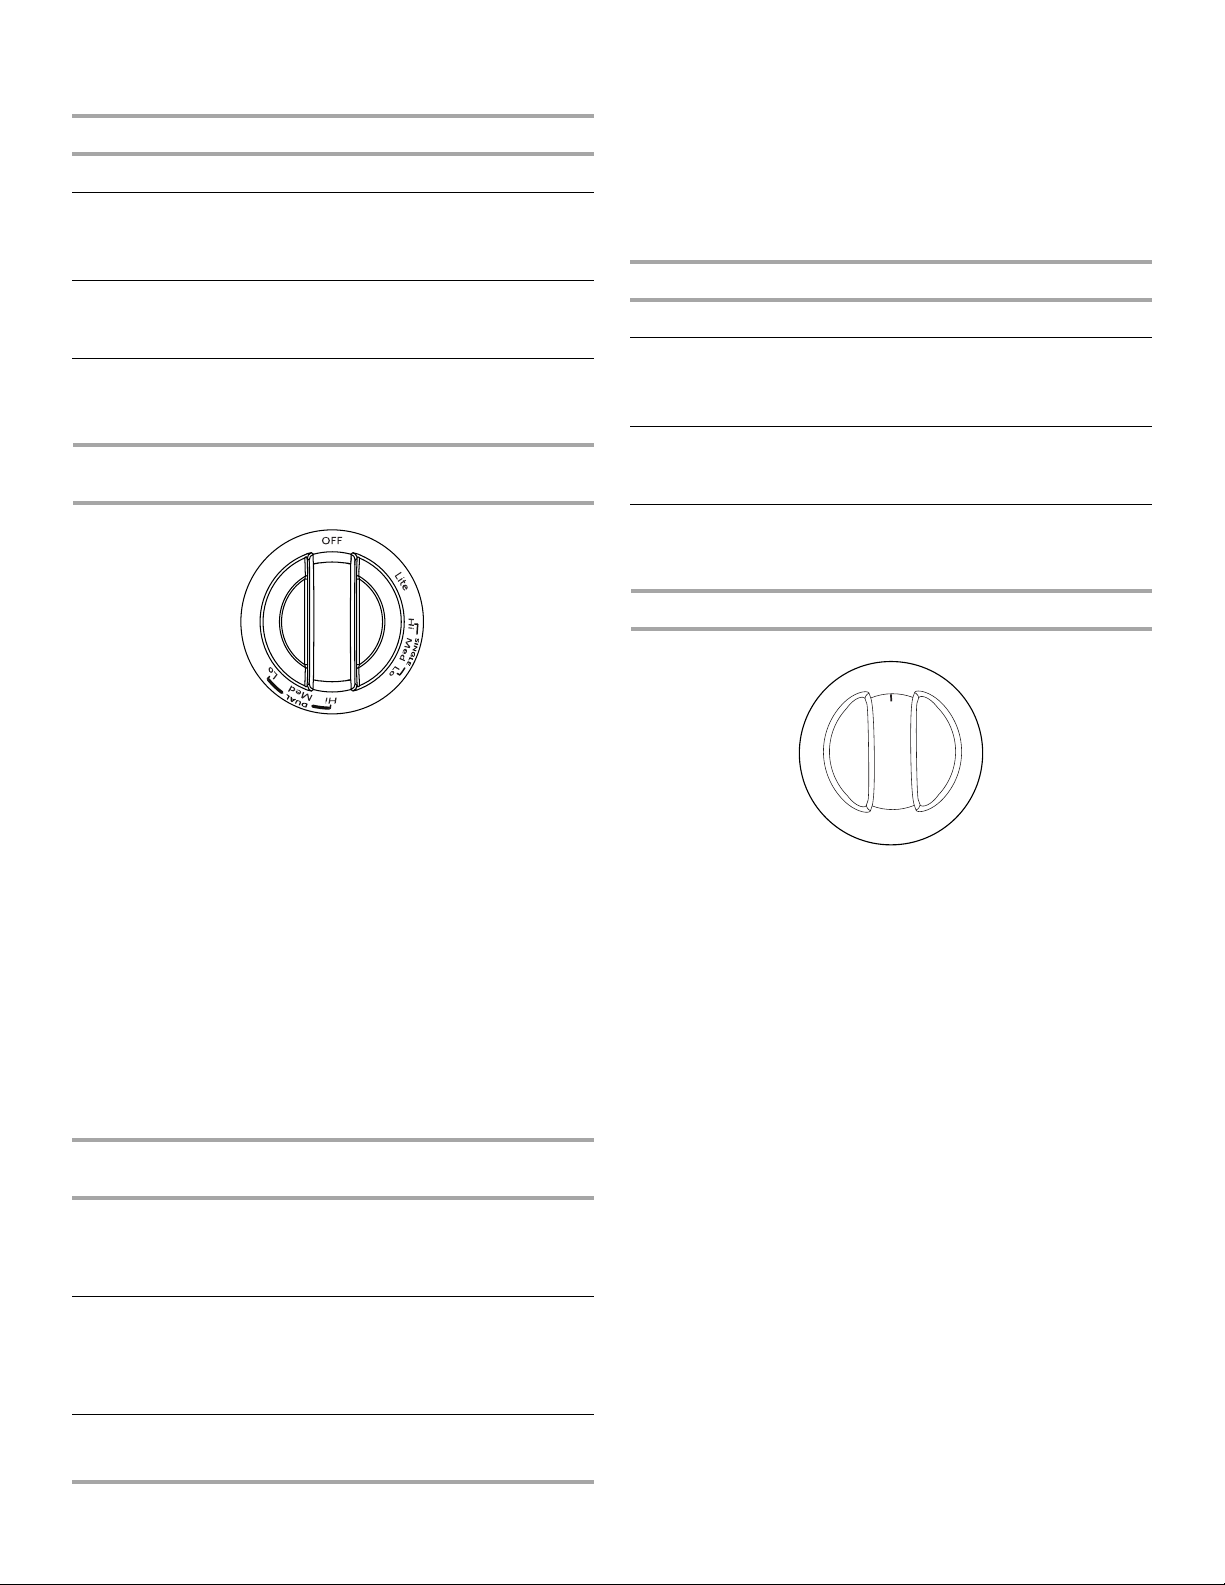
OFF
Lite
S
Hi
I
M
M
E
M
R
ed
B
U
R
Lo
N
E
Lo
R
E
ed
N
M
R
Hi
U
B
R
E
W
P
O
R
NOTE: Settings are marked on the control knob.
®
The TripleTier
Flame Burner (15,000 Btu/h [British Thermal
Units]) can provide the highest heat setting and 3 levels of
simmer control. It is ideal for cooking large quantities of food or
liquid and using large pots and pans.
High Power Settings
To Se t:
1. Push in and turn knob counterclockwise to LITE.
All surface burners will click. Only the simmer burner with the
control knob turned to Lite will produce a flame.
2. Push in and turn knob counterclockwise to POWER BURNER
HI. All 3 burner rings will produce a flame.
3. Turn knob to anywhere between POWER BURNER HI and
POWER BURNER LO.
Use the following chart as a guide when setting Power Burner
heat levels.
HIGH POWER
SETTING
HI
RECOMMENDED USE
■ Start food cooking.
■ Bring liquid to a boil.
■ Wok cooking.
REMEMBER: When range is in use or (on some models)
during the Self-Cleaning cycle, the entire cooktop area may
become hot.
Power failure
In case of prolonged power failure, the surface burners can be lit
manually. Hold a lit match near a burner and turn knob
counterclockwise to LITE. After burner lights, turn knob to
setting.
MED
(Medium)
■ Maintain a slow boil.
■ Fry poultry or meat.
■ Cook pudding, sauce, icing or
gravy.
LO
■ Fry or sauté foods.
■ Hold a slow boil.
Simmer Settings
1. Push in and turn knob counterclockwise to LITE.
All surface burners will click. Only the simmer burner with the
control knob turned to Lite will produce a flame.
2. Push in and turn knob counterclockwise to anywhere
between SIMMER BURNER HI and SIMMER BURNER LO.
7
Use the following chart as a guide when setting Simmer Burner
heat levels.
SIMMER SETTINGS RECOMMENDED USE
LITE
HI
■ Light the burner.
■ Cooking thicker foods such as
tomato sauce, chili.
■ Stew or steam foods.
MED
(Medium)
■ Cooking medium-density foods
such as cream soups, sauces and
gravy.
LO
■ Keep food warm.
■ Simmer.
Simmer Settings
1. Push in and turn knob counterclockwise to LITE.
All surface burners will click. Only the simmer burner with the
control knob turned to Lite will produce a flame.
2. Push in and turn knob counterclockwise to anywhere
between SINGLE HI and SINGLE LO.
Use the following chart as a guide when setting Simmer Burner
heat levels.
SIMMER SETTINGS RECOMMENDED USE
LITE
HI
■ Light the burner.
■ Cooking thicker foods such as
tomato sauce, chili.
■ Stew or steam foods.
TripleTier® Burner with Dual Settings and Single Settings
(Model KGSS907XSP)
NOTE: Settings are marked on the control knob.
The TripleTier
®
Flame Burner (15,000 Btu/h [British Thermal
Units]) can provide the highest heat setting and 3 levels of
simmer control. It is ideal for cooking large quantities of food or
liquid and using large pots and pans.
High Power Settings
To Se t:
1. Push in and turn knob counterclockwise to LITE.
All surface burners will click. Only the simmer burner with the
control knob turned to Lite will produce a flame.
2. Push in and turn knob counterclockwise to DUAL HI. All 3
burner rings will produce a flame.
3. Turn knob to anywhere between DUAL HI and DUAL LO.
Use the following chart as a guide when setting Power Burner
heat levels.
HIGH POWER
SETTING
HI
MED
(Medium)
RECOMMENDED USE
■ Start food cooking.
■ Bring liquid to a boil.
■ Wok cooking.
■ Maintain a slow boil.
■ Fry poultry or meat.
■ Cook pudding, sauce, icing or
gravy.
MED
(Medium)
■ Cooking medium-density foods
such as cream soups, sauces and
gravy.
LO
■ Keep food warm.
■ Simmer.
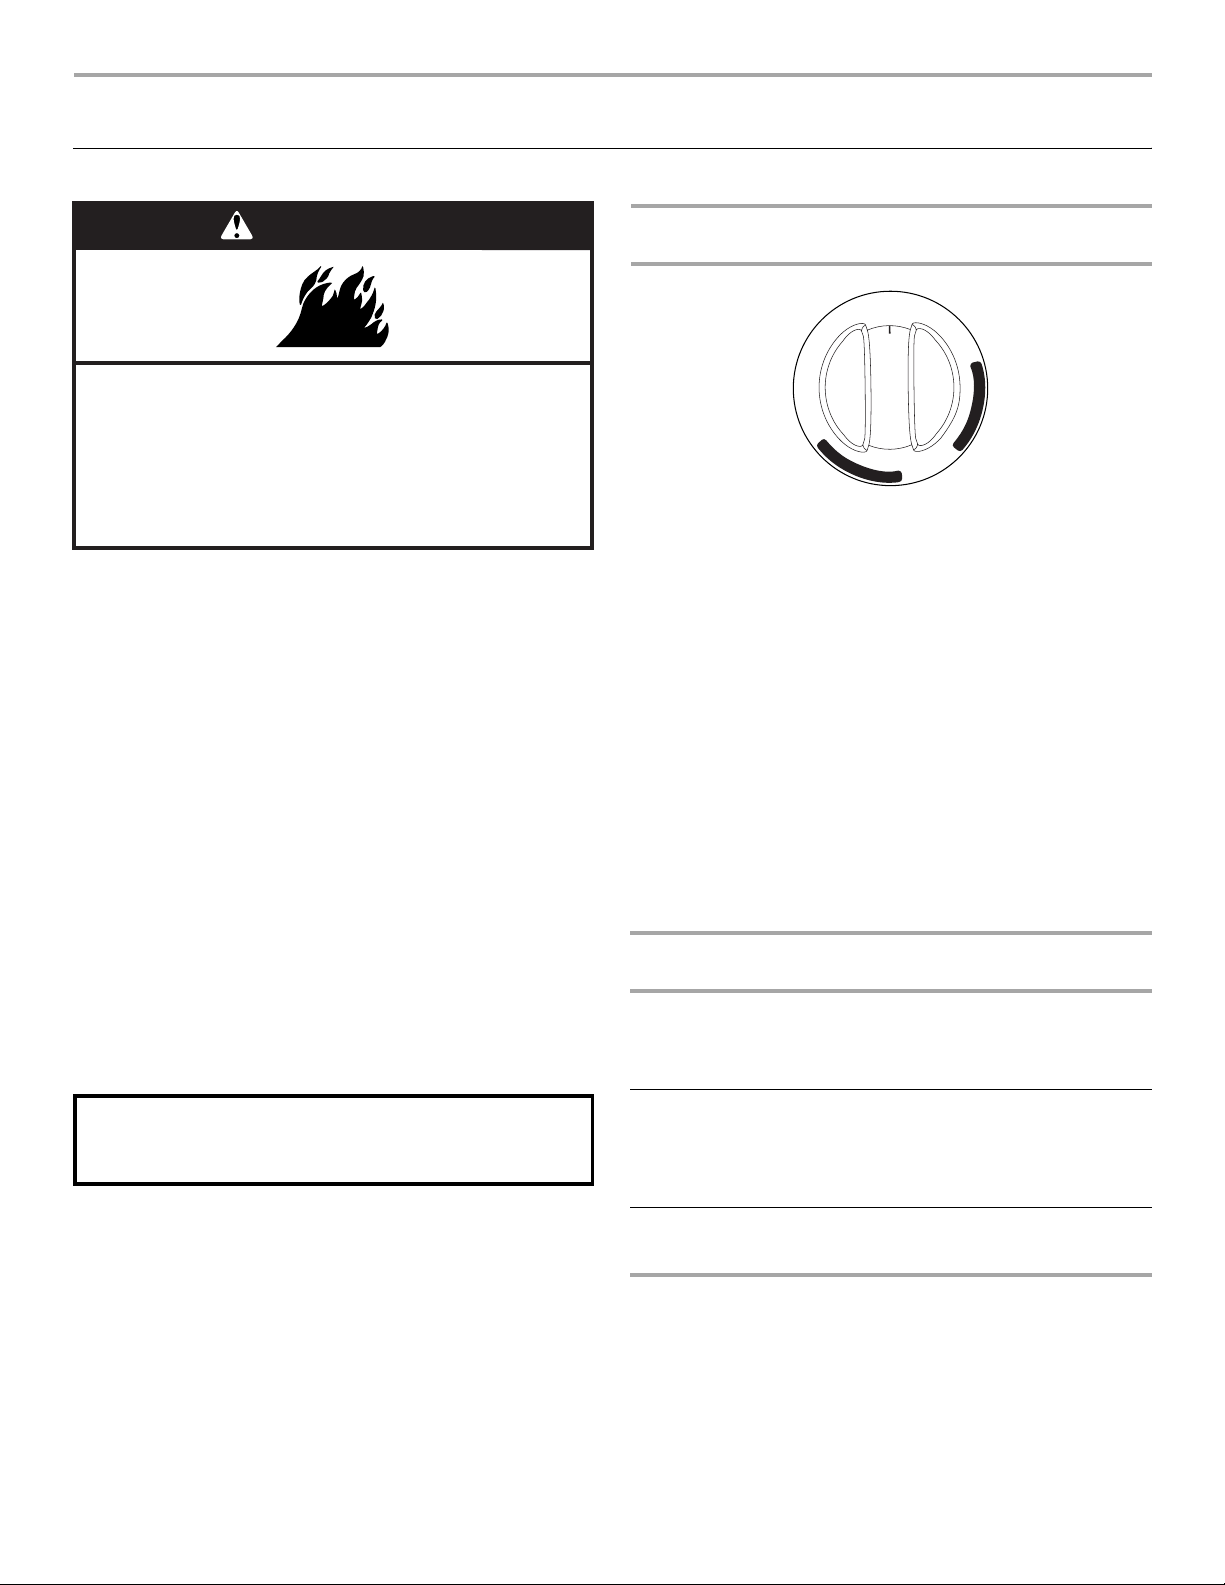
Large, Medium and Small Burner Control
O
FF
Lite
Lo
Hi
Med
NOTE: Settings are marked on the control knob.
All of the burner controls provide a range of cooking settings from
HI to LO.
The large (on some models) standard burner (14,000 Btu/h
[British Thermal Units]) provides the highest heat setting, and is
ideal for cooking large quantities of food or liquid and using large
pots and pans.
The medium burner (12,500 Btu/h) provides the high heat setting,
and is ideal for cooking medium-sized quantities of food or liquid
and using medium-sized pots and pans.
The small burners (6,000 Btu/h) are ideal for small quantities of
food or liquid and using small pots and pans. The lower power
allows more accurate simmer control at the lowest setting.
To Se t:
1. Push in and turn knob counterclockwise to LITE.
All surface burners will click. Only the burner with the control
knob turned to Lite will produce a flame.
2. Turn knob anywhere between HI and LO.
LO
■ Fry or sauté foods.
■ Hold a slow boil.
8
Use the following chart as a guide when setting heat levels.
E
SETTING RECOMMENDED USE
HI
Medium High
between
MED and HI
MED (Medium)
Medium Low
between
MED and LO
LO
■ Start food cooking.
■ Bring liquid to a boil.
■ Hold a rapid boil.
■ Quickly brown or sear food.
■ Hold a slow boil.
■ Fry poultry or meat.
■ Stew or steam food.
■ Cook pudding, sauce, icing or
gravy.
■ Keep food warm.
■ Simmer.
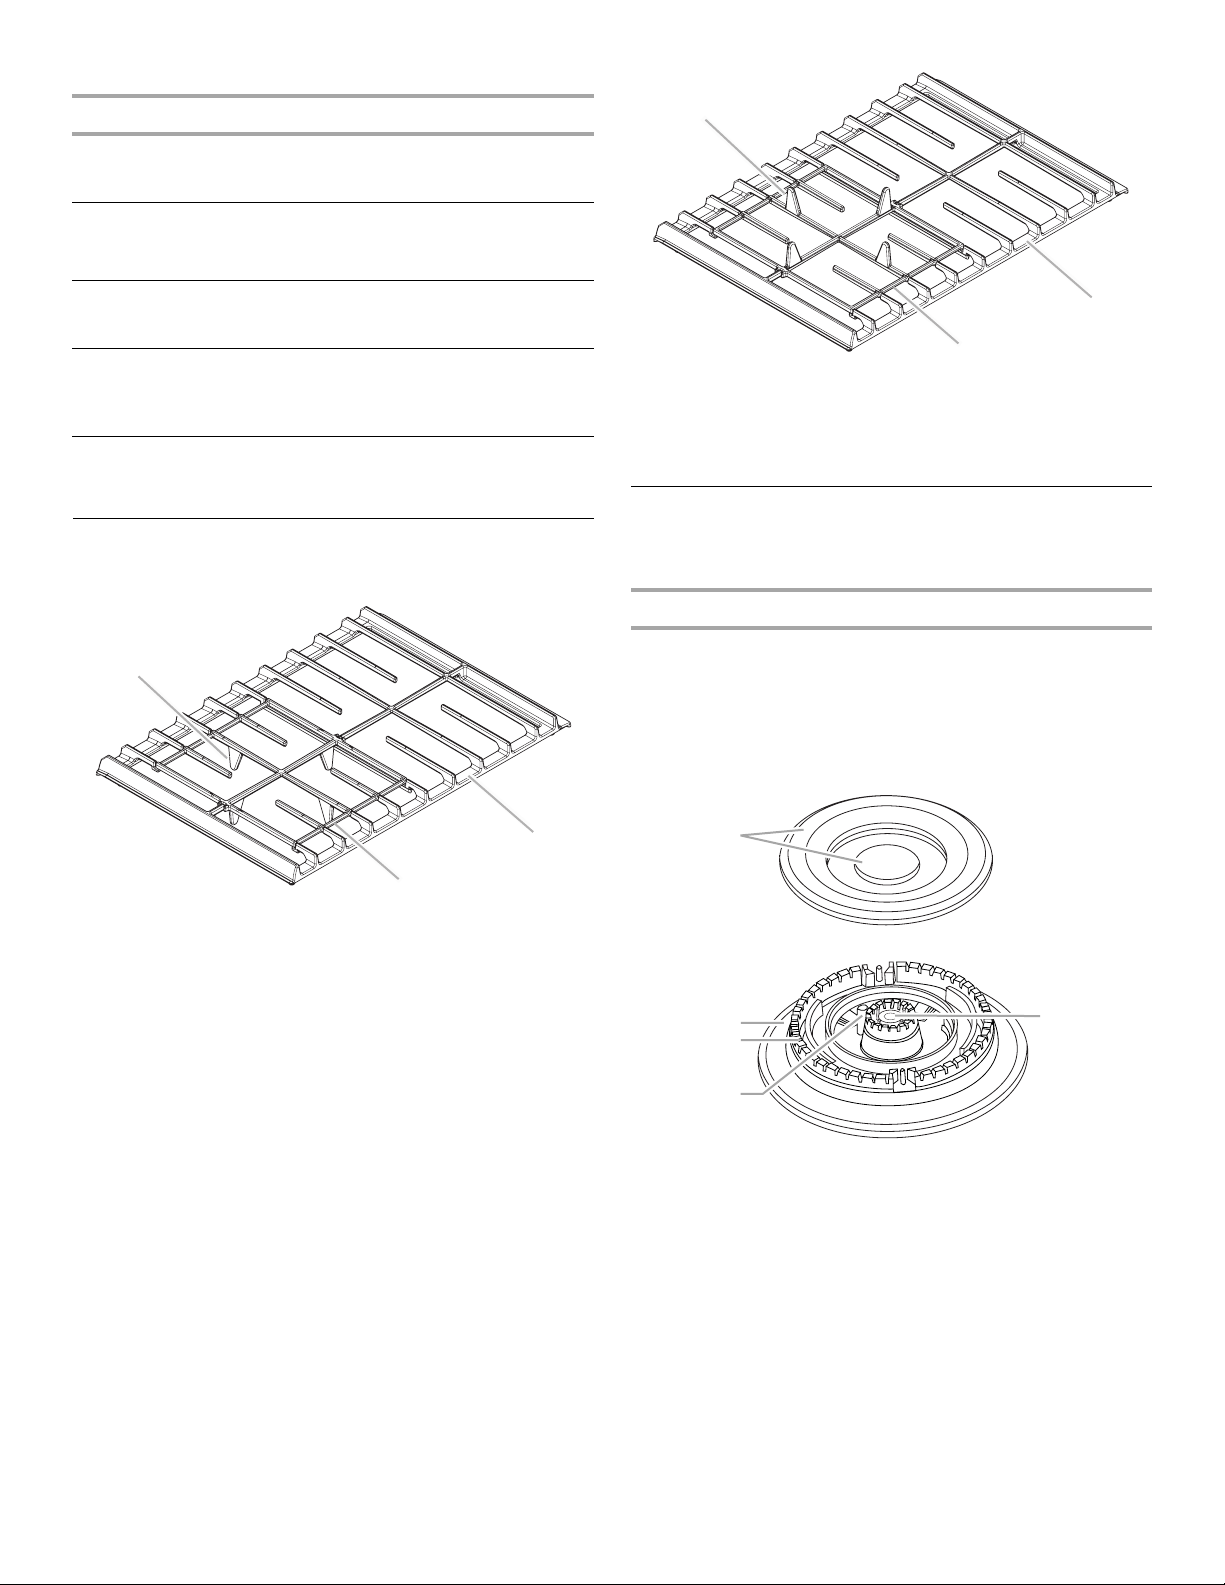
TripleTier® Flame Burner
with InstaWok™ Grate
A
A
B
C
A. Wok supports pointing up
B. Cooktop grate with InstaWok™ Grate
insert (left side of range only)
C. Reversible InstaWok™ Grate insert
3. Place the wok grate within the supports.
Sealed Surface Burners
IMPORTANT: Do not obstruct the flow of combustion and
ventilation air around the burner grate edges.
Burner Cap Alignment
Always keep the burner cap properly fitted in place when using a
surface burner. A clean burner cap will help avoid poor ignition
and uneven flames. Always clean the burner cap after a spillover
and routinely remove and clean the caps according to the
“General Cleaning” section.
B
C
A. Wok supports pointing down (for use
with flat-bottomed cookware)
B. Cooktop grate with InstaWok™ Grate
insert (left side of range only)
C. Reversible InstaWok™ Grate insert
The TripleTier® Flame Burner with InstaWok™ Grate is a
multifunction burner that produces everything from a rapid boil
down to a low simmer.
®
The TripleTier
by a dual valve control knob, which controls 2 separate burners.
See “TripleTier
Flame Burner with InstaWok™ Grate is functioned
®
Burner with High Power Burner and Low Power
Simmer Settings” in the “Cooktop Controls” section.
The InstaWok™ Grate supports 12" to 14" (30.5 cm to 35.6 cm)
Wok pans and can be flipped over to become a flat grate for use
with flat-bottomed cookware.
IMPORTANT: The InstaWok™ Grate must be in place when you
are using the TripleTier
®
Flame Burner.
To Use the InstaWok™ Grate:
1. Check that the control knob is in the OFF position and the
grate is completely cool before handling.
2. Remove grate from cooktop and flip the grate over so that the
wok supports are pointing up.
TripleTier® Flame Burner
A
B
C
D
A. TripleTier
B. Burner base
C. Alignment pins
D. Igniter
E. Gas tube opening
®
flame burner caps
9

Standard Burner
D
A
A
B
1. Remove the burner cap from the burner base and clean
according to “General Cleaning” section.
2. Clean the gas tube opening with a damp cloth.
3. Clean clogged burner ports with a straight pin as shown. Do
not enlarge or distort the port. Do not use a wooden
toothpick. If the burner needs to be adjusted, contact a
trained repair specialist.
E
C
A. Burner cap
B. Burner base
C. Alignment pins
D. Igniter
E. Gas tube opening
Gas tube opening
Gas must flow freely throughout the gas tube opening for the
burner to light properly. Keep this area free of soil and do not
allow spills, food, cleaning agents or any other material to enter
the gas tube opening. Keep spillovers out of the gas tube
opening by always using a burner cap.
Burner ports
Check burner flames occasionally for proper size and shape as
shown below. A good flame is blue in color, not yellow. Keep this
area free of soil and do not allow spills, food, cleaning agents or
any other material to enter the burner ports.
TripleTier
Standard Burner
®
Flame Burner
A
C
³⁄₄
" (19.1 mm)
A.
³⁄₈
" (9.53 mm)
B.
C. Burner ports
BBA
4. Replace the burner cap, making sure the alignment pins on
the cap are properly aligned with the burner base.
B
A. Incorrect
B. Correct
5. Turn on the burner. If the burner does not light, check cap
alignment. If the burner still does not light, do not service the
sealed burner yourself. Contact a trained repair specialist.
Cookware
IMPORTANT: Do not leave empty cookware on a hot surface
cooking area, element or surface burner.
Ideal cookware should have a flat bottom, straight sides and a
well-fitting lid, and the material should be of medium-to-heavy
thickness.
Rough finishes may scratch the cooktop or grates. Aluminum and
copper may be used as a core or base in cookware. However,
when used as a base they can leave permanent marks on the
cooktop or grates.
Cookware material is a factor in how quickly and evenly heat is
transferred, which affects cooking results. A nonstick finish has
the same characteristics as its base material. For example,
aluminum cookware with a nonstick finish will take on the
properties of aluminum.
Cookware with nonstick surfaces should not be used under the
broiler.
Use the following chart as a guide for cookware material
characteristics.
COOKWARE CHARACTERISTICS
Aluminum
■ Heats quickly and evenly.
■ Suitable for all types of cooking.
■ Medium or heavy thickness is best for
most cooking tasks.
B
A. 1-1¹⁄₂" (25-38 mm)
B. Burner ports
T
o Clean:
IMPORTANT: Before cleaning, make sure all controls are off and
the oven and cooktop are cool. Do not use oven cleaners, bleach
or rust removers.
10
Cast iron
Ceramic or
Ceramic glass
■ Heats slowly and evenly.
■ Good for browning and frying.
■ Maintains heat for slow cooking.
■ Follow manufacturer’s instructions.
■ Heats slowly, but unevenly.
■ Ideal results on low to medium heat
settings.
Copper ■ Heats very quickly and evenly.
COOKWARE CHARACTERISTICS
H
Earthenware ■ Follow manufacturer’s instructions.
■ Use on low heat settings.
Porcelain
■ See stainless steel or cast iron.
enamel-onsteel or cast
iron
Stainless steel ■ Heats quickly, but unevenly.
■ A core or base of aluminum or copper
on stainless steel provides even
heating.
GLASS TOUCH-ACTIVATED
ELECTRONIC OVEN CONTROL
Style 1 (Models KGRS807 and KGSS907)
C
B
D
ON
MED LOW HI
CONTROL
LOCKED
Home Canning
When canning for long periods, alternate the use of surface
burners between batches. This allows time for the most recently
used areas to cool.
■ Center the canner on the grate.
■ Do not place canner on 2 surface burners at the same time.
■ For more information, contact your local agricultural
department. Companies that manufacture home canning
products can also offer assistance.
E
CLEAN
TIME
PROBE
TEMP
F
C
HR MIN
COOK TIME
DELAY
F
MIN HR SEC MIN
START
TIME
G
STOP
TIME
I
A
A. EasyConvect conversion
B. Convection oven settings
C. Oven settings
D. Proof bread setting
E. Oven display
F. Clock/time of day display
Style 2 (Model KGSK901)
A
O
Q
P
M
N
G. Number pads
H. Start (control lock)
I. Off
J. Options selection pad
K. Clock set/start
L. Timer
B
CLEAN
TIME
PROBE
TEMP
MED LOW HI
F
C
CONTROL
ON
LOCKED
HR MIN
COOK TIME
DELAY
L
C
MIN HR SEC MIN
START
TIME
K
J
M. Stop time
N. Cook time (length of
cooking time)
O. Self-clean
P. Oven light (on/off)
Q. Warming drawer controls
D
STOP
TIME
E
A. Oven settings
B. Oven display
C. Clock/time of day display
D. Number pads
M
L
K
E. Start (control lock)
F. O f f
G. Options selection pad
H. Clock set/start
J
I
H
I. Timer
F
G
J. Stop time
K. Cook time (length of cooking time)
L. Self-clean
M. Oven light (on/off)
11

Electronic Control Pads
When pressing any control pad function on the Electronic Oven
Control, use the pad of your finger to press the desired function.
Hold down the pad a few seconds, or until the desired function
appears in the display.
When entering multiple functions within one setting, pause briefly
between each control pad command. If a command pad is
pressed several times repeatedly, the pad may briefly stop
working. Wait a few seconds, and the pad should function again
as normal.
Oven Displays
When the oven is in use, this display shows the oven
temperature, heat source(s) and start time. During Timed
Cooking, this display also shows a timed countdown and the
stop time (if entered).
If “Err” appears on the display, an invalid pad was pressed.
Press OFF and retry your entry.
When the oven is not in use this display is blank, except for the
clock display.
Timer
The Timer can be set in minutes and seconds or hours and
minutes and counts down the set time.
NOTE: The Timer does not start or stop the oven.
To Se t Ti me r :
1. Press TIMER SET/START.
Press again to switch from MIN/SEC and HR/MIN.
2. Press the number pads to set length of time.
3. Press TIMER SET/START to start the timer.
When the set time ends, timer completion tones will sound,
then reminder tones will sound approximately every
10 seconds.
4. Press TIMER OFF anytime to cancel the Timer and/or stop
reminder tones.
If OFF is pressed, the oven will turn off.
The time can be reset during the countdown by repeating the
above steps.
Start
The START pad begins any oven function except the Timer,
Control Lock and Sabbath Mode. If not pressed within 5 seconds
after pressing a pad, “START?” will appear on the oven display as
a reminder. If not pressed within 5 minutes after pressing a pad,
the oven display will return to inactive mode (blank) and the
programmed function will be canceled.
If a function has been started and a different function is selected,
“START?” will appear in the display after 5 seconds. If the START
pad is not pressed within 5 seconds, the oven display will return
to the active/already started function.
Control Lock
The Control Lock feature shuts down the control panel pads to
avoid unintended use of the oven.
The Control Lock feature may be used either when the range is in
use or turned off (for example, during cleaning).
The Control Lock is preset unlocked, but can be locked.
When the control is locked, only the TIMER SET/START, TIMER
OFF and OVEN LIGHT pads will function.
To Lock/Unlock Control: Before locking, make sure the oven,
the Timer and Timed Cooking are off. Press and hold the START
pad for 5 seconds until “CONTROL LOCK” appears on the
display. Repeat to unlock and remove “CONTROL LOCK” from
the display.
OPTIONS
Options Selection Pad
The OPTIONS selection pad allows you to access special
functions within the Electronic Oven Control that allow you to
customize the product to your needs. These special functions
allow you to change the oven temperature between Fahrenheit
and Celsius, turn the audible signals and prompts on and off, and
adjust the oven calibration. The Dehydrate and Sabbath Mode
are also set using the OPTIONS selection pad.
To Us e:
Press OPTIONS. The oven display will scroll through the various
options, starting at 1 and ending in 7. You can also press the
OPTIONS selection pad and number pad to quickly enter the
desired hidden function.
OPTIONS SPECIAL FUNCTION
1 Fahrenheit and Celsius conversion
2Tones On/Off
3 Tones High/Low
4 Cooking Time Completion Tones On/Off
5* Dehydrate
6 Oven temperature calibration
7 Sabbath Mode
Off
The OFF pad stops any oven function except for the Clock, Timer
and Control Lock.
Clock/Timer Display
This is a 12-hour clock.
To Set Clock:
1. Press CLOCK SET/START.
2. Press number pads to set time of day.
3. Press CLOCK SET/START.
12
*Available only on convection models.
Fahrenheit and Celsius - Option 1
Fahrenheit is the default setting, but setting may be changed to
Celsius.
To Ch ang e: Press OPTIONS, then 1 on the keypad for Celsius.
To convert back to Fahrenheit, press OPTIONS, then 1 again on
the keypad.

Tones - Options 2, 3, 4
Tones are audible signals, indicating the following:
One beep
■ Function has been entered
Three beeps
■ Invalid pad press
Preheat Completion Tone
One chime indicates a preheat cycle has been completed.
Timer Completion Tones
Three chimes sound when the timer reaches zero. This can occur
when using the timer for functions other than cooking.
Cooking Time Completion Tones
Three beeps indicate the end of a cooking cycle.
All Tones ON/OFF
All tones are preset to ON, but can be turned OFF.
To change: Press OPTIONS, then 2 to turn tones OFF. To turn
tones ON, press OPTIONS again, and then 2.
Tone Volume High/Low
The volume is preset to HIGH, but can be changed to LOW.
To change: Press OPTIONS, then 3 for LOW. Press OPTIONS,
then 3 again for HIGH.
Cooking Time Completion Tones ON/OFF
All tones are preset to ON, but can be turned OFF.
To change: Press OPTIONS, then 4 to turn tones OFF. To turn
tones ON, press OPTIONS again, and then 4.
Oven Temperature Calibration -
Option 6
IMPORTANT: Do not use a thermometer to measure oven
temperature because opening the oven door during cycling may
give incorrect readings.
The oven provides accurate temperatures; however, it may cook
faster or slower than your previous oven, so the temperature
calibration can be adjusted. It can be changed in Fahrenheit or
Celsius.
A minus sign means the oven will be cooler by the displayed
amount. The absence of a minus sign means the oven will be
warmer by the displayed amount. Use the following chart as a
guide.
ADJUSTMENT °F
(AUTOMATIC °C CHANGE)
10°F (5°C) ...a little more
20°F (10°C) ...moderately more
30°F (15°C) ...much more
-10°F (-5°C) ...a little less
-20°F (-10°C) ...moderately less
-30°F (-15°C) ...much less
To A djust Ov en Tem per at ure Ca li bra ti on :
1. Press OPTIONS, and then 6 to set the calibration.
2. Press 3 to increase the temperature, or press 6 to decrease
the temperature.
3. Press START to end calibration.
COOKS FOOD
Dehydrate - Option 5
(on convection models, closed door)
Dehydration is a method used to preserve food. Various factors,
such as the quality of the fresh food, pretreatment techniques,
the size and thickness of the food, and the climate may affect the
finished product.
During dehydration, heat is used to force out moisture and air
circulation is used to carry the moisture away.
Refer to a reliable book or source for complete information about
dehydrating and preserving foods.
To De hy dr at e:
Position the racks according to the following chart. See
“Positioning Racks and Bakeware” section for diagram.
NUMBER OF RACKS RACK POSITION(S)
13
22 and 4
31, 3 and 5
1. Close the oven door.
2. Press OPTIONS then 5.
Press the number pads to enter a temperature other than
140°F (60°C). The dehydrating range can be set between
100°F and 200°F (38°C and 93°C).
3. Press START.
4. Press OFF when finished dehydrating.
NOTE: The oven will automatically turn off after 12 hours.
However, some foods may take more than 12 hours to dehydrate.
If this is the case, the oven will need to be restarted.
The Sabbath Mode sets the oven to remain on in a bake setting
until turned off. A timed Sabbath Mode can also be set to keep
the oven on for only part of the Sabbath.
When the Sabbath Mode is set, only the number and start pads
will function, no tones will sound, and the displays will not show
messages or temperature changes. The heat sources icons will
appear lit on the oven display throughout the Sabbath Mode.
When the oven door is opened or closed, the oven light will not
turn on or off and the heating elements will not turn on or off
immediately.
If a power failure occurs when the Sabbath Mode is set, the oven
will remain Sabbath Mode compliant but will no longer be actively
cooking. The “ON” indicator will no longer be illuminated. Press
OFF to return to normal operating mode (non-Sabbath Mode
compliant, not cooking).
To Activate:
IMPORTANT: Before the Sabbath Mode can be regularly set, the
oven must first be enabled with a one time only setup.
1. Open the oven door.
2. Press OFF.
3. Press the number pads 7, 8, 9, 6, in this order.
4. Press START to activate.
5. Press OFF pad to clear the display.
To Deactivate:
The oven can be disabled of the ability to set the Sabbath Mode
by repeating the steps in the previous “To Activate” section.
When disabled the Sabbath Mode cannot be regularly set until
re-enabled.
Sabbath Mode - Option 7
“SABBATH ENABLED” will appear on the display.
13
To Regularly Set, Untimed:
1. Press BAKE.
Press the number pads to enter a temperature other than
325°F (163°C). The bake range can be set between 170°F
and 500°F (77°C and 260°C).
2. Press START. The oven will begin a bake cycle.
3. Press OPTIONS, and then press number pad 7.
4. “SABBATH MODE” will appear on the oven display.
To Regularly Set, Timed:
WARNING
To Change Temperature:
1. Press the number pad from the chart.
2. Press START.
Warming Drawer Operation During Sabbath Mode
The warming drawer may be set for use during Sabbath Mode.
This is accomplished by pressing the WARMING DRAWER ON
key (continue pressing until desired temperature level is
displayed) before the oven is placed into its Sabbath Mode
compliant state. See “To Regularly Set, Untimed” section for
instructions on placing the oven into its Sabbath Mode compliant
state. Once the oven is in its Sabbath Mode compliant state, the
warming drawer cannot be turned on or off and its temperature
cannot be changed until the oven is returned to its normal
operating state (non-Sabbath Mode compliant state, not cooking)
by pressing the OFF key.
Food Poisoning Hazard
Do not let food sit in oven more than one hour before
or after cooking.
Doing so can result in food poisoning or sickness.
1. Press BAKE.
Press the number pads to enter a temperature other than
325°F (163°C). The bake range can be set between 170°F
and 500°F (77°C and 260°C).
2. Press COOK TIME.
3. Press the number pads to enter the length of Sabbath Mode
time, up to 11 hours 59 minutes.
4. Press START. The oven will begin a timed bake cycle.
The start time and stop time will appear on the display.
5. Press OPTIONS, and then press number pad 7. “SABBATH
MODE” will appear on the display.
6. When the stop time is reached, the oven will automatically
turn off. The oven control will remain Sabbath Mode
compliant until the OFF button is pressed.
Temperature Change
The oven temperature can be changed when the oven(s) are in
the Sabbath Mode. No tones will sound, and the display will not
change. The heating elements will not turn on or off for a random
time, anywhere from 16 to 24 seconds. It may take up to ½ hour
for the oven to change temperature.
Number pads 1 through 0 represent temperatures. Use the
following chart as a guide.
NUMBER PAD OVEN TEMPERATURE
1 170°F (77°C)
2 200°F (95°C)
3 225°F (107°C)
4 250°F (120°C)
5 300°F (149°C)
6 325°F (163°C)
7 350°F (177°C)
8 375°F (191°C)
9 400°F (204°C)
OVEN USE
Odors and smoke are normal when the oven is used the first few
times, or when it is heavily soiled.
IMPORTANT: The health of some birds is extremely sensitive to
the fumes given off. Exposure to the fumes may result in death to
certain birds. Always move birds to another closed and wellventilated room.
NOTE: This oven automatically adjusts for 208V operation
without affecting cooking performance. Preheat times may be
longer.
Aluminum Foil
IMPORTANT: To avoid permanent damage to the oven bottom
finish, do not line the oven bottom with any type of foil or liner.
■ On those models with bottom vents, do not block or cover
the oven bottom vents.
■ For best cooking results, do not cover entire rack with foil
because air must be able to move freely.
■ To catch spills, place foil on rack below dish. Make sure foil is
at least ¹⁄₂" (1.3 cm) larger than the dish and that it is turned
up at the edges.
Bakeware
The bakeware material affects cooking results. Follow
manufacturer’s recommendations and use the bakeware size
recommended in the recipe. Use the following chart as a guide.
BAKEWARE/
RESULTS
Light colored
aluminum
■ Light golden crusts
■ Even browning
Dark aluminum and
other bakeware with
dark, dull and/or
nonstick finish
■ Brown, crisp
crusts
RECOMMENDATIONS
■ Use temperature and time
recommended in recipe.
■ May need to reduce baking
temperatures slightly.
■ Use suggested baking time.
■ For pies, breads and casseroles,
use temperature recommended in
recipe.
■ Place rack in center of oven.
0 450°F (232°C)
14
BAKEWARE/
B
RESULTS
RECOMMENDATIONS
Keep probe as far away from heat source as possible. Close oven
door.
Insulated cookie
sheets or baking
pans
■ Little or no bottom
browning
Stainless steel
■ Light, golden
crusts
■ Uneven browning
Stoneware/Baking
stone
■ Crisp crusts
Ovenproof
glassware, ceramic
glass or ceramic
■ Brown, crisp
crusts
■ Place in the bottom third of oven.
■ May need to increase baking time.
■ May need to increase baking time.
■ Follow manufacturer’s instructions.
■ May need to reduce baking
temperatures slightly.
Meat Thermometer
On models without a temperature probe, use a meat
thermometer to determine whether meat, poultry and fish, are
cooked to the desired degree of doneness. The internal
temperature, not appearance, should be used to determine
doneness. A meat thermometer is not supplied with this
appliance. Follow manufacturer's directions for using a meat
thermometer.
Temperature Probe
(on convection models)
A
A. Temperature probe jack
B. Temperature probe
1. Press the number pads to enter a probe temperature. The
probe temperature can be set between 130°F and 190°F
(54°C and 88°C).
2. Press BAKE, CONVECT BAKE or CONVECT ROAST.
Press number pads to enter a temperature other than the one
displayed.
3. Press START.
The set oven temperature will appear on the oven display
throughout cooking.
“Lo” will appear as the probe temperature until the internal
temperature of the food reaches 130°F (54°C) or if the probe
is unplugged. Then the display will show the temperature
increasing in 1°F increments.
When the set probe temperature is reached, the oven will
shut off automatically and “Cooking Complete” will appear on
the oven display.
If enabled, end-of-cycle tones will sound.
4. Press OFF or open the oven door to clear the display.
WARNING
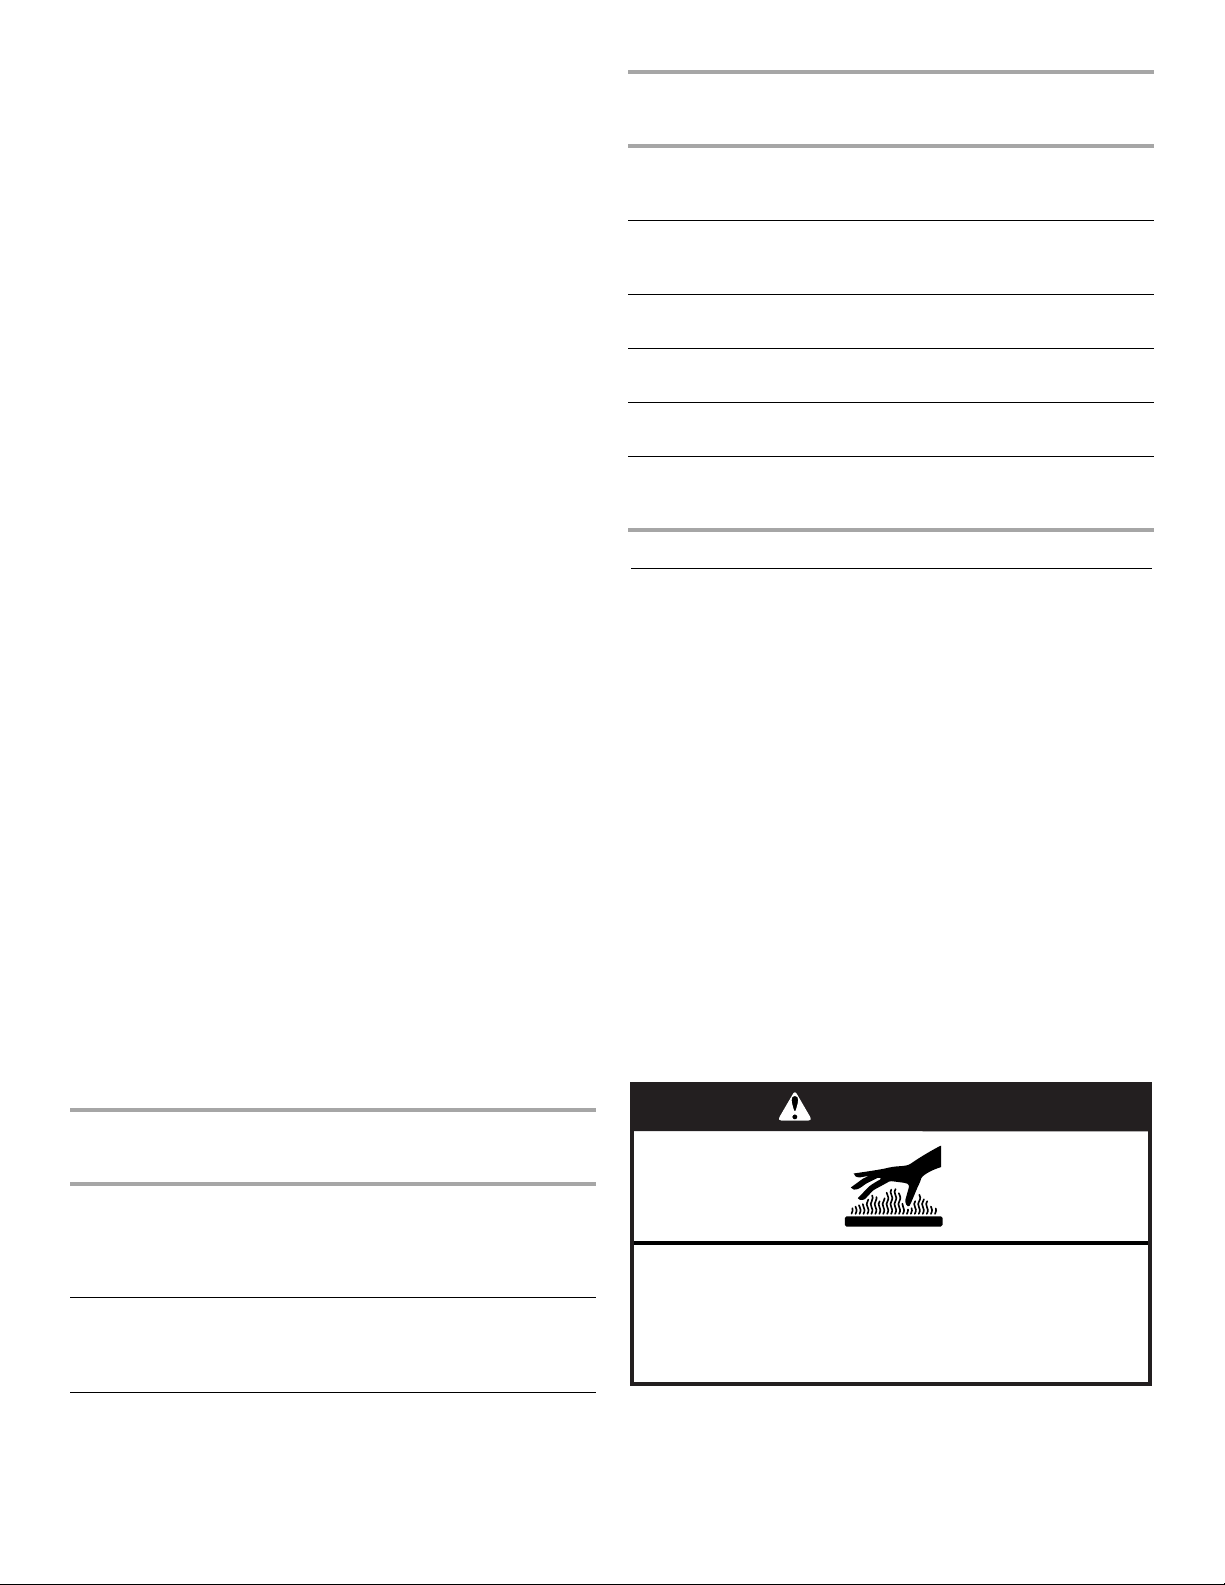
Burn Hazard
Use an oven mitt to remove temperature probe.
Do not touch broil element.
Failure to follow these instructions can result in burns.
The temperature probe accurately measures the internal
temperature of meat, poultry and casseroles with liquid and
should be used in determining the doneness of meat and poultry.
It should not be used during full and center broiling, convection
broiling, dehydrating or proofing bread.
Always unplug and remove the temperature probe from the oven
when removing food.
To Us e:
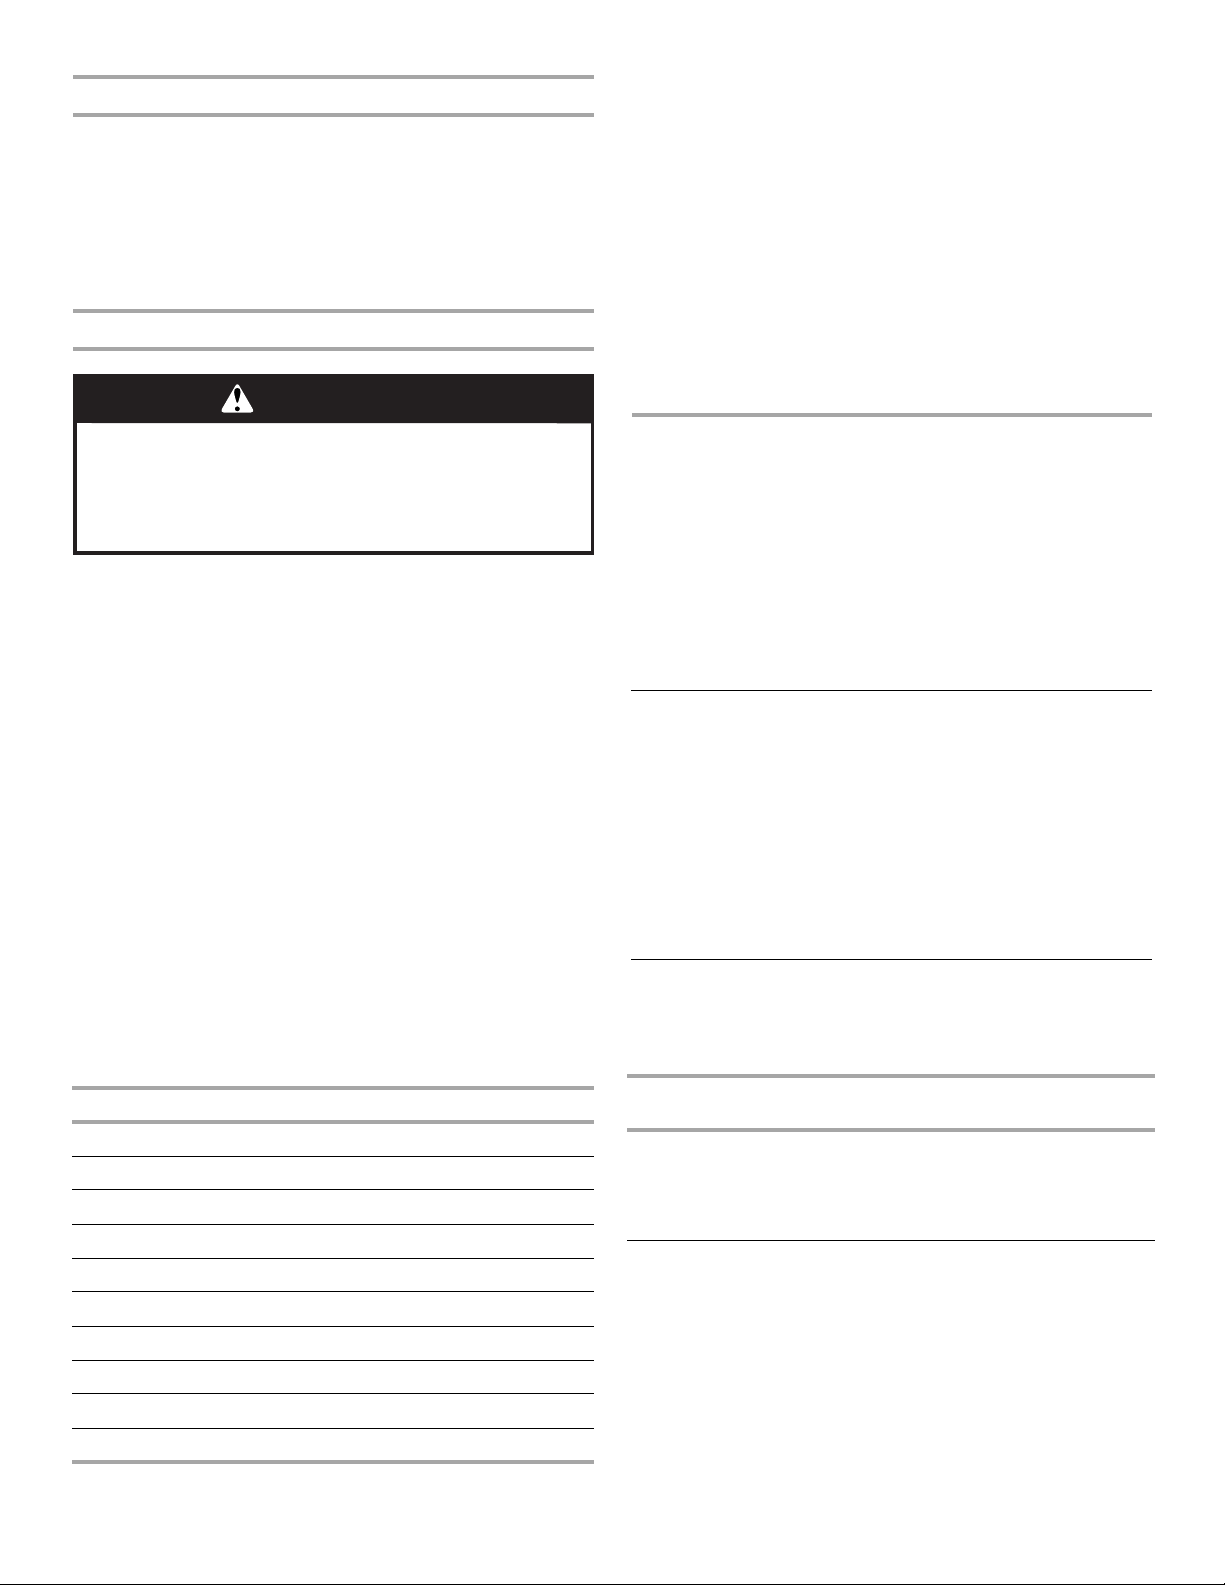
Before using, insert the probe into the center of the thickest
portion of meat or into the inner thigh or breast of poultry, away
from fat or bone at an angle as shown in following diagram. Place
food in oven and connect the temperature probe to the jack.
To Change Probe Temperature, Oven Setting:
Press OFF, then repeat previous steps.
After cooking, unplug the probe and remove food from oven. The
probe symbol will remain lit until the probe is unplugged from the
probe jack.
See “General Cleaning” section to clean probe.
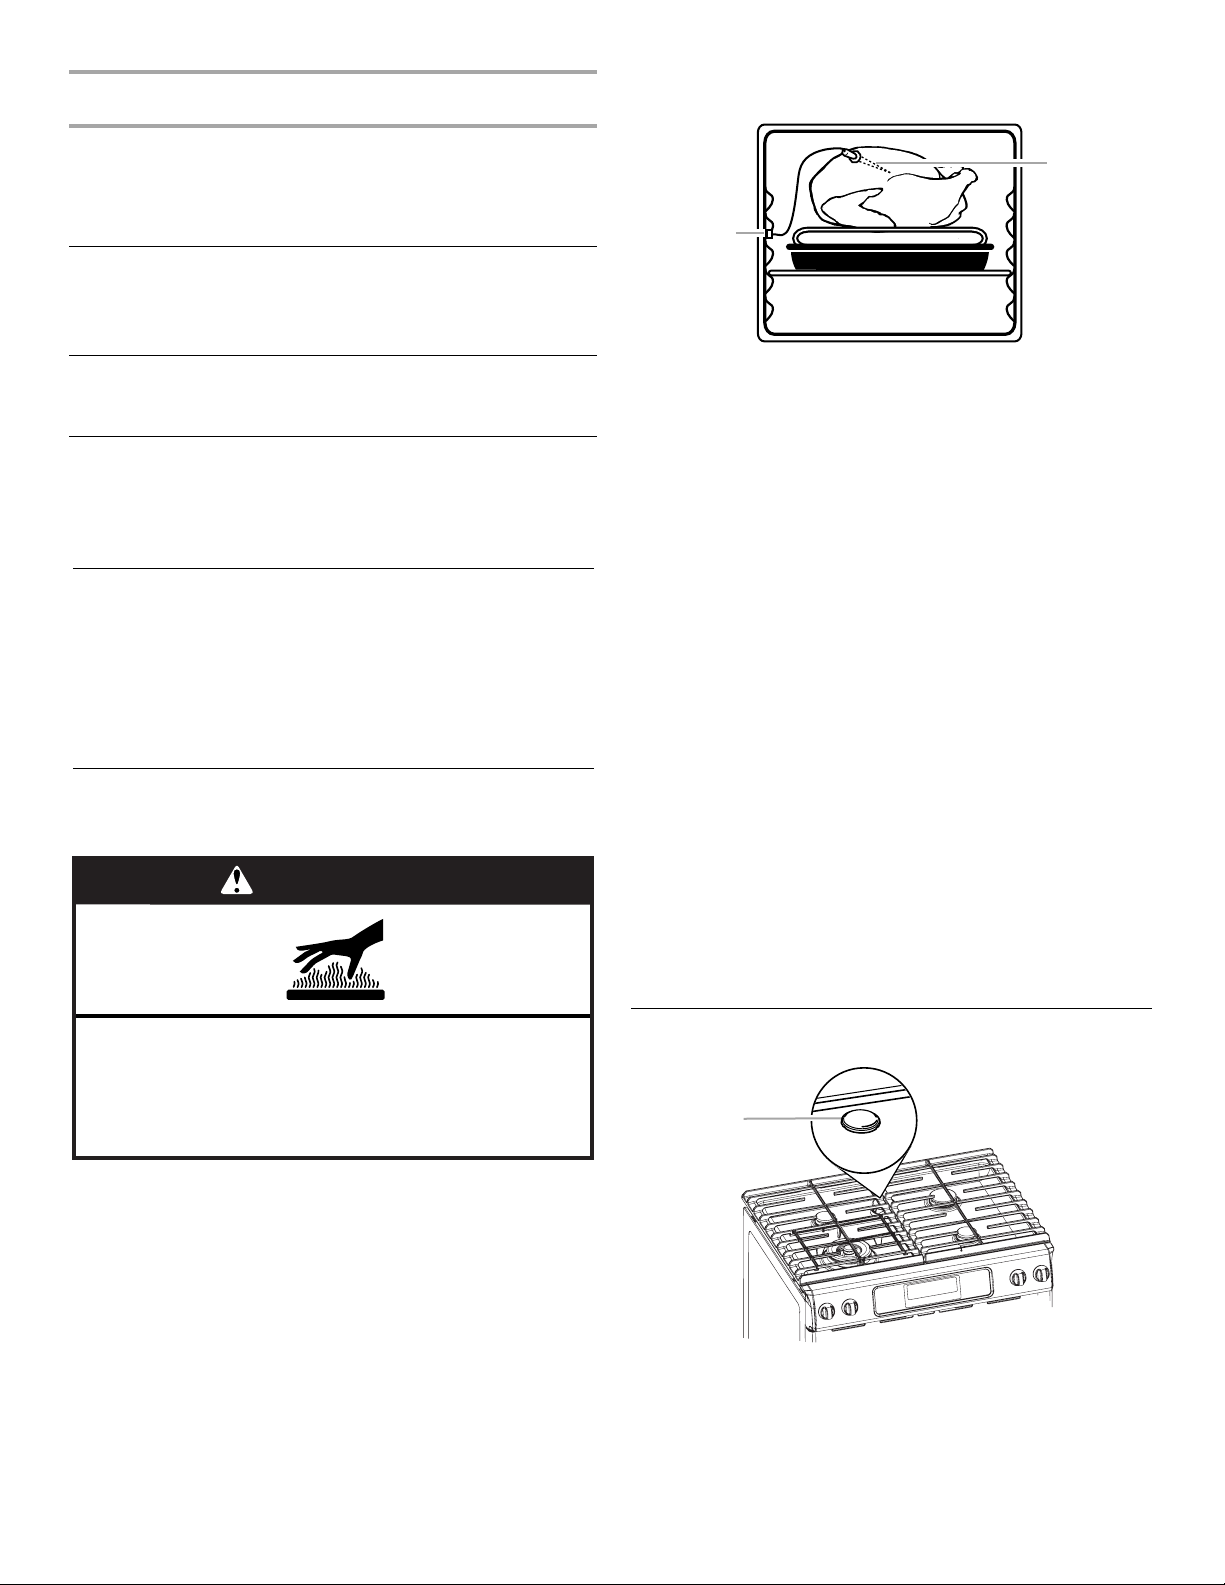
Oven Vent
A
A. Oven vent cap
The oven vent should not be blocked or covered since it allows
the release of hot air and moisture from the oven. Blocking or
covering the oven vent will cause poor air circulation, affecting
cooking and cleaning results. Do not set plastics, paper or other
items that could melt or burn near the oven vent.
15
Positioning Racks and Bakeware
IMPORTANT: To avoid permanent damage to the porcelain
finish, do not place food or bakeware directly on the oven door or
bottom.
RACKS
■ Position racks before turning on the oven.
■ Do not position racks with bakeware on them.
■ Make sure racks are level.
To move a rack, pull it out to the stop position, raise the front
edge, then lift out. Use the following illustration and charts as a
guide.
5
4
3
2
1
Traditional Cooking
FOOD RACK POSITION*
Large roasts, turkeys, angel food,
bundt cakes, quick breads, pies
Yeast breads, casseroles, meat and
poultry
Cookies, biscuits, muffins, cakes 2 or 3
*On models with the CleanBake™ feature, foods may be placed
on a lower rack position.
Convection Cooking
OVEN SETTING NUMBER OF
RACKS USED
Convection Bake 1 1, 2 or 3
Convection Bake 2 1 or 2 and 4
Convection Bake 3 1, 3 and 5
Convection Roast 1 1, 2 or 3
Convection Broil 1 3 or 4
BAKEWARE
To cook food evenly, hot air must be able to circulate. For
traditional cooking, allow 2" (5 cm) of space around bakeware
and oven walls. For convection cooking, allow 1" (2.5 cm) of
space around bakeware and oven walls. Use the following chart
as a guide.
NUMBER
OF PAN(S)
1 Center of rack.
2 Side by side or slightly staggered.
3 or 4 Placement that gives best result. Make sure that
POSITION ON RACK
no bakeware piece is directly over another.
1 or 2
2
RACK
POSITION(S)
Bake
A
B
A. Broil elements
B. Bake element
The BAKE function is ideal for baking, roasting or heating foods.
During baking or roasting, the bake burner and broil element will
cycle on and off in intervals to maintain oven temperature.
If the oven door is opened during baking or roasting, the broil
element will turn off immediately and the bake burner will turn off
in 30 seconds to 2 minutes. They will come back on once the
door is closed.
To Bake or Roast:
Before baking and roasting, position racks according to the
“Positioning Racks and Bakeware” section.
For baking, allow the range to preheat before placing food in the
oven. When roasting, it is not necessary to wait for the oven to
preheat before putting food in, unless recommended in the
recipe.
1. Press BAKE once for 350°F (177°C), or press the number
pads to enter the desired temperature.
2. Press START.
“Preheating” will show in the display until the set temperature
is reached.
“Lo” will also appear in the display if the actual oven
temperature is under 170°F (77°C).
When the actual oven temperature reaches 170°F (77°C), the
oven display will show the oven temperature increasing in
1-degree increments.
When the set temperature is reached, if on, 1 tone will sound.
3. Press OFF when finished cooking.
Broil
This range has both a gas burner and an electric halo element
that work together to enhance broiling performance on the broiler
pan and grid provided.
Broiling uses direct radiant heat to cook food. There are 2 broiling
choices, Full Broil and Center Broil. Full Broil uses both the gas
burner and electric halo elements for maximum browning
coverage of foods. Center Broil uses the inner element for
browning coverage of a smaller area.
■ For best results, use a broiler pan and grid. It is designed to
drain juices and help avoid spatter and smoke.
If you would like to purchase a Broiler Pan Kit, it may be
ordered. See “Assistance or Service” section to order. Ask for
Part Number W10123240.
■ For proper draining, do not cover the grid with foil. The
bottom of the pan may be lined with aluminum foil for easier
cleaning.
■ Trim excess fat to reduce spattering. Slit the remaining fat on
the edges to avoid curling.
16
■ Pull out oven rack to stop position before turning or removing
food. Use tongs to turn food to avoid the loss of juices. Very
thin cuts of fish, poultry or meat may not need to be turned.
■ After broiling, remove the pan from the oven when removing
the food. Drippings will bake on the pan if left in the heated
oven, making cleaning more difficult.
■ If the oven door is opened during broiling, the boil element
will turn off and come back on once the door is closed.
Before broiling, position rack according to the Broiling Chart. It is
not necessary to preheat the oven before putting food in unless
recommended in the recipe. Position food on grid in the broiler
pan, then place it in the center of the oven rack.
Close the door to ensure proper broiling operation.
To Us e:
1. Press BROIL once for FULL BROIL or twice for CENTER
BROIL.
Choose Full Broil to broil larger amounts of food using both
the broil burner and the broil element. Choose Center Broil to
broil smaller amounts of food using only the inner broil burner.
2. Press START.
3. Press OFF when finished.
FOOD RACK
Pork chops
1" (2.5 cm) thick 4 450°F
Ham slice [precooked]
¹₂" (1.25 cm) thick
1" (2.5 cm) thick
Frankfurters 4 500°F
Lamb chops
1" (2.5 cm) thick 4
Chicken
bone-in pieces 3
Fish
¹₂" (1.25 cm) thick
1" (2.5 cm) thick
*Place up to 9 patties, equally spaced, on broiler grid.
POSITION
4
4
3
3
TEMP. TOTAL
(232°C)
500°F
(260°C)
(260°C)
400°F
(204°C) 18-20
500°F
(260°C) 32
350°F
(177°C)2020-22
TIME
MIN.
25-28
10-12
20-22
8
Variable Temperature Broiling
Changing the temperature when Variable Temperature Broiling
allows more precise control when cooking. The lower the
temperature, the slower the cooking. Thicker cuts and unevenly
shaped pieces of meat, fish and poultry may cook better at lower
broiling temperatures.
To Us e:
1. Close oven door.
2. Press BROIL once for FULL BROIL or twice for CENTER
BROIL.
3. Press the number pads to set a temperature between 300°F
and 500°F (149°C and 260°C).
4. Press START.
The temperature can be changed after this step. Press the
number pads to reset the temperature, then press START.
5. Press OFF when finished.
BROILING CHART
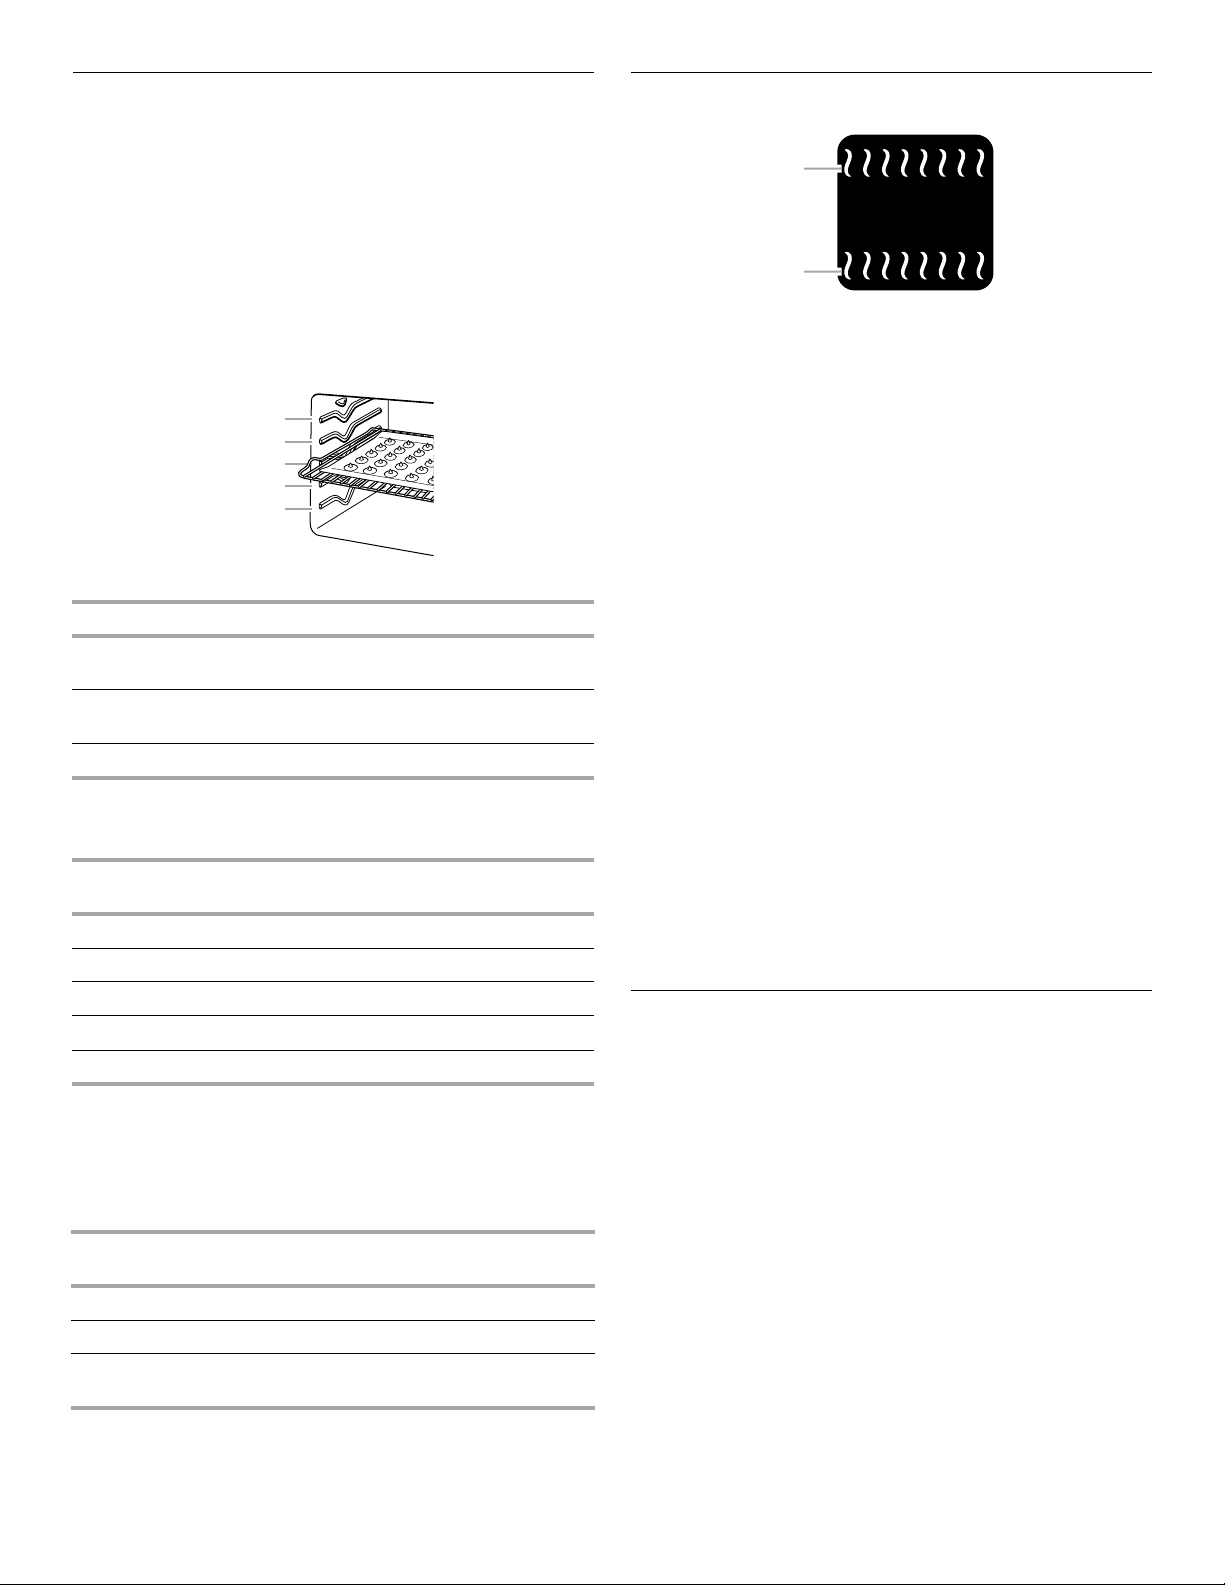
For best results, place food 3" (7 cm) or more from the broil
element. Times are guidelines only and may need to be adjusted
for individual tastes. Recommended rack positions are numbered
from the bottom (1) to 4. For diagram, see the “Positioning Racks
and Bakeware” section.
FOOD RACK
POSITION
TEMP. TOTAL
TIME
MIN.
Convection Cooking
(on some models)
In a convection oven, the fan-circulated hot air continually
distributes heat more evenly than the natural movement of air in a
standard thermal oven. This movement of hot air helps maintain a
consistent temperature throughout the oven, cooking foods more
evenly, crisping surfaces while sealing in moisture and yielding
crustier breads.
Most foods can be cooked by lowering cooking temperatures
25°F to 50°F (14°C to 28°C), and cooking time can be shortened
by as much as 30 percent, especially for large turkeys and roasts.
■ It is important not to cover foods with lids or aluminum foil so
that surface areas remain exposed to the circulating air,
allowing browning and crisping.
■ Keep heat loss to a minimum by opening the oven door only
when necessary.
■ Choose cookie sheets without sides and roasting pans with
lower sides to allow air to move freely around the food.
■ Test baked goods for doneness a few minutes before the
minimum cooking time with a method such as using a
toothpick.
WARNING
Steak
1" (2.5 cm) thick
medium rare
medium
well-done
Steak
1¹⁄₂" (3.8 cm) thick
rare
medium
Ground meat patties*
1" (2.5 cm) thick
well-done 4
4
4
4
4
4
500°F
(260°C)1416
18
500°F
(260°C)2328
500°F
(260°C) 16-18
Burn Hazard
Use an oven mitt to remove temperature probe.
Do not touch broil element.
Failure to follow these instructions can result in burns.
■ Use a meat thermometer or the temperature probe (on some
models) to determine the doneness of meats and poultry.
17
 Loading...