

KitchenAid KG25H3XSL5, KG25H0XOB5, KV25MCXSL5, KG25H0XBK5, KG25H3XOB5 Instructions And Recipes Manual
...
®
BOWL-LiFT
STAND MIXER
iNSTRUCTiONS AND RECIPES
BATTEUR A
BOL AMOVIBLE
iNSTRUCTiONS ET RECETTES
BATIDORA
CON TAZON
QUE SELEVANTA
iNSTRUCCIONES Y RECETAS
USA: 1-800-541-6390 KitchenAid.com
Canada: 1-800-807-6777 KitchenAid.ca
Proof of Purchase
Always keep a copy of the sales receipt
showing the date of purchase of your
Stand Mixer. Proof of purchase will
assure you of in-warranty service.
Before you use your Stand Mixer,
please fill out and mail your product
registration card packed with the unit.
This card will enable us to contact you
in the unlikely event of a product safety
notification and assist us in complying
with the provisions of the Consumer
Product Safety Act. This card does not
verify your warranty.
Pleasecomplete the following for your
personal records:
Model Number
Date Purchased
Store Name and Location
Preuve d'achat
Conservez toujours une copie de la
facture indiquant la date d'achat de
votre batteur sur socle. La preuve
d'achat vous assurera un service sous
garantie.
Avant d'utiliser votre batteur sur socle,
veuillez remplir et postez votre carte
d'enregistrement de produit fournie
avec I'unit6.
Num@o de module
Cette carte nous permet de vous
contacter dans le cas fort peu probable
d'une notification de s6curit6 du produit
et nous aidera _ nous conformer aux
provisions de la Ioi am@icaine sur la
s6curit6 du produit au consommateur.
Cette carte ne v@ifie pas votre garantie.
Veuillez remplir cequi suit pour vos
dossiers:
Date d'achat
Nom du magasin et emplacement
Comprobante de compra
Guarde siempre una copia del recibo
de compra que muestre la fecha en
que adquiri6 su batidora con base. El
comprobante de compra le asegura su
derecho al servicio de garantia.
Antes de utilizar su batidora con base,
por favor complete y envie por correo
la tarjeta de registro del producto que
viene junto con la unidad.
N0mero del modelo
Esta tarjeta nos permitir& comunicarnos
con usted en el remoto caso que se
d6 un aviso de seguridad del producto
y nos ayudar& a cumplir con las
disposiciones de la Ley de Seguridad de
Productos de Consumo. Esta tarjeta no
confirma su garantia.
Por favor, complete los siguientes datos
para su registro personal:
Fechade compra
Nombre de la tienda y direcci6n
TABLEOF CONTENTS
INTRODUCTION
Proof of Purchase ................................................................ Inside Front Cover
Stand Mixer Safety........................................................................................ 3
Important Safeguards ................................................................................... 3
Electrical Requirements ................................................................................. 4
WARRANTYAND SERVICEINFORMATION
Kitchenaid _ Stand Mixer Warranty ................................................................ B
Hassle-FreeReplacement Warranty
BOUnited States and District Of Columbia .................................................... 6
Hassle-FreeReplacement Warranty Canada ................................................ 6
How to Arrange for Warranty Servicein Puerto Rico..................................... 7
How to Arrange for Service after the Warranty Expires All Locations .......... 7
How to Arrange for Service Outside these Locations ..................................... 7
How to Order Accessories and Replacement Parts......................................... 8
FEATURESAND OPERATION
Troubleshooting Problems ............................................................................. 9
Bowl-Lift Stand Mixer Features.................................................................... 10
Assembling Your Bowl-Lift Stand Mixer ....................................................... 13
Pre-UseCleaning ................................................................................. 13
Attaching Mixing Bowl ........................................................................ 13
Raising and Lowering Mixing Bowl ...................................................... 13
Removing Mixing Bowl ........................................................................ 13
Attaching the Flat Beater, Wire Whip and
PowerKnead TM Spiral Dough Hook ....................................................... 14
Removing the Flat Beater,Wire Whip and
PowerKnead TM Spiral Dough Hook ....................................................... 14
Using The Pouring Shield (not included with all models) ............................. 1B
Attaching the Pouring Shield ............................................................... 1B
Using the Pouring Shield ..................................................................... 1B
Removing the Pouring Shield ............................................................... 1B
Cleaning the Pouring Shield................................................................. 1B
Using the KitchenAid _ Stand Mixer Accessories........................................... 16
Bowl-Lift Stand Mixer Use........................................................................... 17
Operating the Mixer ............................................................................ 17
Commercial Style Motor Protection ...................................................... 17
Speed Control Guide................................................................................... 18
Care and Cleaning ...................................................................................... 19
Cleaning the Stand Mixer and Accessories ........................................... 19
Beater to Bowl Clearance............................................................................ 20
Continued on next page
TABLEOF CONTENTS
Mixing Tips ................................................................................................
Egg Whites ................................................................................................
Whipping Cream .......................................................................................
Stand Mixer Attachments ..........................................................................
Mounting Attachments ......................................................................
Removing Attachments ......................................................................
Stand Mixer Accessories .............................................................................
General Instructions for Mixing and Kneading Yeast Dough
21
22
22
23
23
23
25
with the Rapid Mix Method ........................................................................ 26
Bread Making Tips ...................................................................................... 27
Shaping a Loaf ............................................................................................ 28
RECIPES
Basic White Bread ....................................................................................... 29
Whole Grain Wheat Bread .......................................................................... 30
French Bread ............................................................................................... 31
Honey Oatmeal Bread ................................................................................. 32
Crusty Pizza Dough ..................................................................................... 33
Basic Sweet Dough ..................................................................................... 34
Cinnamon Swirl Rounds .............................................................................. 35
STAND MIXER SAFETY
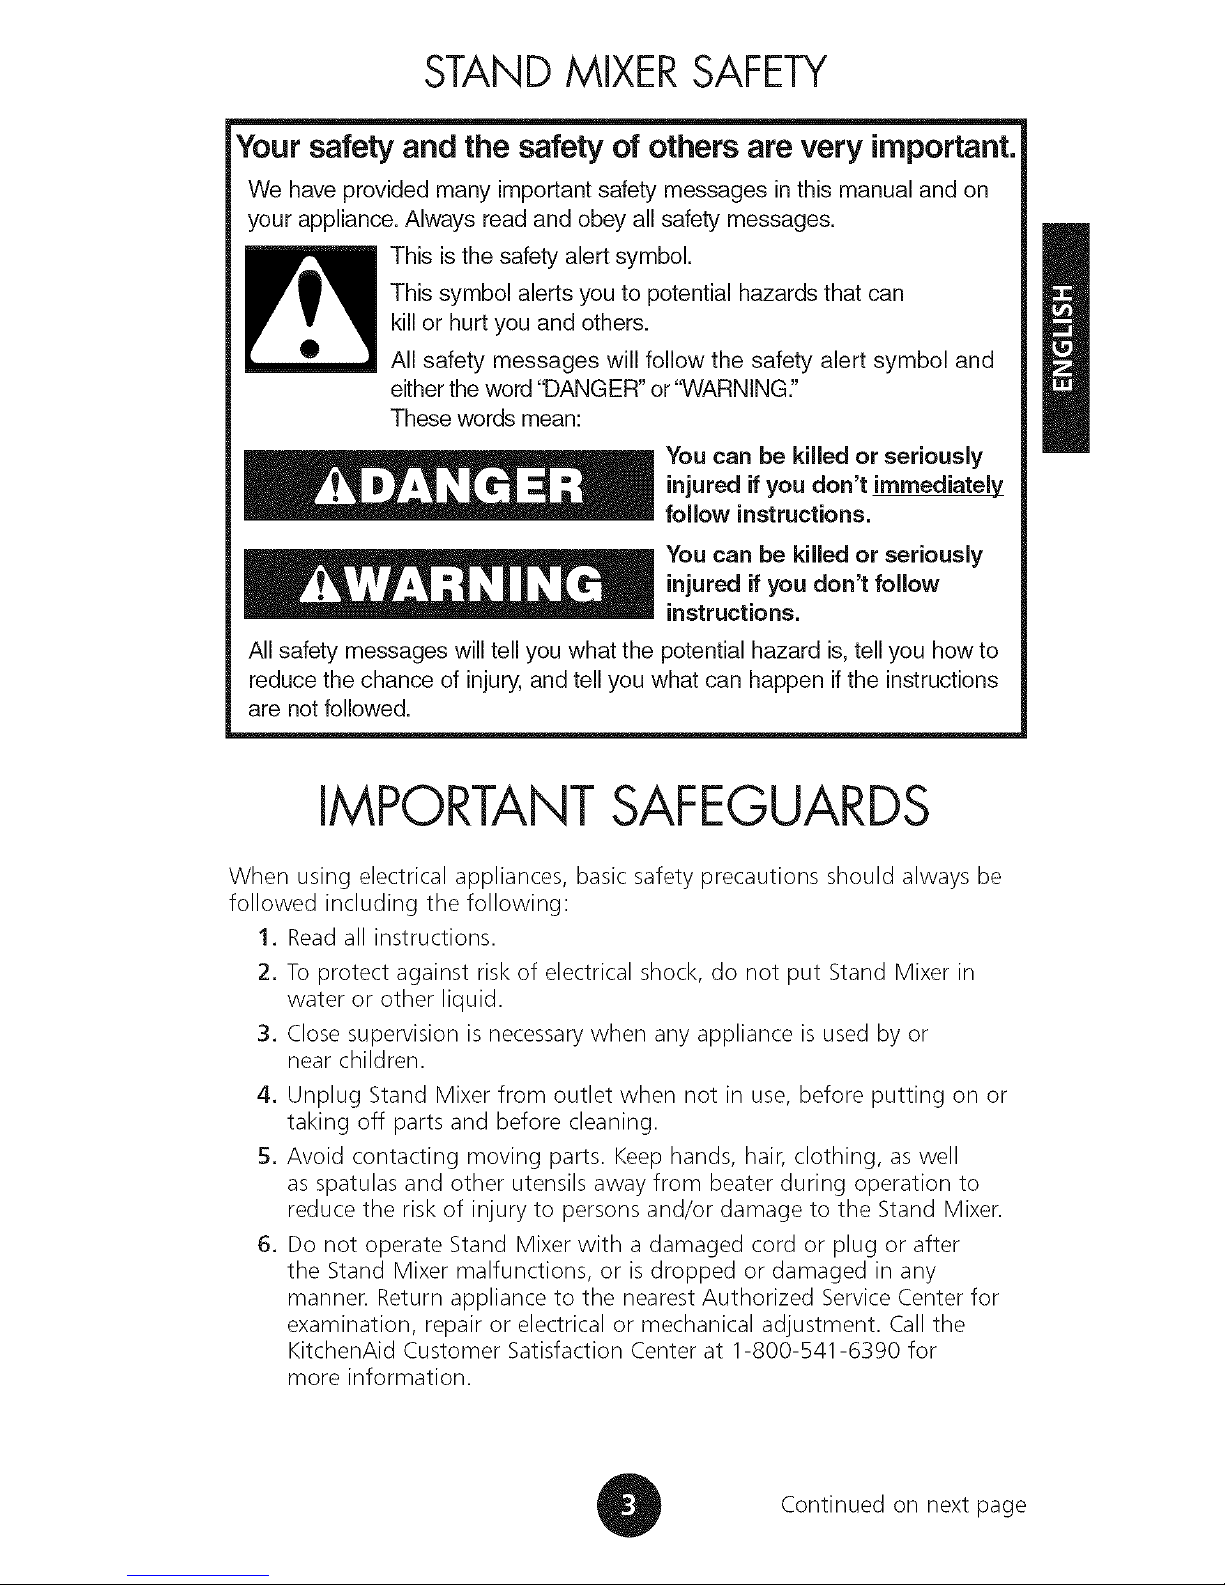
Your safety and the safety of others are very important.
We have provided many important safety messages in this manual and on
your appliance. Always read and obey all safety messages.
This is the safety alert symbol.
This symbol alerts you to potential hazards that can
kill or hurt you and others.
All safety messages will follow the safety alert symbol and
either the word "DANGER" or'_VARNING:'
These words mean:
You can be killed or seriously
injured if you don't immediately
follow instructions.
You can be killed or seriously
injured if you don't follow
instructions.
All safety messages willtell you what the potential hazard is, tell you how to
reduce the chance of injury, and tell you what can happen ifthe instructions
are not followed.
IMPORTANT SAFEGUARDS
When using electrical appliances, basic safety precautions should always be
followed including the following:
1. Readall instructions.
2. To protect against risk of electrical shock, do not put Stand Mixer in
water or other liquid.
3. Close supervision is necessarywhen any appliance is used by or
near children.
4. Unplug Stand Mixer from outlet when not in use, before putting on or
taking off parts and before cleaning.
5. Avoid contacting moving parts. Keep hands, hair, clothing, aswell
as spatulas and other utensils away from beater during operation to
reduce the risk of injury to persons and/or damage to the Stand Mixer.
6. Do not operate Stand Mixer with a damaged cord or plug or after
the Stand Mixer malfunctions, or is dropped or damaged in any
manner. Return appliance to the nearest Authorized Service Center for
examination, repair or electrical or mechanical adjustment. Call the
KitchenAid Customer Satisfaction Center at 1-800-541-6390 for
more information.
Continued on next page
7.TheuseofattachmentsnotrecommendedorsoldbyKitchenAidmay
causefire,electricalshockorinjury.
8.DonotusetheStandMixeroutdoors.
9.Donotletthecordhangoveredgeoftableorcounter.
10.Removeflatbeater,wirewhipordoughhookfromStandMixer
beforewashing.
11.Thisproductisdesignedforhouseholduseonly.
SAVETHESE INSTRUCTIONS
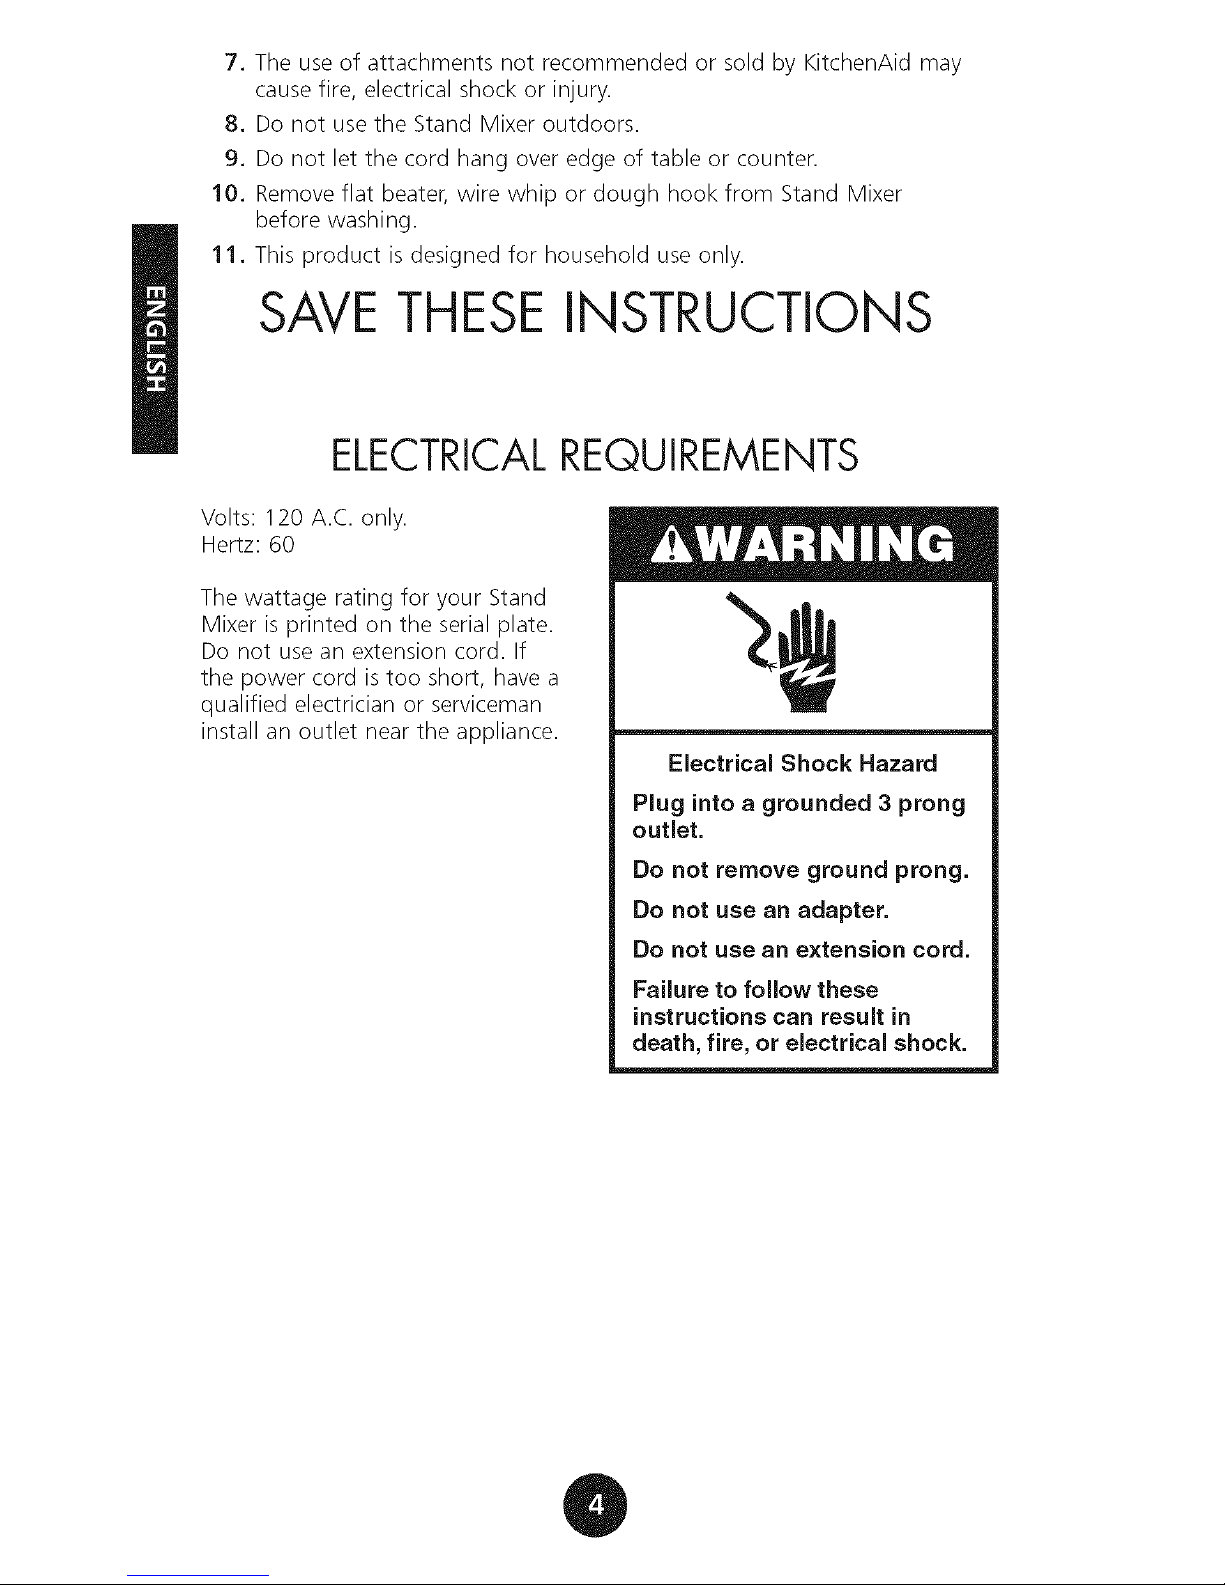
ELECTRICALREQUIREMENTS
Volts: 120 A.C. only.
Hertz: 60
The wattage rating for your Stand
Mixer is printed on the serial plate.
Do not use an extension cord. If
the power cord is too short, have a
qualified electrician or serviceman
install an outlet near the appliance.
Electrical Shock Hazard
Plug into a grounded 3 prong
outlet.
Do not remove ground prong.
Do not use an adapter.
Do not use an extension cord.
Failure to follow these
instructions can result in
death, fire, or electrical shock.
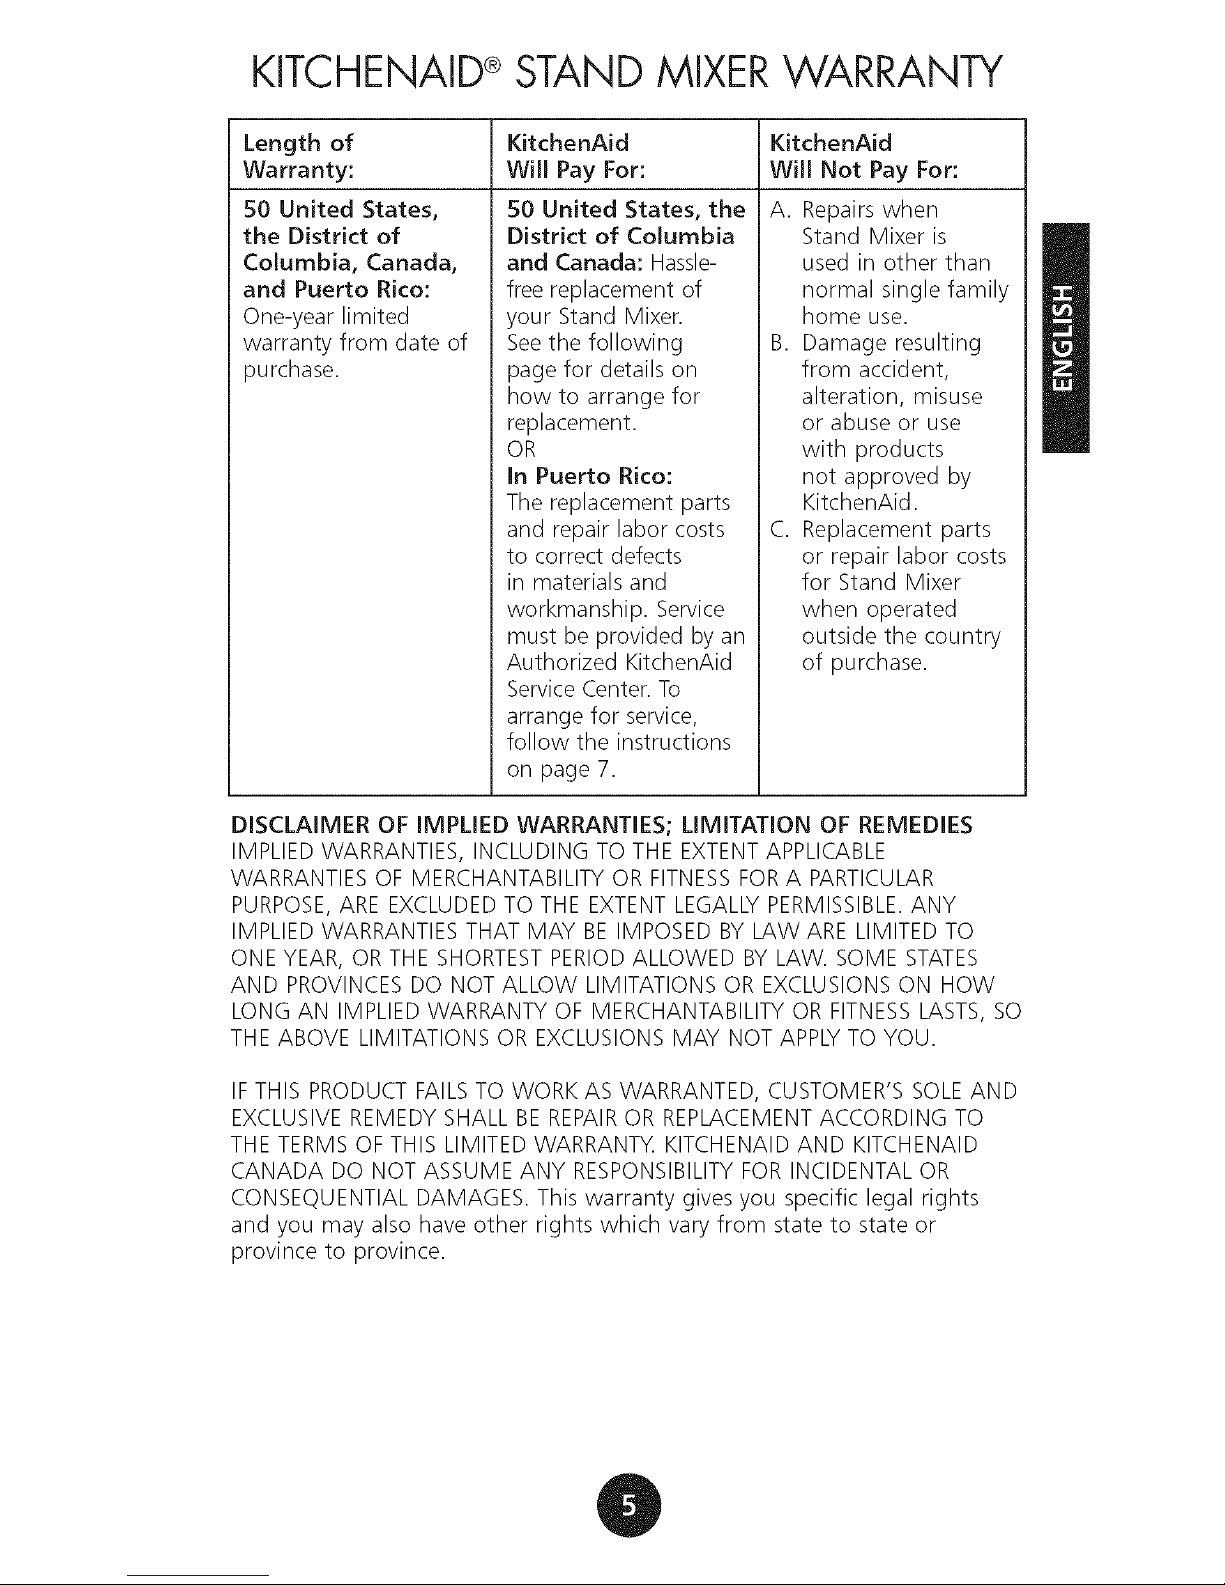
KITCHENAID®STAND MIXER WARRANTY
Length of
Warranty:
50 United States,
the District of
Columbia, Canada,
and Puerto Rico:
One-year limited
warranty from date of
purchase.
KitchenAid
Will Pay For:
50 United States, the
District of Columbia
and Canada: Hassle-
free replacement of
your Stand Mixer.
Seethe following
page for details on
how to arrange for
replacement.
OR
In Puerto Rico:
The replacement parts
and repair labor costs
to correct defects
in materials and
workmanship. Service
must be provided by an
Authorized KitchenAid
ServiceCenter. To
arrange for service,
follow the instructions
on page 7.
KitchenAid
Will Not Pay For:
A. Repairs when
Stand Mixer is
used in other than
normal single family
home use.
B. Damage resulting
from accident,
alteration, misuse
or abuse or use
with products
not approved by
KitchenAid.
C. Replacement parts
or repair labor costs
for Stand Mixer
when operated
outside the country
of purchase.
DISCLAIMER OF IMPLIED WARRANTIES; LIMITATION OF REMEDIES
IMPLIED WARRANTIES, INCLUDING TO THE EXTENT APPLICABLE
WARRANTIES OF MERCHANTABILITY OR FITNESS FOR A PARTICULAR
PURPOSE, ARE EXCLUDED TQ THE EXTENT LEGALLY PERMISSIBLE. ANY
IMPLIED WARRANTIES THAT MAY BE IMPOSED BY LAW ARE LIMITED TQ
ONE YEAR, QR THE SHORTEST PERIOD ALLOWED BY LAW. SOME STATES
AND PROVINCES DQ NOT ALLOW LIMITATIONS QR EXCLUSIONS QN HOW
LONG AN IMPLIED WARRANTY QF MERCHANTABILITY QR FITNESS LASTS, SQ
THE ABOVE LIMITATIONS QR EXCLUSIONS MAY NOT APPLY TQ YOU.
IF THIS PRODUCT FAILS TO WORK AS WARRANTED, CUSTOMER'S SOLE AND
EXCLUSIVE REMEDY SHALL BE REPAIR QR REPLACEMENT ACCORDING TQ
THE TERMS QF THIS LIMITED WARRANTY. KITCHENAID AND KITCHENAID
CANADA DQ NOT ASSUME ANY RESPONSIBILITY FOR INCIDENTAL QR
CONSEQUENTIAL DAMAGES. This warranty gives you specific legal rights
and you may also have other rights which vary from state to state or
province to province.
HASSLE-FREEREPLACEMENTWARRANTY
50 UNITED STATESAND DISTRICT
OF COLUMBIA
We're so confident the quality of
our products meets the exacting
standards of KitchenAid that, if your
Stand Mixer should fail within the
first year of ownership, KitchenAid
will arrange to deliver an identical
or comparable replacement to your
door free of charge and arrange
to have your original Stand Mixer
returned to us. Your replacement
unit will also be covered by our one
year limited warranty. Pleasefollow
these instructions to receive this
quality service.
If your KitchenAid _ Stand Mixer
should fail within the first year of
ownership, simply call our toll-free
Customer Satisfaction Center at
1-800-541-6390 Monday through
Friday, 8 a.m. to 8 p.m. (Eastern
Time), or Saturday, 10 a.m. to 5 p.m.
Give the consultant your complete
shipping address. (No RO. Box
numbers, please.)
When you receive your replacement
Stand Mixer, use the carton and
packing materials to pack up your
original Stand Mixer. In the carton,
include your name and address on
a sheet of paper along with a copy
of the proof of purchase (register
receipt, credit card slip, etc.).
HASSLE-FREEREPLACEMENT
WARRANTY - CANADA
We're so confident the quality of
our products meets the exacting
standards of the KitchenAid brand
that, if your Stand Mixer should fail
within the first year of ownership,
KitchenAid Canada will replace
your Stand Mixer with an identical
or comparable replacement. Your
replacement unit will also be covered
by our one year limited warranty.
Pleasefollow these instructions to
receive this quality service.
If your KitchenAid_ Stand Mixer
should fail within the first year of
ownership, take the Stand Mixer
or ship collect to an Authorized
KitchenAid Canada ServiceCentre.
In the carton include your name
and complete shipping address
along with a copy of the proof of
purchase (register receipt, credit card
slip, etc.). Your replacement Stand
Mixer will be returned prepaid and
insured. If you are unable to obtain
satisfactory service in this manner
call our toll-free Customer Interaction
Centre at 1-800-807-6777.
Or write to us at:
Customer Interaction Centre
KitchenAid Canada
1901 Minnesota Court
Mississauga, ON L5N 3A7
HOW TO ARRANGE FORWARRANTY
SERVICEIN PUERTORICO
Your KitchenAid RStand Mixer
is covered by a one-year limited
warranty from the date of
purchase. KitchenAid will pay for
replacement parts and labor costs
to correct defects in materials
and workmanship. Service must
be provided by an Authorized
KitchenAid Service Center.
Takethe Stand Mixer or ship prepaid
and insured to an Authorized
KitchenAid Service Center. Your
repaired Stand Mixer will be returned
prepaid and insured. If you are
unable to obtain satisfactory service
in this manner, call toll-free
1-800-541-6390 to learn the location
of a ServiceCenter near you.
HOW TO ARRANGE FOR SERVICE
AFTERTHE WARRANTY EXPIRES-
ALLLOCATIONS
Before calling for service, please
review the Troubleshooting section
on page 9.
For service information in the
50 United States, District of
Columbia, and Puerto Rico,
call toll-free 1-800-541-6390.
Or write to:
Customer Satisfaction Center
KitchenAid Portable Appliances
P.O.Box 218
St. Joseph, MI 49085-0218
Or contact an Authorized Service
Center near you.
For service information in
Canada,
call toll-free 1-800-807-6777.
Or write to:
Customer Interaction Centre
KitchenAid Canada
1901 Minnesota Court
Mississauga, ON L5N 3A7
HOW TO ARRANGE FOR SERVICE
OUTSIDE THESELOCATIONS
Consult your local KitchenAid dealer
or the store where you purchased
the Stand Mixer for information on
how to obtain service.
For service information in
Mexico,
call toll-free
01-800-024-17-17
(JV Distribuciones)
Or
01-800-902-31-00
(Industrias Birtman)
HOW TO ORDERACCESSORIES
AND REPLACEMENTPARTS
To order accessories or
repJacement parts for your
Stand Mixer in the 50 United
States, District of CoJumbia, and
Puerto Rico,
call toll-free 1-800-541-6390
Monday through Friday, 8 a.m. to
8 p.m. (EasternTime), or Saturday,
10 a.m. to 5 p.m.
Or write to:
Customer Satisfaction Center
KitchenAid Portable Appliances
RO. Box 218
St. Joseph, MI 49085-0218
To order accessories or
repJacement parts for your
Stand Mixer in Canada,
call toll-free 1-800-807-6777.
Or write to:
Customer Interaction Centre
KitchenAid Canada
1901 Minnesota Court
Mississauga, ON LBN 3A7
To order accessories or
repJacement parts for your
Stand Mixer in Mexico,
call toll-free
01-800-024-17-17
(JV Distribuciones)
Or
01-800-902-31-00
(Industrias Birtman)
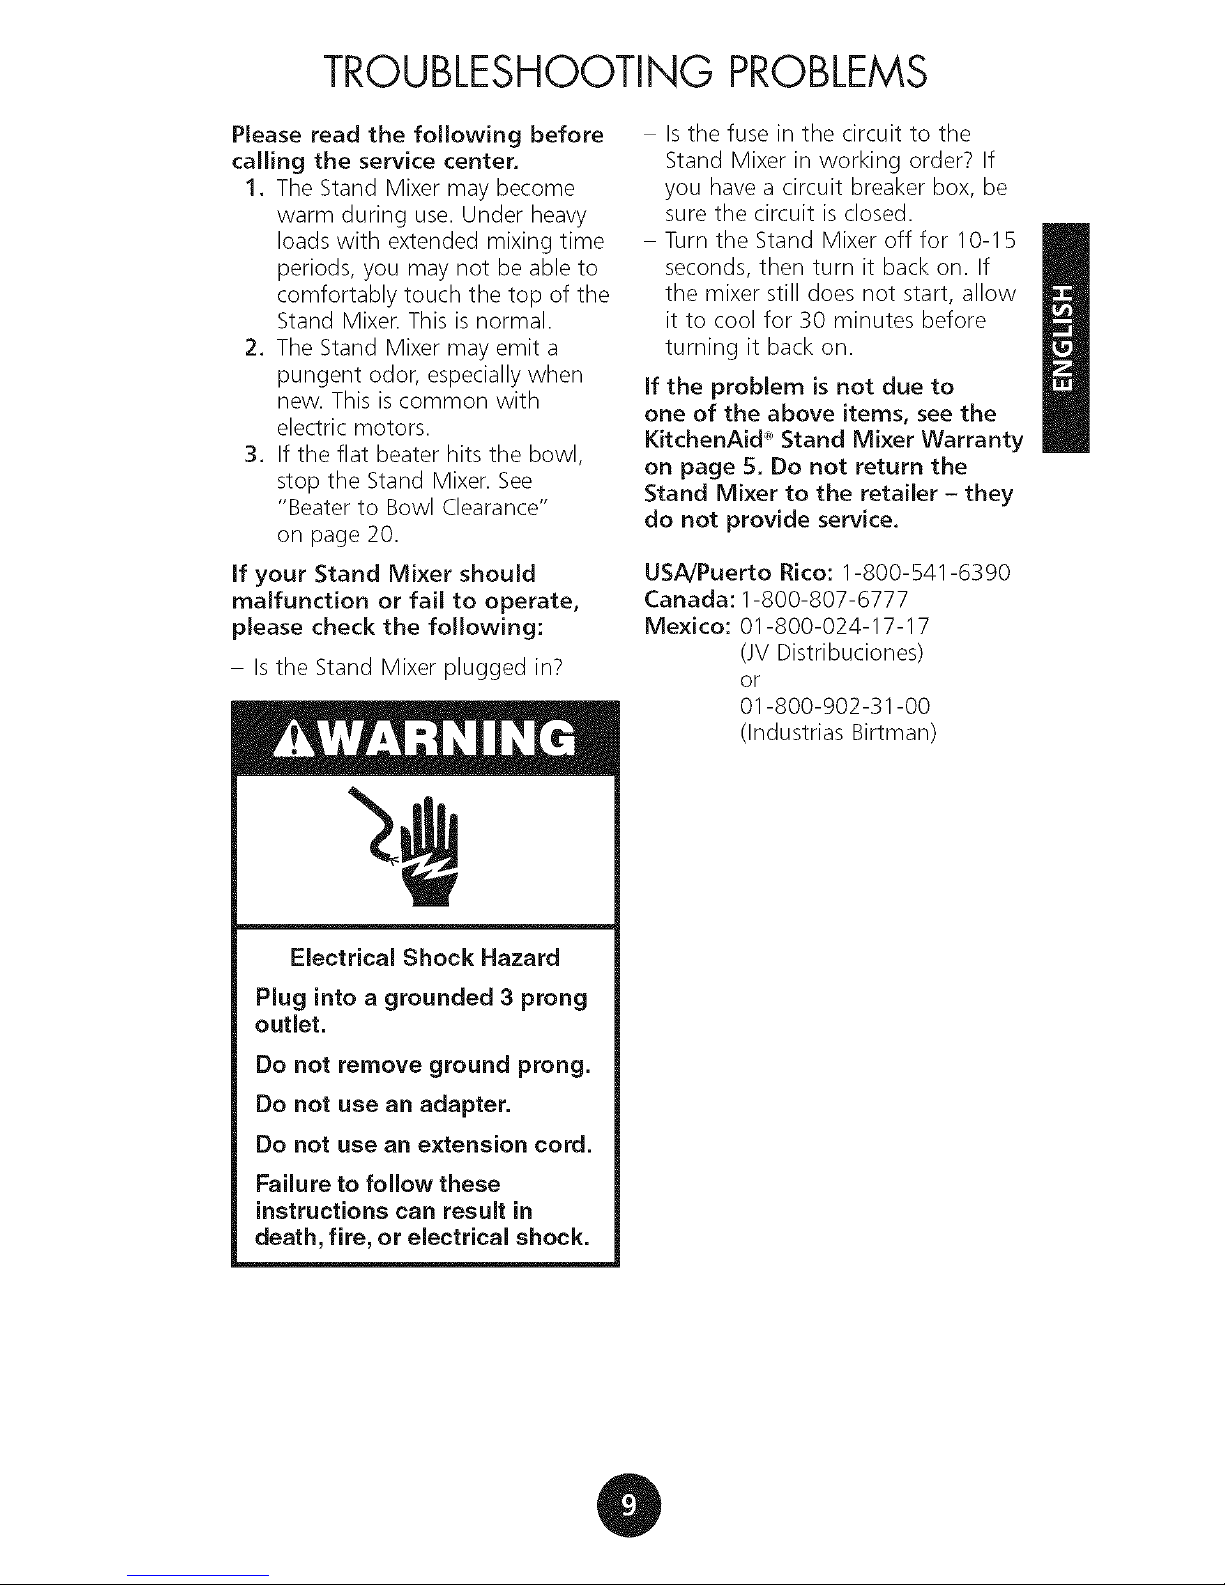
TROUBLESHOOTING PROBLEMS
Please read the following before
calling the service center.
1. The Stand Mixer may become
warm during use. Under heavy
loads with extended mixing time
periods, you may not be able to
comfortably touch the top of the
Stand Mixer. This is normal.
2. The Stand Mixer may emit a
pungent odor, especially when
new. This is common with
electric motors.
3. If the flat beater hits the bowl,
stop the Stand Mixer. See
"Beater to Bowl Clearance"
on page 20.
If your Stand Mixer should
malfunction or fail to operate,
please check the following:
Is the Stand Mixer plugged in?
Electrical Shock Hazard
Plug into a grounded 3 prong
outlet.
Do not remove ground prong.
Do not use an adapter.
Do not use an extension cord.
Failure to follow these
instructions can result in
death, fire, or electrical shock.
Isthe fuse in the circuit to the
Stand Mixer in working order? If
you have a circuit breaker box, be
sure the circuit is closed.
Turn the Stand Mixer off for 10-1B
seconds, then turn it back on. If
the mixer still does not start, allow
it to cool for 30 minutes before
turning it back on.
if the problem isnot due to
one of the above items, see the
KitchenAid _'Stand Mixer Warranty
on page 5. Do not return the
Stand Mixer to the retailer - they
do not provide service.
USA/Puerto Rico: 1-800-541-6390
Canada: 1-800-807-6777
Mexico: 01-800-024-17-17
(JV Distribuciones)
or
01-800-902-31-00
(Industrias Birtman)
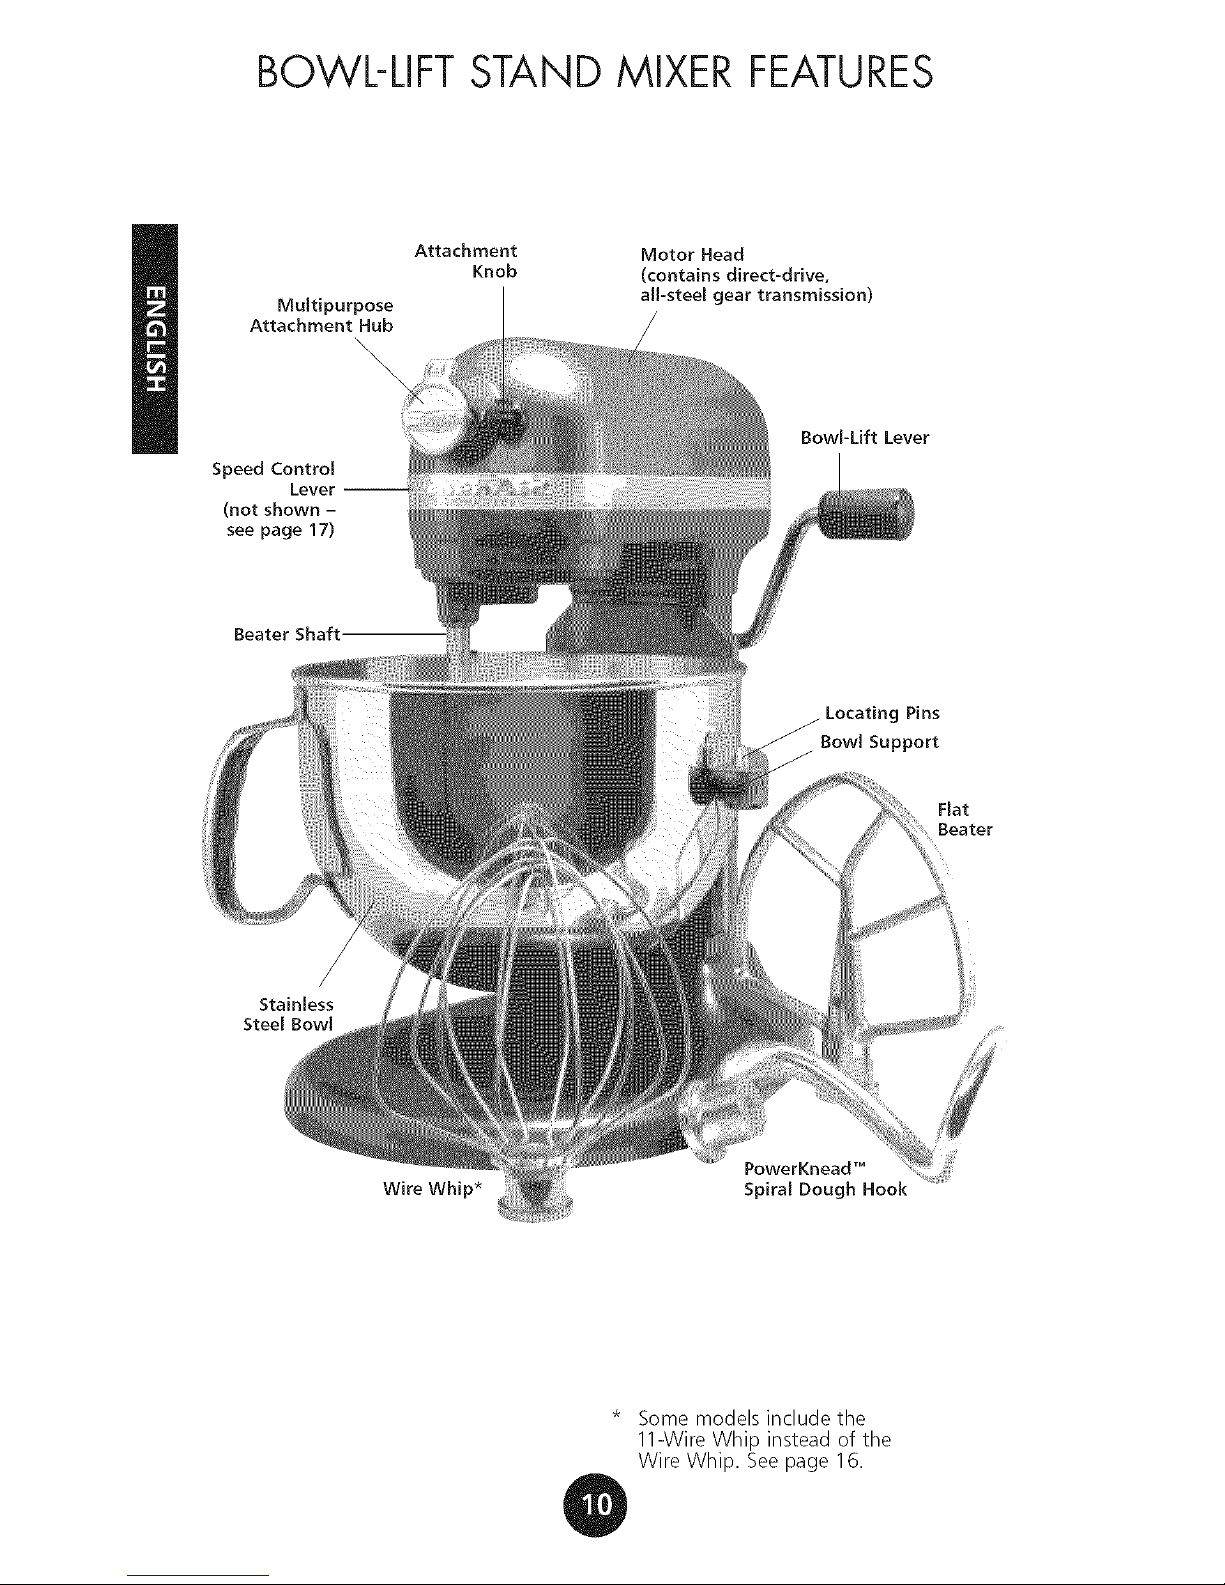
BOWL-LiFT STAND MIXER FEATURES
Multipurpose
Attachment Hub
\
\
Speed Control
Lever --
(not shown -
see page 17)
Attachment Motor Head
Knob (contains direct-drive,
all-steel gear transmission)
Bowl-Lift Lever
Beater Shaft--
Pins
BowlSupport
Flat
Beater
Stainless
Steel Bowl
Wire Whip*
PowerKnead _
Spiral Dough Hook
* Some models include the
11-Wire Whip instead of the
Wire Whip. See page 16.
BOWL-LiFT STAND MIXER FEATURES
Direct=Drive,
All=Steel Gear Transmission
The motor head houses the
powerful, high-performance motor
and the direct-drive, all-steel gear
transmission.
Multipurpose Attachment Hub
with Hinged Hub Cover
Hinged hub cover flips open to
reveal the multipurpose attachment
hub. The hub powers a variety of
attachments that simplify food
preparation and add culinary
versatility (seepage 23-25).
Commercial-Style Motor Protection
This reset feature protects the motor
from overheating by automatically
shutting down the mixer when
thermal overload is detected.
Attachment Knob
Knob secures Stand Mixer
attachments to the hub.
Bowl-Lift Lever
Sturdy bowl-lift lever raises and
lowers the mixing bowl.
Beater Shaft
Flat beater, dough hook, and wire
whip accessories mount to the
beater shaft.
Stainless Steel Bowl
Polished stainless steel bowl is
dishwasher safe.
Speed Control Lever
10 mixing speeds provide versatility
for any recipe. Speedsrange from a
very slow stir to a very fast mix.
Bowl=Height Adjustment Screw
Screw adjusts the beater-to-bowl
clearance. Factory preset.
Bowl Support
Durable metal arms support the
bowl for stable mixing.
Locating Pins
Pinsfit through the bowl brackets to
position the bowl on the bowl support.
67=Point Planetary Mixing Action
The beater spirals to 67 different
touch-points within the bowl for
quick, complete mixing.
Soft Start TM Mixing Feature
Helps minimize ingredient splatter
with gentle acceleration to the
selected speed.
PowerKnead TM Spiral Dough
Hook
Quickly and thoroughly kneadsanytype
of raiseddough even largequantities.
Flat Beater
Use the flat beater to mix cakes,
quick breads, cookie dough and
to mash potatoes. Special design
works with unique mixing action to
thoroughly mix ingredients.
Wire Whip
The design of the wire whip rapidly
increases airflow into egg mixtures
for stiff souffl6s and rigid peaks
of meringue. With the planetary
mixing action, the wire whip covers
134 points within the bowl to create
silky decorator icings and lighter,
fluffier whipped cream.
NOTE: Some models include the
11-Wire Whip instead.
Continued on next page
BOWL-LIFT STAND MIXER FEATURES
11-Wire Whip
The 11-wire whip is ideal for
achieving superior results when
whipping smaller quantities of egg
whites and cream. The design of the
11-wire whip produces larger
volumes of egg whites in significantly
less time than it would take the
standard wire whip. The 11-wire
whip also can whip cream faster.
NOTE: The 11-Wire Whip is standard
equipment with select models but
can be purchased as an optional
accessory. [Model KN211WW]
Wide-Chute Pouring ShieJd
(not shown)
The dual-purpose pouring shield
helps prevent ingredient splatter and
minimizes flour puff. Wide pouring
chute makes adding ingredients easy.
(Standard with select models.)
EJectroni¢ Speed Sensor
The electronic speed sensor
maintains the selected speed even
when ingredients are added and the
density and weight change.
ASSEMBLING YOUR BOWL-LIFT
STAND MIXER
Pre-Use Cleaning
Before using your Stand Mixer for the
first time, wash the mixing bowl and
accessories (see "Care and Cleaning"
on page 19).
Attaching Mixing Bowl
Electrical Shock Hazard
Plug into a grounded 3 prong
outlet.
Do not remove ground prong.
Do not use an adapter.
Do not use an extension cord.
Failure to follow these
instructions can result in
death, fire, or electrical shock.
4. Placebowl brackets over the
locating pins on the bowl support.
5. Pressdown on the back of the
bowl until bowl pin snaps into
the spring latch.
6. Raisethe bowl before mixing.
7. Pluginto a grounded
3-prong outlet.
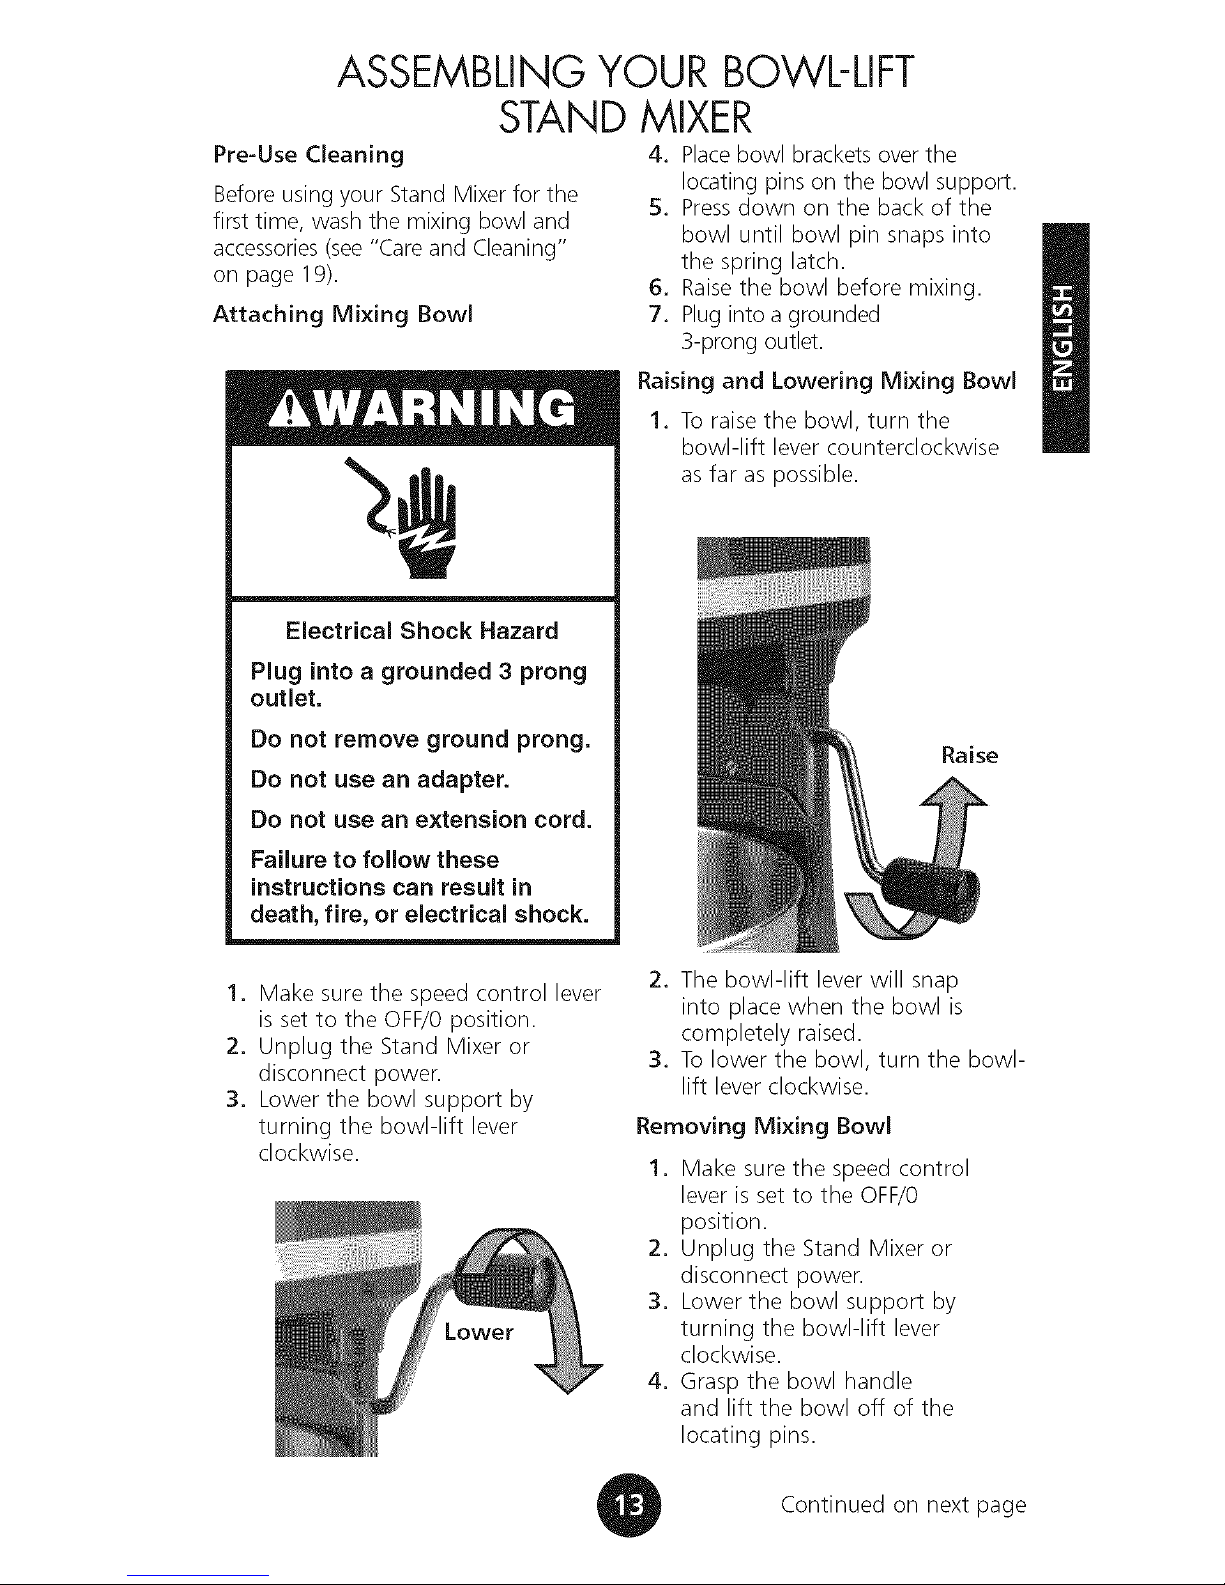
Raising and Lowering Mixing Bowl
1. Toraise the bowl, turn the
bowl-lift lever counterclockwise
asfar as possible.
Raise
1. Make sure the speed control lever
isset to the OFF/Oposition.
2. Unplug the Stand Mixer or
disconnect power.
3. Lower the bowl support by
turning the bowl-lift lever
clockwise.
Lower
2. The bowl-lift lever will snap
into place when the bowl is
completely raised.
3. Tolower the bowl, turn the bowl-
lift lever clockwise.
Removing Mixing Bowl
1. Make sure the speed control
lever is set to the OFF/O
position.
2. Unplug the Stand Mixer or
disconnect power.
3. Lower the bowl support by
turning the bowl-lift lever
clockwise.
4. Grasp the bowl handle
and lift the bowl off of the
locating pins.
Continued on next page
ASSEMBLING YOUR BOWL-LIFT
STAND MIXER
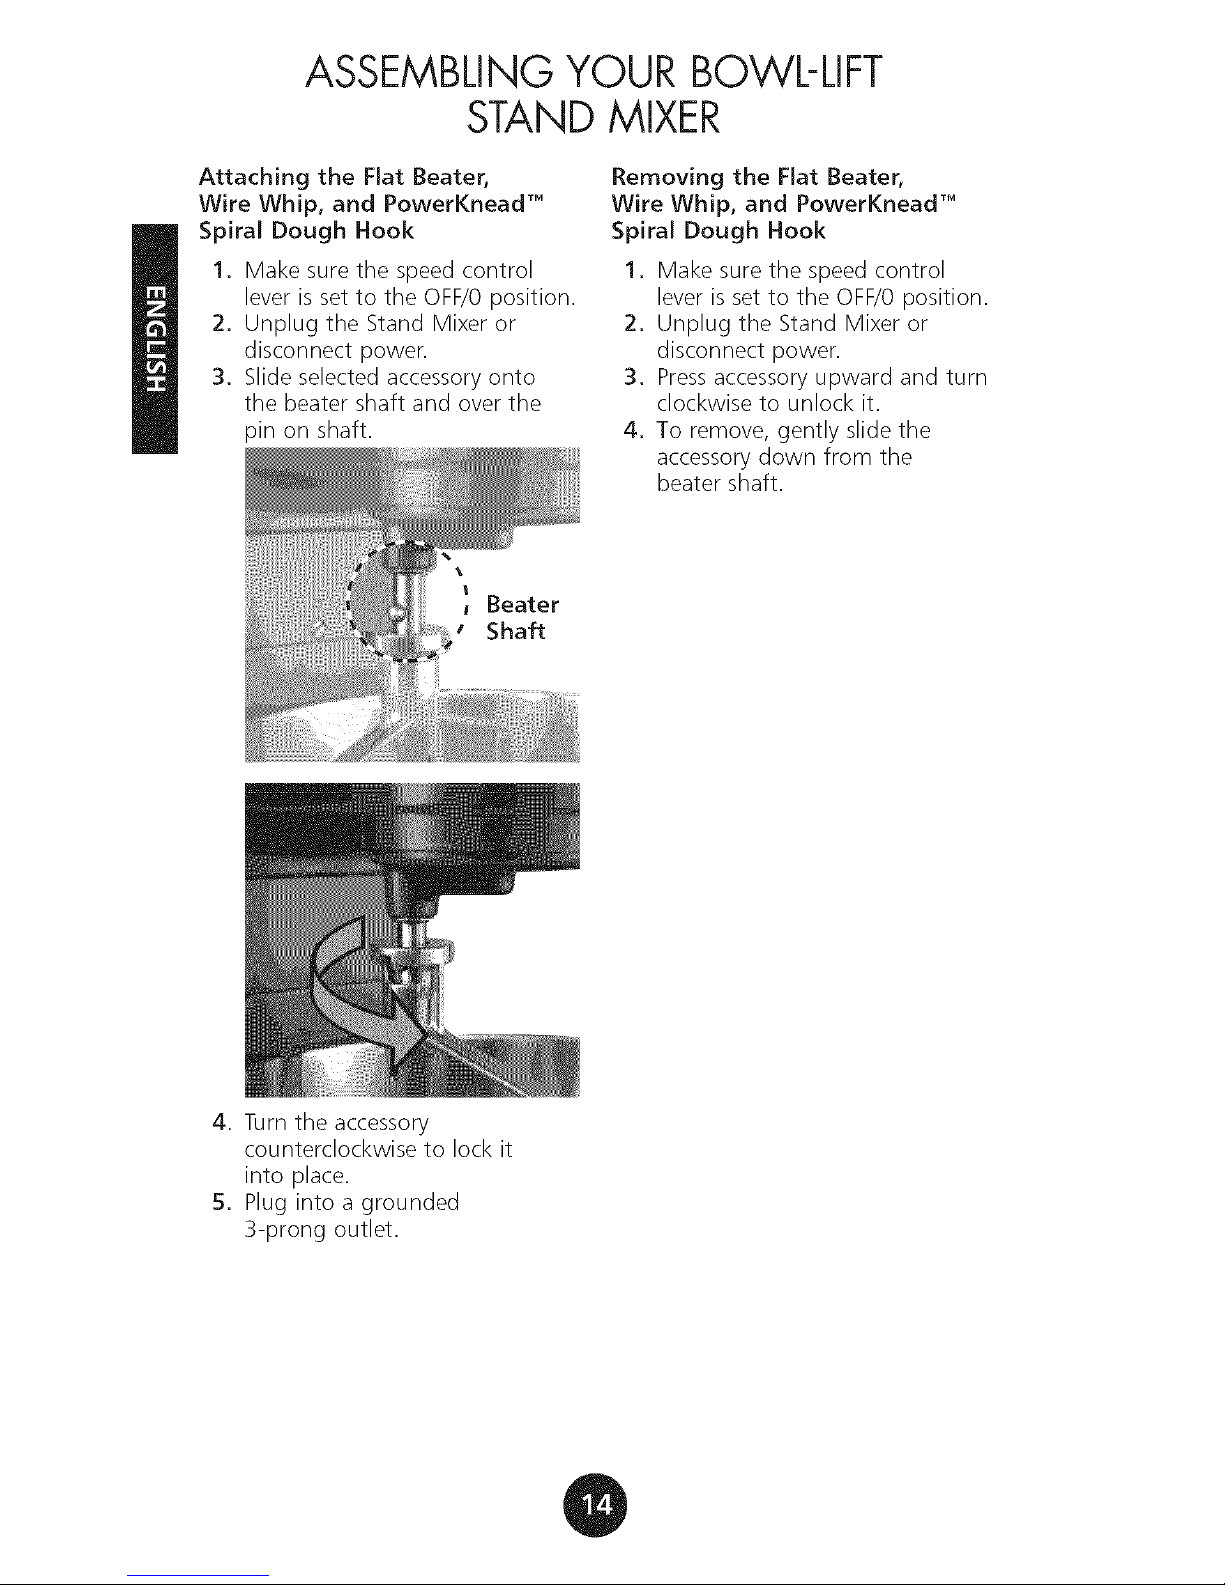
Attaching the Flat Beater,
Wire Whip, and PowerKnead TM
Spiral Dough Hook
1. Make sure the speed control
lever is set to the OFF/Oposition.
2. Unplug the Stand Mixer or
disconnect power.
3. Slide selected accessory onto
the beater shaft and over the
pin on shaft.
I
Beater
Shaft
Removing the Flat Beater,
Wire Whip, and PowerKnead TM
Spiral Dough Hook
1. Make sure the speed control
lever is set to the OFF/Oposition.
2. Unplug the Stand Mixer or
disconnect power.
3. Pressaccessory upward and turn
clockwise to unlock it.
4. To remove, gently slide the
accessory down from the
beater shaft.
4. Turn the accessory
counterclockwise to lock it
into place.
5. Plug into a grounded
3-prong outlet.
USING THE POURING SHIELD*
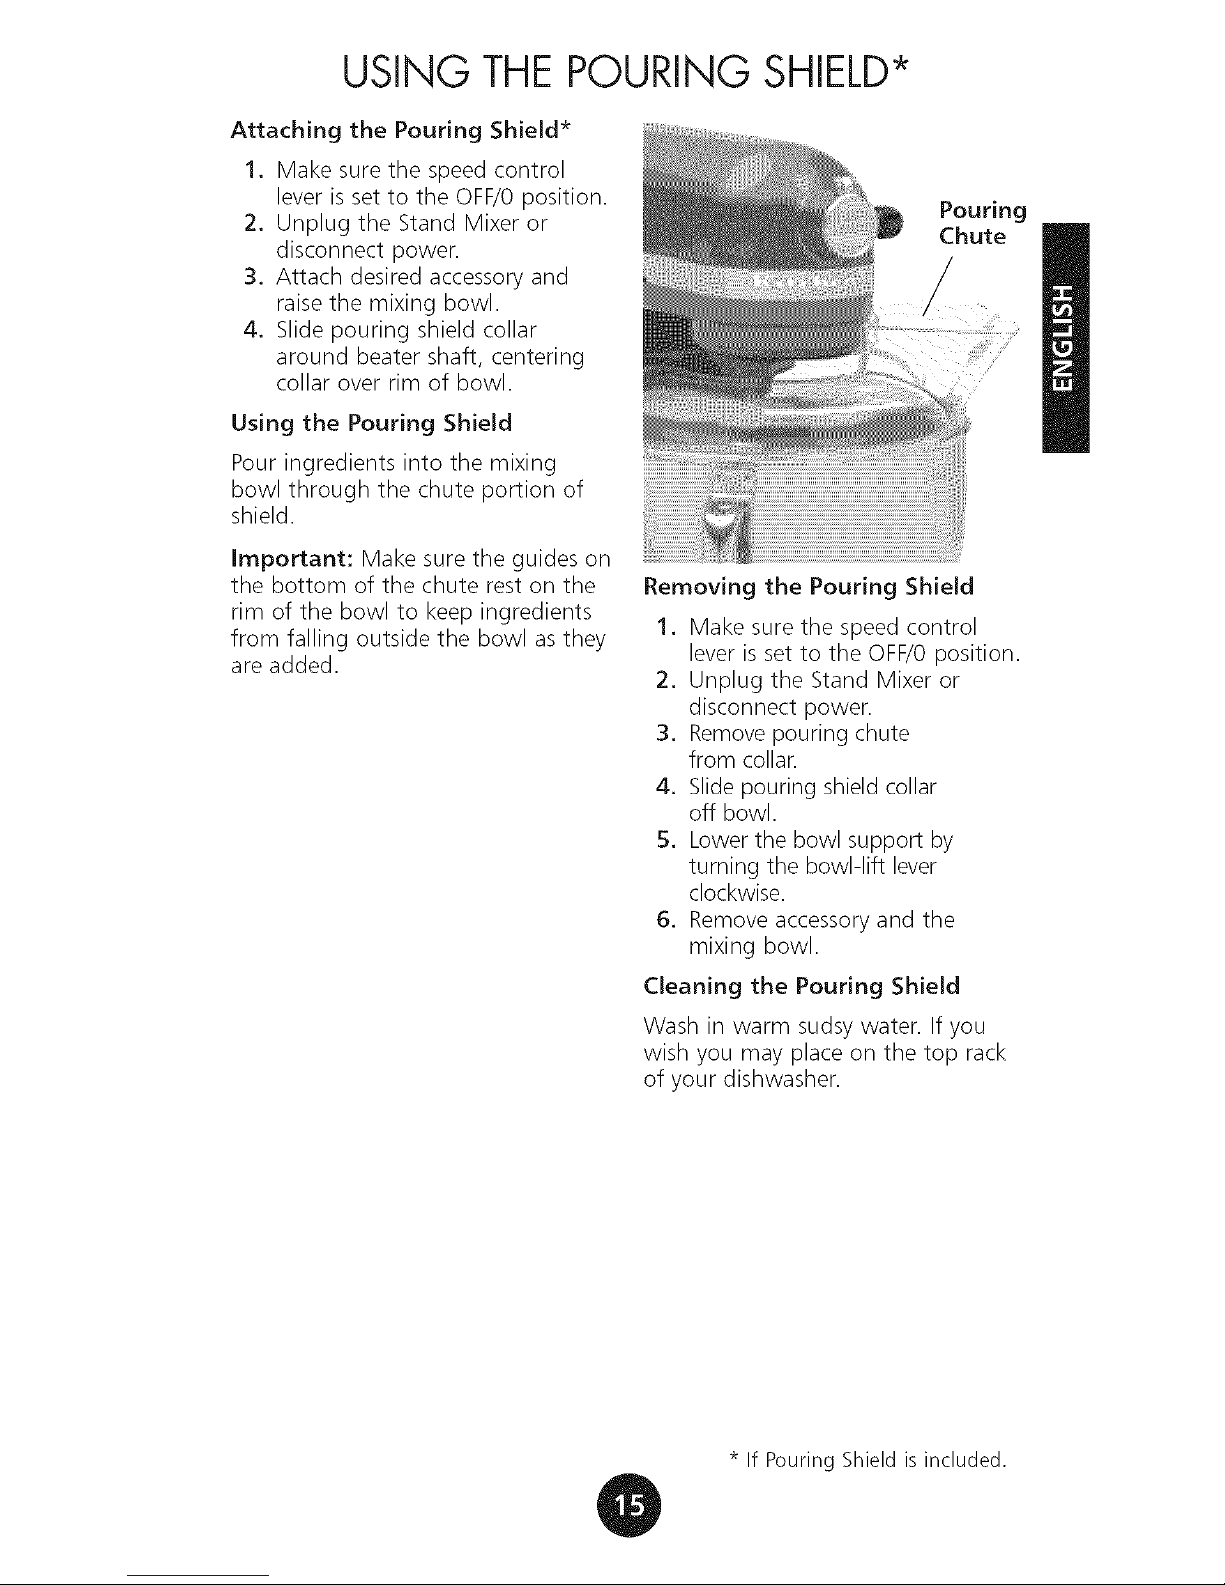
Attaching the Pouring ShieJd*
1. Make sure the speed control
lever is set to the OFF/Oposition.
2. Unplug the Stand Mixer or
disconnect power.
3. Attach desired accessory and
raise the mixing bowl.
4. Slide pouring shield collar
around beater shaft, centering
collar over rim of bowl.
Using the Pouring ShieJd
Pour ingredients into the mixing
bowl through the chute portion of
shield.
Important: Make sure the guides on
the bottom of the chute rest on the
rim of the bowl to keep ingredients
from falling outside the bowl as they
are added.
Pouring
Chute
/
Removing the Pouring Shield
1. Make sure the speed control
lever is set to the OFF/Oposition.
2. Unplug the Stand Mixer or
disconnect power.
3. Removepouring chute
from collar.
4. Slide pouring shield collar
off bowl.
5. Lower the bowl support by
turning the bowl-lift lever
clockwise.
6. Remove accessory and the
mixing bowl.
CJeaning the Pouring ShieJd
Wash in warm sudsy water. If you
wish you may place on the top rack
of your dishwasher.
* If Pouring Shield is included.
USING THE KITCHENAID®
STAND MIXERACCESSORIES
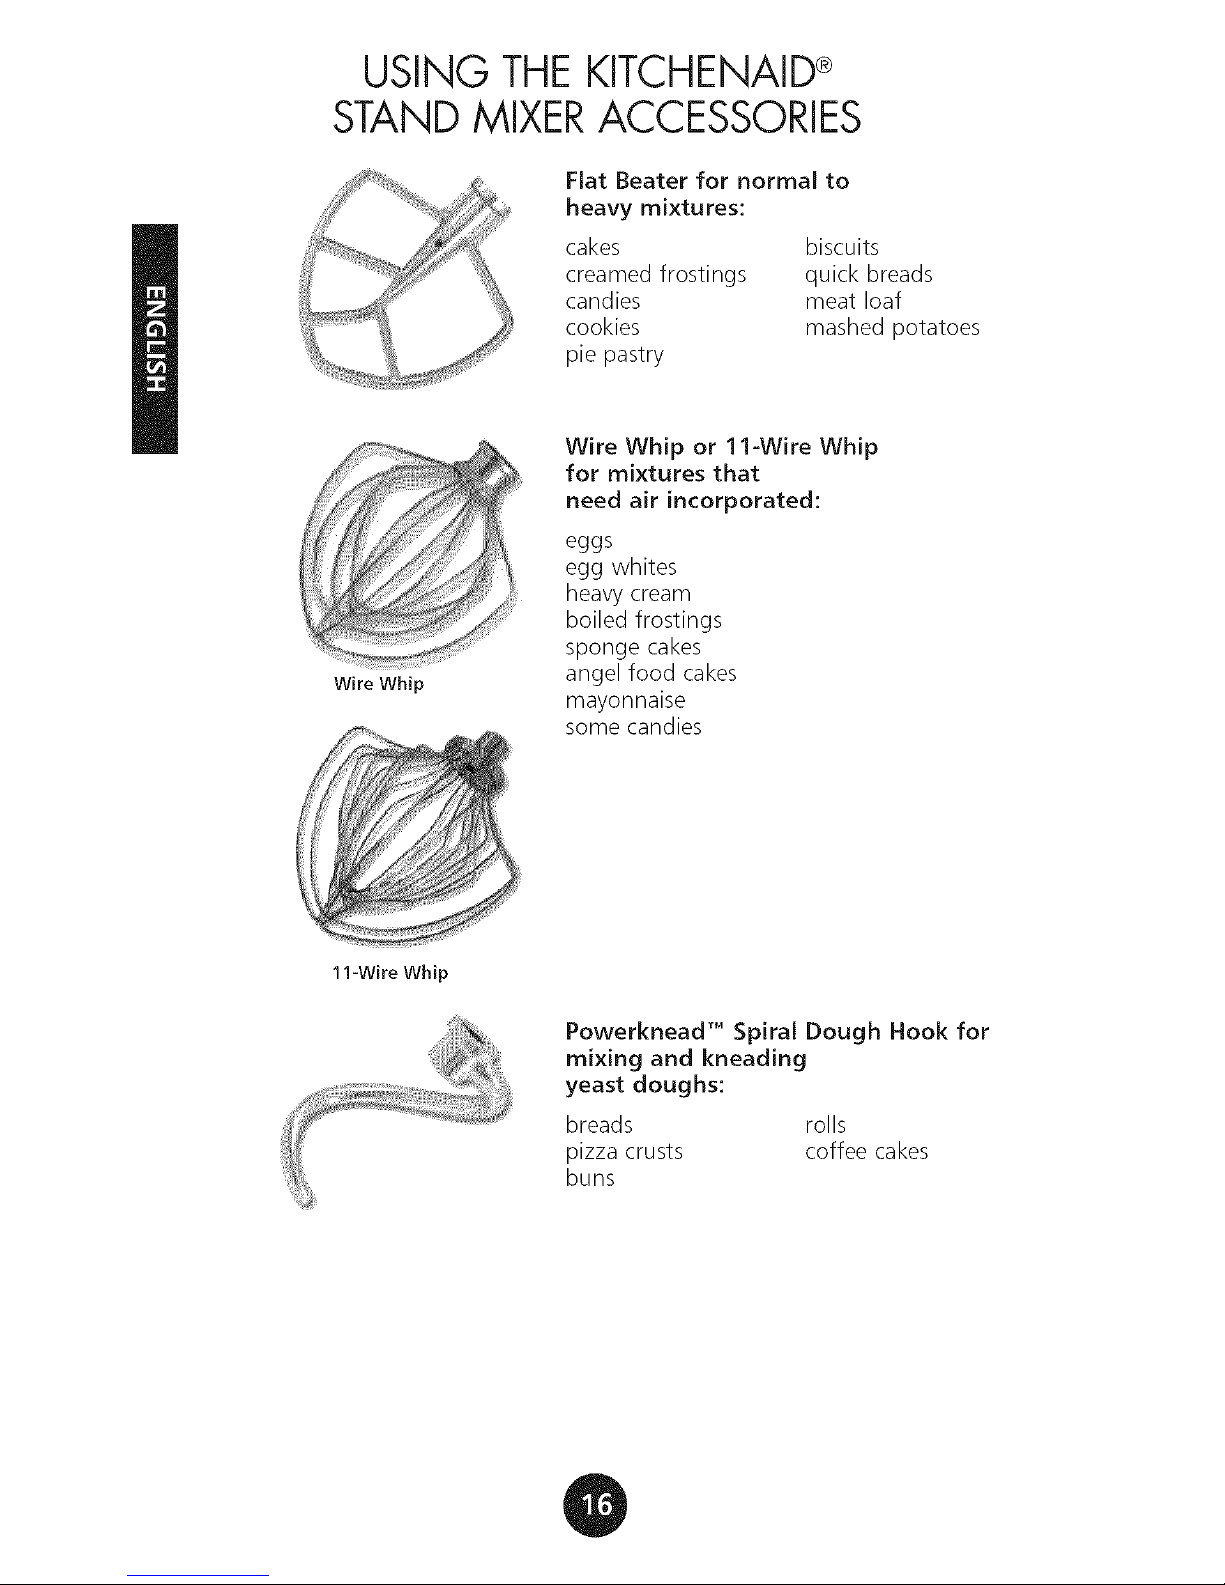
Fiat Beater for norma[ to
heavy mixtures:
cakes
creamed frostings
candies
cookies
pie pastry
biscuits
quick breads
meat loaf
mashed potatoes
Y
Wire Whi
11-Wire Whip
Wire Whip or 11-Wire Whip
for mixtures that
need air incorporated:
eggs
egg whites
heavy cream
boiled frostings
sponge cakes
angel food cakes
mayonnaise
some candies
Powerknead TM Spiral Dough Hook for
mixing and kneading
yeast doughs:
breads rolls
pizza crusts coffee cakes
buns
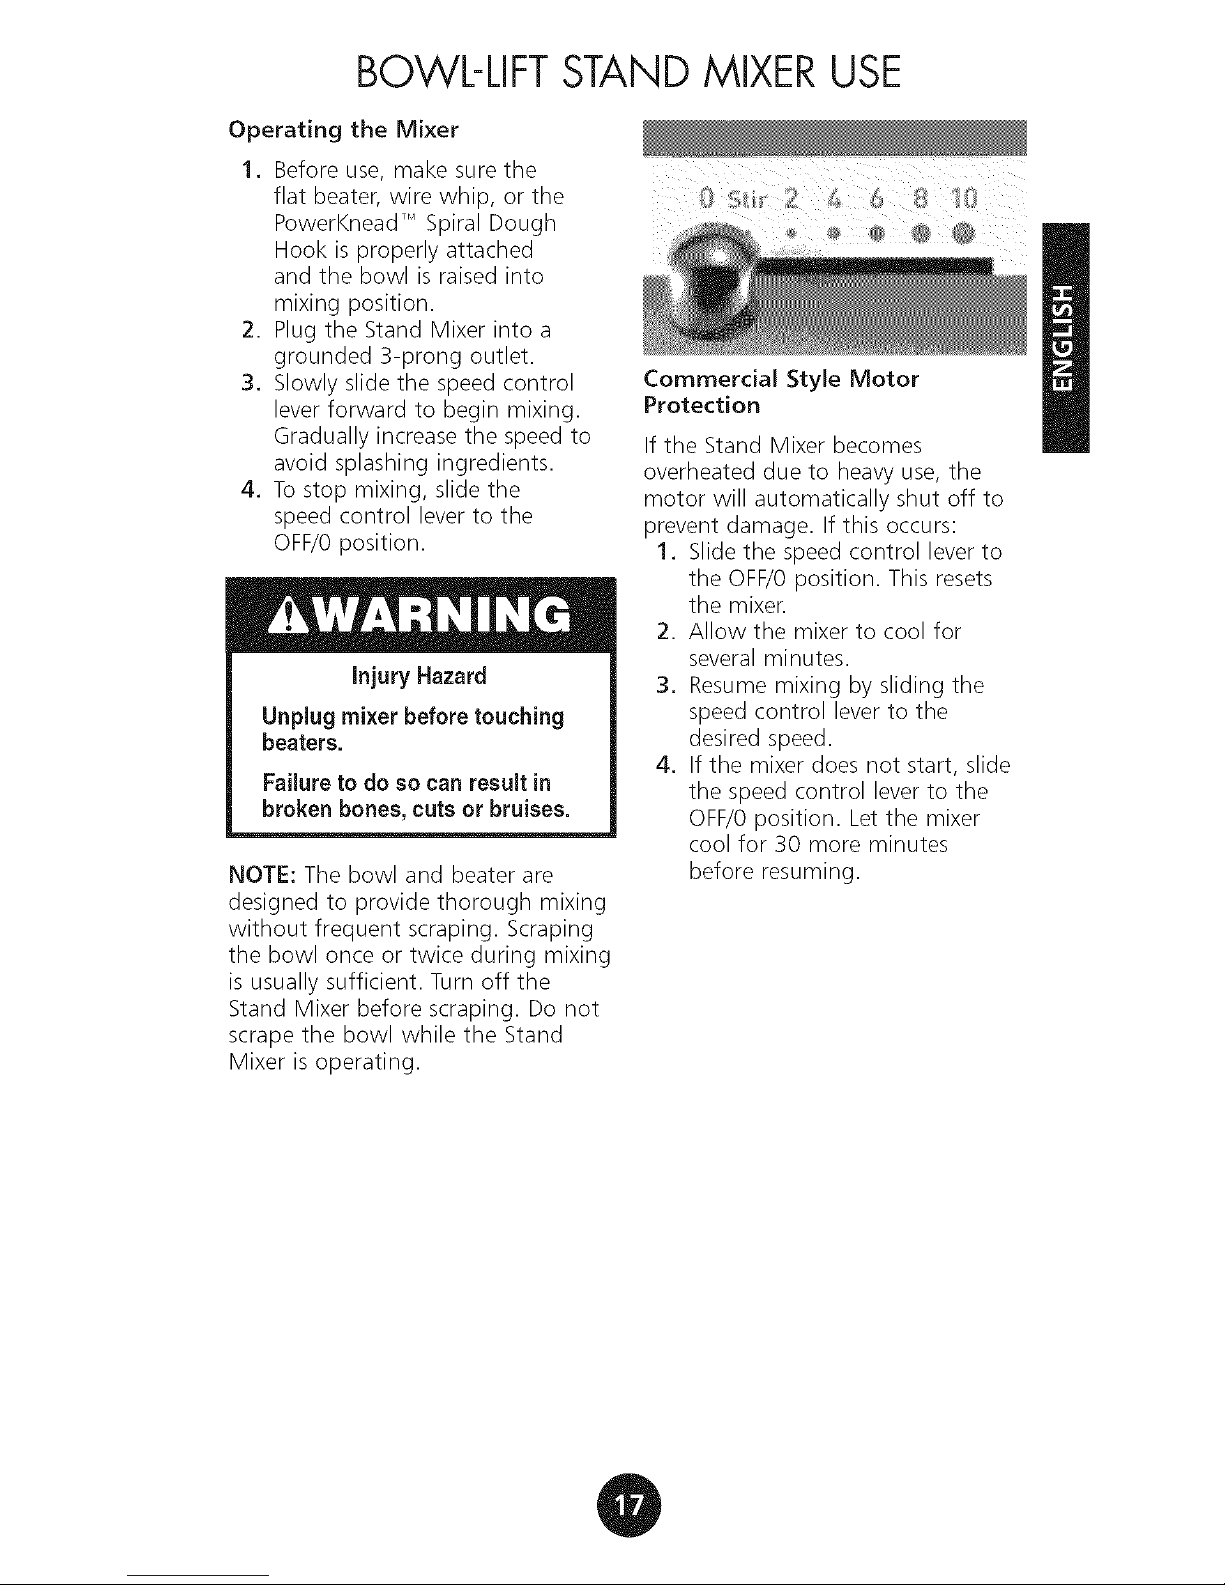
BOWL-LIFTSTAND MIXER USE
Operating the Mixer
1. Before use, make sure the
flat beater, wire whip, or the
PowerKneadTM Spiral Dough
Hook is properly attached
and the bowl is raised into
mixing position.
2. Plug the Stand Mixer into a
grounded 3-prong outlet.
3. Slowly slide the speed control
lever forward to begin mixing.
Gradually increase the speed to
avoid splashing ingredients.
4. Tostop mixing, slide the
speed control leverto the
OFF/Oposition.
injury Hazard
Unplug mixer before touching
beaters.
Failure to do so can result in
broken bones, cuts or bruises.
NOTE: The bowl and beater are
designed to provide thorough mixing
without frequent scraping. Scraping
the bowl once or twice during mixing
is usually sufficient. Turn off the
Stand Mixer before scraping. Do not
scrape the bowl while the Stand
Mixer is operating.
If the Stand Mixer becomes
overheated due to heavy use, the
motor will automatically shut off to
prevent damage. If this occurs:
1. Slide the speed control lever to
the OFF/Oposition. This resets
the mixer.
2. Allow the mixer to cool for
several minutes.
3. Resume mixing by sliding the
speed control leverto the
desired speed.
4.
Ifthe mixer does not start, slide
the speed control lever to the
OFF/Oposition. Let the mixer
cool for 30 more minutes
before resuming.
SPEEDCONTROL GUIDE
The speed control lever can be set between the speeds listed below if a finer
adjustment is required.
IMPORTANT: Use Speed 2 when preparing yeast dough using any other
speed may damage the mixer.
Speed Use For
STIR STIRRING
Description
Forslow stirring, combining, mashing,
starting all mixing procedures. Use to add
flour and dry ingredients to batter, add
liquids to dry ingredients, and combine
heavy mixtures.
• Also for usewith IceCream
Maker Attachment.
NOTE: Do not use STIRspeed to mix or
knead yeast dough.
SLOW MIXING
Forslow mixing, mashing, and faster
stirring. Use to mix heavy batters and
candies, begin mashing potatoes or other
vegetables, cut shortening into flour,
mix thin or splashy batters, and mix
and knead yeast dough.
• Also for usewith Can Opener Attachment.
MIXING &
BEATING
Formixing semi-heavy batters, such as cookies.
Use to combine sugar and shortening and to
add sugar to egg whites for meringues. This is
a medium speed for cake mixes.
• Also for use with the Food Grinder
Attachment, the Slicer/Shredder
Attachment, and the Fruit/Vegetable
Strainer Attachment.
BEATING &
CREAMING
Formedium-fast beating, creaming, or
whipping. Use to finish mixing cake,
doughnut, and other batters. This is a high
speed for cake mixes.
• Also for use with the Citrus Juicer
Attach ment.
FAST BEATING
& WHIPPING
Forwhipping cream, egg whites, and
boiled frostings.
10 FASTWHIPPING
Forwhipping small amounts of cream
or egg whites.
• Also for use with the Pasta Maker and
Grain Mill Attachments.
NOTE: The mixer will slow down under the
heavy loads imposed by these attachments.
This is normal.
CARE AND CLEANING
Cleaning the Stand Mixer and
Accessories
• Make sure the speed control
lever is set to the OFF/Oposition.
• Unplug the Stand Mixer or
disconnect power.
• Burnished (bare metal) flat
beaters, PowerKneadTM Spiral
Dough Hook, and wire whips
should be hand washed in
hot soapy water and dried
immediately after washing. Do
not wash burnished accessories
in the dishwasher.
• All mixing bowls, coated (white)
flat beaters, and coated (white)
dough hooks are dishwasher safe.
• Wipe mixer with a soft, damp
cloth. Do not use abrasive
cleansers or scouring pads. Do
not immerse mixer in water.
• Wipe off beater shaft frequently
to remove any residue that
may accumulate. Do not store
accessories on the beater shaft.
BEATERTO BOWL CLEARANCE
Your Stand Mixer isadjusted at the
factory so the flat beater just clears
the bottom of the bowl. If, for
any reason, the flat beater hits the
bottom of the bowl, or istoo far
away from the bowl, you can correct
the clearance easily.
NOTE: Adjustments should be made
only with the flat beater in place.
1. Make sure the speed control
lever is set to the OFF/0 position.
2. Unplug the Stand Mixer or
disconnect power.
3. Place the bowl-lift lever in the
down position.
4. Attach the mixing bowl and
flat beater.
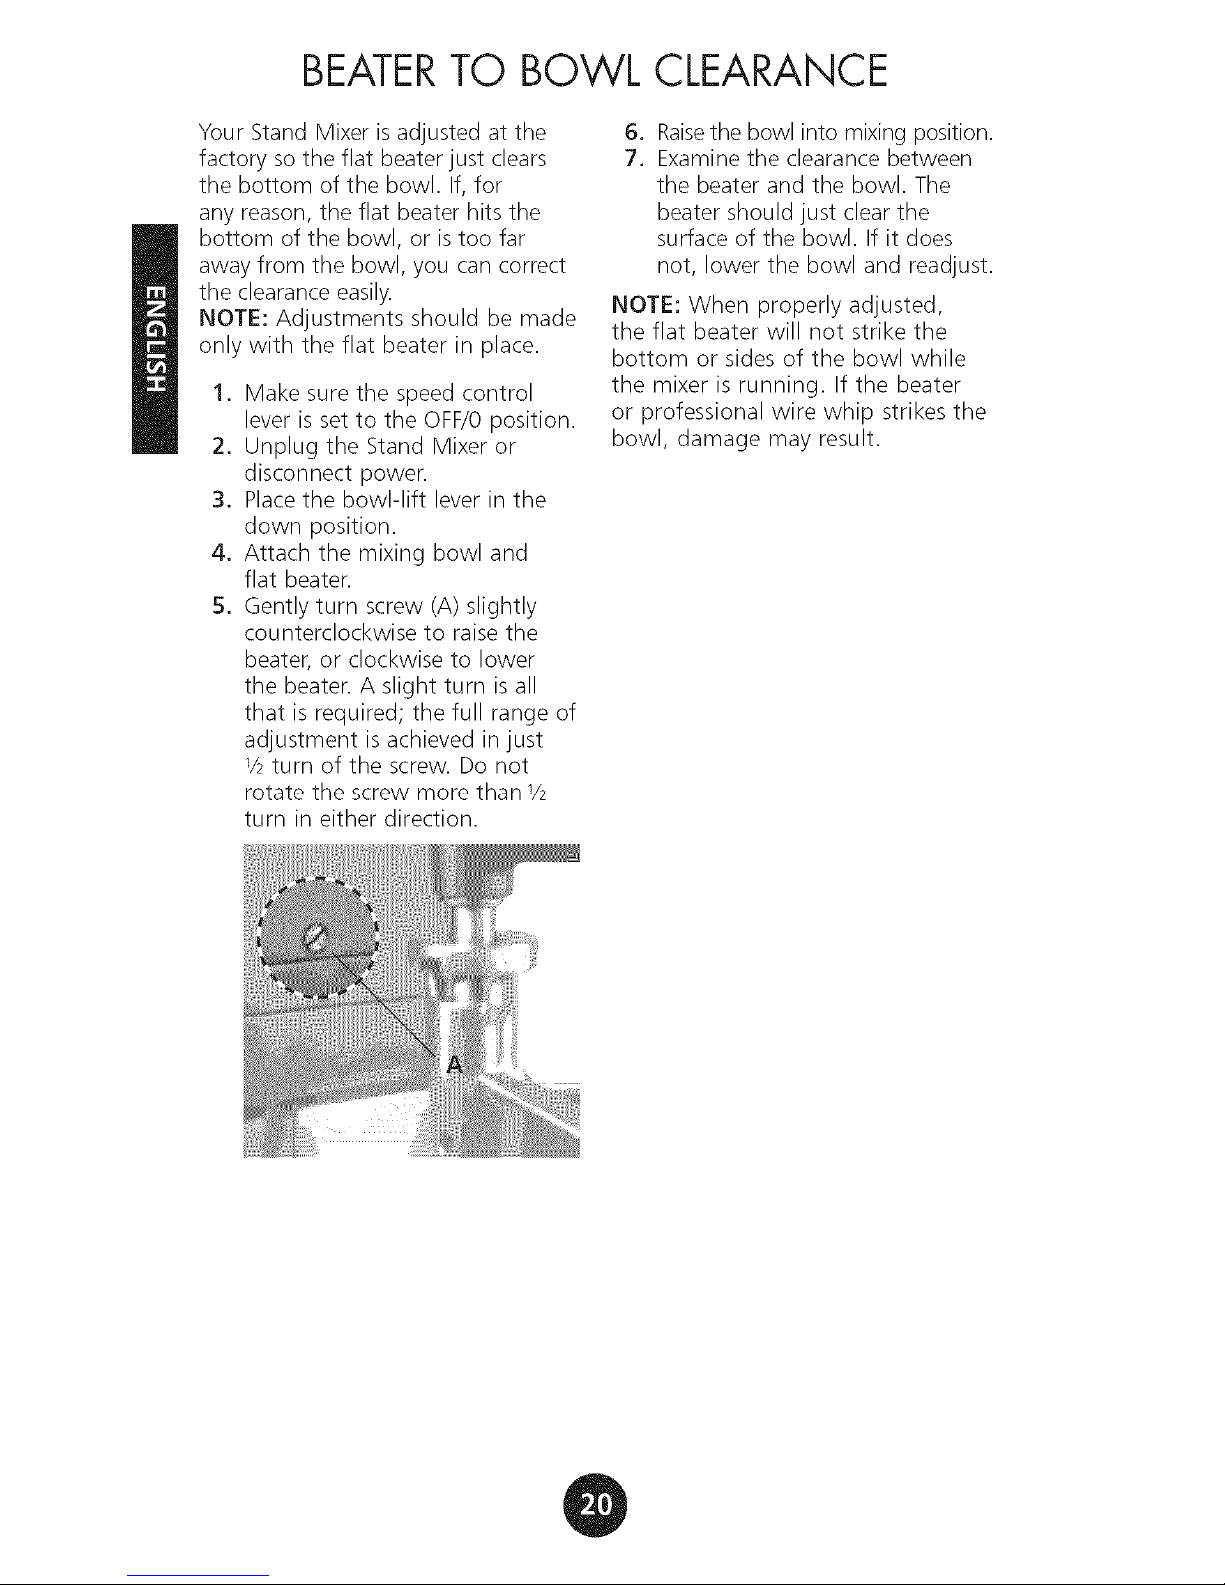
5. Gently turn screw (A) slightly
counterclockwise to raise the
beater, or clockwise to lower
the beater. A slight turn is all
that is required; the full range of
adjustment is achieved in just
_Aturn of the screw. Do not
rotate the screw more than V2
turn in either direction.
6. Raisethe bowl into mixing position.
7. Examine the clearance between
the beater and the bowl. The
beater should just clear the
surface of the bowl. If it does
not, lower the bowl and readjust.
NOTE: When properly adjusted,
the flat beater will not strike the
bottom or sides of the bowl while
the mixer is running. If the beater
or professional wire whip strikes the
bowl, damage may result.
MIXING TIPS
Converting Your Recipe
for the Mixer
The following mixing instructions
can help guide you in converting
your own favorite recipes and
mixing methods for use with your
KitchenAid '_Stand Mixer.
The "quick mix" method (sometimes
referred to as the "dump" method)
is ideal for simple cake recipes. This
method calls for combining dry
ingredients with most or all-liquid
ingredients in one step.
More elaborate cake recipes should
be prepared using the traditional
cake mixing method commonly
referred to as the "creaming"
method. With this method, sugar
and shortening, butter, or margarine
are thoroughly mixed (creamed)
before other ingredients are added.
For all cakes, mixing times may
vary because your KitchenAid _
Stand Mixer mixes faster than most
other mixers. In general, mixing
a cake with a KitchenAid _ Stand
Mixer will take about half the time
recommended in most cake recipes.
Tohelp determine the ideal mixing
time, observe the batter or dough
and mix only until it has the desired
appearance described in your recipe,
such as "smooth and creamy." To
select the best mixing speed for the
job, use the Speed Control Guide
on page 18.
Adding Ingredients
Always add ingredients as close to
the side of the bowl as possible, not
directly into the moving beater. The
Pouring Shield* can simplify adding
ingredients. If the ingredients in the
bottom of bowl are not thoroughly
mixed, then the beater-to-bowl
clearance must be adjusted. See
page 20 for instructions.
Cake Mixes
When preparing packaged cake
mixes, use Speed 2 for low speed,
Speed 4 for medium speed, and
Speed 6 for high speed. Forthe best
results, mix for the time stated on
the package directions.
Adding Nuts, Raisins, or
Candied Fruits
Follow individual recipes for
guidelines on including these
ingredients. In general, solid materials
should be folded into the mix during
the last few seconds of mixing on
the STIRSpeed. The batter should
be thick enough to prevent the fruit
or nuts from sinking to the bottom
of the pan during baking. Sticky
fruits should be dusted with flour for
better distribution in the batter.
Liquid Mixtures
Mixtures containing large amounts
of liquid ingredients should be mixed
at lower speeds to avoid splashing.
Increase the speed only after the
mixture has thickened.
* If Pouring Shield is included.
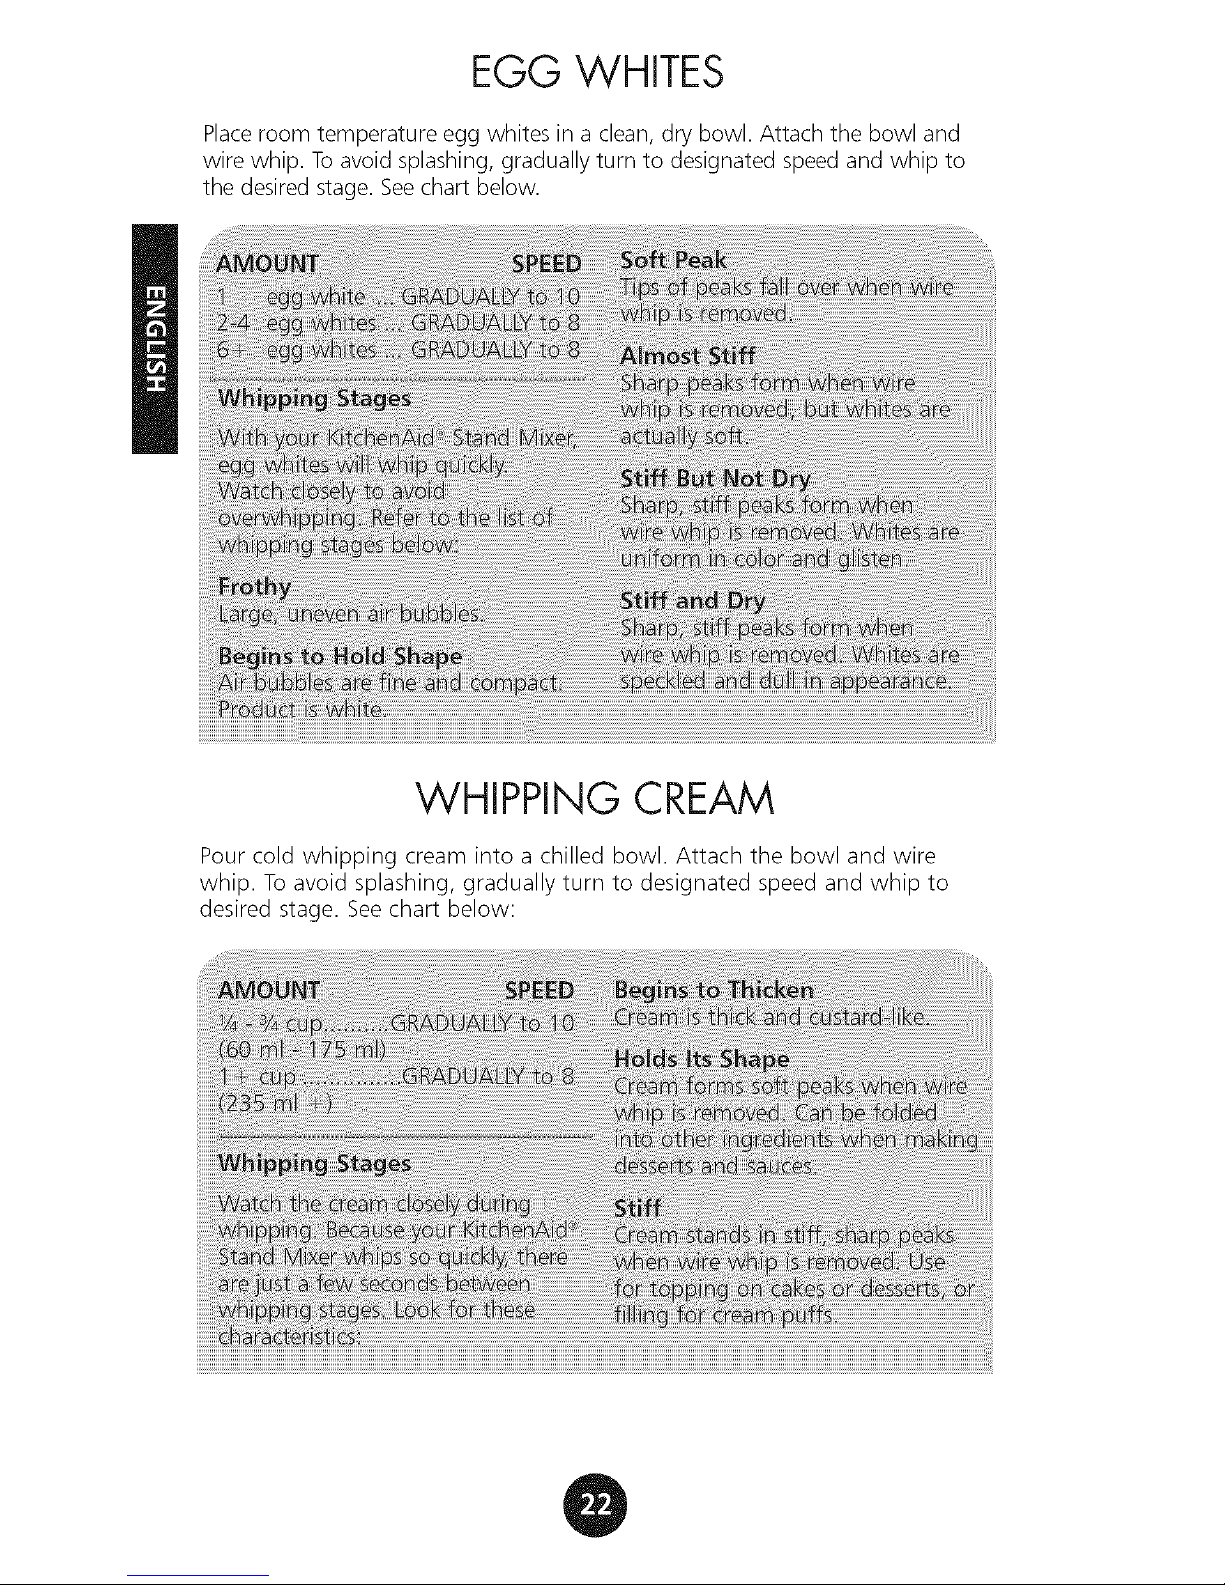
EGG WHITES
Placeroom temperature egg whites in a clean, dry bowl. Attach the bowl and
wire whip. To avoid splashing, gradually turn to designated speed and whip to
the desiredstage. Seechart below.
WHIPPING CREAM
Pour cold whipping cream into a chilled bowl. Attach the bowl and wire
whip. Toavoid splashing, gradually turn to designated speed and whip to
desired stage. Seechart below:
STAND MIXER ATTACHMENTS
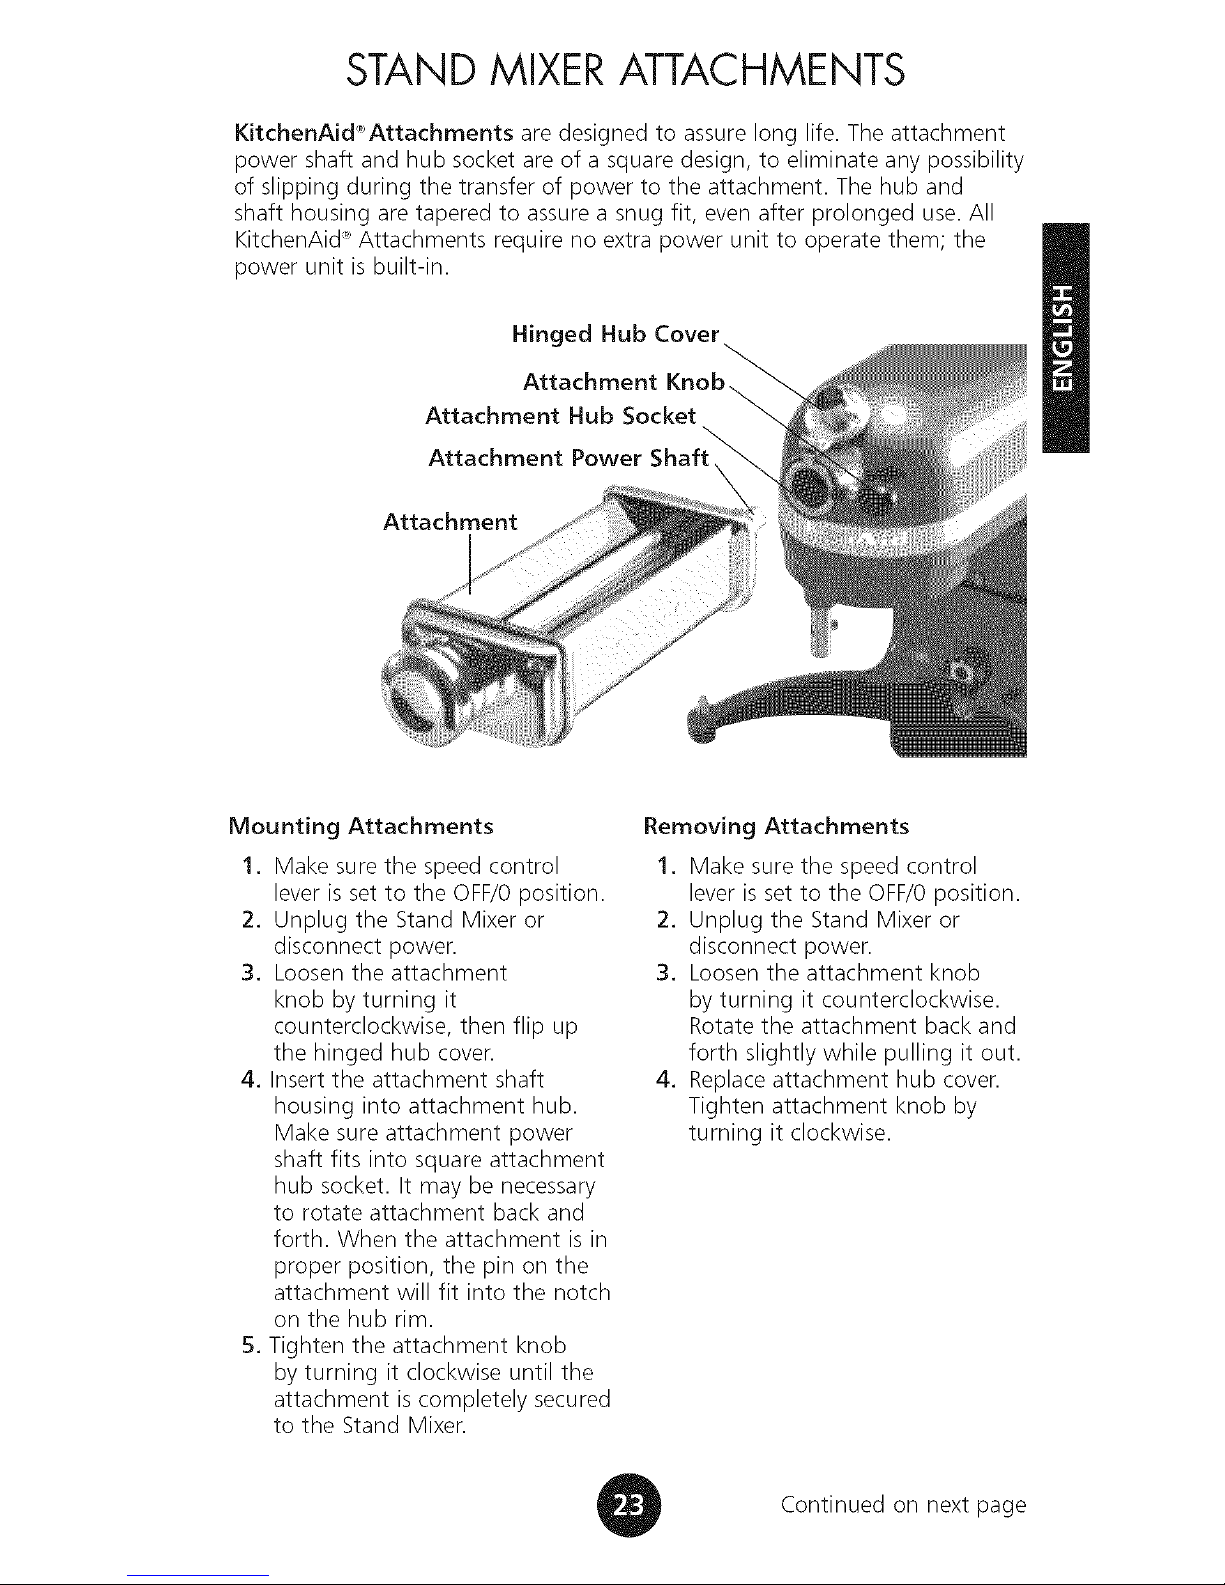
KitchenAid_'Attachments are designed to assure long life. The attachment
power shaft and hub socket are of a square design, to eliminate any possibility
of slipping during the transfer of power to the attachment. The hub and
shaft housing are tapered to assure a snug fit, even after prolonged use. All
KitchenAid _ Attachments require no extra power unit to operate them; the
power unit is built-in.
Hinged Hub Cover
Attachment Knob \
Attachment Hub Socket
Attachment Power Shaft
Attachment
Mounting Attachments
1. Make sure the speed control
lever is set to the OFF/Oposition.
2. Unplug the Stand Mixer or
disconnect power.
3. Loosen the attachment
knob by turning it
counterclockwise, then flip up
the hinged hub cover.
4. Insert the attachment shaft
housing into attachment hub.
Make sure attachment power
shaft fits into square attachment
hub socket. It may be necessary
to rotate attachment back and
forth. When the attachment is in
proper position, the pin on the
attachment will fit into the notch
on the hub rim.
5. Tighten the attachment knob
by turning it clockwise until the
attachment iscompletely secured
to the Stand Mixer.
Removing Attachments
1. Make sure the speed control
lever is set to the OFF/Oposition.
2. Unplug the Stand Mixer or
disconnect power.
3. Loosen the attachment knob
by turning it counterclockwise.
Rotate the attachment back and
forth slightly while pulling it out.
4. Replaceattachment hub cover.
Tighten attachment knob by
turning it clockwise.
Continued on next page

STAND MIXER ATTACHMENTS
PASTA MAKER
Five
interchangeable
_! pasta plates create
_i!! fresh macaroni,
flat noodles,
lasagna, and thick
or thin spaghetti.
Includes the
required Food Grinder Attachment.
[SNPA] has pasta plates only,
without the Food Grinder
Attachment. [SNFGA]
RAVIOLI MAKER
Rollspasta sheets
and filling into
3 rows of fresh,
large-pocket
ravioli. Includes
speciallydesigned
filling scoop and cleaning brush.
Accommodates 6-inch wide pasta
sheetsproduced with the Pasta
Sheet RollerAttachment [KPSA]
(sold separately).[KRAV]
PASTA CUTTER COMPANION SET
Accommodates
pasta sheets
produced by the
Pasta Sheet Roller
[KPSA] or the
Pasta Roller Set
[KPRA] (both sold
separately) to cut thin angel hair pasta
and thick noodles. [KPCA]
PASTA SHEET ROLLER AND
CUTTER SET
The 3-piece, all
metal set contains
a Pasta Sheet
Roller, Fettuccine
Cutter, and
Spaghetti Cutter.
Includes cleaning
brush. [KPSA]
PastaSheet Roller
only. [KPRA]
GRAIN MILL
The all-metal
Grain Mill
Attachment will
grind wheat,
oats, corn, rice,
and other low-
moisture, low-
oil grains. Choose from "cracked"
to extra-fine consistency. Includes
cleaning brush. [KGMA]
SLICER AND SHREDDER
Cuts thick or thin
slices of firm fruits
and vegetables,
as well asfine or
coarse shreds of
.............. crisp vegetables,
nuts, and firm
cheese. Includes 2 slicer and 2
shredder cones. [RVSA]
FOOD GRINDER
Quickly grind
meats, firm fruits
and vegetables,
dry bread, and
cheese. Includes
coarse and fine
grinder plates,
and combination
food pusher/wrench. [FGA]
SAUSAGE STUFFER
Prepare sausages
that burst with
delectable flavor
and nutrition.
Includes a 3/s-inch
(1 cm) tube for
small links, and a
%-inch (1.6 cm)
tube for large links. The Sausage Stuffer
requires the Food Grinder Attachment
[FGA sold separately.] [SSA]
STAND MIXER ATTACHMENTS
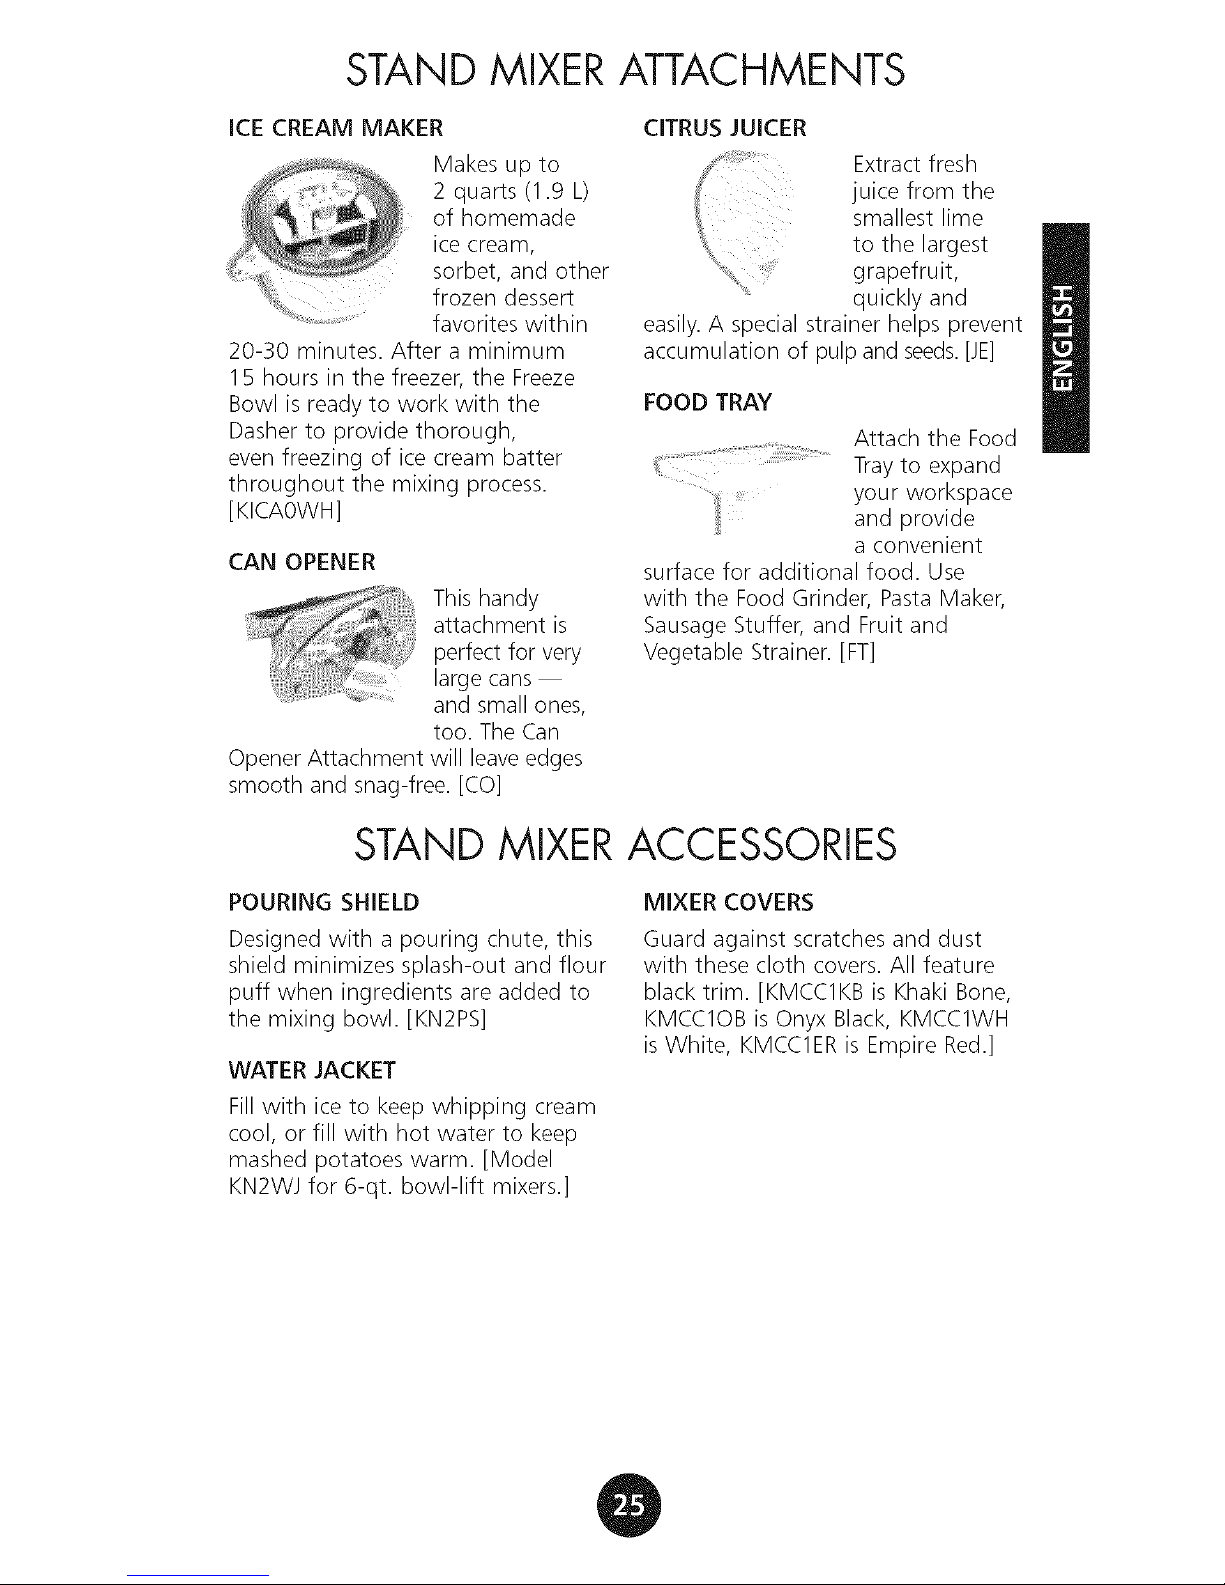
ICE CREAM MAKER
Makes up to
2 quarts (1.9 L)
of homemade
ice cream,
sorbet, and other
frozen dessert
favorites within
20-30 minutes. After a minimum
15 hours in the freezer, the Freeze
Bowl is ready to work with the
Dasher to provide thorough,
even freezing of ice cream batter
throughout the mixing process.
[KICAOWH]
CAN OPENER
This handy
attachment is
perfect for very
large cans
and small ones,
too. The Can
Opener Attachment will leave edges
smooth and snag-free. [CO]
CITRUS JUICER
Extract fresh
juice from the
smallest lime
to the largest
grapefruit,
quickly and
easily.A special strainer helps prevent
accumulation of pulp and seeds.[JE]
FOOD TRAY
Attach the Food
Trayto expand
your workspace
and provide
a convenient
surface for additional food. Use
with the Food Grinder, Pasta Maker,
Sausage Stuffer, and Fruit and
Vegetable Strainer. [FT]
STAND MIXER ACCESSORIES
POURING SHIELD
Designed with a pouring chute, this
shield minimizes splash-out and flour
puff when ingredients are added to
the mixing bowl. [KN2PS]
WATER JACKET
Fill with ice to keep whipping cream
cool, or fill with hot water to keep
mashed potatoes warm. [Model
KN2WJ for 6-qt. bowl-lift mixers.]
MIXER COVERS
Guard against scratches and dust
with these cloth covers. All feature
black trim. [KMCC1KB is Khaki Bone,
KMCC1OB is Onyx Black, KMCClWH
is White, KMCC1ERis Empire Red.]
GENERAL INSTRUCTIONS
FOR MIXING AND KNEADING YEAST
DOUGH WITH THE RAPIDMIX METHOD
"Rapid Mix" describes a bread baking
method that calls for dry yeast to
be mixed with other dry ingredients
before liquid is added. In contrast,
the traditional method is to dissolve
yeast in warm water.
1. Place all dry ingredients including
yeast into bowl, except last 1 to
2 cups (235 to 475 ml) flour.
2. Attach bowl and dough hook.
Raise mixer bowl. Turn to Speed
2 and mix about 15 seconds, or
until ingredients are combined.
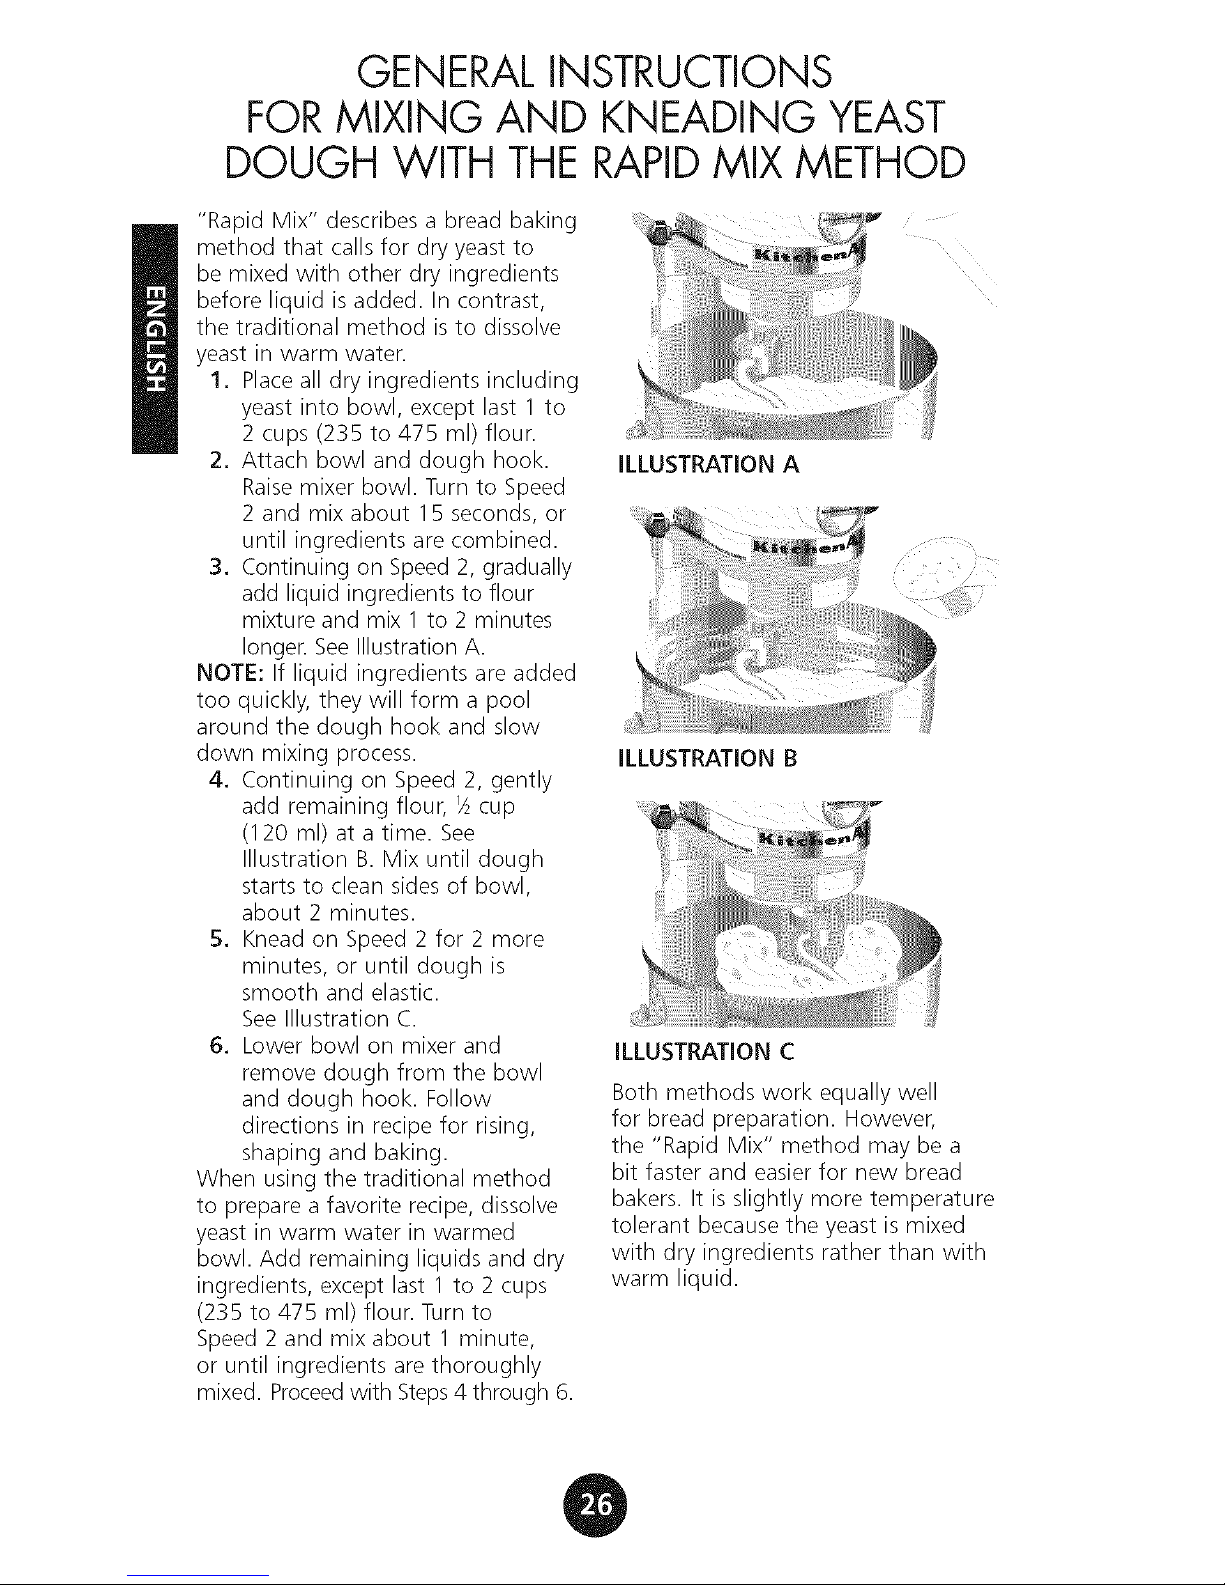
3. Continuing on Speed 2, gradually
add liquid ingredients to flour
mixture and mix 1 to 2 minutes
longer. See Illustration A.
NOTE: If liquid ingredients are added
too quickly, they will form a pool
around the dough hook and slow
down mixing process.
4. Continuing on Speed 2, gently
add remaining flour, _Acup
(120 ml) at a time. See
Illustration B. Mix until dough
starts to clean sides of bowl,
about 2 minutes.
5. Knead on Speed 2 for 2 more
minutes, or until dough is
smooth and elastic.
See Illustration C.
6. Lower bowl on mixer and
remove dough from the bowl
and dough hook. Follow
directions in recipe for rising,
shaping and baking.
When using the traditional method
to prepare a favorite recipe, dissolve
yeast in warm water in warmed
bowl. Add remaining liquids and dry
ingredients, except last 1 to 2 cups
(235 to 475 ml) flour. Turn to
Speed 2 and mix about 1 minute,
or until ingredients are thoroughly
mixed. Proceed with Steps 4 through 6.
ILLUSTRATION A
i
ILLUSTRATION B
ILLUSTRATION C
Both methods work equally well
for bread preparation. However,
the "Rapid Mix" method may be a
bit faster and easier for new bread
bakers. It is slightly more temperature
tolerant because the yeast is mixed
with dry ingredients rather than with
warm liquid.
BREADMAKING TIPS
Making bread with a mixer is quite different from making bread by hand.
Therefore, it will take some practice before you are completely comfortable
with the new process. For your convenience, we offer these tips to help you
become accustomed to bread making the KitchenAid _ brand way.
• Start out with an easy recipe, like
BasicWhite Bread, page 29, until
you are familiar with using the
dough hook.
ALWAYSuse the dough hook to
mix and knead yeast doughs.
• Use Speed 2 to mix or knead yeast
doughs. Use of any other speed
creates high potential for Stand
Mixer failure.
NEVERuserecipes calling for more
than 14 cups (3.4 L)all-purpose
flour or 8 cups (1.9 L)whole wheat
flour when making dough with a
6 quart (5.7 L) mixer.
• NEVERuse recipescallingfor more
than 12 cups (3 L)all-purposeflour
or 6 cups (1.5 L)whole wheat flour
when making dough with a 5 quart
(4.73 L)mixer.
• Use a candy or other kitchen
thermometer to assure that liquids
are at temperature specified
in the recipe. Liquids at higher
temperature can kill yeast, while
liquids at lower temperatures will
retard yeast growth.
• Warm all ingredients to room
temperature to insure proper rising
of dough. If yeast isto be dissolved
in bowl, always warm bowl first by
rinsing with warm water to prevent
cooling of liquids.
• Allow bread to rise in a warm
place, 80°F to 85°F (26°C to 29°C),
free from draft, unless otherwise
specified in recipe.
Here are some alternative rising
methods to use: (1) The bowl
containing the dough can be
placed on a wire rack over a pan
of hot water. (2) The bowl can
be placed on the top rack of an
unheated oven; put a pan of hot
water on the rack below. (3) Turn
the oven to 400°F (200°C) for
1 minute; then turn it off; place
the bowl on the center rack of the
oven and close the door.
Cover bowl with waxed paper, if
desired. Always cover with towel
to retain warmth in the bowl and
protect the dough from drafts.
Recipe rising times may vary due
to temperature and humidity in
your kitchen. Dough has doubled
in bulk when indentation remains
after tips of fingers are pressed
lightly and quickly into dough.
Most bread recipes give a range
for the amount of flour to be used.
Enough flour has been added
when the dough starts to clean
sides of bowl. If dough is sticky or
humidity is high, slowly add more
flour, about _/_cup (120 ml)
at a time but NEVERexceed
recommended flour capacity.
Knead after each addition until
flour is completely worked into
dough. If too much flour isadded,
a dry loaf will result.
When done, yeast breads and rolls
should be deep golden brown in
color. Other tests for aloneness of
breads are: Bread pulls away from
the sides of pan, and tapping
on the top of the loaf produces
a hollow sound. Turn loaves and
rolls onto racks immediately after
baking to prevent sogginess.
SHAPING A LOAF
J
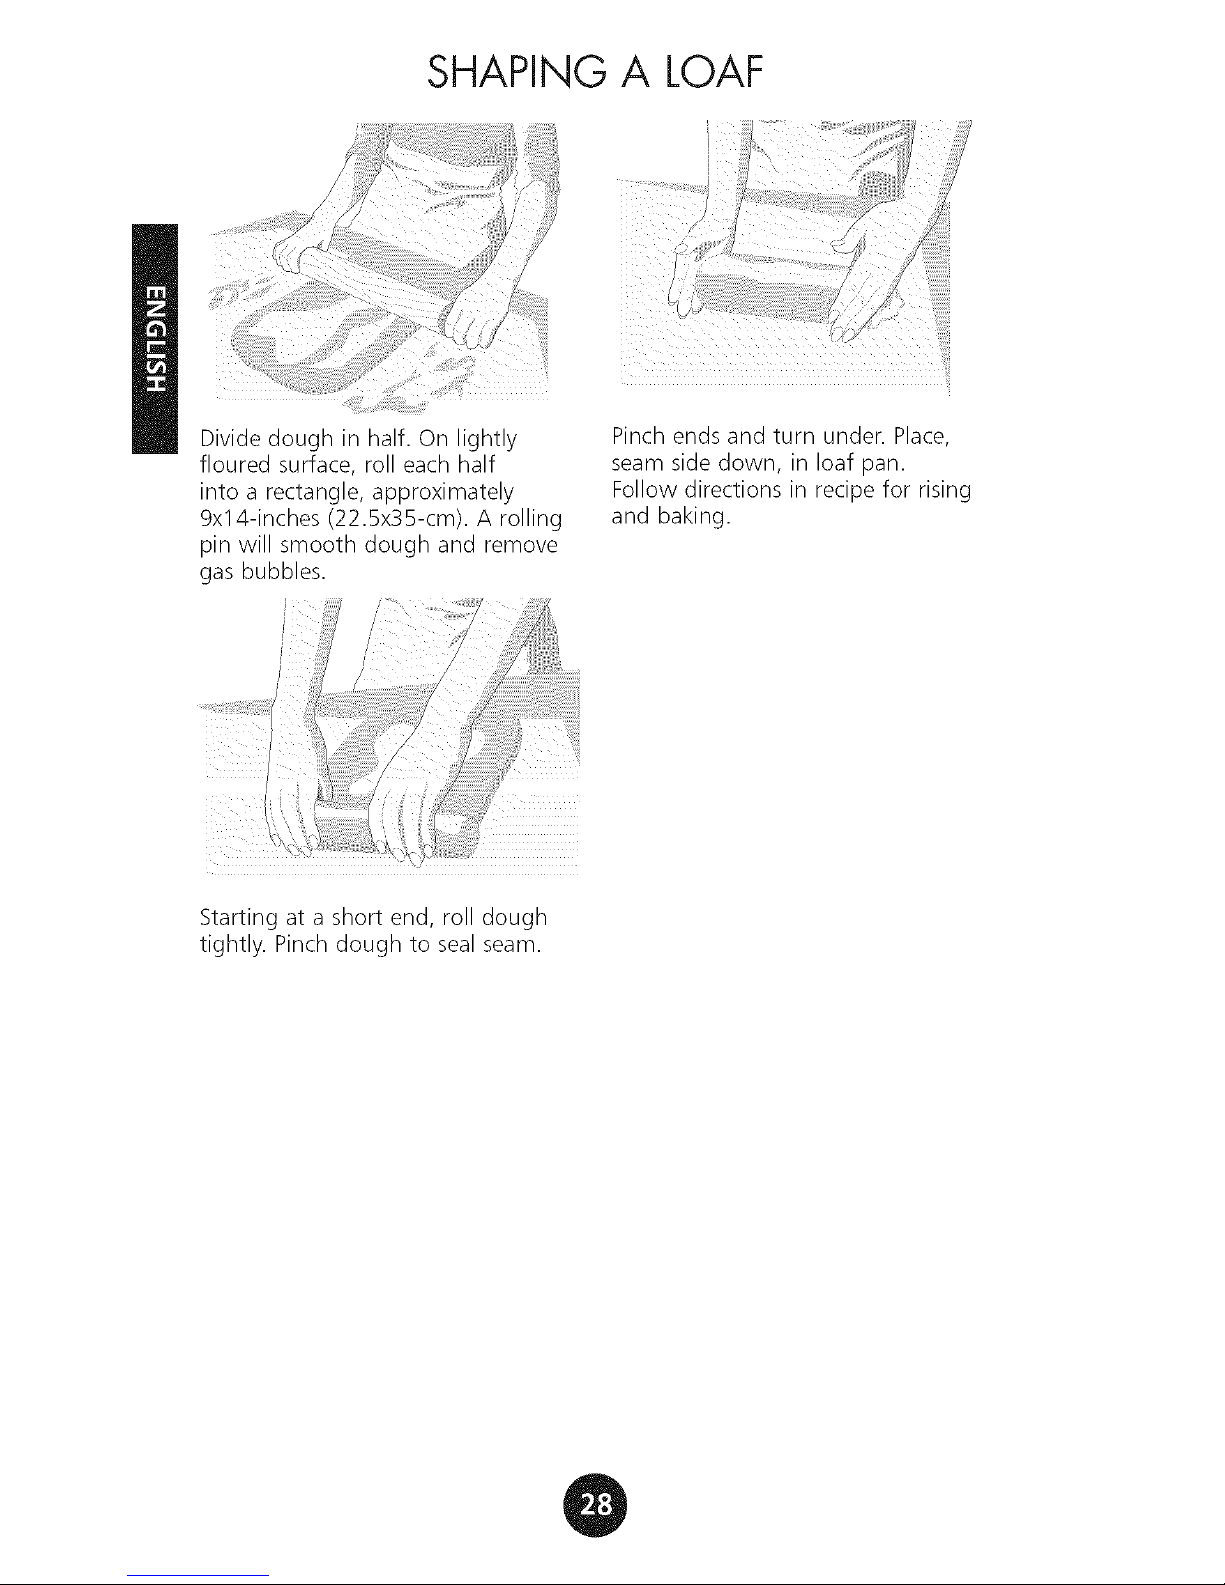
Divide dough in half. On lightly
floured surface, roll each half
into a rectangle, approximately
9x14-inches (22.5x35-cm). A rolling
pin will smooth dough and remove
gas bubbles.
Pinch ends and turn under. Place,
seam side down, in loaf pan.
Follow directions in recipe for rising
and baking.
Starting at a short end, roll dough
tightly. Pinch dough to seal seam.
 Loading...