

Page 1
WARMING DRAWER
Use & Care Guide
For questions about features, operation/performance, parts, accessories or service, call: 1-800-422-1230
In Canada, call for assistance 1-800-461-5681, for installation and service, call: 1-800-807-6777 or visit our website at...
www.kitchenaid.com or www.KitchenAid.ca
TIROIR-RÉCHAUD
Guide d’utilisation et d’entretien
Au Canada, pour assistance composez le 1-800-461-5681, pour installation ou service composez le 1-800-807-6777 ou visitez notre site web à...
www.KitchenAid.ca
Table of Contents/Table des matières.............................................................................2
Models/Modèles KEWD105 KEWD175 KEWV105
8304068
Page 2
TABLE OF CONTENTS
TABLE DES MATIÈRES
WARMING DRAWER SAFETY ......................................................3
Electrical Requirements ...............................................................4
PARTS AND FEATURES................................................................5
WARMING DRAWER CONTROLS................................................6
Power Switch ...............................................................................6
Temperature Control Knob ..........................................................6
Timer.............................................................................................6
Timer Override Switch.................................................................. 6
Moist-Dry Slide.............................................................................6
WARMING DRAWER USE.............................................................6
Setting the Controls .....................................................................6
Positioning Rack and Pans.......................................................... 7
Warming Cookware .....................................................................8
Proofing Bread .............................................................................8
Aluminum Foil...............................................................................8
WARMING DRAWER CARE ..........................................................8
Drawer Slides ...............................................................................8
Warming Drawer ..........................................................................8
General Cleaning..........................................................................9
TROUBLESHOOTING ....................................................................9
ASSISTANCE OR SERVICE.........................................................10
In the U.S.A. ...............................................................................10
In Canada ...................................................................................10
WARRANTY ..................................................................................11
SÉCURITÉ DU TIROIR-RÉCHAUD .............................................12
Spécifications électriques ..........................................................13
PIÈCES ET CARACTÉRISTIQUES ..............................................14
COMMANDES DU TIROIR-RÉCHAUD.......................................15
Interrupteur d’alimentation.........................................................15
Bouton de commande de la température..................................15
Minuterie.....................................................................................15
Interrupteur de dépassement de la minuterie............................15
Curseur de réglage Moist-Dry (humide-sec)..............................15
UTILISATION DU TIROIR-RÉCHAUD.........................................15
Réglage des commandes ..........................................................15
Grille de positionnement et plats ...............................................16
Ustensiles de réchauffage..........................................................17
Levée du pain.............................................................................17
Papier d'aluminium.....................................................................17
ENTRETIEN DU TIROIR-RÉCHAUD...........................................17
Glissières du tiroir.......................................................................17
Tiroir-réchaud .............................................................................17
Nettoyage général ......................................................................18
DÉPANNAGE.................................................................................18
ASSISTANCE OU SERVICE.........................................................19
GARANTIE.....................................................................................20
WARMING DRAWER SAFETY
Your safety and the safety of others are very important.
We have provided many important safety messages in this manual and on your appliance. Always read and obey all safety
messages.
This is the safety alert symbol.
This symbol alerts you to potential hazards that can kill or hurt you and others.
All safety messages will follow the safety alert symbol and either the word “DANGER” or “WARNING.”
These words mean:
You can be killed or seriously injured if you don't immediately
DANGER
WARNING
All safety messages will tell you what the potential hazard is, tell you how to reduce the chance of injury, and tell you what can
happen if the instructions are not followed.
follow instructions.
can be killed or seriously injured if you don't
You
instructions.
follow
2
Page 3
IMPORTANT SAFETY INSTRUCTIONS
WARNING: To reduce the risk of fire, electrical
shock, injury to persons, or damage when using the
warming drawer, follow basic precautions, including the
following:
■ Proper Installation – Be sure the warming drawer is
properly installed and grounded by a qualified
technician.
■
Never Use the Warming Drawer for Warming or Heating
the Room.
■
Do Not Leave Children Alone – Children should not be left
alone or unattended in area where warming drawer is in
use. They should never be allowed to sit or stand on any
part of the warming drawer.
■
Wear Proper Apparel – Loose-fitting or hanging garments
should never be worn while using the warming drawer.
■
User Servicing – Do not repair or replace any part of the
warming drawer unless specifically recommended in the
manual. All other servicing should be referred to a qualified
technician.
■
Storage in Warming Drawer – Flammable materials should
not be stored in a warming drawer.
■
Do Not Use Water on Grease Fires – Smother fire or flame
or use dry chemical or foam-type extinguisher.
■
Use Only Dry Potholders – Moist or damp potholders on
hot surfaces may result in burns from steam. Do not let
potholder touch hot heating elements. Do not use a towel
or other bulky cloth.
■
Use Care When Opening Door – Let hot air or steam
escape before removing or replacing food.
■
Do Not Heat Unopened Food Containers – Build-up of
pressure may cause container to burst and result in injury.
■
Placement of Warming Drawer Racks – Always place
warming drawer racks in desired location while warming
drawer is cool. If rack must be moved while warming
drawer is hot, do not let potholder contact hot heating
element in warming drawer.
■
DO NOT TOUCH HEATING ELEMENTS OR INTERIOR
SURFACES OF WARMING DRAWER – Heating elements
may be hot even though they are dark in color. Interior
surfaces of a warming drawer become hot enough to
cause burns. During and after use, do not touch, or let
clothing or other flammable materials contact heating
elements or interior surfaces of warming drawer until they
have had sufficient time to cool. Other surfaces of the
warming drawer may become hot enough to cause burns –
among these surfaces are warming drawer vent openings
and surfaces near these openings and warming drawer
doors.
SAVE THESE INSTRUCTIONS
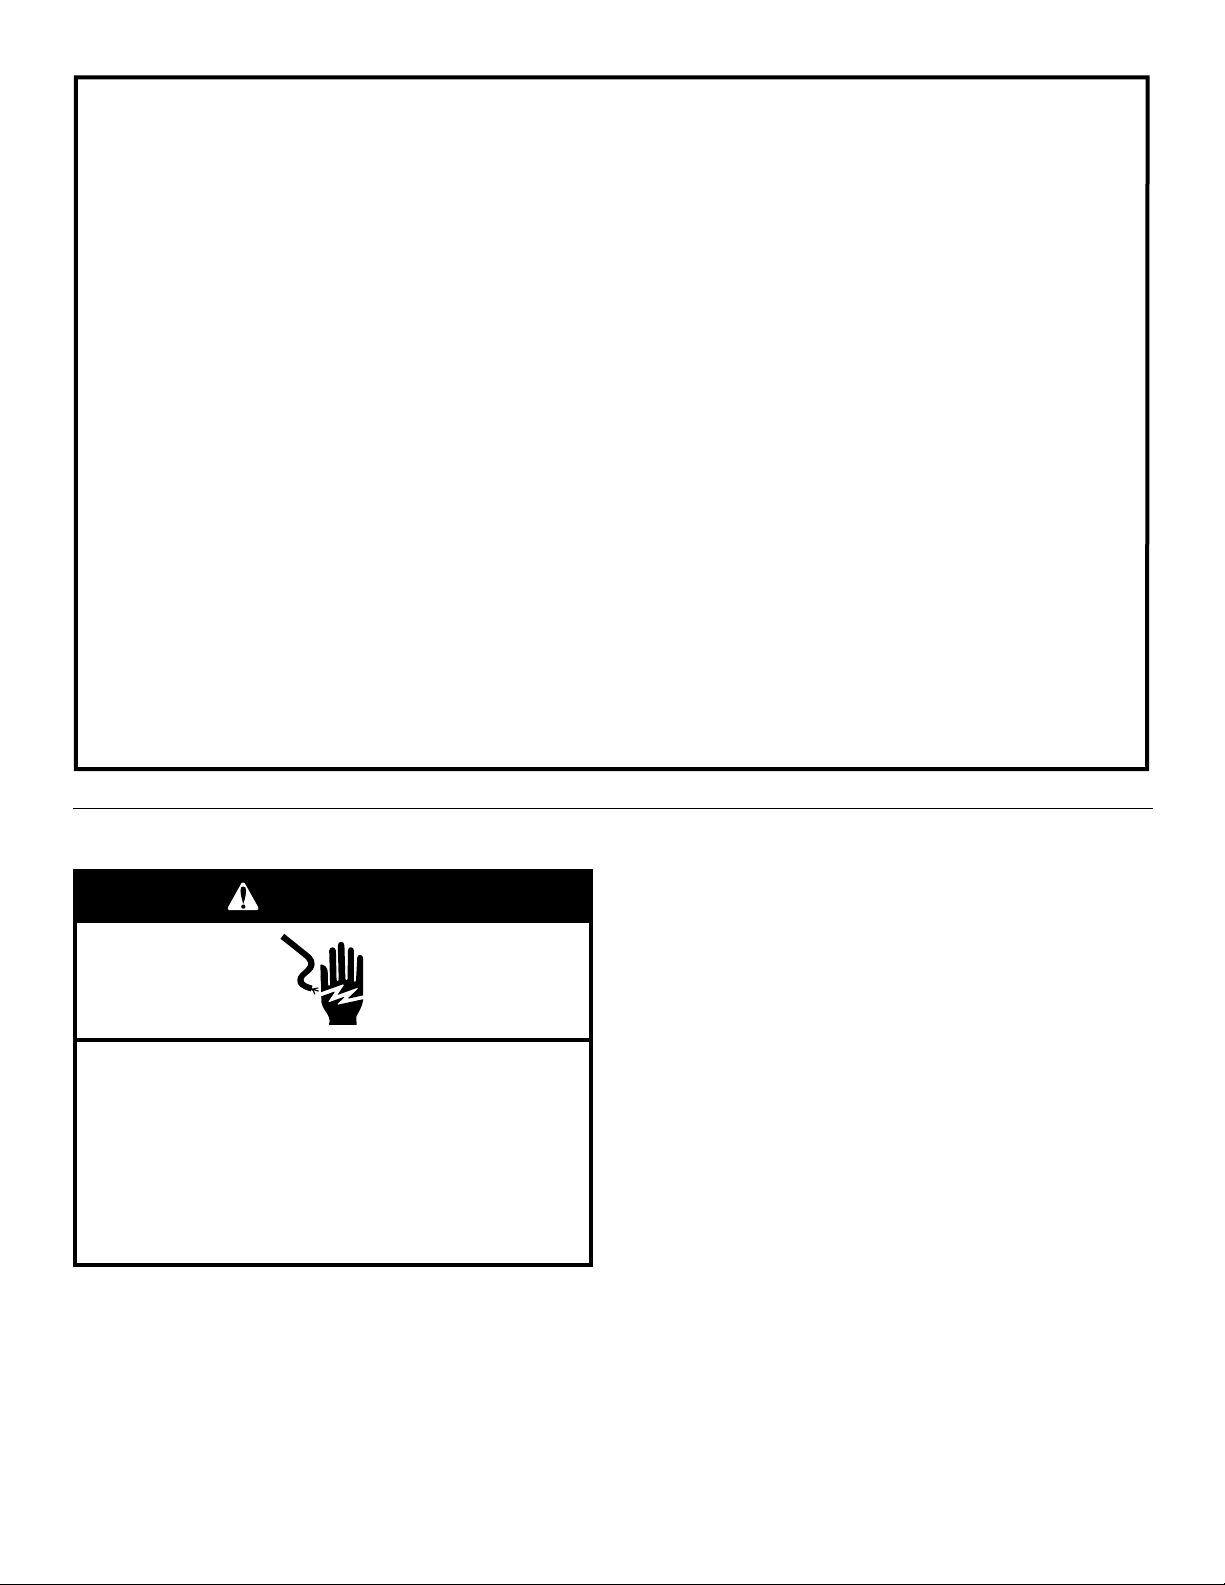
Electrical Requirements
WARNING
Electrical Shock Hazard
Plug into a grounded 3 prong outlet.
Do not remove ground prong.
Do not use an adapter.
Do not use an extension cord.
Failure to follow these instructions can result in death,
fire, or electrical shock.
It is important to make sure you have the proper electrical
connection:
A 115 Volt, 60 Hz., AC only 15- or 20-amp electrical supply,
properly grounded in accordance with the National Electrical
Code and local codes and ordinances, is required.
It is recommended that a separate circuit, serving only your
warming drawer, be provided.
Recommended Grounding Method
For your personal safety, this appliance must be grounded. This
appliance is equipped with a power supply cord having a 3 prong
grounding plug. To minimize possible shock hazard, the cord
must be plugged into a mating, 3 prong, grounding-type wall
receptacle, grounded in accordance with the National Electrical
Code and local codes and ordinances. If mating wall receptacle
is not available, it is the personal responsibility of the customer to
have a properly grounded, 3 prong wall receptacle installed by a
qualified electrician.
3
Page 4
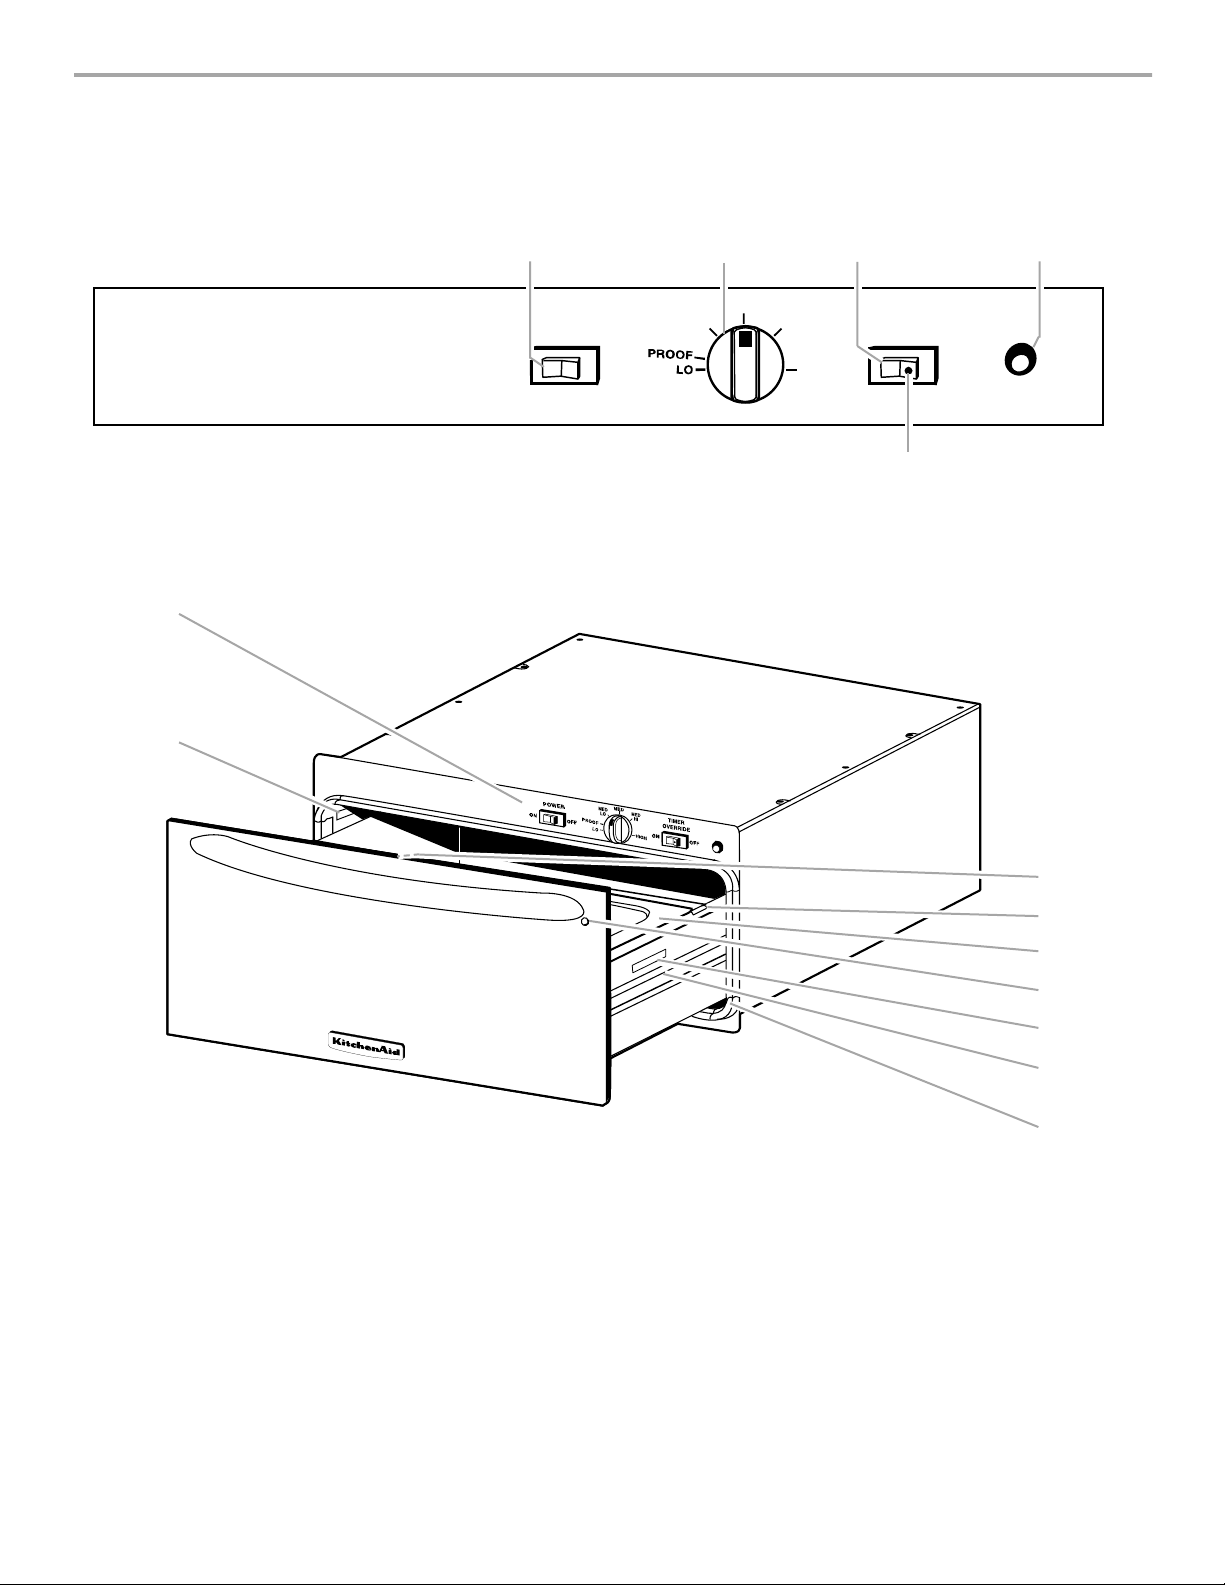
PARTS AND FEATURES
C
D
G
This manual covers several different models. The range you have purchased may have some or all of the parts and features listed. The
location and appearance of the features shown here may not match those of your model.
Control Panel
AC
B
D
A. Power “ON” switch
B. Temperature control knob
Warming Drawer
A
B
ON
POWER
OFF
MED
LO
MED
MED
HI
HIGH
TIMER
OVERRIDE
ON
OFF
E
C. Timer override switch D. Power “ON” indicator light
E. Timer override light
A. Control panel
B. Model and serial number plate
C. Moist-dry slide (not shown)
D. Pan support and locator
E. Pans
F. “ON” light viewer
E
F
H
I
G. Consumer information number
H. Drawer slide
I. Gasket
4
Page 5
WARMING DRAWER CONTROLS
Power Switch
WARNING
Food Poisoning Hazard
Do not let food sit for more than one hour before or
after cooking.
Doing so can result in food poisoning or sickness.
Press the POWER “ON” switch to turn on the warming drawer.
Once the power is turned on, a red indicator light will illuminate.
This indicator light is located on the right side of the Timer
Override switch.
When finished, press the POWER “OFF” switch to turn off the
warming drawer. When the warming drawer is turned off
automatically or manually, the indicator light will go out and the
drawer will begin to cool.
Temperature Control Knob
The temperature is controlled by rotating the control knob to the
desired setting. The temperature ranges from LO to HIGH,
approximately 90°F to 225°F (32°C to 107°C).
Timer
The warming drawer has an automatic 4-hour timer. After
4 hours, the warming drawer will shut off. Although the automatic
timer is set for a 4-hour period, do not leave food in warming
drawer for more than 1 hour.
Timer Override Switch
The automatic 4-hour timer can be turned off using the Timer
Override switch. This feature allows you to keep the warming
drawer on until it is turned off manually with the Power “Off”
switch.
It is recommended that the switch remain in the “Off” position,
unless longer warming times are required. When the Timer
Override switch is in the “On” position, the light on the switch will
illuminate, showing the Timer has been bypassed.
IMPORTANT: Although the Timer can be bypassed by using the
Timer Override switch, do not let food sit in the warming drawer
for more than 1 hour. Bacterial growth may occur.
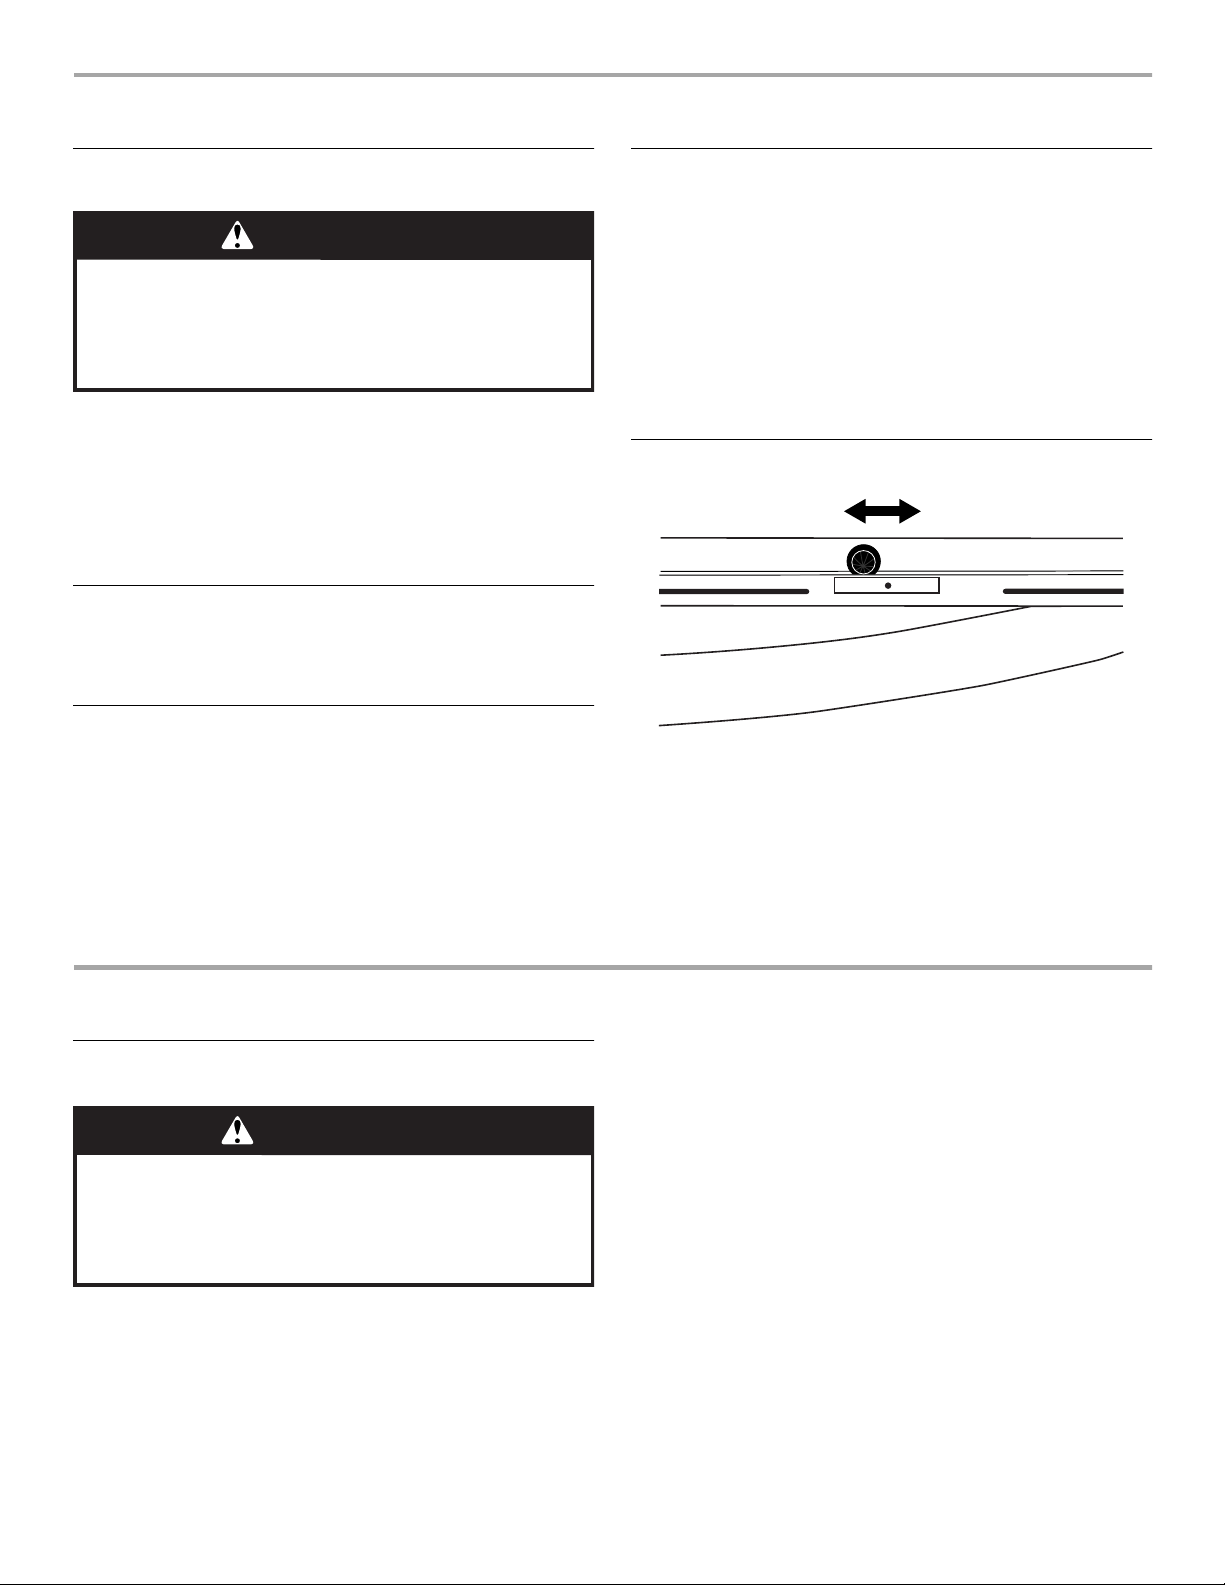
Moist-Dry Slide
MOIST DRY
The Moist-Dry slide allows you to open or close the vent slots in
the door. The MOIST setting holds moisture in, while the DRY
setting allows steam and moisture to escape from the drawer.
NOTE: Condensation may form on inner surfaces. This is normal.
To keep foods moist, put slide on MOIST, closing the vents.
Closing the vents will seal the drawer and keeps hot food soft
and moist.
To keep foods crisp, put slide on DRY, opening the vents.
Opening the vents releases moisture from the drawer and keeps
hot foods crisp and dry.
WARMING DRAWER USE
Setting the Controls
WARNING
Food Poisoning Hazard
Do not let food sit for more than one hour before or
after cooking.
Doing so can result in food poisoning or sickness.
The warming drawer is ideal for keeping hot cooked foods at
serving temperature. It may also be used for warming breads and
pastries.
Different types of food may be placed in the warming drawer at
the same time. For best results, do not hold foods longer than
1 hour. For smaller quantities or heat-sensitive foods (such as
eggs), do not hold longer than 30 minutes.
Food must be heated to serving temperature before being placed
in the warming drawer. Cover foods with a lid or aluminum foil.
Do not cover with plastic wrap.
Breads, pastries, and fruit pies may be heated from room
temperature on the HI setting. Remove food from plastic bags
and place in oven-safe container.
Oven-safe serving dishes and dinner plates can be heated while
the warming drawer is preheating.
NOTE: Place pans and positioning rack in the warming drawer
before preheating.
To Us e :
1. Press the POWER “ON” switch.
2. Select MOIST or DRY setting.
3. Set the drawer to desired temperature setting (LO, MED LO,
MED, MED HIGH and HIGH).
4. Preheat the drawer. For LO, preheat for 5 minutes. For MED,
preheat for 8 minutes. For HIGH, preheat for 10 minutes.
5
Page 6
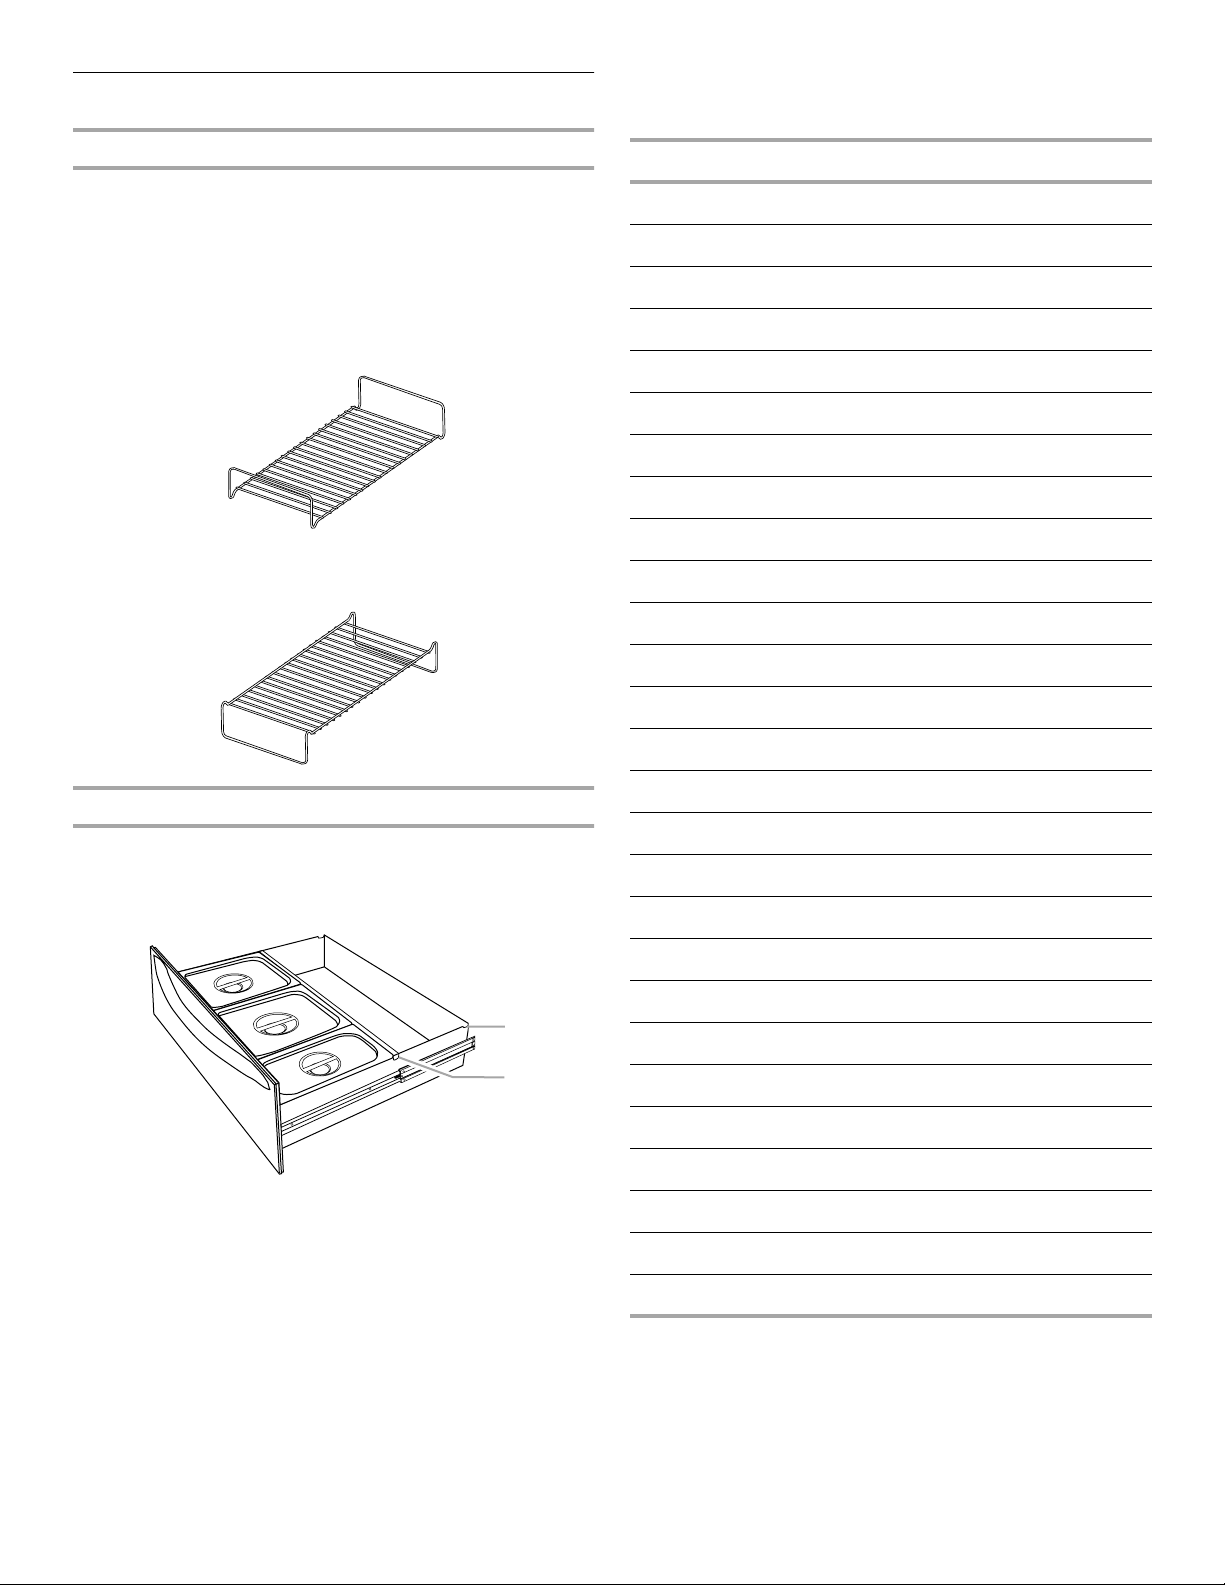
Positioning Rack and Pans
Positioning Rack
The rack accompanying your warming drawer can be used in
2 different positions, high and low. The rack will fit from front to
back or side to side.
NOTE: When placing the rack front to back, the warming drawer
must be fully opened.
Low position
This position raises the oven-safe container ½" (1.27 cm) from
the bottom of the drawer.
WARMING DRAWER TEMPERATURE CHART
Different foods require different settings in order to maintain the
ideal serving temperature. Use the following chart as a guide.
FOOD SETTING
Bacon* HI
Beef, medium and well-done HI
Bread, hard rolls LO
Bread, soft rolls LO
Casseroles HI
Coffee cake, pastries LO
Cooked cereal MED
Eggs MED
High position
This position lets you stack items in the drawer.
Pans
The warming drawer comes with oven-safe pans with lids that fit
conveniently inside the drawer. On 30" (76 cm) models, the
warming drawer comes with 3 pans. On 27" (68 cm) models, the
warming drawer comes with 2 pans.
B
A
Fish, Seafood (No breading) MED
Fish, Seafood (Breaded)* MED
Fried foods HI
Gravy, Cream Sauces HI
Ham MED
Hors d’oeuvres (soft) HI
Hors d’oeuvres (crisp) HI
Lamb MED
Pancakes, waffles* MED
Pies, custard MED
Pies, single crust LO
Pies, double crust LO
Pizza HI
Pork MED
A. Pan support (in locator notch)
B. Storage notch
When using the pans, make sure the pan support is properly
installed in the locator notch before inserting pans. When not
using the pans, place the support in the storage notch.
6
Potatoes, baked HI
Potatoes, mashed MED
Poultry HI
Quiche MED
Vegetables MED
*All foods should be covered, except those marked with an
asterisk (*).
Page 7

Warming Cookware
A
Use only cookware approved for oven use. Follow the cookware
manufacturer’s instructions, especially when using glass or
plastic cookware.
Proofing Bread
Proofing bread prepares dough for baking by activating the
yeast.
To Pro of:
1. Cover dough with lightly oiled wax paper and place
temperature safe bowl(s) directly on bottom of drawer.
2. Set control knob to PROOF setting.
3. Place vent on MOIST setting.
WARMING DRAWER CARE
Drawer Slides
The drawer slides allow you to fully extend the drawer for easier
cleaning. If necessary, the drawer can be removed.
NOTE: Load capacity for the drawer and slides is 100 lbs (45 kg).
4. Check dough periodically for proofing progress.
5. Verify doneness by pressing 2 fingers ¹⁄₂" (1.27 cm) into
dough. If indentation remains, the dough is ready.
For second proofing of dough, follow steps 1-4.
Aluminum Foil
Do not line warming drawer with aluminum foil.
Keep food covered if it was cooked with a cover on it.
Use narrow strips of foil to shield pie crust edges from further
browning in drawer.
Place tent-shaped foil loosely over meat or poultry to prevent
dryness and further browning while in the drawer.
The use of aluminum foil to cover foods may cause moisture to
collect and drip into the drawer.
3. Press the tab down on the right side and lift tab up on the left
side at the same time, then pull drawer out 1" (2,54 cm) to
disengage latch.
Warming Drawer
Remove all items from inside the warming drawer, and allow the
unit to cool completely before attempting to remove the drawer.
To Re mov e:
1. Open drawer to its full open position.
2. Locate the black triangle-shaped tabs on both sides of the
drawer.
A. Tab
4. Hold the drawer by its sides (not by its front). Slowly pull it all
the way out.
To Replace:
1. Align the drawer glides with the receiving guides.
2. Push drawer in all the way.
3. Gently open and close the drawer to ensure it is seated
properly on the guides.
7
Page 8

General Cleaning
IMPORTANT: Before cleaning, make sure all controls are off and
the warming drawer and the drawer accessories are cool. Always
follow label instructions on cleaning products.
Soap, water and a soft cloth or sponge are suggested first unless
otherwise noted.
STAINLESS STEEL SURFACES
Do not use soap-filled scouring pads, abrasive cleaners, Cooktop
Polishing Creme, steel-wool pads, gritty washcloths or some
paper towels. Damage may occur.
Rub in direction of grain to avoid damaging.
■ Stainless Steel Cleaner & Polish (not included):
See “Assistance or Service” section to order.
■ Liquid detergent or all-purpose cleaner:
Rinse with clean water and dry with soft, lint-free cloth.
■ Vinegar for hard water spots
■ Soap and water:
Pull knobs straight away from control panel to remove. Wash,
rinse and dry with a soft cloth.
WARMING DRAWER
■ Paper towel and spray glass cleaner:
Make sure drawer is cool. Follow manufacturer’s instructions.
■ Warm, soapy water and a nonabrasive, plastic scrubbing
pad:
Wash, wipe with clean water and dry thoroughly.
POSITIONING RACK
■ Steel-wool pad and warm, soapy water:
Wash, rinse and dry thoroughly.
CONTROL KNOB
Do not use steel wool, abrasive cleansers or oven cleaner.
Do not soak knob.
When replacing knobs, make sure knobs are in the OFF position.
PAN S
■ Mild soap and water:
Wash, rinse and dry with soft cloth. Do not clean in
dishwasher. Discoloration will occur.
TROUBLESHOOTING
Try the solutions suggested here first in order to avoid the cost of an unnecessary service call.
Warming drawer will not operate
■ Is the power supply cord unplugged?
Plug into a grounded 3 prong outlet.
■ Has a household fuse blown, or has a circuit breaker
tripped?
Replace the fuse or reset the circuit.
■ Is the power switch in the “ON” position, but the indicator
light not illuminated?
Reset unit by turning the power switch to “OFF” and then
“ON.” The unit may have been in the timer mode, and the
timer may have ended its cycle.
Drawer does not slide properly
■ Has the drawer been mounted properly on the slides?
See “Warming Drawer Care” section.
■ Has the drawer been overloaded?
The weight inside the drawer should not exceed
100 lbs (45 kg).
■ Is the drawer load uneven?
Redistribute the food to evenly balance the weight.
Excessive moisture on the drawer
■ Did you preheat the drawer?
Preheat the drawer before each use. See “Warming Drawer
Use” section.
■ Is the MOIST-DRY setting correct?
Set the MOIST-DRY slide to “DRY” to vent the moisture.
■ Was the food covered with aluminum foil?
See “Aluminum Foil” section.
Drawer does not shut off automatically
■ Have you bypassed the timer?
Check the Timer Override switch. The Timer Override switch
must be in the “OFF” position for the timer to function
properly.
8
Page 9

ASSISTANCE OR SERVICE
Before calling for assistance or service, please check
“Troubleshooting.” It may save you the cost of a service call. If
you still need help, follow the instructions below.
When calling, please know the purchase date and the complete
model and serial number of your appliance. This information will
help us to better respond to your request.
If you need replacement parts
If you need to order replacement parts, we recommend that you
use only factory specified parts. These factory specified parts will
fit right and work right because they are made with the same
precision used to build every new KITCHENAID
To locate factory specified parts in your area, call us or your
nearest KitchenAid designated service center.
In the U.S.A.
Call the KitchenAid Customer eXperience Center toll free:
1-800-422-1230.
Our consultants provide assistance with:
■ Features and specifications on our full line of appliances.
■ Installation information.
■ Accessory and repair parts sales.
■ Specialized customer assistance (Spanish speaking, hearing
impaired, limited vision, etc.).
■ Referrals to local dealers, repair parts distributors, and
service companies. KitchenAid designated service
technicians are trained to fulfill the product warranty and
provide after-warranty service, anywhere in the United States.
To locate the KitchenAid designated service company in your
area, you can also look in your telephone directory Yellow
Pages.
For further assistance
If you need further assistance, you can write to KitchenAid with
any questions or concerns at:
KitchenAid Brand Home Appliances
Customer eXperience Center
553 Benson Road
Benton Harbor, MI 49022-2692
Please include a daytime phone number in your correspondence.
®
appliance.
Accessories U.S.A.
To order accessories, call the KitchenAid Customer eXperience
Center toll free at 1-800-442-9991 and follow the menu prompts.
Or visit our website at www.kitchenaid.com and click on “Shop-
Online,” then “Accessories.” Portable appliances, bakeware,
cookware, gadgets and textiles are also available.
In Canada
For product related questions, please call the KitchenAid Canada
Customer Interaction Centre toll free: 1-800-461-5681
Monday to Friday 8:00 a.m. - 6:00 p.m. (EST).
Saturday 8:30 a.m. - 4:30 p.m. (EST).
Our consultants provide assistance with:
■ Features and specifications on our full line of appliances.
■ Referrals to local dealers.
For parts, accessories and service in Canada
Call 1-800-807-6777. KitchenAid designated service technicians
are trained to fulfill the product warranty and provide afterwarranty service, anywhere in Canada.
For further assistance
If you need further assistance, you can write to KitchenAid
Canada with any questions or concerns at:
Customer Interaction Centre
KitchenAid Canada
1901 Minnesota Court
Mississauga, Ontario L5N 3A7
Please include a daytime phone number in your correspondence.
9
Page 10

KITCHENAID® WARMING DRAWER WARRANTY
ONE YEAR LIMITED WARRANTY
For one year from the date of purchase, when this major appliance is operated and maintained according to instructions attached to or
furnished with the product, KitchenAid or KitchenAid Canada (hereafter “KitchenAid”) will pay for factory specified parts and repair
labor to correct defects in materials or workmanship. Service must be provided by a KitchenAid designated service company.
ITEMS KITCHENAID WILL NOT PAY FOR
1. Service calls to correct the installation of your major appliance, to instruct you how to use your major appliance, to replace or repair
house fuses or to correct house wiring or plumbing.
2. Service calls to repair or replace appliance light bulbs, air filters or water filters. Those consumable parts are excluded from warranty
coverage.
3. Repairs when your major appliance is used for other than normal, single-family household use.
4. Damage resulting from accident, alteration, misuse, abuse, fire, flood, acts of God, improper installation, installation not in
accordance with electrical or plumbing codes, or use of products not approved by KitchenAid.
5. Replacement parts or repair labor costs for units operated outside the United States or Canada.
6. Pickup and delivery. This major appliance is designed to be repaired in the home.
7. Repairs to parts or systems resulting from unauthorized modifications made to the appliance.
8. Expenses for travel and transportation for product service in remote locations.
9. The removal and reinstallation of your appliance if it is installed in an inaccessible location or is not installed in accordance with
published installation instructions.
DISCLAIMER OF IMPLIED WARRANTIES; LIMITATION OF REMEDIES
CUSTOMER'S SOLE AND EXCLUSIVE REMEDY UNDER THIS LIMITED WARRANTY SHALL BE PRODUCT REPAIR AS PROVIDED
HEREIN. IMPLIED WARRANTIES, INCLUDING WARRANTIES OF MERCHANTABILITY OR FITNESS FOR A PARTICULAR PURPOSE,
ARE LIMITED TO ONE YEAR OR THE SHORTEST PERIOD ALLOWED BY LAW. KITCHENAID SHALL NOT BE LIABLE FOR
INCIDENTAL OR CONSEQUENTIAL DAMAGES. SOME STATES AND PROVINCES DO NOT ALLOW THE EXCLUSION OR LIMITATION
OF INCIDENTAL OR CONSEQUENTIAL DAMAGES, OR LIMITATIONS ON THE DURATION OF IMPLIED WARRANTIES OF
MERCHANTABILITY OR FITNESS, SO THESE EXCLUSIONS OR LIMITATIONS MAY NOT APPLY TO YOU. THIS WARRANTY GIVES
YOU SPECIFIC LEGAL RIGHTS AND YOU MAY ALSO HAVE OTHER RIGHTS, WHICH VARY FROM STATE TO STATE OR PROVINCE
TO PROVINCE.
Outside the 50 United States and Canada, this warranty does not apply. Contact your authorized KitchenAid dealer to determine if
another warranty applies.
If you need service, first see the “Troubleshooting” section of the Use & Care Guide. After checking “Troubleshooting,” additional help
can be found by checking the “Assistance or Service” section or by calling KitchenAid. In the U.S.A., call 1-800-422-1230. In Canada,
call 1-800-807-6777. 9/05
Keep this book and your sales slip together for future
reference. You must provide proof of purchase or installation
date for in-warranty service.
Write down the following information about your major appliance
to better help you obtain assistance or service if you ever need it.
You will need to know your complete model number and serial
number. You can find this information on the model and serial
number label located on the product.
Dealer name____________________________________________________
Address ________________________________________________________
Phone number __________________________________________________
Model number __________________________________________________
Serial number __________________________________________________
Purchase date __________________________________________________
10
Page 11

SÉCURITÉ DU TIROIR-RÉCHAUD
Votre sécurité et celle des autres est très importante.
Nous donnons de nombreux messages de sécurité importants dans ce manuel et sur votre appareil ménager. Assurez-vous de
toujours lire tous les messages de sécurité et de vous y conformer.
Voici le symbole d’alerte de sécurité.
Ce symbole d’alerte de sécurité vous signale les dangers potentiels de décès et de blessures graves à vous
et à d’autres.
Tous les messages de sécurité suivront le symbole d’alerte de sécurité et le mot “DANGER” ou
“AVERTISSEMENT”. Ces mots signifient :
Risque possible de décès ou de blessure grave si vous ne
DANGER
AVERTISSEMENT
Tous les messages de sécurité vous diront quel est le danger potentiel et vous disent comment réduire le risque de blessure et
ce qui peut se produire en cas de non-respect des instructions.
IMPORTANTES INSTRUCTIONS DE SÉCURITÉ
AVERTISSEMENT : Pour réduire le risque
d'incendie, de choc électrique, de blessures ou de dommages
lors de l'utilisation du tiroir de réchauffage, il convient
d'observer certaines précautions élémentaires dont les
suivantes :
■ Installation appropriée - S'assurer que le tiroir de
réchauffage est correctement installé et relié à la terre par
un technicien qualifié.
■ Ne jamais utiliser le tiroir de réchauffage pour réchauffer ou
chauffer la pièce.
■ Ne pas laisser les enfants seuls - Les enfants ne doivent
pas être laissés seuls ou sans surveillance dans la pièce où
le tiroir de réchauffage est en service. Ne jamais laisser les
enfants s'asseoir ou se tenir sur une partie quelconque du
tiroir de réchauffage.
■ Porter des vêtements appropriés - Des vêtements amples
ne doivent jamais être portés pendant l'utilisation du tiroir
de réchauffage.
■ Entretien par l'utilisateur - Ne pas réparer ni remplacer
toute pièce du tiroir de réchauffage si ce n'est pas
spécifiquement recommandé dans le manuel. Toute autre
opération d'entretien ou de réparation doit être confiée à
un technicien qualifié.
■ Remisage dans le tiroir de réchauffage - Les matériaux
inflammables ne doivent pas être remisés dans le tiroir de
réchauffage.
■ Ouvrir la porte du tiroir avec soin - Laisser l'air chaud ou la
vapeur s'échapper avant d'enlever ou de replacer les
aliments.
■ Ne pas utiliser d'eau pour éteindre un feu de graisse -
Étouffer le feu ou les flammes ou utiliser un extincteur à
produits chimiques secs, ou un extincteur à mousse.
suivez pas immédiatement les instructions.
Risque possible de décès ou de blessure grave si vous
ne suivez pas les instructions.
■ N'utiliser que des mitaines sèches - Des mitaines mouillées
ou humides sur des surfaces chaudes peuvent provoquer
des brûlures provenant de la vapeur. Ne pas laisser les
mitaines toucher les éléments chauffants. Ne pas utiliser
une serviette ou un autre chiffon épais.
■ Ne pas chauffer des contenants non ouverts d'aliments -
L'accumulation de pression peut faire exploser le
contenant et causer des blessures.
■ Positionnement des grilles du tiroir de réchauffage -
Toujours placer la grille du tiroir de réchauffage à l'endroit
voulu lorsque le tiroir de réchauffage est froid. Si la grille
doit être déplacée pendant que le tiroir de réchauffage est
chaud, ne pas laisser les mitaines toucher l'élément chaud
de chauffage dans le tiroir de réchauffage.
■ NE PAS TOUCHER LES ÉLÉMENTS DE CHAUFFAGE OU
LES SURFACES INTÉRIEURES DU TIROIR DE
RÉCHAUFFAGE - Les éléments chauffants peuvent être
chauds même lorsqu'ils ont une teinte foncée. Les
surfaces intérieures du tiroir de réchauffage deviennent
assez chaudes pour causer des brûlures. Pendant et après
l'utilisation, ne pas toucher les éléments de chauffage ou
ne pas laisser les vêtements ou autres matériaux
inflammables venir en contact avec les éléments
chauffants ou les surfaces intérieures du tiroir de
réchauffage avant qu'ils soient suffisamment refroidis.
D'autres surfaces du tiroir de réchauffage peuvent devenir
assez chaudes pour causer des brûlures - ces surfaces
comprennent les ouvertures de l'évent et du tiroir de
réchauffage et les surfaces près de ces ouvertures et la
porte du tiroir de réchauffage.
CONSERVEZ CES INSTRUCTIONS
11
Page 12

Spécifications électriques
AVERTISSEMENT
Il est important de vous assurer d’avoir la bonne connexion
électrique :
Une source d'alimentation de 115 volts, 60 Hz, types 15 ou
20 ampères CA seulement, correctement mise à la terre
conformément au Code national de l'électricité et aux codes et
règlements locaux est nécessaire.
Il est recommandé d'utiliser un circuit indépendant pour
alimenter uniquement votre tiroir-réchaud.
Risque de choc électrique
Brancher sur une prise à 3 alvéoles reliée à la terre.
Ne pas enlever la broche de liaison à la terre.
Ne pas utiliser un adaptateur.
Ne pas utiliser un câble de rallonge.
Le non-respect de ces instructions peut causer
un décès, un incendie ou un choc électrique.
Méthode recommandée de mise à la terre
Pour votre propre sécurité, cet appareil doit être mis à la terre.
L'appareil comporte un cordon d'alimentation électrique à trois
broches pour la mise à la terre. Pour minimiser les risques de
choc électrique, le cordon d'alimentation électrique doit être
branché sur une prise de courant murale mise à la terre
correspondante à trois alvéoles où la mise à la terre a été faite
conformément au Code national de l'électricité et aux codes et
règlements locaux. Si une prise murale correspondante n'est pas
disponible, il incombe au client de faire installer par un électricien
qualifié une prise murale à 3 alvéoles correctement mise à la
terre.
12
Page 13

PIÈCES ET CARACTÉRISTIQUES
D
G
Ce manuel couvre plusieurs modèles différents. La cuisinière que vous avez achetée peut comporter quelques-unes ou toutes les
pièces et caractéristiques énumérées. L'emplacement et l'apparence des caractéristiques illustrées peuvent être différents de ceux de
votre modèle.
Tableau de commande
AC
B
D
A. Interrupteur d'alimentation “ON” (marche)
B. Bouton de commande de la température
Tiroir-réchaud
A
B
ON
POWER
OFF
MED
LO
MED
MED
HI
HIGH
TIMER
OVERRIDE
ON
OFF
E
C. Interrupteur de dépassement de la minuterie D. Voyant d'alimentation “ON” (marche)
E. Voyant d'interrupteur de dépassement
de la minuterie
A. Tableau de commande
B. Plaque signalétique des numéros de
modèle et de série
C. Curseur de réglage humide-sec
(non illustré)
D. Support de plat et encoche de
positionnement
E. Plats
F. F e n être de voyant “ON” (marche)
C
E
F
H
I
G. Numéro d'information pour la clientèle
H. Glissière de tiroir
I. Joint d'étanchéité
13
Page 14

COMMANDES DU TIROIR-RÉCHAUD
Interrupteur d’alimentation
AVERTISSEMENT
Risque d'empoisonnement alimentaire
Ne pas laisser des aliments reposer plus d'une heure
avant ou après la cuisson.
Le non-respect de cette instruction peut causer un
empoisonnement alimentaire ou une maladie.
Appuyer sur l'interrupteur d'alimentation “ON” (marche) pour
allumer le tiroir-réchaud. Dès la mise sous tension, un voyant
rouge s'allume. Ce voyant se trouve du côté droit de
l'interrupteur de dépassement de la minuterie.
Après avoir terminé, appuyer sur l'interrupteur d'alimentation
“OFF” (arrêt) pour éteindre le tiroir-réchaud. Lorsque le tiroirréchaud est éteint automatiquement ou manuellement, le voyant
s'éteint et le tiroir commence à se refroidir.
Il est recommandé de laisser l'interrupteur à la position “Off” à
moins que des temps de réchauffage plus longs soient requis.
Lorsque l'interrupteur de dépassement de la minuterie est à la
position “On”, le voyant s'allume pour indiquer que l'on a
dépassé la minuterie.
IMPORTANT : Bien qu'il soit possible de dépasser la minuterie
au moyen de l'interrupteur de dépassement de la minuterie, ne
pas laisser d'aliments dans le tiroir-réchaud pendant plus de
1 heure. Des bactéries peuvent se développer.
Curseur de réglage Moist-Dry (humide-sec)
MOIST DRY
Bouton de commande de la température
Le contrôle de la température s'effectue en tournant le bouton de
commande sur le réglage désiré. La température varie de LO
(basse) à HIGH (élevée), environ 90°F à 225°F (32°C à 107°C).
Minuterie
Le tiroir-réchaud est doté d'une minuterie automatique de
4 heures. Au bout de 4 heures, le tiroir-réchaud s'éteint. Bien que
la minuterie automatique soit réglée pour une période de
4 heures, ne pas laisser d'aliments dans le tiroir-réchaud pendant
plus de 1 heure.
Interrupteur de dépassement de la minuterie
La minuterie automatique de 4 heures peut être éteinte au moyen
de l'interrupteur Timer Override (dépassement de la minuterie).
Cette caractéristique vous permet de garder le tiroir-réchaud
allumé jusqu'à ce qu'il soit éteint manuellement avec
l'interrupteur d'alimentation “Off”.
UTILISATION DU TIROIR-RÉCHAUD
Réglage des commandes
AVERTISSEMENT
Risque d'empoisonnement alimentaire
Ne pas laisser des aliments reposer plus d'une heure
avant ou après la cuisson.
Le non-respect de cette instruction peut causer un
empoisonnement alimentaire ou une maladie.
Le tiroir-réchaud est idéal pour garder les aliments cuits à la
température de service. Il peut aussi servir pour réchauffer des
pains et pâtisseries.
Le curseur de réglage Moist-Dry (humide-sec) permet d'ouvrir ou
de fermer les ouvertures d’aération dans la porte. Le réglage
MOIST (humide) retient l'humidité tandis que le réglage DRY (sec)
permet à la vapeur et à l'humidité de s'échapper du tiroir.
REMARQUE : De la condensation peut se former sur les
surfaces internes. Ceci est normal.
Pour garder les aliments humides, glisser le curseur à MOIST
pour fermer les ouvertures d’aération. La fermeture des
ouvertures d’aération scelle le tiroir et garde les aliments tendres
et humides.
Pour garder les aliments croustillants, glisser le curseur à DRY
pour ouvrir les ouvertures d’aération. L'ouverture libère l'humidité
du tiroir et garde les aliments chauds croustillants et secs.
Différents types d'aliments peuvent être placés dans le tiroirréchaud en même temps. Pour les meilleurs résultats, ne pas y
garder les aliments pendant plus de 1 heure. Pour les quantités
plus petites ou les aliments sensibles à la chaleur (tels que les
œufs), ne pas garder pendant plus de 30 minutes.
Les aliments doivent être à la température de service avant d'être
placés dans le tiroir-réchaud. Couvrir les aliments avec un
couvercle ou du papier d'aluminium. Ne pas les couvrir de
pellicule de plastique.
Les pains, pâtisseries et tartes aux fruits peuvent être chauffés de
la température de la pièce au réglage HI. Sortir les aliments des
sacs de plastique et les placer dans un contenant qui va au four.
Les plats de service et les assiettes vides peuvent être réchauffés
pendant que le tiroir-réchaud préchauffe.
REMARQUE : Placer les plats et la grille de positionnement dans
le tiroir-réchaud avant le préchauffage.
14
Page 15

Utilisation :
1. Appuyer sur l'interrupteur d'alimentation “ON” (marche).
2. Sélectionner le réglage MOIST (humide) ou DRY (sec).
3. Régler le tiroir à la température désirée (LO, MED LO, MED,
MED HIGH et HIGH).
4. Préchauffer le tiroir. Pour LO, préchauffer 5 minutes. Pour
MED, préchauffer 8 minutes. Pour HIGH, préchauffer
10 minutes.
Lors de l'utilisation du ou des plats, s'assurer que le support de
plat est bien installé dans l'encoche de positionnement avant
d'insérer le ou les plats. Quand vous n’utilisez aucun plat, placer
le support dans l'encoche de rangement.
TABL EA U DE S T EMP ÉRATURES DU TIROIR-RÉCHAUD
Différents aliments nécessitent différents réglages pour maintenir
la température de service idéale. Se servir du tableau suivant
comme guide.
Grille de positionnement et plats
Grille de positionnement
La grille accompagnant le tiroir-réchaud peut être utilisée dans
2 positions différentes, élevée ou basse. La grille s'adaptera
d'avant en arrière ou latéralement.
REMARQUE : Pour l'installation de la grilles de l'avant vers
l'arrière, le tiroir-réchaud doit être complètement ouvert.
Position basse
Relève l'ustensile de ½" (1,27 cm) à partir du fond du tiroir.
Position élevée
Vous permet d’empiler des articles dans le tiroir.
ALIMENTS RÉGLAGE
Bacon* HI
Bœuf, à point et bien cuit HI
Pain, petits pains LO
Pain, petits pains mous LO
Plats en sauce HI
Brioches, pâtisseries LO
Céréales cuites MED
Oeufs MED
Poisson, fruits de mer (non panés) MED
Poisson, fruits de mer (panés)* MED
Aliments frits HI
Sauce, sauces à la crème HI
Jambon MED
Plats
Le tiroir-réchaud est livré avec des plats avec couvercles qui sont
adaptés au tiroir. Sur les modèles de 30" (76 cm), le tiroir-réchaud
est livré avec 3 plats. Sur les modèles de 27" (68 cm), le tiroirréchaud est livré avec 2 plats.
B
A
A. Support de plat (dans l’encoche de positionnement)
B. Encoche de rangement
Hors-d'œuvre (mous) HI
Hors-d'œuvre (croustillants) HI
Agneau MED
Crêpes, gaufres* MED
Tartes, c r ème pâtissière MED
Tartes, c ro ûte unique LO
Tartes, c ro ûte double LO
Pizza HI
Porc MED
Pommes de terre, au four HI
Pommes de terre, en puréeMED
Volaille HI
Quiche MED
Légumes MED
*Tous les aliments doivent être couverts, sauf ceux marqués d'un
astérisque (*).
15
Page 16

Ustensiles de réchauffage
A
N'utiliser que des ustensiles adaptés au four. Suivre les
instructions du fabricant de l'ustensile, surtout lors de l'utilisation
d'ustensiles en verre ou en plastique.
Levée du pain
La levée du pain prépare la pâte pour la cuisson en activant la
levure.
Pour lever la pâte :
1. Couvrir la pâte de papier ciré légèrement huilé et placer le ou
les bols résistants à la chaleur directement au fond du tiroir.
2. Régler le bouton de commande au réglage PROOF (levée).
3. Glisser le curseur au réglage MOIST (humide).
ENTRETIEN DU TIROIR-RÉCHAUD
Glissières du tiroir
Les glissières du tiroir permettent de l'ouvrir complètement pour
en faciliter le nettoyage. Au besoin, le tiroir peut être enlevé.
REMARQUE : La capacité de charge du tiroir et des glissières
est de 100 lb (45 kg).
4. Vérifier périodiquement la progression de la levée de la pâte.
5. Vérifier si elle est prête en enfonçant 2 doigts de ¹⁄₂" (1,27 cm)
dans la pâte. Si le renfoncement demeure, la pâte est prête.
Pour la seconde levée de la pâte, suivre les étapes 1 à 4.
Papier d’aluminium
Ne pas garnir le tiroir de papier d'aluminium.
Garder l'aliment couvert s'il a été cuit avec un couvercle.
Utiliser de fines languettes de papier d'aluminium pour empêcher
les bords de croûte de tarte de continuer de brunir dans le tiroir.
Placer du papier d'aluminium en forme de tente par-dessus la
viande et la volaille pour l'empêcher de sécher ou de continuer
de brunir dans le tiroir.
L'utilisation de papier d'aluminium pour couvrir les aliments peut
causer une accumulation d'humidité qui s’égouttera dans le tiroir.
3. Appuyer sur l'onglet du côté droit et soulever en même temps
l'onglet du côté gauche, puis ouvrir le tiroir 1" (2,54 cm) de
plus pour désengager le loquet.
Tiroir-réchaud
Retirer tous les articles de l'intérieur du tiroir-réchaud et laisser
l'appareil refroidir complètement avant d'essayer d'enlever le
tiroir.
Pour enlever :
1. Ouvrir le tiroir complètement.
2. Localiser les onglets noirs en triangles des deux côtés du
tiroir.
A. Onglet
4. Tenir le tiroir par les côtés (non par l'avant). Le sortir
complètement et lentement.
Pour réinstaller :
1. Aligner les glissières du tiroir avec les guides.
2. Pousser le tiroir jusqu’au fond.
3. Ouvrir et fermer le tiroir doucement pour s'assurer qu'il
repose bien sur les guides.
16
Page 17

Nettoyage général
IMPORTANT : Avant le nettoyage, s’assurer que toutes les
commandes sont désactivées et que le tiroir-réchaud et ses
accessoires sont refroidis.Toujours suivre les instructions sur les
étiquettes des produits de nettoyage.
Du savon, de l'eau et un chiffon doux ou une éponge sont
recommandés à moins d'indication contraire.
Lors de la réinstallation des boutons, s'assurer que chaque
bouton est sur la position OFF (arrêt).
■ Eau et savon :
Tirer les boutons directement hors du tableau de commande
pour les enlever. Laver, rincer et sécher avec un chiffon doux.
SURFACES EN ACIER INOXYDABLE
Ne pas utiliser de tampons de récurage savonneux, nettoyants
abrasifs, crème à polir pour table de cuisson, tampons en laine
d'acier, chiffons de lavage rudes ou certains essuie-tout. Des
dommages peuvent survenir.
Frotter dans la direction du grain pour éviter les dommages.
■ Nettoyant et poli pour acier inoxydable (non compris) :
TIROIR-RÉCHAUD
■ Essuie-tout et nettoyant à vitres :
S'assurer que le tiroir a refroidi. Suivre les instructions du
fabricant.
■ Eau tiède savonneuse et tampon de récurage non abrasif en
plastique :
Laver et rincer avec de l'eau propre et sécher complètement.
Voir la section “Assistance ou service” pour passer une
commande.
■ Détergent liquide ou nettoyant tout-usage :
Rincer à l'eau propre et sécher avec un chiffon doux sans
charpie.
■ Vinaigre pour les taches d'eau dure
GRILLE DE POSITIONNEMENT
■ Tampon en laine d'acier et eau tiède savonneuse :
Laver, rincer et sécher complètement.
PLATS
BOUTON DE COMMANDE
Ne pas utiliser de la laine d'acier, des produits de nettoyage
abrasifs ou un nettoyant à four.
Ne pas faire tremper le bouton.
■ Savon doux et eau :
Laver, rincer et sécher avec un chiffon doux. Ne pas nettoyer
dans un lave-vaisselle. Une décoloration se produirait.
DÉPANNAGE
Essayer les solutions suggérées ici d'abord afin d'éviter le coût d'une visite de service non nécessaire.
Le tiroir-réchaud ne fonctionne pas
■ Est-ce que le cordon d'alimentation est débranché?
Brancher sur une prise reliée à la terre (à trois alvéoles).
■ Un fusible est-il grillé ou le disjoncteur s'est-il ouvert?
Remplacer le fusible ou remettre le disjoncteur en fonction.
■ L'interrupteur d'alimentation est-il à la position “ON”
sans que le voyant ne soit allumé?
Réinitialiser l'appareil en tournant l'interrupteur d'alimentation
à “OFF” (arrêt), puis à “ON” (marche). L'appareil était peutêtre en mode minuterie et la minuterie avait peut-être terminé
son cycle.
Le tiroir ne glisse pas bien
■ Le tiroir a-t-il été bien installé sur les glissières?
Voir la section "Entretien du tiroir-réchaud".
■ Le tiroir a-t-il été trop chargé?
Le poids dans le tiroir ne devrait pas dépasser 100 lb (45 kg).
■ La charge dans le tiroir est-elle déséquilibrée?
Redistribuer les aliments pour équilibrer le poids
uniformément.
Humidité excessive sur le tiroir
■ Le tiroir a-t-il été préchauffé?
Préchauffer le tiroir avant chaque utilisation. Voir la section
“Utilisation du tiroir-réchaud”.
■ Le réglage MOIST-DRY (humide-sec) est-il correct?
Régler le curseur MOIST-DRY à “DRY” pour évacuer
l'humidité.
■ L'aliment était-il recouvert de papier d'aluminium?
Voir la section “Papier d'aluminium”.
Le tiroir ne se ferme pas automatiquement
■ La minuterie a-t-elle été dépassée?
Vérifier l'interrupteur de dépassement de la minuterie. Il doit
se trouver à la position “OFF” pour que la minuterie
fonctionne bien.
17
Page 18

ASSISTANCE OU SERVICE
Avant de faire un appel pour assistance ou service, consulter la
section “Dépannage”. Ce guide peut vous faire économiser le
coût d’une visite de service. Si vous avez encore besoin d’aide,
suivre les instructions ci-dessous.
Lors d’un appel, veuillez connaître la date d’achat, le numéro de
modèle et le numéro de série au complet de l’appareil. Ces
renseignements nous aideront à mieux répondre à votre
demande.
Si vous avez besoin de pièces de rechange
Si vous avez besoin de commander des pièces de rechange,
nous vous recommandons d’employer uniquement des pièces
spécifiées par l'usine. Les pièces spécifiées par l'usine
conviendront et fonctionneront bien parce qu’elles sont
fabriquées avec la même précision que celles utilisées dans la
fabrication de chaque nouvel appareil KITCHENAID
Pour localiser des pièces spécifiées par l'usine dans votre région,
contactez-nous ou appelez le centre de service désigné de
KitchenAid le plus proche.
Pour des questions relatives aux produits, veuillez appeler sans
frais le Centre d’interaction avec la clientèle de KitchenAid
Canada au : 1-800-461-5681
Lundi à vendredi 8 h - 18 h (HNE).
Samedi 8 h 30 - 16 h 30 (HNE).
®
.
Nos consultants vous renseigneront sur les sujets suivants :
■ Caractéristiques et spécifications sur toute notre gamme
d’appareils électroménagers.
■ Références aux marchands locaux.
Pour pièces, accessoires et service
Composer le 1-800-807-6777. Les techniciens de service
désignés par KitchenAid Canada sont formés pour remplir la
garantie des produits et fournir un service après la garantie,
partout au Canada.
Pour plus d’assistance
Si vous avez besoin de plus d’assistance, vous pouvez
soumettre par écrit toute question ou préoccupation à
KitchenAid Canada à l’adresse suivante :
Centre d’interaction avec la clientèle
KitchenAid Canada
1901 Minnesota Court
Mississauga, Ontario L5N 3A7
Veuillez inclure dans votre correspondance un numéro de
téléphone où on peut vous joindre dans la journée.
18
Page 19

GARANTIE DU TIROIR-RÉCHAUD KITCHENAID®
GARANTIE LIMITÉE DE UN AN
Pendant un an à compter de la date d'achat, lorsque ce gros appareil ménager est utilisé et entretenu conformément aux instructions
jointes à ou fournies avec le produit, KitchenAid ou KitchenAid Canada (ci-après désignées “KitchenAid”) paiera pour les pièces
spécifiées par l'usine et la main-d'œuvre pour corriger les vices de matériaux ou de fabrication. Le service doit être fourni par une
compagnie de service désignée par KitchenAid.
KITCHENAID NE PRENDRA PAS EN CHARGE
1. Les visites de service pour rectifier l'installation du gros appareil ménager, montrer à l'utilisateur comment utiliser l'appareil,
remplacer ou réparer des fusibles ou rectifier le câblage ou la plomberie du domicile.
2. Les visites de service pour réparer ou remplacer les ampoules électriques de l'appareil, les filtres à air ou les filtres à eau. Ces
pièces consomptibles ne sont pas couvertes par la garantie.
3. Les réparations lorsque le gros appareil ménager est utilisé à des fins autres que l'usage unifamilial normal.
4. Les dommages imputables à : accident, modification, usage impropre ou abusif, incendie, inondation, actes de Dieu, installation
fautive ou installation non conforme aux codes d'électricité ou de plomberie, ou l'utilisation de produits non approuvés par
KitchenAid.
5. Le coût des pièces de rechange et de la main-d'œuvre pour les appareils utilisés hors des États-Unis ou du Canada.
6. Le ramassage et la livraison. Ce gros appareil ménager est conçu pour être réparé à domicile.
7. Les réparations aux pièces ou systèmes résultant d'une modification non autorisée faite à l'appareil.
8. Les frais de voyage ou de transport pour le service d'un produit dans les régions éloignées.
9. La dépose et la réinstallation de votre appareil si celui-ci est installé dans un endroit inaccessible ou n'est pas installé
conformément aux instructions d'installation fournies.
CLAUSE D'EXONÉRATION DE RESPONSABILITÉ AU TITRE DES GARANTIES IMPLICITES; LIMITATION DES RECOURS
LE SEUL ET EXCLUSIF RECOURS DU CLIENT DANS LE CADRE DE LA PRÉSENTE GARANTIE LIMITÉE CONSISTE EN LA
RÉPARATION PRÉVUE CI-DESSUS. LES GARANTIES IMPLICITES, Y COMPRIS LES GARANTIES APPLICABLES DE QUALITÉ
MARCHANDE ET D'APTITUDE À UN USAGE PARTICULIER, SONT LIMITÉES À UN AN OU À LA PLUS COURTE PÉRIODE AUTORISÉE
PAR LA LOI. KITCHENAID N'ASSUME AUCUNE RESPONSABILITÉ POUR LES DOMMAGES FORTUITS OU INDIRECTS. CERTAINES
JURIDICTIONS NE PERMETTENT PAS L'EXCLUSION OU LA LIMITATION DES DOMMAGES FORTUITS OU INDIRECTS, OU LES
LIMITATIONS DE LA DURÉE DES GARANTIES IMPLICITES DE QUALITÉ MARCHANDE OU D'APTITUDE À UN USAGE PARTICULIER,
DE SORTE QUE CES EXCLUSIONS OU LIMITATIONS PEUVENT NE PAS S'APPLIQUER DANS VOTRE CAS. CETTE GARANTIE VOUS
CONFÈRE DES DROITS JURIDIQUES SPÉCIFIQUES ET VOUS POUVEZ ÉGALEMENT JOUIR D'AUTRES DROITS QUI PEUVENT
VARIER D'UNE JURIDICTION À UNE AUTRE.
À l'extérieur du Canada et des 50 États des États-Unis, cette garantie ne s'applique pas. Contacter votre marchand KitchenAid autorisé
pour déterminer si une autre garantie s'applique.
Si vous avez besoin de service, voir d'abord la section “Dépannage” du Guide d'utilisation et d'entretien. Après avoir vérifié la section
“Dépannage”, de l'aide supplémentaire peut être trouvée en vérifiant la section “Assistance ou service” ou en appelant KitchenAid. Aux
É.-U., composer le 1-800-422-1230. Au Canada, composer le 1-800-807-6777. 9/05
Conservez ce manuel et votre reçu de vente ensemble pour
référence ultérieure. Pour le service sous garantie, vous
devez présenter un document prouvant la date d'achat ou
d'installation.
Inscrivez les renseignements suivants au sujet de votre gros
appareil ménager pour mieux vous aider à obtenir assistance ou
service en cas de besoin. Vous devrez connaître le numéro de
modèle et le numéro de série au complet. Vous trouverez ces
renseignements sur la plaque signalétique située sur le produit.
Nom du marchand ______________________________________________
Adresse ________________________________________________________
Numéro de téléphone ___________________________________________
Numéro de modèle______________________________________________
Numéro de série ________________________________________________
Date d’achat____________________________________________________
19
Page 20

8304068
© 2005. All rights reserved.
Tous droits réservés.
® Registered Trademark/TM Trademark of KitchenAid, U.S.A., KitchenAid Canada licensee in Canada
® Marque déposée/TM Marque de commerce de KitchenAid, U.S.A., Emploi licencié par KitchenAid Canada au Canada
Printed in U.S.A.
Imprimé aux É.-U.
9/05
 Loading...