

KITCHENAID KEWK170TWH, KEWK170TBL, KEWK100TBL, KEWK100TWH Installation Instructions

FACTORY DECORATIVE DOOR PANEL KIT INSTALLATION
INSTRUCTIONS FOR WARMING DRAWERS
Tools and Parts
Gather the required tools and parts before starting installation.
Tools Needed
■ Phillips screwdriver
Install Decorative Door Panel
1. Install warming drawer as instructed by the installation
instructions provided with the warming drawer.
2. Remove packaging and protective coating from decorative
door panel.
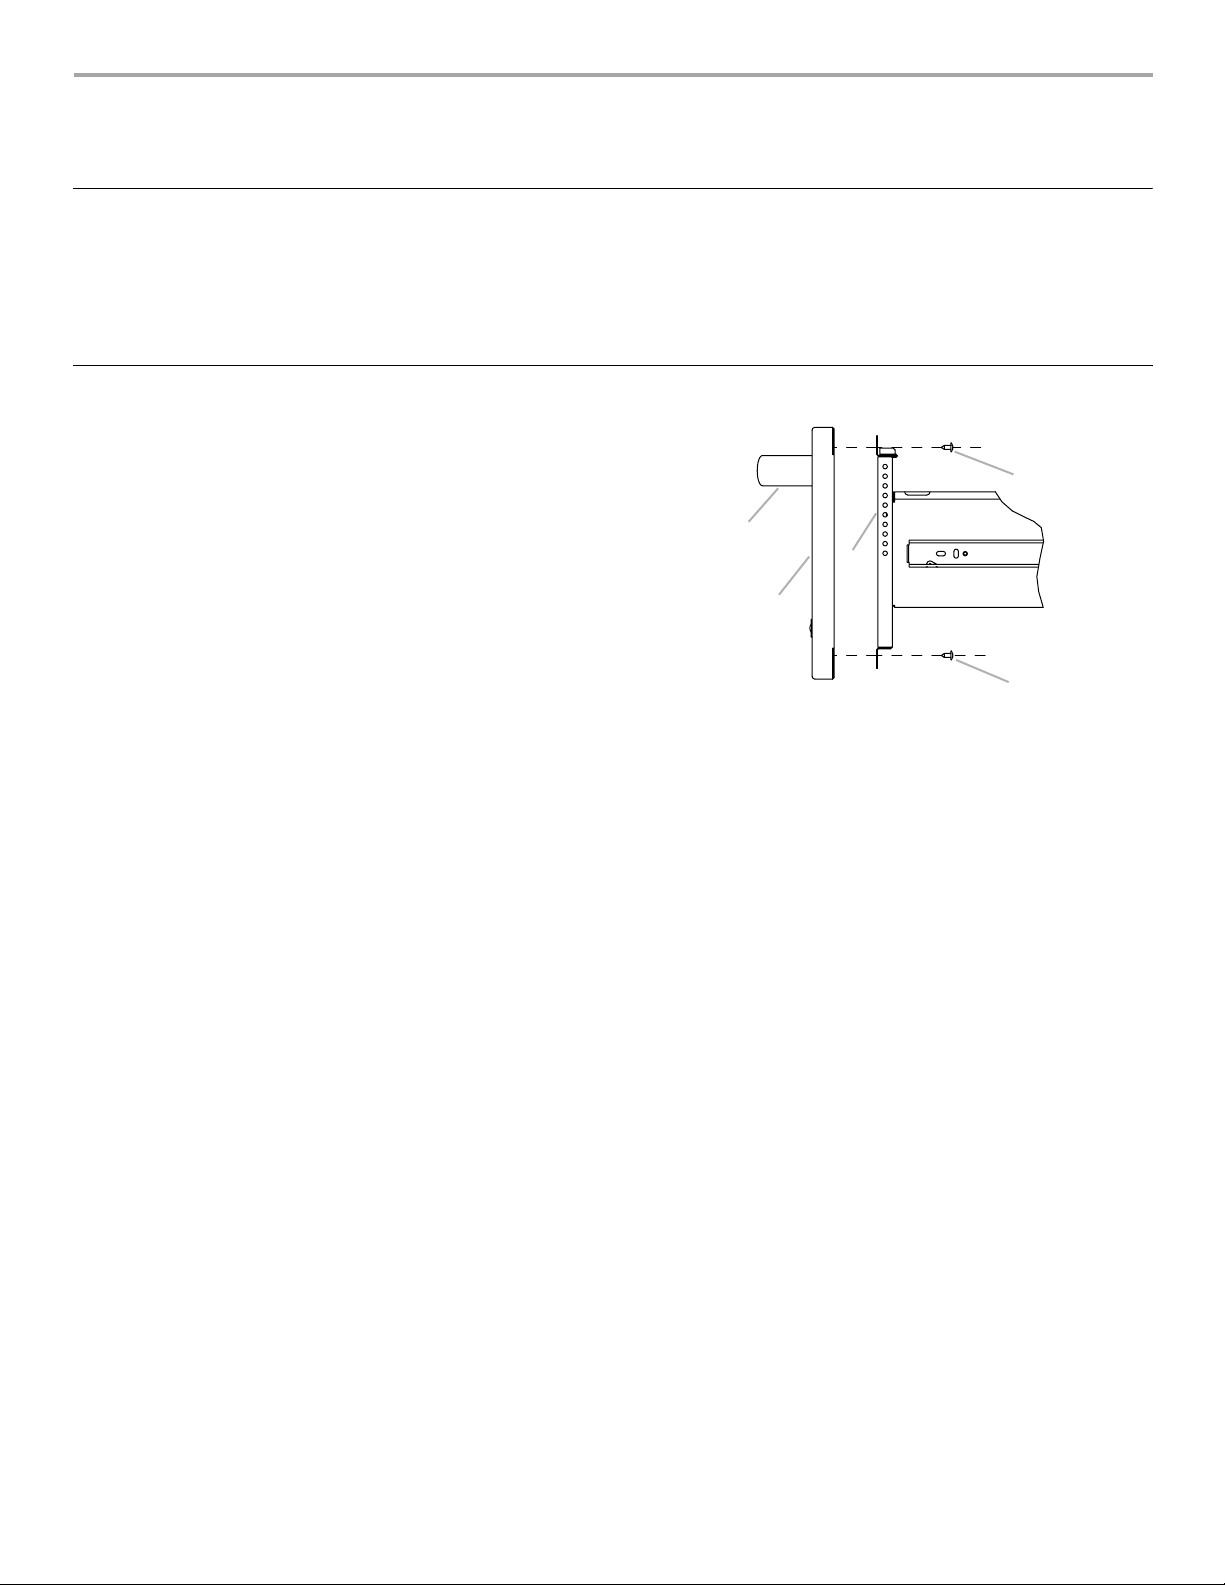
3. Align holes on decorative panel with holes on drawer front of
warming drawer.
4. While holding handle on decorative panel, install 4 top
screws. Open drawer fully and install 2 bottom screws.
Parts Supplied
■ Warming Drawer Decorative Door Panel
■ 6 - #8-18 x ½" screws
D
A
C
B
D
A. Decorative door panel handle
B. Decorative door panel
C. Warming drawer front
D. 6 - #8-18 x ½" screws
ENSEMBLE D’USINE - PANNEAU DE PORTE DÉCORATIF POUR
TIROIR-RÉCHAUD - INSTRUCTIONS D’INSTALLATION
Outillage et pièces
Rassembler les outils et pièces nécessaires avant de commencer l’installation.
Outils nécessaires
■ Tournevis Phillips
Installation du panneau de porte décoratif
1. Installer le tiroir-réchaud en suivant les instructions
d’installation fournies avec le tiroir-réchaud.
2. Retirer l’emballage et la pellicule de protection du panneau
de porte décoratif.
3. Aligner les trous sur le panneau décoratif avec les trous à
l’avant du tiroir-réchaud.
4. En maintenant la poignée sur le panneau décoratif, installer
les 4 vis supérieures. Ouvrir complètement le tiroir et installer
les 2 vis inférieures.
Pièces fournies
■ Panneau de porte décoratif pour tiroir-réchaud
■ 6 vis n° 8-18 x ½"
D
A
C
B
D
A. Poignée du panneau de porte décoratif
B. Panneau de porte décoratif
C. Avant du tiroir-réchaud
D. 6 vis n° 8-18 x ½"
W10122855A
© 2007.
All rights reserved.
Tous droits réservés.
Printed in U.S.A.
Imprimé aux É.-U.
3/07
 Loading...