

KitchenAid KEWD105 User Manual
For questions about features, operation/performance, parts accessories or service, call:
In Canada, call for assistance
TIROIR DE RÉCHAUFFAGE
Au Canada, pour assistance composez le
Table of Contents/Table des matières.............................................................................2
WARMING DRAWER
Use & Care Guide
1-800-461-5681
www.kitchenaid.com
, for installation and service, call:
www.KitchenAid.ca
or
Guide d’utilisation et d’entretien
1-800-461-5681
, pour installation ou service composez le
www.KitchenAid.ca
1-800-807-6777
1-800-807-6777
1-800-422-1230
or visit our website at...
ou visitez notre site web à...
Models/Modèles KEWD105 KEWD175 KEWV105
8302185

TABLE OF CONTENTS
TABLE DES MATIÈRES
WARMING DRAWER SAFETY................................................... 3
Electrical Requirements ...............................................................4
PARTS AND FEATURES ............................................................ 5
WARMING DRAWER CONTROLS................................................6
Power Switch ...............................................................................6
Temperature Control Knob ..........................................................6
Timer.............................................................................................6
Timer Override Switch.................................................................. 6
Moist-Dry Slide.............................................................................6
WARMING DRAWER USE.............................................................6
Setting the Controls .....................................................................6
Positioning Racks and Pans ........................................................7
Warming Cookware .....................................................................7
Proofing Bread .............................................................................7
Aluminum Foil...............................................................................8
WARMING DRAWER CARE ..........................................................8
Drawer Slides ...............................................................................8
Warming Drawer ..........................................................................8
General Cleaning..........................................................................8
TROUBLESHOOTING ....................................................................9
ASSISTANCE OR SERVICE...........................................................9
WARRANTY ..................................................................................10
SÉCURITÉ DU TIROIR-RÉCHAUD..........................................11
Spécifications électriques ..........................................................12
PIÈCES ET CARACTÉRISTIQUES...........................................13
COMMANDES DU TIROIR-RÉCHAUD.......................................14
Interrupteur d'alimentation.........................................................14
Bouton de commande de la température..................................14
Minuterie.....................................................................................14
Interrupteur de dépassement de la minuterie............................14
Curseur de réglage Moist-Dry (humide-sec)..............................14
UTILISATION DU TIROIR-RÉCHAUD.........................................15
Réglage des commandes ..........................................................15
Positionnement des grilles et plats............................................15
Ustensiles de réchauffage..........................................................16
Levée du pain.............................................................................16
Papier d'aluminium.....................................................................16
ENTRETIEN DU TIROIR-RÉCHAUD...........................................16
Glissières du tiroir.......................................................................16
Tiroir-réchaud.............................................................................16
Nettoyage général ......................................................................17
DÉPANNAGE.................................................................................17
ASSISTANCE OU SERVICE.........................................................18
GARANTIE.....................................................................................19
2
WARMING DRAWER SAFETY
Your safety and the safety of others are very important.
We have provided many important safety messages in this manual and on your appliance. Always read and obey all
safety messages.
This is the safety alert symbol.
This symbol alerts you to potential hazards that can kill or hurt you and others.
All safety messages will follow the safety alert symbol and either the word “DANGER” or
“WARNING.” These words mean:
You can be killed or seriously injured if you don't
immediately follow instructions.
can be killed or seriously injured if you don't
You
follow instructions.
All safety messages will tell you what the potential hazard is, tell you how to reduce the chance of injury, and tell you
what can
happen if the instructions are not followed.
IMPORTANT SAFETY INSTRUCTIONS
WARNING: To reduce the risk of fire, electrical
shock, injury to persons, or damage when using the
warming drawer, follow basic precautions, including
the following:
■ Proper Installation – Be sure the warming drawer is
properly installed and grounded by a qualified
technician.
■ Never Use the Warming Drawer for Warming or
Heating the Room.
■ Do Not Leave Children Alone – Children should not
be left alone or unattended in area where warming
drawer is in use. They should never be allowed to sit
or stand on any part of the warming drawer.
■ Wear Proper Apparel – Loose-fitting or hanging
garments should never be worn while using the
warming drawer.
■ User Servicing – Do not repair or replace any part of
the warming drawer unless specifically recommended
in the manual. All other servicing should be referred
to a qualified technician.
■ Storage in Warming Drawer – Flammable materials
should not be stored in a warming drawer.
■ Do Not Use Water on Grease Fires – Smother fire or
flame or use dry chemical or foam-type extinguisher.
■ Use Only Dry Potholders – Moist or damp potholders
on hot surfaces may result in burns from steam. Do
not let potholder touch hot heating elements. Do not
use a towel or other bulky cloth.
■ Use Care When Opening Door – Let hot air or steam
escape before removing or replacing food.
■ Do Not Heat Unopened Food Containers – Build-up
of pressure may cause container to burst and result
in injury.
■ Placement of Warming Drawer Racks – Always place
warming drawer racks in desired location while
warming drawer is cool. If rack must be moved while
warming drawer is hot, do not let potholder contact
hot heating element in warming drawer.
■ DO NOT TOUCH HEATING ELEMENTS OR
INTERIOR SURFACES OF WARMING DRAWER –
Heating elements may be hot even though they are
dark in color. Interior surfaces of a warming drawer
become hot enough to cause burns. During and after
use, do not touch, or let clothing or other flammable
materials contact heating elements or interior surfaces
of warming drawer until they have had sufficient time
to cool. Other surfaces of the warming drawer may
become hot enough to cause burns – among these
surfaces are warming drawer vent openings and
surfaces near these openings and warming drawer
doors.
SAVE THESE INSTRUCTIONS
3
Electrical Requirements
WARNING
Electrical Shock Hazard
Plug into a grounded 3 prong outlet.
Do not remove ground prong.
Do not use an adapter.
Do not use an extension cord.
Failure to follow these instructions can result in
death, fire, or electrical shock.
It is important to make sure you have the proper electrical
connection:
A 115 Volt, 60 Hz., AC only 15 or 20 amperes electrical supply,
properly grounded in accordance with the National Electrical
Code and local codes and ordinances, is required.
It is recommended that a separate circuit, serving only your
warming drawer, be provided.
Recommended Grounding Method
For your personal safety, this appliance must be grounded. This
appliance is equipped with a power supply cord having a 3 prong
grounding plug. To minimize possible shock hazard, the cord
must be plugged into a mating, 3 prong, grounding-type wall
receptacle, grounded in accordance with the National Electrical
Code and local codes and ordinances. If mating wall receptacle
is not available, it is the personal responsibility of the customer to
have a properly grounded, 3 prong wall receptacle installed by a
qualified electrician.
4
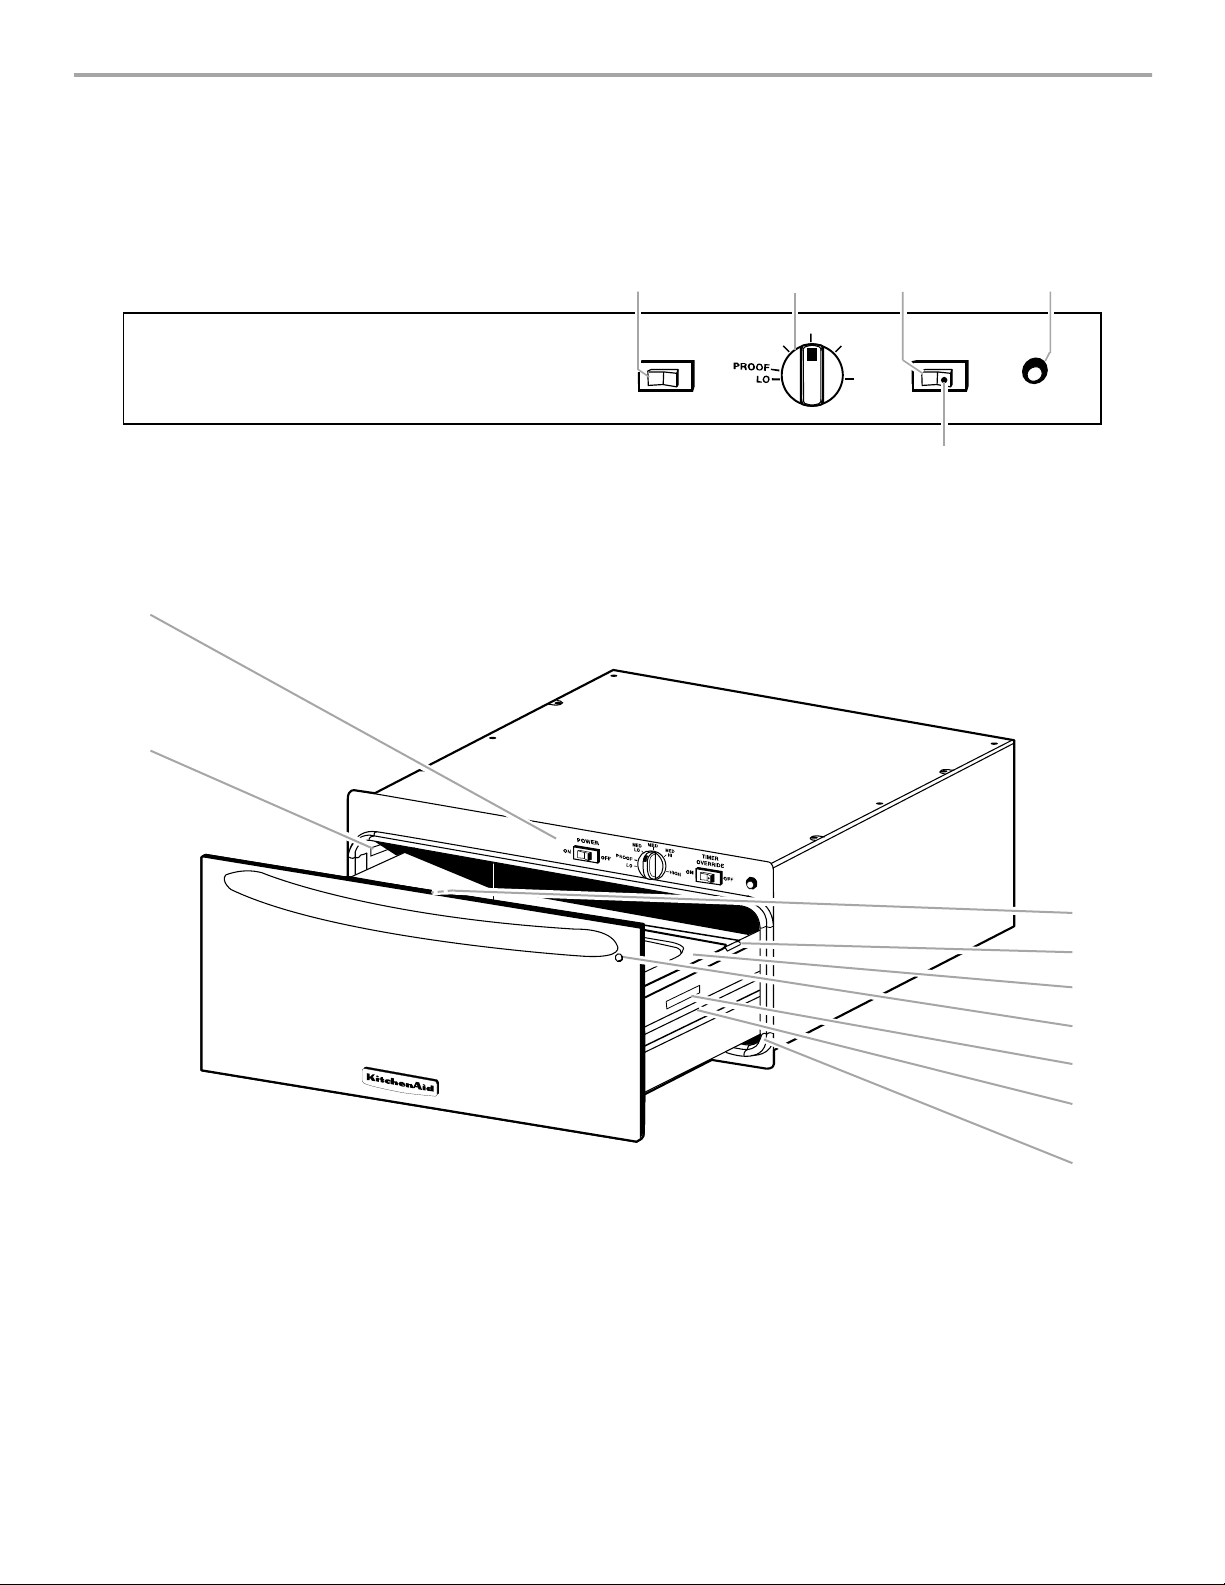
PARTS AND FEATURES
This manual covers several different models. The range you have purchased may have some or all of the parts and features listed. The
location and appearance of the features shown here may not match those of your model.
Control Panel
1. Power “ON” Switch
2. Temperature Control Knob
Warming Drawer
1
2
13
POWER
ON
3. Timer Override Switch 4. Power “ON” Indicator Light
OFF
2
MED
MED
LO
5. Timer Override Light
MED
HI
HIGH
ON
TIMER
OVERRIDE
5
4
OFF
1. Control Panel
2. Model and Serial Number Plate
3. Moist-Dry Slide (not shown)
4. Pan Support and Locator
5. Pans
6. “ON” Light Viewer
3
4
5
6
7
8
9
7. Consumer Information Number
8. Drawer Slide
9. Gasket
5
WARMING DRAWER CONTROLS
MOIST DRY
Power Switch
WARNING
Food Poisoning Hazard
Do not let food sit for more than one hour before
or after cooking.
Doing so can result in food poisoning or
sickness.
Press the POWER “ON” switch to turn on the warming drawer.
Once the power is turned on, a red indicator light will illuminate.
This indicator light is located on the right side of the TIMER
OVERRIDE switch.
When finished, press the POWER “OFF” switch to turn the
warming drawer off. When the warming drawer is turned off
automatically or manually, the indicator light will go out and the
drawer will begin to cool.
Temperature Control Knob
The temperature is controlled by rotating the control knob to the
desired setting. The temperature ranges from LO to HIGH,
approximately 90°F to 225°F (32°C to 107°C).
Timer
The warming drawer has an automatic 4 hour timer. After 4 hours,
the warming drawer will shut off. Although the automatic timer is
set for a 4-hour period, do not leave foods in warming drawer for
more than one hour.
Timer Override Switch
The Timer can be turned off using the TIMER OVERRIDE switch.
This feature allows you to keep the warming drawer on until it is
turned off manually with the POWER “OFF” switch.
It is recommended that the switch remain in the “OFF” position,
unless longer warming times are required. When the TIMER
OVERRIDE switch is in the “ON” position, the light on the switch
will illuminate, showing the Timer has been bypassed.
IMPORTANT:
TIMER OVERRIDE switch, do not let food sit in the warming
drawer for more than one hour. Bacterial growth may occur.
Although the Timer can be bypassed by using the
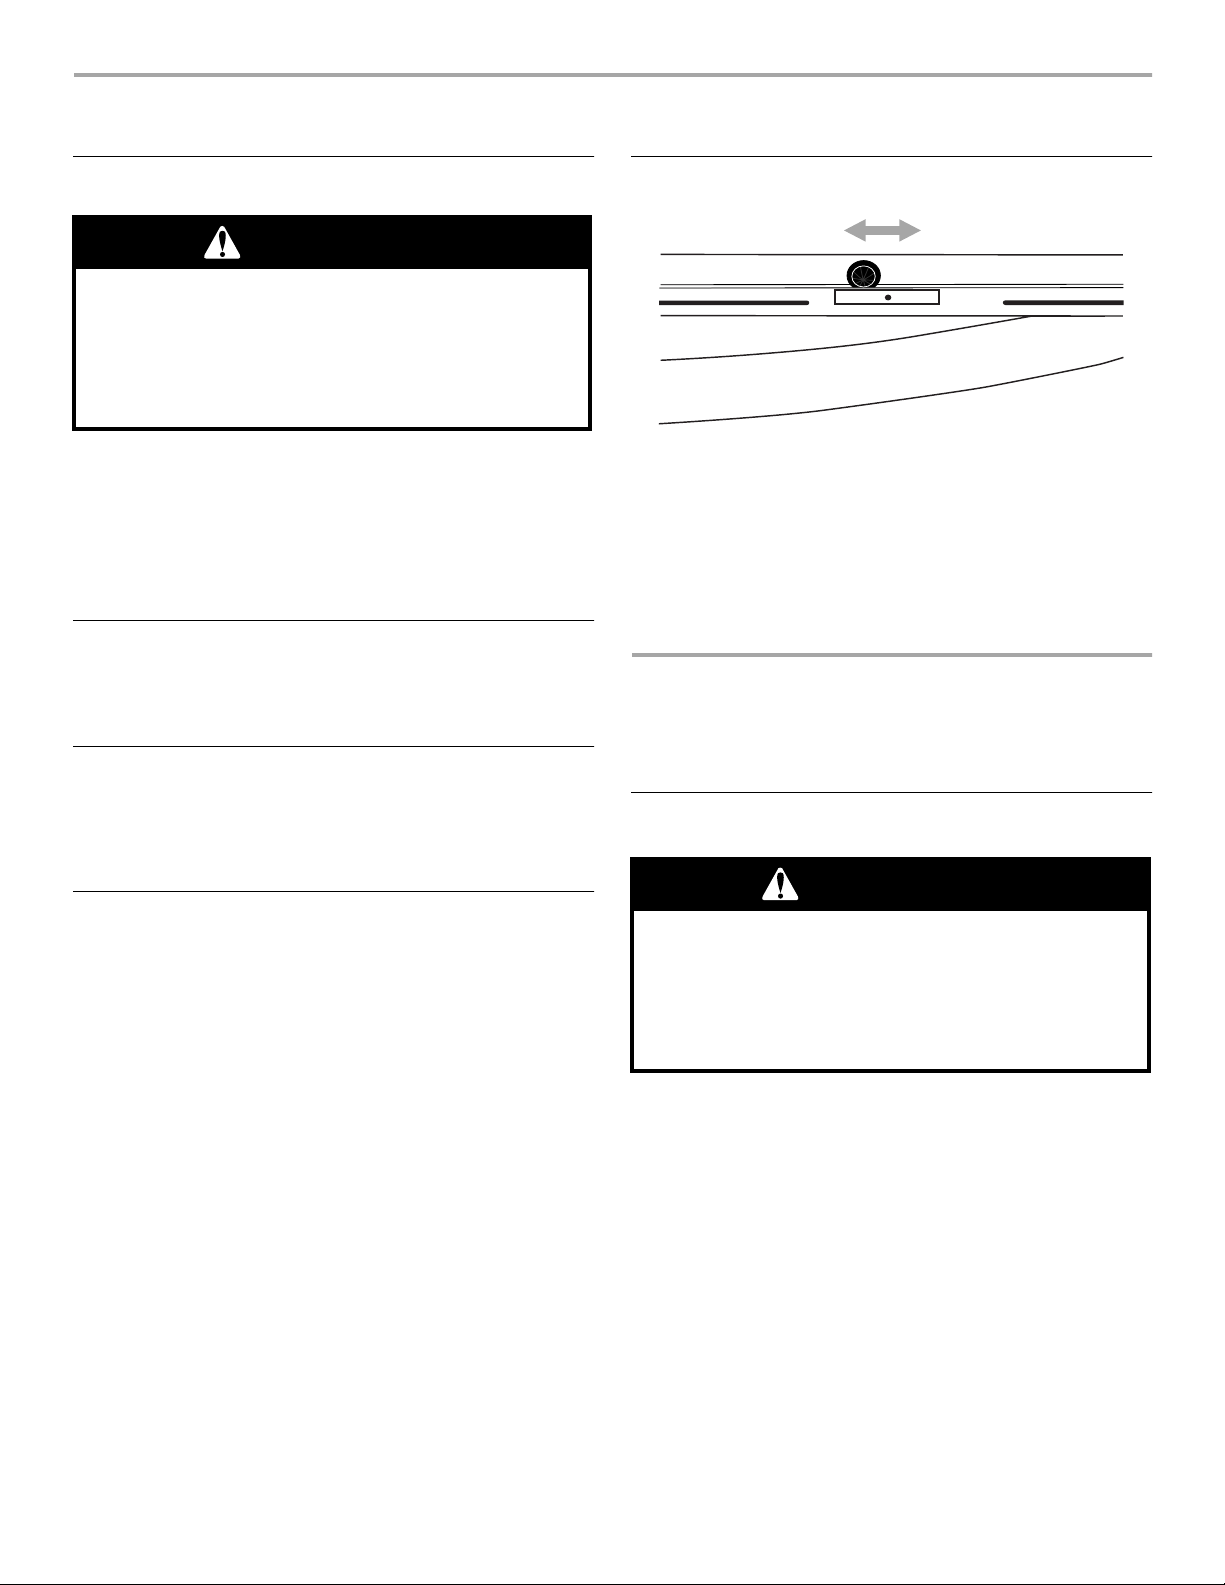
Moist-Dry Slide
The Moist-Dry slide allows you to open or close the vent slots in
the door. The MOIST setting holds moisture in, while the DRY
setting allows steam and moisture to escape from the drawer.
NOTE:
Condensation may form on inner surfaces. This is normal.
To keep foods moist, put slide on MOIST, closing the vents.
Closing the vents will seal the drawer and keep hot food soft and
moist.
To keep foods crisp, put slide on DRY, opening the vents.
Opening the vents releases moisture from the drawer and keeps
hot foods crisp and dry.
WARMING DRAWER
USE
Setting the Controls
WARNING
Food Poisoning Hazard
Do not let food sit for more than one hour before
or after cooking.
Doing so can result in food poisoning or
sickness.
The warming drawer is ideal for keeping hot cooked foods at
serving temperature. It may also be used for warming breads
and pastries.
Different types of food may be placed in the warming drawer at
the same time. For best results, do not hold foods longer than
one hour. For smaller quantities or heat-sensitive foods (such as
eggs), do not hold longer than 30 minutes.
Food must be at serving temperature before being placed in the
warming drawer. (Breads, pastries, and fruit pies may be heated
from room temperature on the HI setting.)
Remove food from plastic bags and place in oven-safe container.
Cover foods with a lid or aluminum foil. Do not cover with plastic
wrap. Empty serving dishes and dinner plates can be heated
while the warming drawer is preheating. It is also recommended
to preheat the positioning rack(s) and pan(s) before using.
To Us e:
1.
6
Press the POWER “ON” switch.
2.
Select MOIST or DRY setting.
 Loading...